Fantendo - Game Ideas & More
Tag: Source edit
Tag: Source edit
Line 1,197: Line 1,197:
 
</div>
 
</div>
 
|-|Alternate Costumes= <div style="text-align:left;">
 
|-|Alternate Costumes= <div style="text-align:left;">
*'''Male:''' Default appearance.
+
*'''Purple:''' Default appearance.
*'''Female:''' Replaced with Female Ritsuka.
+
*'''?:''' ?.
 
*'''?:''' ?.
*'''Blue:''' Based off of Shirou Emiya from Fate/stay night.
 
 
*'''?:''' ?.
*'''Red:''' Replaced with Female Ritsuka. Based off of Rin Tohsaka
 
*'''Black:''' Based off of Kirei Kotomine.
+
*'''?:''' ?.
 
*'''?:''' ?.
*'''Purple:''' Replaced with Female Ritsuka. Based off of Illyasviel von Einzbern.
 
 
*'''?:''' ?.
*'''Grey:''' Based off of Sieg from Fate/Apocrypha.
 
 
*'''?:''' ?.
*'''Orange:''' Replaced with Female Ritsuka. Based off of Hakuno Kishinami from Fate/EXTRA.
 
*'''Atlas Academy:''' Male Ritsuka in the Atlas Academy Uniform. Unlockable costume.
+
*'''?:''' ?. Unlockable costume.
*'''Chaldea Combat:''' Female Ritsuka in the Chaldea Combat Uniform. Unlockable costume.
+
*'''?:''' ?. Unlockable costume.
 
</div>
 
</div>
 
</tabber>
 
</tabber>
Line 1,448: Line 1,448:
 
</div>
 
</div>
 
|-|Alternate Costumes= <div style="text-align:left;">
 
|-|Alternate Costumes= <div style="text-align:left;">
*'''?:''' ?.
+
*'''Male:''' Default appearance.
*'''?:''' ?.
+
*'''Female:''' Replaced with Female Ritsuka.
 
*'''Blue:''' Based off of Shirou Emiya from Fate/stay night.
*'''?:''' ?.
 
 
*'''Red:''' Replaced with Female Ritsuka. Based off of Rin Tohsaka
*'''?:''' ?.
 
*'''?:''' ?.
+
*'''Black:''' Based off of Kirei Kotomine.
 
*'''Purple:''' Replaced with Female Ritsuka. Based off of Illyasviel von Einzbern.
*'''?:''' ?.
 
 
*'''Grey:''' Based off of Sieg from Fate/Apocrypha.
*'''?:''' ?.
 
 
*'''Orange:''' Replaced with Female Ritsuka. Based off of Hakuno Kishinami from Fate/EXTRA.
*'''?:''' ?.
 
*'''?:''' ?. Unlockable costume.
+
*'''Atlas Academy:''' Male Ritsuka in the Atlas Academy Uniform. Unlockable costume.
*'''?:''' ?. Unlockable costume.
+
*'''Chaldea Combat:''' Female Ritsuka in the Chaldea Combat Uniform. Unlockable costume.
 
</div>
 
</div>
 
</tabber>
 
</tabber>

Revision as of 21:47, 24 June 2022

This page features the movesets for every downloadable character in Super Smash Bros. Something Else. To see a character's moveset, click on a character's portrait.

DLC Roster

GenoSSBSR(transparent)
OfficerHowardSSBSR(transparent)
ChrisSSBSR(transparent)
2BSSBSR(transparent)
SunflowerSSBSR(transparent)
ReimuSSBSR(transparent)
Geno Officer Howard Chris 2B Sunflower Reimu
SusieSSBSR(transparent)
CynthiaSSBSR(transparent)
KiryuSSBSR(transparent)
MasterChiefSSBSR(transparent)
NakoruruSSBSR(transparent)
ScorpionSSBSR(transparent)
Susie Cynthia Kiryu Master Chief Nakoruru Scorpion
VaatiSSBSR(transparent)
RhythmGirlSSBSR(transparent)
AhriSSBSR(transparent)
RitsukaSSBSR(transparent)
JonesySSBSR(transparent)
ZagreusSSBSR(transparent)
Vaati Rhythm Girl Ahri Ritsuka Jonesy Zagreus
RavenBeakSSBSR(transparent)
PorkySSBSR(transparent)
PhoenixWrightSSBSR(transparent)
KOS-MOSSSBSR(transparent)
NekuSSBSR(transparent)
DoomSlayerSSBSR(transparent)
Raven Beak Porky Phoenix Wright KOS-MOS Neku Doom Slayer
RandomSSBSR(transparent)
? ? ? ? ? ?

Downloadable Characters

Fighter Pass 1

GenoSSBSR(transparent)

Geno

Protector of Star Road

Geno, real name ♡♪!?, is one of Mario’s partners in Super Mario RPG: Legend of the Seven Stars. A warrior of Star Road, he is sent by "a higher authority" to restore peace to Mario's world. Possessing a doll owned by a Toad named Gaz, he ventures into the Forest Maze to gain the 2nd Star Piece, defeating Bowyer with help from Mario and Mallow. From there, Geno joins Mario, and helps him on his quest to defeat the Smithy Gang and restore Star Road.
Moveset

Geno is a Zoner character. Geno is equipped with a variety of projectile attacks, which can use to outrange his foes. His main gimmick is Action Commands. By pressing the attack button at certain times during attacks, Geno can enhance their power and grant them unique abilities. He is a mid-lightweight with no additional movement options.

  • Jab: Fires a quick pellet forward from his fingers.
  • Side Tilt: Fires his fist forward a short distance. Press the attack button while the arm is out to have it fire a blast of energy to damage enemies in front of it.
  • Up Tilt: Swings his cannon overhead, releasing flames.
  • Down Tilt: A sweeping kick.
  • Dash Attack: A shoulder tackle. Press the attack button during the move, and Geno’s elbow will open to fire a close-ranged blast.
  • Side Smash: Turns both his arms into cannons and fires a burst rapid star forward. Hold and release the button at the right time to fire a large star that acts as a projectile.
  • Up Smash: Turns both his arms into cannons and fires a burst rapid star upwards. Hold and release the button at the right time to fire a large star that acts as a projectile.
  • Down Smash: Turns both his arms into cannons and releases a blast of fire around him. Hold and release the button at the right time to increase the height of these blasts, dealing more damage.

  • Neutral Air: Spins while releasing flames from his fingers around him.
  • Forward Air: Fires a quick pellet forward from his finger.
  • Back Air: An elbow bash. Press the attack button during the move, and Geno’s elbow will open to fire a close-ranged blast, propelling you forward.
  • Up Air: Fires his fist upward a short distance. Press the attack button while the arm is out to have it fire a blast of energy to damage enemies above it.
  • Down Air: Fires his fist downward a short distance. Press the attack button while the arm is out to have it fire a blast of energy to damage enemies below it. Has a meteor effect.

  • Pummel: Punches the foe in the face.
  • Forward Throw: Rocket punches the foe in the gut, launching them away.
  • Back Throw: Grabs the foe by the legs, spins, then tosses them backwards.
  • Up Throw: Uppercuts the foe while firing his fist upward.
  • Down Throw: Pins the foe to the ground and fires rapid shots below him.

  • Neutral Special: Geno Beam - Geno fires a beam of energy from his cannon. Hold the button to charge it. As you do so, three stars will appear above Geno. When the third star appears, release the button to fire a stronger beam.
  • Side Special: Geno Whirl - Geno tosses a disc of light energy forward. Normally it does minimal damage. However, press the special button while the disc is out, and it will explode, dealing damage to any nearby enemies.
  • Up Special: Geno Boost - Geno charges up energy before flying in the held direction. Arrows will appear around Geno while the attack charges, and when they disappear, pressing the special button again will increase the distance you travel, while also giving Geno the ability to charge into enemies to deal damage.
  • Down Special: Geno Blast - Geno punches the ground, creating a pillar of energy that damages anyone near and above him. Hold the button to charge it. As you do so, three stars will appear above Geno. When the third star appears, release the button to summon two smaller blasts, alongside the big one around you, to further increase the attack’s range.
  • Final Smash: Geno Flash - Geno transforms into a cannon, before firing a blast that expands and traps targets before exploding. Hold the button to charge it. As you do so, three stars will appear above Geno. When the third star appears, release the button to further increase its damage and size.

  • On-Screen Appearance: Geno’s doll form is seen sitting on the ground, as his star form appears from the sky and possesses it, rising up with his hands in the air before going into a battle stance.
  • Taunts:
    • Up Taunt: Geno’s star form leaves the doll briefly, floating around before reentering it.
    • Side Taunt: ?
    • Down Taunt: ?
  • Victory Poses:
    • Left: Fires two shoots from his arm cannon, before crossing his arms and nodding.
    • Up: One of the Star Pieces flies around Geno before it flies above his head, as Geno raises both hands and holds it up.
    • Right: ?

  • Cyan: Default appearance.
  • Purple: Based off of the Happy Cape.
  • White: Based off of the Sailor Cape.
  • Yellow: Based off of the Fuzzy Cape.
  • Orange: Based off of the Fire Cape.
  • Blue: Based off of the Star Cape.
  • Green: An original color.
  • Gray: Based off of Smithy.
  • Classic: His original outfit from Super Mario RPG: Legend of the Seven Stars. Unlockable costume.
  • ?:?. Unlockable costume.

OfficerHowardSSBSR(transparent)

Officer Howard

?

Officer Howard is the main protagonist of Astral Chain. Adopted by Maximilian Howard, they and their twin sibling Akira admired his work and wished to become police officers themselves. With the mysterious Chimeras invading Earth, they were recruited into the Neuron Task Force, and were given a Legion in order to combat these extradimensional threats and save humanity.
Moveset

Officer Howard is a Trapper character. With the help of their Legion, they can control large amounts of the stage. At first, the Legion will be in a Synced state, in which it will follow Howard, and only appears when it performs certain Specials. Upon performing Neutral Special or Side Special, it will be Desynced, granting it free movement across the stage by holding Neutral Special, however it is vulnerable to attack during this state. The Legion has limited Stamina, 100 in total, which goes down when it is summoned, desynced, performs an attack, or is hit by an attack. The higher the damage of the attack, the more stamina it uses. If the Legion loses all of its stamina, it cannot be summoned for some time, and any damage it takes will be transferred to you. The Legion will go back to a synced state by pressing Shield Special, or by grabbing the enemy. Officer Howard is a lightweight with the ability to wall jump.

  • Jab: Two swings with the X-Baton, followed by a thrust forward. You can delay each sequence in the attack.
  • Side Tilt: Swings the X-Baton forward.
  • Up Tilt: Swings the X-Baton upward.
  • Down Tilt: A sweeping kick.
  • Dash Attack: Lunges forward and slams the X-Baton in Gladius Form downward.
  • Side Smash: Slashes forward with the X-Baton in Gladius Form.
  • Up Smash: Slashes upward with the X-Baton in Gladius Form.
  • Down Smash: Slashes in front then behind with the X-Baton in Gladius Form.

  • Neutral Air: Spins the X-Baton around himself.
  • Forward Air: Fires a shot from the X-Baton in Blaster Form forward.
  • Back Air: Fires a shot from the X-Baton in Blaster Form behind him.
  • Up Air: Slashes in an arc upward with the X-Baton in Gladius Form.
  • Down Air: Flies downward while slamming downward with the X-Baton in Gladius Form. Has a meteor effect.

  • Pummel: Strikes the enemy with the X-Baton.
  • Forward Throw: The Legion appears behind the Officer Howard and slashes the enemy away.
  • Back Throw: The Legion transforms into an Axe Legion, stabbing the enemy before swinging them overhead behind them.
  • Up Throw: Officer Howard kicks the enemy upward, as the Legion transforms into an Arrow Legion and fires an arrow upward.
  • Down Throw: The Legion transforms into an Arm Legion, raises the enemy upward, then slams them into the ground.

  • Neutral Special: Summon / Move Legion - Officer Howard summons the Legion, desyncing it. While it is out, holding the special button allows you to take direct control of the Legion, allowing you to move it freely around the stage and attack enemies.
  • Side Special: Legion Toss - The Legion flies forward, automatically desyncing it if it synced. If it runs into an enemy, it performs a spinning attack that traps foes, leaving them vulnerable to damage.
  • Up Special: Beast Pounce - The Legion transforms into a Beast Legion, flying at an upward angle before pouncing down on enemies. Officer Howard will ride on the Legion while it performs this attack, and if the Legion is desynced, Howard will be pulled to its location, allowing you to recover wherever the Legion is placed.
  • Down Special: Chain Drive - An electric shock is transmitted through the Astral Chain, damaging the enemy if they are touching it.
  • Final Smash: Legion Fusion - Officer Howard and the Legion fuse together. During this state, your attack button is replaced with a barrage of claw slashes, while your special button is replaced with a blast of energy around you. Running is replaced with a quick teleporting dash, allowing you to catch up to an enemy no matter how fast they are. It lasts for a limited time, but taking damage will reduce the amount of time it lasts.

  • Neutral Attack: Two slashes followed by a downward slash.
  • Side Tilt: A lunging slash forward.
  • Up Tilt: A slash upward.
  • Down Tilt: A downward slash.
  • Side Smash: The Legion transforms into an Arrow Legion, firing an arrow a distance forward.
  • Up Smash: The Legion transforms into an Axe Legion, performing a powerful swing upward.
  • Down Smash: The Legion transforms into an Arm Legion, punching the ground to create a powerful shockwave. Has a meteor effect.

  • On-Screen Appearance: Drops down from the sky before attaching their Legatus to their arm and summoning their Legion.
  • Taunts:
    • Up Taunt: Stands upright and salutes.
    • Side Taunt: ?
    • Down Taunt: The Legion transforms into a Beast Legion and Officer Howard pets it.
  • Victory Poses:
    • Left: Performs a series of attacks alongside their Legion before the two strike a pose.
    • Up: ?
    • Right: ?

  • Male: Default appearance.
  • Female: Replaced with Female Officer Howard.
  • Red: Based off of the Rescue color set.
  • Orange: Replaced with Female Officer Howard. Based off of the Mechanic color set.
  • Green: Based off of the Security color set.
  • Brown: Replaced with Female Officer Howard. Based off of the Military color set.
  • Black: Based off of the Monotone color set.
  • White: Replaced with Female Officer Howard. Based off of the Medic color set.
  • Lappy: Male Officer Howard in a Lappy costume. Unlockable costume.
  • Raven: Female Officer Howard wearing the Raven Armor. Unlockable costume.

ChrisSSBSR(transparent)

Chris

?

Chris Redfield is a recurring main protagonist in the Resident Evil series. A member of the S.T.A.R.S’ Alpha team, an elite special force of the Raccoon Police Department, after being sent to a forest to investigate the disappearance of Bravo team, he and the rest of S.T.A.R.S. would become trapped in the Spencer Mansion to face all of the horrors inside. After learning of how a group known as the Umbrella Corporation instigated the viral outbreak in the mansion, he leaves Raccoon City to embark on a personal mission against the group, eventually forming the BSAA to combat the use of biological weaponry, even after Umbrella’s collapse.
Moveset

Chris is a Turtle character. Chris’ main gimmick is his Limited Ammo. Unlike other characters with guns, Chris has no way to regain ammo without losing a stock. With proper use of your resources however, Chris has a wide variety of attacks in his arsenal, and can create devastating combos. He is a mid-heavyweight with the ability to crawl.

  • Jab: A left punch, followed by a right punch, followed by a knife slash.
  • Side Tilt: A knife slash forward..
  • Up Tilt: An upward knife swing.
  • Down Tilt: A slide kick.
  • Dash Attack: A shoulder bash.
  • Side Smash: A roundhouse kick.
  • Up Smash: An jumping uppercut.
  • Down Smash: A double-sided kick.

  • Neutral Air: A spinning knife swing around Chris.
  • Forward Air: A flying kick.
  • Back Air: Quickly turns around while swinging his knife.
  • Up Air: An upward knife slash.
  • Down Air: A stomp. Has a meteor effect.

  • Pummel: Knees the opponent.
  • Forward Throw: Kicks the opponent away.
  • Back Throw: Grabs the enemy and performs a suplex.
  • Up Throw: Tosses a Grenade under their feet to blow them up.
  • Down Throw: The enemy gets tackled down to the ground by a Cerberus, who mauls them as Chris pulls out a Flamethrower to burn them both, with the Cerberus running from the flames.

  • Neutral Special: Gun - Chris pulls out his currently equipped gun, gaining the ability to freely aim around him. Press the attack button while aiming and you’ll fire a shot. The gun will reload once it runs out of ammo, but pressing special while shielding allows you to do it manually.
    • Handgun: The most versatile of the guns, firing pretty fast and as quickly as you can pulling the trigger. Aim for your enemies’ heads to deal increased damage. Holds 10 bullets per clip and is the only gun with infinite ammo.
    • Shotgun: The most powerful gun in Chris’ arsenal, the Shotgun fires a blast that, while only useful in close-range, deals heavy damage. Holds 6 bullets per clip, and has 18 bullets per stock.
    • Submachine Gun: The only gun capable of firing automatically, making it great for racking up damage. However, it has a spread making it difficult to use in long-range. Holds 30 bullets per clip and has 120 bullets per stock.
    • Magnum: A more powerful version of the Handgun, it deals good damage (especially if a headshot is landed), and causes heavy damage to shields. However, it fires the slowest. Holds 6 bullets per clip and has 12 bullets per stock.
  • Side Special: Grenade Launcher - Chris pulls out a Grenade Launcher, firing a grenade that flies in an arc before exploding upon impact. Hold a direction to change the angle it is fired. Holds only 16 shots per stock.
  • Up Special: Hookshot - Chris pulls out a Hookshot, firing a grappling hook upward. It can tether to ledges and grab enemies out of the air.
  • Down Special: Survivor’s Inventory - A menu opens up and Chris is given the option of one of eight items which he can use (including the Guns used in Chris’ Neutral Special). Each of these items have a limited number of uses.
    • Green Herb: If left alone for a time, allowing Chris to restore a small amount of health. Can only be used 2 times per stock.
    • Incendiary Rounds: Gives the Grenade Launcher’s next shot a flame effect, with the explosion leaving behind flames that damage enemies who touch it. Can only be used 2 times per stock.
    • Acid Rounds: Gives the Grenade Launcher’s next shot an acid effect, dealing damage to anyone hit overtime. Can only be used 2 times per stock.
    • Electric Rounds: Gives the Grenade Launcher’s next shot an electric effect, stunning in its radius. Can only be used 2 times per stock.
  • Final Smash: Reach for the S.T.A.R.S. - Chris rolls out of the way as Nemesis (or Mr. X if Leon or Claire are performing the attack) appears, charging forward and grabbing the foe, taking them into a cutscene. Nemesis tosses them around and beats them to a pulp, before a Rocket Launcher is dropped in front of Chris by a helicopter. Chris grabs the Rocket Launcher, firing it at them to blow up both Nemesis and the caught foe, launching them away.

  • On-Screen Appearance: ?
  • Taunts:
    • Up Taunt: Does a beckoning gesture, saying “C’mon!” or “Bring it!”
    • Side Taunt: ?
    • Down Taunt: ?
  • Victory Poses:
    • Left: ?
    • Up: Three zombies are seen encroaching on Chris, but he shoots them all down. After doing so, the camera zooms in as Chris strikes a pose.
    • Right: ?

  • Chris: Default appearance.
  • Jill: Replaced with Jill Valentine.
  • Leon: Replaced with Leon S. Kennedy.
  • Claire: Replaced with Claire Redfield.
  • Red Chris: Based off of Barry Burton.
  • Red Jill: Based off of Ada Wong.
  • Yellow Leon: Based off of Brad Vickers.
  • White Claire: Based off of Rebecca Chambers.
  • Sailor: Chris’ Sailor outfit from Resident Evil: Revelations. Unlockable costume.
  • Mafia: Leon’s Special 2 outfit from Resident Evil 4. Unlockable costume.

2BSSBSR(transparent)

2B

?

YoRHa No.2 Type B, or simply 2B, is one of the protagonists of NieR: Automata. A combat android created as part of the YoRHa squadron, her mission is to liberate Earth from hostile machine lifeforms created by an unnamed alien race, who wish to wipe out all of humanity. She is cold and collected, but disdains openly displaying her emotions, and as a result, she hides emotional trauma and anger over the missions she is forced to complete.
Moveset

2B is a Rushdown character. She is a very combo-focused character, racking up damage quickly before launching the foe with a powerful attack. Her main gimmick is Virtuous Contract and Virtuous Treaty. Tapping or holding the button will change which weapon 2B uses for the attack, with tapping focusing on multi-hitting combo moves, and holding increasing the damage at the cost of speed. Alongside her is Pod 042, who will float behind her and is used with several of her attacks. However, Pod 042 can be damaged, and if it sustains enough, it will go into a cooldown state where it can’t be used. She is a lightweight with the ability to 8-way air dash.

  • Jab: Two slashes, followed by 2B tosses her small sword to perform a spinning slash, followed by her lunging forward and slashing upward. Holding the button at any point has 2B perform a downward slam.
  • Side Tilt: Tapping has her slash forward, followed by tossing her small sword to slash enemies in front of her. Holding the button has 2B perform a downward slash.
  • Up Tilt: Tapping has her perform a quick upward slash that launches enemies into the air. Holding has her perform a heavier slash upward.
  • Down Tilt: Tapping has her perform a sweeping kick. Holding has her swing her large sword in front of her.
  • Dash Attack: Tapping has her flip forward while spinning her small sword. Holding has her stop and launch her large sword forward a short distance.
  • Side Smash: Spins twice with her large sword, ending with a launching hit.
  • Up Smash: Performs a heavy upward swing with her large sword.
  • Down Smash: Pod 042 creates spears of energy that emerge from the ground to strike enemies around 2B.

  • Neutral Air: Pod 042 spins around her with a blade to slash enemies.
  • Forward Air: Tapping has 2B perform a combo of slashes in front of her. Holding has 2B swing her large sword downward. Has a meteor effect.
  • Back Air: Tapping has 2B perform kick behind her. Holding has 2B swing her large sword upward behind her.
  • Up Air: Tapping has 2B perform an upward overhead slash. Holding has
  • Down Air: A downward slash.

  • Grab: Pod 042 flies forward and grabs for 2B. If Pod 042 is damaged, 2B will do a normal grab.
  • Pummel: Knees the opponent.
  • Forward Throw: Slashes the opponent away.
  • Back Throw: Slides behind the foe before performing a shoulder bash.
  • Up Throw: Slashes the opponent upward.
  • Down Throw: Pod 042 drags the enemy to the ground before she kicks them away.

  • Neutral Special: Pod Gatling / Pod Laser - Tap the button to have Pod 042 fire a stream of bullets in front of 2B. Keep tapping the button to fire for longer, but the shots slow down and grow weaker as time goes on. 2B can move and attack while firing. Hold the button to have Pod 042 charge up before firing a laser at a downward angle. During the charge Pod 042 will not move, allowing you to lead enemies into the attack.
  • Side Special: Mirage - 2B disappears, and if any enemies are nearby when she performs the move, she’ll perform a slashing attack. Hold the button to charge it, and upon hitting a foe, she’ll perform a combo of slashes.
  • Up Special: Pod Jump - 2B grabs Pod 042, who spins her around before tossing her in the held direction. Hold the special button to delay the attack, allowing 2B to hover.
  • Down Special: Evasive System - 2B dashes backwards. If she is hit by an attack, she’ll transform into holograms, dodging the attack. From there she can perform one of two follow-ups. Tapping the button has 2B perform an upward slash, which can be used to follow-up into a combo. Holding the button has 2B launch the foe away with a powerful slash, which acts more like a normal counter.
  • Final Smash: YoRHa Special Attack / Self-Destruct - 2B lunges forward and performs a heavy slash in front of her, trapping any nearby foes. After performing a series of slashes, she launches the foe into the air, before moving a lightspeed to strike the foe, before launching them to the ground with a final downward slash. At over 100%, a 2-second countdown will appear and 2B will self-destruct, dealing heavy damage to anyone in her radius. After the attack however, 2B will take 100% damage, and if the attack misses, 2B will be left vulnerable for a short time, as she cannot attack and her speed is dramatically slowed while rebooting.

  • On-Screen Appearance: Floats onto the stage while holding onto Pod 042.
  • Taunts:
    • Up Taunt: Pats Pod 042 on the head, as it says either “Report: Pleasant” or “Gratitude confirmed. Your affinity with this Pod has risen”.
    • Side Taunt: Puts her hand to her chest and says “Glory to mankind”.
    • Down Taunt: ?
  • Victory Poses:
    • Left: ?
    • Up: ?
    • Right: ?

  • Black: Default appearance.
  • White: Based off of 2P, an alternate color scheme from Soul Calibur 6.
  • Red: Based off of Devola & Popola.
  • Yellow: Based off of Commander White.
  • Green: Based off of Anemone.
  • Brown: Based off of Pascal.
  • Purple: Based off of Operator 210.
  • Cyan: Based off of Kainé.
  • Heavy Armor: Wears the Heavy Armor B. Unlockable costume.
  • ?: ?. Unlockable costume.

SunflowerSSBSR(transparent)

Sunflower

Bloom of your Doom

The Sunflower is a recurring plant from throughout the Plants vs. Zombies series. She is one of the many plants the player uses to defeat Dr. Zomboss and his zombie horde, and prevent them from eating their brains. She plays a crucial part in the player’s defense, being your main way of producing Sun in order to plant more Plants.
Moveset

Sunflower is a Trapper character. Her main gimmick is Sun. By picking it up as it falls from the sky, or producing it by pressing special while shielding, Sunflower can use Sun to place down Plants around the stage. This allows her to control large amounts of the stage, however, proper management and patience is needed, as her attack speed can be rather slow. She is a lightweight with no additional movement options.

  • Jab: Summons a Bonk Choy to perform two straight punches, followed by an uppercut.
  • Side Tilt: Summons a Bonk Choy to punch in front of her.
  • Up Tilt: Summons a Bonk Choy to pop out and perform an uppercut.
  • Down Tilt: Plants her roots into the ground as a Spikeweed pops out to poke at enemies above it.
  • Dash Attack: Jumps forward, as a Blover appears and spins its leaves while moving forward, dealing multiple hits.
  • Side Smash: Summons a Chomper to bite down in front of you.
  • Up Smash: Summons a Cactus to sprout out of the ground and grow to strike enemies above her.
  • Down Smash: Summons a Squash, to jump up before squashing down anyone besides Sunflower.

  • Neutral Air: Pulls out a Starfruit, which fires stars in five directions.
  • Forward Air: Summons a Cattail to stab enemies with its tail twice.
  • Back Air: Summons a Bloomerang, tossing a boomerang behind her.
  • Up Air: Summons a Snapdragon to breathe a stream of fire above her.
  • Down Air: Summons a Lightning Reed to launch a blast of lightning under her. The tip has a meteor effect.

  • Pummel: Summons a Puff-Shroom that fires spores at the enemy.
  • Forward Throw: The Puff-Shroom grows into a Fume-Shroom and fires a stream of spores that launches the enemy backwards.
  • Back Throw: Tosses the enemy into a Coconut Cannon, then fires them out behind her.
  • Up Throw: Summons a Torchwood, which launches enemies upward with the fire on its head.
  • Down Throw: Summons a Grave Buster, which pulls foes into the ground, burying them.

  • Neutral Special: Peashooter - Sunflower quickly summons a Peashooter, which will fire out a pea forward. On the ground, you can hold the button at the cost of 50 sun to place it on the ground. The Peashooter will stay in place, and fire at anyone in front of it. However, it has a limited lifespan, and if hit by a few hits, it will go away immediately. You can hold the button to change it into a different plant.
    • Repeater: At the cost of 100 sun, the Repeater fires two peas at once compared to the Peashooter’s one, allowing for more damage output.
    • Gatling Pea: At the cost of 150 sun, the Gatling Pea fires rapid peas, but must rev up before it can fire. Has the most damage output, but due to the charge, it is left vulnerable for a brief moment.
  • Side Special: Wall-Nut / Wall-Nut Bowling - Sunflower summons a Wall-Nut at the cost of 50 sun. The Wall-Nut will act as a wall and a platform, blocking most attacks. Only one Wall-Nut can be on-screen at a time. With Wall-Nut out, the special changes to a shove, which if used near the Wall-Nut, will cause it to roll forward and act as a slow but powerful projectile. You can hold the button to change it into a different plant.
    • Tall-Nut: At the cost of 125 sun, the Tall-Nut acts as a taller and higher health version of the Wall-Nut. However, it cannot be bowled, and has a limited lifespan.
  • Up Special: Cabbage-Pult - Sunflower summons a Cabbage-Pult under her, which launches her into the air. On the ground, you can hold the button at the cost of 50 sun to place it on the ground. The Cabbage-Pult will lob cabbages, which fly at an angle. However, it has a limited lifespan, and if hit by a few hits, it will go away immediately. You can hold the button to change it into a different plant.
    • Kernel-Pult: At the cost of 100 sun, the Kernel-Pult is a bit weaker, but it directly targets enemies, and has a chance of launching butter that stuns its targets.
    • Melon-Pult: At the cost of 150 sun, the Melon-Pult acts as a stronger version of the Cabbage-Pult, lobbing melons that explode on impact.
  • Down Special: Potato Mine - Sunflower tosses a Potato-Mine, which plants into the ground. It takes a bit of time to arm, but after a short moment, it will pop out. Anyone that touches it in this state will be blown up. Only one Potato-Mine can be on screen at a time. You can hold the button to change it into a different plant.
    • Cherry Bomb: At the cost of 150 sun, the Cherry Bomb instead explodes at a set time, dealing damage to anyone nearby when it activates. Be careful, as Sunflower can be hit by her own Cherry Bomb if she isn’t careful.
    • Jalapeno: At the cost of 200 sun, the Jalapeno explodes into a wave of fire, setting the surrounding area ablaze and dealing damage to anyone touching it.
  • Final Smash: Garden Warfare - Crazy Dave riding Penny suddenly appears from a Time Portal, flying forward and launching anyone in his way into a cutscene. Taken to the Player’s House, the trapped foes look behind them as a huge wave of zombies approach them. Sunflower is waiting on the other side of the lawn, as she commands a group of Gatling Peas and Winter Melons to fire at the foes. The enemies are attacked from both sides by the two groups, before a Cob Cannon fires into the air and launches a cob at the foes, blowing them up and launching them away.

  • On-Screen Appearance: The Sunflower is seen in the ground swaying back and forth, before uprooting itself.
  • Taunts:
    • Up Taunt: Jumps around in celebration. Based off of the “Celebrate” gesture.
    • Side Taunt: Twirls around before looking towards the screen and winks.
    • Down Taunt: Crosses her leaves and performs a little dance. Based off of the “Giddy Up” gesture.
  • Victory Poses:
    • Left: ?
    • Up: ?
    • Right: Sunflower is seen singing on a stage as a crowd of Zombies, and the camera zooms into her as she strikes a pose with the microphone.

  • Yellow: Default appearance.
  • Green: Based off of the Peashooters.
  • Brown: Based off of Wall-Nut and Tall-Nut.
  • Cyan: Based off of ice plants like the Snow Pea and Ice-Shroom.
  • Purple: Based off of mushrooms like Puff-Shroom or Fume-Shroom.
  • Pink: Based off of Hypno-Shroom and Royal Hypno-Flower.
  • Red: Based off of Rose.
  • Grey: Based off of the colors of the Zombies.
  • Vampire: The Vampire Flower variant from Plants vs. Zombies: Garden Warfare 2. Unlockable costume.
  • Solar Flare: Wears an outfit based off of Solar Flare from Plants vs. Zombies: Heroes. Unlockable costume.

ReimuSSBSR(transparent)

Reimu

Shrine Maiden of Paradise

Reimu Hakurei is the main protagonist of the Touhou Project series. As the sole shrine maiden of the Hakurei Shrine, she is responsible for managing the Great Hakurei Barrier and is often called on to investigate strange occurrences throughout Gensokyo. She is straightforward and optimistic, shifting her mood quickly depending on the situation.
Moveset

Reimu is a Hit-and-Run character. She relies on cornering the enemy with her wide array of projectiles, leaving them vulnerable to a powerful attack. Her main gimmick is her Power Gauge. As she deals damage to enemies with her normal attacks, or narrowly dodges enemy’s attacks, also known as Grazing, she will be awarded with Power Items. Picking these up fills the Power Gauge, and by collecting up, Reimu will gain a level, with each level adding an Option that launches projectiles during special moves. The Power Gauge can go up to three Levels, but goes down over time and drops down to a prior level instantly after a KO. She is a lightweight with the ability to float and 8-way air dash.

  • Jab: A slap, followed by a kick, followed with a lunging hand thrust.
  • Side Tilt: Swings her gohei forward.
  • Up Tilt: Swings her gohei upward.
  • Down Tilt: Spins her gohei on the ground.
  • Dash Attack: A sliding kick.
  • Side Smash: Swings her gohei forward as it is charged with energy.
  • Up Smash: Performs Ascension Kick, flying upward a short distance and performing a flip kick.
  • Down Smash: Performs Evil-Sealing Circle, placing her hand on the ground and creating a magic circle that blasts magic around her.

  • Neutral Air: A spin while swinging her gohei.
  • Forward Air: A flying kick.
  • Back Air: Flips around before kicking behind her.
  • Up Air: An upward gohei swing.
  • Down Air: Creates a blast of pressure magic under her. Enemies hit by Reimu’s hand will be meteor smashed.

  • Pummel: Smacks the enemy with her gohei.
  • Forward Throw: Knocks away the foe with a barrier.
  • Back Throw: Paralyzes the foe with a charged stab with her gohei, before kicking them away.
  • Up Throw: Places her hand on the ground and creates a rising barrier that launches foes upward.
  • Down Throw: Slams the foe into the ground, before teleporting above them and performing a diving kick.

  • Neutral Special: Hakurei Amulet - Reimu launches an amulet that has a slight homing effect. Hold the button to charge up a larger amulet that, while more powerful, loses its homing effect. Options will launch smaller homing amulets, but they don’t cause knockback.
  • Side Special: Youkai Buster - Reimu launches three ofuda that spread out as they fly. Hold the button to condense the ofuda into a tighter spread. Options increase the number of ofuda that are thrown.
  • Up Special: Dimensional Rift - Reimu teleports upwards. Though it does not cover a lot of distance, Reimu can cancel it into any of her normal attacks. Pressing Special after performing the move has Reimu toss a spread of needles at a downward angle while stalling her in the air for a bit. Options increase the number of needles that are thrown.
  • Down Special: Yin-Yang Orb - Reimu launches a yin-yang orb at a downward angle. The orb bounces off of surfaces, objects and enemies, while dealing damage to anyone they hit. With each Option Reimu has, an additional Yin-Yang Orb can be launched, with the Option returning to Reimu after the orb disappears.
  • Final Smash: Fantasy Heaven - Reimu summons seven yin-yang orbs as she rushes forward to perform a combo of attacks. With the last hit, she launches the foe into the air, before teleporting above them, and uses the orbs to unleash a barrage of ofuda all around her. She ends the attack by using Fantasy Seal, turning the orbs into balls of rainbow light that home into the foe and launching them away.

  • On-Screen Appearance: ?
  • Taunts:
    • Up Taunt: ?
    • Side Taunt: ?
    • Down Taunt: ?
  • Victory Poses:
    • Left: ?
    • Up: ?
    • Right: ?

  • Red: Default appearance.
  • Black: Based off of Marisa Kirisame.
  • Dark Blue: Based off of Sakuya Izayoi.
  • Green: Based off of Youmu Konpaku.
  • Blue: Based off of Sanae Kochiya.
  • Cyan: Based off of Cirno.
  • Purple: Based off of Yukari Yakumo.
  • Pink: Based off of Remilia Scarlet.
  • Classic: Reimu’s original outfit and color scheme from the PC-98 Touhou games. Unlockable costume.
  • ?: ?. Unlockable costume.

Fighter Pass 2

SusieSSBSR(transparent)

Susie

?

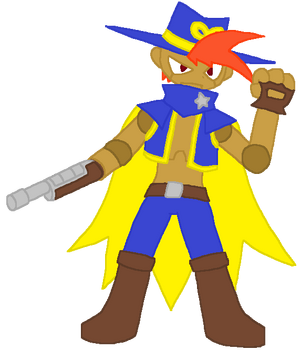
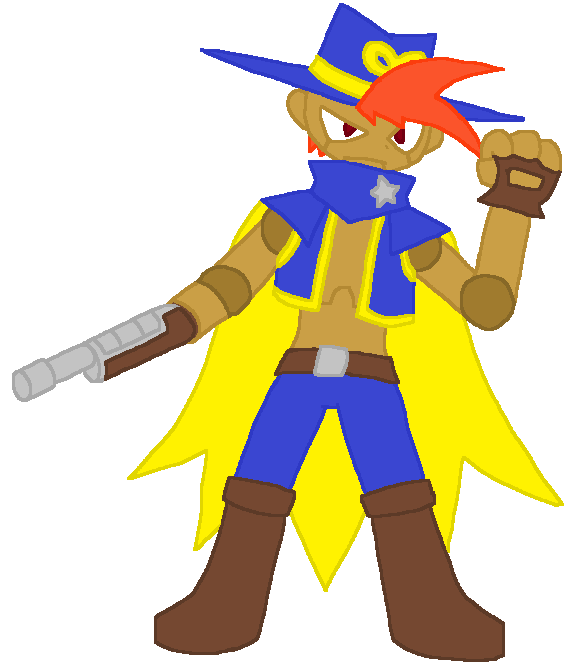
Susie is a reoccuring character from the Kirby series. She is the secretary and daughter of Max Profitt Haltmann, CEO of the Haltmann Works Company, a corporation seeking eternal prosperity by invading and mechanizing other planets. In her debut, Kirby: Planet Robobot, she initially acts as an antagonist, acting as a boss and later sending other creations of Haltmann Works to take him out. However, when the company’s mother computer, Star Dream, gained sentience and sought to eradicate all life in existence, she became an ally to Kirby, helping him take the haywire computer down.
Moveset

Susie is initially a Zoner character. A lightweight with no additional movement options, with her Blaster, she can keep her enemies at a distance. Her main gimmick is her Business Suit. By pressing Down Special, Susie can summon her Business Suit, granting her an entirely new moveset, a Bait-and-Punish playstyle, super-heavy weight, the ability to jump on enemies to damage them, and Robobot Armor, making her immune to all knockback except from stronger attacks. However, the Business Suit is slow, has only one jump, and has limited health. Though this health goes back up overtime whenever the Business Suit isn’t in use, if it runs out, the Business Suit will explode, damaging Susie and making it unable to summon until the next stock.

  • Jab: Two slaps followed by a close-ranged shot from her Blaster
  • Side Tilt: A pistol whip.
  • Up Tilt: A blaster shot upward.
  • Down Tilt: Fires a shot at the ground, creating a blast of energy.
  • Dash Attack: Flies forward while spinning to damage enemies.
  • Side Smash: Fires a laser in front of her.
  • Up Smash: Fires a laser upward.
  • Down Smash: Fires a blast onto the ground in front of her, which creates a quick burst of energy that travels forward.

  • Neutral Air: Spins around while pistol whipping anyone around her.
  • Forward Air: Pistol whips anyone in front of her.
  • Back Air: Swings backwards and pistol whips anyone behind her.
  • Up Air: Quickly fires a blaster shot above her.
  • Down Air: Quickly fires a blaster shot under her.

  • Pummel: Hits the enemy in the head with her blaster.
  • Forward Throw: Strikes the enemy in the gut with her blaster, then fires a shot to knock them away.
  • Back Throw: Tosses them backwards and fires multiple shots into them as they are launched away.
  • Up Throw: Tosses the enemy upward as her Transporter appears to slice the enemy.
  • Down Throw: Pins the enemy to the ground then fires an exploding shot into them, knocking the foe into the air.

  • Neutral Special: HWC Blaster - Susie fires a shot from her Blaster. These shots can be fired quickly, and can be charged for extra damage. While charging, she can move and even jump, though she cannot turn around while doing so.
  • Side Special: Aero Cracker - Susie uses her Transporter to launch herself forward, charging into enemies. Hold the button to increase the distance it travels. At any point, you can press Side Special again to stop your momentum and launch a burst of energy. The longer charge there is left, the farther it travels and the more damage it deals.
  • Up Special: Transporter - Susie grabs onto her Transporter, which she uses to fly into the air before descending back down. During the float, Susie can fire at enemies with the attack button.
  • Down Special: Business Suit - Susie summons her Business Suit and hops in, using it to attack enemies. While summoning it, you are briefly vulnerable.
  • Final Smash: Robobot Drill - Susie summons her Business Suit as its arm transforms into a massive drill. She then flies forward at high speed, charging into enemies for massive damage. After flying past the blast line, she reappears on-stage.

  • Jab: The suit performs a downward punch, followed by an uppercut, followed by a forward punch.
  • Side Tilt: The suit performs a forward sweep.
  • Up Tilt: Susie fires a shot from her Blaster upward.
  • Down Tilt: The suit swipes forward in front of it.
  • Side Smash: The suit’s arm transforms into a rocky fist as it punches forward.
  • Up Smash: The suit’s arm transforms into an energy blade, which it swipes above it to damage enemies.
  • Down Smash: The suit’s arms transform into sawblades, which it brings down to shred enemies beside it.
  • Pummel: Crushes the enemy in its arms.
  • Forward Throw: Slams the enemy in front of it.
  • Back Throw: Slams the enemy behind it.
  • Neutral Special: Drillbit - The Business Suit fires two Drillbits, which curves from its back and home into enemies in front of it. A good pressure tool.
  • Side Special: Spin Cycle - The Business Suit spins its arms, damaging enemies around it. You can slightly move while performing the attack, and if used in the air, it slows its falling speed.
  • Up Special: Driver Slam - The Business Suit jumps upward, charges up, and flies in any downward direction to slam into enemies. Has a meteor effect.
  • Down Special: Disengage - Susie jumps out of her Business Suit as it disappears.
  • Final Smash: Robobot Drill - The Business Suit’s arm transforms into a massive drill as it flies forward at high speed, charging into enemies for massive damage. Itthen flies forward at high speed, charging into enemies for massive damage. After flying past the blast line, it reappears on-stage.

  • On-Screen Appearance: Flies onto the stage with her Transporter.
  • Taunts:
    • Up Taunt: ?
    • Side Taunt: ?
    • Down Taunt: ?
  • Victory Poses:
    • Left: ?
    • Up: ?
    • Right: ?

  • White: Default appearance.
  • Blue: Based on Susie’s P2 color in Kirby: Star Allies.
  • Yellow: Based on Susie’s P3 color in Kirby: Star Allies.
  • Green: Based on Susie’s P4 color in Kirby: Star Allies.
  • Purple: Based off of President Haltmann.
  • Black: Based off of Parallel Susie from Team Kirby Clash Deluxe.
  • Grey: Based off of Mega Titan from Kirby and the Amazing Mirror. The Business Suit’s color is based off of HR-H from Kirby 64: The Crystal Shards.
  • White: Based off of Metal General from Kirby’s Return to Dreamland. The Business Suit’s color is based off of HR-D3.
  • ?: ?. Unlockable costume.
  • ?: ?. Unlockable costume.

CynthiaSSBSR(transparent)

Cynthia

?

Cynthia is the Champion of the Sinnoh region and the strongest opponent you’ll face in Pokémon Diamond and Pearl. She has a deep love for mythology and history, spending her time researching and exploring various sites associated with Legendary Pokémon. She fights alongside three of her Pokémon, Glaceon, the Fresh Snow Pokémon, Roserade, the Bouquet Pokémon and Garchomp, the Mach Pokémon.
Moveset
Glaceon

Glaceon is a Turtle character. It prefers pressuring the player from a distance, utilizing a variety of tricky projectiles and traps. Glaceon is a lightweight with the ability to crawl. They can switch between the other Pokémon by pressing Shield Special.

  • Jab: A headbutt.
  • Side Tilt: Turns around and performs a kick, creating an icicle on its foot to stab the enemy.
  • Up Tilt: Swings its tail above as it is coated in ice.
  • Down Tilt: Swings its tail low to the ground as it is coated in ice.
  • Dash Attack: Lunges forward as icy fangs appear in front of it to bite nearby foes.
  • Side Smash: Summons a large curved ice spike to strike enemies in front of it.
  • Up Smash: Summons a large curved ice spike to strike enemies upward.
  • Down Smash: Creates two large icicles in front and behind it.

  • Neutral Air: Curls up into a ball and spins as icy wind surrounds it.
  • Forward Air: Swings its tail in front of it as it is coated in ice.
  • Back Air: Kicks behind it, creating an icicle.
  • Up Air: Swings its head upward as it shoots cold air from its mouth.
  • Down Air: Points its tail downward at an angle as it is coated in a large icicle.

  • Pummel: Envelops the enemy in an icy wind, damaging them.
  • Forward Throw: Headbutts the foe away.
  • Back Throw: Creates an ice spike from the ground to knock the foe backwards.
  • Up Throw: The icy wind grows, launching the foe upward.
  • Down Throw: The icy wind converges and freezes the foe.

  • Neutral Special: Icicle Spear - Glaceon creates an icicle that flies forward as a projectile. Hold the button to delay the icicle’s flight, allowing you to create tricky combo situations.
  • Side Special: Ice Shard - Glaceon tosses a ball of ice in an arc, damaging enemies and having a chance to freeze. If it lands on the ground, it creates icy spikes which act as traps.
  • Up Special: Icy Wind - Glaceon becomes enveloped in an icy wind, charging up before flying in the held direction while damaging enemies she runs into.
  • Down Special: Icicle Crash - On the ground, Glaceon creates ice spikes along the ground. In the air, it instead creates an icy platform that can be stood on, before falling and acting as a projectile.
  • Final Smash: ? - ?

  • On-Screen Appearance: ?
  • Taunts:
    • Up Taunt: ?
    • Side Taunt: ?
    • Down Taunt: ?
  • Victory Poses:
    • Left: ?
    • Up: ?
    • Right: ?

  • Default: Default appearance.
  • ?: ?.
  • ?: ?.
  • ?: ?.
  • ?: ?.
  • ?: ?.
  • ?: ?.
  • ?: ?.
  • Sygna: ?. Cynthia wears her Renegade Sygna Suit from Pokémon Masters Unlockable costume.
  • Legends: ?. Cynthia wears an outfit based on Volo from Pokémon Legends: Arceus Unlockable costume.

Roserade

Roserade is a Spacer character. With its quick stabs and whips, it can keep up with the enemy and attack them from a distance. In combination with its poisonous attacks, it can force the enemy into making mistakes, of which it can capitalize on. Roserade is a mid-lightweight with the ability to wall jump. They can switch between the other Pokémon by pressing Shield Special.

  • Jab: Swings upward then toward with two thorns from its roses, followed by a flurry of stabs and a final thrust.
  • Side Tilt: A quick thorn stab forward.
  • Up Tilt: Swings a vine upward.
  • Down Tilt: A quick downward poke.
  • Dash Attack: A lunging double stab.
  • Side Smash: Stabs forward with a large thorn.
  • Up Smash: Creates multiple vines before they converge and stab upward.
  • Down Smash: Creates a storm of leaves around it to damage enemies.

  • Neutral Air: Spins while swinging two vines around her.
  • Forward Air: Two quick thorn stabs in front of it.
  • Back Air: Turns around and kicks behind it.
  • Up Air: Swings a vine upward in an arc above it.
  • Down Air: Turns and stabs enemies under it with a thorn. Has a meteor effect.

  • Grab: Creates three thorny vines to grab distant enemies. Can be used as a tether recovery.
  • Pummel: Crushes the foe with its vines.
  • Forward Throw: A thorn appears with its free arm which it uses to stab the enemy away.
  • Back Throw: Swings the enemy behind it with its vines.
  • Up Throw: Swings the enemy upward.
  • Down Throw: Swings the enemy to the ground.

  • Neutral Special: Seed Bomb - Roserade launches a seed at an upward angle, which upon reaching max height, explodes and fires seed pellets in a spread downward. Great for creating pressure and tacking on damage.
  • Side Special: Poison Jab / Venoshock - Roserade lunges forward with a stab from one of its thorns, poisoning the target and dealing damage overtime. Hold the button to charge it, increasing its distance and the size of the thorn. If you hit a target that is already poisoned, the move becomes Venoshock, ending the poison effect but dealing extra damage.
  • Up Special: Petal Blizzard - Roserade stirs up a blizzard of petals around it, damaging enemies around her and rising into the air. Covers a lot of height but lacks horizontal distance.
  • Down Special: Toxic Spikes - Roserade tosses down a poisoned spike. Anyone that touches the spike will take damage and be poisoned.
  • Final Smash: ? - ?

  • On-Screen Appearance: ?
  • Taunts:
    • Up Taunt: ?
    • Side Taunt: ?
    • Down Taunt: ?
  • Victory Poses:
    • Left: ?
    • Up: ?
    • Right: ?

  • Default: Default appearance.
  • ?: ?.
  • ?: ?.
  • ?: ?.
  • ?: ?.
  • ?: ?.
  • ?: ?.
  • ?: ?.
  • Sygna: ?. Cynthia wears her Renegade Sygna Suit from Pokémon Masters Unlockable costume.
  • Legends: ?. Cynthia wears an outfit based on Volo from Pokémon Legends: Arceus Unlockable costume.

Garchomp

Garchomp is a Bait-and-Punish character. Boasting impressive power, this is off-set by their slow speed, forcing the player to often rely on setups and reads to cause the most damage. Garchomp is a super-heavyweight with no additional movement options. They can switch between the other Pokémon by pressing Shield Special.

  • Jab: Slashes in front of him twice before biting forward.
  • Side Tilt: A tail swing.
  • Up Tilt: Swings its head upward.
  • Down Tilt: Stomps the ground in front of him.
  • Dash Attack: Glides forward and bites the enemy.
  • Side Smash: Slashes with both claws in front of him, creating a large X-shape.
  • Up Smash: Swings upward with a heavy slash.
  • Down Smash: Punches the ground to create earth spikes.

  • Neutral Air: A spinning attack with its fins.
  • Forward Air: Swings both claws downward. Has a meteor effect.
  • Back Air: Swings its tail behind it.
  • Up Air: Swings its head upward.
  • Down Air: Stomps under it. Has a meteor effect.

  • Pummel: Bites at the enemy’s face.
  • Forward Throw: Grabs the enemy in its jaws, jumps in the air, then slams them to the ground.
  • Back Throw: Grabs the enemy in its jaws and slams them behind it.
  • Up Throw: Summons a sandstorm to launch you into the air.
  • Down Throw: Piledrives the foe, burying them.

  • Neutral Special: Dragon Breath - Garchomp shoots a beam of dragon energy at a downward angle. Hold the button to charge, increasing the damage, and causing Garchomp to sweep the beam in front of it. If the beam is fully charged, upon reaching max length, Garchomp swings the beam upward.
  • Side Special: Dragon Rush / Dig - Garchomp dives at a downward angle, damaging any enemy in its way. If he touches the ground while performing this, he will start digging through it while moving forward. Hold the button to keep digging. Release the button and Garchomp will jump out, performing a rising attack with its back fin.
  • Up Special: Giga Impact - Garchomp flies upward while spinning, dealing multiple hits, before flying downward with a cleaving slash. The second half of the attack has a meteor effect.
  • Down Special: Earthquake - Garchomp stomps the ground, creating an earthquake that launches grounded foes around it into the air. During the attack, Garchomp has super armor. Hold the button to increase the distance and damage.
  • Final Smash: ? - ?

  • On-Screen Appearance: ?
  • Taunts:
    • Up Taunt: ?
    • Side Taunt: ?
    • Down Taunt: ?
  • Victory Poses:
    • Left: ?
    • Up: ?
    • Right: ?

  • Default: Default appearance.
  • ?: ?.
  • ?: ?.
  • ?: ?.
  • ?: ?.
  • ?: ?.
  • ?: ?.
  • ?: ?.
  • Sygna: ?. Cynthia wears her Renegade Sygna Suit from Pokémon Masters Unlockable costume.
  • Legends: ?. Cynthia wears an outfit based on Volo from Pokémon Legends: Arceus Unlockable costume.

KiryuSSBSR(transparent)

Kiryu

The Dragon of Dojima

Kazuma Kiryu is a recurring protagonist in the Yakuza series. He is a member of the Dojima Family, a subsidiary of the Tojo Clan, one of the largest yakuza groups in Japan. Despite this, he is an honorable person who lives by a strict code of honor and a strong sense of justice. After falsely being blamed for the death of his boss, being expelled from his clan, he was released in prison after a ten-year stay, and fights against the new threats in his life.
Moveset

Kiryu is a Grappler character. His focus on powerful close-ranged strikes and grabs makes him a close-ranged powerhouse. Kiryu’s main gimmick is his Heat Gauge. Kiryu builds up Heat when damaging the enemy. Once a segment of your heat meter is filled, you can press the special button after performing a Jab or Smash Attack, or by holding the button during a special or grab, to perform a Heat Action, at the cost of one segment. If the Heat Gauge is filled to its max, Kiryu enters Climax Heat, gaining a red glow and super armor. The Heat Gauge, however, goes down if Kiryu takes damage, and if Kiryu loses a segment of his Heat Gauge during Climax Heat, it will end. He is a mid-heavyweight with no additional movement options.

  • Jab: Four quick punches. Spend some of your Heat to follow up with a flurry of damaging kicks.
  • Side Tilt: A roundhouse kick.
  • Up Tilt: A double-hitting axe kick.
  • Down Tilt: A sweeping kick.
  • Dash Attack: Jumps and performs three kicks followed by a downward axe kick.
  • Side Smash: A powerful roundhouse kick. Spend some of your Heat to follow up with a powerful flipping kick.
  • Up Smash: Performs a slapping uppercut. Spend some of your Heat to perform Essense of Sumo Slapping, following up with multiple slaps, ending in a kick that launches the enemy upward.
  • Down Smash: A powerful stomp. Spends some of your Heat to follow up the stomp with a punch downward, spiking the enemy and causing them to bounce into the air.

  • Neutral Air: A flying kick.
  • Forward Air: A drop kick.
  • Back Air: A spinning back kick.
  • Up Air: A double jumping kick. A reference to Akira from the Virtua Fighter series.
  • Down Air: A downward axe kick. Has a meteor effect.

  • Pummel: Punches the foe in the face.
  • Forward Throw: Launches the foe away with a heavy kick. Spend some of your Heat to perform Essense of Beatdown, punching the foe multiple times before headbutting the foe away.
  • Back Throw: Knees the foe in the gut, before grabbing the enemy by the legs, spinning, and tossing them away. Spend some of your Heat to perform Essense of Backdrop, grabbing the foe by the head and using his momentum to fall backwards and slam the foe behind him.
  • Up Throw: Swings the foe overhead and onto the floor behind him, launching them into the air. Spend some of your Heat to perform Essense of Barrage, performing a series of feints and blows before uppercutting the foe.
  • Down Throw: Grabs the foe in the back of the head before slamming them into the ground. Spend some of your Heat to perform Essense of Extreme Dragon, crushing his enemy’s head with his fists, before jumping and slamming their fist on his knee.

  • Neutral Special: Essence of Resourcefulness - Kiryu pulls out one of several items of which he can use as a melee weapon. Each of the items have different properties, and cycle between each other. Press the special button again with the item, and you can toss it as a projectile.
    • Traffic Cone: The fastest of the items, but also the weakest, generally doing the same damage to your fists with the only benefit of extra range. When thrown it travels the farthest of the three items.
    • Trash Can: The most well-rounded of the items. Deals good damage but its attacks are slightly slower than your normal attacks. When thrown it travels less distance than the Traffic Cone, but deals more damage.
    • Bicycle: The powerful items, but while you are holding it your movement is slowed. When thrown it covers little distance but causes high damage.
  • Side Special: Quick Step / Rush Step - Kiryu performs a quick crouching dash. During the dash, he is immune to damage during the first few frames, and can perform various follow ups after the dash. Dashing forward then attacking has Kiryu perform a rushing punch, while dashing backwards has him perform a roundhouse kick. Grabbing during the dash has him perform Meteor Grab, quickly grabbing the foe before tossing them away. If Kiryu is in Climax Heat mode, the attack is replaced with Rush Step, allowing Kiryu to perform two dashes in quick succession, and also increasing the amount of time he is invincible. And if you press special while Kiryu has Heat and is performing Meteor Grab, he’ll perform Dragon Charge, grabbing the foe and performing a leaping suplex for heavy damage.
  • Up Special: Beast Charge / Bear Hug - Kiryu covers his face before charging either forward, upward, or downward, damaging enemies in his way. Pressing special while Kiryu has Heat has him follow up the attack with a Bear Hug, a command grab that puts the enemy in a crumple state.
  • Down Special: Counter / Komaki Tiger Drop - Kiryu assumes a defensive stance, and if he is hit by an attack, counterattacks with a headbutt. Pressing special while Kiryu has Heat has him instead perform Komaki Tiger Drop, a counterattack that comes at the cost of a smaller window. If it lands however, it causes massive damage.
  • Final Smash: Essence of the Dragon God - Kiryu walks forward and performs a powerful punch, sending anyone he hits into a cutscene. Tossing off his jacket and shirt, revealing his dragon tattoo, he challenges them to step up, as a massive blue dragon appears behind him. He and the dragon perform a series of rushing blows on the foes, before Kiryu performs a flip kick that creates a massive explosion of energy, launching the foes into the air as the dragon flies up into the sky.

  • On-Screen Appearance: Walks onto the stage while adjusting his shirt.
  • Taunts:
    • Up Taunt: Waves his hand and says “Come on!”
    • Side Taunt: Shakes his head and cracks his knuckles.
    • Down Taunt: Drinks a bottle of Stamina X.
  • Victory Poses:
    • Left: Cracks his knuckles, performs a series of punches, then kicks into the air, striking a pose similar to the one seen on the cover of Yakuza.
    • Up: Runs forward and slides across the ground before pointing towards the screen. Based on the animation that plays when he starts a Disco mini-game.
    • Right: Is seen shirtless, the camera panning up before Kiryu turns his head towards the camera. During this he says, “There can only be one dragon”. Based on the cover of Yakuza 2 and Yakuza Kiwami 2.

  • Kiwami: Default appearance. Wears his outfit from the original Yakuza and Yakuza Kiwami.
  • 0: Kiryu’s outfit from Yakuza 0.
  • Black Kiwami: An original color.
  • Red 0: Based on Akira Nishikiyama in Yakuza 0.
  • Yellow Kiwami: Based on Goro Majima.
  • Blue 0: An original color.
  • Shirtless Kiwami: Kiryu in his Yakuza design without his shirt on.
  • Shirtless 0: Kiryu in his Yakuza Kiwami design without his shirt on.
  • 5: Kiryu’s outfit in Yakuza 5. Unlockable costume.
  • Judgement: Kiryu’s outfit when singing Judgement -Shinpan-. Unlockable costume.

MasterChiefSSBSR(transparent)

Master Chief

?

Master Chief Petty Officer John-117, or simply Master Chief, is the protagonist of the Halo series. Born as John, he was taken from his home by the UNSC, he became part of the SPARTAN-II Project, and was trained to become a supersoldier. John proved to be a natural leader, leading his fellow trainees over eight years of grueling training and dangerous physical augmentation. He would serve as part of the UNSC Naval Special Warfare Command for over 30 years, leading the Spartans against threats like the Insurrection, the Covenant Empire and the Flood.
Moveset

Master Chief is a Zoner character. A mid-heavyweight with no additional movement options, he has two main gimmicks. First is the Energy Shield. Master Chief has a meter above his percentage that reduces the knockback Master Chief takes when he takes damage. These shields regenerate overtime. However, if the bar fully goes down, Master Chief will be left vulnerable, temporarily taking increased knockback until the shields fully regenerate. Then, there is his Spartan Arsenal. When an enemy takes enough damage from Master Chief’s attacks, they will drop a Gun. With Shield Special, tapping it can be used to reload his gun, and holding it allows him to switch between all of his current weapons. However, if he is ever KOed, he’ll lose his previous guns (1 normally but 2 if he has the Sniper Rifle or higher). Overall, while okay at first, he truly shines once he gets more and more weapons, becoming a very versatile fighter. Each gun is obtained in a set order:

  • Magnum: One of Master Chief’s default weapons. A pretty weak but accurate gun that holds 12 rounds. It cannot be dropped.
  • Assault Rifle: One of Master Chief’s default weapons. An automatic weapon that comes at the cost of short range. Holds 32 rounds.
  • Battle Rifle: A semi-automatic weapon. Great for mid-ranged fights. Holds 36 rounds.
  • Shotgun: A pump-action shotgun that deals great damage against close-ranged targets. Holds 6 rounds.
  • Needler: A gun that fires crystals with a slight homing effect, which sticks to enemies and explodes after a time. Holds 30 rounds.
  • Sniper Rifle: A long-ranged rifle that deals extra damage when aiming at the enemy’s head. Holds 4 rounds.
  • Rocket Launcher: Master Chief’s most powerful weapon, fires powerful exploding rockets, but it's very slow to reload. Holds 2 rounds.

  • Jab: Swings the Magnum in front of him.
  • Side Tilt: A straight punch forward.
  • Up Tilt: An uppercut.
  • Down Tilt: A sweep kick.
  • Dash Attack: Performs the Spartan Charge, charging forward with a shoulder tackle while using the thrusters on his back.
  • Side Smash: A forward slash with the Energy Sword.
  • Up Smash: A powerful upward slash with the Energy Sword.
  • Down Smash: Swings in front of him with the Gravity Hammer.

  • Neutral Air: Swings the Magnum in front of him.
  • Forward Air: A flying kick.
  • Back Air: An elbow bash behind him.
  • Up Air: Swings the Magnum above him.
  • Down Air: Performs the Ground Pound, flying downward with his thrusts to slam into enemies under him. Has a meteor effect.

  • Pummel: Hits the enemy on the head with the Magnum.
  • Forward Throw: Puts the enemy in a chokehold before activating his thrusters and kicking the foe away.
  • Back Throw: Suplexes the enemy.
  • Up Throw: Uppercuts the enemy then fires three shots at them with the Magnum.
  • Down Throw: Throws the enemy to the ground then punches their face.

  • Neutral Special: Fire Gun - Master Chief fires his gun. Hold the button to go have Master Chief aim the gun, allowing him to move and fire the gun by pressing the attack button.
  • Side Special: Grenade - Master Chief tosses a Frag Grenade. The grenade explodes after a set time, dealing damage to anyone nearby. Quickly tap the button when performing this move and Master Chief will instead throw a Plasma Grenade instead, which sticks to surfaces and targets.
  • Up Special: Gravity Lift - Master Chief drops down a Gravity Lift, either in front of him on the ground, or below him in the air, pushing him into the air. The lift will linger on stage, and can be used by him or his enemies before it disappears.
  • Down Special: Bubble Shield - Master Chief places down a Bubble Shield. The shield will nullify all projectiles fired at it, but not projectiles fired within it, and enemies can still walk through it and attack you with attacks once they’re inside. The Bubble Shield goes away after a time.
  • Final Smash: Warthog Run - Master Chief pulls out a Spartan Laser, firing it out in front of him, and sending anyone hit into a cutscene. Dropped in the middle of a war zone, they see Master Chief riding in on a Warthog. Arbiter fires at the enemies with the vehicle’s turret, before Master Chief drives straight into the foes, launching them away.

  • On-Screen Appearance: A Drop Pod falls from the sky as Master Chief kicks the door open.
  • Taunts:
    • Up Taunt: Removes Cortana’s chip from his head as she says "Good luck with your mission" or "You look nice", before he puts the chip back.
    • Side Taunt: Reloads his current gun, saying “I need a weapon”.
    • Down Taunt: Put his currently equipped weapon on his shoulder while saying “I’m finishing this fight.”.
  • Victory Poses:
    • Left: Drops down with a Ground Pound before looking up while holding his Assault Rifle. Based on his pose on the cover of Halo 4.
    • Up: Holds a UNSC Flag before placing it down as it waves in the air.
    • Right: Fires his Assault Rifle around him, before reloading it and pointing it at the screen. Based on his pose on the cover of Halo: Combat Evolved.

  • Green: Default appearance.
  • Red: Resembles the colors of the Red Team.
  • Blue: Resembles the colors of the Blue Team.
  • Yellow: Resembles the colors of the Yellow Team.
  • Cyan: Resembles the colors of the Cyan Team.
  • White: Resembles the colors of the White Team.
  • Purple: Resembles the colors of the Purple Team.
  • Black: Resembles the colors of Noble Six.
  • Classic: Wears the Mark V armor from Halo: Combat Evolved. Unlockable costume.
  • ?: ?. Unlockable costume.

NakoruruSSBSR(transparent)

Nakoruru

Mother Nature's Guardian

Nakoruru is a recurring protagonist in the Samurai Shodown series. A gentle and shy Ainu priestess living in Hokkaido, despite her pacifistic ways, she becomes a Kamui warrior after the death of her father. She is devoted to protecting the natural world, eventually becoming one with the spirit of Nature, to help restore nature's balance in times of crises. She is almost always seen with her hawk companion, Mamahaha.
Moveset

Nakoruru is a Hit-and-Run character. She relies on punishing the enemy from a distance before rushing in for a powerful attack. Being a fighting game character, Nakoruru has Command Inputs that increase the power of specials when inputting a command motion, and 1-on-1 Facing where she'll always face the enemy in a 1-on-1 fight. Alongside her is Mamahaha, who flies above her to perform attacks. However, Mamahaha can be damaged, and if she takes too much, her Up Special and Neutral Special become unavailable for a time. Alongside that, when she reaches 100%, she enters Rage Explosion, gaining a temporary damage boost, multi-hitting properties on her specials, and the ability to perform the move Lightning Blade by inputting this motion: (↓↘→↓↘→), causing big damage and putting the enemy in a crumple state, but leaving you vulnerable if you miss and causing Rage to go down immediately. She is a lightweight with the ability to wall jump.

  • Jab: A slash forward followed by a downward slash and an upward slash.
  • Side Tilt: An inward slash in front of her.
  • Up Tilt: An upward slash.
  • Down Tilt: A sweep kick.
  • Dash Attack: A lunging slash.
  • Side Smash: A heavy slash in front of her.
  • Up Smash: A wide upward jumping slash.
  • Down Smash: Rolls forward while slashing anyone in her way.

  • Neutral Air: A slash in front of her.
  • Forward Air: A kick forward.
  • Back Air: A stab behind her.
  • Up Air: An upward slash.
  • Down Air: A downward kick. Has a meteor effect.

  • Pummel: Knees the enemy.
  • Forward Throw: Shoves the foe away.
  • Back Throw: Drags her enemy behind herself, then shoves them.
  • Up Throw: Slashes the foe upward, before jumping after them, grabbing them, and slamming them downward.
  • Down Throw: Slams the foe to the ground and stabs them.

  • Neutral Special: Amube Yataro - Nakoruru calls on Mamahaha as she dives at a downward angle. Once she reaches the ground or a blast line, she returns to Nakoruru. Mamahaha during the attack will nullify all projectiles.
  • Forward Special: Rera Mutsube - Nakoruru flies at an upward angle while slashing anyone in her way. Hold the button to increase the distance it travels. Input this motion: (↓↘→) to increase the attack's damage.
  • Back Special: Annu Mutsube - Nakoruru slashes forward while sliding low to the ground, damaging enemies in her way. Hold the button to increase the distance it travels. Input this motion: (←↙↓) to increase the attack’s motion.
  • Up Special: Mamahaha Cling / Kamui Mutsube - Nakoruru grabs onto Mamahaha, allowing her to freely fly through the air for a short time. While flying, pressing the attack button allows her to perform a slash attack, while pressing special allows her to perform Kamui Mutsube, a downward version of Rera Mutsube. Pressing the shield button will cause Mamahaha to drop you.
  • Down Special: Kamui Rimuse - Nakoruru swings her cloak in front of her, damaging enemies and reflecting projectiles. Can be performed up to three times in a row by tapping the special button multiple times. Input this motion: (←↓↙) to increase the attack’s damage.
  • Final Smash: Kanto Kamui Mutsube - Nakoruru jumps up as Mamahaha grabs her, and the two dive downward to charge into the first player in their way. Anyone hit is launched into the air, as Nakoruru flies across the screen to deliver multiple slashes, before appearing above the foe and diving downward to perform a final stab. She then apologizes to the foe. Automatically KOs at over 100%.

  • On-Screen Appearance: Backflips onto the stage, then calls for Mamahaha as she flies into view.
  • Taunts:
    • Up Taunt: ?
    • Side Taunt: ?
    • Down Taunt: ?
  • Victory Poses:
    • Left: ?
    • Up: ?
    • Right: ?

  • Red: Default appearance.
  • Blue: Based off of Rimururu.
  • Yellow: Based off one of her alternate costumes from Samurai Shodown.
  • Green: Based off one of her alternate costumes from Samurai Shodown.
  • Pink: Based off of one of her alternate colors from Samurai Shodown 5.
  • Black: Based off of Haohmaru
  • Cyan: Based off of Galford.
  • Purple: Based off of Rera.
  • Schoolgirl: Her Kamuikotan Girls' School Uniform from King of Fighters 14. Unlockable costume.
  • Vampire: Her outfit from SNK Heroines: Tag Team Frenzy. Mamahaha is replaced with a bat. Unlockable costume.

ScorpionSSBSR(transparent)

Scorpion

Vengeance Incarnate

Hanzo Hasashi, better known as Scorpion, is the mascot and a major character in the Mortal Kombat series. A member of the Shirai Ryu, he and his clan were exterminated, he was reborn as a spectre in the Netherrealm, seeking vengeance against those responsible for the destruction of his family and clan. At first he believed Bi-Han, a member of a rival clan known as the Lin Kuei, was responsible, later killing him in the first Mortal Kombat tournament. However, he would later learn that the man responsible for the massacre was Quan Chi, who had been manipulating him from the start. After killing him and getting his revenge, he becomes a more heroic person, choosing to protect Earthrealm (albeit still in his violent and vigilante manner).
Moveset

Scorpion is a Footsies character. Like other characters originating from fighting games, Scorpion has Command Inputs that increase the power of specials when inputting a command motion, and 1-on-1 Facing where he'll always face the enemy in a 1-on-1 fight. Scorpion’s main gimmicks are Button Commands, allowing Scorpion to follow up his normals with other normals by tapping or holding the button again, and the Super Meter, which goes up overtime when dealing and taking damage. Scorpion can spend half of it to either Amplify his Special Moves by holding the special button, or perform a Breaker by pressing Special while shielding, which can be used to break out of combos. He is a middleweight with the ability to wall cling.

  • Jab: A jab, followed by a hook, followed by an overhead downward punch. Hold the button and he’ll perform a downward hook punch, followed by a backhanded punch, followed by either a roundhouse kick.
  • Side Tilt: A straight kick forward, followed by a fiery roundhouse kick. Hold the button, and he’ll perform a shin kick, followed by a gut punch, followed by a sword swing. After the shin kick, if you instead hold down the button while performing the attack, Scorpion will instead follow up by stabbing his sword into the ground, followed by him launching himself forward with a flying kick.
  • Up Tilt: Performs a punch at a high angle. Hold the button to perform a flip kick.
  • Down Tilt: A sweep kick. Hold the button to perform an uppercut.
  • Dash Attack: A kunai stab.
  • Side Smash: Swings both of his swords downward.
  • Up Smash: Swings his sword upward.
  • Down Smash: Swings his sword while spinning low to the ground.

  • Neutral Air: A flying kick.
  • Forward Air: A kunai stab forward.
  • Back Air: A quick sword stab behind him.
  • Up Air: An upward sword slash.
  • Down Air: A downward-angled drop kick. Has a meteor effect.

  • Pummel: Knees the opponent.
  • Forward Throw: Slashes the foe before punching them away with a flaming uppercut.
  • Back Throw: Kicks the foe in the leg before teleporting behind them to kick them a second time.
  • Up Throw: Rolls backwards and kicks the enemy in the air.
  • Down Throw: Stabs the foe with his kunai before slashing them away with his sword.

  • Neutral Special: Spear - Scorpion throws a kunai attached to a metal chain. If it hits an enemy, it will impale them, and Scorpion will pull the enemy in to follow up with another attack. It can also be used as a tether recovery.
    • Double Spear: When Amplified, Scorpion throws two spears, which fly farther, quicker and deal more damage.
  • Side Special: Fireball - Scorpion tosses a fireball at a downward angle. Upon contact, it creates a small explosion. Quickly tapping the button allows you to toss the fireball a farther distance. Input this motion: (↓→) to increase the attack’s damage.
    • Hellfire: When Amplified, Scorpion tosses a fireball that explodes into a pillar of flame, which traps enemies and burns them.
  • Up Special: Teleport - Scorpion quickly disappears, teleporting in the held direction, before reappearing and performing a flaming kick. Input this motion: (↓←) to increase the attack’s damage.
    • Hell Port: When Amplified, Scorpion creates a flaming explosion upon appearing, armoring through all attacks.
  • Down Special: Demon Dash - Scorpion briefly turns into a flaming skeleton, rushing forward a distance. At first, it deals no damage, but it is a useful way to dodge out of the way of enemy attacks and get behind them. If you touch the enemy when you reappear however, Scorpion will raise the enemy into the air before creating a flaming explosion. Input this motion: (←→) to increase the attack’s damage.
    • Demon Rush: When Amplified, Scorpion rushes forward a longer distance, and will perform the grab no matter where the enemy is when he performs the attack.
  • Final Smash: Toasty! - Scorpion throws his spear forward. If anyone is hit, Scorpion will toss them into a portal, transporting them into the Netherrealm. Scorpion drops down with them, summoning two large pillars. From there, Scorpion grabs the enemy with his spears, and tosses them into the pillars, before jumping up and slamming them into the ground. He then walks towards the dazed enemy, and we get a first-person view from the enemy, as Scorpion takes off his mask and breathes fire on them, covering the screen in flames. Instantly KOs at over 100%.

  • On-Screen Appearance: Jumps out of a Netherrealm portal.
  • Taunts:
    • Up Taunt: Raises his arms into the air as flames appear around him.
    • Side Taunt: Points toward the enemy and says, “You will suffer”, before putting his hand to his chest.
    • Down Taunt: Spins his spear around him as he says, "I am vengeance".
  • Victory Poses:
    • Left: Raises his fist into the air before putting his hands on his hips.
    • Up: Swings his spear around before tossing it towards the screen in slow-motion.
    • Right: Swings his swords around before jumping into the air and performing a spinning slash while going into slow-motion.

  • Yellow: Default appearance.
  • Blue: Based off of Sub-Zero. His flames have a blue effect.
  • Green: Based off of Reptile.
  • Red: Based off of Ermac.
  • Gray: Based off of Smoke.
  • Purple: Based off of Rain.
  • Black: Based off of Noob Saibot.
  • Brown: Based off of Tremor.
  • Klassic: Scorpion’s outfit in the original Mortal Kombat. Unlockable costume.
  • Hanzo: His appearance as a human in Mortal Kombat X. Unlockable costume.

Fighter Pass 3

VaatiSSBSR(transparent)

Vaati

The Wind Sorcerer

Vaati is a recurring antagonist in the Legend of Zelda series. Once a member of the Minish, he became fascinated with dark magic and the evil in the hearts of men, eventually beginning to desire power. After stealing a magic cap from his master Ezlo, he transformed into a sorcerer and sought to wreak havoc upon all of Hyrule, requiring the Four Sword to defeat him and seal him away.
Moveset

Vaati is a Trapper character. His primarily wind-based moveset makes him great at manipulating his enemies’ positions, whether he wants them to be close for a combo or far away to zone them out. He is a lightweight with the ability to air dash and hover.

  • Jab: Slashes forward twice with wind magic before performing a flurry of slashes.
  • Side Tilt: Swings his cape forward.
  • Up Tilt: Slashes upward with wind magic.
  • Down Tilt: Sweeps his cape along the ground.
  • Dash Attack: Flies forward while spinning, headbutting foes.
  • Side Smash: Creates a powerful burst of dark lightning in front of him.
  • Up Smash: Creates a dark vortex of wind around it before it spirals upward into a spike.
  • Down Smash: Creates a blast of dark lightning on both sides.

  • Neutral Air: Spins while creating a ring of cutting winds around him.
  • Forward Air: Fires a blast of dark lightning forward.
  • Back Air: Fires a blast of dark lightning behind him.
  • Up Air: Creates a burst of wind above him. Launches him a short distance downward.
  • Down Air: Creates a burst of wind under him. Launches him a short distance upward.

  • Pummel: Traps the enemy in a whirlwind.
  • Forward Throw: Launches the enemy away with a burst of wind.
  • Back Throw: Tosses the enemy behind him using a burst of wind.
  • Up Throw: Spins the enemy before launching them upward.
  • Down Throw: Launches the enemy downward with a burst of wind, bouncing them into the air.

  • Neutral Special: Gale Force - Vaati charges up before launching a blast of wind in front of him. Deals no damage, but pushes back enemies and reflects projectiles. The longer it is charged, the farther the attack is.
  • Side Special: Dark Vortex - Vaati creates an orb of swirling dark winds that slowly moves forward. Although it doesn’t do anything at first, pressing Down Special will have Vaati detonate the orb, creating a vortex that pulls in nearby enemies.
  • Up Special: Wind Rupture - Vaati creates a vortex of wind that pushes him upward. The vortex will linger on stage for a bit, and other players can also use the vortex, which can lead to combo opportunities.
  • Down Special: Eye of the Reborn - Vaati charges up before summoning up to two dark floating eyes. These eyes will swirl around Vaati, shooting weak blasts of energy from their eyes every time Vaati attacks. They will last for a limited time, but will disappear if Vaati is damaged.
  • Final Smash: Vaati’s Wrath - Vaati curls up before transforming into his demonic one-eyed form. During the transformation, he can freely float around the stage and deals damage on contact. Pressing the attack button fires a blast of electricity from his eye, while pressing the special button creates a vortex of wind that pulls enemies below him into the air.

  • On-Screen Appearance: Floats down to the ground while surrounded by dark winds.
  • Taunts:
    • Up Taunt: Floats in the air and laughs maniacally.
    • Side Taunt: Closes his eyes and restrains his arm as it courses with dark energy.
    • Down Taunt: ?
  • Victory Poses:
    • Left: ?
    • Up: Creates two wind slashes, before rising from the ground in a tornado as he laughs maniacally.
    • Right: ?

  • Purple: Default appearance.
  • ?: ?.
  • ?: ?.
  • ?: ?.
  • ?: ?.
  • ?: ?.
  • ?: ?.
  • ?: ?.
  • ?: ?. Unlockable costume.
  • ?: ?. Unlockable costume.

RhythmGirlSSBSR(transparent)

Rhythm Girl

?

Rhythm Girl is a recurring character and mascot of the Rhythm Heaven series. After obtaining tap shoes with a specific shade of red, she became able to access the secret tap-dance parties of the animal kingdom. She is very stylish and has a love for fashion, even convincing her monkey friends to try new outfits with her.
Moveset

Rhythm Girl is an All-Arounder character. On her own, she’s a pretty standard character, but in order to play her effectively, the player will need to master her gimmick, the Rhythm System. Attacking enemies to the beat (represented by Mr. Upbeat) will increase the power of your attacks. Landing multiple hits to the beat will add onto a Combo, further increasing your attack’s power. However, taking too long or attacking off-beat will cause the combo to drop. She is a mid-lightweight with no additional movement options.

  • Jab: Summons on the Space Dancers, who strikes a pose, then kicks, then does a series of punches.
  • Side Tilt: Puts on a visor and pulls out a golf club before swinging it forward, referencing Hole in One.
  • Up Tilt: Ducks down as one of the Clappy Trio appears to clap above her.
  • Down Tilt: Taps her foot in front of her, referencing her own minigame, Tap Trial.
  • Dash Attack: Spins forward at high speeds, referencing Kitties! If performed on the beat, she strikes a pose at the end that deals additional damage.
  • Side Smash: Summons the Wandering Samurai to perform a slash forward. If performed on the beat, the attack gains multi-hitting properties.
  • Up Smash: Pulls out a book and spins it before thrusting it upward, referencing Cheer Readers.
  • Down Smash: Summons two Blue Birds on both sides, who peck their becks thrice toward the ground. If performed on the beat, the attack has a meteor effect.

  • Neutral Air: The Monkey bangs on a tambourine, creating a shockwave around it.
  • Forward Air: Pulls out a badminton racket and swings it forward, referencing Air Rally. If performed on the beat, the attack has a meteor effect.
  • Back Air: Swings her arm backwards, referencing DJ School.
  • Up Air: The Monkey swings its hand upward, similar to what they do in Monkey Watch.
  • Down Air: Stomps downward, based on the jump she does in Tap Trial.

  • Pummel: Summons Munchy Monk, who jumps forward and claps at the foe.
  • Forward Throw: Summons one of the Frogettes from Frog Hop, who spins before tossing the foe forward.
  • Back Throw: A Sneaky Spirit from Sneaky Spirits suddenly appears, moving toward the grabbed foe from behind before launching them away.
  • Up Throw: Summons one of Research Scientists of Love Lab, who shakes the opponent before tossing them upward.
  • Down Throw: A giant fork from Fork Lifter stabs the foe before swinging them away.

  • Neutral Special: Karate Man - Karate Joe appears in front of Rhythm Girl. Rhythm Girl will toss three objects to the beat. Time your button presses and Karate Joe will launch them as projectiles. The first two will be buckets, and the last object is a rock, which deals more damage. If failed, the buckets and rocks will fall to the ground, covering very little distance.
  • Side Special: Ringside - The Reporter appears and says "Whoa, you go, big guy!". TIme the button to when she stops talking and the Wrestler will rush forward, performing a powerful uppercut to launch foes. You are also able to move while the attack is being performed, giving you the opportunity to perform combos. If failed, the Wrestler will trip, dealing a pitiful amount of damage.
  • Up Special: Launch Party - A box appears under Rhythm Girl as it ticks down from 5. Time the button to when it reaches zero, and Rhythm Girl will be launched high into the air. If failed, it doesn’t cover as much distance. This attack is not affected by Rhythm and thus will not break your streak if you fail.
  • Down Special: Glee Club - The Chorus Kids appear in front of Rhythm Girl as they sing from left to right. Time your button press to when the third one sings, and they will be stored. Then, press Down Special at any time, and the Chorus Kids will wail out, creating a damaging shockwave that launches foes and reflects projectiles.
  • Final Smash: ? - ?

  • On-Screen Appearance: Floats down on some balloons, similar to the start of Night Walk.
  • Taunts:
    • Up Taunt: Holds up a sign that says “Superb” as a sound effect plays and she smiles.
    • Side Taunt: Holds up a sign that says “OK” as a sound effect plays.
    • Down Taunt: Holds up a sign that says “Try Again” as a sound effect plays and she has a disappointed look.
  • Victory Poses:
    • Left: ?
    • Up: ?
    • Right: ?

  • Red: Default appearance.
  • Pink: The outfit she wears in Remix 5 from Rhythm Tengoku.
  • Maroon: The outfit she wears in Tap Trial 2 from Rhythm Tengoku.
  • Magenta: The outfit she wears in Remix 7 and Remix 8 from Rhythm Tengoku.
  • Blue: The outfit she wears in Remix 7 from Rhythm Tengoku.
  • Orange: The outfit she wears in the Songbird Remix from Rhythm Heaven Megamix.
  • Pink: The outfit worn by the Pitcher in Exhibition Match, from Rhythm Heaven Fever.
  • Cyan: The outfit worn by the Pop Singer in Fan Club 2, from Rhythm Heaven.
  • ?: ?. Unlockable costume.
  • ?: ?. Unlockable costume.

AhriSSBSR(transparent)

Ahri

The Nine-Tailed Fox

Ahri is a champion in League of Legends. A mysterious fox-like vastaya searching for her place in the world, she is innately connected to the magic of the spirit realm. She enjoys toying with her prey and manipulating their emotions before devouring their life essence. Despite her nature however, she retains a sense of empathy as she receives flashes of the memories from each soul she consumes.
Moveset

Ahri is a Zoner character. Utilizing her orb and various tricky projectiles and attacks, she keeps her opponents at a distance and uses them to perform dangerous combos. Her main gimmick is Essence Theft. Everytime she deals 15% to an enemy, they will drop an Essence Fragment. Each fragment added to her amount grants her a slight boost in speed and damage, up to capacity of 9. She can also spend some to increase the power of her special attacks. However, she’ll lose a fragment if she is hit with a strong enough move, and will lose all of her fragments if she is KOed. She is a lightweight with the ability to air dash.

  • Jab: Swings her orb in front of her before releasing small blasts of energy in front of her, ending with one final burst that knocks away foes.
  • Side Tilt: Fires a quick blast of energy from her orb.
  • Up Tilt: Swings her orb upward in front of her.
  • Down Tilt: Shoots a burst of spirit flames from her orb along the ground.
  • Dash Attack: Swings her orb out in front of her.
  • Side Smash: Creates an explosion of spirit energy in front of her.
  • Up Smash: Creates a blast of spirit fire upward.
  • Down Smash: Creates a blast of spirit fire on both sides around her.

  • Neutral Air: Swings her tails around her.
  • Forward Air: Fires three quick bursts of energy from her orb.
  • Back Air: Swings her tails behind her.
  • Up Air: Fires a blast of spirit energy above her. Blasts her downward.
  • Down Air: Fires a blast of spirit energy below her. Blasts her upward.

  • Pummel: Her orb fires pulses of energy at the player.
  • Forward Throw: Thrusts the orb into her enemy to launch them away.
  • Back Throw: Tosses them away as she fires a blast of energy from her orb.
  • Up Throw: Tosses the enemy into the air she fires multiple blasts of energy into them.
  • Down Throw: Tosses the enemy to the ground as she thrusts the orbs onto them, creating an explosion.

  • Neutral Special: Fox-Fire - Ahri creates a small flame which will float in place before falling down to the ground, dealing damage to anyone who touches it. Up to two can be on screen at a time. Hold the button and Ahri will instead create flames that circle around her, which will damage enemies nearby, before she launches the flames forward as homing projectiles. Hold the button to further increase the number of flames, up to six. Each charge uses 1 fragment, up to a maximum of 3.
  • Side Special: Orb of Deception - Ahri tosses her orb as a projectile. The orb will fly a distance forward, then return back to Ahri, able to deal damage on the way back as well. Press the special button while the orb is out at any point and it will release a pulse of spirit energy that damages foes around it. Each charge uses 1 fragment.
  • Up Special: Spirit Rush - Ahri dashes in the held direction, charging into enemies to damage them. Uniquely, you can use this up special up to 3 times in the air, though each consecutive time you use it, it uses 1 fragment.
  • Down Special: Charm - Ahri blows a kiss that slowly moves forward. Anyone that is hit by the attack will become charmed, not only losing control but slowly moving toward Ahri. However, you can break out by mashing the controls. Press down special again while the heart is out and you can cause it to shatter, creating spikes of energy on both sides of it to damage foes, though in this state it can’t charm them. Uses 1 fragment.
  • Final Smash: ? - ?

  • On-Screen Appearance: Spawns in from a pillar of blue light.
  • Taunts:
    • Up Taunt: ?
    • Side Taunt: ?
    • Down Taunt: ?
  • Victory Poses:
    • Left: ?
    • Up: ?
  • Right: ?

  • White: Default appearance.
  • Beige: Based off of her Dynasty outfit.
  • Black: Based off of her Midnight outfit.
  • Orange: Based off of her Foxfire outfit.
  • Pink: Based off of her Popstar outfit.
  • Yellow: Based off of her Star Guardian outfit.
  • Blue: Based off of her Spirit Blossom outfit.
  • Purple: Based off of her Coven outfit.
  • K/DA: Her K/DA outfit from the music video of Pop/Stars. Unlockable costume.
  • ?: ?. Unlockable costume.

RitsukaSSBSR(transparent)

Ritsuka

The Last Master

Ritsuka Fujimaru is the main protagonist of Fate/Grand Order. A member of the Chaldea Security Organization, who are responsible for preventing the extinction of the human race, they are one of the 48 "Master candidates", who will be sent back in time to correct the distortions of the past to prevent the extinction of humanity. After the other 47 candidates were injured, Ritsuka was left as the last Master, gaining the privilege of summoning and commanding multiple Servants, spirits summoned for the sole purpose of fighting in the Holy Grail War. With this power, they seek to complete the Grand Order, by excising the Holy Grails, stopping the Singularities that disrupt the continuity of human history, and preventing mankind’s extinction.
Moveset

Ritsuka is a Zoner character. On his own, Ritsuka lacks meaningful ways of doing damage on his own, with the exception of moves that have him summoning his main servant, Mash Kyrielight. His moveset centers around summoning Servants to fight for him. These basically act like quicker Assist Trophies, acting on their own to attack the enemy. Which Servant is summoned is randomized, though servants are split between different rankings determining how rare they can appear (Bronze being the most common, Silver being in the middle, and Gold being the rarest). Only two Servants can be out at a time, and any Servants present on the stage can be damaged and KOed by attacks. With the exception of Rider Servants, summoning a Servant requires Saint Quartz, which are dropped by enemies when you deal enough damage to them. Ritsuka can store up to 5 Saint Quartz at a time, starting with 3 at the start of the match. Ritsuka is a lightweight with no additional movement options.

  • Jab: Two quick punches followed by a kick.
  • Side Tilt: A quick kick forward.
  • Up Tilt: An uppercut.
  • Down Tilt: A sweep kick.
  • Dash Attack: A lunging punch.
  • Side Smash: Summons Mash, who appears and swings her shield in front of her.
  • Up Smash: Summons Mash, who appears and swings her shield above her.
  • Down Smash: Summons Mash, who slams her shield down in front of her.

  • Neutral Air: A flying kick.
  • Forward Air: A spinning kick.
  • Back Air: An elbow bash.
  • Up Air: Summons Mash, as the two thrust her shield upward.
  • Down Air: Summons Mash, as the two slam her shield under them. Has a meteor effect.

  • Pummel: Knees the enemy.
  • Forward Throw: Summons Mash to launch the foe away with a shield bash.
  • Back Throw: Grabs the foe and kicks them behind him.
  • Up Throw: Tosses the foe upward.
  • Down Throw: Tosses the foe to the ground and summons Mash as she slams her shield onto the foe.

  • Neutral Special: Range Servant - Ritsuka summons out a Servant that attacks the foe from a distance.
    • Bronze Servants
      • EMIYA: Attacks by either pulling out a bow and firing arrows from a distance, or, if at close-range, he can use his blades to perform quick slashes, making him great at both melee and long-range.
      • Robin Hood: Jumps around and fires arrows from his crossbow. Though the shots themselves are weak, they’re fast, and due to Robin Hood’s movement can be hard to see coming.
      • Medea: Attacks with up to three spells, the ones chosen being random. She can either attack by launching a stream of fire at the enemy, creating a blizzard around her to damage her, or creating thunderbolts to strike from above.
    • Silver Servants
      • Oda Nobunaga: Summons rifles and stands in place, firing if the enemy is in her line of sights. The shots increase in damage the farther the enemy is.
      • Lancelot: Rushes around and attacks with either his sword, which deals good knockback, or submachine guns. The submachine guns can quickly rack up damage, but only at close-range.
      • Scáthach: Charges up before launching her spear forward. If it hits the enemy, it will fly around them and rack up damage before Scáthach appears above them and drops down to launch the foe away.
    • Gold Servants
      • Gilgamesh: Summons multiple swords which he hurls at the opponent as projectiles. Can rack up damage pretty easily thanks to their numbers.
      • Ishtar: Charges up before firing a massive arrow of light in front of her. Causes high damage.
  • Side Special: Weapon Servant - Ritsuka summons out a Servant that primarily attacks the foe from close range.
    • Bronze Servants
      • Cú Chulainn: Advances toward the foe and attacks with his spear, either by slashing in front of him, or by thrusting it forward. A good mid-ranged attacker thanks to his range.
      • Sasaki Kojirou: Briefly charges up, before performing a rushing slash once the enemy is in front of him.
      • Jack the Ripper: Disappears. After a few seconds pass, she will appear behind the enemy and perform a rushing slash, dealing okay damage and putting the enemy into a crumple state if they are on the ground. A good combo and opening tool.
    • Silver Servants
      • Heracles: Slowly advances toward the enemy and attacks with his club. While he is very slow, he has the most health, and doesn’t flinch from weak attacks.
      • Siegfried: Advances toward the foe and attacks with heavy swings from his sword, as well as a jumping downward slash. While slow, these attacks deal good knockback, making him good at KOing enemies.
      • Karna: Rushes toward the foe. Upon getting close, he performs a spinning flame attack, followed by a powerful downward slash that creates a pillar of flame.
    • Gold Servants
      • Artoria Pendragon: Rushes toward the enemy and upon getting close, performs multiple slashes, followed by a final mana-infused slash to launch the foe. Thanks to her speed and good damage, she can be very oppressive.
      • Mordred: Walks toward the foe, and upon getting close, charges her sword with energy as she performs a wide slash. She doesn’t flinch from attacks, and, combined with her great damage, makes her great at KOing foes.
  • Up Special: Rider Servant - Ritsuka summons out a Rider Servant. They all function mostly the same, allowing the player to charge in the held direction with their mounts, though the effect is different depending on the character. At any point, you can jump off to get back onto the stage.
    • Bronze Servants
      • Medusa: Rides on a Pegasus, traveling a large distance but dealing little damage.
      • Astolfo: Rides on a Hippogriff, traveling a less distance and dealing more damage.
    • Silver Servants
      • Francis Drake: Rides forward on a smaller version of her ship. Travels less distance, but deals more damage and possesses super armor.
    • Gold Servants
      • Iskandar: Summons forth his horse and a legion of soldiers, traveling across the entire screen to deal large amounts of damage.
  • Down Special: Support Servant - Ritsuka summons out a Servant that provides Ritsuka with support abilities like healing and buffs.
    • Bronze Servants
      • Elizabeth Báthory: Grants Ritsuka and any present Servants increased damage.
      • Ereshkigal: Grants Ritsuka and any present Servants increased defense, as well as super armor against weaker attacks.
    • Silver Servants
      • Tamamo-no-Mae: Heals Ritsuka and allows any present Servants to stay out for longer.
      • Shuten Douji: Pours alcohol onto the ground, leaving a large puddle of it that stuns enemies who touch it.
    • Gold Servants
      • Jeanne d’Arc: Grants Ritsuka and all Servants super armor against all attacks. She also creates a blast around her that damages nearby enemies.
      • Merlin: Heals Ritsuka and any present Servants, as well as granting them increased damage for a short time.
  • Final Smash: ? - ?

  • On-Screen Appearance: ?
  • Taunts:
    • Up Taunt: ?
    • Side Taunt: ?
    • Down Taunt: ?
  • Victory Poses:
    • Left: ?
    • Up: ?
    • Right: ?

  • Male: Default appearance.
  • Female: Replaced with Female Ritsuka.
  • Blue: Based off of Shirou Emiya from Fate/stay night.
  • Red: Replaced with Female Ritsuka. Based off of Rin Tohsaka
  • Black: Based off of Kirei Kotomine.
  • Purple: Replaced with Female Ritsuka. Based off of Illyasviel von Einzbern.
  • Grey: Based off of Sieg from Fate/Apocrypha.
  • Orange: Replaced with Female Ritsuka. Based off of Hakuno Kishinami from Fate/EXTRA.
  • Atlas Academy: Male Ritsuka in the Atlas Academy Uniform. Unlockable costume.
  • Chaldea Combat: Female Ritsuka in the Chaldea Combat Uniform. Unlockable costume.

JonesySSBSR(transparent)

Jonesy

?

Jonesy is a Soldier character in Fortnite: Save the World, and one of the default avatars used in Fortnite: Battle Royale. A former high ranking member of the Imagined Order, he was tasked into jumping into the Zero Point, sending him through many realities in The Omniverse to bring order to them, and bring them into the Loop for study. When the Zero Point becomes too unstable however, he betrays the I.O. and joins The Seven to reseal it.
Moveset

Jonesy is a Zoner character. A mid-heavyweight with the ability to crawl, on his own, Jonesy isn’t the greatest, but as he gains Loot from attacking enemies. Loot comes in two forms: Guns and Materials. Jonesy can have up to 4 weapons with him at a time and can switch between them by holding Special while Shielding. Each weapon has limited Ammo, and once it is out, the Weapon will be dropped. Your weapons will also be dropped if you are ever KOed, and if you have too many weapons, you will be forced to drop your currently equipped weapon for the new one (though you can pick this weapon back up if you so choose).

  • Pistol: Jonesy’s starting weapon. Pretty weak but fires quickly. Hold 30 shots.
  • Assault Rifle: A well-rounded fully automatic weapon. Holds 60 shots.
  • Pump Shotgun: A powerful close-ranged gun. Holds 6 shots.
  • Tactical Shotgun: Deals less damage than the Pump Shotgun, but fires quicker. Holds 12 shots.
  • Submachine Gun: A fast-firing weapon with low damage and range. Holds 90 shots.
  • Revolver: A slower but more powerful version of the pistol. Holds 10 shots.
  • Bolt-Action Sniper Rifle: A slow but very accurate weapon. Headshots deal extra damage. Holds 5 shots.
  • Rocket Launcher: The most powerful of Jonesy’s guns, firing exploding rockets. Holds 3 shots.
  • Grenade: A throwable grenade that is affected by gravity, dealing damage to anyone nearby. Comes in groups of 4.
  • Clinger: A throwable grenade that sticks to surfaces, exploding after a short time. Comes in groups of 3.
  • Stink Bomb: A throwable grenade that explodes into a cloud of gas, damaging anyone in it. Comes in groups of 3.
  • Boogie Bomb: A throwable grenade that explodes on impact, causing anyone in the radius to dance uncontrollably, leaving them vulnerable to damage. Comes in groups of 1.
  • Damage Trap: A trap placed similar to a floor piece. When an enemy steps on it, spikes will pop out and damage them. Comes in groups of 1.
  • Small Shield Potion: A small healing item. While using it, you are left open for a bit. Comes in groups of 1.
  • Chug Jug: A larger healing item. However, it takes a longer time to drink. Comes in groups of 1.
Materials on the other hand come in three forms, Wood, Stone and Metal. Wood is the most common, and the fastest building, but also the weakest, Stone is in the middle, and Metal is the rarest, the slowest building, but also the weakest. These materials can be used while in Build Mode to construct either Walls, Floors or Stairs. These start off weak as they assemble, but will stay on stage for some time after, acting as obstacles. However, up to five of these structures can be up at a time.

  • Jab: Swings his pickaxe in front of him.
  • Side Tilt: Swings his pickaxe in front of him.
  • Up Tilt: Swing his pickaxe above him.
  • Down Tilt: A sweep kick.
  • Dash Attack: A jumping slam downward.
  • Side Smash: Pulls out the Infinity Blade and swings it in front of him.
  • Up Smash: Jumps up before slamming the Infinity Blade into the ground, creating a shockwave in front of him. Has a meteor effect.
  • Down Smash: Spins low to the ground while swinging the Infinity Blade around him.

  • Neutral Air: Swings his pickaxe around him.
  • Forward Air: Swings his pickaxe downward. Has a meteor effect.
  • Back Air: Swings his pickaxe above him.
  • Up Air: Swings his pickaxe above him.
  • Down Air: Thrusts the pickaxe downward.

  • Grab: Fires a Grappler to grab distant enemies. Can also be used to tether recovery.
  • Pummel: Knees the opponent.
  • Forward Throw: Tosses the opponent forward.
  • Back Throw: Grabs the enemy and tosses them behind him.
  • Up Throw: Swings his pickaxe upward to launch the foe into the air.
  • Down Throw: Throws the opponent to the ground, launching them into the air.

  • Neutral Special: Fire Weapon - Jonesy fires his currently equipped weapon. Hold the button to go have Jonesy move, allowing him move and aim with the control stick and fire by pressing the attack button.
  • Side Special: Shopping Cart - Jonesy rushes forward with a Shopping Cart. Anyone he runs into will become trapped in it. From there, Jonesy can perform one of two actions. Pressing attack allows him to send the Shopping Cart flying forward, allowing you to combo with it. Pressing special allows Jonesy to hop in the shopping cart, charging into enemies. When either of these happen, the shopping cart becomes affected by gravity.
  • Up Special: Launch Pad - A launch pad appears under Jonesy, which he uses to launch himself into the air. Upon reaching peak height, he pulls out his Glider which he can use to glide back onto the stage.
  • Down Special: Build Mode - Jonesy pulls out a blueprint, and gains the ability to build using the materials he’s gathered by hitting enemies. Press the attack button to place the building, the special button to switch materials, and the shield button to switch structure type.
  • Final Smash: The End - Jonesy summons the Battle Bus, which rams into enemies, sending them into a cutscene. Launched into the island, Jonesy glides off as multiple rockets and a massive meteor are launched into the Zero Point, creating a black hole that sucks in all the caught players. This then launches them, instantly KOing them if they were at over 100%.

  • On-Screen Appearance: Glides down onto the stage with his glider.
  • Taunts:
    • Up Taunt: Dances while holding up an L-sign. Based off of the “Take the L” emote.
    • Side Taunt: Dances by swinging his arms back and forth. Based off of the “Floss” emote.
    • Down Taunt: Dances by spinning his arms around while moving up and down. Based off of the “Orange Justice” emote.
  • Victory Poses:
    • Left: Takes out a pinch of salt and sprinkles it in front of the camera. Based off of the “Pure Salt” emote.
    • Up: Performs a dance before crossing his arms. Based off of the “Dance Moves” emote, also known as the Default Dance.
    • Right: Pulls out a trophy and begins thrusting it up and down in the air in jubilation. Based off of the “Kiss the Cup” emote.

  • Jonesy: Default appearance.
  • Ramirez: Replaced with Ramirez.
  • Spitfire: Replaced with Spitfire.
  • Banshee: Replaced with Banshee.
  • Hawk: Replaced with Hawk.
  • Wildcat: Replaced with Wildcat.
  • Renegade: Replaced with Renegade.
  • Headhunter: Replaced with Headhunter.
  • Cuddle Team Leader: Replaced with Cuddle Team Leader. Unlockable costume.
  • The Foundation: Replaced with The Foundation. Unlockable costume.

ZagreusSSBSR(transparent)

Zagreus

Prince of the Underworld

Zagreus is the main protagonist of Hades. The son of Hades, he spent most of his life bearing the brunt of his frustration and rage, growing distant from his and the rest of the underworld’s denizens due to his inability to meet the expectations of his father and contribute to running the Underworld. After learning of the truth of his parentage, he decides to leave the House of Hades, and attempts to escape the Underworld and find his long-lost mother.
Moveset

Zagreus is an All-Arounder character. A mid-heavyweight with no additional movement options, his main gimmick are Boons. By filling up the God Gauge near his percentage (filled by damaging enemies or taking damage), the player can press Special while Shielding to summon a random god, allowing you to choose one of three Boons to give your special moves special effects depending on which god is summoned. All upgrades go away on KO.

  • Aphrodite: Aphrodite’s upgrades add a Weak effect to your attacks, reducing the damage of your targets.
  • Ares: Ares’ upgrades add a Doom effect to your attacks, creating a blade above the hit foe that damages them after a few seconds pass.
  • Artemis: Artemis’ upgrades give your attacks a chance to do a Critical Hit.
  • Athena: Athena’s upgrades give your attacks the ability to Deflect, reflecting enemy projectiles.
  • Demeter: Demeter’s upgrades add an ice effect to your attacks, giving attacks the chance to freeze.
  • Dionysus: Dionysus’ upgrades add a Hangover effect to your attacks, causing targets to take damage overtime.
  • Poseidon: Poseidon’s upgrades add knockback effects to attacks, pushing foes away.
  • Zeus: Zeus’ upgrades add lightning to attacks, making it easier to rack up damage at the cost of some knockback.

  • Jab: Slashes forward with the Stygian Blade, followed by a downward chop, followed by a forward stab.
  • Side Tilt: Quickly stabs Varatha, the Eternal Spear, forward.
  • Up Tilt: Swings Varatha upward.
  • Down Tilt: Swings low to the ground with Aegis, the Shield of Chaos.
  • Dash Attack: Stabs forward with the Stygian Blade.
  • Side Smash: Performs Nova Smash, leaping a short distance forward before stabbing the Stygian Blade into the ground, creating a blast around him. Has a meteor effect.
  • Up Smash: Performs Rising Cutter, performing a powerful rising uppercut with the Twin Fists of Malphon.
  • Down Smash: Performs Spin Attack, spinning Varatha around him to damage enemies.

  • Neutral Air: Swings the Stygian Blade around him.
  • Forward Air: Swings the Stygian Blade in front of him. Has a meteor effect.
  • Back Air: Swings the Aegis behind him.
  • Up Air: Fires several shots from Exagryph, the Adamant Rail, above him.
  • Down Air: Flies downward while holding Aegis below him, slamming into enemies.

  • Pummel: Uses the Twin Fists to perform a rapid flurry of punches.
  • Forward Throw: Knocks the enemy away with Aegis.
  • Back Throw: Tosses the foe behind him before firing a shot from Exagryph to launch them away.
  • Up Throw: Launches the enemy upward with an uppercut.
  • Down Throw: Knocks the enemy to the ground, then fires an explosive shot from Exagryph that knocks the foe away.

  • Neutral Special: Coronacht - Zagreus pulls out Coronacht, the Heart-Seeking Bow, firing an arrow forward. Charge it to increase damage, distance and speed. Shot it immediately once it is fully charged to perform a Power Shot, further increasing its damage. Boons give the arrows special effects.
  • Side Special: Dash - Zagreus quickly dashes forward, passing through enemies and briefly dodging attacks. Boons give it the ability to create a blast around Zagreus upon reappearing.
  • Up Special: Bull Rush - Zagreus pulls out Aegis, charging up before charging in the held direction. Charging increases the distance it travels. The shield will block attacks from the front. Boons give the charge special effects.
  • Down Special: Cast - Zagreus fires up to two Bloodstones, which have a slight homing effect towards enemies. Enemies hit by the Bloodstone will take increased damage for a short time, and the Bloodstones can stack to further increase damage. After the effect is over, the Bloodstone falls to the ground, and Zagreus will have to pick it up to use the move again. Boons change the cast into a different projectile entirely.
    • Crush Shot: Aphrodite turns Cast into a close-ranged blast that makes enemies Weak.
    • Slicing Shot: Ares turns Cast into a blade rift that flies slowly forward, bounces off of walls and deals rapid damage to targets.
    • True Shot: Artemis turns Cast into a fast homing projectile that has a chance to randomly Crit.
    • Phalanx Shot: Athena turns Cast a large, but slow-moving projectile that reflects other projectiles.
    • Crystal Beam: Demeter turns Cast into a stationary crystal that fires an icy laser at set intervals.
    • Trippy Shot: Dionysus turns Cast into an arcing projectile that explodes on contact, leaving behind a cloud of Festive Fog that has a chance of stunning enemies in it.
    • Flood Shot: Posiedon turns Cast into an exploding blast of water that pushes enemies away.
    • Electric Shot: Zeus turns Cast into a fast electric projectile that chains between up to four targets.
  • Final Smash: Call of Olympus - Zagreus rushes forward, slashing anyone in his way into a cutscene. Rushing towards the foe, he calls upon the Olympian Gods to strike down his foes with their powers, as Zagreus unleashes a combo of slashes on them. Hades then suddenly appears from a puff of smoke in the distance, and he and Zagreus toward each other for the final blow, striking the enemy in between and launching them away. If the target reaches over 100%, a special KO screen appears, where the enemy falls into a pool of blood as a banner appears saying, “THERE IS NO ESCAPE”, playing out exactly like Hades’ game over screens.

  • On-Screen Appearance: Falls from the sky and punches the ground, before getting up and pulling out the Stygian Blade.
  • Taunts:
    • Up Taunt: ?
    • Side Taunt: ?
    • Down Taunt: ?
  • Victory Poses:
    • Left: ?
    • Up: ?
    • Right: ?

  • Red: Default appearance.
  • Green: Based off of Achilles.
  • Black: Based off of Thanatos.
  • Blue: Based off of Megaera.
  • Purple: Based off of Nyx.
  • Teal: Based off of Poseidon.
  • Yellow: Based off of Zeus.
  • White: An original color.
  • ?: ?. Unlockable costume.
  • ?: ?. Unlockable costume.

Fighter Pass 4

DoomSlayerSSBSR(transparent)

Doom Slayer

The Bane of Demonkind

The Doom Slayer is the main protagonist of the DOOM series. A legendary warrior and leader of the Night Sentinels of Argent D'Nur, he is feared by demonkind for his immense strength and power, able to take on entire hordes on them without stopping. Unable to kill him, he was sealed inside of a sarcophagus, only to be found by the UAC after a trek into Hell. When the UAC was invaded, the Doom Slayer awoke, and sought to continue his goal to kill every demon that stands in his path.
Moveset

The Doom Slayer is a Hit-and-Run character. A heavyweight with the ability to air dash, he packs a wide array of projectiles to deal constant damage from any range, and he packs some powerful attacks, but he requires proper set-up and resource management to use well. Doom Slayer's main gimmick is his assortment of Guns. By pressing special while shielding, he can switch between various weapons, which change his Neutral Special and Side Special. Each of these weapons have limited Ammo, which depletes when these weapons and the Doom Slayer's Smash Attacks are used, but are dropped by enemies by performing melee attacks on them. The Doom Slayer has 4 weapons to choose from:

  • Combat Shotgun: Fires off a damaging buckshot in front of you. The best weapon for close-ranged situations. Holds 16 ammo at a time.
  • Heavy Cannon: Fires a quick stream of bullets as long as you hold the special button. Well-rounded. Holds 60 ammos at a time.
  • Plasma Rifle: Fires a constant barrage of energy blasts. Deals no knockback but it's the best at dealing constant damage. Holds 100 ammo at a time.
  • Rocket Launcher: Fires projectile rockets at enemies. Easily the most powerful, but if you use it too close you'll get caught in the blast. Holds 6 ammo at a time.

  • Jab: Two punches, followed by an uppercut.
  • Side Tilt: A gun bash with his currently equipped weapon.
  • Up Tilt: A slash upward with the Doomblade.
  • Down Tilt: A sweeping kick.
  • Dash Attack: The Dash, having Doom Slayer charge forward a short distance.
  • Side Smash: Pulls out the Super Shotgun and fires a shot forward. Each time it is used it uses 2 ammo from your Combat Shotgun.
  • Up Smash: Pulls out the Ballista and fires a blast upward. Each time it is used it uses 20 ammo from your Plasma Rifle.
  • Down Smash: Pulls out the Chaingun, firing downward before raising his arm to fire at an upward angle, carrying the foe. Each time it uses 15 ammo from your Heavy Cannon.

  • Neutral Air: A spinning attack with the Doomblade.
  • Forward Air: A quick punch forward.
  • Back Air: A swift backwards kick.
  • Up Air: A stab upward with the Doomblade.
  • Down Air: A stomp. Has a meteor effect.

  • Pummel: Punches the enemy in the face while holding them by the neck.
  • Forward Throw: Trips the enemy before kicking them away.
  • Back Throw: Kicks the enemy behind them before punching them away.
  • Up Throw: Tosses the enemy into the air, then uses the Flame Belch to burn the enemy.
  • Down Throw: Tosses the enemy to the ground and chainsaws them in the stomach. Recovers a lot of ammo.

  • Neutral Special: Fire Weapon - The Doom Slayer fires his currently equipped weapon. While firing the Heavy Cannon and Plasma Rifle, the player can not only continuously fire by holding the button, but can also move forwards or backwards (though you cannot turn around unless you stop firing).
  • Side Special: Weapon Mod - The Doom Slayer uses his weapon's modification, which changes depending on which weapon he is using.
    • Sticky Bombs: With the Combat Shotgun equipped, the Doom Slayer fires a sticky explosive that latches onto surfaces and enemies before quickly exploding. Each shot uses 2 ammo.
    • Precision Bolt: With the Heavy Cannon equipped, the Doom Slayer pulls up a scope and can fire a precision bolt at an enemy. Doom Slayer cannot move, but can aim in any direction. Each shot uses 6 ammo.
    • Heat Blast: With the Plasma Rifle equipped, the Doom Slayer fires a blast of energy in front of him that deals heavy damage. Charges up as you fire, increasing in power the more you fire the gun.
    • Lock-on Burst: With the Rocket Launcher equipped, the Doom Slayer begins aiming. If he is looking at an enemy, a reticle will slowly charge before it locks onto the foe. Afterwards, releasing the button has the Doom Slayer fire three rockets that seek out the target, at the cost of a little less damage. Each time it is used it uses up 3 ammo.
  • Up Special: Meat Hook - The Doom Slayer pulls out his Super Shotgun, before firing its Meat Hook at an upward angle. It doesn't work like normal tether recoveries, as it won't attach to ledges, but instead gives Doom Slayer another jump and doesn't put him into freefall. If he latches onto an enemy, he'll fly towards them and fire a Super Shotgun blast.
  • Down Special: Chainsaw - Doom Slayer pulls out his chainsaw, before rushing a short distance forward. If he hits the enemy, he'll chainsaw them, dealing a good chunk of damage. Though it doesn't have much launching power, it has the benefit of dropping a large amount of ammo. The chainsaw has a cooldown after it lands a hit.
  • Final Smash: BFG9000 - Doom Slayer pulls out the BFG9000, firing out a massive blast of Argent energy forward. Deals immense damage to anyone hit by it directly, and anyone else nearby will be damaged by the projectile's tendrils, though they won't take as much damage.

  • On-Screen Appearance: Steps out of a portal before cocking his Combat Shotgun.
  • Taunts:
    • Up Taunt: Raises his gun triumphantly in the air.
    • Side Taunt: Puts away his gun and cracks his knuckles.
    • Down Taunt: Pulls out a random action figure of a demon and plays around with it before putting it away.
  • Victory Poses:
    • Left: The Doom Slayer is seen looking around, before looking towards the camera. He extends the Doomblade and stabs in under the camera, as it falls to the ground.
    • Up: The camera rises as a horde of Imps climb up a large mountain, with the Doom Slayer at the top. One Imp attempts to pounce on him, but the Doom Slayer punches them. Based off of the cover of the original DOOM.
    • Right: Looks back towards the camera and takes off his helmet, before turning his head towards the camera, smiling and nodding. He then goes through a portal and disappears.

  • Green: Default appearance.
  • Red: Based on the Blood Slayer skin.
  • Blue: Based on the Midnight Slayer skin.
  • White: Based on the Astro Slayer skin.
  • Black: Based on the Democide Slayer skin.
  • Orange: Based on the Phobos Slayer skin.
  • Gold: Based on the Gold Slayer skin.
  • Classic: The Doom Slayer's classic appearance from the original DOOM and DOOM 2.
  • Praetor: Based on the Doom Slayer's original appearance in DOOM (2016). Unlockable costume.
  • Doomicorn: Based on the Doomicorn skin. Unlockable costume.

Fighter Pass 5

TBA