This page is a listing of the many Adventure Mode stories found in SHIFT. Each Adventure mode consists of five platforming stages or battles, before culminating in a boss fight. Each level may be played on the standard difficulty settings ranging from Easy to Intense, as well as Almighty once said difficulty has been unlocked.
Each platforming stage has 3 hidden items known as X Sigils, and each adventure also has an additional Sigil for defeating the story's Boss with an S Rank. There are 144 Sigils in total, and 60 much be obtained to unlock the final story mode, Adventure: χ.
Adventure: Urbia[]
Stage 1[]
Stage 1 begins in the darkest corners of the Pleajeune District, with the camera panning up the side of a building to reveal Kat watching over the city. Things seem to be going fine until Kat hears a siren in the distance, and assuming it's criminal activity, she heads off to investigate.

Playable Characters: Kat
After arriving at the building where the siren was coming from, Kat finds it to be a bank, which is being attacked by some strange white creatures. Encouraging the local police force that she's here to help, Kat leaps into the fray and begins fending off the creatures.
Battle: Nobody Dusk x5, Nobody Creeper x7
Playable Characters: Kat
With the assailants fended off, Kat and the police force determine that bizarrely, nothing at all was stolen, and it's entirely possible that these strange creatures simply wanted to cause chaos. With the day saved, Kat leaps off into the night, with a young girl hiding in a nearby building gazing at her in awe.
Stage 2[]
After the events of the previous night, Kat is shocked to see her name not in the morning papers, with no credit seemingly given to her at all. Disappointed, she decides that she needs to do something to get her name out there, and after browsing through the paper and petting Dusty a little, she stumbles across an ad for New Urbia City's annual SHIFT tournament; figuring that the tournament would give her the recognition she wanted, Kat sets off to sign up, running into the city to find the registry point.
Kat arrives at Urbia City Hall, demanding to speak to whoever is in charge of setting up the tournament. The secretary, introduced as Molly, explains that the mayor himself is in charge of setting up the tournament, but that every available slot has been filled. Angered, Kat asks to see the mayor in order to prove her worth as a contestant; this thought is interrupted as a nearby door opens, and the muscular mayor Mike Haggar introduces himself. Haggar explains that Molly is correct and all entry slots have been filled, but that he liked the gumption she showed; if Kat could best him, he'd consider letting her into the tournament as well. Molly covering her eyes to avoid watching the carnage, the two fought.

Battle: VS. Mike Haggar
Playable Characters: Kat
Kat managed to best Haggar in battle, but the mayor didn't seem mad at all... In fact, he was quite impressed with her display of fighting skill. Haggar told Molly to set up an additional fighter slot for Kat in the upcoming tournament, saying she had proven her worth to him. Kat was happy that she had been given this opportunity- only to have the moment ruined by a police officer bursting into the room, stating that more of the strange white creatures had emerged in Urbia Park. Kat rushed out to fend them off, with Haggar and Molly following behind.

Playable Characters: Kat, Mike Haggar, Molly
Stage 3[]
Having been fully registered in the tournament, Kat heads off to the Urbia SHIFT Stadium in order to begin the fight proper. Along the way, however, she encounters a group of thugs in the street, causing violence and general mayhem. Kat decides to help stop this group before anyone gets hurt, taking a detour from her trip to the stadium.
Playable Characters: Kat
Upon clearing out the majority of the thugs, Kat comes across a teenage girl with orange clothes, who claims to be the leader of the gang and introduces herself as Naomi. Kat asks Naomi why exactly she's causing so much mayhem, and the latter simply states that she's attempting to "move up in the world" by any means necessary, and is aiming to take the SHIFT Championship for herself. Kat decides to take down Naomi and hand her over to the authorities.

Battle: VS. Naomi
Playable Characters: Kat
Eventually beating Naomi and calling the police to let them know to pick her up, Kat runs off to SHIFT Stadium, arriving just in time for her first match. Both Haggar and Molly are sitting in the front row, eagerly watching her, and the crowd cheers for the newcomer as a massive behemoth in armor walks up to her, wishing her luck in the battle.
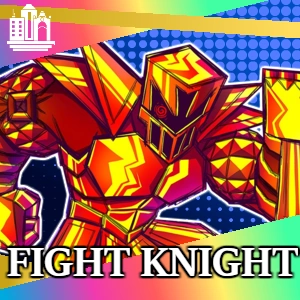
Battle: VS. Fight Knight
Playable Characters: Kat
Stage 4[]
Having bested Fight Knight, Kat continues climbing the ladder of the tournament. In one innocuous match, however, time seems to freeze entirely as the contestant reveals themselves to be another one of the mysterious white creatures. Confused, Kat decides to fend it off anyways.
Battle: Nobody Dusk x10, Nobody Creeper x5, Nobody Berserker x2
Playable Characters: Kat
Time resumes as the crowd cheer's for Kat's apparent defeat of her opponent, with absolutely no suggestion that they were aware of the previous events. Deciding to just shake the event off as the effects of adrenaline, Kat talks to Haggar about his next match, who he says is a fearsome and powerful rival of his who could likely give Kat an intense match. Recently, however, he had been dethroned from his champion position by some strange newcomer, leaving him even more itching to enter the fight. Keeping this in mind, Kat kept moving onward, with the semifinal fighter revealed to be the powerful on-and-off mayor Max Brass.

Battle: VS. Max Brass
Playable Characters: Kat
Stage 5[]
Kat moves on to the finals of the tournament, and decides to meet with her final opponent before the match proper starts in order to wish them good luck. Upon meeting her opponent, Vegeta, however, he comes off as brash and crude, claiming he doesn't need luck in order to take down someone like Kat. Becoming suitably motivated to dethrone Vegeta, Kat faces off against the Saiyan warrior in the championship's final best-to-three match.

Battle: VS. Vegeta
Playable Characters: Kat
With Kat victorious, she is declared the new SHIFT champion as Haggar and Molly come out of the stands to personally congratulate her. Kat is ecstatic to finally be given recognition and thanks her opponents for helping her along the way; Vegeta, however, has vanished entirely, and is found grumbling to himself in the men's locker room about being unable to best her in combat. Suddenly, a muscular man wreathed in shadow appears, asking Vegeta if he desires the power to take his revenge and prove he is the strongest. He quickly accepts, and begins glowing with purple energy as the mystery figure begins powering him up.
Boss[]
Kat's celebration with Dusty is cut short when she is called by Haggar, who gives her an urgent message that something terrible is happening at the stadium. Rushing to his side as quick as she can, Kat finds that the stadium is being crumbled by a massive ape wearing what looks like Vegeta's clothing. Understanding that the giant monster could easily destroy the city, Kat decides it's for the best that she take it down, with Haggar, Molly, and Fight Knight deciding to join the fray as well.

Battle: VS. Great Ape Vegeta
Playable Characters: Kat, Mike Haggar, Molly, Fight Knight
With Great Ape Vegeta defeated, the energy leaves his body as he reverts to normal. Molly begins calculating the costs to repair the stadium while Kat and Haggar begin pondering what exactly is going on between this mysterious transformation and the white creatures that have been appearing over the city.
Adventure: Feyte[]
Stage 1[]
The level begins in King Asgore's castle, in which the king is speaking to the Royal Guard and informing them of their next mission. The dastardly dandy Propeller Knight is believed to have uncovered something dangerous, and will most likely use it in his quest to rob the Kingdom of Feyte of its hard-earned money. Sending the Royal Guard out on a quest to locate his ship, Asgore wishes the four warriors luck as they venture from the castle proper into the nearby forest. Watching them leave, Asgore turns to his nearby right-hand woman Mòrag and tells her to follow them, assuming the four will get into trouble along the way.

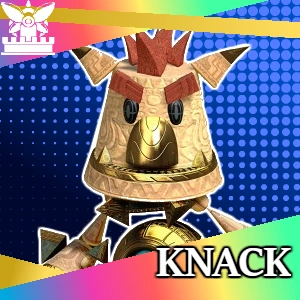
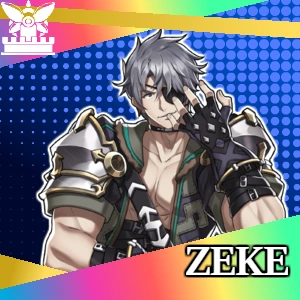

Playable Characters: Papyrus, Knack, Zeke, Shantae
Stage 2[]
Having made their way out of the forest, the Royal Guard comes across a vast swamp full of decaying wildlife. Though some members decide going around would be better, Guard captain Papyrus presses onward with a hearty laugh, not realizing everyone else is going around the swamp.
Playable Characters: Papyrus
After some progression, Papyrus realizes he is without allies as he is surrounded by enemies. Ducking for cover, he has many of the enemies wiped out by a slash if blue flame- looking up, he sees Mòrag on the scene, defending him. The two stand back-to-back as they face off with their opponents.
Battle: Nobody Dusk x12, Burning Leo x4, Monoeye x8, Tenteyecle x2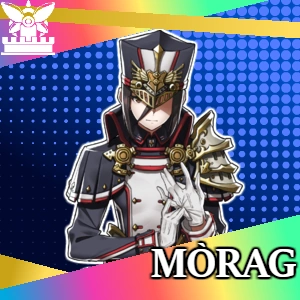
Playable Characters: Papyrus, Mòrag
Papyrus applauds his victory, while Mòrag attempts to scold him for losing the rest of his team. His optimistic demeanor never falters, however, as he simply treks onwards, believing in the Royal Guard and knowing that they will be up ahead.
Stage 3[]
Further into the swamp, the sky gets darker and the undergrowth gets thicker. Papyrus and Mòrag are undeterred, but they soon find themselves being harassed by some strange axe-wielding entity as they scramble through the mucky, dusky landscape.
Playable Characters: Papyrus, Mòrag
After some time, the two come to a large clearing where a young witch resides, decrying the trespassers from entering her domain. Papyrus attempts to explain that they are just merely passing through, but the witch, introducing herself as Metallia, states that none who enter her swamp will ever leave. Mòrag draws her weapons as the three engage in combat.

Battle: VS. Metallia
Playable Characters: Papyrus, Mòrag
Stage 4[]
Papyrus and Mòrag finally exit the swamp, where they reunite with Knack, Zeke, and Shantae, who have been waiting for some time for their leader to return. While Mòrag threatens them and berates them for not venturing in to find their captain, Papyrus interjects to point out that Propeller Knight's ship is on the horizon, waiting to be entered. The five head off, ready to apprehend the rogue once and for all.
Upon entering the ship, the group finds that the only way to see Propeller Knight himself is through proving one's worth at the casino in the lower decks. The Royal Guard set out to prove themselves in the games on display.
Playable Characters: Papyrus, Knack, Zeke, Shantae, Mòrag
Eventually, a young couple approach the group, claiming that they have been spending too much time in the casino's trappings and that others need to at least attempt to win. Papyrus, eager to approach Propeller Knight, challenges the couple before anyone can interject, and the Royal Guard is quickly thrust into a battle with these two lovers.
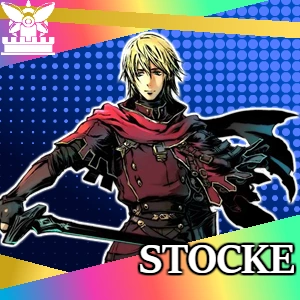
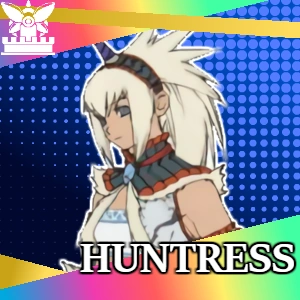
Tag Team Battle: VS. Stocke and Huntress
Playable Characters: Papyrus, Knack, Zeke, Shantae, Mòrag (Pick 2)
As the fight dissolved, a young steward approached Papyrus, stating that Propeller Knigth was interested in speaking to who he had heard were fantastic fighters. As Mòrag stared at the skeleton, confused that his actions had benefited the group, they headed up to the bridge proper.
Stage 5[]
The group entered Propeller Knight's cabin as he turned around in his chair to greet them, only to be shocked that it was the Royal Guard all along. The Guard drew their weapons to face the knight in battle, but he quickly pressed a button on a panel behind him, causing the floor to fall out from underneath them as he laughed. Finding themselves in the cargo hold, the Royal Guard tried to make their way back to the cabin.
Playable Characters: Papyrus, Knack, Zeke, Shantae, Mòrag
Eventually making their way back to the main deck of the ship, the group found themselves confronted by Propeller Knight, who was determined to end the heroic meddling of the Royal Guard once and for all. The two parties clashed in a battle to finally triumph over the other.

Battle: VS. Propeller Knight
Playable Characters: Papyrus, Knack, Zeke, Shantae, Mòrag
Boss[]
With Propeller Knight defeated, the Royal Guard rejoices while Mòrag searches through the objects in his possession. She comes across a strange ring, which gives off an eerie energy, but as she tries pulling it off, she is blasted back by a wave of dark energy and knocked unconscious. The Royal Guard turn around to find a strange robed individual emerge from the ring, who claims that they are too late in stopping him from unleashing the beast that his masters have desired him to set loose upon Feyte. Nobody is quite sure what he means, but it can't be good- the group engage the cloaked figure immediately.
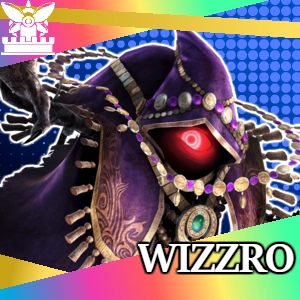
Battle: VS. Wizzro
Playable Characters: Papyrus, Knack, Zeke, Shantae
Though the Royal Guard managed to defeat Wizzro, he simply started laughing evilly as the ring on his finger began glowing. The wizard burst into purple flames as dark miasma began drifting upwards from the cargo hold; before anybody could do anything, an even larger creature burst from the deck, shattering a massive hole in the floor. As the beast glared at everyone, they pulled out their weapons and fought for their lives.
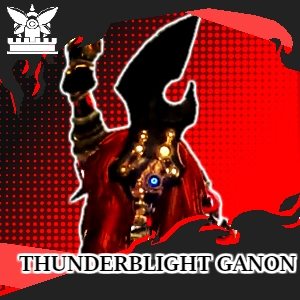
Battle: VS. Thunderblight Ganon
Playable Characters: Papyrus, Knack, Zeke, Shantae
The Thunderblight was defeated, and the team rejoiced once again. This time, however, Papyrus was deep in thought- if the wizard really did work for someone, then that meant more danger could strike at any minute, and nobody in the world would be safe from their actions. Explaining to the team that they still had a job to do, Papyrus lead the Royal Guard off the vessel.
Adventure: Electra[]
Stage 1[]
The first stage begins in a penthouse apartment, in which a motionless 2B is seen resting in a corner before activating. She approaches her presumed owner, mayor of Electra City Kathleen Coyle, and her managerial AI Infinite. Coyle informs 2B that it is time to go on her nightly patrol route, searching for potential criminals to bring to justice. 2B, unable to protest, heads out to the dark city streets to do her assigned duty.

Playable Characters: 2B
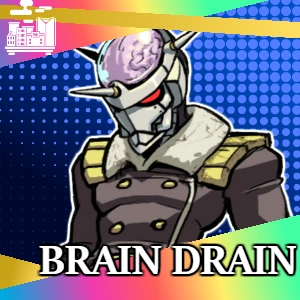
After spending some time on her nightly patrol, 2B comes across a young girl in a heavy metallic jacket holding up a small store. Rushing in with her blade, 2B challenges the child, who she identifies as Gibril, one of the lackeys of notorious villain Brain Drain.

Battle: VS. Gibril
Playable Characters: 2B
Stage 2[]
After informing the authorities of her apprehension of Gibril, 2B is contacted by Electra chief of police Samus, who thanks her for taking down a known criminal with ties to Brain Drain. Samus informs 2B that recently, the city has been plagued by a string of murders and disappearances, which she believes to be tied to Brain Drain. Samus asks 2B for her help, and as 2B is unable to deviate from her goal, she accepts. Samus pairs 2B up with some of her subordinates, Commander Yammark and Kaminari, and asks the three to investigate Electra City's harbor for suspicious activity.


Playable Characters: 2B, Commander Yammark, Kaminari
Though the group encounter some thugs and other hostile entities, no clues connected to the murders are found. They are about to leave when a tall, muscular man strikes from the shadows, significantly wounding Yammark and leaving before anybody has the chance to retaliate.
Stage 3[]
With Yammark taken out of commission, 2B and Kaminari were left with hunting down another possible lead to the murders: a strange gang of hackers that had been stealing personal information from citizens across the city. With backup from forensic scientists Acid Man, the trio set out to the gang's hideout.

Playable Characters: 2B, Kaminari, Acid Man
After reaching the depths of the hacker hideout, the trio come across Sombra, head of the hacker gang. Desperate to avoid capture, she offers to provide intel on who actually committed the murders, but 2B refuses, saying she must enter custody.

Battle: VS. Sombra
Playable Characters: 2B, Kaminari, Acid Man
After capturing Sombra, 2B receives a transmission from Infinite, who demands to know why she has been active for so long without checking in. 2B simply informs Infinite that she has been doing police work, and that Mayor Coyle should not be worried.
Stage 4[]
With Sombra apprehended, 2B and her allies return to the police station to find everything in disarray. Samus informs her that a dangerous criminal, Ray, who is believed to have connections with Brain Drain, has escaped custody and is now on a rampage. The two unite to hunt down the dangerous criminal.

Playable Characters: 2B, Kaminari, Samus, Acid Man
Eventually cornering the fleeing Ray in an alleyway, 2B and Samus attempt to reason with her to no avail; she is too scared and frenzied to cooperate. Seeing no other choice, the team decides to take her down with physical force.
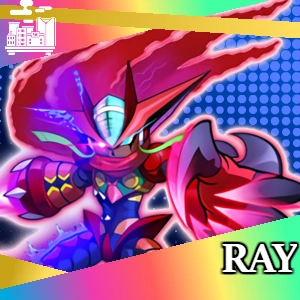
Battle: VS. Ray
Playable Characters: 2B, Kaminari, Samus, Acid Man
Upon Ray's capture and return to the police HQ, she explains that, like Gibril, she was experimented on by Brain Drain and had her genetic code tampered with. Escaping from the mad scientist by any means necessary, all she really wanted was to fix her condition, and in order to prove her innocence, she gave away Brain Drain's location: a lab in the Electra sewers.
Stage 5[]
Before 2B and Samus enter the sewers in search of Brain Drain, she receives another transmission from Infinite, who asks whether or not this is what her master would want her to be involved in. 2B simply responds that her duty is to defend the city, and as such, apprehending the criminal is her priority. Infinite growls before ending the transmission, leaving 2B suspicious.
Playable Characters: 2B, Kaminari, Samus, Acid Man
Eventually, the group comes across Brain Drain's underground laboratory, in which the cybernetic supervillain greeted the police warmly and amicably, a suave and seductive tone in his voice. Before he could say anything, Samus interjected, saying he was under arrest for kidnapping and experimenting on children like Gibril and Ray.
Battle: VS. Brain Drain
Playable Characters: 2B, Kaminari, Samus, Acid Man
Brain Drain was sent back to the police HQ, where he was interrogated by 2B and Samus. Though convicted for his kidnapping crimes, the two women eventually determined that he was not responsible for the murders and disappearances that had plagued Electra City. The only question now was... who was? It was then that 2B received another message from Infinite: 2B was ordered to arrive back at Coyle's apartment, ASAP. The anger in his voice concerned 2B, who asked Samus to return to the apartment with her.
Boss[]
At Coyle's apartment, 2B was shocked to find Infinite alone, with no sign of Coyle at all. When asked what exactly what was going on, Infinite began explaining that 2B's "black box data collection" during her field trials was complete, and that she needed to have her core transferred from her body. Noticing a muscular man in the shadows, 2B demanded to know what exactly Infinite had done, and the AI jackal revealed that his patron- M. Bison- was behind the murderous rampage and "gathering of hearts" that had spread across Electra City, and that he had volunteered to offer up 2B's own intense storage of combat data to him for the price he had always desired; becoming more than an AI and gaining a physical body.

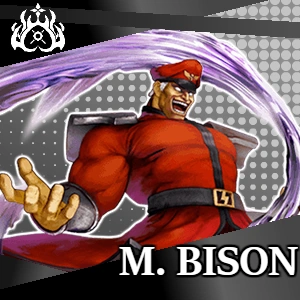
Tag Team Battle: VS. Infinite and M. Bison
Playable Characters: 2B, Samus
Both Infinite and Bison were intensely powerful combatants, but eventually, 2B and Samus managed to triumph over the two... or so they thought. As Bison released dark energy into the ruby powering Infinite's holographic form, he began to shift into a massive corrupted beast that burst from the window and splayed onto the city streets, causing massive havoc. As Samus stayed behind to fend off Bison, 2B lept into the street to slay Infinite.

Battle: VS. Perfect Infinite
Playable Characters: 2B
2B fights valiantly, but her battle with Infinite does not go as planned. Having taken too much damage, she enters power-down mode, hopeful that she could at least have saved the city. Infinite reverts to normal, his power exhausted, as M. Bison floats down from Coyle's balcony; it is implied he managed to defeat Samus. Infinite showcases 2B's unconscious form,stating that such a powerful warrior would be perfect for "the device", and the muscular man nods his head, opening a dark portal and throwing 2B through it. Bison then walks up to Infinite, who becomes hopeful that he will grant him the body he desires so much- to his dismay, Bison rips out the Phantom Ruby holding his body together, causing him to flicker out of existence as Bison states that someone named "Hyness" will appreciate the missing piece of his collection.
Adventure: Al-Kharr[]
Stage 1[]
Stage 1 of this adventure begins in a desert city in the middle of the night, while strange nightmarish creatures are seen creeping about. One creature reaches into a window, hand hovering over a sleeping child and slowly siphoning a blue mist from their head. Suddenly, the creature squeals and bursts into black smoke as it is revealed that it was stabbed through the chest by a large naginata, whose owner is revealed to be Magnolia. Magnolia waits for a second as her mentor Joseph appears, telling her that the rest of Al-Khampis is under siege by the same creatures. The two venture off into the night with the goal of killing off the other "Nightmares".


Playable Characters: Magnolia, Joseph Joestar
Once dawn comes, the remaining Nightmares vanish on contact with the light. Magnolia expresses her exhaustion with constantly having to drive the dark creatures off, and Joseph points out that if they only knew where to find their source, they would be able to kill them all in one fell swoop. Magnolia decides to visit Yew, a learned scholar- Yew informs her that the first documented sightings of the Nightmares were off in the deep desert, and that he'd be happy to bring Magnolia and Joseph on an expedition.
Stage 2[]
In Al-Kharr's royal palace, young queen Tethi is found sitting on her throne, watched by her guard Urbosa. Tethi is shown trying to concentrate on using her wind powers but fails, with Urbosa encouraging her to try again. Tethi expresses disappointment in not being able to fully utilize her skills as a Seedling queen, wondering if it means she is truly fit to rule. As Urbosa tries to comfort her, a palace servant rushes in, explaining that the palace is under attack by unknown creatures. Urbosa grabs Tethi as the two attempt to escape.
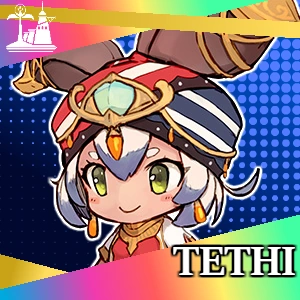

Playable Characters: Tethi, Urbosa
Overrun by enemies, Urbosa tells Tethi to exit the palace via a secret passage while she holds them off. Forcing a crying Tethi to leave her, Urbosa is tasked with fighting off the seemingly endless waves of enemies.
Battle: VS. Endlessly Spawning Enemies
SURVIVE.
Playable Characters: Urbosa
The stage ends with Tethi, now far from the palace, watching it crumble into dark flame. Sniffling, she sets out for civilization.
Stage 3[]
Magnolia, Joseph, and Yew are found out in the middle of the desert, with the implication that they have been there for several days. The three eventually find a small oasis in the vast sands, only to find it overrun by Nightmares, which they decide to destroy.

Playable Characters: Magnolia, Joseph Joestar, Yew
Eventually, the group finds a rustling in the bushes which they believe to be another Nightmare, only for it to be a scared Tethi. Concerned for the young Seedling, Joseph decides to let her join the group so they may return her to civilization. Tethi accepts the offer happily as the quartet venture onward.
Stage 4[]
Arriving in a small desert town, Magnolia and Joseph decide to stop at a fortune teller for more information about the Nightmares while Yew and Tethi rest. The young fortune teller, Menat, informs them that the Nightmares are beings birthed from an ancient entity known as a "Ba'al", which uses its servants to obtain dreams of sleeping individuals so that it may gain power. Though Magnolia is intrigued by the mysterious word, her train of thought is interrupted when the town is attacked by mysterious white creatures that do not resemble normal Nightmares. The two ask for Menat's assistance in taking down the new threats, and she agrees, happy to have some excitement in her dreary job.
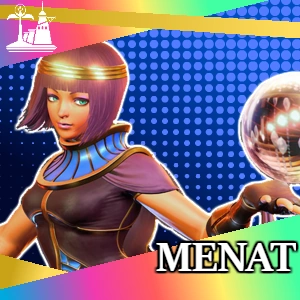
Playable Characters: Magnolia, Joseph Joestar, Menat
With the white creatures disposed of, Magnolia asks Menat if she has any idea of where the Ba'al's hideaway could potentially be. Menat explains that there is a far-off patch of desert where people have been known to feel disoriented and sleepy, and she believes that that could be the true location of the Ba'al. The group of five set off to beat the source of the Nightmares as the camera lingers on a lone skeleton, complaining about his broken food stall.
Stage 5[]
The group arrive at what Menat dubs the Mind Pit, a deep sinkhole in which the sand appears to constantly be shifting colors. The five jump into the pit, with Magnolia expressing her jubilation at being able to finally rid the world of the Nightmares while Tethi becomes excited that she will finally be able to "get payback" for Urbosa.
Playable Characters: Magnolia, Joseph Joestar, Tethi, Yew, Menat
Boss[]
At the bottom of the Mind Pit, the group come across a massive sphere of darkness that seems to be siphoning blue energy from a multitude of nearby sleeping Nightmares. Eager to prevent the creature from waking up, the group begin slaughtering the Nighmares, only to have the blob's true form awaken- that of a monstrous Ba'al. The group prepare for battle as the eldritch horror shrieks in anger.
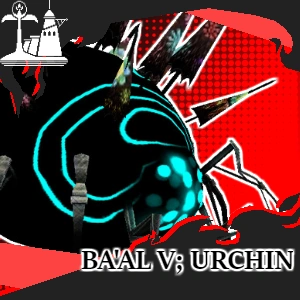
Battle: VS. Ba'al v; Urchin
Playable Characters: Magnolia, Joseph Joestar, Tethi, Yew, Menat
As the Ba'al lay dying, the Nightmares began dissipating into nothingness. The group celebrated- aside from Menat, who looked concerned- when Yew asked her what was amiss, she stated that according to legend, the Ba'al only awoke when a being of greater power was stirring. What exactly had woken the creature up... and was it a graver threat than the Ba'al itself?
Adventure: Undernull[]
Stage 1[]
Stage 1 begins in an eerie, demonic-looking palace where Pandora is seeing simply laying about, with her steward Death at her side. Death disapprovingly claims that Pandora, despite the immense power afforded to her as ruler of the Undernull, is being too lax in her rule to be considered a serious leader. Pandora simply smirks, stating that she's simply doing what the ruler of a utopia like her would be doing- living in the life of luxury. Before Death can contest this, a spirit runs into the room, alerting her to an attack on their location. Pandora and Death rush out to assist in fending off the attackers.

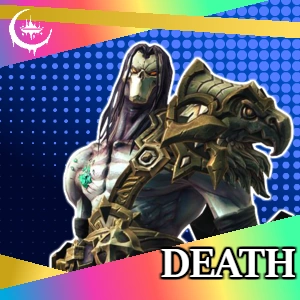
Playable Characters: Pandora, Death
Upon reaching the outside of the castle, Death grabs a nearby skeleton soldier, demanding to know who sent the invaders. The skeleton, terrified, states that they were sent by Ash, the "Prince of Hell" and one who believed he held the right to hold the throne over Pandora. Disgusted, Pandora kicked the skeleton's head off, telling a disgruntled Death that they would be heading off towards where all skeletons came from, and where she believed Ash would be- the Bone Pits.
Stage 2[]
In order to make it to the Bone Pits, Pandora and Death would have to cross a region known as the Deathless Woods, a location known for its disorienting and misty paths. Though Death warned that the trek was foolish, Pandora simply decided to truck onwards anyways, claiming that she knew exactly what she was doing.
Playable Characters: Pandora, Death
Eventually, the two came to a small clearing where a girl's echoing laughter seemed to surround them. Though Death, weaponry drawn, could not pinpoint the source, Pandora simply turned around, finding a small girl in a white dress who covered her face upon being looked at. Though she seemed harmless at first, she vanished before the pair's eyes, only to reappear behind Death and kick him; in retaliation, the duo decided to teach the brat a lesson.

Battle: VS. Queen Booette
Playable Characters: Pandora, Death
Stage 3[]
Upon finally making their way to the Bone Pits, Pandora gave a great sigh of relief that their little escapade was almost over. Death pondered yet again why Pandora wasn't taking the threat to her rule seriously, but the goddess simply remarked that she was really the only one who was able to carry out her job; anybody else would simply not be able to keep up. With her point made, Pandora lead Death into the presumed lair of Ash.
Playable Characters: Pandora, Death
Surely enough, the two did manage to locate Ash; a scrawny, rabbit-like skeleton who turned out to have the impatience of a child. When questioned why exactly he was doing all of this, Ash simply complained that he thought he, as a "much cooler and awesome guy", would be better fit to rule than someone who never did anything. Pandora seemed to take grave offense to this, and challenged Ash to a duel to prove her worth.

Battle: VS. Ash
Playable Characters: Pandora, Death
Upon Ash's defeat, the rabbit attempts to apologize for his actions; despite Death's desire to end the life of the troublemaker once and for all, Pandora simply accepts his apology, letting him off with a warning and telling him not to try it again. However, the three are distracted by a white figure standing atop a nearby cliff, who seems to be wielding a baseball bat. While Ash asks who the heck the figure is, it simply leaps into the throng of skeletons, mercilessly bashing thousands of undead in a split second before leaping off in the direction of Pandora's palace. Asking Ash to team up with her to investigate, Pandora lead him and Death back home.
Stage 4[]
As Pandora lead the charge back home, she noticed something odd; plenty of patches of ground had been struck by some unknown object, and the impact site around the craters had been sapped of all their color and vibrance, leading her to suspect it had to do with the murderous white figure. With nary a moment to spare, the trio headed onward.
Playable Characters: Pandora, Death, Ash
Stage 5[]
Pandora arrived back at her castle with Death and Ash in tow. Surprisingly, nothing had been stolen or damaged, but the white figure had clearly struck as many of the undead and spirits inhabiting the palace were harmed or had vanished. With the knowledge that the bat-wielding maniac was here, the goddess decided to finally prove herself as a capable leader to Death.
Playable Characters: Pandora, Death, Ash
Eventually, the group came to the throne room, in which the mysterious white man was standing as if he had been waiting for them. After threats from both Death and Ash, the man introduced himself as the Batter, a warrior on a holy mission from his superiors to "exterminate the impure undead". Seeing him for the threat he was and not even bothering to ask who his superiors were, the three rushed the Batter, aiming to end the conflict here and now.
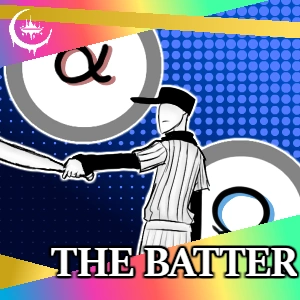
Battle: VS. The Batter
Playable Characters: Pandora, Death, Ash
Boss[]
Pandora taunted the fallen Batter for his failings, despite Death's clear antagonism towards this action. However, when the goddess's back was turned, the body of the batter slowly grew larger and more monstrous, preparing to slash at her with a mighty claw of holy energy. Before Pandora could do anything to react, the claw came down at her- and was intercepted by Death, who took the blow for her. The mood became somber as Pandora's mood shifted entirely- with no other options, the goddess put on her game face and rushed towards the rejuvenated Batter with her full power on display.
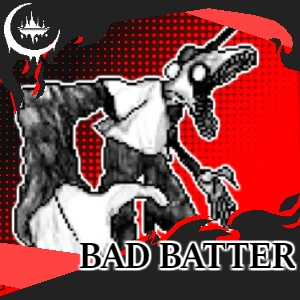
Battle: VS. Bad Batter
Playable Characters: Pandora, Ash
When Death came to, the Batter had vanished entirely and Pandora was relaxing with Ash on her throne, the wounds of battle recuperating as the two were simply making up and laughing. Death sighed, saying that Pandora hadn't learned anything from the experience, but Pandora simply told him that he was being awfully rude for someone who had gotten her overly emotional. With the threat of the Batter gone for good and no potential harm to come their way, Pandora gave Death her first order as a new ruler- take a load off.
Adventure: Paylrule[]
Stage 1[]
The first stage begins in a strange monochrome building resembling a church, where a young woman is seen packing various books and scrolls into a bag. This woman is introduced as Zelda, who is soon interrupted in her backing by a strange bug-like being in a cloak, who is introduced as Hornet. Hornet informs Zelda that the "Pale King's" forces are encroaching on their position fast, leading to Zelda hastily packing the last few scrolls as they rush out of the building into a dark, snowy landscape, chased by insectoid warriors.


Playable Characters: Zelda, Hornet
After setting up camp in the snowy wastes, Zelda and Hornet gather around a small fire as the former pulls out another book, adorned with a set of three golden triangles. Zelda explains that, according to her research on the Triforce, the third bearer should be in the city of Anor Londo, currently under siege by the forces of Paylrule.
Stage 2[]
Zelda and Hornet finally arrive in Anor Londo; though it is populated by a multitude of strange monsters, almost no noise can be heard across the eerie snow-covered city aside from the clash of blades in the distance. Hornet decides that they should follow the noise, as the source could perhaps lead them to their destination.
Playable Characters: Zelda, Hornet
The two eventually find the source of the clash, now gone silent; a lone warrior in golden armor, wielding a spear crackling with lightning. Though he swiftly turns his weapon on the two women when he hears their approach, upon seeing that they are no threat, he puts it down and apologizes. The warrior introduces himself as Ornstein, explaining that his allies have gone missing in the war against Paylrule and that he has been defending his kingdom alone since then. Zelda explains that they too are on a quest to overthrow Paylrule, and asks if Ornstein can assist in leading them to a distant temple. He agrees, and the three set off... only to have the camera zoom out, revealing a short figure in white watching them in a crystal ball, who gestures to two figures in the darkness in order to set them on the path to capturing the "traitors".
Stage 3[]
The trio left Anor Londo and soon arrived in a snowy forest, which Hornet and Zelda found a nice change of pace from the dark and gloomy kingdom they had lived in for some time. Eventually, however, Ornstein caught a whiff of smoke and realized that some entity had set the forest ablaze; the trio did their best to hurry onward, as they were now too deep in the forest to turn back now.
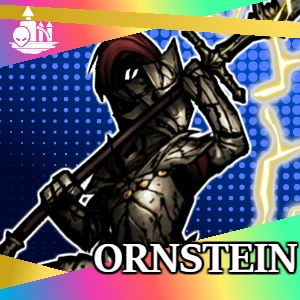
Playable Characters: Zelda, Hornet, Ornstein
Eventually, the trio came across the source of the flames, a strange butterfly-like being wielding dual blades. Zelda gasped; this was Morpho Knight, a powerful warrior under command of the Pale King, and his presence indicated that the Pale King was increasingly aware of their location. Seeing no other option, the trio challenged the red knight to battle.
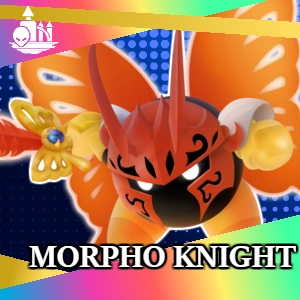
Battle: VS. Morpho Knight
Playable Characters: Zelda, Hornet, Ornstein
The trio escaped the burning forest alive, deciding to set up camp on a small snow hill in order to rest and recuperate. As the sky grew dark, Ornstein asked why exactly this Pale King wanted the two dead so much; Zelda explained that, though she had been raised in Paylrule society as a simple priestess, she had come across the discovery that the Pale King had conquered her true birth land- the kingdom of Hyrule- many years ago. She and Hornet had uncovered this mystery together for many years, determining that an ancient relic once held by the Hyrule royal family known as the Triforce could potentially spell the end for the Pale King, getting revenge for the massive cultural erasure he was responsible for. As night fell, Zelda kissed Hornet on the forehead, telling the two that the temple believed to hold the Triforce would be within their reach in the morning.
Stage 4[]
After much trekking, the trio of warriors made their way to the Tri Temple, where Zelda believed the Triforce would be held. Though the dark stony corridors were full of traps and monsters, Zelda's wisdom, Hornet's courage, and Ornstein's power would perhaps be enough to get them through this ordeal...
Playable Characters: Zelda, Hornet, Ornstein
The three warriors came across a shrine in the center of the temple which seemed to depict what Zelda was certain was the Triforce: a trio of triangles, they themselves forming another triangle. According to Zelda, all that the three needed to do was contact the statue in order to unleash the relic's power... Before they could do so, however, the statue was enveloped in pitch black vines as a small insect wandered into the room, radiating a menacing aura. With no other option, the three lunged at their opponent.

Battle: VS. The Vessel
Playable Characters: Zelda, Hornet, Ornstein
With the Vessel beaten, the vines around the statue crumbled away, and the three quickly pressed their hands to it. Their bodies were filled with power as strange triangular runes appeared on the backs of their hands, and light filled the room and bled out the doors of the temple. With this power, they would be able to stop Paylrule's conquests once and for all.
Stage 5[]
Arriving back in Paylrule where the entire adventure had begun, Zelda, Hornet, and Ornstein were now tasked with breaking through the Pale King's guard and assaulting his throne room in the White Palace directly. Though this would be a gargantuan feat, Zelda felt confident that they would be able to handle this; just in case, however, she gave Hornet another kiss and gave Ornstein a hug, simply showing affection if they never got to see each other again.
Playable Characters: Zelda, Hornet, Ornstein
Boss[]
Carving and slashing their way through the White Palace, the three warriors reached the throne room of the Pale King, a diminutive little figure who immediately began cowering behind his throne. Desperate for help, he called in for what he dubbed "Hornet's big brother"; a massive insect sealed in chains emerged from the floor, breaking from its seal and brandishing a massive blade. The light of the Triforce glowing within them, the three began their duel with the ultimate warrior- the Hollow Knight.
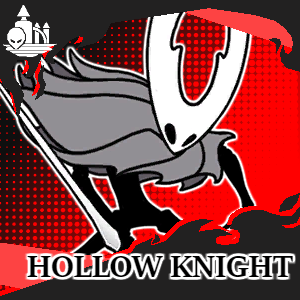
Battle: VS. Hollow Knight
Playable Characters: Zelda, Hornet, Ornstein
Though the battle was rough, the trio finally managed to defeat the insectoid swordsman, taking a minute to recuperate from the fight before apprehending the Pale King. To their surprise, however, the big king simply began letting out a girlish laugh; before they could react, a multitude of daggers were thrown into them, which seemed to be laced with a narcotic poison of some kind. Zelda's vision went blurry as she thought she saw the Pale King shapeshifting into someone else... and then everything went black.
Adventure: Moon[]
Stage 1[]
The first stage begins with a small robot awakening in a pod. Identifying herself as Aigis while running diagnostics, she opens the pod's door to find herself on the moon orbiting Earth. Seeing a large floating structure off in the distance, she is reminded of her mission: exterminate the Dimension Witch Lusamine. Though nervous about her goal, Aigis ventures onward.

Playable Characters: Aigis
Some moves are disabled temporarily for this stage's first playthrough.
Stage 2[]
Struggling to fight onward throughout the treacherous surface of the Moon, Aigis retreats to a small cave in order to rest. Noticing the cavern is lined with strange black crystals, Aigis attempts to grab one for analysis- upon contact, however, the crystals all began flying out of the wall and assembling together, forming into a massive black creature. Though the creature was imposing, Aigis felt no fear, simply outstretching her hand to touch its own. Somehow, she managed to establish a connection with the beast almost instantly- perhaps it shared her goals?
Playable Characters: Aigis
Stage 3[]
With Necrozma on her side, Aigis tore through the dangerous moon-dwelling creatures with ease, alongside Lusamine's defensive forces. Eventually, she came across the massive floating fortress, as well as the massive hole in the moon's surface that it was siphoning energy from. Detecting massive levels of power from the bottom of the hole, Aigis determined it would be a good idea to examine what exactly Lusamine was doing, and she jumped into the hole with Necrozma.
Playable Characters: Aigis
After some time, Aigis and Necrozma came across what she believed was the core of the Moon, only for it to instead be some strange glowing organism that had its energy siphoned out of it by the above floating fortress. Aigis used Necrozma to shatter some of the chains keeping the creature in place; scared and frightened, it attacked Aigis on sight.
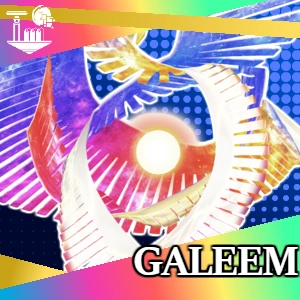
Battle: VS Galeem
Playable Characters: Aigis
The glowing creature seemed to calm down after its defeat, no longer moving as erratically and simply hovering next to Aigis as though analyzing her. Aigis simply reached her hand out affectionately as she had with Necrozma, indicating to the two that they needed to managed to infiltrate the fortress floating above them. With but a simple point, her newfound allies whisked her up the shaft.
Stage 4[]
Accompanied by both Necrozma and Galeem, Aigis decided the best place to infiltrate Lusamine's fortress was from immediately below- to get there, though, they'd need to fight their way through more of the witch's forces. Certain that they could do it, the little robot charged forward, allies in tow.
Playable Characters: Aigis, Galeem
Stage 5[]
Having finally broken their way into the great fortress of the Dimension Witch, Ultra Moonopolis, Aigis knew that her mission's completion was in sight. With nary a threat to stop her now with her powerful new allies, the robot rushed onward through the fortress's winding corridors, exterminating every threat she came across.
Playable Characters: Aigis, Galeem
After some time, Aigis came to her goal; the throne room of the Dimension Witch Lusamine herself. As she expected, the woman herself was there, accompanied by a strange jellyfish-like entity that seemed almost parasitically connected to her. Aigis announced her mission to exterminate the Witch before she destroyed the Moon- and countless lives in the process. Lusamine simply laughed, saying that the energy she was siphoning from Galeem- the God of Light that had been sealed within the Moon's core- was simply to provide a paradise for the beings she felt attached to. Seeing no other choice, Aigis challenged Lusamine to battle.
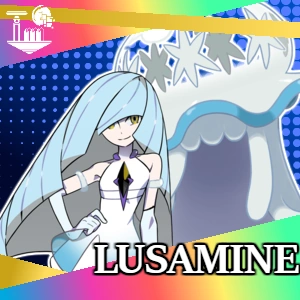
Battle: VS Lusamine
Playable Characters: Aigis, Galeem
Boss[]
With their united power, Aigis, Necrozma, and Galeem brought Lusamine to her absolute limit. Screaming as if she was reaching her breaking point, she began glowing with energy as she absorbed her Nihilego servant into her body, her form mutating and shifting until she became a massive eldritch horror, emitting a dark smoke from her body. Seeing what she believed to be the true form of the Dimension Witch, Aigis put up one final struggle to take down her adversary.
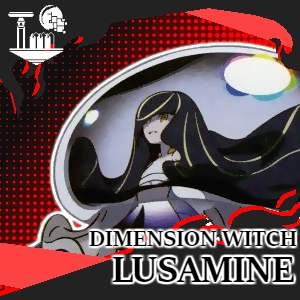
Battle: VS Dimension Witch Lusamine
Playable Characters: Aigis, Galeem
Defeated, Lusamine began drifting in and out of consciousness as Aigis reported to her CYoR-Life commanders that the task was complete, and that the Moon's integrity was saved. The Witch faded back to lucidity, speaking of missing her husband and children before she reverted back to her more humanoid form, the Nihilego seemingly gone. All seemed well as Aigis bid Galeem farewell, the angelic being drifting off into the sky...
Suddenly, on the horizon, she saw what looked like a floating castle descending on the planet. Were her receptors functioning correctly? What was this?
Adventure: Onikuda[]
Stage 1[]
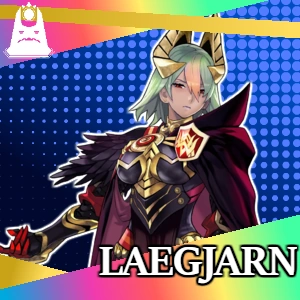
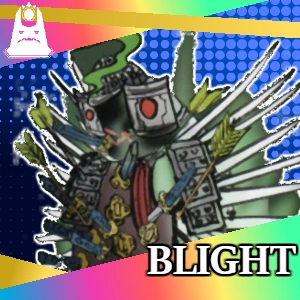
The first stage begins in what resembles a throne room coursing with lava, with a teenage girl in armor grabbing a golden sword near said throne. Introduced as Laegjarn, she begins speaking to the blade as a dark green mist begins to emerge from it, explaining that now is the ideal time to begin her plans to escape from the Island of Onikuda, something she dubs the "inescapable prison". The mist forms into a suit of armor introduced as Blight, who claims that he will follow Laegjarn to the ends of the earth until their escape, simply so he can have a place to finally rest. The two warriors begin their trek down the side of the building they are inside, with the two being followed by a strange flame-headed individual.
Playable Characters: Laegjarn, Blight
Stage 2[]
After some time, the duo of swordfighters made their way from the top of Onikuda's castle to the abandoned ghost town beneath it; once full of prisoners, they had since scurried to elsewhere in the island, as if something had scared them all off. Wary of threats, Laegjarn pressed onward.
Playable Characters: Laegjarn, Blight
Eventually, the pair of warriors heard what seemed like sinister laughing surrounding them, though they could not determine where it was coming from. Eventually, Blight pointed out a girl in purple robes, who was surrounded by a group of ghosts while giggling maniacally. Laegjarn attempted to pass by her peacefully, but the girl kept warping to and fro, blocking her path constantly. With no other choice, they decided to teach her a lesson.

Battle: VS Hex Maniac
Playable Characters: Laegjarn, Blight
The Hex Maniac didn't seemed to mind her loss, and instead simply thanked the two for playing with her before laughing off into the fog once more. Laegjarn simply concluded that life in a prison kingdom such as this had warped her mind.
Stage 3[]
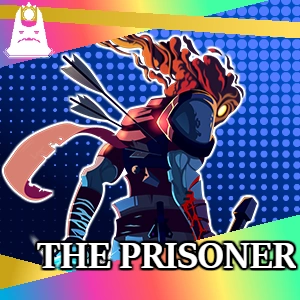
At long last, the duo had made their way to the docks, where they could escape from Onikuda and be free for what felt the first time in their lives. Just as Laegjarn was about to ring the bell to call in the ferry, however, a massive spear landed directly in front of her, followed by a woman in armor. Before she could ask who this intruder was, the newcomer simply told her that her father was looking for her, which struck a chord of fear down Laegjarn's fiery heart. Out of nowhere, another being in armor jumped into the fray as well, its flaming head showing a modicum of excitement followed by disappointment. Was it trying to go to the ferry too? Either way, Laegjarn demanded that Blight help her in fending off this spear-wielder.
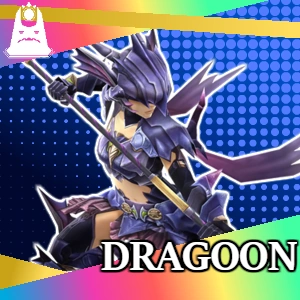
Battle: VS Dragoon
Playable Characters: Laegjarn, Blight, The Prisoner
Eventually, Laegjarn had to call off the fight- she knew deep down that Dragoon was right. Deciding that she needed to become a true warrior and face her father head-on, she informed Blight and the flame-headed Prisoner that they would need to return back to Onikuda's palace- her time as queen of the prison island was not yet over.
Playable Characters: Laegjarn, Blight, The Prisoner, Dragoon
Stage 4[]
The group arrived back at Onikuda's palace, where Dragoon informed Laegjarn that her father was waiting for her in the underground garden beneath the castle proper. Not willing to let his daughter off easily, he had also told the guards to attack her on sight, letting her prove her worth before she arrived. Not willing to back down, Laegjarn accepted.
Playable Characters: Laegjarn, Blight, The Prisoner, Dragoon
After some time, the quartet reached the underground garden, where the heavily armored king Surtr sat waiting. The man spoke to his daughter in a booming voice, congratulating her on proving herself a fine warrior and deciding to return home to fulfill her role as queen. The daughter refused, claiming that she could no longer bear her title if it meant being trapped forever in a prison she ruled. Disappointed, Surtr told Laegjarn to prove her worth in combat, letting her prove her determination to leave even more.
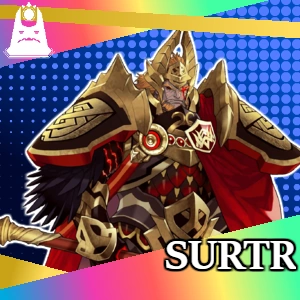
Battle: VS Surtr
Playable Characters: Laegjarn
As Surtr knelt down, gasping for air, he tried begging his daughter to reconsider her actions, claiming that "she" wouldn't let anybody escape the island alive. Curious as to what her father meant, Laegjarn's query was interrupted by a silver cylinder emerging from the ground akin to an elevator. Her interest piqued, the group decided to investigate as Surtr begged them not to.
Stage 5[]
The elevator led the group down to a strangely dark and metallic lab of some kind, completely unlike the rest of Onikuda. The Prisoner pointed out a multitude of beings, some human and some not, sealed up in various tubes with wires hooked up to their bodies- clearly something was incredibly amiss here. Laegjarn and Blight pressed on, with Dragoon and the Prisoner close behind them.
Playable Characters: Laegjarn, Blight, The Prisoner, Dragoon
Eventually, the group came to what seemed to be a giant robotic woman floating in the air, hooked up to more wires. The robot came to life, her eyes glowing malevolently as she sarcastically congratulated them on figuring out the truth of Onikuda island- it was a construct by her, the almighty Contessa, to attain ultimate power by absorbing the memories and genetic material of the prisoners that were brought to her. Though Surtr and his daughter were figurehead rulers, Contessa was truly in command of the island; this statement lead to the group raising their weapons, knowing that they had full reign to escape if Contessa was slain.
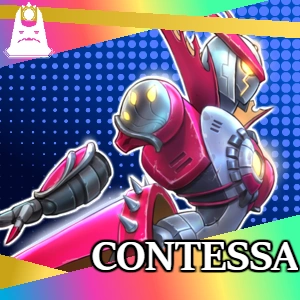
Battle: VS Contessa
Playable Characters: Laegjarn, Blight, The Prisoner, Dragoon
Boss[]
With Contessa defeated, nobody had any reason to remain in Onikuda anymore; the group quickly reconvened by the docks once more as the Prisoner quickly sat down in the ferry that they had called in. Laegjarn asked the Dragoon if she wanted to join them, but the mysterious warrior simply said that she felt like she deserved to stay behind. Laegjarn was confused but decided to honor her wishes; grabbing Blight's sword, she was about to join the Prisoner until a strange earthquake triggered, with a massive golden being emerging from the water. Contessa had returned in an even larger golden body, and the deranged robot claimed she would die before she let anybody escape her clutches. Unfortunately for her, she likely would.
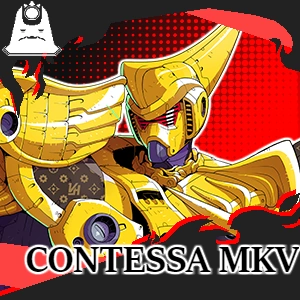
Battle: VS Contessa Mk.V
Playable Characters: Laegjarn, Blight, The Prisoner, Dragoon
Contessa crumbled into the water as her systems began failing. The stone shell surrounding Onikuda began crumbling as its creator perished... Nothing was stopping everyone from leaving. With Blight's blade at her side, Laegjarn faced the sunlight with a smile.
And then the black sphere appeared on the horizon.
Adventure: Shell[]
Stage 1[]
The camera pans over a burning, dystopian landscape with cannons and ammunition lying everywhere, eventually landing on a flag with Bowser's insignia as the turtle's menacing laugh is heard. Elsewhere, in a green grassy plain on the outskirts of this fiery region, a lone figure pulls a blade from the ground as they begin venturing forth, with an unknown goal. This figure's name? Bullet.

Playable Characters: Bullet
Stage 2[]
After clearing the plains, Bullet made his way to the sandy desert bordering the Shell Kingdom. The journey up until now had been a cakewalk, but now things would truly present a challenge as Bowser's forces began appearing en masse. If Bullet didn't stop them, though, who would?
Playable Characters: Bullet
After some time, Bullet came under fire from an unknown sniper off in the distance. The camera showcases this mysterious threat as The Hunter, who seems to be targeting Bullet simply for practice. Not willing to let someone as low-scale as this sniper take him down before he reached Bowser, Bullet rushed forward to attack.
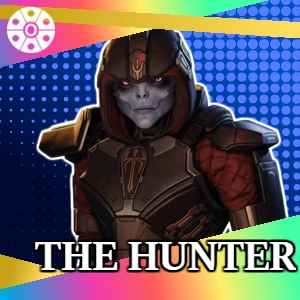
Battle: VS The Hunter
Playable Characters: Bullet
Stage 3[]
The desert became more and more arid as Bullet trekked onward, fending off more and more of Bowser's forces along the way. The little hero didn't look back as he headed into the dangerous sandstorms that lied ahead, knowing everything would be alright.
Playable Characters: Bullet
Stage 4[]
After spending so much time in the desert, Bullet was genuinely happy to see the craggy rocks and flowing lava streams that indicated his arrival to the Shell Kingdom proper. It was only a matter of time before he reached Bowser's palace. Before he could enter, however, he was called upon by a woman he saw sitting atop the stone wall- introducing herself as Aimee, she questioned the small bullet whether or not he had the determination to face off against Bowser, a being she had grappled with previously and failed miserably in doing so. Bullet simply claimed that he was a hero, and a hero needed to face any challenge presented to them without hesitation. Shrugging, Aimee simply encouraged Bullet to do well in his quest to stop Bowser.
Playable Characters: Bullet
Stage 5[]
At long last, Bullet had made his way to Bowser's castle, the stronghold of the evil he sought to defeat with every fiber of his being. Though the trek here had been dangerous, he had emerged victorious every step of the way, like a true hero would be. Now, it was time for his final challenge.
Playable Characters: Bullet
Bullet made his way to Bowser's throne room, where the massive gunmetal monster sat atop his massive flaming throne. The behemoth simply laughed, mocking the puny warrior for his size and daring him to even lay a scratch on his invulnerable metal body. Needless to say, Bullet gave no thought to these threats whatsoever- the final boss had arrived.

Battle: VS Bowser
Playable Characters: Bullet
Boss[]
Bowser had been defeated once and for all, and Bullet could finally rest easy knowing that he had stopped such a great and powerful evil being. With Bowser's defeat, his castle began crumbling to pieces... even though that shouldn't realistically be happening. Confused, Bullet looked around and noticed that the Koopa King's throne had begun shaking violently- in a burst of rubble, the throne leaped from the ground, bearing massive razor-sharp claws and a multitude of cannons. Bullet wasn't done yet.
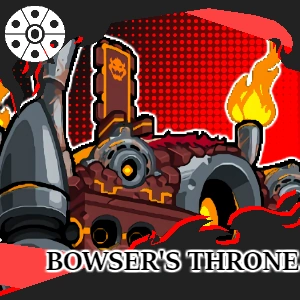
Battle: VS Bowser's Throne
Playable Characters: Bullet
Bullet evacuated the castle as fast as he could, only barely making it out before the entire palace crumbled into rubble. With his job complete at last, the little hero planted his blade in the ground and took a nap against it, considering this a job well done... Unbeknownst to him, his job would not be over quite yet.
Adventure: χ[]
Stage 1[]
Stage 1 begins with a shot over the entirety of the world as stormclouds begin brewing. Though many simply take it to be a standard cloudy day, Kat is shown in New Urbia City, looking up at the sky suspiciously. Suddenly, a TV begins flickering with static nearby, which is followed up by scenes of a similar action occurring in Electra City and on a crystal ball in the Undernull, which Pandora bangs angrily to try to fix the reception. The transmission is intercepted by a mysterious figure in a black coat, who lifts up his hood to reveal his face.
The mysterious figure introduces himself as Xemnas, the leader of Organization X. As a scene of a massive ivory fortress descending from the sky is shown, Xemnas greets the world as a researcher of the powers of the heart. In the kingdom of Feyte, the Royal Guard are shown gearing up for combat, and the Electra police force, Samus included, are shown gathering weaponry. Inside the sinister fortress, a small figure is shown praying before a massive crystal heart- his prayers are interrupted by the appearance of M. Bison, who walks in holding the Phantom Ruby. The white-robed shaman grabs the gem from Bison, inserting it into the massive heart as it begins glowing with an evil energy. As this happens, Xemnas continues his speech, explaining that all he desires is a chance to study the heart in an attempt to form one of his own- and begins thanking the people of the planet for donating their hearts to his experiment.
In a flash of light, the crystal heart in the center of the fortress releases a massive ripple that blasts in every direction, striking both the planet and the Moon. Those hit by the shockwave are struck with immense amounts of energy, collapsing and turning lifeless as small heart-like wisps emerge from their bodies- these wisps are then shown flying into the fortress proper, which charges even more energy. The sky begins to turn purple and the ground begins crumbling and shifting as the world's heart itself is impacted by this disastrous attack.
Kat awakes to find herself sitting in a strange charred landscape, everything deprived of life. She has no clue how she managed to survive the incident, but she soon encounters allies, who seem to have also survived for a multitude of reasons- being either robotic, spirits, or in one instance, simply blocking the wave with his shield. The group looks to the horizon, witnessing the twisted white fortress that holds Organization X descending on a nearby clearing. With no other choice, Kat heads off to storm the fortress and save the world in its darkest hour. Before she can get far, however, the others join with her, eager to help save the world.
Playable Characters: Kat, Papyrus, Brain Drain, Death, Aigis, Blight, Bullet (Pick 3)
Stage 2[]
After some time, the group of heroes makes it to the Organization's fortress, with no defenses on the outside keeping them out- perhaps they did not expect anybody to survive the initial shockwave? Inside, however, were boundless amounts of the white Kat had repeatedly fought in the past. Knowing they were now agents of Organization X, she didn't feel any qualms in pushing through them.
Playable Characters: Kat, Papyrus, Brain Drain, Death, Aigis, Blight, Bullet + Any characters discovered and saved in Stages 1 (Pick 3)
After some time, the group came across a small being in white robes, who seemed to be excitedly preparing for something and giggling with glee. Upon realizing there were people behind him, however, he jumped up in shock, threatening to end them where they stood.
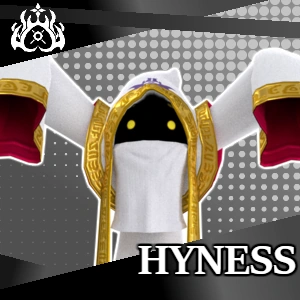
Battle: VS Hyness
This opponent is fought on max difficulty regardless of difficulty setting.
Playable Characters: Kat, Papyrus, Brain Drain, Death, Aigis, Blight, Bullet + Any characters discovered and saved in Stage 1 (Pick 3)
After his defeat, Hyness simply began retreating, stating that he had much bigger things to prepare for than simple consorting with feeble-minded fools- he needed to prepare for the release of the ultimate weapon, which he had been awaiting to do for as long as he could remember. Hyness vanished, and the group began pursuing him.
Stage 3[]
The inner sanctum of the Organization's fortress was even darker and more sinister than before, and some members of the group were beginning to lose hope that they'd ever see their friends again. Papyrus told the group to stay positive- even though they were in the scariest, most sinister-looking place that had probably ever existed, their friends would want them to keep pushing onward even if they were long gone. With the skeleton's motivating speech behind them, the group pushed onward with renewed vigor.
Playable Characters: Kat, Papyrus, Brain Drain, Death, Aigis, Blight, Bullet + Any characters discovered and saved in Stages 1/2 (Pick 3)
At long last, they had reached the fortress's core, where Hyness could be seen praying before a massive purple heart connected to the rest of the fortress by strange tubes and wires. Before they could intervene, they were attacked by two figures- M. Bison and the shapeshifting girl who has been manipulating so many events on her own, Toga. Needing to push through them to stop Hyness, the group united in combat for what they thought would be the final time.

Battle: VS M. Bison and Toga
This opponent is fought on max difficulty regardless of difficulty setting.
Playable Characters: Kat, Papyrus, Brain Drain, Death, Aigis, Blight, Bullet + Any characters discovered and saved in Stages 1/2 (Pick 3)
Bison and Toga were soundly defeated, but before they could react to anything, the heart began glowing with intense energy as Hyness's prayer finished. As dark energy pumped through the veins of the fortress, Xemnas appeared to congratulate Hyness on a job well done- before realizing that the intruders had made it to his inner sanctum. Deciding to let the Organization's newest recruit handle the rest, he waved his hand as a dark portal appeared in the floor, warping the team of heroes elsewhere.
Stage 4[]
Warped to a dark and horrifying dungeon, the group was soon confronted with a massive robotic foes the likes of which none of them had even encountered before. As the mech raised its sword with the intent to kill, the team raised their own weapons to retaliate.
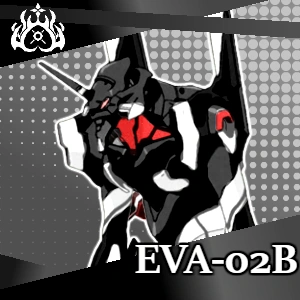
Battle: VS EVA-02B
The opponent is incredibly large, and cannot use special moves or any move related to the Gunship Fire mechanic.
Playable Characters: Kat, Papyrus, Brain Drain, Death, Aigis, Blight, Bullet + Any characters discovered and saved in Stages 1/2/3 (Pick 3)
As the robot began shorting out, Brain Drain decided to tear open the chest, revealing the pilot as none other than 2B, whose body had been wired into the massive mech and had her interior "black box" removed- perhaps all this was an attempt to analyze the hearts of robotic life as well. Unable to take 2B with them as she was, the group continued through the dungeon, aiming to reach Xemnas once more.
Playable Characters: Kat, Papyrus, Brain Drain, Death, Aigis, Blight, Bullet + Any characters discovered and saved in Stages 1/2/3 (Pick 3)
Terminus of Worlds: Finale[]
Reaching the peak of the fortress, the party was faced with a multitude of doorways, all of them being pumped full of the dark essence and being adorned with what looked like souls of powerful individuals that many of them had faced previously. Realizing that by defeating these souls again, they could potentially stop the Organization's machine from functioning, the group split up to face against these powerful foes once more.
Playable Characters: Kat, Papyrus, Brain Drain, Death, Aigis, Blight, Bullet + Any characters discovered and saved in Stages 1/2/3/4 (Pick 1)
Players are placed in a room with a multitude of doors representing various bosses- to the sides of the room are small platforms, which hold a total of 2 Drinks of the Gods and 4 Maxim Tomatoes. While players are only given one stock with a character of their choice, they are given the option to switch characters by pausing in the hub room. Switching will retain all damage taken. All following bosses must be beaten in any order.

Defeating certain bosses will unlock relevant characters and add them to the accessible roster for Adventure Mode:
- Defeating Great Ape Vegeta will unlock Vegeta.
- Defeating Perfect Infinite will unlock Infinite.
- Defeating Bad Batter will unlock The Batter.
- Defeating Dimension Witch Lusamine will unlock Lusamine.
- Defeating Contessa Mk.V will unlock Contessa.
Unlocking one of these characters also causes another Maxim Tomato to spawn in the central room, meaning one can either choose to focus these bosses or wait to fight them until they need the health. After all 10 bosses are defeated, the doorway to the final stage is opened.
Final Boss[]
After destroying all the boss doors, the group could hear warning sirens echoing throughout the fortress. Suddenly, it began shifting and changing beneath their feat, and many of them were thrown off of the open-roofed area they were standing in. As the fortress transformed into a massive mechanical dragon infinitely larger than any foe they had ever faced, they could hear the words of Xemnas echoing from inside, and the Organization's seemed incredibly distraught that they had ruined his one and only shot to craft a heart of his own. For that, they would perish underneath the might of his ultimate weapon, a fortress fueled by the power of Hyness's void god and the myriad hearts from across the world.
The mighty goliath bore down on them at lightning speed, but as everyone ran or braced for impact, a massive cleaving slash knocked the fortress away. It was 2B, still sealed in her mech but now having regained her memories, knowing what she had to do to help save everyone. Though the mech was skyscraper-sized, she was still puny compared to Xemnas's weapon- in spite of that, she told everyone else to go, knowing this was their one and only chance to destroy the fortress's core for good.
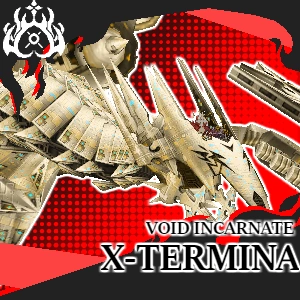
Battle: VS Void Incarnate, χ-Termina
Playable Characters: EVA-02B
As both 2B and the fortress fell, everyone took the opportunity to strike and ran inside the monster. This would either be their death- or the one final chance they had to save the world.
Playable Characters: Kat, Vegeta, Papyrus, Brain Drain, Infinite, Death, The Batter, Aigis, Lusamine, Blight, Contessa, Bullet + Any characters discovered and saved in Stages 1/2/3/4 (Pick 4)
After a long and dangerous trek through the bowels of the fortress, the group eventually came to the creature's heart- a massive mechanical sphere emanating dark energy. Though its surface seemed impenetrable, they needed to do the impossible and destroy it once and for all.

Battle: VS Void Core
After managing to breach the hull of the fortress's heart, everyone expected the task at hand to be over. To their surprise, a dark inky substance began leaking from the ruptured core, forming into a strange sphere that seemed to exude terrifying and malignant energies. The embodiment of all the negative emotions and feelings that Xemnas had created- the Void Heart- was now here to face them.

Battle: VS Void Heart
The entirety of Xemnas's fortress began to crumble without the Void Heart's presence to stabilize it; knowing they probably couldn't survive the collapse of such a massive location, many individuals began booking it. Before they could get any farther, however, Xemnas himself appeared, exuding tremendous amounts of energy and donning a white-and-black coat. Xemnas forbade anybody leave, stating that his chosen vengeance for the ruination of his one and only goal would be to see everyone else face the void with him. While most of the heroes began escaping, a lone group of three decided to stay behind and hold Xemnas off.
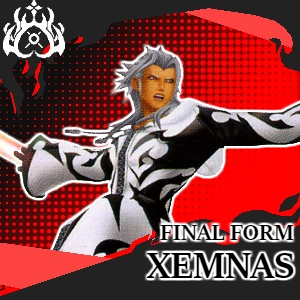
Battle: VS Final Form Xemnas
Playable Characters: Kat, Vegeta, Papyrus, Brain Drain, Infinite, Death, The Batter, Aigis, Lusamine, Blight, Contessa, Bullet + Any characters discovered and saved in Stages 1/2/3/4 (Pick 3)
Ending[]
As the fortress of χ-Termina collapsed, it began glowing with a bright blue light that blasted across the planet. The charred landscape restored itself, and all of the stolen hearts seemed to settle back to where they belonged. The heroes had saved the world from the dark fate that Xemnas had seemed to desire.
Everyone who had helped to defeat the madman's plans found themselves in a grassy field next to the wreckage of χ-Termina; there were no signs of Xemnas or any of his cronies anywhere, though 2B and her mech were found covered in moss and had to be excavated. With everyone safe and sound, the team decided to go their separate ways... but not before one good brawl to end things on a high note.
As the credits roll, a multitude of scenes are shown:
- Kat is pictured fighting in the SHIFT tournaments with Vegeta once more, with Mike and Molly cheering her on from the sidelines.
- The Royal Guard, alongside Mòrag and Asgore, are shown celebrating dining at a large fancy dinner table, eating, among other things, a rather ugly-looking butterscotch-cinnamon pie.
- 2B is shown having been removed from the chest of the EVA mech and repaired, gazing at the beast's empty chest cavity while holding hands with Samus.
- Magnolia, Yew, Menat, and Joseph are shown enjoying some of the Tostarenan's freezy treats together. Tethi seems to be trying to feed one to Urbosa, who ignores it.
- Pandora, Ash and Death are all crowded on a large pillow watching something in a crystal ball. The former two seem engrossed as Ash eats popcorn, while Death simply seems annoyed, glaring at the Batter standing nearby.
- Zelda, Hornet, and Ornstein both sit around a bonfire with a sword embedded in it, conversing happily together.
- Aigis is shown back on the moon, waving goodbye to Galeem and Necrozma as they fly away into the stars.
- Laegjarn is simply adrift on a small boat in the middle of a calm ocean, accompanied by Blight and The Prisoner. She seems relaxed.
- Bullet stares at a piece of cardboard he has hung up on the wall, which depicts him alongside Kat defeating Xemnas in a crudely-drawn crayon style.
- An unknown figure analyses the ruins of χ-Termina, noticing the liquid from Void Heart spilling onto the ground. He pulls out a small iPad-like device, scanning the substance, and scoops it up into a container before warping away in a dark portal.