Incarnations re:Umbral Endeavor is a umbrella platform-fighter in the Incarnations series of games. It was announced on April 13th 2022, and was released on December 20th 2023 for the Nintendo Switch, Playstation 4, Playstation 5, and (oddly) Nintendo 3DS. It's either a sequel, a spiritual successor, or a remaster of Incarnations: Umbral Endeavor; nobody actually knows which it is, but it's definitely one of the three.
Gameplay[]
re:Umbral Endeavor is a fairly standard platform-fighter, taking heavy cues from Super Smash Bros. Ultimate and Slap City in particular. The ultimate goal of the game is to deplete your opponent's stocks by knocking them off of the stage with attacks. The higher your opponent's damage percentage, the farther they'll fly when struck. Players will also have to contend with stage-specific hazards and randomly-appearing items while fighting each other.
Each character's moveset consists of quick but weak basic attacks, Strong attacks that send foes flying (though they can't be "charged up" like other platform-fighters' Strong attacks unless the user is Locked), Special Moves with unique properties, and throws that they can use after grabbing the enemy. Characters can also raise a bubble-like shield to protect themselves, though taking too much damage or leaving the shield up for too long will cause it to shrink and eventually shatter, stunning them.
re:Umbral Endeavor introduces a few additional mechanics to differentiate itself from its fellows, however...
Recovery mechanics[]
Recovering from offstage functions very differently in re:Umbral Endeavor than it does in some other platform fighters. There is no "freefall" state in the game; fighters can still use other abilities after using a Special Move for recovery. Instead, they simply lose the ability to use that Special Move again until they've landed back on the ground.
Smaaash!! Gauge[]
Each character has a super meter called a Smaaash!! Gauge, which fills up as they inflict or receive damage. When the Gauge is filled, pressing the Smaaash!! Attack button (bound to ZL or L2 by default) will drain the whole thing to unleash a super move. Most characters have multiple Smaaash!! Attacks, and can choose which one to unleash by holding a corresponding direction during the input.
Locked Movement[]
The right trigger button on the controller (ZR on Nintendo consoles, R2 on Sony consoles) are "Lock-On" buttons. When a Lock-On button is held, the controlled character becomes Locked, which prevents them from turning around automatically while moving and enables the ability to charge Strong attacks. Certain characters may also reap benefits unique to them from being Locked.
Some attacks require a "Back" input. Using them simply requires Locking your character, then pressing the direction opposite the one your character's facing in.
Comeback Mechanics[]
When a fighter is in certain sticky situation, they will gain certain benefits that enhance their performance and give them a bit of extra fighting chance. There are multiple comeback mechanics, and they can stack with one another.
- Rage, returning from the Super Smash Bros. series. When a fighter hits a certain health threshold, the damage and launching power of their attacks is increased, lasting until they're K.O.'d. The health threshold and the potency of the buff vary from fighter to fighter, and some fighters like Roxas even get unique benefits from Rage.
- Last Stand, which activates only in the tail end of a fight and grants increased Smaaash!! Gauge generation until the battle's end. During stock battles, the effect activates for a fighter when they're on their final stock (or at the same time as Rage, if it's a one-stock fight). During timed battles, the effect activates for every fighter during the final 60 seconds, and scales based on placement; first place gets barely any increase, while last place reaps massive benefits. Last Stand can be disabled in the battle settings, or applied to only specific fighters as a handicap.
Item Moves[]
Sometimes, equipping or wielding an item will replace certain moves in a character's arsenal, such as Overture replacing its user's Strong attacks. These replaced moves will only be used while the fighter wielding them isn't Locked; using the same input while Locked will unleash their normal version of the attack.
When wielding multiple items that replace the same move, there are a few rules dictating which item's move you'll have access to.
- More specific move inputs will always out-prioritize less specific move inputs.
- Moves from held items, like Battering and Shooting items, will always out-prioritize moves with identical inputs from Equipment or Transformation items.
- When multiple Equipment or Transformation items in use have moves with identical inputs, the most recently equipped item or most recently applied transformation will always out-prioritize the rest.
Game Mutations[]
When playing in Versus Mode, you can choose from a number of Mutations to alter the flow and pace of combat. All the game's Mutations are listed below:
- Turbo: Not to be confused with the mode of the same name in Smash Bros. mods! re:Umbral Endeavor's Turbo mode is based on the Devil May Cry games; when active, it makes the game 20% faster. This doesn't affect the timer on Time battles, but everything else is sped up.
- Freestyle: This is the Turbo Mode you see in Smash Bros. mods. When playing with Freestyle on, characters can freely cancel attacks into each other at the push of a button, which can turn a single hit into a devastating and flashy combo attack.
- Stage Mutations: All Mutations in this category let the stage transform into other stages mid-fight. They are all mutually exclusive; you can only have one active at a time!
- Stage Morph: Functions identically to its appearance in Super Smash Bros. Ultimate. Players pick two stages before the match. Then, at certain time intervals, the stage will switch between the two selected forms.
- Wallbreak: Players pick anywhere between two and five stages before the match. Whenever a player gets K.O.'d off the side of the screen, they're sent flying across the world and land on one of the other stages chosen.
- Fighter Mutations: Like Stage Shift, all of these Mutations let players switch fighters during the battle, and you can only pick one.
- Fighter Morph: Like Stage Morph, but with fighters! Players pick two characters, and randomly switch between the two during combat. Morphs happen individually, and before a morph happens, the character's form will begin flashing to warn the player.
(Fun fact! When you switch to another character mid-Install, the Install's duration will reset when you switch back!) - Double Trouble: Players pick two characters. They only control the first one, and the second one automatically follows them and uses normals of the same input when possible.
- Fighter Morph: Like Stage Morph, but with fighters! Players pick two characters, and randomly switch between the two during combat. Morphs happen individually, and before a morph happens, the character's form will begin flashing to warn the player.
- Gameplay Mutations: Mutations in this category add new mechanics, or alter old ones. You can equip as many of these as you like.
- Heat: When a fighter's Smaaash!! Gauge reaches maximum, they enter a powered-up Heat state that slowly drains their Gauge. In this state, they deal increased damage, and can use Smaaash!! Attacks at a 50% discount.
- Melee: Enables wavedashing. Jump and then quickly airdodge into the ground to slide a short distance. You can still use grounded attacks while sliding.
- 20XX: Replaces fighters' shield with a reflector that deals damage, is frame-one invincible, and can be jump-cancelled.
- Aetheric: Replaces fighters' shield with a parry. Successfully parrying a foe will briefly leave them in a unique vulnerable state.
- Novelty Mutations: These mutations are just giant memes that nobody will ever actually use outside of maybe one YouTube video. You can activate as many of these as your twisted little mind desires.
- One For All: All fighters share a single health value. When one of them takes damage, everyone takes damage. And whenever anyone gets K.O.'d, it resets to 0%. It's always anyone's game with this ultra-chaotic Mutation on!
- Mega Microgame$: Fans of the WarioWare stage in Smash Bros. will be all too familiar with this particular Mutation. At random points in the battle, a short "minigame" will be randomly declared. Players who succeed at the minigame will be rewarded with power-ups.
- Incarnations Party: During the battle, Toadette from the Mario series will appear at a random point on the stage. By speaking with her by using the Taunt button while not Locked, you can pay her coins (collected from hitting enemies) to gain a stock in Stock battles or a point in Time battles. After someone buys from her, Toadette will move to a different point on the stage.
- Dark Spirits: At any time, a random person on the internet can choose to "invade" a match with this Mutation, joining the battle on a random player's team. (If you aren't connected to the internet, or if nobody has invaded in a while, then the game will just randomly spawn a computer-controlled ally.) These invaders take more damage and knockback than normal, and only have a single stock. Additionally, they aren't actually counted as a player; if their teammate runs out of stocks, the match will end like normal even if the invader is still alive.
Fighters[]
Base Roster[]
or
The EX Special version of Blitz Shot launches a significant number of electricity spheres which all fly in a line, effectively making it an unorthodox multi-hit projectile that can beat out some counter and reflect options.
or
The EX Special version of Armor Pierce Kick has Akatsuki unleash an even faster volley of even more kicks, dealing huge damage and covering an impressive horizontal distance.
or
The EX Special version of Human Cannon is a multi-hit that rises even higher into the air and deals even more damage. Its strongest use is in recovery; chaining regular Armor Pierce Kick into Human Cannon into EX Human Cannon can cover tremendous distances.
Though it has to compete with Akatsuki's EX Specials when it comes to meter usage, its power as his only "true" Smaaash!! Attack can't be denied.

Whenever Arakune releases an attack button, a bug will be summoned to attack each Cursed enemy, with the type of bug that appears determined by the button used.
or
Back + Special
If an enemy touches its body before it teleports, it will transform into a large spider and capture them in a web cocoon, before teleporting like normal. (The spider can be blocked.)


midair only
This Smaaash!! Attack doesn't cost the entire gauge to activate; instead, it will only consume about 20% on the move's start, and continued use will drain it away at a steady pace.
Tapping the Special button when inputting the move causes the yo-yo to deal damage on the way out. Holding it causes the yo-yo to deal damage on the way back.
Movement
Yo-Yo active or
Bridget can also use Rolling Movement immediately after hitting a fully-charged Strong attack, in which case she'll instead charge towards the enemy that she struck with the attack. If she hit multiple foes, the control stick can be used to pick one; otherwise, she'll target the closest one.
midair only
My Heart
When using Brake, Bridget screeches to a halt, shooting forwards sparks. The faster and safer of the two options.
When using Shoot, Bridget leaps forwards and spins her yo-yos around her, dealing more damage but leaving her more vulnerable afterwards if the move is blocked. She retains the horizontal momentum from Kick Start My Heart while in midair, even after she finishes using Shoot.
Yo-Yo active or
If used after hitting with a fully-charged Dust Attack, Roger will instead charge towards the struck enemy. Like Rolling Movement, he'll target the closest enemy, but can be forced to target another one by tilting the control stick towards them.

If you find your brain melting from playing as them, though, you can take a break at any time by using their Fusion Smaaash!! Attack, which transforms them into the most cathartically gorilla-like character you could possibly get.
Howard's Strong Attacks cause their Legion to perform special moves. (Some of these moves cause the Legion to change shape, but it's purely an aesthetic difference.) When Howard uses certain attacks of their own, the Legatus on their arm will flash blue. When this happens, he can perform a Sync Attack, cancelling from the attack directly into one of the Legion's Strong Attacks.
Special
Special (hold)
For the Install's duration, Howard's moveset is entirely overhauled, transforming him from a precise puppetmaster to a brutal rushdown fighter. They don't have any Specials, and instead their arsenal consists of claw-based normals. Hitting an enemy with these attacks will restore some health to Howard, even if the attack is blocked.

A strong tool, both for neutral and for covering an opponent's wakeup options and forcing them to play Candevil's game. However, Candevil can only have one bon bon on screen at a time, and cannot fire off a second one until the first one is gone.
When holding the Special button at the end of the move, Candevil will unleash a shockwave of toxic liquid, knocking enemies away and leaving its claws coated in poison. For a short time afterwards, all of its attacks will poison struck fighters, dealing damage over time.
When used with Deja Vu, the curse's duration will be extended.
After hitting a fighter with Record, Candevil will become powered up. In this state, it can use its Smaaash!! attack button and directional inputs to perform Special Moves from the struck fighter's movelist. (For example, after using Record on Akatsuki, Candevil could use Blitz Shot using Forward + Smaaash!!.) It will also gain any passive abilities that fighter has. Candevil will retain access to its stolen moves and abilities until it loses its current stock.
Candevil's copied moves can be enhanced by Deja Vu or Toxic Stab.

Ginyu takes this ability with him, no matter whose body he's in; an enemy in his body won't be able to do this.
Special
or
Forward + Smaaash!!
Ginyu takes this ability with him, no matter whose body he's in; an enemy in his body won't be able to do this.
Holding the Smaaash!! Attack button when inputting the move causes Ginyu to stab one claw into his gut before firing the attack off, dealing a chunk of damage to himself. It can be risky to do so in case the Body Change misses.
While in a foreign body, Ginyu can still use all his abilities bound to the Smaaash!! Attack button. He can access the enemy's Smaaash!! Attacks while Locked, but the rate at which he gains meter is reduced while in a foreign body.
Ginyu takes this ability with him, no matter whose body he's in; an enemy in his body won't be able to do this.


Unlike duo characters in other platform-fighters, the parade bird is totally invincible! But nearly all of their attacks can also hit the player's bird, dealing low damage and hitstun with fixed knockback. As a result, mismanaging your attacks while playing this character can be severely punishing, but the friendly fire can also be used strategically to gain an extra boost in a chosen direction.
The Conductor and DJ Grooves will swap positions whenever they lose a stock, but the differences between the birds are entirely cosmetic. Additionally, if they win, whichever of the two dealt the most damage will be spotlighted on the victory screen.
Sawblades thrown by the parade bird can't hurt the lead bird.
Owl Express:
The parade bird's stabbing won't make the lead bird flinch, but it can still rack up a lot of damage on the lead bird if you aren't careful!
Owl Express:
Extra knives summoned by the parade bird will fly forwards when the lead bird charges, and can't hurt the lead bird.
Owl Express:
C.A.W. Agents can only "grab" grounded opponents, and can be defeated in a single hit.

When powered up, Gadouken becomes Haten Gadoken; this version travels much farther and hits three times. It's a decent option for locking shielding enemies in place while you try to go for a grab.
When powered up, Koryuken becomes Go Koryuken; using it will cause Dan to perform two multi-hitting uppercuts twice in a row. This has the side-effect of doubling the move's recovery potential.
No Kamae
No Kata
The other two movesets utilize his Angel Weapons and Demon Weapons, respectively; he'll use one of these two when using Special Moves while Locked, and he can swap between the two by using Realignment.

Fire Breath
This move can barely be called a recovery option; the height gained from it is barely anything, and if Dark Bowser fails to grab a ledge, the diving portion will cause him to lose more height than he gained.
As a spiked ball, Dark Bowser can roll around at unusually high speeds, damaging enemies just by plowing through them. He won't flinch when hit by weaker projectiles, and gains a single hit of super armor against physical attacks when he reaches max speed.
For several seconds, captured players must survive against Dark Star Core, which can be commanded to perform various high-power attacks with controller inputs from Dark Bowser. Enemies K.O.'d while inside of Dark Bowser will respawn inside Dark Bowser. At the end of the move's duration, Dark Bowser will cough out all the captured players.

(after an attack)
When Demonee-Ho has Smirk, Demon Co-Op is faster, deals more damage, and actually deals knockback as well. Use it to reset the enemy after a high-knockback attack to continue a combo, or to finish them off when they're just barely on the screen's edge.
When Demonee-Ho has Smirk, the shotgun burst has greatly increased horizontal reach.
In midair, he breathes directly downwards to propel himself through the air, and the breath can be redirected mid-flight using the control stick.
When Demonee-Ho has Smirk, he fires three shots in quick succession.

When ditching the body, Dimple pops out of the top of it, gaining a surprising amount of height. Ditching a possessed body can make for a strong emergency recovery option when See Ya! doesn't cut it.
Power Steal can be used to repossess bodies that Dimple's gained Total Control over.
Teleporting to a body Dimple's gained Total Control over will instantly repossess it. Additionally, Dimple's disappearance is completely silent if he warps out of a smokescreen, and his reappearance is silent when warping into one.
Holding the Smaaash!! button will cause Dimple to charge up energy. Once he's charged enough, he'll instead use...

or
Special
Holding the Attack or Special button when inputting Punch will cause Coyle to charge up power in the chosen ARM. ARMS have two tiers of charge; the first grants Punch special properties based on the ARM used, while the second causes a duplicate ARM to sprout from Coyle's shoulder. A fully-charged Punch can cover a terrifying amount of space.
- Lokjaw: A face-shaped ARM created using a prototype of Hedlok. Lokjaw attacks are slower than other ARMS attacks, but pack even more punch.
When charged, instead of throwing a punch, Coyle only thrusts the ARM only a short distance forwards before firing a slow-moving crimson projectile from the jaws. The projectile explodes on contact with surfaces or enemies. At point-blank, the initial ARM thrust can deal damage. - Parabola: A conical ARM that opens up like an umbrella. While it's normally Coyle's fastest ARM, ressing the Special button a second time during attacks with the Parabola will cause it to open in a burst of sparks, dealing extra damage and slowing down the attack. An open Parabola can block oncoming attacks.
When charged, the Parabola becomes electrified, letting it stun enemies briefly on hit. - Brrchuk: An ARM holding a set of nunchuks. When punching with the Brrchuk equipped, Coyle spins the Brrchuk, hitting multiple times.
Charging up the Brrchuk imbues it with icy power. Hitting enough times in a row with a charged Brrchuk will freeze the victim solid.
- Lokjaw: During Rush, Lokjaw functions similarly to when it's charged - first a short thrust forwards that can hit the enemy at point-blank, then the ARM spits out an explosive projectile. The projectiles are even bigger and stronger in Rush, though.
- Parabola: Parabola's attacks move at lightning speed during rush, and the ARM will open up automatically when it hits the enemy to deal extra damage.
- Brrchuk: Punches from the Brrchuk fire off multi-hit energy waves during Rush. These waves are faster than Lokjaw's explosive shots, though they don't have the same explosive damagr. A final punch from the Brrchuk doesn't have the same launching power as the other two, but freezes the enemy.
When Elliana isn't Overheated, her Smaaash!! Gauge will gradually drain while she's on the ground, and can also be reduced with Strong Attacks, throws, or Abandon Ship. She will also rapidly lose meter while frozen.
Effects that would improve meter gain for other characters will instead reduce it for Elliana, and effects that disable her Smaaash!! Gauge will cause her to become Overheated for their duration.
in midair
or
Up + Attack
Elliana's throws fire the enemy out of a cannon built into her mech. All of her throws reduce her Smaaash!! Gauge when used.
When Elliana is Overheated, her Strong Attacks instead unleash bursts of flame, hitting once for heavy damage.
Regardless of whether Elliana is or isn't Overheated, her Strong Attacks reduce her Smaaash!! Gauge on use, making them useful for managing Overheat. The attacks can also be used in midair, and will affect Elliana's air momentum.
Using Rocket Fist will generate some Smaaash!! Gauge.
Holding the Special button when inputting the move will charge the missile up, increasing its size and damage but significantly reducing its ability to change directions.
Using Guided Missile will generate some Smaaash!! Gauge.
The mech she ejected out of will be left behind, and gradually build up heat until it self-destructs. The higher the Smaaash!! Gauge was when Elliana ejected, the less time it'll take for the mech to self-destruct. It will always self-destruct as soon as possible if used while Overheated.
When Elliana hits a mine on the floor with her down tilt, she can knock it back into the air, then juggle it with her other attacks.
Using Mine Lay will generate some Smaaash!! Gauge.

Knife
The A.T. Field grants one hit of super armor for each segment of the Sync Rate Gauge that was filled when the move was used. The remaining hits are indicated by the number of octagons that make up the Field, and the Field fades after all of the super armor has been spent.
Wild Rampage has some versatility in recovery; if EVA-01 collides with a wall mid-leap, it'll grab onto the side and fling itself upwards.
EVA-01 can also cancel out of the stance by jumping or shielding; though it won't regain the meter spent to enter the stance in the first place, it will still leave with more Sync Rate than before.

This transformation occurs regardless of whether Last Stand is enabled or disabled in the match's settings.
Holding the attack button delays the move's startup briefly, but launches the Fighter higher and turns the burst of magic into an explosion that can damage enemies; this version of the move is called Rocket Jump.
- Homing Boost: Projectiles home in slightly on enemies. In the case of the Silver Bow, its existing homing ability is enhanced.
- Slip Shot: Projectiles can pass through barriers and stage geometry.
- Burn Attack: Projectiles set struck enemies on fire, dealing a little bit of extra damage over time.
- Paralyze Attack: Projectiles briefly paralyze struck enemies, freezing them in place briefly before they're sent flying.
- Eggplant/Tempura Attack: The next projectile attack will turn whoever it hits into an eggplant or a shrimp tempura (which one is determined by the Fighter's costume), preventing them from attacking for 2-3 seconds. Don't miss, or the effect will be wasted.
- Power Thief: Non-projectile attacks generate more Smaaash!! Gauge.
- Transparency: The Fighter becomes invisible.
- Item Vacuum: Nearby items are pulled towards the Fighter.

(during a grab)

In midair, Majima can move in any direction during the spin... though once he commits to moving in a direction, it can take him a little while to turn.
or
Roll + Special
of Batting
midair only
midair only
Chronos can be used for as long as the user has Smaaash!! Gauge remaining, and it can be used even when the Gauge isn't full... but the Gauge will rapidly deplete while in slowed time, and running out will cause the user to enter a cooldown period where they won't be able to use it for a while.

Jack can cancel out of other attacks by firing off an Instant Ability. This tech is referred to by some Jack players as the "Cultural Reset."
- Neutral - Wild Fang: Jack swings his sword upwards, then downwards while advancing a short distance forwards.
- Foward - Hound's Claw: Jack performs a spinning slash, sweeping his sword in front of him to launch enemies away.
- Up - Retribution: Jack slashes upwards with his sword, knocking close-range enemies into the air.
- Fira: Jack hurls out a fireball as a fast-moving explosive projectile.
- Watera: A geyser bursts upwards from the ground in front of Jack, launching the enemies above it high into the air.
- Thundara: Jack calls down a thunderbolt that strikes in front of him, spiking airborne opponents.
- Aerora: Jack conjures a tornado that slowly moves forwards, dealing rapid damage to enemies.

Pressing the Smaaash!! button again immediately after a Blade Mode attack will return Sam to his Iaido Stance while maintaining slowed time, letting him chain together his Strong Attacks.

When JoJo is already trailing thread behind him, using Thread Trail a second time will cause him to charge the thread with Hamon, damaging any enemies that touch it. He'll then yank all the thread back to him.
When JoJo is charging his thread with Hamon, allies can grab onto the thread by airdodging into it. Any allies holding the thread will be pulled towards JoJo when he retrieves his thread, letting him aid them in their recovery. (Locking prevents you from grabbing onto the thread, letting you dodge normally.)
If the clackers hit stage geometry before they begin returning to JoJo, they'll latch on for a short time. They will continue to spin while attached to the stage, dealing damage to any enemies that get too close. Eventually, they'll break off and begin returning to JoJo.
When used in midair, JoJo will fire the crossbow downwards by default, and the kickback will launch him in the direction opposite of whichever one he aimed in.
The crossbow can only hold one shot at a time, and it takes a lot of effort to load. After using Giant Crossbow, JoJo will have to reload it by using the move a second time before he can fire it again.
The instant an attack he used in slowed time deals damage to the opponent, his Smaaash!! Gauge will be completely drained, and time will resume.
Feelings
Clever...!

Use Cerberus for a quick burst of recovery in a serious pinch, use it when you're done using Commands and don't want your opponent to benefit from them... or just use it at the very end of a Command's lifespan for some free healing.

in midair
in midair
in midair
Once Fourze activates a States, this attack becomes unavailable.
Once Fourze activates a States, this attack becomes unavailable.
Holding the attack button causes him to charge up power in the rocket, increasing how far he can fly. The charge can be stored by interrupting it with another action. At max charge, the move becomes Rider Rocket Drill Kick, in which Fourze uses the drill on his left leg to hit multiple times as he flies, dealing greatly increased damage and dragging the enemy along.
- Elekstates: Fourze gains a sword, which he uses for certain normals that replace his old ones. Nearly all of these normals have a sweetspot at the sword's tip which can briefly paralyze enemies, freezing them in midair before sending them flying. His Strong attacks in particularly have greatly enhanced range, utilizing pulses of electricity.
- Firestates: Fourze gains a gun, which he uses for certain normals that replace his old ones. Nearly all of these normals are either fire- or ice-elemental projectiles, and holding the attack button when using them causes Fourze to fire a continuous stream of heat or cold, which loses power and reach if sustained for too long. Additionally, Fourze takes slightly less damage and gains more Smaaash!! Gauge when hit by energy attacks.
- Cosmicstates: Fourze gains a club, which he uses for certain normals that replace his old ones. All his moves that do utilize other Astroswitches are powered up slightly; some become slightly faster or stronger, while others gain unexpected new properties like the ability to freeze.
Hitting an enemy with the front of Massigler will cause them to be pinned to the front and carried along for the ride until its engine sputters out. They can mash out early, like a regular grab.

Uniquely, Crystal Heart doesn't just work on the ground; try using it while clinging to a wall!
midair only

When used during Resonance, Kotone will automatically angle her naginata upwards or downwards to hit the enemy if needed.
When used during Resonance, All-Out Attack deals massive damage, but it will also immediately end Resonance when used.
When used during Resonance, holding the Special button will cause the targeted position to automatically home in on nearby enemies and track their position.
During Resonance, Orpheus advances forwards much further, and will stop directly in front of an enemy. Additionally, its attack has greatly increased hitstop, giving Kotone more time to hit the enemy again or grab them out of the air.
(during a grab)
Dekaja can be used during Cadenza, but doing so costs half the Smaaash!! Gauge. If this would take the timer below zero, Dekaja can still be used, but Cadenza will immediately end.
Leo can't jump while in Brynhildr, but moving left and right is replaced by a short-range dodge that can pass through foes' bodies like a roll, and his shield is replaced by a counter-attack move. He also gains access to many new attacks in Brynhildr, though he loses access to all of his Specials.
Exiting the stance is as easy as releasing the Lock button.
Charging Gravierte Würde for even longer lets Leo fire a version that's bigger, hits four times, and travels even further... but is also even slower to start.
Kaltes Gestöber
Kaltes Gestöber
If Leo has enough charge to use Gravierte Würde, holding up and releasing the Special button will instead unleash a version of Eisensturm that has him rising even higher into the air and grants him damage invulnerability at the start, making it a powerful option as both a reversal and a recovery move.
des Dirigenten
Dunkel

Pressing the Strong attack button multiple times will fan the gun's hammer and fire multiple back-to-back shots; Ocelot can only fire six shots in a row like this before he'll automatically holster his weapon and return to an idle stance.
When the button is released, Ocelot will quickly draw one revolver and fire it at the reticle's position, or at the targeted enemy. If there are any obstructions between him and the target, Ocelot will automatically attempt to fire the bullet in such a way that it ricochets off of the stage and into his target; but the more the bullet ricochets, the longer it'll take to hit its target, and the easier it'll be to predict and dodge.
midair only
Showdown


midair only

While in an item's form, Morgan functions exactly like that item in every aspect except for destructibility (attacks will just damage them normally). They can even be picked up and thrown off the stage... The utility of this ability is only truly apparent in a Team Battle.

When using Razor Uppercut in midair, each uppercut will lift Mr. Sandman a short distance into the air. One uppercut on its own doesn't give much height, so you'll usually have to use a full chain of three to get back on-stage.
Express
with Rage
while charging attack
When used, he'll briefly jeer forwards in an attempt to spook the opponent. If an attack would hit him during the taunt, he'll automatically duck out of the way and counter with a hook punch, launching the enemy horizontally. If he doesn't get hit, he'll go right back into charging his attack.

The yellow Discard Effect launches White into the air, which can be used as an additional jump in emergencies. The Soul Card is linked to the largest chunk of White's moveset, but it also tends to recharge faster.
The purple Discard Effect launches a sticky grenade in a chosen direction. Once the bomb lands on a surface, it will automatically detonate after a little under a second, dealing damage to surrounding enemies and propelling White directly upwards.
The blue Discard Effect causes White to instantaneously dash directly forwards, damaging enemies in his path. White is invulnerable during part of the dash. Hitting an airborne enemy with the attack will meteor smash them.
The cyan Discard Effect causes White to hurl a grappling hook forwards. If it hits a wall or enemy, he'll quickly pull himself to the hook's end.
The red Discard Effect causes White to charge upwards while bathed in an aura of flames, or in another direction by inputting one on the control stick during the attack's brief start-up. Some flames linger on White's body for a very short time afterwards, knocking struck enemies away from him.
The green Discard Effect causes White to dive downwards, meteor-smashing any foes in his path and emitting a shockwave on impact with the ground. If he's already on the ground, he'll emit the shockwave immediately. White has some invincibility frames during this move, particularly the landing.

midair only
If Okuyasu manages to hit an airborne enemy with a sweetspot at the very start of the move, the enemy will get caught under The Hand's foot and dragged downwards. If they land back on the stage, The Hand will unleash its stomping attack like normal. If they don't land back on the stage, and instead dive off the edge, the enemy will be K.O.'d before Okuyasu.
Holding the Special button charges up The Hand's power, causing the flowerpot to appear farther away from Okuyasu. Okuyasu can still fight normally while charging, but will be locked out of moves that utilize The Hand until he unleashes the attack.
you off!
Holding the Smaaash!! attack button charges up The Hand's power, eventually causing the attack to become unblockable. Okuyasu can still fight normally while charging, but will be locked out of moves that utilize The Hand until he unleashes the attack.
The Hand will still be utilized for some of Okuyasu's attacks if he's Locked, at the cost of interrupting the volley; otherwise, Okuyasu will attack on his own, and moves like his forward tilt and down aerial won't have the special properties that they derive from The Hand.

The default throw, Bounce Bomb, simply has him rolling a bomb a short distance across the ground. It's straightforward but highly multipurpose, and can be used in midair to chuck bombs diagonally downwards.

Raidou starts each round with his Smaaash!! Gauge completely full, letting him summon a demon right away. He tends to gain meter a bit faster than other fighters, too, especially when he doesn't have a demon on the field.
While acting aggressively, the demon will chase down the enemy and use normal attacks of its own volition.
While acting defensively, the demon will follow Raidou, and won't attack unless it's commanded to use a Skill.
Special + Smaaash!!
Special + Smaaash!!
Special + Smaaash!!
Special + Smaaash!!

When Rawk Hawk collides with an enemy, he'll bounce off of them in the held direction, dealing some damage in the process. If he collides with a wall instead, though, he'll automatically cling to it.
or
Hawklike Reflexes
Falling Hawk can also be used while clinging to a surface. When doing so, the control stick can be used to choose the direction of the dive.
(during an attack)
...Wait, hold on a sec, isn't the Crystal Star on his champ's belt a fake?! What gives?!

Certain effects increase the damage required to be in Rage. If this would raise the threshold above Roxas's current health, he will exit Rage.
Pressing an attack button will cause Roxas to unleash a dashing slash, moving forwards instantly. The movement can be used to easily evade projectile attacks.
Pressing the Shield button will cause Roxas to perform Reversal, darting a short distance forwards and dodging attacks in the process. If he's close to an enemy, he'll skirt around them and end up behind them, facing their back.
with Rage

while Locked
Fairfrozen can only be used for about a second at a time. When that time is up, or when the Smaaash!! button is released, Selicy will return to her original position. It doesn't cost any Smaaash!! Gauge to use.
Holding the Special button will continue to add more mass to the Frostbolt, increasing its size and damage at the cost of flight speed. After reaching a certain size threshold, it applies two Frost instead of just one.
If Selicy moves with Fairfrozen, her ice blades will continue stabbing from the spot where the move was used, letting her charge up another move.
In Berserk Form, Serph's stats are those of his human form. This means he's faster than Varna, but also easier to launch.

Colliding with a platform during a Lagann Impact while the Special button is being held will cause Simon to begin digging through it. When re-emerging from the ground, he'll burst out drill-first, damaging anyone in his path, and potentially burrowing into another surface if he collides with one. Drilling through platforms like this will consume Spiral Power, with the rate increasing the longer Simon is underground. If Simon runs out of Spiral Power before he can re-emerge, he'll automatically be forced out from the point where he entered.
Artillery
you think we are?!

(after an attack)
(after an attack)

MY BANK ACCOUNT CAN ONLY HOLDS [1997] KROMER. GOOD YEAR!!!!!!
KROMER

[Hold Forward Before Specil] LAUNCHES A BOUNCING BABY Pipis, HARD TO PREDICT.
[Tap Forward And Specil At The Same Time] LAUNCHES A [BIG SHOT] FOR [BIG!!! DAMAGE!!!!!].
I LOVE [Free* Health Insurance]

When a fighter other than Tahu picks up Golden Armor, all they can do is toss it around, dealing no damage and minimal knockback on hit. When Tahu picks up a piece of Golden Armor, he will automatically equip it to his body. (If he already has that Golden Armor, it will transform into a piece he doesn't have yet.) For each piece of Golden Armor that Tahu has equipped, his attack and launch power increase slightly. Some pieces also give him new abilities or upgrade specific moves. He can have up to six pieces - three Plates on his chest and upper arms, a Sword Hilt, a Shield, and a Mask. Try to collect them all!
When Tahu is K.O.'d, three pieces of his Golden Armor will burst off of his body as he respawns, and he'll have to reclaim them before they disappear or get thrown off-stage by an enemy.
When Tahu has his Golden Mask, the barrier persists for slightly longer, and the counterattack becomes capable of reflecting projectiles.
When Tahu has his Golden Mask, he launches himself slightly higher when using the Kanohi Miru.
Inferno Tide is the only attack that lets Tahu retain the ability to block projectiles with the Golden Shield.

Pressing the Smaaash!! Attack button with Boost already active will deactivate it.
Holding the Smaaash!! Attack button will apply even more Boost, up to a maximum of three levels, to enhance Special Moves even further in exchange for spending even more segments. (Attacks used with a higher Boost level will still only consume one segment, and won't gain any additional benefits.)
- Healing Grape: A healing item that is immediately used up to restore ~15% damage.
- Wind Soulstone: A throwable item that explodes on contact with an enemy or surface, releasing a column of wind similar to Tradewinds that launches enemies upwards.
- Ice Soulstone: A throwable item that explodes on contact with an enemy or surface, freezing any struck enemies.
- Befuddling Dust: A throwable item that explodes on contact with an enemy or surface, releasing a lingering cloud that reverses the controls of any enemies inside.
- Blinding Dust: A throwable item that explodes on contact with an enemy or surface, releasing a lingering cloud that extends the invulnerability period of any dodges Tressa or her allies perform inside it.
- Light Nut: A transforming item that is immediately used up to temporarily increase Tressa's movement speed.
- Donate: An option that only becomes available in team battles. Instead of buying an item, Tressa gifts the spent meter to a teammate of her choosing.

Mexican Typhoon is an exceptionally unique move; in addition to having one of re:Umbral Endeavor's only 360° inputs, it can be inputted with Attack, Strong, or Special. Additionally, the move comes out when the attack button is released. As a result, T. Hawk can chain into it incredibly easily from other attacks simply by holding the attack's button, doing the circle input, then releasing.
When using Condor Spire or any of its variants, T. Hawk can cancel into any of the other variants, but only once.

Vegeta retains the effects of a Zenkai Boost even after he loses Rage. He can receive multiple Zenkai Boosts in a single stock, but for each Zenkai Boost that Vegeta already has, the increase provided by a new Zenkai Boost will be lessened.
Saiyans that can't move
of one to ten...
The move has a sweetspot at the very start of the move. The sweetspot doesn't do anything on its own, but any enemy struck by it will be spiked by the bicycle kick follow-up.
Maximum Charge can be stocked multiple times, and Final Flash, Galick Gun, and Super Saiyan will consume all stocked Maximum Charges at once.
Final Flash will consume all available Maximum Charges to increase its size and hit count. At three or more Maximum Charges, it gains the unique ability to temporarily destroy any parts of the stage it touches, creating gaping holes. (The holes will automatically refill after only a couple seconds.)
Galick Gun will consume all available Maximum Charges to increase its size and hit count.
For the Install's duration, the damage of Vegeta's normals and Special Moves are increased, and the meter cost to use Final Flash or Galick Gun is reduced to about 20% of the Smaaash!! Gauge. And while he loses the ability to use Maximum Charge while transformed, his existing Maximum Charges cannot be depleted for the Install's duration, letting him spam powered-up beam attacks until he reverts to normal.

Taunt + Smaaash!!
Taunt + Smaaash!!
This particular Smaaash!! attack consumes all of Vergil's remaining charges... but the more charges it consumes, the more damage it deals, and the more health Vergil recovers.
Special + Smaaash!!
Special + Smaaash!!
midair only
V1 only has four coins, and "regenerates" missing coins over time. Its current coin count, as well as the remaining recharge time on any missing coins, is visible as part of its HUD.
midair only
The Electric Railcannon fires a piercing beam of lightning that travels instantaneously. Its most terrifying property, though, is its ability to Ricoshot.

The Thorns linger for a short time, letting Xemnas pursue the enemy after throwing them.
Using Ethereal Bolt while Locked will cause the blades to be suspended in midair. When the Lock is released, they will fly directly towards the closest enemy.
Xemnas will conjure Twilight Thorns along the kick's path. The thorns will always extend across the full length, even if Xemnas hits an enemy and ends his kick early.


Spark Sword
The attack deals slightly increased damage and knockback when it hits an enemy facing towards Zeke, making it something of a knowledge check, but the increase isn't significant enough to really worry about it.
Thunder Beam
Thunder
Fury Slash
When used in midair, ULFS will cause Zeke to rapidly fall downwards in a diving chop, meteor-smashing any enemies in his path, and will unleash a damaging electric pulse when he lands on the ground. The farther he falls, the bigger the pulse becomes; at max charge, the move becomes known as Ultimate Lightning Fury Slash Max!!!
Shining Justice
Instead, Shining Justice has its own unique rules. Zeke can only use it once per stock, and its duration is tied to how much damage he's taken; at 0%, you'll only get about three seconds out of it. Finally, when the Install fades, Zeke will be forced into a lengthy crumple animation as soon as he's on the ground and isn't attacking, leaving him wide open.
Thunderslash

In addition, the Smaaash!! Attack she unleashes when the button is released is based on the direction held on release, rather than the direction held on press.
Locking while the Pod is firing will cause it to continue firing in the chosen direction, letting 2B move freely and use other attacks as if she weren't Locked.
Assault
Using the attack while airborne, or jumping during the attack, will cause 2B to gain height with each spin rather than moving forwards.
This attack doesn't cost any Smaaash!! Gauge to use... instead, it can only be used once per stock, and deals a whopping 200% damage to 2B when she explodes. And it destroys her skirt, too, of course.
DLC Fighters[]

Amaterasu's barrier will only appear when she spawns; when it's shattered, it cannot reappear unless she loses a stock and respawns. It's not a lifeline, but it can give her stronger footing when spawning or respawning.
or
Back + Strong
Power Slash can be cancelled into after hitting an enemy with any normal attack or Special Move, including Power Slash itself. When doing so, Amaterasu will automatically "slash" at the struck enemy's current position, regardless of how far she's knocked them away. This version of the move slashes inwards, knocking the enemy back towards Amaterasu. Using Power Slash this way has longer recovery than the normal version of the move, limiting its usefulness in combos sometimes, but pairing it with Veil of Mist can make for terrifying combos.
When using Cold Star in midair, Amaterasu will fire magatamas at a slight downward angle. The move also stalls her air momentum while in use.
When using Hardhead Tackle on the ground, continuing to hold forward at the move's end will cause Amaterasu to continue moving forwards and transition directly into her dash.
When a projectile hits the Reflector, it'll be... well, reflected. When a melee attack hits the Reflector, it will be nullified; and when doing so on the ground, Amaterasu will automatically counter by performing an izuna drop - hurling the enemy into the air, then leaping up to grab onto them and dive head-first into the ground, dealing heavy damage. If they somehow wind up diving off-stage, the enemy will be K.O.'d before Amaterasu.
If items are enabled, one will spawn when the enemy collides with the ground, seemingly broken off of the enemy by the force of the fall.
Amaterasu will also automatically use the move when the end of the ink path hits an enemy; when doing so, she'll lash the vine onto them and pull herself over, then hop off their head for extra height.
Greensprout Bloom can be used in midair, and though it will quickly fall offstage when doing so, Amaterasu can still walljump off the tree to gain extra height, giving the move some unorthodox useability in recovery.
or
Roll + Grab
When Godrick uses this move while he has Rage, he breathes flames from the dragon head into the whirlwind surrounding the body, making the attack fire-elemental.
Tapping up on the control stick during Striding Flame will cause Godrick to sweep his arm upwards, knocking nearby enemies into the air with his arm or juggling them briefly with the flames. Using this follow-up will end Striding Flame, even if the Special Button is still held.
or
Roll + Special
When used out of a Side Roll, Storm Assault doesn't leap as high and isn't as "floaty," making it much harder to react to. Godrick can't be grabbed during the move's start-up.
When Godrick uses this move while he has Rage, he breathes flames from the dragon head into the whirlwind surrounding the body, making the attack fire-elemental.
or
Smaaash!! (during a grab)
Godrick can also use Bear Witness! while he has an enemy grabbed, which turns the move into a powerful upwards throw. The animation remains unchanged.

A quick tap just causes a flag to pop out, which can trip opponents on hit.
Releasing the Special button around when Peacock finishes drawing the revolver causes a giant blade to pop out, hitting enemies a fair distance in front of Peacock and knocking them away from her.
Finally, keeping the Special button held even when Peacock is firing will cause her to shoot an actual projectile, which travels extremely fast. Keep the Special button held, or start mashing it, to fire up to three shots in quick succession, dealing increased damage but increasing the move's recovery time.
or
Forward + Special
or
Back + Special
The Down variant of the move causes Peacock to simply toss out a George that waddles slowly and adorably forwards. When one hits a ledge, it'll just turn around and start walking the other way, making it particularly good on small platforms. Peacock can also toss the George into empty air to attack foes below her, giving it some niche uses in edgeguarding.
The Forward variant has Peacock pointing forward and summoning a George in a li'l go-kart from a portable hole behind her. This George drives forwards quickly but recklessly, and will fall off any ledges it hits and explode on contact with a wall.
The Back bariant has Peacock raising two flags and summoning a George in a tiny plane above her head, who divebombs downwards in an arc and explodes on contact with any stage geometry.
Impending Doom
When the button is released, the something will abruptly fall down in the spot where it was summoned, revealing it to be a random object. The more the move was charged, the bigger and more damaging the object will be. Even when only partially charged, the move deals good shield damage and knockback.
Using Shadow of Impending Doom doesn't consume any Smaaash!! Gauge, but since it requires holding the Smaaash!! attack button to use, it's a bit difficult to use it and a metered option at the same time.
Lenny has a certain amount of "health" that rapidly decreases over time, but can also be reduced by attacks. Once his health hits zero, he explodes, dealing damage as massive as he is to any enemies that are too close.
This move does have an additional property, but only when the "Fighter Morph" Mutation is active; hitting an enemy with this move will immediately cause them to switch fighters.

Shulk will only receive visions for Smaaash!! Attacks that can hit fighters. He won't receive a vision for a non-damaging move like an Install, for a stance-based move with multiple possible follow-up attacks (e.g. Jetstream Sam's Blade Mode), or for attacks that would be effectively unavoidable even with a Vision (e.g. Goddess of Explosions's Goddess Buster).
Shadow Eye can counter physical attacks and projectiles alike, but the window in which it can counter attacks will decrease temporarily if it's used too often. More pressingly, Shadow Eye cannot counter Smaaash!! Attacks. (Not that Shulk needs any help in dealing with those.)
Monado Shield's most obvious drawback is that it only protects against metered options; it won't do anything to protect Shulk from normals, Special Moves, or a regular grab.
You can use Monado Shield as a hard-read, but its most reliable application is as a reaction to a Vision when you don't think you can use a roll or Monado Speed to rush in and punish.
Monado Buster is Shulk's most straightforward Smaaash!! Attack, but given the enormous utility of his defensive metered options, it's usually reserved for matchups where Monado Shield has nothing to block and Monado Purge has nothing to dispel.
Use Monado Speed to dodge through an enemy's attack and get into close-quarters for a punish. The move can be especially effective in response to a Vision.

Tulin's Arrows are ammunition for Great Eagle Bow, and one Arrow will be spent whenever he uses the attack. He can carry up to five at a time.
Tulin's Material is used to augment Great Eagle Bow, altering the move's properties. He can only carry one Material at a time, but many Materials can be used multiple times before they're exhausted.
Tulin's double jumps are "refreshed" after using Tulin's Gust.
Warrior
ground only
ground only
Using Updraft gives Tulin a lot of height, but he can't perform any other actions until he's near the height of his ascent. If you need to get airborne and act quickly, it's usually better to just jump off the ground.
midair only
Holding the Special button causes Tulin to slowly draw the bow back, charging the attack. When fully charged, the Great Eagle Bow fires three arrows in a close spread instead of just one. (The shot will still only consume one of Tulin's Arrows.)
If Tulin has a Material, the Material will automatically be attached to any arrows he fires from the Great Eagle Bow, affecting the arrows' properties in the following ways:
- Fire Fruit: Increases arrows' damage and makes them fire-elemental.
- Ice Fruit: Causes arrows to freeze enemies solid on an unblocked hit.
- Bomb Fruit: Causes arrows to explode on contact with surfaces or fighters. Be careful - the explosions can hurt Tulin, too!
- Puffshroom: Causes arrows to create a temporary smokescreen at the spot where they land.
- Octo Balloon: Arrows will attach an Octo Balloon to whatever fighter or item they hit, reducing their weight. Octo Balloons attached to anything too small or light will instead lift them up into the air.
- Keese Eyeball: Gives arrows homing properties.
- Zonai Rocket: Increases arrows' speed and damage.
- Zonai Beam Emitter: Transforms arrows into thin laser beams.
midair only
midair only
Pressing the Special button will cause Tulin to fire the tornado off in any direction as a powerful, fast-moving windbox; the projectile doesn't deal any damage, but is perfect for snuffing out enemy recoveries. Using it will end Tulin's Gust early.
Stages[]


the Heart


Items[]


Assist Summon transformations can be controlled using button inputs, but not all of them have a full range of attacks.

Then, the Recycler Charge explodes, converting all nullified projectiles and items into raw materials that it launches in every direction as makeshift shrapnel. (In other words, the more items and projectiles it deletes, the more damage it'll deal.) The larger raw materials can themselves be picked up and thrown.


the Blaze


Evil!!
or
Forward + Strong

while Locked

Kalina Ann
As soon as the second Kalina Ann is picked up, their remaining shots are pooled together. If the user throws one Kalina Ann away, the shots are divvied up evenly between the two, with the one the user is still holding taking the remainder.
With Double Kalina Ann, the fighter can alternate between the two rocket launchers, increasing the fire rate.
With Double Kalina Ann, Hysteric will launch even more missiles.
Fighters without Smaaash!! Gauges, or whose gauges aren't full, can still use Mega Cascade; but when they do, the attack's wind-up is significantly increased, the damage is decreased, and it instantly consumes all the Kalina Anns' remaining shots.


midair only


while Locked

coated
Additionally, the user's high-power attacks gain the ability to briefly petrify struck foes and turn them into golden statues, which makes them easier combo by increasing their weight and immobilizing them for slightly longer. Hitting a petrified opponent with another attack will break them open, letting them move again.

Power
The Giant's Mask is a little temperamental about when and where it can be used. In more cramped battlefields, it might not do anything until you can get to a place where you have enough room to fully transform... Even when you aren't the size of a Giant, though, you'll always have the weight of one while you're wearing the mask.


Assist Summons[]
A successor to the Assist Trophies from the Super Smash Bros. franchise, Assist Summons can be spawned by using certain items, and will attack on behalf of their summoner for a short time.


Body


When attacked, Duskull won't flinch, but it will be pushed a short distance away by the attack.

- To move quickly across long distances, it can enter Drive Mode by lowering its body to the ground, letting it use the wheels on its legs to accelerate forwards.
- To move over water, it can enter Water Mode by deploying a propeller from its torso, letting it hover over the water's surface.
- To move in midair, it can enter Flight Mode by deploying a propeller from its torso and propelling itself upwards with its Jet Booster, letting it fly slowly through the air.


I'm really good
at is...


When the weight becomes too much to handle, the stage will turn completely gray, and its floor will drop into the void. It only takes about a second for the floor to rise back up to its original place, but it can still shake up players' footing in a battle.
After the stage has collapsed, Planet Meteo despawns.

Kick

Dummy
Attacking Skelly fills up the Smaaash!! Gauge must faster than normal.

Stimulation


Whispy Woods doesn't receive knockback from attacks. Instead, fighters have to deal a set amount of damage to him before he can be K.O.'d.
At low health, Whispy will instead blow out tornadoes, which can home in on enemies.

Trivia[]
Page Creation[]
- re:Umbral Endeavor was born from a desire to work on a more freeform umbrella, with as many openings for additional moves as possible, and without quite as many mechanical restrictions as prior projects.
- The mindset when creating characters' movesets is to stop working on them when they "feel" complete enough, rather than worrying about coming up with moves for specific inputs. This is why many characters are "missing" Special Moves on certain inputs, such as Akatsuki not having a Down Special or Plague Knight not having a Forward Special; it simply didn't feel like they needed those moves to be interesting.
- The Locking function was specifically devised to expand input options in an interesting way. Its usage as part of character-specific gimmicks, such as Dante's alternate weapons or Leo Whitefang's Brynhildr Stance, was an unexpected but hugely welcome bonus.
- The function was partially inspired by Persona 4 Arena, in which players can use a button input to change directions in midair, as well as how Lock-On works in the Devil May Cry series.
- Locking's Devil May Cry roots, and how the series's lock-on mechanic worked with Devil Breakers specifically, went on to inspire Item Moves.
- The function was partially inspired by Persona 4 Arena, in which players can use a button input to change directions in midair, as well as how Lock-On works in the Devil May Cry series.
- Smaaash!! Attacks were born out of a desire to give fighters a varying number of weaker supers, allowing for more versatility and more interesting mechanical choices than what Final Smashes offered in Super Smash Bros.
- While we're on the subject of Smaaash!! Attacks. They were primarily named after the critical-hit effect from the Mother franchise. It also serves as a nod to Super Smash Bros. itself, of course.
Fighters[]
- When choosing which veteran fighters to work on first, priority went to the ones that were deemed "could be done better," particularly in the deliberately-open format of re:Umbral Endeavor, as well as the ones who got new moves and mechanics to work with from video games that had released sometime after their movesets in Umbral Endeavor had been written up.
- When Dr. Coyle's moveset in Umbral Endeavor was first developed, there were no playable ARMS characters in Super Smash Bros. With the release of Min Min as a DLC character, however, there's now some precedent for how an ARMS character would play in a platform fighter. So, when bringing her into re:Umbral Endeavor, her moveset was redesigned to more closely resemble Min Min's.
- Dan Hibiki's Saikyo-Ryu passive is based on an actual obscure mechanic of his in Street Fighter Alpha 3, in which after using 23 attacks, every 15th attack onwards would be "supercharged" if he used Koryuken. It was also based on the "Red Gadoken" from Street Fighter V.
- Demonee-Ho's Demon Co-Op move is based on the mechanic of the same name from Shin Megami Tensei: Strange Journey. It also takes cues from how Desperate Hit works in Shin Megami Tensei Liberation Dx2, in which it's a Passive ability that causes Demonee-Ho to automatically use a weak Almighty attack at the end of its turn.
- Before Leo Whitefang was chosen as Incarnations's first ever Guilty Gear representative, moveset concepts for I-No and Faust were briefly toyed with. Faust was ditched due to difficulties with making his Scarecrow attack work in a satisfying way in a platform-fighter. I-No, meanwhile, simply seemed less interesting than what Leo brought to the table.
- The second Guilty Gear rep was originally planned to be a character from Guilty Gear Xrd (likely either Elphelt Valentine or Kum Haehyun), but the release of Bridget as the first Season 2 DLC in Guilty Gear Strive dramatically changed plans.
- Meta Knight is one of the creator's favorite characters to include in umbrella games because "he has so many different versions of so many different attacks across so many different appearances, that it's really easy to come up with a completely different move arrangement after only two new games."
- The exercise of making a platform-fighter moveset for him that was largely distinct from his Super Smash Bros. moveset was particularly fun.
- While most of T. Hawk's moves are based on his most recent appearance (Street Fighter IV), the mechanics of Mexican Typhoon (particularly it using a negative-edge input) are instead directly based on how the move functioned in Street Fighter 2.
- Zeke von Genbu's use of Electric Circus in his Strong Attacks was directly based on an identical gameplay mechanic in SHIFT, and was used with permission and blessing from that page's creator.
Credits[]
Fighters[]
Base Roster[]
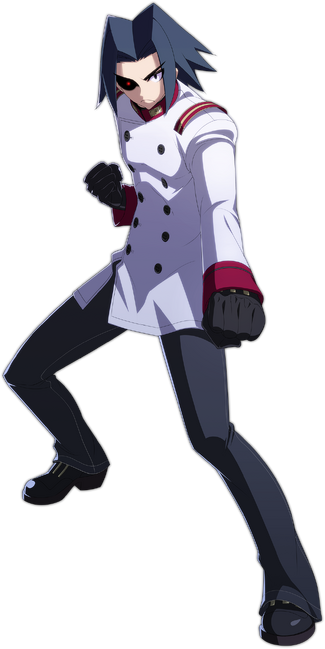
- Akatsuki is from the Akatsuki Blitzkampf series.
- Arakune is from the BlazBlue series. Its moveset in this game is based on its appearance in BlazBlue: Central Fiction.
- Big Band is from Skullgirls 2nd Encore.
- Blaze the Cat is from the Sonic the Hedgehog series. Her moveset in this game is based on her appearance in Sonic Rush.
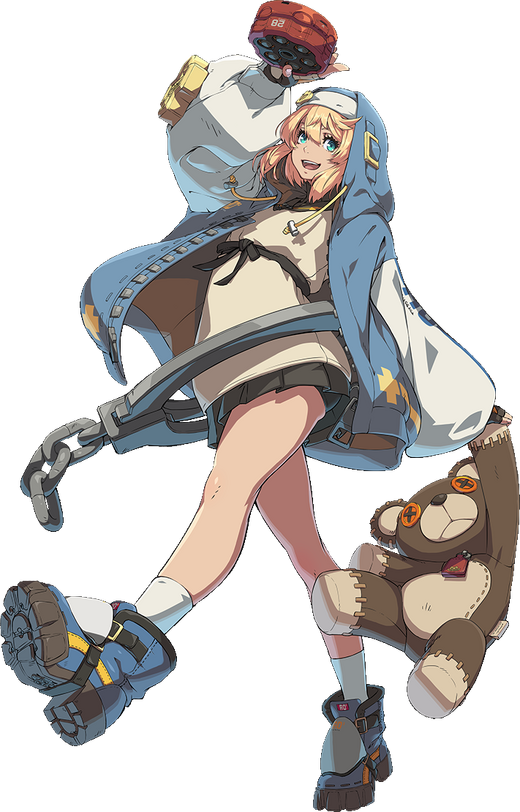
- Bridget is from the Guilty Gear series. Her moveset in this game is based on her appearance in Guilty Gear Strive.
- Cadet Howard is from Astral Chain.
- Candevil is from Cassette Beasts.
- Captain Ginyu is from the Dragon Ball series. His moveset in this game is based on his appearance in Dragon Ball FighterZ.
- The Conductor & DJ Grooves are from A Hat In Time.
- Dan Hibiki is from the Street Fighter series. His moveset in this game is based on his appearance in Street Fighter V.
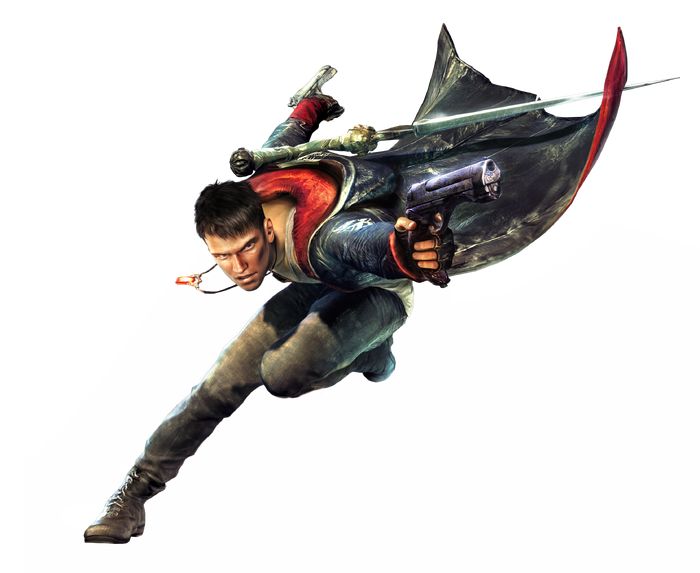
- Dante is from DmC: Devil May Cry.
- Dark Bowser is from Mario & Luigi: Bowser's Inside Story.
- Demonee-Ho is from the Shin Megami Tensei series.
- Dimple is from Mob Psycho 100.
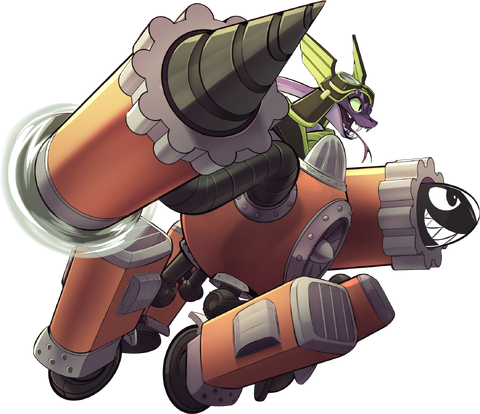
- Dr. Coyle is from ARMS.
- Elliana is from the Rivals of Aether series.
- EVA-01 is from the Neon Genesis Evangelion series.
- The artwork used for EVA-01 was created by an unknown artist, and was used in this project without permission.
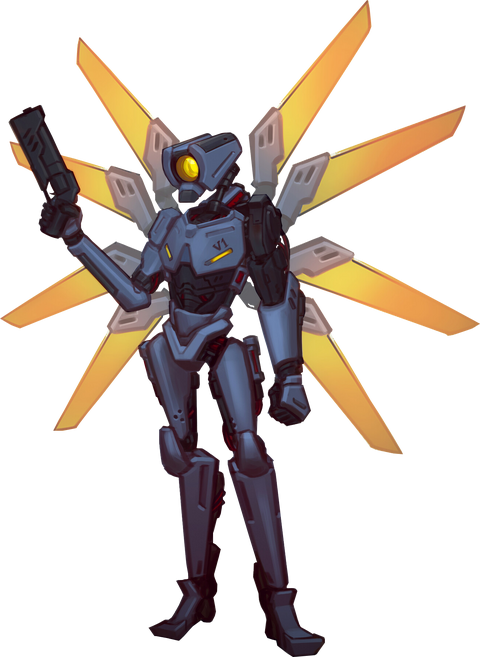
- The Fighter is from Kid Icarus: Uprising.
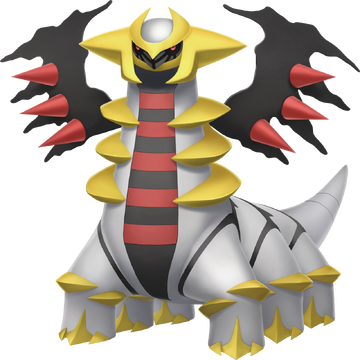
- Giratina is from the Pokémon series.
- Goddess of Explosions is from multiple Ludocity games. Her moveset in this game is based on her appearance in Slap City.
- Goro Majima is from the Yakuza series. His moveset in this game is based on his appearance in Yakuza 0.
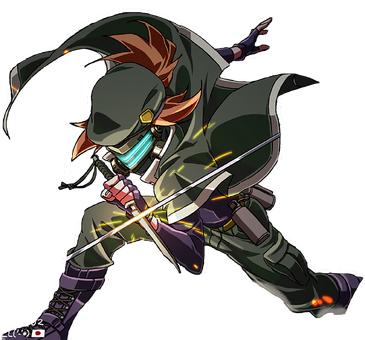
- Headhunter is from Katana ZERO.
- The artwork used for Headhunter was created by @DEL_steamer, and was used in this project without permission.
- Jack is from Stranger of Paradise: Final Fantasy Origin.
- Jetstream Sam is from Metal Gear Rising: Revengeance.
- JoJo is from JoJo's Bizarre Adventure. His moveset in this game is based on his appearance in JoJo's Bizarre Adventure: Battle Tendency.
- Kaiser Oblivion is from Bravely Second: End Layer.
- Kamen Rider Fourze is from Kamen Rider Fourze.
- The Knight is from Hollow Knight.
- Kotone Shiomi is from the Persona series. Her moveset in this game is based on her appearance in Persona Q2: New Cinema Labyrinth.
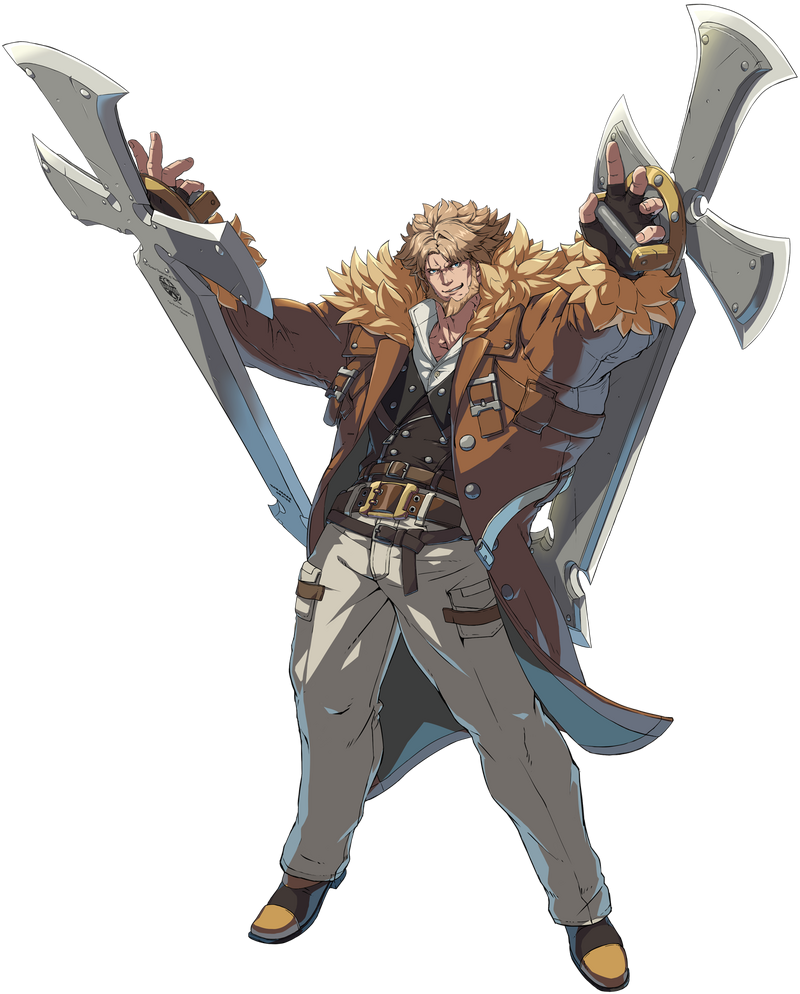
- Leo Whitefang is from the Guilty Gear series. His moveset in this game is based on his appearance in Guilty Gear Strive.
- Major Ocelot is from the Metal Gear series. His moveset in this game is based on his appearance in Metal Gear Solid 3: Snake Eater.
- Meta Knight is from the Kirby series.
- Miriam is from Bloodstained: Ritual of the Night.
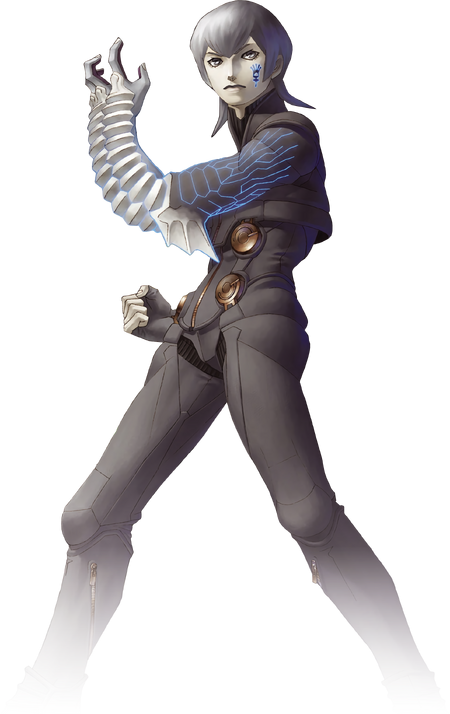
- Morgan Yu is from Prey (2017).
- Mr. Sandman is from the Punch-Out!! series. His moveset in this game is based on his appearance in Punch-Out!! (2009).
- Neon White is from Neon White.
- Okuyasu Nijimura is from JoJo's Bizarre Adventure: Diamond is Unbreakable.
- Plague Knight is from the Shovel Knight series. His moveset in this game is based on his appearance in Shovel Knight: Plague of Shadows.
- Raidou Kuzunoha XIV is from the Devil Summoner: Raidou Kuzunoha series.
- Rawk Hawk is from Paper Mario: The Thousand-Year Door.
- Roxas is from the Kingdom Hearts series.
- Selicy is from the One Step From Eden series.
- Serph is from the Shin Megami Tensei: Digital Devil Saga series.
- Simon is from Tengen Toppa Gurren Lagann.
- Simon Yorke is from Etrian Odyssey Untold: The Millennium Girl.
- Spamton is from DELTARUNE.
- The artwork used for Spamton was created by CordRocker, and was used in this project without permission.
- Tahu is from the Bionicle series.
- Tressa Colzione is from the Octopath Traveler series.
- The artwork used for Tressa was created by @konpeitopanic, and was used in this project without permission.
- T. Hawk is from the Street Fighter series.
- Vegeta is from the Dragon Ball series. His moveset in this game is based on his appearances in Dragon Ball FighterZ.
- Vergil is from the Devil May Cry series. His moveset in this game is based on his appearance in Devil May Cry 5.
- V1 is from ULTRAKILL.
- Xemnas is from the Kingdom Hearts series.
- Yangus is from Dragon Quest VIII: Journey of the Cursed King.
- Zeke von Genbu is from Xenoblade Chronicles 2.
- 2B is from NieR: Automata.
DLC Fighters[]
- Amaterasu is from Okami.
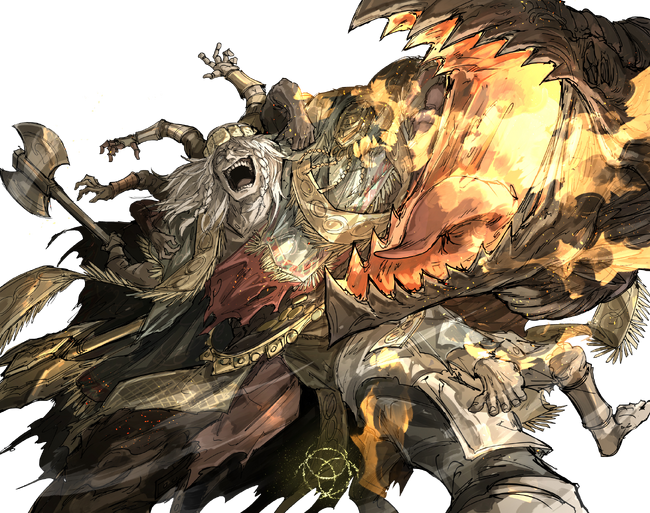
- Godrick the Grafted is from Elden Ring.
- The artwork used for Godrick the Grafted was created by @kankan33333, and was used in this project without permission.
- Peacock is from Skullgirls 2nd Encore.
- Shulk is from the Xenoblade Chronicles series.
- Tulin is from the The Legend of Zelda series. His moveset in this game is based on his appearance in The Legend of Zelda: Tears of the Kingdom.
Stages[]
- Bolshaya Past Crevice is from Metal Gear Solid 3: Snake Eater.
- Deathcard Cabin is from Inscryption
- The DenLiner is from Kamen Rider Den-O.
- Dive to the Heart is from the Kingdom Hearts series.
- Ghost Girl's Alley is from JoJo's Bizarre Adventure: Diamond is Unbreakable.
- Hill Valley Courthouse is from the Back to the Future series.
- Jidoor Opera House is from Final Fantasy VI.
- Kennedy Space Center is based on its appearance in JoJo's Bizarre Adventure: Stone Ocean.
- Lake Verity is from the Pokémon series.
- Metal Gear EXCELSUS is from Metal Gear Rising: Revengeance.
- The Potionarium is from the Shovel Knight series.
- Red Grave City is from Devil May Cry 5.
- The Sanguine Sea is from Lunacid.
- Subcon Forest is from A Hat In Time.
- Terminal Velocity is from Sonic Colors.
- Updaam is from DEATHLOOP.
- Wheatley Laboratories is from Portal 2.
Items[]
- The COMP is from the Shin Megami Tensei: Devil Survivor series.
- The Gaia Memory is from Kamen Rider W.
- The Recycler Charge is from Prey (2017).
- The O-Pin is from The World Ends With You.
- The Trial Memory is from Kamen Rider W.
- Bond of the Blaze is from Kingdom Hearts III.
- The Devil Sword Sparda is from the Devil May Cry series.
- Nightblood is from Warbreaker.
- The artwork used for Nightblood was created by u/darken1633, and was used in this project without permission.
- Thunderseal is from the Guilty Gear series.
- The Devastator is from Remnant: From The Ashes.
- Kalina Ann is from the Devil May Cry series. Its mechanics in this game are based on its appearance in Devil May Cry 5.
- The Knives are from JoJo's Bizarre Adventure: Stardust Crusaders.
- The Invincible Candy is from the Kirby series.
- Dragoon Boots are from Final Fantasy VI.
- Overture is from Devil May Cry 5.
- Tiger Claws are from Kid Icarus: Uprising.
- Australium Paint is from Team Fortress 2.
- The Giant's Mask is from The Legend of Zelda: Majora's Mask.
- The Weird Mushroom is from Super Mario Maker.
- Leshy's Dagger is from Inscryption.
- The Life Balloon is from the Donkey Kong Country series.
Assist Summons[]
- AAP07: BALTEUS is from Armored Core VI: Fires of Rubicon.
- Ankh is from Kamen Rider OOO.
- Bugzzy is from the Kirby series.
- Caesar Zeppeli is from JoJo's Bizarre Adventure: Battle Tendency.
- Duskull is from the Pokémon series.
- E-102 Gamma is from the Sonic series.
- Komainu is from the Spectrobes series.
- Missile is from Ghost Trick: Phantom Detective.
- Mothman is from the Shin Megami Tensei series.
- Planet Meteo is from the Meteos series.
- Scrafty is from the Pokémon series.
- Skelly is from Hades.
- Survivor is from JoJo's Bizarre Adventure: Stone Ocean.
- Vivi Ornitier is from Final Fantasy IX.
- Whispy Woods is from the Kirby series.
- Yamper is from the Pokémon series.