 | ||||
| Developer(s) | Toroko | |||
| Publisher(s) | Nintendo | |||
| Platform(s) | Nintendo DS | |||
| Genre(s) | First Person Shooter | |||
| Release Date(s) |
| |||
| Mode(s) | none | |||
| Age Rating(s) | ||||
| Media Included | Cartridge | |||

Pikmin: Ultrahunt is a first person shooter developed by Toroko and published by Nintendo for the Nintendo DS. It takes the Pikmin series into a radically new direction by putting the series in a first person pespective. It takes place after the events of Pikmin 2 on Gamecube, releasing in 2006. It stars a new protagonist, Hestia, a native of the planet Proma who comes to PNF-404 with a broken whistle and must make do by using her vaccuum gun to blast through the treacherous planet. She must recover her ship parts and do so mostly alone, although with the unwilling help of Pikmin she blasts out of her Vaccun.
The game released June 21st, 2006 in Japan, July 2nd, 2006 in North America, and December 19th, 2006 in Europe and Australia.
Plot[]

A ship from the planet of Proma ends up striking against a sudden asteroid. It's pilot, Hestia, manages to warp jump the ship to the nearby planet of PNF-404 and crash lands on the planet. Hestia goes out to recover the ship pieces, although quickly comes across a group of Orange Pikmin. Unable to communicate with them and unable to use her whistle, Hestia instead utilizes the Orange Pikmin through her Vaccun, a gun that can vaccuum the small Pikmin up and use them as ammo. Using the Orange Pikmin, Hestia is able to make headway through a viny area.
Finding one of the ship pieces, Hestia picks it up and sets up a make-shift camp, slowly learning things about the strange Pikmin, corralling them through fences and other makeshift capture devices. Hestia must find the remaining 15 ship pieces in the next 15 days, encountering more Pikmin species along the way, as well as their enemies. You can get three different endings depending on how well you do.
Happy Ending[]
If you find all 15 Ship Pieces, plus all the upgrades, Hestia will be able to leave the planet on her repaired ship, allowing her to escape PNF-404 and back home. She logs the data on her return trip, finding that the data seems to line up with research done by the Hocotate people. Crossexamining the data, Hestia realizes the planet is ripe for expansion if she had a proper whistle. Back on PNF-404, a tribe of Pikmin begin to gather with crude drawings of Olimar, Louie, The President, and Hestia carved onto a wall, scratching the carvings to suggest that they will embark on war if any of them return.
Average Ending[]
If you find the necessary 10 Ship Pieces, Hestia will be able to leave the planet on her repaired ship, allowing her to escape PNF-404 and back home. She will not be able to log any data she had due to a missing part. An orange, green, and yellow Pikmin watch as she leaves, unsure if she will ever return. A group of Pikmin in tribal masks approach them, ready recruit them against their cause.
Bad Ending[]
If you fail to find all 10 of the necessary ship parts by the end of the 15th day, Hestia's life support will begin to cease functioning so she attempts to leave in her unfinished ship which explodes and doesn't even lift up, destroying the camp. Pikmin in masks gather Hestia's body and send it to a Onion, where she becomes converted into a Pikmin-like creature figure. She then watches as the tribe of Pikmin begin to gather her former camp for materials to construct a shrine of a mysterious figure that looks like a undentified Olimar-like figure with three eyes.
Gameplay[]
Pikmin: Ultrahunt is unique among other Pikmin titles due to taking place in the first person and being more actively a shooter game. Hestia can vaccuum up to 5 Pikmin initially before finding upgrades that allow her to carry 10, 20, and finally 30 Pikmin. She can also use her vaccum gun to suction herself to collectible treasures which she can carry behind her and swing around similar to a mace. This prevents her from sucking up Pikmin though, so she will have to fire Pikmin already in her ammo. Additionally, she may take a weight debuff, although further into the game she will find upgrades to the suction cap that allows her to displace the weight better.
As the game progresses, Hestia is able to dump Pikmin she finds into a fencing at a make-shift base and even gather Onions to produce new Pikmin from food and enemy carcasses as well as convert existing, captured Pikmin into other types of Pikmin.
Controls[]
| Move | Jump | ||
| Use Vaccun | Hold Ammo/Swing Collected Object | ||
| Lock On | Stylus on Second Screen | Adjust Reticle | |
| Move Camera (Left) | Move Camera (Right) |
Pikmin[]
There are a total of nine types of Pikmin in Pikmin: Ultrahunt, five of which have their own Onions that can produce more of them. The other four are considered special types and must be activated from something in the enviroment to create them.
| Normal Pikmin | |
|---|---|
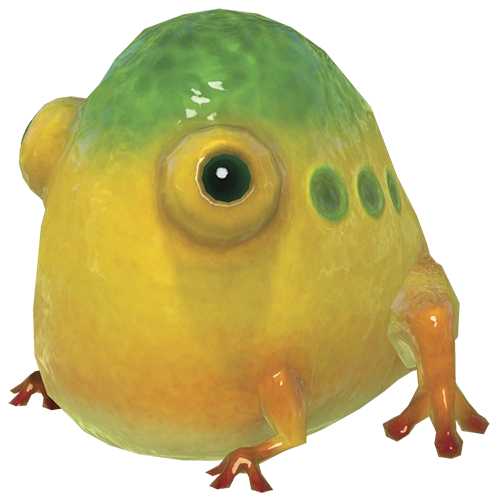
 Orange Pikmin |
Orange Pikmin are the first type of Pikmin you will find on your journey. They are immune to thorns and can destroy vines with their searing skin. When fired, they latch onto foes and explode, turning into spirits in the process. While incredibly basic, they deal the most damage but are also the most disposable Pikmin as a result due to the fact they can be used only once. |
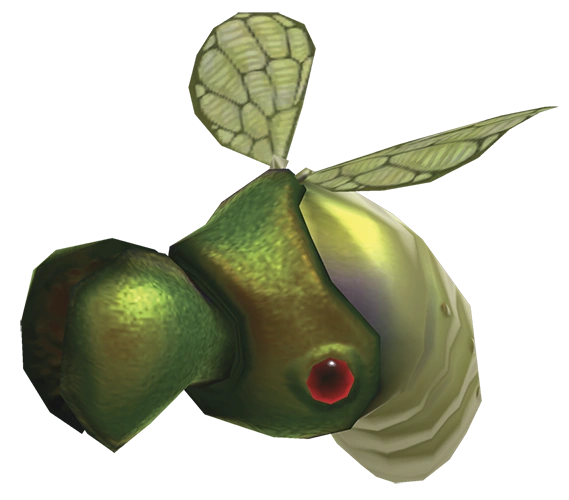
 Green Pikmin |
Green Pikmin are the second type of Pikmin you will find on your journey. They are immune to acid and can go through acid without dying. When fired, they latch onto foes and beat them with their stems, as well as coating them with their acidic skin. This effectively poisons foes. Since Hestia lacks a working whistle, Green Pikmin either need to be vacuumed off a foe they're attacking or gathered after the foe goes down. They can be used multiple times and are rather handy but don't deal a lot of damage right away. |
 Red Pikmin |
Red Pikmin are the third type of Pikmin you will find on your journey. They have above average attack power and don't explode like the Orange Pikmin. They are immune to fire and can stomp out small fires allowing safe passage for Hestia. They can also snuff out the fire at the impact site as well as restore it back. This is useful during the final boss. Since Hestia lacks a working whistle, Red Pikmin either need to be vacuumed off a foe they're attacking or gathered after the foe goes down. They can be used multiple times because of this. |
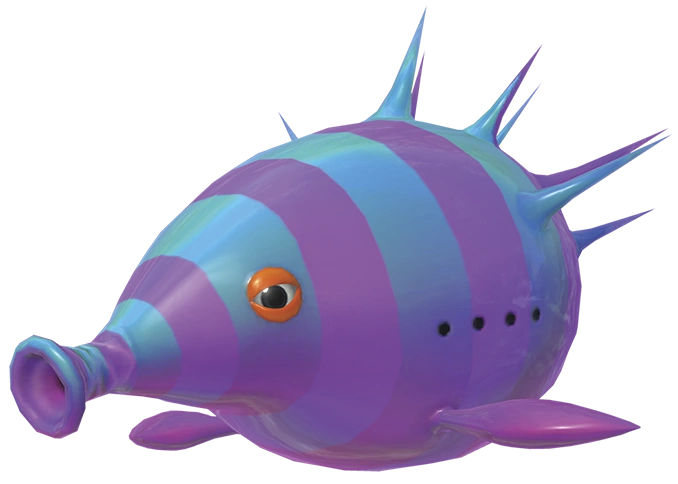
 Yellow Pikmin |
Yellow Pikmin are the fourth type of Pikmin you will find on your journey. They can be shot further than other Pikmin on account for their large yellow ears. They have average attack power and are immune to electricity, allowing them to be shot through electrical fields or attack enemies with electrical skin. Since Hestia lacks a working whistle, Yellow Pikmin either need to be vacuumed off a foe they're attacking or gathered after the foe goes down. They can be used multiple times because of this. |
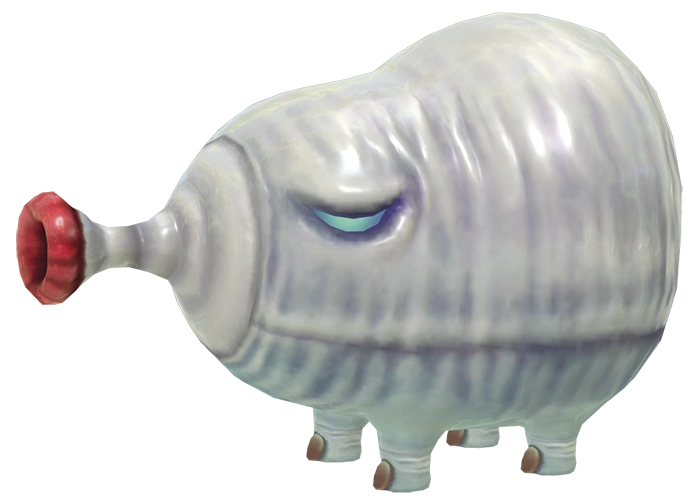
 Blue Pikmin |
Blue Pikmin are the final type of normal Pikmin you will find on your journey. They are able to go into water on account of their gills and mouth. They can pick up drowning Pikmin and carry out enemy carcasses out of water. They have average attack, durability, mobility, digging speed, and throwing distance, meaning they have little utility that other Pikmin don't. Since Hestia lacks a working whistle, Blue Pikmin either need to be vacuumed off a foe they're attacking or gathered after the foe goes down. They can be used multiple times because of this. |
| Special Pikmin | |
 Star Pikmin |
Star Pikmin are a variant of Yellow Pikmin that can be obtained by throwing Yellow Pikmin into Crystallized Lakes. They light up the area around them and can be used to blind certain enemies and keep some enemies away from you. They also light up dark areas. When put into the Vaccun, they can be used as a flash light for Hestia, although they have average attacking power. They also lose their immunity to electricity. Since Hestia lacks a working whistle, Star Pikmin either need to be vacuumed off a foe they're attacking or gathered after the foe goes down. They can be used multiple times because of this. |
 Heart Pikmin |
By throwing any kind of non-special Pikmin into a Heart-Spotted Candypop Bud, the Pikmin will become Heart Pikmin. Heart Pikmin are interesting in that they leave healing puddles when walking around, and while Hestia can't directly control them, they tend to stay in one spot to create a generous healing puddle. Hestia can use the Vaccun to grab them and create healing puddles where she wants them to be. However, it should be noted that Healing Puddles can be used by bosses as well. Heart Pikmin can also be used against enraged bosses and on toxic substances, as they are immune to toxicity as both an elmenent and concept. Since Hestia lacks a working whistle, Heart Pikmin either need to be vacuumed off a foe they're attacking or gathered after the foe goes down. They can be used multiple times because of this. |
 Mushroom Pikmin |
Mushroom Pikmin are unique in that they are not friendly towards Hestia at all and are in fact, a status effect that can be placed on Pikmin by a boss. However, Hestia does not already work directly with Pikmin to begin with, so whether they are friendly or not does not matter as long as they can fit in the Vaccun. Mushroom Pikmin do not latch onto enemies but do infect them with spores that can be used to poison the enemy heavily. When they bounce off a opponent, they will tend to run towards Hestia, but can be killed in a single shot by any Pikmin type. Hestia can also wait for the status effect to wear off. |
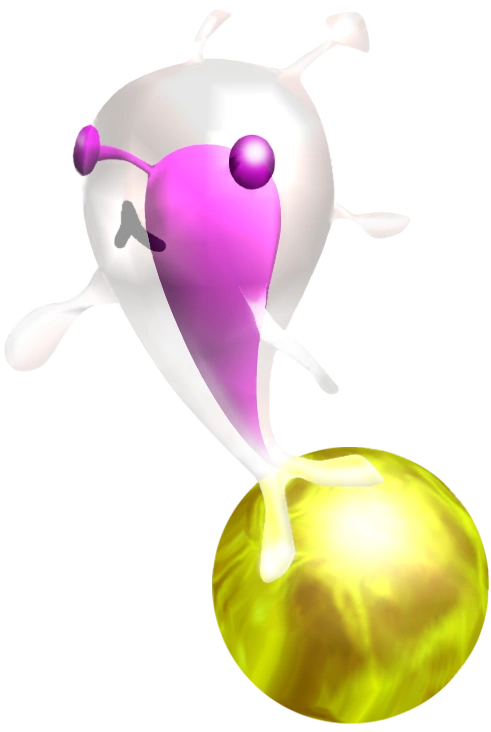
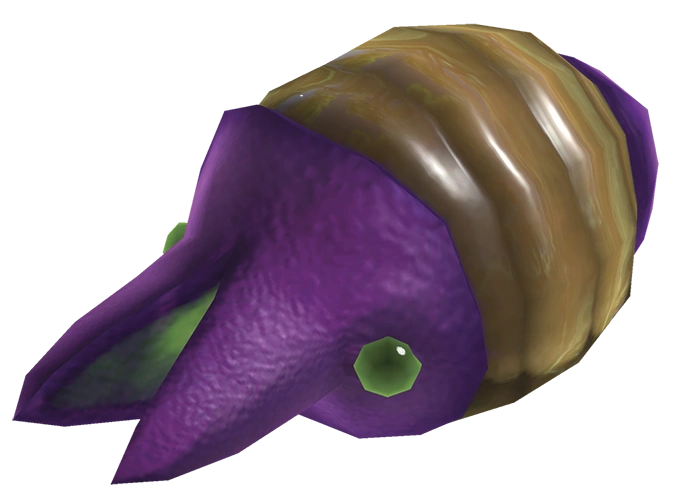
 Purple Pikmin |
By throwing any kind of non-special Pikmin into a Violet Candypop Bud, the Pikmin will become Purple Pikmin. These Pikmin are heavier than normal Pikmin and can carry heavier objects. When shot out of the Vaccun, they can stun foes and even bosses if their weakpoint is hit. They can't latch onto most enemies unlike most Pikmin, but they pack quite a lot of power when they are shot. They bounce off when they attack a foe, allowing Hestia to instantly use them again. |
Enemies[]
Normal Enemies[]
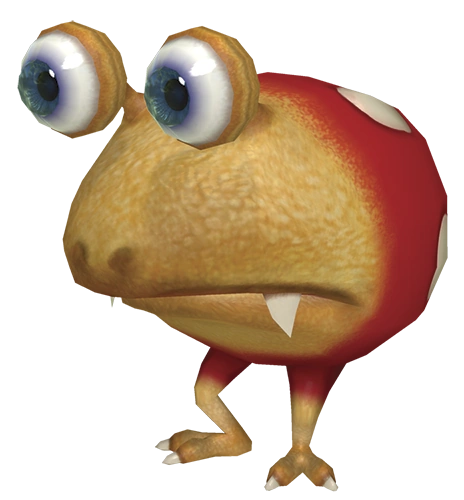
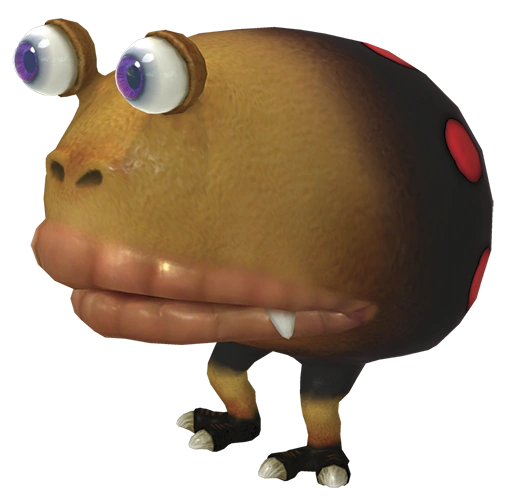
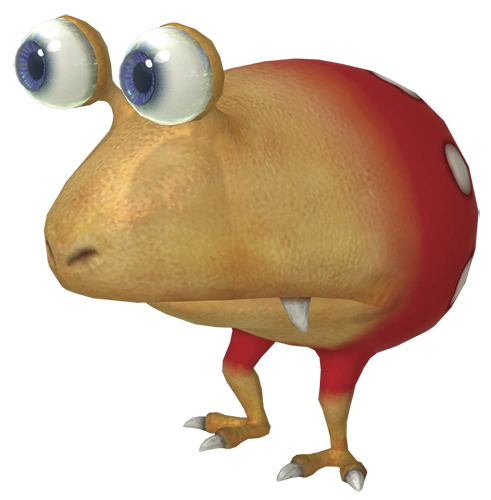 Red Bulborb |
Red Bulborbs are nocturnal and sleep during most of the day, preferring to hunt at night. They sleep basically all day, allowing you to get the first hit on them for most of the day cycle. They also don't really make an effort to defend themselves. You want to aim towards the back of a Red Bulborb, with about 20 Pikmin shots able to take it down. They have a weight of 10, allowing for 12 Pikmin to be planted if carried and used by any color of Onion. |
|---|---|
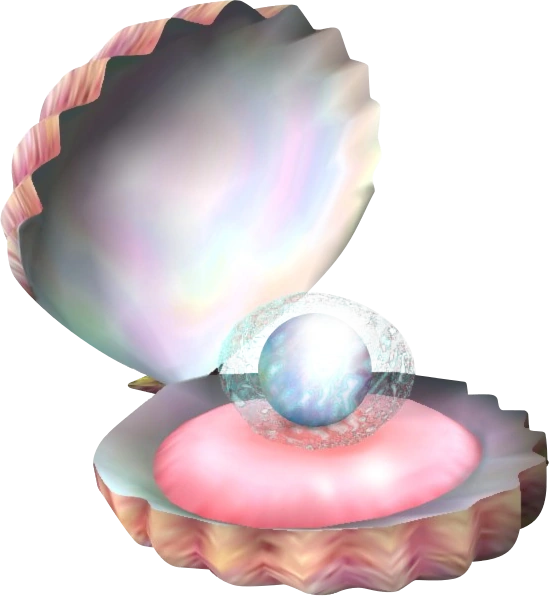 Pearly Clamclamp |
Pearly Clamclamps are bivalves that have a pearl that acts as the weakpoint. You can fire Pikmin onto it to deal damage, with it's only defense being able to clamp down like a venus flytrap and eating any Pikmin across the surface. You must vaccuum up the Pikmin in order to save them. It has a ton of health, but when delivered to any Onion of any color it will plant 50 Pikmin. It should be noted if a Pearly Clamclamp is submerged in water, Orange Pikmin will not be able to detonate against them. |
 Honeywisp |
Honeywisps float across the air carrying nectar and tend to glow and make high pitched cries, appearing and disappearing out of thin air. They cannot technically be killed, but will drop their nectar which will replinish Pikmin's health if they drink it. |
 Female Sheargrub |
Female Sheargrubs are creatures that chase Pikmin but do not harm them. They can regenerate when buried underground and destroy any build bridges overnight. Female Sheargrubs can be defeated by a single Pikmin shot or a simple swing of a collected object. There's no threat- you can even lead them into water to drown them. |
 Male Sheargrub |
Male Sheargrubs are creatures that are considered predatory and extremely aggressive, and will attack leaders and Pikmin when the opportunity presents itself. They are found mostly underground. They use their mandibles to attack Pikmin and Hestia. They can be taken out with a single shot to the back but shake so much when eating a Pikmin that attacking with Pikmin will not deal as much damage due to their inability to latch on. They drown when led into water. |
 Fiery Blowhog |
Fiery Blowhogs shoot fire from its red snout. Fiery Blowhogs generally stay around their home location and do not travel very far. It spews out fire if Hestia or a Pikmin comes nearby. When blowing fire, they cannot turn, giving them a vulernable opening. They typically can be attacked with any Pikmin and can be swarmed, although they can shake off Pikmin when not firing from the snout. Vaccuum off Pikmin if it becomes clear the Fiery Blowhog will survive a swarm. Red Pikmin are safest against Fiery Blowhogs, but can still be bucked into water where they will perish. |
 Puffy Blowhog |
Puffy Blowhogs gently fly in the air in their home location, but if they see Hestia or Pikmin they tend to get more agressive and blast them with air. The air knocks back Hestia and Pikmin, although Hestia will be able to stay on the ground if tethered to an heavy object. Their gusts are meant to blow Pikmin into hazards or other dangers. It has to go the ground to shake Pikmin off. Generally you can shoot a couple Orange or Purple Pikmin at it to take it down easily. |
 Shearwig |
Shearwigs crawl across the ground like Sheargrubs, but retreat by flying when it becomes apparent they will lose and shake off Pikmin when they do. However, they're still in range of fire when they fly away, so they can be defeated very quickly. They can also be led to water where they can drown. |
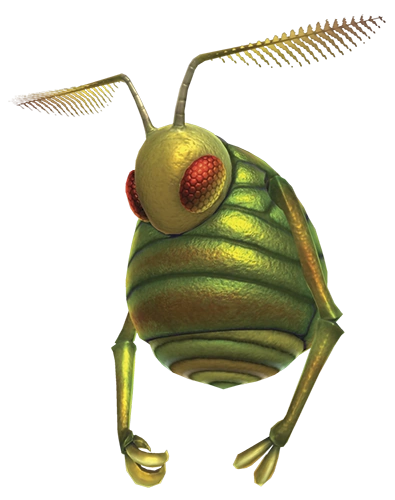
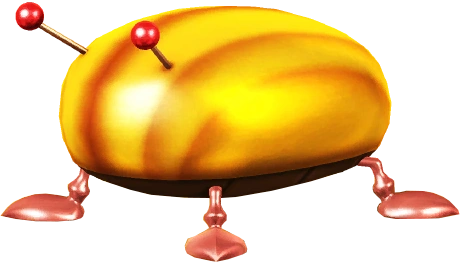 Iridescent Flint Beetle |
Iridescent Flint Beetles cannot be defeated, but when shot at they will turn over and become defenseless, dropping nectar and pellets that can be used by Onions to create more Pikmin. Shooting Pikmin at it's overturned stomach will release goodies, although over a limited time they will turn back over and run away too quickly to get another shot it, despawing as soon as they are off screen. |
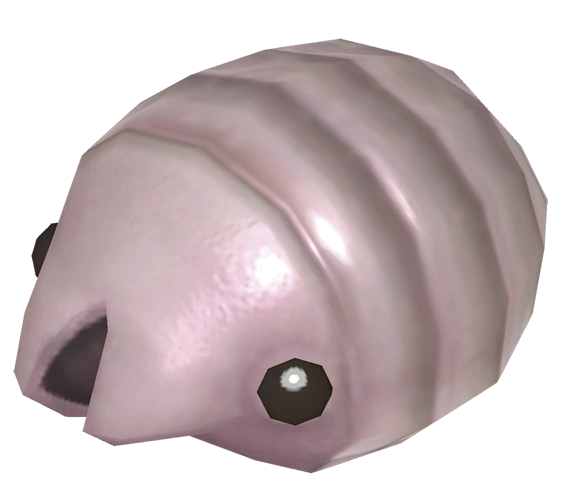
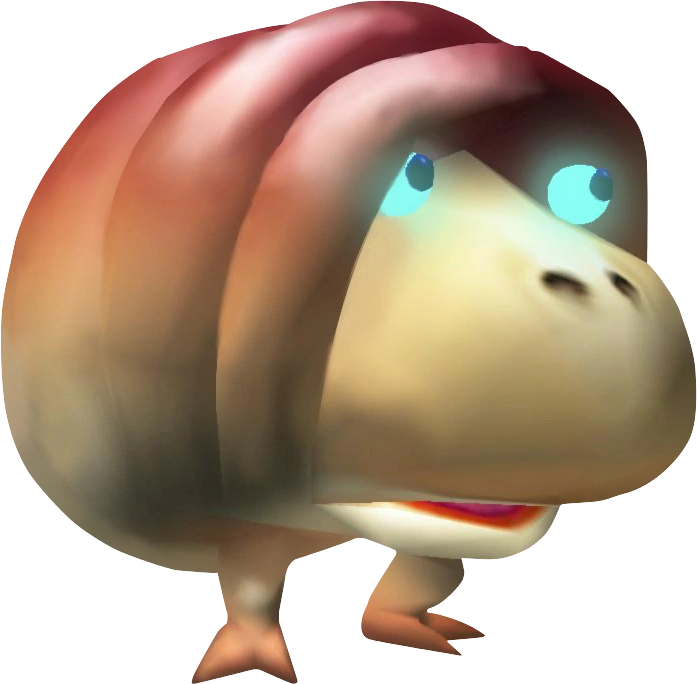 Breadbug |
Breadbugs own a den which it emerges from at the beginning of a day or sublevel. It normally trots freely around the are and ignores Pikmin and Hestia. When it reaches a object, it will drag it to it's den. They ignore Pikmin carrying objects. They have tough blubber that makes them immune to being swarmed with latching Pikmin, so shots from Orange Pikmin and Red Pikmin are the best way to down it- it was take more damage against a wall. They can also be heavily damaged by objects being swung at them. |
 Dwarf Red Bulborb |
Dwarf Red Bulborbs are smaller versions of Red Bulborbs who also sleep all day. While weaker than the Red Bulborb, they release cries that wake up nearby Bulborbs when attacked. Although similar in appearance to Bulborbs, these belong to a totally different species. You can effectively defeat it with swarming. |
 Dwarf Bulbear |
Dwarf Bulbears sniff the air and notice Pikin from a great distance. They have more health than a Dwarf Red Bulborb. They shriek to alert nearby Spotty Bulbears. They swing their bodies to launch Pikmin away from them and perform backflips. They are mostly dangerous because of their numbers and ability to group together against Pikmin and Hestia. |
 Spotty Bulbear |
Spotty Bulbears sleep if left alone and have bloodshot eyes upon awakening. They have more health than your standard Red Bulborb and their carrying weight allows you to produce 15 Pikmin sprouts upon returning it's body. A large collection of Red Pikmin and Orange Pikmin can typically down a Spotty Bulbear easily. |
 Lake Bulborb |
Lake Bulborbs are Bulborbs that can swim and breathe underwater and emerge on the surface when awakened by swimming from Hestia or Blue Pikmin. They can leap up from the lake floor and grab many Pikmin with their jaws. Lead them to land and then swarm them with Pikmin from behind to defeat them- they will produce 10 Pikmin with their carcasses when given to a Onion. |
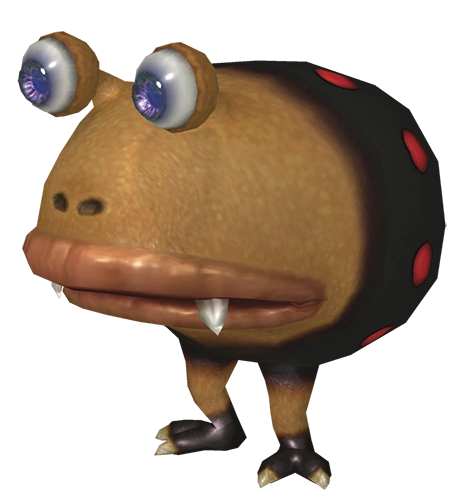
 Bruiser Bulborb |
Bruiser Bulborbs are uniquely colored Bulborbs that are immune to swarming, having toxic coated skin that only Green and Heart Pikmin can deal with. They also like to attack with charging attacks from the front. Hit them with these toxic-immune Pikmin from behind to defeat them- they will produce 12 Pikmin with their carcasses when given to a Onion. |
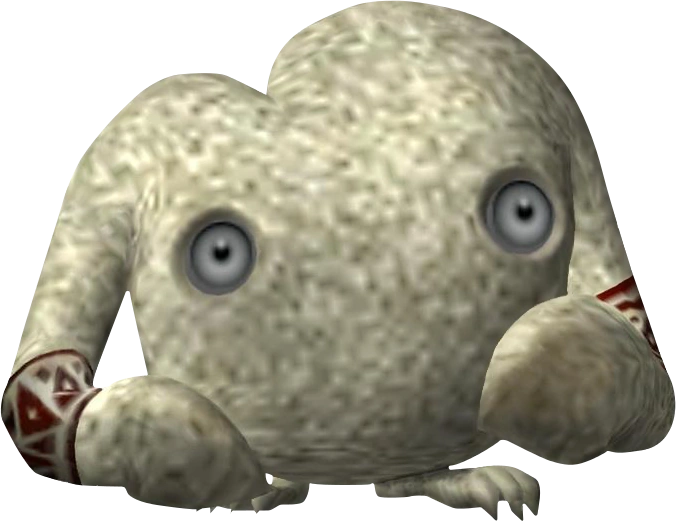 Mamuta |
Mamuta are agressive creatures that attack by pounding Pikmin into the ground, which replants them. This can be advantageous although Hestia will typically always need to pluck out Pikmin that get pounded. When they run out of Pikmin to pound into the ground, they will go after Hestia next. Attack them from behind, although they generally have a hefty amount of health. They plant 8 Pikmin when dragged to a Onion. |
 Swooping Snitchbug |
Swooping Snitchbugs fly through the air and grab prey with their claws and carry them before violently hurling them to the ground. Pikmin are simply replanted when dropped, but they can also carry Hesia and damage her greatly. Throwing Pikmon at it will weigh it down where it can be effectively killed. They plant 4 Pikmin when dragged back to a Onion. |
 Water Dumple |
Water Dumples are found in water or surviving on land. They have large mouths and whiskers, and tentacles around their abdomen. They can be taken down very easily by a few hits from Pikmin. While weak, it will chase for a considerable distance if attacked. They produce 5 seeds when brought to Onions. |
 Wogpole |
Wogpoles are small creatures that hang out in lakes and might accidentally beach themselves from time to time. They are a hard to get enemy witha low reward. Wogpoles will occasionally stop when chased by Pikmin, opening for attack. Wogpoles can't attack but shake off Pikmin when they are attached. They only give 1 seed when placed into a Onion, so they're way more trouble than it's worth. |
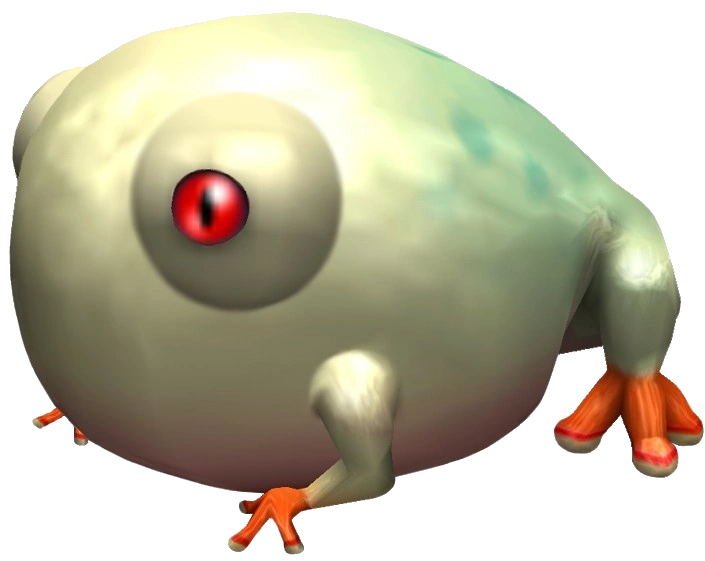 Wollywog |
Frequently found in or near a body of water, the Wollywog is a slow and stocky creature with a passive nature. They attack by leaping into the air if Pikmin or Hestia comes nearby. They don't actively pursue targets, but return to their starting location. They can shake Pikmin off, which throws them. When they are defeated, they fall onto their sides to try and flatten Pikmin underneath them. Either quickly vaccum off Pikmin before they completely fall, or weight them down with 10 or so Pikmin. |
 Tropical Wollywog |
Tropical Wollywogs act similar to Wollywogs but have poison skin that only Green Pikmin and Heart Pikmin can attack. They are slow and stocky creatures with a passive nature. They attack by leaping into the air if Pikmin or Hestia comes nearby. They actively pursue targets, but return to their starting location when low on health. They can shake Pikmin off, which throws them. When they are defeated, they fall onto their sides to try and flatten Pikmin underneath them. Either quickly vaccum off Pikmin before they completely fall, or weight them down with 10 or so Pikmin. |
 Yellow Wollywog |
Yellow Wollywogs are known to leap into the air, floating temporarily, and dropping, with the intent of landing on and crushing small Pikmin below. Frequently found in or near a body of water, the Yellow Wollywog is a slow and stocky creature with a passive nature. They don't actively pursue targets, but return to their starting location. Swarming them prevents them from jumping. |
 Dart Wollywog |
Dart Wollywogs are known to leap into the air, floating temporarily, and dropping, with the intent of landing on and crushing small Pikmin below. They can be found in or near a body of water, the Dart Wollywog is a quick but stocky creature with a passive nature. They actively pursue targets, but return to their starting location when low on health. Swarming them prevents them from jumping. |
Bosses[]
 Shaggy Long Legs |
Shaggy Long Legs are arachnorbs that have masses of long, shaggy hair covering several parts of its body. It's hair covers it's weakspots. It won't be able to be damaged until it's hair is plucked out, so throw Pikmin onto it's legs to pluck the hair, then the hairy orb in the center which will then expose it for further shots of Pikmin where it can then be taken out very quickly. When Pikmin are clinging to it, it will try and shake them off. It's immune to elements until it's hair is taken off. |
|---|---|
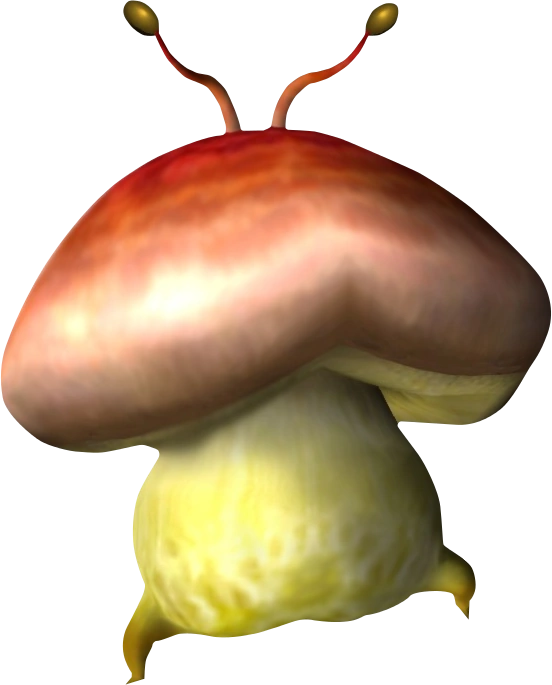 Puffstool |
Puffstools are huge walking fungus with a giant red cap. It runs away when attacked but will trip frequently when doing so. Although the cap is invulernable to Pikmin attacks (although not by swinging attacks from Hestia), one must throw Pikmin onto it's undersection once it's on the ground. When the Puffstool rights itself, it blows purple spores which turn Pikmin into Mushroom Pikmin. It will then try to lead them to attack Hestia, although Hestia is not a traditional leader so she can still use the Mushroom Pikmin against Puffstool until it's defeated. |
 Goolix |
The Goolix is a watery boss that comes out from the ground. It has two nucleli in it's blue amobea and can morph and stretch around to engulf and drown Pikmin. The only Pikmin immune to it are the Blue Pikmin. It;s large yellow nucleus is immune to damage but the smaller blue one can be shot at with Blue Pikmin. The more Pikmin attacking it, the less it can move. However, you may want to vaccuum the Pikmin before it can collide it's nuceluli together to defeat Pikmin. |
 Smoky Progg |
Smoky Progg resides in a large watery area and inside a egg which breaks apart when approached. The Smoky Progg, true to it's name, constantly emits a cloud of gas behind it that is harmful to both the Pikmin and Olimar. The only Pikmin immune to this gas are the Heart Pikmin, which can be used to do some shots if needed. Generally you want to aim at the head with Orange or Red Pikmin to take it down- swarming will just kill all the Pikmin. It damages Pikmin and Hestia if it's close to them, as well as uprooting Pikmin. |
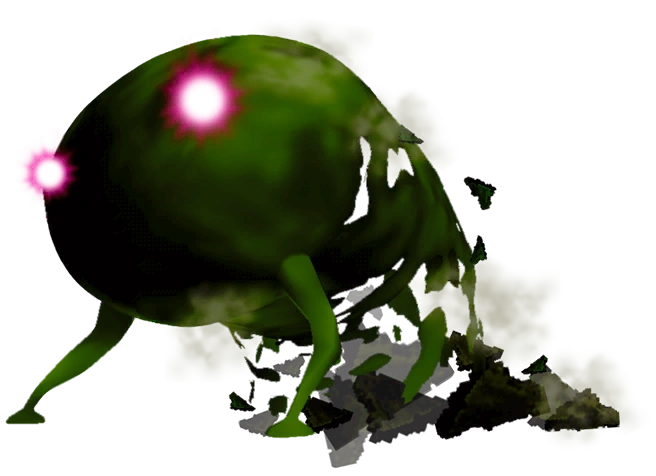
 Waterwraith |
The Waterwraith is a generally humanoid creature that rolls across with two stone rollers. One of the more dangerous creatures on Hestia's journey as it can kill Pikmin instantly by rolling them over. It can also drown them in their watery body. You can only damage it with Purple Pikmin, so it is useful to try and change any Pikmin into heavy Purple Pikmin to turn the Waterwraith purple and vulernable to all Pikmin attacks. When fully defeated, everything crumbles. |
 Molten Slooch |
Molten Slooch is the final boss of Pikmin: Ultrahunt. The Molten Slooch is covered in molten metal and contains the final ship part needed to finish the game know as the Cobalt Stabilizer. The Molten Slooch is immune against every Pikmin except the Red Pikmin during it's first phase, which is needed to make it continue moving. The Red Pikmin can latch on, although the Molten Slooch will attempt to shake them off. Keep luring them until you find a body of water, which will be required to lure them in to cool off their hot metal bodies. Then pull out the cooled Molten Slooch and smash it open with Purple Pikmin to gain the last ship part. The Molten Slooch will trickle out as a small orange creature who will go towards the camp fire at your base, requiring you to turn it off before it can get there so you can finally stamp it out for good- otherwise the Molten Slooch will revive itself and attack your base, killing all held Pikmin if possible. |
Areas[]
| Impact Site | Where Hestia's ship landed. When you first begin, the area will be covered in thorny vines. You will need to use Orange Pikmin planted into the ground to burn the vines up and proceed. After Day 1 is complete and the first ship part is found, Hestia will set up a make up camp with fences to place Pikmin in. Any Onions you find can be dragged here and placed into spots to produce more Pikmin. Additionally, you can put treasure into a hoarding site. In the center is a fire that prevents most creatures on the planet from coming near your base, making it generally a safe place to be. However, some persistent foes are not afraid of light.
|
|---|---|
| Acidic Delta | A rocky mountainous region where acid flows down in lakes and down waterfalls. Touching the acid will harm Hestia, so she needs to use Green Pikmin to create controlled avalanches of rock to ascend further up across the area. Two sleeping Bulborbs will be found here, who will awaken at night. They are far enough apart from each other that you will typically not need to fight both at once. Some Orange Pikmin can be found here, but Green Pikmin will be the primary Pikmin found in this area. A small amount of Female Sheargrubs litter the area. Smoky Progg can be found in a hidden area in a egg, holding the Bouncy Dynamo.
|
| Corrosive Cave | A cave inside the Acidic Delta that can be accessed by stopping the flow of an acid waterfall. The cave is dark for the most part, making going inside fairly difficult without Star Pikmin, however a crystal lake can be found here at the enterance. Inside you will find more acid pits and some optional collectibles, as well as some ship parts. Orange, Green, and Yellow Pikmin can be found inside the Corrosive Cave in limited quantities. One awake Bulborb can be found here. You can also find four Fiery Blowhogs, and a lot of both kinds of Sheargrubs. The Puffstool boss can be found here, carrying the optional Delta Destablizer ship piece.
|
| Magma Geyser | A small volcanic area covered in lava lakes and flame geysers. The center of the area has a small volcano where you can find a bunch of Fiery Blowhogs, while Puffy Blowhogs fly through the air. Patches of the ground have Red Pikmin that are immune to the lava. Watch out for the Mamuta and Breadbugs as well! This is also where the Molten Slooch, who contains the last needed ship part, resides, who only appears after collecting all the other necessary ship parts.
|
| Moon Marina | A beach like area with waves crashing into shore with a circular stone bend filled with small puddles of water containg various watery creatures. Watch out for Lake Bulborbs, Water Dumple, Wogpoles, Wollywogs and the Yellow Wollywogs. Your first boss is likely to be found here in the form of Goolix, who can be a challenge unless you find the Blue Pikmin that are immune to water.
|
| Seaweed Catacombs | A small, hidden alcove where you can find a bevy of Heart-Spotted Candypop Buds and Violet Candypop Buds. The Waterwraith resides here and seaweed hangs from the ceiling. The seaweed can be used to latch Pikmin to safety from the Waterwraith as he rolls around in the catacombs or from safety from other creatures inside.
|
| Bamboo Rainforest | A rainforest made of towering green bamboo. This is the furthest area from the Impact Site and rain will frequently occur here, creating puddles that will otherwise drown Pikmin. You will find Yellow Pikmin who will need to be protected right away, as well as many interesting varieties of creatures lurking around here. Shaggy Long Legs can be found in a carved out stump arena where the rain never comes. Electrical fields appear in open areas, created by lightning rods which are required to push down platforms to get to this carved out stump.
|
Gallery[]
")
")
")
")
")
")
")
")
Trivia[]
- Hestia's suit is based off Olimar's black palette from Super Smash Bros. Brawl.
- This game was completed in less than 24 hours, as you can see in the game's history logs. This was part of a personal challenge to complete a project in a short timespan- although originally this game was going to be only given a week instead. The time span kept getting shorter and shorter as progress was blazed through.
- The game features all non-boss enemies from Pikmin 1, leading some to believe this may have originally started as a remake of Pikmin for the Nintendo DS. However, developer interviews reveal that this was never the case, as the game was always envisioned as a shooter spin-off, although originally Olimar was supposed to be the protagonist. This changed as it wouldn't make sense for him storywise to use the Pikmin like this after encountering them three times already during the events of previous games.
- The Molten Slooch is from the same class of species as the Pyroclasmic Slooch enemy from Pikmin 3.