| Image + Name
|
Info
|

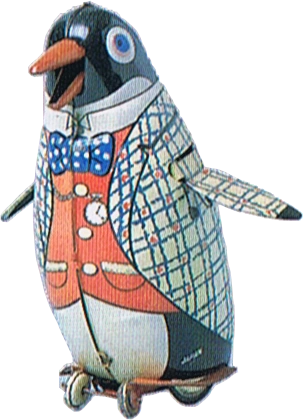
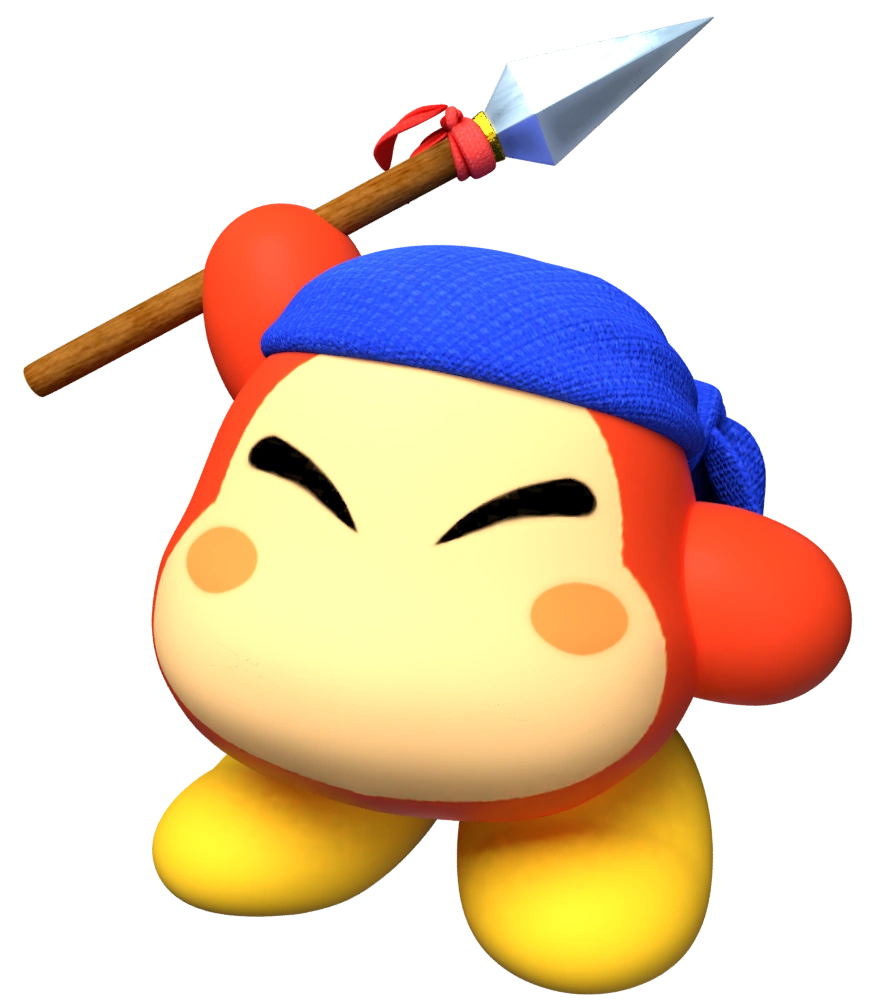
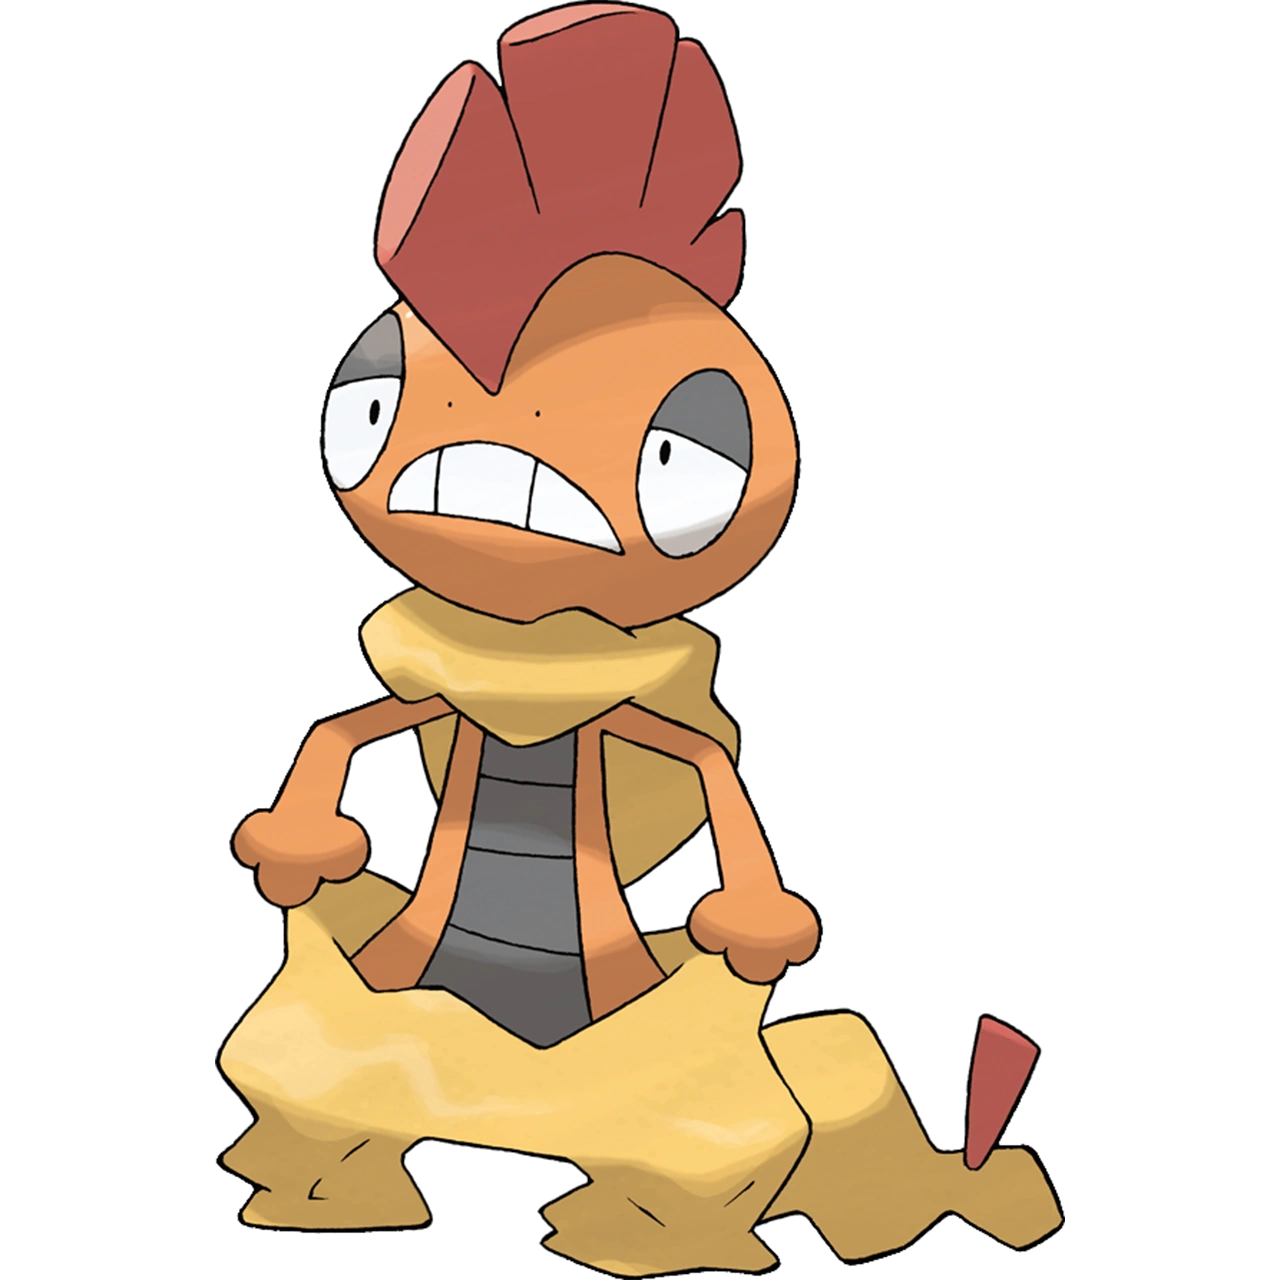
Luigi
|
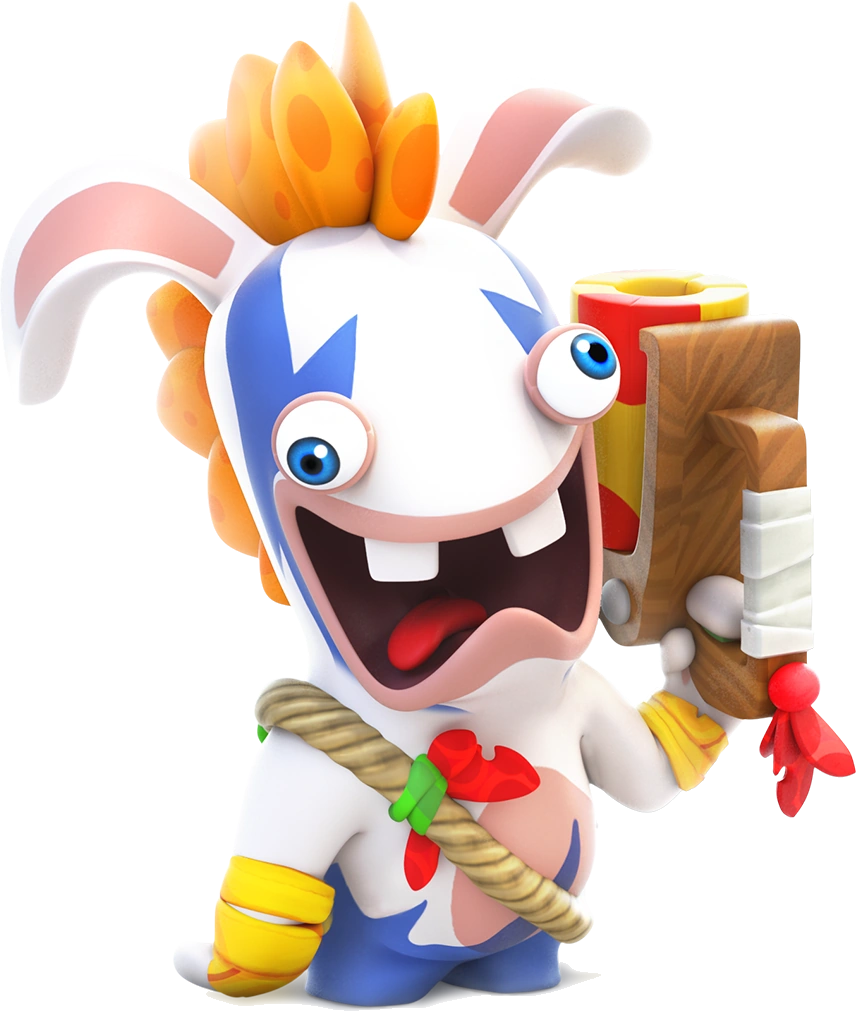
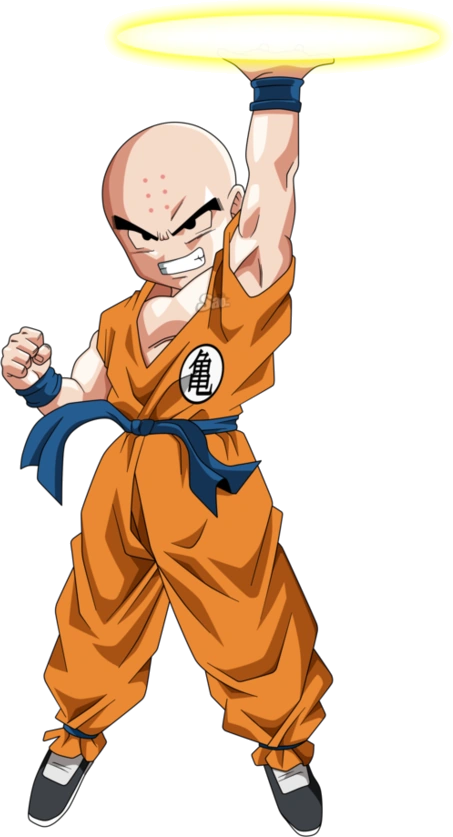
Luigi was introduced mostly as a palette swap for Mario for the second player, but in Lost Levels and in Super Mario Bros. 2 he was made more distinct. While he may live in Mario's shadow, he is making a name for himself and even recently celebrated a year named after him.
|
| Move
|
Description
|
| Entrance
|
Luigi opens up a door and peeks his head in, looking scared. He then pushes himself out, attempting to look braver.
|
Neutral Special
Electroball
|
Luigi fires out a shocking green electric ball that does not bounce. While uncharged, it only does 4% damage, but if Luigi spends the time to charge it, it can deal a whopping 11% damage.
- Customs
- Custom 1 - Green Fireball: Luigi fires a green fireball that is good for spacing and deals 6% damage, but can only be charged to deal 9% damage.
- Custom 2 - Booball: Luigi can fire a white boo-shaped projectile that deals more damage if the opponent is facing away from it. 5% damage if facing it, 8% damage if not facing it.
- Custom 3 - Fast Electroball: Luigi's electroball move is much faster to execute and charge, but only deals 8% damage charged and 2% damage uncharged.
|
Side Special
Green Missile
|
Luigi charges up and fires himself like a missile, dealing 7% damage. Luigi can do an additional attack in the air that covers his body in green fire when the player taps the attack button again, dealing 9% damage with 2% recoil damage.
- Customs
- Custom 1 - Aqua Missile: Luigi now bounces and moves like a seal, with water emitting from him. This allows him to make multiple attacks in missile formation without having to charge up again. Each attack does 6% damage but he looses the ability to form green energy around him.
- Custom 2 - Shadow Missile: When Luigi hits someone, they are damaged for 6% and a random negative effect is placed on them, similar to Luigi's shadowzone effect. Cannot be charged.
- Custom 3 - Sluggish Missile: A slower but stronger version of the attack that deals 11% damage on contact; cannot be charged.
|
Up Special
Green Hammer
|
Luigi propels up into the air with a green hammer, doing a body spin the air before slamming into the ground. Opponents can be harmed for 8% damage.
- Customs
- Custom 1 - Baby Hammer: Luigi uses a much smaller hammer that deals less damage (5%) but gives a huge squeaky jumping boost.
- Custom 2 - Baahammer: Luigi uses a hammer with a sheep's head on it, dealing 6% damage and putting the opponent to sleep.
- Custom 3 - Fast Hammer: Luigi executes the move much faster, but deals 7% damage and doesn't jump quite as high.
|
Down Special
Green Drill
|
Luigi jumps up high into the air, before coming straight down with his body twisting as green energy surrounds him, resembling a green drill. This deals 3% damage but breaks shields.
- Customs
- Custom 1 - Scoot Drill: Luigi moves forward with the drill under him like a jackhammer, dealing 9% damage.
- Custom 2 - Ice Drill: When Luigi drills into a character, they become frozen temporarily and Luigi can push them away provided he's fast enough. The drill only does 5% damage.
- Custom 3 - Luiginary Typhoon: Using Luiginoids, Luigi can send out a devastating attack dealing 12% damage using Luiginoids. It has a huge charge period and needs to be executed in the air; should Luigi hit the ground before fully charging it, it will fail.
|
Final Smash
Poltergust 3000
|
Luigi sucks in his opponents and blasts them out for 130% damage.
|
| Taunts
|
- Up Taunt - Makes a L sign with his hand, before firing it off like a gun with sound effects from Luigi.
- Side Taunt - Falls over and uses his stomach as a balancing point for his body.
- Down Taunt - Kicks the ground; this taunt can actually deal damage (5%) and is a powerful meteor smash when done in midair.
|
| Special Team-Up Names
|
- With Mario - Mario Bros.
- With Peach - Waltzing Brawlers
- With Bowser - Greenskinned Grapplers
- With Wario - Mirrorside Frenzies
- With Yoshi - Green Machine
- With Rosalina - Photo Friends
|
| Alternate Costumes
|
Smash 64 Luigi Fighting Polygon Team Luigi |
| Unlock Conditions
|
| TBA
|
|
Rosalina and Luma
|
Rosalina is essentially a space goddess, having recreated the universe after it's destruction by Bowser during the events of Super Mario Galaxy. She finds time to hang out with Mario and the other denizens of the Mushroom Kingdom, though. Rosalina and Luma work as a pair, with Rosalina serving as the leader of the duo. Rosalina can set up Luma to deal damage at a distance away from her or set them up as a projectile to charge forward at opponents.
|
| Move
|
Description
|
| Entrance
|
Rosalina & Luma fly onto the stage while accompanied by a trail of stardust.
|
Neutral Special
Luma Shot
|
Rosalina launches off Luma to deal a corkscrew battering ram to opponents, dealing 5%-16% depending on how charged it is. The Luma has super armor, but Rosalina does now. Luma stops after either hitting something or at the end of it's path. It used also to space out Luma, as Luma will remain in place unless Rosalina presses Neutral Special again.
- Customs
- Custom 1 - Luma Spin Shot: Rosalina fires off Luma, who spins as they charge forward. Has less distance than Luma Shot, but knocks opponents farther and Rosalina spins as she launches the Luma, which deals 7% damage.
- Custom 2 - Luma Arc Shot: Rosalina launches Luma up in a arc, giving the move a new aerial arc that can meteor spike opponents in the air and launches Luma farther. However, the move ignores ledges and Rosalina cannot call Luma back to her side, needing to be next to the Luma to redo the attack.
- Custom 3 - Power Luma Shot: Rosalina launches Luma a much shorter distance, but deals a immense powerful 24% damage. Has a long start-up time and has decreased range compared to even the Luma Spin Shot.
|
Side Special
Star Bits
|
Luma shoots off three Star Bits forward, which pierces opponents for 2.8-8.8% damage. They are not projectiles despite appearing to be as such, and thus cannot be reflected or absorbed. Allows Rosalina to attack via the Luma after using Luma Shot. This move is useless after the Luma is killed off and needs to respawn, similar to Luma Shot.
- Customs
- Custom 1 - Star Chunks: Luma releases bigger Star Bits that deal 5-7% damage, although they are now treated as projectiles. They also have a smaller range.
- Custom 2 - Far Flinging Star Bits: Luma releases smaller Star Bits with far more range, although they are treated as projectiles similar to Star Chunks. They deal a total of 3-5% damage.
- Custom 3 - Luma Shield: Luma creates a shield that can reflect projectiles when activated, although this move completely looses it's damaging applications.
|
Up Special
Launch Star
|
Rosalina uses a multicolored Launch Star to launch herself upwards. Can be angled to help launch her purely vertically, horizontally or diagonally. However, it will leave her in a helpless state.
- Customs
- Custom 1 - Rocket Star: Rosalina gains a hitbox while launching, which deals 3-11% damage. However, it is much shorter and cannot be angled.
- Custom 2 - Pull Star: Rosalina sets up a pull star that she can later float towards as a recovery. Does no damage and the Pull Star only exists for 15 seconds. An additional one cannot be set up.
- Custom 3 - Power Star: A version of Launch Star with more horizontal distance but cannot be aimed to give her more options. Deals no damage.
|
Down Special
Gravitational Pull
|
Rosalina waves her wand and pulls in items and projectiles gravitate towards her. She will automatically equip items pulled towards her. She can gimp certain recoveries like Ness's PK Thunder with this move or steal R.O.B's gyro. It deals no actual damage.
- Customs
- Custom 1 - Catch & Release: Rosalina pulls in characters instead of items, dealing 8% damage with an explosion of energy around Rosalina. Can be interrupted when performed, unlike the original move.
- Custom 2 - Hungry Luma: Rosalina feeds a summoned Hungry Luma star-bits, which causes it to then explode into energy that deals 33% damage. Has a long start up time, but can be interrupted multiple times without actually breaking the attack, thus allowing Rosalina to fill up the Hungry Luma over the course of several different periods, which is handy for making opponents actually come towards it.
- Custom 3 - Chance Cube: Rosalina summons a Chance Cube from Super Mario Galaxy 2. If it lands on the 1-Up Mushroom, it will heal her by 10%. If it lands on the Coin, it will make the Luma a golden color and increase it's knockback. If it lands on the Bowser symbol, a large explosion dealing 15% damage will occur near Rosalina. There is a cooldown timer of 5 seconds after using this move.
|
Final Smash
Power Star
|
Rosalina summons a giant Power Star, which slowly expands as it fires small stars around itself. The Power Star itself can deal extreme amounts of damage to opponents. Throwing the opponent into the Power Star can cause up to around 250%, potentially turning it into a one-hit KO. The metered version can only deal up to 50% damage and has a shorter span and size overall.
|
| Taunts
|
- Up Taunt - Rosalina & Luma lean forward and twirl like a planet on its axis while Luma chirps cheerfully.
- Side Taunt - Rosalina puts her hand on her hip, leans back, waves her wand and says "Mmm hmm!" while Luma nods its head in agreement. Rosalina's animation is slightly different if she is facing left.
- Down Taunt - Rosalina crouches and then slowly rises up while waving her wand and while Luma dances around.
|
| Special Team-Up Names
|
- With Mario - Stargazed Somethings
- With Peach - Planet Princesses
- With Bowser - Galactic Empires
- With Wario - Conquerors of Destiny
- With Yoshi - Parents of Thousands
- With Luigi - Photo Friends
|
| Alternate Costumes
|
Olympic Swimming Rosalina Master Shadow Rosalina |
| Unlock Conditions
|
| TBA
|
|
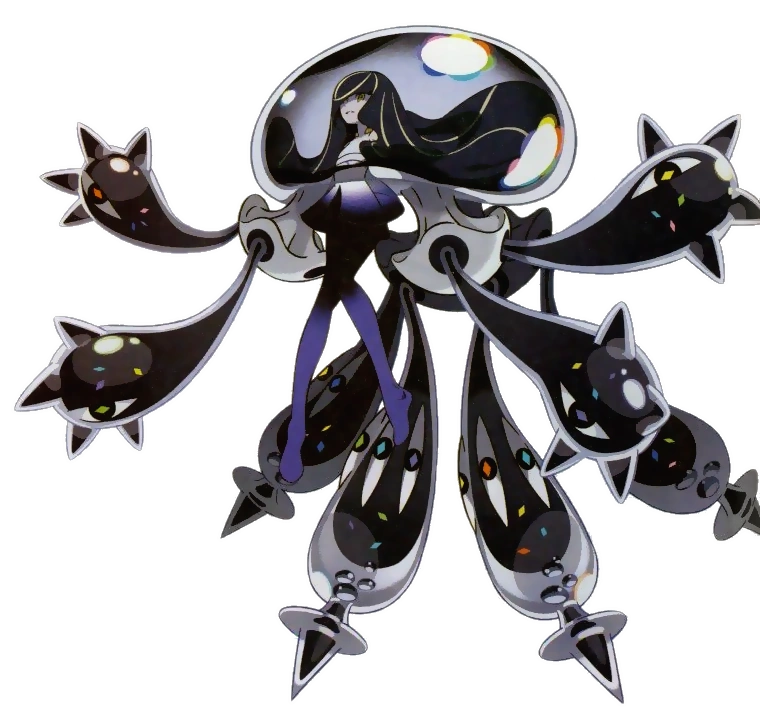
Cosmetta
|
Cosmetta is the sister of Rosalina who was introduced in Super Mario: Elemental Journey, stolen from her family and made to be the protector of the Cosmic Lighthouse and the Black Hole Gun. She is notably fairly terrible at her job, leading to all the black holes that were carelessly scattered across the galaxy that Mario came across in Super Mario Galaxy 1 and 2. In Smash, she plays very differently than her sister, utilizing earth attacks and black holes into her moveset, making her a fairly interesting fighter that attacks by changing the battlefield or magnetizing her foes via black holes.
|
| Move
|
Description
|
| Entrance
|
Cosmetta appears out of a violent looking teleport, which disperses in black particles as she bites her lip and examines her opponent curiously.
|
Neutral Special
Black Hole Gun
|
Cosmetta aims her Black Hole Gun before firing it. The player can control the angle by tilting the control stick in the direction they want before pressing the attack button to fire. It immediately draws items, projectiles, and opponents all to that spot if they are within range, what can be seen with a fuzzy radiating circle of effect around the black hole. It does no active damage, although any projectiles inside will deal damage to their opponents as normal even if they were the ones to fire the projectile. Stays active for 120 frames.
- Customs
- Custom 1 - Black Hole Boomerang: Cosmetta fires off a boomerang with the black hole effects that returns to her with all the things it collected. Deals no damage and will heal Cosmetta if it collects projectiles. However, it's range of effect is smaller.
- Custom 2 - Black Hole Stop: Cosmetta fires a black hole right in front of her that sucks in foes, cancelling any move they were about to do before dropping them. Has a bit of a start up.
- Custom 3 - Mini Black Hole: Cosmetta flicks small Black Holes that stay active for 300 frames and deal 7% damage on contact, with an suction effect towards opponents. They have a very small range, though.
|
Side Special
Gaia Charge
|
Cosmetta releases a dirt ball that slowly expands in size, dealing 1-30% damage depending on how much ground it absorbs. The further it goes, the bigger it gets. It only expires if a projectile cancelling move is used or after 7 seconds, being one of the longest-lasting projectiles in the game. Requires Cosmetta to charge for 60 frames.
- Customs
- Custom 1 - Earth Charge: Cosmetta shoots out a simple dirt ball that rolls across the ground, dealing 5% damage. She can charge it up to make it bigger and deal 9% damage.
- Custom 2 - Green Thumb: Cosmetta creates a grind rail of vines that she uses to slide into opponents, dealing 8-9% damage via her hip ala Peach Bomber.
- Custom 3 - Gaia Ball: Cosmetta releases a large ball of dirt that absorbs items and opponents, dealing 9% damage when they get hit as well as locking them into the ball so Cosmetta can follow up with attacks. They can mash out of it.
|
Up Special
Black Hole Pull
|
Cosmetta shoots a black hole directly above her, which pulls her into it's orbit. She encircles inside it before it disappears. This is a incredible recovery move that will allow Cosmetta to continue jumping and dealing attacks as it won't put her in a helpless state, however it is incredibly easy to punish and won't deal damage.
- Customs
- Custom 1 - Black Hole Attractor: Cosmetta releases a black hole just above her head that sucks in airborne opponents or anyone not on the ground in the radius. She can then follow up with an attack with the opponents that are trapped inside. Active for 200 frames.
- Custom 2 - Black Pull Star: Cosmetta pulls back on a black pull-star, which launches her a little bit vertical and mostly horizontal, allowing her to deal 9% damage as launches.
- Custom 3 - Lighthouse Pillar: A pillar resembling the Cosmic Lighthouse raises underneath Cosmetta, lifting her up from the ground and acting as a temporary platform. It can be destroyed by attacks, having 30% health.
|
Down Special
Red Bubble
|
Cosmetta surronds herself in a harming red bubble that knocks opponents back and deals 1% damage per 30 frames for the next 4 seconds. Protects against melee attacks and projectiles but can only be out for a total of 20 frames.
- Customs
- Custom 1 - Absorbing Bubble: Cosmetta surrounds herself in a bubble that absorbs projectiles but does nothing against melee attacks. It builds up her resistance to getting launched.
- Custom 2 - Growing Bubble: Cosmetta covers herself in a bubble that is very weak at the start, but expands slowly and fortifies against any kind of attack or even people even being able to walk through it. Active for 270 frames.
- Custom 3 - Telescoping Bubble: Cosmetta surrounds herself in a glossy bubble that allows her to fire off stars by tapping the attack button while it is active. It does not protect against attacks, but will deal 10% damage with it's star effects. Active for 230 frames.
|
Final Smash
Cosmic Lighthouse
|
Cosmetta summons the Cosmic Lighthouse and hops onto it, steering it away from the stage and then readies her Black Hole Gun to fire a massive blackhole that sucks in opponents and deals 100%/50% damage to those sucked inside.
|
| Taunts
|
- Up Taunt - Cosmetta laughs as she moves her right arm in a beckoning way.
- Side Taunt - Cosmetta bites her right pointer finger as she floats.
- Down Taunt - Cosmetta showcases some dark magic from the palms of her hands as she does a very loose zero-gravity float.
|
| Special Team-Up Names
|
- With Rosalina - Sisters from the Stars
|
| Alternate Costumes
|
| TBA
|
| Unlock Conditions
|
| TBA
|
|
Pauline
|
Pauline was one of the first female characters in gaming, first appearing in Donkey Kong as a character named "Lady" who was captured by Donkey Kong. Since then, Pauline has evolved to become more of her own character, eventually taking office shortly before the events of Super Mario Odyssey. In Super Smash Bros. Discord, she uses her three lost items from Donkey Kong to attack, as well as a powerful jump inspired by the lyrics of her song Jump Up! Super Star! Her customs reference other Donkey Kong games as well as the Mario vs. Donkey Kong series, and even her brief appearance in NES Pinball!
|
| Move
|
Description
|
| Entrance
|
Pauline grabs a microphone as she jumps in from off the stage.
|
Neutral Special
Hat Trick
|
Pauline throws her hat, able to deal 6% damage as it spins as a projectile. She can then jump on it, able to throw it again for 6% damage while in the air and dive towards it using her air dodge. By spinning with the control stick quickly and then throwing the hat, Pauline is able to have it spin while creating a rainbow, dealing 12%. This gives her a lot of air but isn't the most effective damaging move.
- Customs
- Custom 1 - Upward Throw: Pauline throws her hat upwards, which spins to deal 12% and knocks opponents downwards in a spike. Pauline cannot jump off it or perform the spin move.
- Custom 2 - Homing Throw: Pauline throws her hat, which has homing properties and deals 8% damage. Pauline can jump off it once but not again as the hat will attempt to home on the second attempt. She can perform a spin move that deals 11% damage, although it's homing range becomes shorter.
- Custom 3 - Downward Throw: Pauline throws her hat at a downwards diagonal as it spins sideways. Like Upward Throw, it cannot be jumped on or perform the spin move. It deals 12% damage and launches opponents upwards.
|
Side Special
Pauline's Umbrella
|
Pauline stabs her umbrella forward for 8% before unfolding it to knock foes back, dealing 4% damage. Allows her to negate being pushed back by wind moves and bounce projectiles back for 1.2x of the original damage.
- Customs
- Custom 1 - Barrel: Pauline hoists a barrel up in her hands and then throws it to deal 12% damage. The barrel does not break on impact, continuing to roll around unless it's hit three times or takes over 25% damage. Pauline can only put one barrel out on the field at a time.
- Custom 2 - Bug Spray: Pauline sprays bug spray, dealing 4% damage with each press of the button. Has no lag during sprays, but has some start up. Multiple doses of bug spray will confuse your opponent or even cause them to fall asleep. Tilting the control stick up will allow Pauline to spray upwards.
- Custom 3 - Vine: Pauline swings on a vine, dealing 14% damage and launching the opponent far. She can use this as a horizontal recovery, but should jump at the apex of the swing or she will swing back and deal 7% damage before the vine comes to a dead stop. The vine is held up by a bug from Donkey Kong 3.
|
Up Special
1UP Girl
|
Pauline rises high into the air as she sticks out her hand, mimicking Mario's own jump, propelling her high into the air. When she lands down on the ground, she performs a quick dance, hitting opponents with her hips for 7% damage and doing some knockback. The dance can be cancelled if Pauline tries to do another move while in the air, resulting in that move being performed instead when she hits the ground. While late, this allows Pauline to use Hat Trick, Pauline's Umbrella, or Purse Spin in addition to the dance with no tell, making her hard to read for opponents.
- Customs
- Custom 1 - Pinball Bumpers: Pauline is launched via a pinball bumper, which goes up and down when she attacks and stays active on the screen for a total 220 frames. When a opponent stands on it, nothing will happen unless Pauline attacks, in which it will deal 12% and launch the opponent upwards!
- Custom 2 - Over the Moon: Pauline does 1UP Girl with an even higher jump, although becomes helpless upon descent. She cannot move while moving upwards and deals only 3% damage on the rocketing start upwards.
- Custom 3 - Miles Above the Rest: Pauline performs 1UP Girl and slowly falls down with her hat, doing no damage. It gives her her best recovery option, with the descent giving her a lot of speed to move horizontally.
|
Down Special
Purse Spin
|
Pauline grabs her purse and swings it around for 5% damage, able to keep opponents away from her. If the player tilts the control stick, they can control her movement, which is slower but allows her to cover more ground. She cannot jump while performing this attack. Cancels melee moves.
- Customs
- Custom 1 - Mini-Pauline: Pauline grabs a Mini-Pauline capsule out of her purse and has it follow her, only to explode after 130 frames. The explosion does 5% damage. Mini-Paulines are slower and cannot jump, meaning they can be spaced away from Pauline. They also explode when attacked. Pauline can send out three at a time.
- Custom 2 - Mini-Mario: Pauline grabs a Mini-Mario capsule out of her purse and has it follow her, dealing damage via it's hammer attacks which deal 6% damage but has minimal knockback. They explode harmlessly when hit. Pauline can send out three at a time.
- Custom 3 - Through Two Dimensions: Pauline transforms into a sprite, able to dodge attacks by running through the background as a pixellated sprite before popping out and dealing 5% damage.
|
Final Smash
Jump Up! Super Star!/Break Free
|
Pauline performs one of two songs with the New Donk City band:
- Unmetered - Jump Up! Super Star! will play as the New Donk City crowd appears in the foreground and a 8-Bit Donkey Kong throws barrels at opponents, which each deal 18% damage. Lasts for 10 seconds.
- Metered - Break Free (Lead the Way) will play as the New Donk City crowd appears in the foreground, with a 8-bit Bowser blowing fire at opponents, which deal 10% damage. Lasts for 4 seconds.
|
| Taunts
|
- Up Taunt - Pauline grabs her hat and throws it before placing it back on.
- Side Taunt - Pauline dances in place as she spins the mic.
- Down Taunt - Pauline taps her chin as she rests her arm on her hand.
|
| Special Team-Up Names
|
- With Peach - Damsels No More
|
| Alternate Costumes
|
|
|
| Unlock Conditions
|
| TBA
|
|
Geno
|
Geno is a Star Spirit who was introduced in Super Mario RPG as an emissary from beyond that aided Mario and his friends on recovering the Star Pieces and defeating Smithy and gang. Taking the form of a wooden doll, Geno's power is immense at the cost of low resistance to attacks, making him take more knockback from attacks.
|
| Move
|
Description
|
| Entrance
|
A yellow star shoots down onto the ground and hops inside the lifeless Geno doll, bringing it to life.
|
Neutral Special
Geno Beam
|
Geno pops his arm to reveal a gun, firing off a rainbow beam at opponents that deals 9% damage. The player can hold down on the attack button to charge it, with three stars appearing over Geno to increase the beam's size and damage it does, dealing up to 19% damage if fully charged.
- Customs
- Custom 1 - Geno Muzzle: Geno pops off three star shaped projectiles that explode on contact to deal 7% damage each. Cannot be charged.
- Custom 2 - Geno Pulse: Geno fires off a ball of energy that pulses as it moves slowly through the air. Geno can then tap the attack button to cause it to explode, dealing 11-18% damage.
- Custom 3 - Geno Fist: Geno sends his wooden fist flying towards his foe, dealing 9% damage. If the player then presses the attack button afterwards within 100 frames, they can then drag the opponent towards Geno, dealing a kick that does 5% damage.
|
Side Special
Geno Whirl
|
Geno generates a disc of light over his head and then fires it quickly across the stage in his direction. The disc can quickly zip over to the edge of most stage boundaries and deals a total of 10-30% damage! However, it has a bit of a start up animation and thus makes it very easy to telegraph. It also has no homing capability, going horizontally across with some downward momentum.
- Customs
- Custom 1 - Geno Spin: Geno spins around and generates two discs of light, firing them off. These work similar to Geno Whirl but each disc only deals 7-11% damage. It is slightly faster and can cover more area.
- Custom 2 - Geno Cutter: Geno creates a jagged, sharp cutting disc that has homing properties, dealing 12% damage. It is slightly slower and has half of the start up time of Geno Whirl.
- Custom 3 - Geno Arc: Geno creates a disc of light that zig-zags up and down, dealing 5% damage each time it comes in contact with an opponent. Easily the slowest disc Geno creates as well as the one that covers the least amount of area, only covering about four character distances away.
|
Up Special
Geno Cannonball
|
Geno transforms his body into a cannon and then fires in the direct that the player tilts the control stick into, becoming a cannonball that deals 15% damage on contact. Can be used to recover, although it is ultimately kind of a poorer recovery move.
- Customs
- Custom 1 - Geno Boost: Geno boosts his speed and attack by 1.4x for a short time at the cost of even more knockback and less defense.
- Custom 2 - Geno Flash: Geno transforms into a cannon but releases a large ball of light that looks around as it expands, dealing 10-20% damage. Covers a wide range but has a cooldown after it is executed that prevents Geno from using it for 400 frames.
- Custom 3 - Geno Cape: Geno floats for a bit as his Star Spirit inside illuminates. He can float in any direction the control stick is tapped for a total of 300 frames.
|
Down Special
Geno Blast
|
Geno summons star shaped projects to hail a distance before him, acting as a way to hitstun opponents out of attacks while dealing 10% damage.
- Customs
- Custom 1 - Geno Pillar: Geno releases a large pillar of energy from his gun arm, covering a wide vertical distance and dealing 12% damage. Leaves him open to punishment as it cannot be cancelled.
- Custom 2 - Star Leap: Geno can avoid all damage by temporarily jumping out of his body, leaving the Geno doll lifeless on the ground as the Star Spirit within leaps high into the air quickly.
- Custom 3 - Star Twist: Geno releases a rainbow colored twisting beam of star energy that encircles around him which damages those who come in contact with him. It is active for 110 frames.
|
Final Smash
Higher Authority
|
Geno summons the Star Pieces, which each utilize a different colored beam attack, with the seven beams able to cover most of the stage, dealing a total of 45% damage as he floats behind the Star Pieces. He then collects the seven star pieces and creates a rainbow disc that will deal 999% damage if it hits an opponent, although this disc cuts straight across the middle of the stage and can be easily dodged. On metered Final Smashs, the disc does not occur.
|
| Taunts
|
- Up Taunt - Geno holds his arm which pops off to reveal the gun before popping back on the arm.
- Side Taunt - Geno's Star Spirit briefly flutters outside of Geno's body before snapping back in.
- Down Taunt - Geno lifts up both of his arms as star particles emit downwards before folding his arms.
|
| Special Team-Up Names
|
- With Mario - Star Warriors
- With Peach - Star Battlers
- With Bowser - Star Warriors
- With Rosalina - Cosmic Deities
|
| Alternate Costumes
|
| TBA
|
| Unlock Conditions
|
| TBA
|
|
Wario
|
Wario is a treasure hunter, entrepreneur, and a game designer. He has a rich and checkered history, first appearing as a villain who took over Mario's castle. Wario has been drastically altered from his past appearances in the Smash series, although all his old moves are still there in the form of customs. This is a fundamental overhaul for the character, although his physics are more or less the same as past appearances. His new moves call more back to the Wario Land series, with his new improved version of his Dash Attack as a neutral special and completely changing both his side and down specials. He even has moves from Wario World and Wario: Master of Disguise thrown in as part of his new base moveset and customs.
|
| Move
|
Description
|
| Entrance
|
Default costume: Wario crashes in a red plane, similar to the opening of Wario Land 3 before popping out.
Biker outfit: Wario speeds in with his motorcycle, hopping off as he swings his arms.
|
Neutral Special
Dash Attack
|
Wario charges forward with his shoulder, able to build up speed over time or by tilting the left control stick. This move deals 7-12% damage depending on how fast Wario is going. In the air, it can be used as a horizontal recovery as Wario will barely lose any air while performing it. It has a high launch rate and can be used to kill at 130%+.
- Customs
- Custom 1 - Chomp: Wario bites in the direction he faces, chewing on opponents and acting as a command grab. Wario will heal 1% for each Chomp he performs, and he will heal 3% for items he consumes or eating healing items will heal 1.5x the damage as usual. This also charges Wario Waft if he is using the move. Deals 2% for each bite, before launching for 5% damage.
- Custom 2 - Dash Tackle: Wario tackles forward, although he leans back to his original position after performing the attack. This attack deals 10% damage, however lacks the movement options that Wario's Dash Attack has and has a poorer launch rate.
- Custom 3 - Hyper Suction: Wario opens his mouth and sucks in items and characters near him. Does not act like a grab or an attack like Chomp, instead acting as a way to pull foes in before performing another attack. It's range is somewhat large.
|
Side Special
Flaming Wario
|
Wario is lit on fire, running forward as he is engulfed in flames. He will dash in the direction he faces, although will turn on ledges and edges. On contact, Wario will deal 7% damage. Lasts a total of 200 frames, with a very long end-lag. Wario gains super armor against attacks in this form, even during ending animation, save Wario shaking off the soot on him.
- Customs
- Custom 1 - Wario Bike: Wario rides his motorcycle, which he can deal 8% damage by ramming into foes with it, but deal more damage (15%) and gain a speed up by jumping. However, jumping will cause the bike to not stop and turn around near ledges. Wario can cancel out of the bike and throw it as a weapon, as well as eat it via Chomp to gain back health.
- Custom 2 - Wild Swing-Ding: Wario command grabs his opponent and swings them around, dealing 10% damage via a swing to both his opponent and anyone else he swings them into before launching them away.
- Custom 3 - Mega Toss: Wario command grabs his opponent and can tilt the control stick to throw them, dealing 8% damage normally and 15% damage to both his opponent and target if he throws it at another opponent.
|
Up Special
Corkscew Conk
|
Wario propels upwards, spinning as a ball, which the player can direct. It greatly increases Wario's vertical distance and if the player pushes the control stick, they can control his horizontal movement. It also deals 8% damage. Cannot be cancelled out of. Wario will not regain control unless he hits a ledge or the floor. On slopes, he will continue to roll.
- Customs
- Custom 1 - Spring Corkscrew: Wario transforms briefly into Spring Wario, able to hop around for 3 seconds before turning back to normal, with each hop acting as a dodge. Additionally, if the player jumps, Wario will leap high into the air and spin his body like a corkscrew, dealing 12% damage to aerial opponents.
- Custom 2 - Corkscrew: Wario spin-jumps into the air, hitting enemies multiple times for 4% damage each swing. The final hit has good diagonal knockback. The direction can be altered while in the air, although not by much. Has more hit and stun than Corkscrew Conk, but doesn't go as high. Easy to cancel out of.
- Custom 3 - Puffy Wario: Wario becomes puffy and lifts up into the air, his cheeks heavily inflated. Deals no damage but Wario can press the attack button to let out more air and end the move early with a faster propelling into the air.
|
Down Special
Steel Pound
|
Wario's overalls take on a metallic appearance as he performs a ground pound, dealing 17% damage and stunning opponents nearby via shockwaves. When performing this move, it cannot be cancelled. Wario gains super armor on the way down that prevents him from being launched or knocked out of the attack.
- Customs
- Custom 1 - Wario Waft: Wario releases pent up gas inside him that is gained from hitting or getting hit by opponents, and it can also be filled up via Chomp. Wario will lift up from the fart attack when it is released on higher levels of charge. It can deal up to a max of 27%, with the lowest charges merely sending out a small 1% damage attack of gas.
- Custom 2 - Piledriver: Wario command grabs his opponent and then slams their body into the ground, driving them into the ground and keeping them grounded. This move does 9% damage.
- Custom 3 - Electric Wario: Wario is shocked by a bolt of lightning, dealing 20% damage to opponents nearby as Wario jumps back and stumbles around a bit. This move does a ton of damage but has a huge punishment period for Wario that can only be cancelled during the first stagger.
|
Final Smash
Wario-Man
|
Wario eats a golden garlic clove that transforms him into Wario-Man. In the full-powered version of this Final Smash, Wario has access to all of his moves and can change his moveset via the triggers as much as he wants with no consequence. The ending lag to all of his moves also decreases. In the metered version of this Final Smash, a cinematic instead plays where Wario lands a flurry of punches as multiple cartoon-styled onomatopoeia such as "BOOM!!" and "POW!" (reminiscent of those found in superhero comics) appear on-screen.
|
| Taunts
|
- Up Taunt - Wario holds his hand up, his fingers pointed out to resemble a W.
- Side Taunt - Wario closes one eye before pointing his pointer finger at the screen.
- Down Taunt - Wario picks up a weight and lifts it, before putting it down and showing off his biceps. If the player holds down the button, he will keep lifting the weight with no sign of fatigue.
|
| Special Team-Up Names
|
- With Mario - Bitter Rivals
- With Peach - Living Royal
- With Bowser - Crude Conquers
- With Rosalina - Conquerors of Destiny
- With Yoshi - Big Eaters
- With Luigi - Mustached Doppelgangers
|
| Alternate Costumes
|
|
|
| Unlock Conditions
|
| TBA
|
|
Mona
|
Mona has gone through a lot of jobs in her time, although she generally ends up working under Wario one way or the other. It's not hard to see why, given Mona thinks Wario is cool and has a crush on him, but usually has to juggle another job with fierce competitors that will do anything to keep her from arriving on time to it. Despite the job changes though, Mona remains a mostly consistent character, being deceptively cute with strange or gross mini-games, having a odd sense of style. Her moveset isn't necessarily about inflicting damage, but more so messing with the opponent so she can punish them greatly with her other attacks. She also carries out a similar move to Wario's old bike move, although it differs in a couple ways.
|
| Move
|
Description
|
| Entrance
|
Mona drives onto the stage through her scooting, hopping off as she
|
Neutral Special
Elephant Sludge
|
Mona summons her pet elephant, who sprays sludge in her direction, dealing 3% damage while slowing down her opponent. Additionally, the sludge makes her opponent take even more knockback, allowing Mona to use it to aid her in KOing opponents. Has somewhat of a limited arc range.
- Customs
- Custom 1 - Pig Ball: Mona summons her pet pig, who fires off a soccer ball at an upwards diagonal, launching opponents for 20% damage. The ball can be kicked back to kill the projectile, but it's a hard hitting move with an aerial lift that can be good for opponents attempting to dodge attacks.
- Custom 2 - Monkey Banana: Mona summons her pet monkey, who throws a banana that damages for 5% and then leaves a banana peel behind that can trip opponents for 7% damage.
- Custom 3 - Hi-Tech Monkey: Mona summons her pet money, who puts on a pair of hi-tech goggles and throws three banana peels which deal 7% damage. Lack the original banana attack.
|
Side Special
Scooter
|
Mona rides her scooter, which damages for 5% when opponents get into contact with it, and can leap high and deal 20% damage. When jumping, it will ignore ledges. Mona can cancel out of the scooter, which will cause it to vanish. One thing of note is that Mona can immediately go into this move after summoning one of her pets, and it will rest on her head as it does it's attack.
- Customs
- Custom 1 - Super Scooter: Mona rides her scooter, which now has a snow plow on the front, allowing it to deal 10% damage on contact. It is slower and cannot jump. Mona can cancel out of it after 30 frames.
- Custom 2 - Blinding Light: Mona rides her scooter, which cannot jump and deals 6% damage on contact. When the player presses the jump button, it instead flashes a light that stuns or paralyzes opponents. Mona can cancel out of it.
- Custom 3 - Moon Scooter: Mona's scooter deals 7% damage and will jump incredibly high with a slow descent. Mona can only cancel out of it when in the air. It will deal 8% damage when in it's jump frames but deals no aerial damage otherwise.
|
Up Special
Monettes
|
Mona takes out two pom poms and strikes upwards, dealing 5% damage. After the first strike, Mona can do her up special again and get two of the Monettes to lift her up into the air, with it being able to follow up from the first hit and deal 8% damage. Finally after performing it a third time in succession, three more Monettes go underneath and lift Mona even higher, for her to deal an upwards strike that deals 15% damage. At the second and third successions, Mona can jump and gain a boost from her fellow Monettes but attempting this on the first will have nothing occur.
- Customs
- Custom 1 - Mona Scoop: Mona shoots a photo, aiming the camera and it's flash above her. It stuns opponents while they're in the air, causing them to drop down onto the ground. Has a high priority rating. Has no recovery properties.
- Custom 2 - Cute Cuts: A stylus appears above the screen and does a diagonal cut to the left and right, dealing 20% damage. Has no recovery properties and appears directly above Mona.
- Custom 3 - Hot Slice: Mona brings out her bass guitar, leaping high into the air as she plays a riff off it. The player can tap the button to keep Mona in the air or stop playing to have her come down. When playing music, Mona deals 3-6% damage.
|
Down Special
Mona Pizza
|
Mona holds out a pizza box and opens it, flinging up to nine slices of pizza that deal 7% damage and have the chance to burn opponents, dealing 2-3% damage per 35 frames for 3-5 seconds. When flinging pizza, Mona is unable to defend herself. Mona can cancel it early, although it adds some end-lag that becomes punishable.
- Customs
- Custom 1 - Roller Blades: Mona puts on a pair of roller blades that make her much faster on the ground, although make her heavier in the air and thus descend faster. When she runs with the rollerskates, she can deal 4% damage on contact. Lasts a total of 440 frames.
- Custom 2 - Crayon Epic: Mona puts up a crayon drawn shield that can defend against projectiles, being out as long as Mona wants to, although it will not defend her from physical attacks.
- Custom 3 - Mini-Spin: Mona command-grabs her opponent and then spins them around tightly, causing them to have reversed controls for 220 frames and take 8% damage.
|
Final Smash
The Dinosaurs
|
Mona's heated rivals, the Dinosaurs, invade the fight by attacking with a giant machine that runs across the stage, dealing 15% damage and huge knockback on touch. In the metered version of this final Smash, it lasts for 3 seconds, while unmetered it goes out for 7 seconds.
|
| Taunts
|
- Up Taunt - Mona looks panicked, realizing that she's about to be late for something.
- Side Taunt - Mona holds up two ice cream cones and winks.
- Down Taunt - Mona picks up her bass guitar and plays a couple notes of "Mona Pizza".
|
| Special Team-Up Names
|
- With Wario - Big Weirdos
- With Captain Syrup - Fierce Leaders
|
| Alternate Costumes
|
|
|
| Unlock Conditions
|
| TBA
|
|
Donkey Kong
|
Donkey Kong is a carefree Kong on Donkey Kong Island who spend his days collecting bananas and spending time with his family and friends. When trouble arises, whether it be the banana hoard stolen or a kidnapping or a threat to the very island he lives on, Donkey Kong pounds his chest and gets it done. Donkey Kong is the third of his kind; his grandfather Cranky Kong is the first Donkey Kong and his father Donkey Kong Jr. is the second. He has been part of Mario's earlier adventures as well, usually as a villain.
Donkey Kong has been retooled entirely. The only move to survive the transition from this game from the last is Spinning Kong. His punch can now launch into a multi-hitting attack, he can stun opponents with a powerful clap from far away, and he can now throw barrels as powerful ground-rolling projectiles. This makes him more of a menace, although his increased options also make him punishable as well if not done right.
|
| Move
|
Description
|
| Entrance
|
Donkey Kong bursts out from a DK Barrel and strikes a flexing pose.
|
Neutral Special
Fury Punch
|
Donkey Kong punches forward. If it connects, it acts like a command grab where the opponent is physically stuck in place while Donkey Kong can whale on them. The player can tap the special button multiple times to inflict more damage, dealing 7-22% damage depending on different conditions such as the opponent mashing out of the punch or how many times the button was pressed. The more damage a opponent has, the harder it is for them to escape the punches. At the end of the punching a launching punch will be used at either 75 frames or when the player lets go of the special button. If this move does not connect, it is very easily punishable.
- Customs
- Custom 1 - Giant Punch: Giant Punch is a chargeable move that charges fully after seven wind-ups. The punch initially deals 10% damage, but each wind up adds a total of 4%+ to the overall damage. Slows Donkey Kong's descent when used in the air. This move charges faster when Donkey Kong has more rage.
- Custom 2 - Grounder Punch: Works similar to Giant Punch in that it can be wound up to five times. Deals 7% damage initially, with each wind up adding 5%+ the overall damage. When used, Donkey Kong slams his fists together and bashes the opponent into the ground, burying them.
- Custom 3 - Lightning Storm Punch: Donkey Kong charges forward with an electrical fist attack that deals 11% damage and can put the opponent into paralysis when used. Cannot be charged or used to deal more damage.
|
Side Special
Sound Wave
|
Donkey Kong slaps his hands together and a green and red shockwave will emit out. The green shockwave stuns opponents and has a larger range, while the red shockwave will command grab foes and allow Donkey Kong to shove them into the ground, burying them. This deals 10% damage but has a much shorter range.
- Customs
- Custom 1 - Coconut Shooter: Donkey Kong fires a coconut from a oak gun, dealing 9% damage with the low arced projectile. If it touches the ground, it deals 19% damage on explosion with a sweetspot.
- Custom 2 - Donkey Konga: Donkey Kong bangs against two Bongos as he crosses his legs, killing momentum to an absolute halt as he beats to the rhythm that appears above his head, directing sound waves that deal 10% damage each to the direction he was facing, which can be aimed via the control stick. It leaves him open to attacks, although the sound waves can kill projectiles as well.
- Custom 3 - Headbutt: Donkey Kong punts forward with his head, which will bury the opponent and deal 10% damage. The aerial version will meteor smash the opponent if they are hit by the sweetspot. Full power shields will break if this move is used against them.
|
Up Special
Spinning Kong
|
Donkey Kong rapidly spins around, trapping opponents and damaging them with a clothesling spin attack. Grants invicibility on the first couple frames and it can do moderate knock back. Does 7% damage in the air and 10% in the air, with follow up hits doing 4% damage. Good horizontal recovery but bad vertical recovery.
- Customs
- Custom 1 - Strong Kong: Donkey Kong is surrounded by three Crystal Coconuts as his attacks are powered to deal 1.2x more damage and 1.7x more knockback. His attacks also grow slower by 1.2x and his knockback received is increased by 1.5x. The move lasts as long as the Crystal Coconuts swirl around him, with one breaking every 220 frames. When all the Crystal Coconuts are gone, Donkey Kong reverts to normal.
- Custom 2 - Barrel Blast: Donkey Kong straps himself into jet powered barrels as he strikes fist forward, dealing 8% damage on contact and dealing slight knockback. Tilting the control stick allows the player to direct Donkey Kong's trajectory.
- Custom 3 - Barrel Launch: Donkey Kong is launched out of a barrel, dealing 15% damage and lots of spinning knockback. The player can tilt the control stick to choose the trajectory that Donkey Kong launches out of.
|
Down Special
Barrel Toss
|
Donkey Kong hoists a Barrel above himself, dealing 8% damage in this motion, before tossing it forward. Holding the special button will cause the barrel to bounce while tapping it will roll it at a slower pace. Contact with the barrel deals 10% damage will launch the opponent back.
- Customs
- Custom 1 - Rambi: Donkey Kong hops onto Rambi, who can trample opponents and bury them into the ground with his powerful charge, which deals 13% damage. Donkey Kong can hop off Rambi by pressing the shield button or the grab button.
- Custom 2 - Squitter: Donkey Kong hops onto Squitter, who creates webs when Donkey Kong jumps and can spit out web projectiles that trap opponents and leave them still and defenseless while dealing no damage. Donkey Kong can hop off Squitter by pressing the shield button or the grab button.
- Custom 3 - Enguarde: Donkey Kong hops onto Enguarde, who is surrounded by a water shield that will make opponents wet on contact. Enguarde also deals 12% via a sweetspot on his pointed swordfish tip. Donkey Kong can hop off Engaurde by pressing the shield button or the grab button.
|
Final Smash
Ultra Barrel DK
|
Donkey Kong straps on the Ultra Barrel rockets and goes extremely fast, which causes fire to surround him as he punches forward, flying around fast while dealing 15% damage with each dash.
|
| Taunts
|
- Up Taunt - Donkey Kong beats his chest while scowling.
- Side Taunt - Donkey Kong shakes himself as if he was wet, during which he will sport a toothy grin before making a humorously confused expression. This actually does get rid of the wet status condition when this taunt is used.
- Down Taunt - Donkey Kong faces the camera and shrugs his shoulders while grunting and making a humorously confused expression.
|
| Special Team-Up Names
|
- With Diddy Kong - DK Crew
- With King K. Rool - Brutes of the Jungle
|
| Alternate Costumes
|
Turbo Charged Donkey Kong Smash 64 Donkey Kong |
| Unlock Conditions
|
| TBA
|
|
Diddy Kong
|
Diddy Kong is Donkey Kong's trusty partner and has gone on his own adventures from time to time. He has a signature look that no Kong can ever match- just look at that star shirt and Nintendo Cap! Excitable if a little childish at times, Diddy Kong has a ton of energy and speed that matches well with Donkey Kong's strength and reservedness. In Smash, Diddy is a quick and agile fighter with a ton of options. None of that has changed, although Diddy fans who want to try something new can use Diddy's new balloon moves based off Diddy Kong Racing, which can be used to do various effects and attacks.
|
| Move
|
Description
|
| Entrance
|
Diddy Kong bursts out of a DK Barrel and claps his hands above his head.
|
Optional Gimmick
Balloons
|
Diddy Kong has a total of five different new Balloon Moves that can be used. None of these are part of his default moveset, instead all being customs. However, they can all be stacked on top of each other and give different effects. Each effect is listed in the moves. However, it should be noted that:
- Diddy can only stack three balloons at a time. While attacks and effects are stacked when Diddy pops the balloons via a Balloon move, he can only create Balloons based off the attack he last used. If Diddy has two Balloon moves in his moveset and he uses Red Balloon to create one Red Balloon and then uses Rainbow Balloon to create a Rainbow Balloon, when he uses Red Balloon again he will pop both Balloons and create a combined effect.
- Diddy inflates new Balloons based off his last used Balloon Move. Diddy inflates each Balloon when he deals 15% damage, but it will be the Balloon type he used last.
- Each Balloon has a different attack/effect based on how many of it's type Diddy has. Some Balloons completely differ when paired together in a group of two or three.
- If Diddy has four Balloon moves and attempts to use one that is not part of his active Balloons while he already has three, all three balloons will pop and Diddy will have to tap the button again to create a new balloon.
|
Neutral Special
Peanut Popgun
|
Diddy charges up his pop-gun to fire peanut projectiles that have a low arc, dealing 3-12% damage. If Diddy Kong over charges the attack, the pop-gun will explode and leave him very vulnerable, but deal 24% damage.
- Customs
- Custom 1 - Rainbow Balloon: Diddy has a rainbow balloon pop onto his back when he first uses the move. Tapping it again will pop the balloon and create a magnet effect, pulling Diddy close to fighters within a weak range. Diddy can charge up this attack by doing damage to opponents, with each 15% damage creating another balloon. When Diddy has two balloons, Diddy is able to deal a headbutt with a extended magnetizing range, dealing 10% damage. When Diddy has three balloons, he can pull opponents from a far range towards him as he deals a powerful double slap that deals 20% damage.
- Custom 2 - Banana Popgun: Diddy fires a banana from his popgun, dealing 8% damage. Cannot be charged but is much faster than his usual pop-gun. Has a longer range as well.
- Custom 3 - Freezy Popgun: Diddy fires blue peanuts from his popgun, dealing 4-10% ice damage depending on how long he charges. If he overcharges, the pop-gun will explode in a icy explosion that freezes opponents and deals 24% damage but leaves him vulnerable.
|
Side Special
Monkey Flip
|
Diddy performs a sideways hop that has the potential to launch him onto an opponent's face if timed correctly, dealing 14-7% damage depending on how clean the attack was. By tilting the control stick, Diddy can perform a shorter hop. Diddy can then grab the opponent and deal up to 7-11% damage. The player can cancel the grab into a flying kick that deals 3% and long knockback by pressing the special attack button instead.
- Customs
- Custom 1 - Red Balloon: Diddy has a red balloon pop onto his back when he first uses the move. Tapping it again will pop the balloon and create a forward firing missile that deals 7% damage with low knockback. Diddy can charge up this attack by doing damage to opponents, with each 15% damage creating another balloon. When Diddy has two balloons, Diddy is able to create a homing rocket that deals 10% damage with low knockback. When Diddy has three balloons, he can fire off 10 smaller rockets that deal 5% damage each but have homing properties.
- Custom 2 - Back Flip: Diddy hops backwards and deals 17-8% damage on impact, and can follow it up with a kick via the special attack button, dealing 5% more damage. Can't grab.
- Custom 3 - Flying Monkey Flip: Diddy hops farther, but only deals 10% damage on contact and his grab deals only 8% damage. The kick is more powerful, dealing 7% damage and able to meteor smash opponents.
|
Up Special
Rocketbarrel Boost
|
Diddy Kong charges his rocketbarrel pack from Donkey Kong 64 in a powerful attack that deals 10% damage upon launching off and 6-8% damage when he collides into foes. Has high recovery flight potential and is very fast, but will be cancelled once Diddy makes contact with anything, be it projectile, wall, or opponent. If he hits a surface, Diddy takes 5% damage.
- Customs
- Custom 1 - Blue Balloon: Diddy has a blue balloon pop onto his back when he first uses the move. Tapping it again will pop the balloon and create a small jetpack boost that propels him into the air, dealing 7% damage with low knockback on contact with foes. Diddy can charge up this attack by doing damage to opponents, with each 15% damage creating another balloon. When Diddy has two balloons, Diddy is able to propel up much further and deal 15% damage on contact with another foe. When Diddy has three balloons, he can fire off with his jetpack and deal 19% damage on contact while still propelling up, being able to reach the top of the screen before being rendered into a helpless state. Unlike his jetpack move, it will not be cancelled on contact with anything.
- Custom 2 - Rocketbarrel Attack: Diddy Kong takes longer to charge but deals 18% damage upon launch explosion. The distance is slightly lower and the speed is slower than the original move.
- Custom 3 - Rusty Rocketbarrel: Diddy Kong charges up faster with this version of Rocketbarrel Boost, but it sputters out during the launch boost. On the explosion, it will turn characters rusty and deal 6% damage.
|
Down Special
Banana Peel
|
Diddy Kong tosses a Banana Peel over his shoulder and into the air to have it fall onto the ground. Grounded opponents who touch the peel while on the ground or are hit by the peel when thrown will slip and trip on the floor, dealing 5% damage. The Banana Peel can picked up and thrown to deal more damage. Only a single banana peel can be out a time for a Diddy player.
- Customs
- Custom 1 - Yellow Balloon: Diddy has a yellow balloon pop onto his back when he first uses the move. Tapping it again will pop the balloon and create a shield that protects against a single hit. Diddy can charge up this attack by doing damage to opponents, with each 15% damage creating another balloon. When Diddy has two balloons, Diddy is able to create a shield that can protect against two hits. When Diddy has three balloons, he can create a shield that protects against three hits. It also makes opponents flinch on contact, as well as having a 10% chance of inflicting the lemon scent status effect.
- Custom 2 - Green Balloon: Similar to the Yellow Balloon move, but allows Diddy to create a oil slick when he has one green balloon that causes opponents to trip and take 5%. Having two balloons creates a spinning, stationary landmine that deals 13% damage and explodes on contact with anything. The third balloon ensnares opponents in a bubble that consistently makes the opponent under the wet effect and slows their movement to half of what it was.
- Custom 3 - Shocking Banana Peel: Diddy throws an electrified Banana peel that deals 5-7% damage and stuns opponents for a bit. They are stunned longer if they jump onto the banana peel.
|
Final Smash
Taj the Genie
|
Diddy Kong slaps his hands together and summons Taj the Genie, who attacks via Golden Balloons that swim up to the top of the stage, acting as rising platforms that will bring opponents to the blast lines. Additionally, Taj rams into foes to deal 15% damage upon collision. Taj is active for 3 seconds in the metered version of this Final Smash and 7 seconds in the unmetered version.
|
| Taunts
|
- Up Taunt - Diddy tosses his cap in the air and has it land on his head.
- Side Taunt - Diddy does a playful fighter's stance, trying to assert his dominance.
- Down Taunt - Diddy claps his hands above his head four times, switching feet in the process.
|
| Special Team-Up Names
|
- With Donkey Kong - DK Crew
- With King K. Rool - Krem and Kong
- With Villager - Balloon Fighters
|
| Alternate Costumes
|
|
|
| Unlock Conditions
|
| TBA
|
|
King K. Rool
|
King K. Rool, the Kommander of the Kremlings, returns to Smash. Having gone against Donkey Kong's clan multiple times under the guise of different roles, King K. Rool is a theatrical bad guy who loves nothing more than putting on a good show and taking out Kongs, making his fights in the original Donkey Kong Country series incredibly memorable due to how unique and different they are from fight mechanics to theming. In Smash, King K. Rool is a heavy weight with a ton of different tools from his various appearances, utilizing two different projectile attacks and being able to use his golden stomach armor to counterattack. Additionally, his recovery is actually really good for a heavy weight and he has a ton of kill options. However, King K. Rool does have a few weaknesses- while he has super armor for a lot of his moves, it has a huge downside. Additionally, one of his attacks can be straight up taken away from him.
|
| Move
|
Description
|
| Entrance
|
King K. Rool drops from the sky with his arms crossed before chuckling. His pose is based on how he appears in Donkey Konga.
|
Gimmick
Belly Armor
|
King K. Rool's golden belly armor is utilized in many of his attacks (forward tilt, dash attack, up smash, down smash, neutral aerial, up aerial, down aerial, and side taunt) and gives him superarmor. However, taking damage with these moves cracks his stomach armor, with K. Rool getting dazed upon it breaking completely after sustaining too much damage. The armor regenerates when not using belly attacks.
|
Neutral Special
Blunderbuss
|
K. Rool pulls out a blunderbuss and fires a Kannonball, donning a pirate hat as he does. Only one Kannonball can be out at a time. Press the special button again to use the Blunderbuss' vacuum function, sucking in nearby enemies or the Kannonball itself. The Kannonball deals 14% damage initially, but if it's sucked backed in and then fired, it will deal 17% damage. Sucking in foes to shoot them will deal 12% damage and launch them away. K. Rool can drop through soft platforms while the Blunderbuss is active, as well as move left or right. Has good KO potential.
- Customs
- Custom 1 - Blundergass: K. Rool fires a gassy skull projectile that deals 5% damage and has an effect that ranges from the mushroom effect, freezing the opponent, or poisoning the opponent. These effects are not random and are shot out in the order described. The projectile is slow moving and won't have as much range, but will cause opponents to flinch when in contact with it.
- Custom 2 - Spiked Blunderbuss: K. Rool fires a spiked Kannonball that deals 19% damage and stays on the ground, dealing 7% damage on contact. He can't use his vacuum function again and must wait for the Kannonball to disappear.
- Custom 3 - Backfiring Blunderbuss: K. Rool can fire off a special gold Kannonball that deals 17% damage, but can be picked up and thrown when K. Rool uses his vacuum function, which will make it backfire and deal 8% recoil damage to K. Rool. When he vacuums in his foe, he can launch them away for 11% damage.
|
Side Special
Crownerang
|
K. Rool flings his crown forward similar to a Boomerang for 9% damage. Has normal armor while K. Rool throws his crown. Deals 7% damage when returning. The crown will try to return to K. Rool when possible, but will lose altitude and land as a item that can be thrown for 11% damage. It can also be interrupted by otherwise projectile killing attacks. K. Rool cannot perform the move until the crown is back on his head. It will reappear on his head after 12 seconds or if he touches it again.
- Customs
- Custom 1 - Crownado: K. Rool throws his crown in a spinning motion, which will not return to him but will reappear on his head after the animation completes. The attack deals 11% damage and flips the opponent's direction, as well reflecting projectiles. A sweetbox at the bottom of the tornado will cause opponents to get dizzy.
- Custom 2 - Crownizzard: K. Rool throws his crown with a chilling gust, freezing opponents who make contact with it and deals 7% damage. It reappears on his head after it comes in contact with someone, although if it fails to do so it will appear as an item to be thrown.
- Custom 3 - Crownenage: K. Rool throws the crown with a mighty force, dealing 12% damage and the bleed effect. His crown is unusable for 4 seconds after the attack.
|
Up Special
Propellerpack
|
K. Rool flies upward using the Propellerpack. Covers excellent distance both horizontal and vertical. Changing direction is difficult and has input delay. K. Rool drifts down in a helpless state when he reaches apex height. The propellers above K. Rool deal 3% damage on contact and can protect him from edgeguards. He can drag opponents to the blast line, although this can be directionally influenced out of.
- Customs
- Custom 1 - Kremling Bounce: While on the ground, K. Rool can bounce up to three times, successively getting higher as he does while creating shockwaves that deal 5% damage that get further out. When he lands on a opponent, he can deal 7% damage and bury them.
- Custom 2 - Flapping Propellerpack: K. Rool gets less air as he puts his hands and feet out in a thrashing motion, dealing 11% damage and spiking foes that get near him.
- Custom 3 - Scepter Slap: K. Rool pulls out a golden scepter and swings it, dealing 4% damage uncharged. K. Rool can charge it up and deal up to 20% damage with large knockback, although this will keep him completely still. Has huge killing power but gets rid of K. Rool's recovery. It can also reflect projectiles.
|
Down Special
Gut Check
|
K. Rool puffs out his stomach and retaliates against attacks, working as a counterattack by dealing 12-42% damage depending on the strength of what he is countering. The counter hitbox is localized to K. Rool's belly, making the rest of his body vulnerable.
- Customs
- Custom 1 - Kannonball Fall: K. Rool stands still as three Kannonballs, each dealing 14% damage, fall from the top of the stage. Really effective anti-air move, although the pattern for the Kannonballs is predictable and can be spotdodged.
- Custom 2 - Jetting Blunderbuss: K. Rool pulls out his Blunderbuss and rockets forward, powered by it's jet exhaust as he moves forward quickly. Can be used for horizontal recovery and deals 10% damage when colliding with a foe.
- Custom 3 - Tesla Rays: K. Rool places a platform underneath himself as an electrical green ray shoots across horizontally on the screen. The ray deals 11% damage and turns foes rusty. Has good range and K. Rool can use the platform to recover or do off stage shenanigans, which will stay on screen for five seconds. However, he is not immune to the ray and others can use the platform he creates.
|
Final Smash
Blast-O-Matic
|
K. Rool stomps, stunning any nearby opponents for 3%, and lunges forward while catching those in his path. If at least one opponent was caught, a cutscene plays in which K. Rool sits on his throne on Crocodile Isle before firing a massive laser from his Blast-o-Matic cannon. The laser then fires through Donkey Kong Island, destroying the island and dealing massive damage on the victims (45% metered, 100% damage unmetered). This move now just deals one hit during the cutscene as opposed to two.
|
| Taunts
|
- Up Taunt - King K. Rool viciously snaps forward.
- Side Taunt - King K. Rool slaps his belly once in amusement. This taunt also uses K. Rool's belly super armor.
- Down Taunt - King K. Rool does a sumo-esque stomp. Similar to Luigi's side taunt, this can spike opponents hanging on ledges.
|
| Special Team-Up Names
|
- With Donkey Kong - Brutes of the Jungle
- With Diddy Kong - Krem and Kong
- With Ridley - Cold Blooded Killers
- With Bowser - Kings of K
|
| Alternate Costumes
|
King K. Rool
(Mario Super Sluggers) |
| Unlock Conditions
|
| TBA
|
|
Yoshi
|
Yoshi is a dinosaur that was first hatched from an egg in Super Mario World and has been there in the Mario series in some way or another as a friend to Mario. He even has his own adventures that take place before Mario was anything but a baby. In Super Smash Bros. Discord, Yoshi has gotten a big overhaul by making his Eggs ammo in his moveset, effecting a lot of his moves. Additionally, his recovery has been changed. These make Yoshi more effective but also present new disadvantages to his overall buffed moveset. This also makes him play close to Yoshi's past appearances in the Yoshi's Island series.
|
| Move
|
Description
|
| Entrance
|
Yoshi hatches from an egg, growing from a baby Yoshi to a full sized Yoshi before striking a pose.
|
| Jump/Flutter Jump
|
Yoshi has a total of two jumps, with a first jump acting as a normal jump and the second jump being the the flutter jump that extends Yoshi's height in the air. By holding down the button, Yoshi can extend his jump by doing the Flutter Jump, dipping down and up as he travels in the air. After this, he will be rendered helpless.
|
Neutral Special
Egg Lay
|
Yoshi swallows the opponent and the pops them out while creating a Yoshi Egg. The move does 6% damage, but can be done multiple times in succession, creating up to six Yoshi Eggs that follow and bounce behind Yoshi. This move is fundamentally different from past installments in that it does not encase the opponent in a egg and Yoshi is able to use the eggs he creates for his side special. When Yoshi has a total of six eggs behind him, he will only deal 4% damage and be unable to create further eggs.
- Customs
- Custom 1 - Yoshi Tongue: Yoshi swallows the opponent and can then spit them out, dealing 8% damage if just spat out, and 11% damage if they collide with an opponent when spat out. The opponent can mash the button while inside Yoshi to force Yoshi to spit early and deal only 4% damage.
- Custom 2 - Yoshi Fireball: Yoshi swallows the opponent and spits them out as a spreading fireball, dealing 9% damage to foes hit by the triple fireball. The actual opponent turned into a fireball transforms back after 60 frames, unaffected and is not damaged.
- Custom 3 - Yoshi Swallow: Yoshi swallows the opponent and encases them in a Yoshi Egg, dealing 7%. While trapped, the opponent receives less damage and can they use button mashing in order to break free, but they are completely immobile and vulnerable to Yoshi's attacks while trapped. They also stay trapped longer the more damaged they are.
|
Side Special
Egg Throw
|
Yoshi can throw the eggs he has following him, able to target and control where they go by tilting the control stick while in a throwing pose. When Yoshi is hit in this throwing pose, he will be stunned out of this move unless it is a non-flinching move. When Yoshi throws his eggs, they deal 5% damage and have a secondary explosion hitbox that deals 7% damage. Yoshi cannot throw eggs if he has none behind him. This is generally a powerful edge guarding tool and gives Yoshi one of the most versatile projectile options.
- Customs
- Custom 1 - Egg Crate: Yoshi's eggs take on a cubic shape instead, and he is able to throw them as a homing projectile that deals 3% damage on hit and 5% damage on explosion. Generally weaker with a homing property that is supposed to offset the loss.
- Custom 2 - Red Eggs: Yoshi's eggs are red spotted instead, and deal 1% damage on hit and 21% damage on explosion. They are more powerful than Yoshi's usual eggs, but if the opponent can dodge the explosion, they will receive the minimal damage possible.
- Custom 3 - Yellow Eggs: Yoshi's eggs are yellow spotted instead, and deal 9% damage on hit and 4% damage on explosion. They have a vaccuum property when exploding, drawing opponents near to get damaged.
|
Up Special
Helicopter Morph
|
A bubble appears around Yoshi and he turns into a helicopter, able to fly upwards in the direction of the player's control stick. Allows Yoshi a lot of control but won't do damage to opponents and on contact with an opponent or their attack, will cancel Yoshi's helicopter morph early. Is active for up to 180 frames. Yoshi can cancel the form with the special button.
- Customs
- Custom 1 - Car Morph: Yoshi transforms into a car, generally increasing his speed. Yoshi can climb walls in this form as well dodge attacks by stretching his wheels up using the attack button, which if pressed again will have Yoshi go down and deal 15% damage to those underneath him. Can also act as a spike. Is active for up to 200 frames. Yoshi can cancel the form with the special button.
- Custom 2 - Train Morph: Yoshi transforms into a train, following tracks that are actually controlled by the player by pressing the control stick. Train Yoshi deals 13% damage on contact and is active for 150 frames. Yoshi can cancel the form with the special button.
- Custom 3 - Hot-Air Balloon Morph: Yoshi transforms into a hot air balloon as whirling energy surrounds him. The Hot-Air Balloon is active for up to 330 frames but rises slower than the helicopter and doesn't have as much control.
|
Down Special
Yoshi Bomb
|
Yoshi slams down in a ground pound, dealing 15% damage to the opponents around him. Stars that deal 4% damage pop out from his ground pound as well, which count as projectiles. When done on the ground, it is weaker and only deals 8% damage with 4% damaging stars, but both versions are able to kill shields relatively fast.
- Customs
- Custom 1 - Mole Tank Morph: Yoshi transforms into a mole tank and is able to dig into the stage and pop out to deal 18% damage attacks. Yoshi's movement across the ground is very slow. On thin platforms, he will be unable to dig, making this move somewhat situational.
- Custom 2 - Yoshi Roll: Yoshi encases himself inside a Yoshi Egg in order to roll around. Yoshi can barrel through opponents, which deals 5-14% depending on the momentum, or quickly retreat. He can roll while jumping to deal 7-17% damage depending on his momentum.
- Custom 3 - Good Egg: Yoshi transforms one of his eggs into a giant egg resembling Good Egg Galaxy from Super Mario Galaxy and then throws it forward in a straight horizontal line, dealing 25% damage. Shielding against the good egg will allow opponents to dodge it's power while destroying their shield. Has a long start up time.
|
Final Smash
Yoshi Herd/Mega Eggdozer
|
Yoshi has two Final Smashes. His first, which is obtained through a Smash Ball, is Yoshi Herd, which transports the opponent into a cutscene where a herd of Yoshis stampedede over them for 100% damage. This is based off Yoshi's scene in Super Smash Bros. Melee's opening and returns from Ultimate. The second, obtained through a metered Final Smash, sees Yoshi get a giant Mega Eggdozer from Yoshi's New Island and throw it forward, dealing 45% damage.
|
| Taunts
|
- Up Taunt - Yoshi dances around in a circle and then says "Yoshi!" upon finishing.
- Side Taunt - Yoshi chases his tail, then briefly pauses to stare at it.
- Down Taunt - Yoshi looks towards the screen, then jumps excitedly up and down while flailing his arms and saying "Yoshi! Yoshi!"
|
| Special Team-Up Names
|
- With Mario - Childhood Friends
- With Yoshi - Fruit Pals
- With Bowser - Legendary Dragons
- With Luigi - Green Machine
- With Rosalina - Parents of Thousands
- With The Stork - Baby Saviors
- With Link - Woken Warriors
- With Yoshi - Yoshi! Yoshi!
|
| Alternate Costumes
|
|
|
| Unlock Conditions
|
| TBA
|
|
The Stork
|
The Stork is argubably one of the most important characters in the entire Mario lore. I mean, he's how we got Mario and Luigi! If he didn't deliver them to Mario's parents, then we would have never had the two brothers living it up in Brooklyn and then disappearing into the Mushroom Kingdom. The Stork is a truly unorthodox fighter, with his weapons being his beak and babies. He utilizes every single baby from Yoshi's Island DS in his moveset, as well as incorporating things such as the stilts and the very rope Kamek used to kidnap him with!
|
| Move
|
Description
|
| Entrance
|
The Stork hangs by his legs before pecking the rope to fly free, landing on his feet.
|
| Flap
|
If the player holds jump while in the air, the Stork takes flight close to the ground and will be able to flap it's wings even when off stage for about 78 frames before it begins to descend.
|
Neutral Special
Baby Wario Magnetize
|
The Stork unfolds the sack to reveal Baby Wario, who uses his magnet to magnetize opponents and items, allowing the stork to carry all the things Baby Wario has magnetized before launching them away for 7-17% damage. Opponents can mash out of it, requiring the Stork to launch them quickly to deal damage. Damage is increased the more Baby Wario magnetizes.
- Customs
- Custom 1 - Polarity Reverse: Baby Wario uses his magnet instead to push opponents and items away, allowing the Stork some space. This has a bigger range than Baby Wario Magnetize but inflicts no damage.
- Custom 2 - Coin Launcher: Baby Wario magnetizes a bunch of gold coins to his magnet before launching them off at the direction of the nearest opponent, dealing 8% damage per coin. Baby Wario magnetizes 3-5 coins each time the move is executed.
- Custom 3 - Baby Bomb: The Stork unfolds the sac to reveal the WarioWare bomb, which promptly explodes to deal 10-25% damage.
|
Side Special
Baby DK Dash Attack
|
The Stork holds Baby Donkey Kong, who performs a dash attack that deals 12% damage to opponents with significant knock back. It is a quick jabbing dash without much range, but has very little end lag, which allows the Stork to quickly use it.
- Customs
- Custom 1 - Spin Peck: The Stork does a corkscrew spin with his bill, dealing 11% damage. If the player hits an opponent, they can mash the attack button to make The Stork peck for an additional 5-8% damage.
- Custom 2 - Cutting Feathers: The Stork raises his wings and three razor sharp feathers float away, dealing 7-9% damage to opponents. The feathers will float in the air for 80 frames and count as a projectile.
- Custom 3 - Baby DK Vine Attack: Baby Donkey Kong grabs a long vine which he uses to whip around. The Stork can move after the inital attack, allowing Baby Donkey Kong to mindlessly whip around the vine and deal 5-8% damage to opponents nearby.
|
Up Special
Baby Parasol
|
The Stork uses Baby Peach to add additional air to his jumps as well as increasing the length of his Flap jump hold. Baby Peach is active for a total of 7 seconds. The Stork will have it's defense lowered considerably due to acting lighter.
- Customs
- Custom 1 - Parasol Redirect: Baby Peach uses her Parasol to redirect the wind, creating a cutting gale that deals 9-11% damage.
- Custom 2 - Stilts: The Stork gets atop stilts, increasing the range of it's normal attacks for about 10 seconds before they break. Attacks dealt to the Stork will also begin to break the stilts.
- Custom 3 - String Up: The Stork ties a rope around his opponent's legs and hangs them up, which they can mash out of but allows the Stork to freely punish them.
|
Down Special
Baby Flamethrower
|
The Stork holds Baby Bowser as he breathes fire, dealing 13-5% damage depending on how long it has been out. It decreases over time. This differs from Bowser's version as the Stork can continue to walk around while Baby Bowser releases fire, with the attack button needing to be pressed to cancel it.
- Customs
- Custom 1 - Kangaroo Bounce: The Stork hops into the pouch of a Kangaroo, which allows the Stork to do a high hop and then a ground stomp, dealing 12% damage.
- Custom 2 - Baby Bubble: The Stork leaves Baby Bowser in a bubble, causing them to cry, which will damage opponents the closer they are to the bubble, dealing 1-3% damage per 30 frames. The Stork has to collect the baby in 30 seconds or they will be dealt 100% damage. Opponents can hit the bubble to speed up this timer.
- Custom 3 - Pecking Pulverize: The Stork jabs forward with his beak in a flurry of pecks, which continue as long as the player holds down the button. The Stork continues to move forward while dealing 1-2% per 20 frames if he is in contact with a opponent. This move has very low knockback.
|
Final Smash
Superstar Mario
|
The Stork tosses a Super Star using his beak to Baby Mario, who gains a cape and the ability to run, who proceeds to dash around the stage and into the air to deal a ton of damage. A giant Yoshi Egg then slams through the center of the stage, dealing 50% damage. In the metered version of this Final Smash, the giant Yoshi Egg does not appear.
|
| Taunts
|
- Up Taunt - The Stork unfolds his bag to reveal either Baby Peach, Baby Wario, Baby Donkey Kong, Baby Bowser, Baby Luigi, or Baby Mario before folding the bag up again.
- Side Taunt - The Stork raises his wings and screams, nearly dropping the bag before catching it in a panic.
- Down Taunt - The Stork folds his wings across his chest. as he taps the ground.
|
| Special Team-Up Names
|
- With Mario - Caretaker and Baby
- With Luigi - Lost Child and Kidnapped Heron
- With Yoshi - Baby Saviors
|
| Alternate Costumes
|
| TBA
|
| Unlock Conditions
|
| TBA
|
|
Linkle
|
Linkle is a young woman who takes care of Cuccos, and believes herself to be the Hero of Time, using her compass as proof as it has been handed down from generation to generation. She is a hero at heart, but she is so bad at directions despite owning a compass and map. Her primary weapons are crossbows.
|
| Move
|
Description
|
| Entrance
|
Linkle floats in by carrying a Cucco, pulling out her twin bows.
|
Neutral Special
Heroine's Bows
|
Linkle pulls out her twin crossbows, firing two arrows in her direction, doing 5% damage for each arrow.
- Customs
- Custom 1 - Shock Arrows: Linkle uses shock arrows, which shocks the opponent when used, dealing 4% damage for each arrow with a shock effect attached.
- Custom 2 - Bomb Arrows: Linkle uses bomb arrows, which do 10% damage each and explode when they make contact with anything.
- Custom 3 - Ancient Arrows: Linkle uses very powerful arrows that can only be used once before a very long cooldown preventing her from using them occurs. In the meantime, she can only use weak bronze tipped arrows that deal 1% damage.
|
Side Special
Bomb Kick
|
Linkle fires a large bomb into the air, then kicks it to make it go off, launching the explosive away from her.
- Customs
- Custom 1 - Small Bomb Kick: Linkle kicks a smaller bomb with less radius, although she can kick it farther and faster.
- Custom 2 - Cucco Kick: Linkle winces as she kicks a Cucco, sending a swarm near the opponent she kicked it to. This move can backfire on Linkle if there is nobody near by.
- Custom 3 - Four Bomb Squadron: Linkle launches bombs in four directions around her and comes down with a sliding kick.
|
Up Special
Flight of the Cucco
|
Linkle hoists a Cucco over her head and can jump higher as a result, as well as float down. Should players hit the Cucco while she has it over her head, Cuccos will swarm the stage and attack whoever attacked the Cucco. This has the side effect of killing Linkle's recovery though.
- Customs
- Custom 1 - Big Cucco: Linkle hoists a bigger Cucco that can't make her jump higher or let her float, but opponents are less likely to miss the Cucco when firing at Linkle.
- Custom 2 - Crystal Cucco: Linkle hoists up a reflective Cucco that will reflect projectiles, although it will not summon other Cuccos when it reflects projeciles. It has slightly worsened effects of a normal Cucco.
- Custom 3 - Black Cucco: Linkle hoists up a black Cucco that shoots out thunder of it's beak when in the air. It cannot summon other Cuccos to attack when it is attacked, although it has the same properties of her normal Cucco attack.
|
Down Special
Rapid Crossfire
|
Linkle moves around while shooting arrows in rapid-fire straight in front of her, until her meter depletes. After this meter depletes, she has to wait for it to go back up before performing this move again.
- Customs
- Custom 1 - Reckless Crossfire: Linkle twirls while shooting arrows rapidly, allowing her to shoot from behind and in front of her. This drains her meter faster.
- Custom 2 - Fire Crossfire: Linkle fires off fire arrows while shooting arrows rapidly, doing slightly more damage. This drains her meter faster.
- Custom 3 - Ice Crossfire: Linkle fires off ice arrows while shooting arrows rapidly, allowing her to freeze opponents. This drains her meter faster.
|
Final Smash
Heroine of Time
|
Linkle points to her opponent and the Triforce surrounds them ala Triforce Slash, and she shoots hundreds of arrows rapidly into her opponent, dealing up to 130% damage.
|
| Taunts
|
- Up Taunt - Linkle takes on/off her hood on her cloak.
- Side Taunt - Linkle pets a Cucco on the head, giggling.
- Down Taunt - Linkle looks at her compass, which spins around.
|
| Special Team-Up Names
|
- With Link - Heroes of Time
- With Cia - Possessive Girls
|
| Alternate Costumes
|
|
|
| Unlock Conditions
|
| TBA
|
|
Cia
|
Cia was the Guardian of Time who harbored affections towards the Hero of Time, which in turn opened herself up to corruption of her soul by Ganon. She isn't quiet about her desires, having a strong sense of ego and self. She wants to make the world and everything in it hers, especially Link.
|
| Move
|
Description
|
| Entrance
|
Cia cackles as she enters out of the Gate of Souls. If Link or Linkle is in the match, she will proclaim "You're mine~!"
|
Neutral Special
Scepter of Time
|
Cia reverses the flow of time of any projectile thrown at her, being able to project it back at the opponent who shot it or someone who gets in the way.
- Customs
- Custom 1 - Scepter of Broken Time: Cia breaks any projectile that gets within her radius upon this move's activation, cancelling it out.
- Custom 2 - Scepter of Unwound Time: Cia snaps the projectile back at the original opponent who threw it, causing it to explode into darkness and dealing 8% damage.
- Custom 3 - Scepter of Shattered Time: Cia shatters the projectile into a million shards, dealing small bits of damages with the shards.
|
Side Special
Dark Orb
|
Cia shoots a slow moving but powerful dark orb that swerves towards the opponent, dealing 10% damage.
- Customs
- Custom 1 - Umbra Orb: Cia shoots an evil slower orb that explodes when it makes contact with anything, dealing 15% damage.
- Custom 2 - Corrupt Orb: Cia shoots a faster dark orb with a red tint that turns projectiles into dark projectiles that heal Cia when they hit her.
- Custom 3 - Light Orb: Cia shoots a dazzlingly fast orb that does very little damage made of light magic.
|
Up Special
Crackling Scepter
|
Cia releases a smattering of thunder, dealing 4% damage before releasing three dark orbs at nearby opponents, dealing 3% damage each.
- Customs
- Custom 1 - Cackling Scepter: This version of the attack just releases the dark orbs at a boosted 4% damage each.
- Custom 2 - Skyward Dark: Cia points her staff skyward and temporarily surrounds herself in dark energy, charging up a dark aura around her that makes her immune to flinching.
- Custom 3 - Whipward Dark: Cia unleashes her whip, whipping opponents around upwards before shooting off a blast of dark energy at them.
|
Down Special
Whiplash Shockwaves
|
Cia transforms her scepter into a whip, whipping at opponents to deal 10% damage or at the ground to create dark shockwaves, with each shockwave dealing 8% damage.
- Customs
- Custom 1 - Umbric Shockwaves: Cia uses her staff to create dark shockwaves that are much larger but only deal 6% damage each.
- Custom 2 - Midnight Pools: Cia creates four pools of dark energy on the ground around her. If an opponent steps on one of them, they will erupt with dark energy and damage enemies.
- Custom 3 - Daylight Pools: Cia creates four pools of light energy on the ground around her. If a opponent steps on one of them, they will encased in a light crystal and be unable to attack for a temporary amount of time.
|
Final Smash
Darkness Within
|
Cia unleashes a dark version of Link to attack with a dark version of the Triforce slash, before summoning them away to whip them hard and then finally blasting them with a dark energy blast.
|
| Taunts
|
- Up Taunt - Cia spins her scepter around and says "You underestimate me at your peril."
- Side Taunt - Cia leans on her staff and teasingly says "Why don't you cool down?"
- Down Taunt - Cia laughs as she stomps the ground, shouting "This keep is MINE!"
|
| Special Team-Up Names
|
- With Linkle - Possessive Girls
- With Link - Green Hearts
|
| Alternate Costumes
|
|
|
| Unlock Conditions
|
| TBA
|
|
Fox
|
Fox McCloud is the main protagonist from the Star Fox series and leader of the Star Fox team. The son of James McCloud, Fox is an expert pilot and has saved the Lylat System from numerous threats. He has many enemies such as the mad, demented scientist known as Andross and the Star Wolf crew, one of which was responsible for the death of his father inadvertently.
Fox is a quick character who has a lot of mobility, good projectile options, and can prevent camping through his Reflectors. They give him a fast approach and while his low knockback is usually a weakness, his fast speed allows for good combo set ups and some of his moves still give him good KOing options, negating the need for general moves for good knockback. However, Fox has a fast falling speed and subpar air speed. He can be easily comboed and KO'd and his recovery options are linear and predictable.
|
| Move
|
Description
|
| Entrance
|
Fox ejects from an Arwing and lands on his feet.
|
Neutral Special
Blaster
|
Fox takes his blaster out of it's holster and fires at the opponent. The blaster's lasers are fired rapidly but do not make the opponent flinch or take any kind of knockback. They lose power the further they travel, dealing 1.4%-3% damage depending on how close the opponent is to Fox's range.
- Customs
- Custom 1 - Feathered Blaster: Fox's blaster shoots slower blue beams but consistently does 3% damage no matter what the range and is able to flinch opponents, although it can not knockback opponents. It can also be used to hitstun opponents from any percent.
- Custom 2 - Bunny Blaster: Fox's blaster shoots yellow beams that have a wider hitbox but can only shock and stunlock opponents, but not deal any actual damage. As such, it's a good combo starter.
- Custom 3 - Frog Blaster: Fox's blaster fires green beams that expand in size as they go over a further distance. They inflict the flower effect on opponents to continuously damage them.
|
Side Special
Fox Illusion
|
Fox dashes forward at a blindingly fast speed, leaving behind after images. Fox will launch opponents at an upwards angle on contact, dealing 3% damage. It can also be used to recovery in favorable situations.
- Customs
- Custom 1 - Falco Phantasm: Fox dashes forward at a blinding speed, leaving behind afterimages of his team member Falco. Falco Phantasm will spike airborne opponents on contact, as well as having 2 less start up frames. On grounded opponents, it'll send them upwards so that Fox can use a back aerial to follow up. It deals 8% damage grounded and 6% damage in the air.
- Custom 2 - Barrel Roll: Fox readies himself like a missile and then launches forward in a spinning barrel roll to inflict 4% damage on a first hit, then 3% damage on loop in a multi-hitting attack that traps opponents. Afterimages of his team member Peppy appear behind him when he uses this move.
- Custom 3 - Frog Illusion: Fox jumps forward at a fast rate, afterimages of his team member Slippy Toad appearing behind him. This attack is used best on the ground, allowing Fox to quickly leap across the stage and deal 8% damage. It also spikes aerial opponents. It's cancelled upon being hit.
|
Up Special
Fire Fox
|
Fox cloaks himself in fire and suddenly fires himself in one of many directions, depending on what direction is held. While charging, he deals 2% damage on contact and can deal either 16% damage clean or 8% damage if late.
- Customs
- Custom 1 - Fire Bird: Fox cloaks himself in blue flames before firing off in any direction, depending on what direction is held. This attack hits multiple times up to 9 times for 2-3% damage each, but won't travel as far as Fox's Fire Fox.
- Custom 2 - Fire Rabbit: Fox cloaks himself in yellow flames, bouncing around while on fire to deal 6-8% to opponents in his path. Can't be used effectively in the air, instead acting as a way to gain stage control through unpredictable hopping that deals damage. Can spike aerial opponents.
- Custom 3 - Fire Frog: Fox cloaks himself in green flames, bouncing around similar to Fire Rabbit but it deals 12-15% damage on contact is much slower, but contains super armor while in the air. Like Fire Rabbit, it's can't be used in the air very effectively but will meteor spike opponents in the air.
|
Down Special
Reflector
|
Fox activates a Reflector around himself, deflecting projectiles for 1.4x the original damage. The Reflector also deals 2% damage to nearby opponents, but won't flinch or launch them.
- Customs
- Custom 1 - Kick Reflector: Fox activates a deep blue-colored Reflector that he kicks away from him, reflecting any projectiles for 1.2x the original damage and hitting opponents that it comes in contact with for 7% damage. It will return to him as if magnetized. This move can be used as a poking tool that can lock or trip low damaged opponents.
- Custom 2 - Punch Reflector: Fox activates a yellow colored Reflector that he punches away from him, which will reflect projectiles for 1.3x the original damage, but the Reflector itself does not contain a hurtbox. Instead, Fox deals 8% damage with the punch forward.
- Custom 3 - Snatch Reflector: Fox activates a green colored Reflector, which pulls in opponents nearby within a certain radius but won't deal damage. Reflected projectiles are reflected for 1.5x the original damage.
|
Final Smash
Star Fox Assault/Landmaster
|
Fox has two final smashes depending on whether he activates it using meter or the Smash Ball:
- Star Fox Assault is his metered Final Smash. When activated, a crosshair briefly appears on screen and flashes upon activation, bringing all foes into a cutscene where Fox and a couple of Arwings fire at the opponent to deal 45% damage, meteor smashing them after the cutscene is over.
- Landmaster is his unmetered Final Smash. When activated, Fox comes down on a giant tank-like vehicle that deals 5% damage upon activation. While piloting it, Fox can drive it around and hover by holding down the jump button. The Landmaster also has many methods of attacking, such as firing the laser turret that deals 8% damage upon firing and the actual projectile itself deals 15% damage. It can also run over foes for 5-17% damage. It lasts for a total of 7 seconds.
|
| Taunts
|
- Up Taunt - Fox charges up a fiery field around himself similarly to when he performs Fire Fox, saying "Here I come!".
- Side Taunt - Fox throws his Blaster into the air, then allows it to land back into its holster.
- Down Taunt - Fox backs up, bends down slightly, and says "Come on!" (かかってこい!, Come at me!) whilst waving his hand in a beckoning gesture.
|
| Special Team-Up Names
|
|
| Alternate Costumes
|
|
|
| Unlock Conditions
|
| Complete 10 matches on the stage Lylat Cruise.
|
|
Falco
|
Falco Lombardi is a member of an avian race and is an ace pilot on the Star Fox team. He is a friendly rival to Fox McCloud, appearing as a brash, cool, but collected wingmate to his team. Although he is an ace pilot, Falco sometimes needs the assistance of Fox when he finds himself in a difficult situation, which he usually reacts with chagrin.
Falco is reclassified as an Echo Fighter for Fox, keeping all the special attributes he had previously as a fighter such his variants on Fox's moves and his damage being much better in the air than on the ground. As such, he is generally able to combo opponents easily and has more power for his attacks that don't reach as long as Fox's. However, he has many of Fox's weaknesses and his moveset does little to combat those, mostly just offering a different approach to his playstyle.
|
| Move
|
Description
|
| Entrance
|
Falco ejects from an upside down Arwing and lands on his feet.
|
Neutral Special
Feathered Blaster
|
Falco takes his blaster out of it's holster and fires at the opponent. Falco's blaster shoots slower blue beams but consistently does 3% damage no matter what the range and is able to flinch opponents, although it can not knockback opponents. It can also be used to hitstun opponents from any percent.
- Customs
- Custom 1 - Fox Blaster: The blaster's lasers are fired rapidly but do not make the opponent flinch or take any kind of knockback. They lose power the further they travel, dealing 1.4%-3% damage depending on how close the opponent is to Falco's range.
- Custom 2 - Bunny Blaster: Falco's blaster shoots yellow beams that have a wider hitbox but can only shock and stunlock opponents, but not deal any actual damage. As such, it's a good combo starter.
- Custom 3 - Frog Blaster: Falco's blaster fires green beams that expand in size as they go over a further distance. They inflict the flower effect on opponents to continuously damage them.
|
Side Special
Falco Phantasm
|
Falco dashes forward at a blinding speed, leaving behind afterimages. Falco Phantasm will spike airborne opponents on contact, as well as having 2 less start up frames. On grounded opponents, it'll send them upwards so that Falco can use a back aerial to follow up. It deals 6% damage grounded and 8% damage in the air.
- Customs
- Custom 1 - Fox Illusion: Falco dashes forward at a blindingly fast speed, leaving behind afterimages of his team member Fox. Falco will launch opponents at an upwards angle on contact, dealing 3% damage. It can also be used to recovery in favorable situations.
- Custom 2 - Barrel Roll: Falco readies himself like a missile and then launches forward in a spinning barrel roll to inflict 4% damage on a first hit, then 3% damage on loop in a multi-hitting attack that traps opponents. Afterimages of his team member Peppy appear behind him when he uses this move.
- Custom 3 - Frog Illusion: Falco jumps forward at a fast rate, afterimages of his team member Slippy Toad appearing behind him. This attack is used best on the ground, allowing Falco to quickly leap across the stage and deal 8% damage. It also spikes aerial opponents. It's cancelled upon being hit.
|
Up Special
Fire Bird
|
Falco cloaks himself in blue flames before firing off in any direction, depending on what direction is held. This attack hits multiple times up to 9 times for 2-3% damage each, but won't travel as far as Fox's Fire Fox.
- Customs
- Custom 1 - Fire Fox: Falco cloaks himself in orange fire and suddenly fires himself in one of many directions, depending on what direction is held. While charging, he deals 2% damage on contact and can deal either 16% damage clean or 8% damage if late.
- Custom 2 - Fire Rabbit: Falco cloaks himself in yellow flames, bouncing around while on fire to deal 6-8% to opponents in his path. Can't be used effectively in the air, instead acting as a way to gain stage control through unpredictable hopping that deals damage. Can spike aerial opponents.
- Custom 3 - Fire Frog: Falco cloaks himself in green flames, bouncing around similar to Fire Rabbit but it deals 12-15% damage on contact is much slower, but contains super armor while in the air. Like Fire Rabbit, it's can't be used in the air very effectively but will meteor spike opponents in the air.
|
Down Special
Kick Reflector
|
Falco activates a deep blue-colored Reflector that he kicks away from him, reflecting any projectiles for 1.2x the original damage and hitting opponents that it comes in contact with for 7% damage. It will return to him as if magnetized. This move can be used as a poking tool that can lock or trip low damaged opponents.
- Customs
- Custom 1 - Body Reflector: Falco activates a Reflector around himself, deflecting projectiles for 1.4x the original damage. The Reflector also deals 2% damage to nearby opponents, but won't flinch or launch them.
- Custom 2 - Punch Reflector: Falco activates a yellow colored Reflector that he punches away from him, which will reflect projectiles for 1.3x the original damage, but the Reflector itself does not contain a hurtbox. Instead, Falco deals 8% damage with the punch forward.
- Custom 3 - Snatch Reflector: Falco activates a green colored Reflector, which pulls in opponents nearby within a certain radius but won't deal damage. Reflected projectiles are reflected for 1.5x the original damage.
|
Final Smash
Wild Bird
|
When activated, a crosshair briefly appears on screen and flashes upon activation, bringing all foes into a cutscene where Falco and a couple of Arwings wildly fly and then fire at the opponent to deal 45% damage metered or 100% damage unmetered, meteor smashing them after the cutscene is over. Falco's version of the meteor smash is angled, making it slightly more difficult to tech.
|
| Taunts
|
- Up Taunt - Falco kicks his Reflector around like a hacky sack and says "Piece of cake!" before catching it.
- Side Taunt - Falco poses by standing on one foot with his wing raised before saying "Get some!"
- Down Taunt - Falco spins once and crosses one wing before saying "Hands off my prey!"
|
| Special Team-Up Names
|
- With Fox/Slippy/Peppy - Star Fox
|
| Alternate Costumes
|
|
|
| Unlock Conditions
|
| Complete 10 matches on the stage Corneria.
|
|
Peppy Hare
|
Peppy Hare was an original team member of Star Fox back when it was manned by James McCloud and Pigma. An experienced pilot, he has learned many tricks in his years of flying, and is also very knowledgeable about Andross's forces, since he once had to escape captivity at their hands. He is fairly wise and is the eldest member of the Star Fox team, although he gave leadership to Fox and serves as a mentor to him.
Peppy is an Echo Fighter for Fox, generally featuring stranger approaches to his moveset such as a Reflector that doesn't deal any damage except for the punching animation that accompanies it, or a bouncy version of Fire Fox. He also has a completely unique move in place of Fox Illusion. However, Peppy is slower and doesn't really have much to offer aside from increased power to his moves. While his version of Blaster can allow him to perform combos, it is very tricky to utilize his decreased speed in accordance with it. As such, Peppy mainly needs to stay on the stage and look for windows to make his toolset effective.
|
| Move
|
Description
|
| Entrance
|
Peppy Hare ejects from an spinning Arwing and lands on his hands, getting up a bit clusmily.
|
Neutral Special
Bunny Blaster
|
Peppy takes his blaster out of it's holster and fires at the opponent. Peppy's blaster shoots yellow beams that have a wider hurtbox but can only shock and stunlock opponents, but not deal any actual damage. As such, it's a good combo starter.
- Customs
- Custom 1 - Fox Blaster: The blaster's lasers are fired rapidly but do not make the opponent flinch or take any kind of knockback. They lose power the further they travel, dealing 1.4%-3% damage depending on how close the opponent is to Fox's range.
- Custom 2 - Feathered Blaster: Peppy's blaster shoots slower blue beams but consistently does 3% damage no matter what the range and is able to flinch opponents, although it can not knockback opponents. It can also be used to hitstun opponents from any percent.
- Custom 3 - Frog Blaster: Peppy's blaster fires green beams that expand in size as they go over a further distance. They inflict the flower effect on opponents to continuously damage them.
|
Side Special
Barrel Roll
|
Peppy readies himself like a missile and then launches forward in a spinning barrel roll to inflict 4% damage on a first hit, then 3% damage on loop in a multi-hitting attack that traps opponents. Afterimages appear behind him when he uses this move.
- Customs
- Custom 1 - Fox Illusion: Falco dashes forward at a blindingly fast speed, leaving behind afterimages of his team member Fox. Falco will launch opponents at an upwards angle on contact, dealing 3% damage. It can also be used to recovery in favorable situations.
- Custom 2 - Falco Phantasm: Peppy dashes forward at a blinding speed, leaving behind afterimages of his team member Falco. Falco Phantasm will spike airborne opponents on contact, as well as having 2 less start up frames. On grounded opponents, it'll send them upwards so that Fox can use a back aerial to follow up. It deals 8% damage grounded and 6% damage in the air.
- Custom 3 - Frog Illusion: Peppy jumps forward at a fast rate, afterimages of his team member Slippy Toad appearing behind him. This attack is used best on the ground, allowing Peppy to quickly leap across the stage and deal 8% damage. It also spikes aerial opponents. It's cancelled upon being hit.
|
Up Special
Fire Rabbit
|
Peppy cloaks himself in yellow flames, bouncing around while on fire to deal 6-8% to opponents in his path. Can't be used effectively in the air, instead acting as a way to gain stage control through unpredictable hopping that deals damage. Can spike aerial opponents.
- Customs
- Custom 1 - Fire Fox: Peppy cloaks himself in orange fire and suddenly fires himself in one of many directions, depending on what direction is held. While charging, he deals 2% damage on contact and can deal either 16% damage clean or 8% damage if late.
- Custom 2 - Fire Bird: Peppy cloaks himself in blue flames before firing off in any direction, depending on what direction is held. This attack hits multiple times up to 9 times for 2-3% damage each, but won't travel as far as Fox's Fire Fox.
- Custom 3 - Fire Frog: Peppy cloaks himself in green flames, bouncing around similar to Fire Rabbit but it deals 12-15% damage on contact is much slower, but contains super armor while in the air. Like Fire Rabbit, it's can't be used in the air very effectively but will meteor spike opponents in the air.
|
Down Special
Punch Reflector
|
Peppy activates a yellow colored Reflector that he punches away from him, which will reflect projectiles for 1.3x the original damage, but the Reflector itself does not contain a hurtbox. Instead, Peppy deals 8% damage with the punch forward.
- Customs
- Custom 1 - Body Reflector: Peppy activates a Reflector around himself, deflecting projectiles for 1.4x the original damage. The Reflector also deals 2% damage to nearby opponents, but won't flinch or launch them.
- Custom 2 - Kick Reflector: Peppy activates a deep blue-colored Reflector that he kicks away from him, reflecting any projectiles for 1.2x the original damage and hitting opponents that it comes in contact with for 7% damage. It will return to him as if magnetized. This move can be used as a poking tool that can lock or trip low damaged opponents.
- Custom 3 - Snatch Reflector: Peppy activates a green colored Reflector, which pulls in opponents nearby within a certain radius but won't deal damage. Reflected projectiles are reflected for 1.5x the original damage.
|
Final Smash
Arwing Assualt
|
When activated, a crosshair briefly appears on screen and flashes upon activation, bringing all foes into a cutscene where Peppy and a couple of Arwings spin in barrel rolls and then fire at the opponent to deal 45% damage metered or 100% damage unmetered, meteor smashing them after the cutscene is over. Peppy's version of the meteor smash causes the opponent to fall helpless, making it dangerous for his opponent over the edge of a stage.
|
| Taunts
|
- Up Taunt - Peppy puts his hands behind his head, attempting to look relaxed and cool but looks tense.
- Side Taunt - Peppy sticks his pointer finger up, stating "Surprise attack incoming!"
- Down Taunt - Peppy looks exhausted, sitting down for a moment before getting up and stretching.
|
| Special Team-Up Names
|
- With Fox/Falco/Slippy - Star Fox
|
| Alternate Costumes
|
Peppy Hare (Star Fox Assault) |
| Unlock Conditions
|
| Complete 50 matches on the stage Lylat Cruise.
|
|
Slippy Toad
|
Slippy Toad is a childhood friend of Fox's and has flown alongside him for several years. Slippy serves as an inventor and mechanic for the team, randing from the Arwing, Landmaster, and more. Slippy is mostly a support type, although he is fairly prominent in the Star Fox series. He might act like a hyper-doofus at times, but he's a fairly excellent mechanic.
Slippy is an Echo Fighter for Fox, who much like Peppy, also features a weirder approach to Fox's gameplay. Unlike Peppy who traded a lot of Fox's speed for power with his moveset, Slippy traded off horizontal mobility for vertical mobility. Slippy jumps higher and features a wall cling and jump. Additionally, he moves faster while in the air and falls much slower than the other space animals. However, his moves generally only work while on the ground, including his version of Fox Illusion and Fire Fox, which make him a bouncy fighter.
|
| Move
|
Description
|
| Entrance
|
Slippy comes out spinning from a spinning airwing, landing on his stomach before getting up and dusting himself off.
|
Neutral Special
Frog Blaster
|
Slippy takes his blaster out of it's holster and fires at the opponent. Slippy's blaster fires green beams that expand in size as they go over a further distance. They inflict the flower effect on opponents to continuously damage them.
- Customs
- Custom 1 - Fox Blaster: The blaster's lasers are fired rapidly but do not make the opponent flinch or take any kind of knockback. They lose power the further they travel, dealing 1.4%-3% damage depending on how close the opponent is to Fox's range.
- Custom 2 - Feathered Blaster: Slippy's blaster shoots slower blue beams but consistently does 3% damage no matter what the range and is able to flinch opponents, although it can not knockback opponents. It can also be used to hitstun opponents from any percent.
- Custom 3 - Bunny Blaster: Slippy's blaster shoots yellow beams that have a wider hurtbox but can only shock and stunlock opponents, but not deal any actual damage. As such, it's a good combo starter.
|
Side Special
Frog Illusion
|
Slippy jumps forward at a fast rate, afterimages appearing behind him. This attack is used best on the ground, allowing Slippy to quickly leap across the stage and deal 8% damage. It also spikes aerial opponents. It's cancelled upon being hit.
- Customs
- Custom 1 - Fox Illusion: Slippy dashes forward at a blindingly fast speed, leaving behind afterimages of his team member Fox. Slippy will launch opponents at an upwards angle on contact, dealing 3% damage. It can also be used to recovery in favorable situations.
- Custom 2 - Falco Phantasm: Slippy dashes forward at a blinding speed, leaving behind afterimages of his team member Falco. Falco Phantasm will spike airborne opponents on contact, as well as having 2 less start up frames. On grounded opponents, it'll send them upwards so that Slippy can use a back aerial to follow up. It deals 6% damage grounded and 8% damage in the air.
- Custom 3 - Barrel Roll: Slippy readies himself like a missile and then launches forward in a spinning barrel roll to inflict 4% damage on a first hit, then 3% damage on loop in a multi-hitting attack that traps opponents. Afterimages of his team member Peppy appear behind him when he uses this move.
|
Up Special
Fire Bird
|
Slippy cloaks himself in green flames, bouncing around similar to Fire Rabbit but it deals 12-15% damage on contact is much slower, but contains super armor while in the air. Like Fire Rabbit, it's can't be used in the air very effectively but will meteor spike opponents in the air.
- Customs
- Custom 1 - Fire Fox: Slippy cloaks himself in orange fire and suddenly fires himself in one of many directions, depending on what direction is held. While charging, he deals 2% damage on contact and can deal either 16% damage clean or 8% damage if late.
- Custom 2 - Fire Frog: Slippy cloaks himself in blue flames before firing off in any direction, depending on what direction is held. This attack hits multiple times up to 9 times for 2-3% damage each, but won't travel as far as Fox's Fire Fox.
- Custom 3 - Fire Rabbit: Slippy cloaks himself in yellow flames, bouncing around while on fire to deal 6-8% to opponents in his path. Can't be used effectively in the air, instead acting as a way to gain stage control through unpredictable hopping that deals damage. Can spike aerial opponents.
|
Down Special
Tongue Reflector
|
Slippy activates a green colored Reflector with his tongue, which pulls in opponents nearby within a certain radius but won't deal damage. Reflected projectiles are reflected for 1.5x the original damage. Slippy's version of the Snatch Reflector can also tether as it uses his tongue.
- Customs
- Custom 1 - Body Reflector: Slippy activates a Reflector around himself, deflecting projectiles for 1.4x the original damage. The Reflector also deals 2% damage to nearby opponents, but won't flinch or launch them.
- Custom 2 - Kick Reflector: Slippy activates a deep blue-colored Reflector that he kicks away from him, reflecting any projectiles for 1.2x the original damage and hitting opponents that it comes in contact with for 7% damage. It will return to him as if magnetized. This move can be used as a poking tool that can lock or trip low damaged opponents.
- Custom 3 - Punch Reflector: Slippy activates a yellow colored Reflector that he punches away from him, which will reflect projectiles for 1.3x the original damage, but the Reflector itself does not contain a hurtbox. Instead, Slippy deals 8% damage with the punch forward.
|
Final Smash
Landmaster
|
When activated, Slippy comes down on a giant tank-like vehicle that deals 5% damage upon activation. While piloting it, Slippy can drive it around and hover by holding down the jump button. The Landmaster also has many methods of attacking, such as firing the laser turret that deals 10% damage upon firing and the actual projectile itself deals 18% damage. It can also run over foes for 6-19% damage. Slippy's version of the Landmaster has a faster airspeed and deals more damage overall, but won't last as long. It lasts for a total of 3 seconds metered and 5 seconds unmetered.
|
| Taunts
|
- Up Taunt - Slippy closes his eyes and cowers in place, before opening one eye and standing back up.
- Side Taunt - Slippy spins around while rapidly flapping his arms, looking confused.
- Down Taunt - Slippy pulls out a small mechanical drone and works on it for a bit before returning back to battle.
|
| Special Team-Up Names
|
- With Fox/Falco/Peppy - Star Fox
|
| Alternate Costumes
|
Slippy (Star Fox Assault) |
| Unlock Conditions
|
| Complete 50 matches on the stage Corneria.
|
|
Marx
|
Marx originally enlisted Kirby's help to stop the Moon and Sun from fighting, to grab pieces of Star Power to get a wish from Galactic Nova. Once Kirby did this, Marx wished for his own selfish vie for power, and took over Popstar for himself. Since then, Marx has come back from his apparent death and teamed up with Kirby to escape the Nova Zoo, although he really isn't that great of a friend, always lying to Kirby. Marx reappears with most of his moves seen in his Kirby Super Star boss appearance, giving him a wide range of powerful elemental abilities.
|
| Move
|
Description
|
| Entrance
|
Marx spreads his wings before hopping on his ball, dancing atop it.
|
| Jump/Soar
|
Marx has a standard three jumps (which are somewhat shorter than the rest of the fighters by average) and if the player holds down on the jump button while he's in the air, he will extend his wings out. He can stay up in the air so long as he is not hit by a physical attack, which will place him back into a helpless state. He can last up to 2.5 seconds in flight mode, but is locked to the height he started wing mode in and cannot ascend or lower while in flight mode. Additionally, Marx forfeits any further jumps he might have had.
|
Neutral Special
Ball Kick
|
Marx kicks his ball forward as a bouncy projectile, which can bounce a upwards of two times or a total of 125 frames before disappearing. It deals 8% damage and he can have up to balls out on the field at once. This move, if done while in his flight mode, will briefly cancel his flight before putting him back into it. Additionally, if the move is merely tapped instead of held down for a given amount of time, he will just roll on the ball, which prevents him from attacking or jumping but increases his speed. He can also not turn while on the ball. All customs feature a identical version of this "ball mode".
- Customs
- Custom 1 - Bluster Ball Kick: A version of the ball kick that is powered by wind. The ball descends more slowly, giving it more air time. Deals 12% damage.
- Custom 2 - Blizzard Ball Kick: A version of the ball kick that is powered by ice. When the ball bounces across the ground, it will create icy spikes that can deal up to 14% damage but only a single ball can be thrown out at a time.
- Custom 3 - Splash Ball Kick: A version of the ball kick that has a total of four bounces that leave a splash of water each time it bounces, with the final bounce having a huge damaging area that deals 21% damage, although only deals 5% damage per kick. Only one can be sent out at a time as well.
|
Side Special
Arrow Stream
|
Marx releases a flurry of arrows from himself which fly in a vertical direction before vanishing. Each arrow has a small bit of hitstun and deals 3% damage. While overall a weak projectile, it's quickness and low penalty cost for reflects makes it a reliable damaging move.
- Customs
- Custom 1 - Rainbow Teleport: Marx dashes forward before disappearing, appearing roughly three character lengths away from where he just was. The move deals 7% damage if Marx teleports near a opponent, although it will leave Marx in a helpless state if he was in flight mode.
- Custom 2 - Crescent Blades: Marx fires off three crescent blades in his direction, dealing 5% damage for each blade. In the air, he will fire them below him, covering the right, center, and left.
- Custom 3 - Laser Light: Marx has a long start up before firing off a thin laser that stretches four character lengths away. The column is rather thin but deals a whopping 25% damage but has low knockback.
|
Up Special
Splitting Sides
|
Marx jumps up in the air, going into flight mode as he charges up an attack. While he can stay up in the air for a total of five seconds, he cannot move in anyway until the player releases the button or the timer runs to five seconds, in which he will release a powerful black hole attack that attracts nearby items or players and deals 22% damage, which immediately makes him drop down, albeit not in a helpless state (although he is not able to activate flight mode until he touches ground again).
- Customs
- Custom 1 - Thorn Tower: Marx creates a thorny tower from underneath him as he ascends, which deals 10% damage on contact and has downwards knockback. Will automatically put him into flight mode, which can be followed up into other combos. If he activates this move already in flight mode, he will instead have a circle of thorns spin around him that deals 5% damage until he touches the ground.
- Custom 2 - Radiant Wings: Marx jumps and enters into flight mode right away, with his wings glowing with energy. Contact with him in this enhanced version of flight mode deals 5% damage.
- Custom 3 - Zap Wings: Marx jumps up and enters into flight mode similar to Radiant Wings, but instead releases two diagonal thunder projectiles that paralyze opponents for a short time while dealing 3% damage.
|
Down Special
Marx Flip Ultima
|
Marx descends down into the ground, which can deal 7% damage, becoming a shadowy purple mist that is unable to be attacked with projectile based attacks before ascending up in a dark uppercut that deals 9% damage and knocks opponent slightly aback.
- Customs
- Custom 1 - Marx Flip Bluster: Marx releases a ring of wind around him that blows back opponents and deals 3% damage when he ascends upwards. Additionally, his recovery upwards is greatly increased.
- Custom 2 - Marx Flip Blizzard: As opposed to releasing a dark uppercut at the end of the ascend animation, Marx creates a cluster of icicles that spike opponents upwards while dealing 14% damage, although the descension no longer has a hitbox. A reliable kill move for Marx.
- Custom 3 - Marx Flip Splash: Marx releases four giant water droplets that drop down at the end of the animation when he ascends back up, which deal 5% damage each. While it covers generally a bigger area of effect, it's power is somewhat weakened compared to the other moves.
|
Final Smash
Nova Wish
|
Nova appears in the background as Marx wishes for ultimate power, gaining the power to spawn multiple thorn towers and giant icicles that swing across the stage before breathing out a giant laser beam. In the metered version of this Final Smash, Marx merely attacks with the laser beam attack.
|
| Taunts
|
- Up Taunt - Marx hops back and forth on the spinning ball.
- Side Taunt - Marx laughs with a high pitched laugh while showing off his wings.
- Down Taunt - Marx sits on his ball, looking pleased.
|
| Special Team-Up Names
|
- With Kirby - Dream Allies
- With Gooey - Innocence and Deception
|
| Alternate Costumes
|
|
|
| Unlock Conditions
|
| TBA
|
|
Jambastion Mages
|
A triad of mages hailing from the sinister dark Jambastion Cult. Their names are Zan, Francisca, and Flamberge, descending from center, to left, to right. Their goal is to revive their dark god, given orders by a hooded man named Hyness. These three mages have no time for friendship, fighting as a triad of sorts- each special attack switches which Mage is playable. Zan is the default mage. By switching out custom moves, a player can have a entire moveset focused around their favorite mage, or have all three join together for their versions of Kirby's friendship powered moves.
|
| Move
|
Description
|
| Entrance
|
Flamberge, Francisca, and Zan descend down slowly from the top of the screen before brandishing their weapons and looking angry. Franchisa and Flamberge generally hide behind Zan after this.
|
| Jump/Float
|
Each of the Jambastion Mages possesses two jumps and a float that allows them to stay 1-character length high while on the stage. This float can be executed by holding the button- and then the player can release when a circle over the Jambastion Mage's hud appears. This allows them to continue their float until they are either launched or fall off a platform. After that, they will float only slightly above the ground.
|
Neutral Special
Electrical Partisan
|
Zan strikes with her partisan in a swirling slash, dealing 5% damage with the chance to paralyze if the opponent is above 100%. Zan can charge the swing to deal 8% damage, with a chance to paralyze if the opponent's health is 80% or higher.
- Customs
- Custom 1 - Fiery Flamberge: Flamberge flings around her burning flamberge, steadily moving forward a total of three character lengths, dealing 5% damage per hit with a total of 3 hits in total.
- Custom 2 - Snowflake Labrys: Franchisa thrusts forward with her labrys, dealing 10% damage with high knockback. Generally has the shortest range out of all of the moves.
- Custom 3 - Friend Circle: Flamberge, Franchisa, and Zan attempt to form a donut circle, spinning forward until the circle falls apart 110 frames later. The rolling attack deals 7% damage on contact and limits their movement to moving forward and jumping.
|
Side Special
Flamberge Fury
|
Flamberge pulls back on her Flamberge before releasing a powerful strike that releases a flurry of fireballs, which can be destroyed via projectiles (each which deals 7%) but still cover a massive range. Has some end lag and the strike itself does nothing.
- Customs
- Custom 1 - Partisan Beam: Zan forms thunder drums behind her as she ascends upwards at a diagonal, before launching her partisan down, dealing 10% damage. A giant laser then forms between Zan and the partisan for a total of 100 frames, dealing 7% damage on contact before Zan summons her spear back.
- Custom 2 - Freezing Soaker: Franchisa uses a gun filled with icy water, shooting it at a downwards diagonal before it shoots out in a zig zag pattern that covers 4 character lengths. Can freeze characters and deal 8% damage on contact.
- Custom 3 - Friend Train: Flamberge, Franchisa, and Zan form a line as Zan puts on a conductor hat, the three marching forward and dealing 12% damage to anyone in their path. Stops at the end of a stage ledge. Can be cancelled in air.
|
Up Special
Friend Star
|
The Jambastion Mages jump onto a Friend Star, which allows them brief full movement in the air for 3 seconds before the Friend Star fails and turns into dark energy. They can fire bullets that deal 3% damage in the direction they face.
- Customs
- Custom 1 - Flamberge Rain: Flamberge rises into the air as she creates multiple flaming flamberges that slam into the ground, dealing 8% damage. fire pillars rising. She creates a total of four fire pillars in total, which each have 15% health and can be destroyed via projectiles. Contact with the fire pillars deals 4% damage. Lasts for 220 frames.
- Custom 2 - Partisan Storm: Zan swirls her partisan around as clouds form around it, before being able to move around as two thunder pillars come down from it, zapping a total of two times for 10% damage each before the cloud vanishes. Has long start up.
- Custom 3 - Labrys Icicles: Franchisa leaps into the air, forming three icicles in the air, which she knocks with her labrys, causing them to float down fast in a waved pattern, dealing 11% damage.
|
Down Special
Avalanche Labrys
|
Franchisa pulls up with her icy Labrys before descending back down, dealing 11% damage and sending icy blue stars that bounce around and freeze opponents.
- Customs
- Custom 1 - Flamberge Jabs: Flamberge pulls back on her flamberge before releasing a furious set of jabs, each jab, of which there are six in total, dealing 3% damage and does no knockback until the final strike.
- Custom 2 - Partisan Mine: Zan slams her partisan into the ground, creating an electrical orb that deals 9% damage on contact, zapping the opponent. She can have up to four of these traps out at a time, as well as deal 5% damage with the partisan slam.
- Custom 3 - Friend Bridge: Flamberge, Franchisa, and Zan form a bridge, crawling across the ground and getting underneath opponents to then launch them high into the air while dealing 13%. They can still be hit, but their hitbox becomes long but short.
|
Final Smash
Void Termina
|
The Jambastion Mages are sacrificed by Hyness to revive their dark lord Void Termina, who towers in the background, slamming his fists into the ground to send off white ground-crawling projectiles that shine brightly, each dealing about 15% damage, sending three at a time. It then grows wings, sending off elemental arrows that can cause burning and ice effects. Finally, it unleashes it's true form, releasing a powerful laser over the entire stage that deals 30% damage. On a metered Final Smash, Void Termina will appear in his true form, skipping the initial fist slamming and arrows. After the final Smash is over, the Jambastion Mages float back to the stage.
|
| Taunts
|
- Up Taunt - Zan readies her electrical partisan.
Franchisa laughs, tilting her labrys to the side.
Flamberge furiously swivels around her flamberge.
- Side Taunt - Zan swivels around her partisan slowly.
Franchisa puts her hand to her chest.
Flamberge curls her fists, punching forward.
- Down Taunt - Zan unleashes her thunder drums before they vanish.
Franchisa grunts before holding her Labrys over her chest.
Flamberge shakes her fists up and down.
|
| Special Team-Up Names
|
- With Kirby - Friend and Foes
- With Marx - Evil Powers United
- With Gooey - Connectors of the Dark
|
| Alternate Costumes
|
|
|
| Unlock Conditions
|
| TBA
|
|
Mimikyu
|
Mimikyu just wants to be loved. He never got it because of his deathly appearance, so it hides under the rags of Pikachu merchandise that ironically is no longer loved. Lurking in shadowy desolate corners, all it really wants is a friend. If it has to fight to get one, it will do so! Mimikyu is a short-ranged fighter for the most part, although is able to leave it's body for a long range attack that will also restore it's Disguise, which allows it to get hit without taking damage and becomes unaffected to status inflictions it's opponent deals to it. While Mimikyu is fairly powerful and has some long-range options, they are locked under customs and their long range options are not as powerful. Mimikyu also has a hard time recovering, with Playing Rough being a powerful move that gives Mimikyu very little options to help recover.
|
| Move
|
Description
|
| Entrance
|
Mimikyu wobbles as he runs into the fight, before a shadowy hand underneath fixes his head.
|
Gimmick
Disguise
|
Mimikyu is able to utilize it's trademark ability Disguise to defend against attacks, propping it's head up. In this state, Mimikyu is able ignore damage for a single hit. It's Down Special, Shadow Sneak will restore it's Disguise, however this has a cool-down that prevents Mimikyu from constantly "repairing" itself- the disguise will only straighten itself out after 300 frames from when it was last broken after use of Shadow Sneak. While Mimikyu also becomes immune to status infliction from his enemies while using Diguise, Disguise only works against the first hit of a move, meaning multi-hit moves can break it.
|
Neutral Special
Astonish
|
Mimikyu lets out a hallowing screech that can stun foes nearby, as well deal 8% damage. It has a short damaging range, while a second stunning run extends past it, although it is generally a short range attack.
- Customs
- Custom 1 - Wood Hammer: Mimikyu grabs it's wooden tail and slams it forward, launching the opponent as it deals 7% damage. Has some end lag but is good for spacing.
- Custom 2 - Feint Attack: Mimikyu spins around, pretending to throw a punch with it's shadowy arms, which draws in nearby foes, before sucker punching them for 8% damage. Causes opponents to flinch but does no knockback.
- Custom 3 - Double Team: Mimikyu moves speedily, making it appear as if there are two Mimikyus lurking about. It then goes into a speedy pummel attack if it can touch an opponent, dealing 6% damage in two separate but close hits.
|
Side Special
Shadow Claw
|
Mimikyu sprouts a shadow arm from underneath it, which slashes at foes for 9% damage. It's reach can extend to three character lengths. It then returns to back underneath Mimikyu. Has a low launch rate but is generally one of Mimikyu's longest range attacks.
- Customs
- Custom 1 - Shadow Ball: Mimikyu charges a ball of shadow from it's palm before firing it, which goes in a zig-zag pattern and goes as far as six character lengths. It deals 2.5% damage uncharged and 25% damage fully charged.
- Custom 2 - Dark Scratch: Mimikyu's shadow arm lunges, dealing 15% damage in a short range attack. One of Mimikyu's shortest range moves but an absolute punisher.
- Custom 3 - Dark Slash: Mimikyu's shadow arm slashes forward in a upwards manner, dealing 8% damage while launching the opponent upwards. Good KOing option at 110% or higher.
|
Up Special
Play Rough
|
Mimikyu jumps up and pounces on the nearest opponent, whacking them with a flurry of shadowy arms before twisting it's head to deal a final strike. Mimikyu can overall do 5-35% damage depending if the opponent attempts to mash out of it, which will be punished for more damage. As a recovery move, it only adds a short extra hop with more horizontal distance than vertical distance. If Mimikyu doesn't land on a opponent, he will look around confused for 20 frames, allowing opponents to punish him.
- Customs
- Custom 1 - Light Screen: Mimikyu sends out a pane of light that protects them from projectile attacks. Interestingly, the shield can stay out as long as the whole match if the opponent continues to feed it projectiles. It will phase through physical attacks, although not be destroyed.
- Custom 2 - Out of Body: Mimikyu gets two shadowy arms underneath it before launching itself high into the air. On the apex of the jump, the disguise will briefly separate, revealing Mimikyu's true form, which is censored through a black fog that deals 15% damage on contact. The disguise will then come back on as Mimikyu makes their descent.
- Custom 3 - Bulk Up: Mimikyu's body pulses with dark energy as it bulks up, increasing it's attack and strength for 120 frames. Has a cooldown of 220 frames.
|
Down Special
Shadow Sneak
|
Mimikyu briefly leaves it's disguise in the form of a shadow, which travels across the floor and has a very thin hitbox overall. When it touches a opponent, it will launch into a frenzied attack that deals 7% damage on the first hit and then the player can tap the button again for a much more furious attack that deals 9% damage. Mimikyu quickly returns to his body. If Mimikyu lost his disguise, he gets it back when he returns to his body after 300 frames from when he lost the disguise. The player can perform this move and then cancel it by moving forward and then tilting the control stick back to Mimikyu's body. Mimikyu cannot jump in this form, however, attacking his disguise will not deal damage to him. The move will also be cancelled if Mimikyu does not reach an opponent within 220 frames.
- Customs
- Custom 1 - Speedy Shadow: Mimikyu's shadow form is faster, but if the opponent attacks his disguise while he's outside of it, he will not get his Disguise back even if he meets conditions. Additionally, he only deals 6% damage on the first hit and 4% damage on the second.
- Custom 2 - Shadow Twister: Mimikyu's hitbox is bigger, but allows him to jump. He deals a single attack that deals 12% damage.
- Custom 3 - True Form Glance: Mimikyu releases a shadowy aura as it's eyes dart around outside of it's disguise. Has a short range but if anyone makes contact, they are damaged for 25% damage.
|
Final Smash
Let's Snuggle Forever
|
Mimikyu is powered by the Z-Crystal it keeps in it's body, it's eyes glowing as it snatches an opponent and attacks them fiercely under it's disguise before launching them away. It deals 45% damage metered and 100% damage unmetered.
|
| Taunts
|
- Up Taunt - Mimikyu opens up a magazine with Pikachu's face on it, looking through the pages.
- Side Taunt - Mimikyu rolls around a Pikachu figurine before snatching it back up into it's body.
- Down Taunt - Mimikyu's head tilts a little as Mimikyu puts it back in place. When the Disguise is broken, Mimikyu will try and set it back in place before giving up.
|
| Special Team-Up Names
|
- With Pikachu - Four Pikachus? I Must Be Seeing Double
- With Pokémon Master - Mimikyu and Trainer Friend
- With Snivy - PokeSlashers
- With Lillie - Hiders of Alola
|
| Alternate Costumes
|
|
|
| Unlock Conditions
|
| TBA
|
|
Lillie
|
Lillie is a mysterious girl who washed ashore on a beach where she was taken in by Professor Kukui and his wife Professor Burnet. Lillie has a rather tragic past with her mother, which has caused her to form a negative opinion about Pokemon battles in general. Traveling alongside her Cosmog nicknamed "Nebby", the two make quite a strange fighter that uses spacial distortion and teleportation to their advantage.
|
| Move
|
Description
|
| Entrance
|
A orb of rainbow light descends down before creating a shockwave as Lillie and Nebby teleport onto the stage, with Lillie looking around nervously.
|
Gimmick
Nebby
|
While Lillie is somewhat of a puppet fighter like Rosalina, her bag makes her very different in terms of summoning the puppet away and back to her. Lillie can release Nebby from the bag to perform specials and standard attacks, but when Nebby is inside the bag, Lillie gains a boosted 1.35x damage and knockback to her attacks. As such, the player will have to decide whether they want the spacing options or increased damage output. Nebby's damage is separate from Lillie's and can be KO'd with no punishment to Lillie except for the general loss of function for many of her special moves.
|
Neutral Special
Cosmic Power
|
When Lillie has Nebby in her bag, she will be surrounded by stars as a bubble coats her, which lowers Lillie's knockback and removes paint or other status effects. When Nebby is outside of her bag, Nebby will instead reflect projectiles (1.56x the original damage) and counter melee attacks, although does not deal actual damage themselves, instead pushing the opponent away towards Lillie.
- Customs
- Custom 1 - Unaware: Nebby performs an attack that ignores counters and breaks shields, but only deals 4% damage when bagged, and 2% damage when unbagged.
- Custom 2 - Cosmic Power Charged: A chargeable version of Cosmic Power that allows Lillie to apply Cosmic Power for longer at the cost of a long start up, and Nebby's projectiles are boosted 2.5x the original damage.
- Custom 3 - Cosmic Reflect: Regardless of whether Nebby is in the bag or not, a barrier will always be put up that reflects projectiles at 1.6x the original damage on either Lillie or Nebby depending on whether Nebby is bagged or unbagged.
|
Side Special
Ultra Space Wormhole: Absorption
|
When Lillie has Nebby in her bag, a Ultra Space Wormhole is summoned near here which brings forth Buzzwole who sticks their needle mouth into the opponent before punching them away (dealing 14% damage). When Nebby is outside of her bag, Nebby will summon the wormhole from where they are located, basically the same except Buzzwole only punches, dealing 7% damage.
- Customs
- Custom 1 - Ultra Space Wormhole: Symbiont: The wormhole summons Nihilego, who deals poison damage slowly on the opponent they attack, dealing 1% damage for each 30 frames, with a total of 8-10 seconds being the effect time. Universal across both versions of the move.
- Custom 2 - Ultra Space Wormhole: Beauty: The wormhole summons Pheromosa, who performs a high kick that deals 10%/5% damage with spiking properties.
- Custom 3 - Ultra Space Wormhole: Lighting: The wormhole summons Xurkitree, who sends a blast of thunder as a projectile that paralyzes opponents while dealing 8%/4% damage.
|
Up Special
Teleport
|
When Lillie has Nebby in her bag, she can teleport in the direction of the control stick with Nebby's power. While this move has a incredibly slow start-up time, it has one of the farthest ranges for a teleport move and deals a lot of damage (22%) if Lillie summons to where her opponent is. This move can KO middleweights at 95%. The player can choose the distance by how long they hold the control stick during the start-up animation.
When Lillie doesn't have Nebby in her bag, Nebby will instead teleport the nearby opponent elsewhere, usually in the air and towards the edge of the stage that Nebby is facing. Likewise, this has a long start-up and deals only 13% damage, but can be followed up with moves from Lillie.
- Customs
- Custom 1 - Quick Teleport: Lillie and Nebby teleport faster, although their range is greatly reduced and their damage only deals 5% across both versions of the move.
- Custom 2 - Cosmic Teleport: When Nebby is in the bag, Lillie is coated in a protective shielding while in her start up animation, but no longer can deal damage. When Nebby is out of the bag, Lillie is teleported to Nebby's position as opposed to Nebby teleporting the opponent.
- Custom 3 - Moon Teleport: Lillie and Nebby can only teleport upwards, although their damage is increased to 25% (bagged) and 17% (unbagged).
|
Down Special
Splash
|
This move may appear useless as all it does is make Nebby perform Splash before either hopping back into Lillie's bag or hopping out to perform the move if Nebby is already in the bag. Splash only deals 3% damage (with a hidden sweetspot that deals 11% damage) but this move is important for switching between Lillie's two methods of attack.
- Customs
- Custom 1 - Fire Splash: This alters the property of Splash to be a fire move that moves up from the ground, knocking opponents high into the air, but lacks the sweetspot and only deals 5% damage.
- Custom 2 - Sweet Splash: The sweetspot increases in size, but only deals 9% damage now.
- Custom 3 - Cosmic Splash: Lillie is protected by a shield when Nebby performs Splash, which deals no damage but protects Lillie from melee and projectile attacks.
|
Final Smash
Menacing Moonraze Maelstrom
|
Nebby quickly evolves into Lunala and performs Menacing Moonraze Maelstrom after Lillie performs her Z-Move dance, transporting itself and it's opponent through a Ultra Space Wormhole before flying up into the air and attacking them with a array of moonbeams. The move deals 125% damage to everyone inside.
|
| Taunts
|
- Up Taunt - Lillie plays the Moon Flute as Nebby dances.
- Side Taunt - Lillie pats the bag, either looking comfortable when Nebby is inside or panicked if Nebby is not inside the bag.
- Down Taunt - Lillie holds her hat as the wind pushes against her. Nebby shivers.
|
| Special Team-Up Names
|
- With Pikachu - Lightning from Kanto
- With Pokémon Master - The Sun and The Moon
- With Snivy - Wind and Grass
- With Mimikyu - Hiders of Alola
|
| Alternate Costumes
|
|
|
| Unlock Conditions
|
| TBA
|
|
Phosphora
|
Phosphora is part of Virdi's forces, using the power of lightning to aid her in her battles. She is also as fast as lightning too! She's a playful personality, teasing both Palutena and Pit in her original appearance but became quick friends with them when Virdi was kidnapped by Gaia. Her electric personality is reflected in her quick, speedy moveset, although if she extends herself too much she will have to charge up. Her moves also do not have a ton of knockback, making them fairly hard to KO foes with, although her stunning attacks allow her to follow up quickly with her other attacks.
|
| Move
|
Description
|
| Entrance
|
Phosphora zips into the background before suddenly appearing in a ball of electricity, stretching out her arms, almost as if she's bored.
|
| Jump/Float
|
Phosphora has two jumps, although will appear floating on the ground similar to Metwo. While in the air, the player can hold the jump button to make her float in the air, which can last as long as the player holds down the jump button. Additionally, when there is no platform underneath Phosphora, the player can dash in the air to give her a lot of horizontal movement back to a platform. She can float above no platform for a total of three seconds before falling helplessly.
|
Neutral Special
Lightning Line
|
Phosphora is able to zip around a total of four time in any direction she wants via the control stick, dealing 7% damage as she zips quickly through opponents. When the four zips are done, she floats at her last position, her hands behind her back as she lays in the air. This opens her up to attacks. Executing this attack more and more times causes the punishment opening to become even bigger as she begins to look exhausted.
- Customs
- Custom 1 - Thunder Shot: Phosphora releases two wide electrical projectiles that deal heavy stun and deal 10% damage each. They go right after the other and are bound close to the ground, although in the air they also shoot straight forward.
- Custom 2 - Triple Shock Orb: Phosphora fires off three electrical projectiles that are quite spaced, which deal 7% damage each. They deal heavy stun upon impact.
- Custom 3 - Electrical Lamp: Phosphora puts down up three electrical lamps before striking them with electricity, creating lines of immense electrical power that deal 25% damage. These electrical lamps can be placed anywhere, but the attack only lasts for about 30 frames before fizzling out. The lamps can also be launched off, requiring Phosphora to plant more if she's not fast enough. The immense amount of set up can be worth it, but it is a lot of set up for 30 frames of absolute stage control.
|
Side Special
Thunder Charge
|
Phosphora holds her arms out as she dashes across the sky or ground, electrified. She will deal 11% damage and deal moderate knockback as well as stunning opponents. When she dashes, she faces the other way on the last frame, meaning it cannot be spammed. Additionally, she loses her float when using this move.
- Customs
- Custom 1 - Electrical Sweep: Phospora creates a moving electrical line that sweeps across the ground or through the air, stunning opponents and dealing 9% damage with minimal knockback.
- Custom 2 - Sweeping Thunder: Phosphora creates a thunder pillar that deals 16% damage and has a long horizontal hurtbox, although it moves somewhat slowly and fizzles out after a second.
- Custom 3 - Thunder Spot: Phosphora creates a white dot that travels across the ground. If it goes under a opponent, Phosphora zaps them with lightning to deal 18% damage.
|
Up Special
Tornado Guard
|
Phosphora surrounds herself in a tornado, which will cause opponents to launch spinning on contact and get dealt 7% damage. Phosphora can only maintain it for 4 seconds before she exhausts herself and opens herself to being punished, although cancelling it early allows her much more safety.
- Customs
- Custom 1 - Wind Current: Phosphora creates a draft of wind under her that propels herself up. She can charge it to become even stronger, although it will blast her only vertically up, with not a ton of horizontal movement. Doesn't deal damage either. Can also kill projectiles.
- Custom 2 - Lightning Shield: Phosphora shoots thunder down to herself, powering herself with thunder. The initial strike deals 8% damage while contact with her will deal 7% damage and low knockback.
- Custom 3 - Thunder Dragon: Phosphora shoots out an dragon shaped projectile that deals 9% damage while rising and then spreads across the ground to deal 5% damage with high stun but little knockback.
|
Down Special
Thunder Floor
|
Phosphora snaps her fingers as the floor below her becomes electric, dealing 8% damage on contact and stunning opponents so long as they stay on it, dealing a little bit of knockback so they bounce on and off the floor until eventually they get back to safe ground. Only a single Thunder Floor can be generated at a time and in the air where there is no ground nearby it becomes a sweeping electrical attack that deals 8% damage. It is active for 4 seconds before it fizzles out and is two character lengths wide.
- Customs
- Custom 1 - Thunder Pillar: Phosphora snaps her fingers as a electrical line appears beside her, acting as a barrier wall for characters, although not for projectiles. It deals 8% damage and has a long vertical range to it, being about three character heights high. It is stationary. It is active for 3.6 seconds before it fizzles out. Only a single one can be sent out at a time.
- Custom 2 - Shock Triad: Phosphora creates three pillars of lightning that shoot down and cause 16% damage, although are very quick and have small hurtboxes.
- Custom 3 - Blast Zone: A large radius around Phosphora will become lit with blue energy before Phosphora unleashes a powerful, huge thunder attack that leaves her fairly vulnerable. It deals 20% damage but the start up and end lag of the attack make it fairly easy to avoid.
|
Final Smash
Lightning Chariot
|
Phosphora boards the Lightning Chariot and flies off-screen, with a crosshair appearing onto the screen which can be controlled by the player. After a brief period, Phosphora swoops in atop the chariot and deals either 45% damage metered or 100% unmetered.
|
| Taunts
|
- Up Taunt - Phosphora lays in the air as she charges an electrical orb, crossing her legs as she says "Hello there!"
- Side Taunt - Phosphora gets into a fighting stance, floating with her hands outstretched and one leg bent.
- Down Taunt - Phosphora's finger smokes with electricity as she cools it off, saying "Enough blabbity blab, let's get to the main act!"
|
| Special Team-Up Names
|
- With Pit - Lightning Riders
- With Palutena - From the Sky
|
| Alternate Costumes
|
|
|
| Unlock Conditions
|
| TBA
|
|
Ridley
|
Ridley is a major antagonist from the Metroid series, being one of the most frequent bosses in the entire series, managing to survive multiple deaths through cybernetics or other means like cloning. Ridley is a constant threat to Samus and the killer of her parents, being one of the most feared creatures in the galaxy. In Super Smash Bros. Discord, Ridley has been somewhat retooled. While his tools are all still there, his recovery has improved drastically thanks to additional jumps and his new up special, Directional Wing, which allows him to recover from multiple directions. Additionally, Ridley has new tools to allow him to survive longer, such as his new Rectoring technique or his new custom specials that allow him to heal or harden his scales to take less damage.
|
| Move
|
Description
|
| Entrance
|
Ridley swoops down onto the stage at an angle, before landing and letting out a roar.
|
Jump/Flap Wings
Rectoring
|
Ridley has one big jump, and then a series of four total wing flaps that gives him very little air but allows him to stay in the air longer. Really effective for transitioning into Directional Wing and some of it's variants.
Ridley can also pull off something known as Rectoring. When knocked back, the player can hold up on the control stick during Ridley's knockback animation and then when Ridley begins to spin, the player can then press the control stick in any direction they desire to launch Ridley towards any direction they want and can execute any attack during this. This doesn't help Ridley survive for longer, but allows him multiple options after getting knocked back.
|
Neutral Special
Plasma Breath
|
Ridley spits a fireball from his mouth, which bounces across the ground, which deals 4.5% damage. It charges up to have Ridley spitting up to five fireballs (each dealing 7.5%) at maximum, which increase in size and damage. When charged, it is fairly effective for camping and edgeguarding due to its low ending lag, and can rack up damage quickly if uninterrupted. It has a high start-up and hitting Ridley's mouth while charging will deal 4% damage to both fighters.
- Customs
- Custom 1 - Plasma Wave: Ridley charges up for a moment before letting out a wave of red plasma that causes the bleed effect. Ridley can delay the attack by holding down the charge button, which also allows him to fall down soft platforms and move left and right in the air.
- Custom 2 - Plasma Screech: Ridley lets out a lava-powered screech that deals 9% flame damage and pushes opponents back from him, within the sweetspot range of Skewer. Perfect for a tight combo, although it has a low range.
- Custom 3 - Plasma Talons: Ridley shoots two fireballs on his hands, powering them up for Space Pirate Rush as well as making some of his smash attacks more powerful (2.0x more damage). It's short duration of 5 seconds makes it a move Ridley needs to use quickly to fully utilize. When Ridley's claws are already powered up, he can instead do a slashing cut that deals 11% damage but has low knockback.
|
Side Special
Space Pirate Rush
|
Ridley rushes forward to grab an opponent, acting as a command grab. If successful, Ridley pounds them into the ground to deal 4% damage and drags them forward in his talons, dealing 2% damage on loop for as long as they're on the ground. As such, the move does more damage the longer the opponent is on the grab. Opponents can mash out of the move, but Ridley can manually throw them for 7% damage, which can kill on higher percents. When used in the air, Ridley grabs them and moves horizontally down to the nearest ledge- if there is none, Ridley just drops them straight to the ground with a meteor spike for 8% damage.
- Customs
- Custom 1 - Tail Rush: Ridley jumps into the air and flaps his wings as his tail scrapes across the ground as he slowly rushes forward. Somewhat slower than Space Pirate Rush, it will lock opponents in hit stun and deals 15% damage overall. It's generally safer and allows Ridley some horizontal recovery.
- Custom 2 - Furious Winds: Ridley flaps his wings angrily, creating powerful windboxes that push the opponents back from him. At the start of the animation, he can also freeze opponents for 5% damage. This stalls him in the air as well.
- Custom 3 - Cellular Drain: Ridley command grabs his opponent and drains them for 8% damage to heal back 4% of his own damage. Has a lot of endlag and Ridley's healing gets weaker if the opponent is effected by a status effect.
|
Up Special
Directional Wing
|
Ridley's new Up Special, Directional Wing, has him stay in place while directional arrows appear around him, indicating which ways he can move in his current position before propelling him into that direction. It won't deal any damage but the move can be immediately followed up with another special. Additionally, it gives Ridley air-stall.
- Customs
- Custom 1 - Wing Blitz: Ridley charges up and then performs a flying tackle in four possible directions. It travels a long distance and doesn't lose power while traveling. It deals 18% when going straight up and 15% damage when going for any of the sides. Ridley can also down tackle for 8% damage but meteor smash aerial targets. It has a slow start up and has fewer angles compared to Directional Wing, which makes it difficult to recover using. Additionally, the angles are much harder to pull off given it has no pause for a player to directionally tilt for.
- Custom 2 - Lava Launch: Ridley generates lava around him as he charges up and then soars upwards, with four lava blobs popping off him and fall downward, dealing 10% damage and burning on contact. Doesn't launch him very high and only works upwards.
- Custom 3 - Chain Tail: Ridley slams his tail downwards and then soars up. If the tail hits an opponent, it acts as a command grab for 8% inital damage as Ridley impales into them, pulling them with him as he soars into the air and then throws them upwards for 4% damage. Soars him very high, but doesn't give him any other angles to work with.
|
Down Special
Skewer
|
Ridley brings his tail back, which glows briefly, and then proceeds to stab forward with it. If it hits at the tip of the tail, it deals extremely high damage (50% total) and causes opponents to become buried. It has a slow start up, deals low damage if any other part of Ridley's tail hits (5%). It's extremely hard to land and can't be cancelled either.
- Customs
- Custom 1 - Harden Scales: Ridley brings his clawed hands to his face as he roars, his scales shimmering as they harden up and his color scheme becomes darker. This allows him to take 50% less damage from attacks and lowers his knockback considerably. This effect is only active for 4 seconds before it fades away and it has a bit of a recharge time. It becomes really powerful against charged projectiles, which Ridley can actually negate simply by attacking the projectiles when he has hardened scales.
- Custom 2 - Cheat Death: Ridley stands up with his talons arched back, bellowing a roar. When hit, Ridley will be healed for 10%-35% damage depending on the magnitude of the attack in question, and it works with both projectiles and melee attacks. However, it can't be used twice in a row, requiring a 20 second cool-down period. When used in the cool-down period, Ridley just coughs flaming fumes that can deal 3% damage in response to attacks and push opponents away, as well as reset the cooldown.
- Custom 3 - Tail Whip: Ridley whips his tail back upwards, launching opponents straight upwards for 12% damage. This move is harder to directionally influence out of due to it's straightforward vertical properties, although a slight angle will exist if the character is too far right or too far left when the tail whip occurs.
|
Final Smash
Plasma Scream
|
Ridley lets out a roar and dashes forward. Upon hitting an opponent, a cinematic sequence begins with Ridley headbutting them onto a ship. This now varies for different opponents:
- Samus and Zero Suit Samus get knocked onto Samus's gunship.
- Mario, Luigi, Princess Peach, Yoshi and Chef Mario get knocked onto Starship Mario.
- Rosalina gets knocked onto the Comet Observatory.
- Cosmetta gets knocked onto the Cosmic Lighthouse.
- Kirby, Gooey, King Dedede and Meta Knight get knocked onto the Halberd.
- Marx gets knocked onto the Galactic Nova, while Susie gets knocked onto Star Dream OS.
- Fox and Wolf get knocked onto their Arwings.
- Olimar gets knocked onto his ship, the Hocotate Ship.
- Bunea gets knocked onto the Virtupine Virtuacenter.
- Donkey Kong, Diddy Kong, and King K. Rool all get knocked onto the Banana Ship.
- For everyone else, they get knocked onto the BOTTLE SHIP from Metroid: Other M.
Ridley then fires a huge orange laser from his mouth that engulfs both the opponent and the ship. For multiple targets, the ship chosen is in port priority. The explosion deals 45% damage metered and 100% damage unmetered. The opponent is meteor smashed after the cutscene ends and the ship can be seen falling into the background.
|
| Taunts
|
- Up Taunt - Ridley roars and strikes a menacing pose, flapping his wings rapidly.
- Side Taunt - Ridley spins in a circle, finishing in a celebrating pose.
- Down Taunt - Ridley straightens up his body as if noticing something, before easing up while slightly smiling. His body lets out a noticeable crackle as he stands upright.
|
| Special Team-Up Names
|
- With King K. Rool - Cold Blooded Pirates
|
| Alternate Costumes
|
|
|
| Unlock Conditions
|
| TBA
|
|
Jenosa Arma
|
Jenosa Arma is a bounty hunter that found herself on Planet Inos infected by a parasite known as the Scurge. This fed off her health, giving her essentially a timed death sentence. She utilizes her prototype exoskeleton suit and weapons to fight. She is an echo of Zero Suit Samus with her main differences being in her Projectile Gauntlets, which act as both a melee and projectile move and the Magnetic Tether, which pulls enemies close to her and has better tethering properties than the Paralyzer. She is also generally heavier and slower.
|
| Move
|
Description
|
| Entrance
|
Jenosa drops in on top of a power cylinder, landing on her arm and feet before standing up.
|
Neutral Special
Projectile Gauntlet
|
Jenosa punches forward, a short blue projectile being shot from her gauntlets that deals 7% damage but has a short range. Additionally, the punch deals 8% damage and launches opponents upwards. This has a heat meter that will appear when executing this move- performing it too often will drain the meter entirely and prevent Jenosa from using the move.
- Customs
- Custom 1 - EMP Beam: Jenosa fires off electrical projectiles which stuns opponents on impact, dealing 5% damage. Additionally, her melee attack deals 4% damage but paralyzes her opponent. This has a heat meter that will appear when executing this move- performing it too often will drain the meter entirely and prevent Jenosa from using the move.
- Custom 2 - Dissipator Beam: Jenosa fires off flaming projectiles that deal 6% damage and inflicting burning onto the opponent, damaging them 1% damage per 20 frames. She does a burning knuckle uppercut that deals 11% damage, but won't launch opponents. This has a heat meter that will appear when executing this move- performing it too often will drain the meter entirely and prevent Jenosa from using the move.
- Custom 3 - Cryostatis Beam: Jenosa fires off a freezing projectile that deals 1% damage but freezes the opponent, doubling damage to them when they are trapped in ice. Jenosa also performs a wind up punch when performing this move, giving it more of a start up but dealing 14% damage when it lands and freezing the opponent as a result of the attack. This has a heat meter that will appear when executing this move- performing it too often will drain the meter entirely and prevent Jenosa from using the move.
|
Side Special
Magnetic Tether
|
Jenosa leans forward as she unleashes a magnetic tether, which pulls opponents in and allows her to grab and pull them towards her. It deals 6% damage on the inital hit, before Jenosa follows up with a punting kick that deals 5.5% damage. When used on ledges, it'll pull Jenosa on and allow her to perform a spinning kick that deals 7% damage.
- Customs
- Custom 1 - Plasma Dash: Jenosa performs a dashing strike with her gauntlets. Doesn't use the tether, so it can't grab to edges.
- Custom 2 - Tether Lash: Jenosa releases the tether and strikes foes with the tip of it, pulling foes toward her. The rest of the whip does nothing. Deals 18% damage, but requires a preciseness to it.
- Custom 3 - Reflect Slash: Jenosa strikes forward with the tether, reflecting projectiles for 2x the original damage, acting as a kind of counter. The whip itself only deals 3% damage.
|
Up Special
Magnetic Wire
|
Jenosa fires her tether upwards, pulling anyone above her downwards for 9% damage. On ground, this will push people back into the air for 9-10% damage. In the air, this gives Jenosa some extra air, but overall as a recovery move it's not great, as it'll only tether upwards. Has magnetic properties that pull opponents in.
- Customs
- Custom 1 - Boost Punch: Jenosa performs a gauntlet-propelled power punc that ends with an outside crescent swing. A more reliable recovery that deals 9% damage and is a reliable KO move, however it will always move Jenosa back slightly at a angle.
- Custom 2 - Impact Punch: Jenosa performs the Boost Punch with a slight variation, the first hit dealing more damage (8%) and has higher knockback. However, the first hit does not consist of loop hits, which decreases its reliability of connecting with the second punch.
- Custom 3 - Lateral Punch: As opposed to going straight up with the Boost Punch, Jenosa goes horizontal with her punch, giving her some horizontal range. It gives her less vertical range though and generally deals about the same damage. Can spike opponents downwards.
|
Down Special
Low Kick
|
The jump grants much more horizontal distance and jumping while flipping that has Jenosa land faster compared to Samus' Flip Jump. However, the jump covers much less vertical distance and grants no intangibility, while the stomp and kick both deal less damage.
- Customs
- Custom 1 - Flip Jump: Jenosa flashes as she does a illuminating flip and an arching jump through the air, with glowing images trailing behind her. This provides some horizontal and vertical recovery and can act as a third jump without leaving Jenosa in a helpless state. While it does not damage in the air, if she lands on a opponent, it will ground them. However, the move has high ending lag overall.
- Custom 2 - Shooting Star Flip Kick: The flying kick's sweetspot deals more damage (17%-14%) and it functions similarly to down aerial, albeit propelling Jenosa at a more horizontal angle. However, the jump covers less horizontal distance.
- Custom 3 - Magnetic Kick: Jenosa fires off the tether at a downward diagonal while performing a flying kick, pulling opponents for 4% damage before launching them away for 6% additional damage as a spike.
|
Final Smash
Scurge
|
Jenosa releases a latent, lingering will of the Scurge, who comes in the form of three Jenosa clones that circle around her, attacking with ice, fire, and electrical attacks (each attack dealing 15% damage), before unleashing a tri-elemental beam that deals 100% damage. In the metered version of this Final Smash, the elemental beam does not occur.
|
| Taunts
|
- Up Taunt - Jenosa whips around her extremely long ponytail.
- Side Taunt - Jenosa stands in a fierce position, hands clenched as she shouts.
- Down Taunt - Jenosa pounds her fist onto a open palm, grinning.
|
| Special Team-Up Names
|
- With Zero Suit Samus - Infected Warriors
|
| Unlock Conditions
|
| TBA
|
|
R.O.B.
|
R.O.B, or the Robotic Operating Buddy, is a robot hailing from the Isle of the Ancients and was part of a grand race created by Dr. Hector. The Isle of the Ancients was destroyed during the Subspace Emissary, leaving R.O.B as the last of his kind. He attacks using spinning gyros and lasers from his eyes, as well as using rocket thrusters as recovery. He is rumored to have some kind of involvement with Samus...
|
| Move
|
Description
|
| Entrance
|
R.O.B.'s parts assemble down from the sky as thunder blasts, piecing R.O.B. together as he blinks and comes alive.
|
Neutral Special
Robo Beam
|
R.O.B fires off a beam that does 10% damage, and if his light on the top of his head flashes red, he can unleash a super charged beam that does up to 18% damage.
- Customs
- Custom 1 - Infinite Robo Beam: Robo Beam can be fired consecutively, but at the cost of a lower damage output, shorter range and its ability to ricochet. Super Robo Beam also takes longer to charge.
- Custom 2 - Radish Throw: R.O.B. throws out a radish for Smicks to chase after, which they will follow after, dealing damage in their path before their hitbox becomes inactive upon eating the Radish.
- Custom 3 - Signal Test: R.O.B. releases a expansive square beam that is generally wider than the Robo Beam but does less damage.
|
Side Special
Arm Rotor
|
R.O.B quickly spins his torso around, dealing 3%-5% damage and then ending it with a uppercut that does 7% damage. It can trap opponents reliably in it's loop and its last hit has KO potential, more so than it did before.
- Customs
- Custom 1 - Flipper Glitch: R.O.B. releases the Flipper Glitch from Stack-Up, which bounces across the stage, dealing damage to opponents in it's way.
- Custom 2 - Reflector Arm: A version of Arm Rotor that does more damage and reflects projectiles with 80% more power than they originally had, but at the cost of its trapping ability.
- Custom 3 - Bouncy Flipper: A version of the Flipper Glitch that bounces way higher and more unpredictable in it's movement, dealing 25% damage.
|
Up Special
Robo Burner
|
R.O.B. activates his thrusts, allowing for impressive vertical and horizontal recovery. Every time it ignites, a small hitbox will go off allowing R.O.B to do a little bit of damage. The only problem is that it is based off fuel, although it can be regained when R.O.B is grounded.
- Customs
- Custom 1 - Robo Rocket: Releases all of R.O.B.'s rocket fuel at once in a super high jump, with the same amount of time being required to recharge.
- Custom 2 - Stack-Up: R.O.B. puts a Block from Stack Up under him, rapidly able to create a tower of five blocks that allow him to create a elevated platform that can block attacks. It can be knocked down with attacks, having 15% health. Uses R.O.B.'s rocket fuel to create the tower.
- Custom 3 - Robotic Tentacles: R.O.B. extends off the ground with the tentacles, making him faster and extending the length of his normally pithy grab, although he can no longer use Robo Burner.
|
Down Special
Gyro
|
R.O.B places a Gyro on his base and charges it, pushing it out or using it as a item. If the player rapidly presses the attack button, it will "supercharge", allowing R.O.B to throw it out quicker with heavier damage, although this comes at the cost of his Robo Burner fuel.
- Customs
- Custom 1 - Dynamite Trap: R.O.B. drops off some dynamite from Gyromite, which explodes 2 seconds afterwards, dealing heavy damage.
- Custom 2 - Spike Glitch: R.O.B. has the Spike Glitch from Stack-Up encircle him, protecting him from damage.
- Custom 3 - Tentacle Burial: R.O.B. extends out his robotic tentacles and buries them into the ground, setting them up as traps.
|
Final Smash
Ultimate Diffusion Beam
|
R.O.B begins his Final Smash with the Diffusion Beam being projected in front of him, steadily getting stronger and bigger over time, dealing more damage. He then turns into a Diffusion Beam cannon, with three screen sized beams being projected across the stage to deal major damage.
|
| Taunts
|
- Up Taunt - R.O.B. faces the screen and then spins his head and torso in a circle.
- Side Taunt - R.O.B. faces the screen and sways his head around while emitting flashing sparkles from his eyes.
- Down Taunt - R.O.B. faces the screen and moves his torso down to his base before spinning it back up into place
|
| Special Team-Up Names
|
- With Samus - Metal Partners
- With Zero Suit Samus - The Girl and The Robot
|
| Alternate Costumes
|
|
|
| Unlock Conditions
|
| TBA
|
|
Villager
|
Villager is from the peaceful town seen in the Animal Crossing franchise. While his smile can be unnerving to some of his opponents, he's generally a good friend to his neighbors. He gets fruit for them, creates new facilities for the town, and buys locally. In Smash, he uses his talents to fight, able to create trees that he then chops down, pocket items and projectiles, and fire gyroids as rockets. Villager has generally been a bit buffed in a lot of areas, as a result of his poor ranking in competitive play in past titles.
|
| Move
|
Description
|
| Entrance
|
Villager steps out of their house and shuts the door as it disappears.
|
Neutral Special
Pocket
|
Villager reaches out and grabs any projectile or item and is able to pocket it for use later. He can then throw out the projectile at 2.1x the original damage. When pocketing his teammate's items, he only throws them at their original power and damage.
- Customs
- Custom 1 - Triple Pocket: Villager is able to store up to three projectiles/items at a time, although he cannot release any projectiles until he collects three, in which he will throw them in the order he collected them. He cannot collect new projectiles until he gets rid of the all the old ones. They are also thrown to deal 1.7x their original damage, with his teammate's projectiles dealing the original damage.
- Custom 2 - Double Pocket: Villager is able to store up to two projectiles/items at a time, although he cannot release any projectiles until he collects two, in which he will throw them in the order he collected them. He cannot collect new projectiles until he gets rid of the all the old ones. They are also thrown to deal 1.8x their original damage, with his teammate's projectiles dealing the original damage.
- Custom 3 - Garden: Villager releases some water when he Pockets, causing a Flower to grow on the opponents head. Pocketed projectiles deal 1.5x of their original damage and deal the same amount of damage when pocketing a teammate's projectile.
|
Side Special
Lloid Rocket
|
Villager launches Lloid the Gyroid as a projectile that rockets forward, which deals 7%. Villager can choose to ride on it to deal 2.3x more damage and deal more knockback dealt. Using the move in this fashion leaves Villager helpless unless the rocket explodes from hitting an opponent or damageable object. When the player tilts the control stick, the rocket spins in a circle, dealing 16% damage to opponents in it's path while not exploding, although shortens the rest of the journey unless done at the end of the animation. Villager can jump off at the apex of spin to gain extra vertical air while going into a helpless state.
- Customs
- Custom 1 - Brewstoid Rocket: Villager launches a Brewstoid as a rocket, dealing 9% unmanned. When riding the rocket, it accelerates quickly and deals 1.7x more damage. Cannot be spun via the control stick. Provides Villager with a speed boost after he collides with a opponent for 2 seconds.
- Custom 2 - Sputnoid Rocket: Villager launches a Sputnoid as a rocket, dealing 8% unmanned. When riding the rocket, it can be tilted in any direction quickly, allowing Villager free control in almost any direction, however it only deals 15% damage when manned. It is also somewhat slower.
- Custom 3 - Poltergoid Rocket: Villager launches a Poltergoid as a rocket, which deals 5% damage and Bleed when it hit a opponent, dealing it for 5-9 seconds depending on the fighter's weight. When manned, it will go slower but explode in a spectral explosion that deals 10% damage inflicts Bleed for 9-15 seconds.
|
Up Special
Balloon Trip
|
Villager uses two balloons, both of a set color determined by the player's number, to fly Balloon Fight-style. Tapping the special button will cause him to up higher, although he can only be hit twice or he will fall into a helpless state. This move will give less distance the more often it's used; if it's deemed a stale move, it will only go half the distance it used to.
- Customs
- Custom 1 - Triple Balloon Trip: Villager has three balloons, allowing him to take another hit but decreases the distance he can go.
- Custom 2 - Single Balloon Trip: Villager has a single balloon, only able to take a single hit while in the air but he is able to go faster and farther while in the air.
- Custom 3 - Explosive Balloon Trip: Villager's balloons will go off after 2.4 seconds in the air, inflicting Burn onto his opponents while dealing 15% damage if he manages to explode near them. The burn effect will deal 0.5% damage every 20 frames for 5 seconds.
|
Down Special
Timber
|
Villager first plants a sapling into the ground, transforming this move into a watering can that can be used to blow opponents back with windboxes. When he uses it on the sapling, it will grow into a tree, which deals 14% damage when it grows. This turns the move into a axe, which Villager will swing around and deal 8% per swing. He then can chop down the tree in two axe swings, which deals 30% damage when it falls cleanly and 20% damage when it falls weakly. The tree will only remain active for 10 seconds.
- Customs
- Custom 1 - Bronze Timber: Villager performs all the steps to Timber quickly, although it deals less damage. The sprouting tree hitbox only deals 10% damage, the cut down tree only deals 15% damage, and the watering pot has no windboxes, although will freeze opponents on higher percentages. Additionally, the axe is much slower and deals 6% damage a swing.
- Custom 2 - Silver Timber: Villager performs all the steps to Timber at about the same rate as the original move. The sprouting tree hitbox only deals 7% damage, but also inflicts Bleed for 4-7 seconds. When cutting down the tree, it deals 22% damage and buries opponents. The watering pot has a vacuum effect that pulls opponents close to Villager. The axe remains the same.
- Custom 3 - Golden Timber: Villager performs all the steps to Timber much slowly, but damage is increased across the board. The sprouting tree hitbox deals 20% damage and the falling tree hitbox deals 35% damage, requiring 3 ax hits. The watering pot has a further reach as well. The axe deals 10% damage on swing.
|
Final Smash
Dream Home
|
Villager calls upon the help of Tom Nook and the Nooklings, who are summoned to craft a house over Villager's opponent, dealing either 100% damage or 45% damage depending on whether the Final Smash is unmetered or metered.
|
| Taunts
|
- Up Taunt - Villager faces the camera and cheers three times in different directions.
- Side Taunt - Villager does the Shrunk Funk Shuffle.
- Down Taunt - Villager bends down and scrapes the ground with a stick.
|
| Special Team-Up Names
|
- With Shovel Knight - Shovels of the Ground
|
| Alternate Costumes
|
|
|
| Unlock Conditions
|
| TBA
|
|
Ike
|
Ike is the successor of his father, Greil, in commanding a group of mercenaries. He later becomes known as the "Radiant Hero" due to his efforts in combatting the invasion force of Daein and later on the Begnion. He is also bitter rivals with the enigmatic Black Knight, who killed his father. Ike is a powerful sword user, being somewhat slower and heavier as a fighter. Ike overall hasn't been buffed too much aside from some damage output and giving Aether some directional input.
|
| Move
|
Description
|
| Entrance
|
Ike warps onto the stage using warp magic and grunts while briefly performing an inward slash.
|
Neutral Special
Eruption
|
Ike hoists his sword up and holds it with two hands before plunging it into the ground, dealing 10%. Ike can continue to charge the move, with it growing flames and intensity. When fully charged, it will deal 36% damage and cover more area with three pillars of blue flame, although if the player does not release the move when a shine spark appears at the end of the blade, it will only deal 26% damage.
- Customs
- Custom 1 - Tempest: Ike hoists his sword up and then slams it into the ground, creating a vortex of wind around him that gimps recoveries and deals 11% damage. Can be charged to deal 24% damage and has a wide hitbox. It also stalls his descent in air but has less KO potential.
- Custom 2 - Strengthtaker: Ike slashes powerfully in a slow-to-start sword slash that becomes more powerful the more times he hits opponents without taking damage. It begins by dealing 10% damage, and gains 3% in damage with each successful hit, the blade becoming wrapped in red flames. The sword can be charged up to deal 40% damage in total, although if Ike is knocked down, it resets entirely. If Ike is hit, it takes 3% damage away from his output.
- Custom 3 - Wrath: Ike hoists his sword to his side, dealing 9% damage if his health is 100% or lower. When his health is above 100%, it increases in power, dealing 10-37% damage depending on how much damage he has taken, capping in power at 333%. Ike will also grip his side as if he has been wounded on higher percentages, adding additional start up time.
|
Side Special
Quick Draw
|
Ike kneels on one knee and readies himself to charge forward. If Ike make contact with an opponent, he will perform a lunging, outward slash. It takes ≈88 frames to fully charge. Uncharged, it will deal 6% damage, but when fully charged, it will deal 18% damage. It can be used as a horizontal recovery, being able to be used and charged in the air.
- Customs
- Custom 1 - Close Combat: Ike performs a shoulder tackle. Charges faster than Quick Draw and pierces opponents, as well as being a better recovery. It deals 4% damage uncharged and 9% damage fully charged. Renders Ike helpless if he doesn't hit an opponent at the end of the animation.
- Custom 2 - Unyielding Blade: Ike swings his blade while performing Quick Draw, dealing 7% uncharged and 22% damage fully charged. It also gives him Super Armor. It takes longer to charge, however.
- Custom 3 - Shove: Ike dashes forward with his arms out, dealing 5% damage as he shoves anything in his way, launching them far. Cannot be charged or cancelled, but has good KO potential near ledges.
|
Up Special
Aether
|
Ike throws his sword high into the air before grabbing it and then slamming down to the ground with it. It deals 10-14% damage depending on how clean the hit was. Ike can now directionally move while descending, although not very far and if he lands on a opponent, it will deal 6-8% damage on impact, depending if it's a clean hit or not.
- Customs
- Custom 1 - Sol: Ike strikes up into the air with his blade, able to bring up opponent s with him and deal a total of 12% damage before launching them away with a 6% damage hit. Makes Ike helpless in the air after performing it.
- Custom 2 - Luna: Ike leaps into the air as he throws his sword, grabbing and twisting his blade before swinging it downwards and striking the opponent to deal 7% damage irregardless of buffs or other defense effects, as well instantly breaking shields. Has a shorter vertical distance and deals less damage.
- Custom 3 - Aether Wave: Ike performs Aether, but it now has a projectile property when it lands, releasing in the form of a 6% damage aether wave. Doesn't deal much knockback and while Ike's strike can deal 10% to opponents he makes contact with via the blade, it's less damage than Aether. Gives Ike a projectile option of sorts and can be used to edge guard.
|
Down Special
Counter
|
Ike readies his blade as a shine spark appears near him, with opponents that attempt to attack him being dealt 1.4x the original attack's damage.
- Customs
- Custom 1 - Patience: Ike waits for the opponent to attack, entering a state where they cannot attack but automatically dodge all the opponent's attacks before following up with a quick 30% damage sword strike.
- Custom 2 - Heavy Blade: Ike swings Ragnell, his sword down, dealing 12% damage as a flame pillar travels across the ground for three character lengths, dealing 5% damage on contact.
- Custom 3 - Veteran Intuition: Ike dodges and then strikes forward with Ragnell to deal 7% damage with moderate knockback. Can act as a counter or dodge.
|
Final Smash
Great Aether
|
Ike performs a upward slash while Ragnell's blade is engulfed in flames. If any opponents are hit, they are launched upward and Ike throws Ragnell into the air along with them. He then leaps upward, catches Ragnell while its blade is still aflame, and unleashes a devastating series of slashes alongside a thrust, a wheel kick and a roundhouse kick. Ike then concludes the attack with a descending, two-handed slash that slams the opponent to the ground and creates a massive explosion upon impact. This attack deals 45% metered, 100% normally.
|
| Taunts
|
- Up Taunt - Ike holds Ragnell with both hands in front of himself while growling loudly as wind blows through his cape.
- Side Taunt - Ike rears back and then holds Ragnell to his side while saying "Prepare yourself!"
- Down Taunt - Ike plunges Ragnell into the ground, then folds his arms while saying "Hmph!" as wind blows through his cape, then picks up Ragnell from the ground.
|
| Special Team-Up Names
|
- With Robin - Vanguard and Tactician
- With Corrin - Flame and Rain
- With Fjorm - Freeze and Burn
- With Tharja - Darkness and Aether
- With Black Knight - Fated Rivals
|
| Alternate Costumes
|
|
|
| Unlock Conditions
|
| TBA
|
|
Black Knight
|
One of Daein's Four Riders and wielder of the blessed sword Alondite. Once an apprentice to Ike's father, Greil, the two eventually duel, resulting in Greil's defeat. Thought to be dead after losing to Ike and the blessed sword Ragnell, the Black Knight survives and comes to the aid of Micaiah, the leader of the Dawn Brigade, a band of Daein freedom fighters. Black Knight is an Echo Fighter of Ike, being even heavier slower, but deals more damage than Ike.
|
| Move
|
Description
|
| Entrance
|
The Black Knight appears from a fiery ring of warp magic, slamming his sword into the ground.
|
Neutral Special
Strengthtaker
|
Black Knight slashes powerfully in a slow-to-start sword slash that becomes more powerful the more times he hits opponents without taking damage. It begins by dealing 10% damage, and gains 3% in damage with each successful hit, the blade becoming wrapped in red flames. The sword can be charged up to deal 40% damage in total, although if Black Knight is knocked down, it resets entirely. If Black Knight is hit, it takes 3% damage away from his output.
- Customs
- Custom 1 - Tempest: Black Knight hoists his sword up and then slams it into the ground, creating a vortex of wind around him that gimps recoveries and deals 11% damage. Can be charged to deal 24% damage and has a wide hitbox. It also stalls his descent in air but has less KO potential.
- Custom 2 - Eruption: Black Knight hoists his sword up and holds it with two hands before plunging it into the ground, dealing 10%. Black Knight can continue to charge the move, with it growing flames and intensity. When fully charged, it will deal 36% damage and cover more area with three pillars of blue flame, although if the player does not release the move when a shine spark appears at the end of the blade, it will only deal 26% damage.
- Custom 3 - Wrath: Black Knight hoists his sword to his side, dealing 9% damage if his health is 100% or lower. When his health is above 100%, it increases in power, dealing 10-37% damage depending on how much damage he has taken, capping in power at 333%. Black Knight will also grip his side as if he has been wounded on higher percentages, adding additional start up time.
|
Side Special
Eclipse
|
Black Knight kneels on one knee and readies himself to charge forward. Black Knight swings his blade while performing moving forward, dealing 9% uncharged and 27% damage fully charged. It also gives him Super Armor. It takes a total of ≈120 frames to charge.
- Customs
- Custom 1 - Close Combat: Black Knight performs a shoulder tackle. Charges faster than Eclipse and pierces opponents, as well as being a better recovery. It deals 6% damage uncharged and 13% damage fully charged. Renders Black Knight helpless even if he hits an opponent while in the air.
- Custom 2 - Dark Draw: Black Knight readies himself, then dashes forward. If Black Knight makes contact with an opponent, he will perform a lunging, outward slash. It takes ≈99 frames to fully charge. Uncharged, it will deal 8% damage, but when fully charged, it will deal 21% damage. It can be used as a horizontal recovery, being able to be used and charged in the air.
- Custom 3 - Shove: Black Knight dashes forward with his arms out, dealing 9% damage as he shoves anything in his way, launching them far. Cannot be charged or cancelled, but has good KO potential near ledges.
|
Up Special
Luna
|
Black Knight strikes his opponents for 8% damage upwards before jumping up himself, impaling them for 10% damage. This move has low knock back but can notoriously destroy a ton of a shield's health on the first frame. Has low KOing power. Similar to Ike's Aether in that it has low recovery potential as well.
- Customs
- Custom 1 - Sol: Black Knight strikes up into the air with his blade, able to bring up opponent s with him and deal a total of 12% damage before launching them away with a 6% damage hit. Makes Black Knight helpless in the air after performing it.
- Custom 2 - Black Luna: An even more powerful version of Luna with a long start up as the Black Knight's sword is embedded with dark magic. Black Knight swings his sword a total of 3 times, dealing 6% damage each before launching the opponent into the air for 8% damage. Has no recovery potential and is easy to fight against, but it's KOing power is incredible.
- Custom 3 - Ether Wave: Black Knight performs Ike's Aether, but it now has a projectile property when it lands, releasing in the form of a 6% damage aether wave. Doesn't deal much knockback and while Black Knight's strike can deal 10% to opponents he makes contact with via the blade, it's less damage than Aether. Gives Black Knight a projectile option of sorts and can be used to edge guard.
|
Down Special
Pavise
|
Black Knight puts up a giant shield that defends him from attacks, completely nullifying any kind of damage, even Final Smashes. It can only last against one attack, although can be held out as long as possible as long as the player holds down the button.
- Customs
- Custom 1 - Patience: Black Knight waits for the opponent to attack, entering a state where they cannot attack but automatically dodge all the opponent's attacks before following up with a quick 35% damage sword strike.
- Custom 2 - Heavy Blade: Black Knight swings Alondite, his sword down, dealing 12% damage as a flame pillar travels across the ground for three character lengths, dealing 5% damage on contact.
- Custom 3 - Veteran Intuition: Black Knight dodges and then strikes forward with Alondite to deal 11% damage with heavy knockback. Can act as a counter or dodge.
|
Final Smash
Last Judgement
|
The Black Knight sends out a black sphere that sends opponents to a castle illuminated by the moon, where he proceeds to brutally slash them with Alondite, which then glows a lunar white before he slams Alondite into them, dealing a total of 45% or 100% damage depending on whether the move is metered or unmetered.
|
| Taunts
|
- Up Taunt - Black Knight sits on a throne for a moment before getting back up. The player can hold down the taunt to keep him sitting.
- Side Taunt - Black Knight spins his sword around before placing it into the ground.
- Down Taunt - Black Knight thrusts his sword into the ground, staring ahead as his cape flies through the wind.
|
| Special Team-Up Names
|
- With Robin - Branded for Darkness
- With Corrin - Servants of the Dark Kings
- With Fjorm - Chilling Moon
- With Tharja - Formed by the Dark
- With Ike - Fated Rivals
|
| Alternate Costumes
|
|
|
| Unlock Conditions
|
| TBA
|
|
Fjorm
|
Fjorm and her elder sister Gunnthrá were princesses of the Ice Kingdom Nifl, ruling alongside their mother, the queen. Surtr attacked and killed their mother and Fjorm attempted to retaliate against him, although she was knocked unconscious during the attack. Surtr kept her alive and left her where she was. Now back on her feet and ready to avenge her fallen kingdom, she uses the power of ice channeled through her spear Leiptr. Fjorm is a somewhat defensive fighter, given much of her moves usually have some kind of defensive element to it such as cancelling projectiles or soaking up damage. Additionally, she is somewhat of a tank in terms of damage output and movement, being somewhat slower and heavier than the rest of the Fire Emblem characters.
|
| Move
|
Description
|
| Entrance
|
Fjorm appears out from a gust of icy wind, swinging around her spear Leiptr.
|
Neutral Special
Glacies
|
Fjorm sends out a frosty charged attack with Leiptr that knocks the opponent straight back, almost as if Fjorm is firing them away. The attack deals 8% damage and icy particles destroy projectiles in Fjorm's direction. At the last frame of the animation, Leiptr's tip unfolds like a flower.
- Customs
- Custom 1 - Glacier: Fjorm stabs Leiptr forward, creating a large icy projectile with small ranged arc, but deals a freezing effect dealing 18% damage. However, the projectile destroying properties are missing from this move and it's short arc makes it hard to precisely line up a shot.
- Custom 2 - Snow Flower: Fjorm stabs Leiptr into the ground as three snow-white flowers form in front of her, knocking back opponents for 8% damage each. Each knockback will send the foe into the flower behind them. Has a lot of end lag.
- Custom 3 - Glacies +: More or less identical to Glacies except with a long start up and end lag, dealing 12% damage while retaining a projectile destroying effect.
|
Side Special
Ice Mirror
|
Fjorm unleashes a frosty mirror that surrounds her, soaking up 30% of the damage she takes and then unleashing it in a frosty explosion. A fairly effective damage soak attack with additional uses, although Fjorm is not able to control when the mirror explodes (the mirror is active for 300 frames/5 seconds before exploding).
- Customs
- Custom 1 - Icy Reflection: A ice clone of Fjorm appears to strike forward with her spear, unleashing a jab attack that deals 12% before disappearing. This ice clone of Fjorm can take up to 30% damage for Fjorm as well. Has a bit of a start up.
- Custom 2 - Ice Absorb: A version of Ice Mirror that soaks up all damage in front of Fjorm before breaking when it takes 120%, dealing 20% damage to Fjorm. It can be cleanly cancelled but will require a 120 frame cool down.
- Custom 3 - Mirror Snow: A mirror that flips the direction of the opponent and trapping their feet in ice-packed snow, making them unable to walk or jump (although many attacks are still usable). While it deals no damage, Fjorm can follow this up with another attack.
|
Up Special
Spur Lunge
|
Fjorm spins up in the air and then lands a blow with Lepitr that deals significant knock back while dealing 11% damage. Has some end lag and is overall not super effective as a recovery.
- Customs
- Custom 1 - Lepitr Lunge: While spinning in the air, Fjorm can freeze airborne opponents for 7% damage. Has longer end lag and deals 9% damage at the end.
- Custom 2 - Iron Lunge: A heavier version of Spur Lunge that deals 18% damage but has a shorter range and height.
- Custom 3 - Steel Lunge: A quicker version of Spur Lunge that has more vertical height and speed, but only deals 4% damage.
|
Down Special
Leiptr Wind
|
Fjorm places the spear across herself, with icy particles swirling around her. Unlike many counters, Leiptr Wind is unique in that works on the opponent regardless of range, causing them to freeze (18%). As such, it is a incredibly effective and unique counter that comes at a increasing more precise timing requirement and weakens with frequent use (9% damage being the minimal amount of damage).
- Customs
- Custom 1 - Leiptr Leap: Fjorm stabs Leiptr into the ground as icy particles take her up into the air. Leiptr deals a total of 16% damage and Fjorm does not enter into a helpless state while shot into the air, allowing her to summon back the weapon and follow up with a additional attack or jump before then being rendered into a helpless state.
- Custom 2 - Leiptr Wall: Fjorm circles Lepitr around, creating a shield of icy wind around her that tosses opponents away from her, with giant spear-like spikes prodding out that deal 13% damage on contact. She can still be effected by projectiles in the first half of this attack, but after the spikes appear she will be completely protected. The move can last up to 360 frames.
- Custom 3 - Leiptr Launch: Fjorm creates giant icicles in front of her and then launches them off to deal 5% damage each, which also can weaken charged projectiles.
|
Final Smash
Glacier Beam
|
Fjorm unleashes a blast of blue light that appears to only deal 15% damage to it's original target before suddenly expanding, coating the entire surrounding area of the stage in spiked ice and dealing 85% additional damage the opponent that was shot at.
|
| Taunts
|
- Up Taunt - Fjorm brandishes Leptir to the camera, with the tip becoming encased in blue smoke. Says "Are you ready?" as she does this.
- Side Taunt - Fjorm spins Leptir around before suddenly holding it in a combat stance, saying "Leiptr! Lance of Ice!"
- Down Taunt - Fjorm places Leptir in the ground as she crosses her arms, saying "No more blood."
|
| Special Team-Up Names
|
- With Robin - Thunder and Ice
- With Corrin - Water and Ice
- With Tharja - Black Ice
- With Gunnthrá - Nifl Sisters
|
| Alternate Costumes
|
|
|
| Unlock Conditions
|
| TBA
|
|
Gunnthrá
|
Fjorm and her elder sister Gunnthrá were princesses of the Ice Kingdom Nifl, ruling alongside their mother, the queen. Her mother was murdered by Surtr, and she sought help from the Kingdom of Askr to fight back. As an Echo Fighter of Fjorm, Gunnthrá is unique in that she doesn't use a melee weapon at all, either modifying Fjorm's attacks to become projectiles or giving them generally more range. She is also lighter than Fjorm. Like Chrom before her, she actually has a special from another fighter entirely, being Robin's Elwind attack.
|
| Move
|
Description
|
| Entrance
|
Gunnthrá appears out from a gust of icy wind, her book floating near her hand as she waves towards it.
|
Neutral Special
Chilling Wind
|
Gunnthrá casts a frosty gale from her book, which freezes opponents and deals 3% damage. Shielding will prevent the opponent from turning into ice, but takes out most of their shield in the process. Can be used to deviously edge guard. Has a long end lag.
- Customs
- Custom 1 - Glacier: Gunnthrá casts a large icy projectile with small ranged arc with her book, but deals a freezing effect dealing 18% damage. However, the projectile destroying properties are missing from this move and it's short arc makes it hard to precisely line up a shot.
- Custom 2 - Glacies: Gunnthrá sends out a frosty charged wall of snow out of her magic book that knocks the opponent straight back. The attack deals 7.5% damage and icy particles destroy projectiles in Gunnthrá's direction. In the last frames of the animation, the snowy particles transform briefly into a flower.
- Custom 3 - Glacies +: More or less identical to Glacies except with a long start up and end lag, dealing 12% damage while retaining a projectile destroying effect.
|
Side Special
Ice Mirror
|
Gunnthrá unleashes a frosty mirror that surrounds her, soaking up 30% of the damage she takes and then unleashing it in a frosty explosion. A fairly effective damage soak attack with additional uses, although Gunnthrá is not able to control when the mirror explodes (the mirror is active for 300 frames/5 seconds before exploding).
- Customs
- Custom 1 - Icy Sister: A ice clone of Fjorm appears to strike forward with her spear, unleashing a jab attack that deals 12% before disappearing. This ice clone of Fjorm can take up to 30% damage for Gunnthrá as well. Has a bit of a start up.
- Custom 2 - Ice Absorb: A version of Ice Mirror that soaks up all damage in front of Gunnthrá before breaking when it takes 120%, dealing 20% damage to Gunnthrá. It can be cleanly cancelled but will require a 120 frame cool down.
- Custom 3 - Mirror Snow: A mirror that flips the direction of the opponent and trapping their feet in ice-packed snow, making them unable to walk or jump (although many attacks are still usable). While it deals no damage, Gunnthrá can follow this up with another attack.
|
Up Special
Elwind
|
Gunnthrá casts wind magic twice below themselves from their Blizzard tome, which propels them into the air. It hits twice, with the first hit being able to meteor smash. The first hit damages for 6%, while the second hit deals 4% damage. Unlike the rest of her moves, this move actually originates from Robin. It differs in that Gunnthrá does not have limited uses for it, but it deals less damage. The particles also change.
- Customs
- Custom 1 - Soaring Elwind: Alters the lifting power of each gust. The first hit has less recovery potential and deals less damage (3%), but the second hit has much more recovery potential (3%). Each gust takes significantly longer to cast.
- Custom 2 - Freezing Elwind: Alters Elwind so it no longer deals damage, but freezes opponents, keeping them in a frozen state for 88 frames.
- Custom 3 - Blizzard Spin: While spinning in the air, Gunnthrá can freeze airborne opponents for 7% damage. Has longer end lag and deals 9% damage at the end.
|
Down Special
Rexcalibur
|
Guunthrá spins around as a freezing tornado surrounds her, dealing 7% damage on the first hit and 2-3% on successive hits from the tornado. The tornado deals damage on contact and cancels melee attacks on contact. Projectiles are not cancelled, however.
- Customs
- Custom 1 - Blizzard Counter: Gunnthrá has her book spin around her, with icy particles swirling around her, capturing melee or projectile attacks. It works on the opponent regardless of range, causing them to freeze (18%). As such, it is a incredibly effective and unique counter that comes at a increasing more precise timing requirement and weakens with frequent use (9% damage being the minimal amount of damage).
- Custom 2 - Blizzard Wall: Gunnthrá circles Lepitr around, creating a shield of icy wind around her that tosses opponents away from her, with giant spear-like spikes prodding out that deal 13% damage on contact. She can still be effected by projectiles in the first half of this attack, but after the spikes appear she will be completely protected. The move can last up to 360 frames.
- Custom 3 - Blizzard Icicles: Gunnthrá creates giant icicles in front of her and then launches them off to deal 5% damage each, which also can weaken charged projectiles.
|
Final Smash
Glacier Beam
|
Gunnthrá unleashes a blast of blue light that appears to only deal 15% damage to it's original target before suddenly expanding, coating the entire surrounding area of the stage in spiked ice and dealing 85% additional damage the opponent that was shot at.
|
| Taunts
|
- Up Taunt - Gunnthrá closes her book and her eyes, breathing softly as chilly air comes out from her mouth.
- Side Taunt - Gunnthrá swipes her book to the side, patting it back and forth almost telekinetically.
- Down Taunt - Gunnthrá clutches her book as she leans away from the battle, looking disgusted.
|
| Special Team-Up Names
|
- With Fjorm - Nifl Sisters
- With Robin - Windy Mages
- With Corrin - Chilling River
- With Tharja - Beautiful Frost
|
| Unlock Conditions
|
| TBA
|
|
Tharja
|
A dark mage hailing from Plegia that is unconcerned about the conflict between Plegia and Ylisse, joining Chrom and Robin's army when approached. Tharja is deeply in love with Robin, using her dark powers to protect them and destroy anyone that attempts to get in her way. Like Robin, she has limited-use tomes she uses for her specials, although she doesn't use a sword in her normal attacks, opting for short range harming hexes instead.
|
| Move
|
Description
|
| Entrance
|
Tharja appears out from a bunch of black sand, cackling as a dark purple aura surges off her.
|
Neutral Special
Rauðrblade
|
Tharja does a piercing slashing attack with her magic, creating a short range magic knife attack that deals 15%. Like all her tome moves, when this runs out of uses, Tharja cannot use this move at all for five seconds.
- Customs
- Custom 1 - Rauðrblade+: Longer ranged version of the Rauðrblade that comes at the cost of dealing less damage (10%).
- Custom 2 - Rauðrstab: Short ranged version of the Rauðrblade that does more damage via a sweet spot on the tip. This move deals 11% damage normally, but 19% damage on the sweetspot.
- Custom 3 - Rauðrsaw: A rolling, red circular saw that Tharja can unleash, dealing damage to opponents it comes across and can go up walls and ceilings. Disappears after 3 seconds and only two can be used at once. These deal 8% damage with minimal knockback.
|
Side Special
Ruin
|
Tharja unleashes a dark attack that encircles her opponent into glowing golden rings that then unleashes a powerful dark attack that deals 22%. Like all her tome moves, when this runs out of uses, Tharja cannot use this move at all for five seconds.
- Customs
- Custom 1 - Ruin+: A smaller ranged version of Ruin that does 29% damage. The opponent must be less than a character length away from Tharja for this to be successful.
- Custom 2 - Candelabra: Tharja floats over a Candelabra over to her opponent, setting them on fire and dealing 12% damage. The player can control the movement of the Candelabra but it will leave Tharja open to attacks.
- Custom 3 - Candelabra+: Tharja uses a bigger version of the Candelabra that is slower but deals 20% damage on impact, as well as burning the foe.
|
Up Special
Retribution
|
Tharja releases a dark floating shockwave that when it hits a opponent, deals a dark combo that damages for 19%. Like all her tome moves, when this runs out of uses, Tharja cannot use this move at all for five seconds.
- Customs
- Custom 1 - Retribution+: Tharja releases a bigger version of Retribution that is slower and does less damage (13%), however cannot be blocked without killing the shield.
- Custom 2 - Vengeance: A counter move that has to be done after a attack lands within a 1 second window, with Tharja sending a bunch of purple shards at her opponent to deal 2.0x the original damage of their original attack.
- Custom 3 - Vengeance+: A counter move that has to be done before a attack lands, with Tharja sending a bunch of purple shards at her opponent to deal a set 15% damage.
|
Down Special
Nosferatu
|
Tharja encases her opponent into a circle of dark energy, sapping away their health as she heals her own. It deals 17% damage and deals 0.8% darkness damage every 12 frames. It heals given the following formula: (17% + 0.8% per 12 frames).
Like all her tome moves, when this runs out of uses, Tharja cannot use this move at all for five seconds.
- Customs
- Custom 1 - Distant Nosferatu: Grabs opponents farther away instead of at close range, but deals only 10% damage, heals less and is slower, damaging 0.6% at a rate of 30 seconds..
- Custom 2 - Chilling Wind: Tharja sends out a vortex of freezing wind that temporarily freezes her opponents and deals 12% damage.
- Custom 3 - Iceburg: Tharja erects a ice pillar in front of her, launching foes underneath it for 18% damage. Can freeze opponents on higher percentages.
|
Final Smash
Pair-Up
|
Tharja teams up with Gaius, who dashes in with his sword after biting down on a lollypop, slashing at the opponent as Tharja casts dark, heavy chains around the opponent. The two then do a simultaneous attack that does heavy damage to the opponent before kicking the opponent to the edge. This move deals 45% damage metered, and 100% damage unmetered.
|
| Taunts
|
- Up Taunt - Tharja holds her book as if she were hugging it.
- Side Taunt - Tharja cackles as the tome around her circles around her body in dark energy.
- Down Taunt - Tharja opens up her palms, sizzling in dark energy as she bites her lip.
|
| Special Team-Up Names
|
- With Robin - Plegian Mages
- With Corrin - Soul Mates?!
- With Fjorm - Black Ice
|
| Alternate Costumes
|
|
|
| Unlock Conditions
|
| TBA
|
|
Orphelia
|
Orphelia is the daughter of the Ylissean prince Owain, who went under the name of "Odin" during his time in Nohr. She is also a distant descendant of the Hero-King Marth. A dreamer, she like her father before her, loves melodramatics and hopes to be a "chosen one" just like her father before her. Orphelia is Tharja's Echo Fighter in Super Smash Bros. Discord. She utilizes dark attacks just like her, but has some freezing properties to her attacks that Tharja doesn't, in addition to having a longer range but weaker attacks.
|
| Move
|
Description
|
| Entrance
|
Orphelia skips as dark energy pulses from her feet as she brings out her own personal tome.
|
Neutral Special
Rauðrstab
|
Orphelia does a short piercing slashing attack with her magic, creating a long range magic sword attack that deals 9% damage normally and 17% damage on a sweetspot. Like all her tome moves, when this runs out of uses, Orphelia cannot use this move at all for five seconds.
- Customs
- Custom 1 - Rauðrblade: Orphelia does a piercing slashing magic knife attack that deals 16%. Is overall more balanced across the whole blade than Rauðrstab but does not possess the sweetspot. It is also shorter ranged.
- Custom 2 - Rauðrblade+: Longer ranged version of the Rauðrblade that comes at the cost of dealing less damage (10%).
- Custom 3 - Rauðrsaw: A rolling, red circular saw that Orphelia can unleash, dealing damage to opponents it comes across and can go up walls and ceilings. Disappears after 3 seconds and only two can be used at once. These deal 8% damage with minimal knockback.
|
Side Special
Death Blow
|
Orphelia launches a powerful magic sword swing that deals 9% damage normally and 18% damage if the attack hits via the sweetspot. It can launch opponents far when hit with the sweetspot and is a effective killing move if used correctly. Like all her tome moves, when this runs out of uses, Orphelia cannot use this move at all for five seconds.
- Customs
- Custom 1 - Ruin: Orphelia unleashes a dark attack that encircles her opponent into glowing golden rings that then unleashes a powerful dark attack that deals 22%.
- Custom 2 - Freezing Candelabra: Orphelia floats over a chilly Candelabra over to her opponent, setting them on freeze and dealing 12% damage. The player can control the movement of the Candelabra but it will leave Tharja open to attacks.
- Custom 3 - Freezing Candelabra+: Orphelia uses a bigger version of the chilly Candelabra that is slower but deals 20% damage on impact, as well as freezing the foe.
|
Up Special
Rising Light
|
Orphelia releases a light projectile that launches opponents upwards, dealing 13% damage with 1% damage for further hits upwards. Like all her tome moves, when this runs out of uses, Orphelia cannot use this move at all for five seconds.
- Customs
- Custom 1 - Rising Light+: Orphelia releases a bigger version of Rising Light that is slower and does less damage (13%), however cannot be blocked without killing the shield.
- Custom 2 - Vengeance: A counter move that has to be done after a attack lands within a 1 second window, with Orphelia sending a bunch of purple shards at her opponent to deal 2.0x the original damage of their original attack.
- Custom 3 - Vengeance+: A counter move that has to be done before a attack lands, with Orphelia sending a bunch of purple shards at her opponent to deal a set 15% damage.
|
Down Special
Chilling Wind
|
Orphelia sends out a vortex of freezing wind that temporarily freezes her opponents and deals 12% damage. Like all her tome moves, when this runs out of uses, Orphelia cannot use this move at all for five seconds.
- Customs
- Custom 1 - Nosferatu: Orphelia encases her opponent into a circle of dark energy, sapping away their health as she heals her own. It deals 17% damage and deals 0.8% darkness damage every 12 frames. It heals given the following formula: (17% + 0.8% per 12 frames).
- Custom 2 - Distant Nosferatu: Orphelia grabs opponents farther away instead of at close range, but deals only 10% damage, heals less and is slower, damaging 0.6% at a rate of 30 seconds.
- Custom 3 - Iceburg: Orphelia erects a ice pillar in front of her, launching foes underneath it for 18% damage. Can freeze opponents on higher percentages.
|
Final Smash
Pair-Up
|
Orphelia teams up with her father Odin, who dashes in with his sword known as the Missiletainn as Orphelia brandishes her tome of the same name. Orphelia chains one opponent with dark chains as Odin zips around with lighting surging off him before releasing a devastating blow. It deals 45% damage metered or 100% damage unmetered.
|
| Taunts
|
- Up Taunt - Orphelia holds her tome close to her chest as she looks around.
- Side Taunt - Orphelia skips around in a circle, humming to herself.
- Down Taunt - Orphelia quickly flips through her tome for the right spell.
|
| Special Team-Up Names
|
- With Marth - Distant Bloodline
- With Lucina - Children of the Future
|
| Alternate Costumes
|
|
|
| Unlock Conditions
|
| TBA
|
|
Shulk
|
Shulk hails from a colony at the base of Bionis- a giant fallen god that makes up the world of Xenoblade Chronicles and is able to wield the Monado with no ill effects. The Monado gives Shulk good range to his attacks, as well as boosts and debuffs his stats in battle. Veterans to the series will notice that Shulk has a new Monado Art called Monado Eater that removes buffs and poisons opponents via a status effect called Bleed. Additionally, Shulk's attacks have been buffed due to his low ranking in competitive Smash play in past installments. Shulk's frame data has also been dramatically improved; he will always be holding the Monado unless the player uses his up taunt, which will place it behind his back and add additional frame data to his next attack.
|
| Move
|
Description
|
| Entrance
|
Shulk jumps down onto the stage while performing a downward slash using the Monado. Shulk then quickly turns his back to the screen and places the Monado on his back while Buster's symbol flashes briefly.
|
Gimmick
Monado Arts
|
Shulk has access to the Monado Arts via his Neutral Special. This changes his stats entirely, from movement, to attack, to even knockback and jumping. It should be noted that none of the customs effect how the Monado Arts buff and debuff Shulk. When shifting through the Monado Arts via taps, they go in the order listed below. The full list of Monado Arts and their effects are listed below:
|
| Jump
|
Speed
|
Shield
|
Buster
|
Smash
|
Eater
|
|
|
|
|
|
|
|
DAMAGE TAKEN:
+22% (1.22X)
AERIAL SPEED:
+50% (1.5x)
FALL SPEED:
+22% (1.22x)
|
DAMAGE DEALT:
-20% (0.8x)
GROUND SPEED:
+70% (1.7x)
AERIAL SPEED:
+30% (1.3x)
|
DAMAGE TAKEN:
-40% (0.67x)
DAMAGE DEALT:
-30% (0.7x)
GROUND SPEED:
-40% (0.6x)
|
DAMAGE TAKEN:
+13% (1.13x)
DAMAGE DEALT:
+40%
KNOCKBACK DEALT:
-32% (0.68x)
|
DAMAGE DEALT:
-50% (0.5x)
KNOCKBACK TAKEN:
+7% (1.07x)
KNOCKBACK DEALT:
+18% (1.18x)
|
Monado Eater is unique, altering Shulk's attacks to remove Buffs on the opponent. Some attacks will inflict Bleed, which deals 3.2% damage every second for 3-5 seconds after the initial damage inflicted.
|
JUMP HEIGHT
INCREASED
|
KNOCKBACK DEALT & JUMP HEIGHT
DECREASED
|
KNOCKBACK DEALT
DECREASED
SHIELD HEALTH
INCREASED
|
SHIELD HEALTH
DECREASED
|
JUMP HEIGHT
INCREASED
|
KNOCKBACK TAKEN
INCREASED
|
|
Neutral Special
Monado Arts
|
Shulk activates the Monado, choosing one out of the six Monado Arts to buff him. The Monado Arts have their strengths and weaknesses, which are all reflected above. Shulk can either tap the special attack button to cycle through the Monado Arts or hold down and then tilt the control stick to get a Monado Art he wants. Each Monado Art lasts for 16 seconds unless manually canceled, and have a cooldown timer of 10 seconds before they can be used again.
- Customs
- Custom 1 - Decisive Monado Arts: The Monado Arts lasts for 21 seconds instead of 16. They also cannot be manually cancelled.
- Custom 2 - Speedy Monado Arts: The Monado Arts last for 5 seconds instead of 16. They have a faster cooldown of 3 seconds when used and can be cancelled freely.
- Custom 3 - Shifting Monado Arts: When activated, Shulk will not chose a Monado Art, instead glowing the colors of the Monado Art he uses. Every 5 seconds, he will change into the next Monado Art unless the player hits the special button again to skip it. This cannot be cancelled. When Shulk has exhausted all the Monado Arts, he has a 3 second cooldown before he can do this again.
|
Side Special
Back Slash
|
Shulk leaps forward in a downward Slash, allowing him to jump over some projectiles. It can now be used to grab ledges as well. This move has a slow start up, but will deal 8% damage if the opponent is facing Shulk, and 16% damage if Shulk attacks them from behind. There is also a bit of an end lag. Combine it with Monado Eater and you are able to inflict Bleed onto your opponent, dealing 3.2% damage every second for 3-5 seconds when you hit them from behind.
- Customs
- Custom 1 - Slit Edge: Shulk charges forward, slicing the Monado horizontally to deal 11% damage. Does a lot of damage to shields. Can be used as a horizontal recovery. Deals Bleed when Monado Eater is used.
- Custom 2 - Stream Edge: Shulk charges forward, swinging the Monado around at the end of the animation in a clothes-lining spin cutter. Shulk can deal a total of 7-15% damage and can inflict Bleed when Moando Eater is used.
- Custom 3 - Shaker Edge: Shulk winds up his arms back before launching the Monado onto the ground, shaking the ground around him. This attack deals 7% damage and knocks opponents down. Has a long start up animation.
|
Up Special
Air Slash
|
Shulk jumps into the air in a upwards slash. The first hit has set knockback and deals 7% damage, while pressing the attack button at its conclusion will result in a second hit that deals 6% damage and launch the opponent farther, making it a powerful kill option. It's KOing potential does decrease under certain Monado Arts.
- Customs
- Custom 1 - Advancing Air Slash: The first slash launches opponents diagonally for 8% damage, while the second slash is faster and moves Shulk forward and slightly downward. The second hit is additionally stronger, dealing 11%.
- Custom 2 - Mighty Air Slash: Deals 9% damage on the first hit and sends opponents up vertically, but shortens the Monado's beam to the length of the blade itself, which makes both hits more difficult to chaining the second attack that deals 13% damage at higher percents.
- Custom 3 - Monado Cyclone: Shulk releases a powerful gust of wind around him that slashes opponents for 3-14% damage and launches them away. Has no recovery use beyond delaying Shulk's fall in the air.
|
Down Special
Vision
|
A counterattack involving Shulk using the Monado to foresee an attack. If he is hit, Shulk retaliates with a slow, powerful, and long-ranged slash that launches opponents forward for 1.3x of the intended damage. When using Monado Eater, he will also inflict Bleed.
- Customs
- Custom 1 - Power Vision: A more powerful counterattack dealing 1.5× the original damage that has less range and can be dodged by opponents if they're fast enough.
- Custom 2 - Shadow Eye: Shulk charges an attack that also decreases Rage of both him and his opponent. This latent energy will then power up the next attack Shulk has by 1.3x.
- Custom 3 - Monado Block: Shulk holds the Monado up, blocking projectiles and melee attacks, and then stabs forward with it to deal 15% damage.
|
Final Smash
Chain Attack
|
Traps opponents in a bright ball of light. If it hits, Shulk summons Dunban, Fiora, and Riki to perform a Chain Attack on the opponent, which he then concludes with a powerful slash. This attack deals 45% metered, or 100% with the Smash Ball.
|
| Taunts
|
- Up Taunt - Shulk shrugs, shakes his head, and waves a hand as if lecturing someone while saying "Now it's Shulk time!". This is the only way to sheathe Shulk's Monado now, and will add additional frame data to Shulk's next attack.
- Side Taunt - Shulk grips the Monado's handle with his right hand while triumphantly pumping his left fist and announcing "I'm really feeling it!".
- Down Taunt - Shulk grips the Monado with both hands, activates it and poses similarly to when he activates Buster while saying "This is the Monado's power!". This actually has a dodge hitbox, allowing Shulk to sometimes evade projectiles or short melee attacks.
|
| Special Team-Up Names
|
- With Tyrea - Tomb Fighters
- With Morag - Blade Battlers
|
| Alternate Costumes
|
|
|
| Unlock Conditions
|
| TBA
|
|
Alvis
|
Alvis is a mysterious character who knows a lot about the Monado and it's ties to godhood and power. He sporadically appears across Shulk's journey. He is revealed to be the "Divine Seer" of Sorean Antiqua, the High Entia Emperor later on in Shulk's journey, although he continues to be mysterious in how he knows about the Monado. In Super Smash Bros. Discord, Alvis is Shulk's Echo fighter, possessing a white Monado from the front cover of Xenoblade: The Secret File. Alvis differs from Shulk in that he has evasive abilities and a new Monado Art called Monado Purge that replaces Monado Eater that transforms some of his attacks into projectiles.
|
| Move
|
Description
|
| Entrance
|
Alvis merely appears, tapping his foot as he brings out his Monado, the Eater Symbol flashing as Alvis swings around the Monado.
|
Gimmick
Monado Arts
|
Alvis has access to the Monado Arts via his Neutral Special. None of the effects are altered from Shulk's Monado, just the order in which Alvis uses them. When shifting through the Monado Arts via taps, they go in the order listed below. The full list of Monado Arts and their effects are listed below:
|
| Purge
|
Shield
|
Buster
|
Smash
|
Speed
|
Jump
|
|
|
|
|
|
|
|
| Monado Purge is unique, transforming Alvis' attacks into projectile slashes that deal the normal damage of the usual attacks.
|
DAMAGE TAKEN:
-40% (0.67x)
DAMAGE DEALT:
-30% (0.7x)
GROUND SPEED:
-40% (0.6x)
|
DAMAGE DEALT:
-20% (0.8x)
GROUND SPEED:
+70% (1.7x)
AERIAL SPEED:
+30% (1.3x)
|
DAMAGE TAKEN:
+13% (1.13x)
DAMAGE DEALT:
+40%
KNOCKBACK DEALT:
-32% (0.68x)
|
DAMAGE DEALT:
-50% (0.5x)
KNOCKBACK TAKEN:
+7% (1.07x)
KNOCKBACK DEALT:
+18% (1.18x)
|
DAMAGE TAKEN:
+22% (1.22X)
AERIAL SPEED:
+50% (1.5x)
FALL SPEED:
+22% (1.22x)
|
MELEE RANGE
DECREASED
|
KNOCKBACK DEALT
DECREASED
SHIELD HEALTH
INCREASED
|
KNOCKBACK DEALT & JUMP HEIGHT
DECREASED
|
SHIELD HEALTH
DECREASED
|
JUMP HEIGHT
INCREASED
|
JUMP HEIGHT
INCREASED
|
|
Neutral Special
Decisive Monado Arts
|
Alvis activates the Monado, choosing one out of the six Monado Arts to buff him. The Monado Arts have their strengths and weaknesses, which are all reflected above. Alvis can either tap the special attack button to cycle through the Monado Arts or hold down and then tilt the control stick to get a Monado Art he wants. The Monado Arts lasts for 21 seconds. They cannot be manually cancelled.
- Customs
- Custom 1 - Monado Arts: Each Monado Art lasts for 16 seconds unless manually canceled, and have a cooldown timer of 10 seconds before they can be used again.
- Custom 2 - Speedy Monado Arts: The Monado Arts last for 5 seconds instead of 16. They have a faster cooldown of 3 seconds when used and can be cancelled freely.
- Custom 3 - Shifting Monado Arts: When activated, Alvis will not chose a Monado Art, instead glowing the colors of the Monado Art he uses. Every 5 seconds, he will change into the next Monado Art unless the player hits the special button again to skip it. This cannot be cancelled. When Alvis has exhausted all the Monado Arts, he has a 3 second cooldown before he can do this again.
|
Side Special
Cross Ray
|
Alvis slams into his foes with a slashing cross of attacks, dealing 10-14% damage. In Monado Purge, it will soar across the stage as a slashing projectile that also deals 10-14 damage, however Alvis' melee hitboxes become smaller.
- Customs
- Custom 1 - Slit Edge: Alvis charges forward, slicing the Monado horizontally to deal 11% damage. Does a lot of damage to shields. Can be used as a horizontal recovery. Becomes a beam with Monado Purge that deals 11% damage, however Alvis' melee hitboxes become smaller.
- Custom 2 - Stream Edge: Alvis charges forward, swinging the Monado around at the end of the animation in a clothes-lining spin cutter. Alvis can deal a total of 7-15% damage with the move. It becomes a spinning projectile with Monado Purge that deals 7-15% damage, however Alvis' melee hitboxes become smaller.
- Custom 3 - Shaker Edge: Alvis winds up his arms back before launching the Monado onto the ground, shaking the ground around him. This attack deals 7% damage and knocks opponents down. Has a long start up animation.
|
Up Special
Lost Ray
|
Alvis tosses his Monado up into the air and can freely move around, but cannot do anything but grab his opponent. The Monado will then return to where he is after 100 frames. Alvis can grab his opponent to have the Monado strike them for 18% damage. With Monado Purge, it becomes a fired projectile that rises then falls onto the ground to deal 18% damage.
- Customs
- Custom 1 - Advancing Air Slash: Alvis uses a upwards flying slash with the Monado that launches opponents diagonally for 8% damage, while the second slash is faster and moves Alvis forward and slightly downward. The second hit is additionally stronger, dealing 11%.
- Custom 2 - Mighty Air Slash: Deals 9% damage on the first hit and sends opponents up vertically, but shortens the Monado's beam to the length of the blade itself, which makes both hits more difficult to chaining the second attack that deals 13% damage at higher percents.
- Custom 3 - Monado Cyclone: Alvis releases a powerful gust of wind around him that slashes opponents for 3-14% damage and launches them away. Has no recovery use beyond delaying Alvis's fall in the air.
|
Down Special
Ranged Vision
|
A counterattack involving Alvis using the Monado to foresee an attack. If he is hit, Alvis retaliates with a fast, and incredibly long-ranged slash that launches opponents forward for 1.1x of the intended damage. When using Monado Purge, he will release it in the form of a grounded projectile.
- Customs
- Custom 1 - Power Vision: A more powerful counterattack dealing 1.5× the original damage that has less range and can be dodged by opponents if they're fast enough.
- Custom 2 - Shadow Eye: Alvis charges an attack that also decreases Rage of both him and his opponent. This latent energy will then power up the next attack Alvis has by 1.3x.
- Custom 3 - Monado Block: Alvis holds the Monado up, blocking projectiles and melee attacks, and then stabs forward with it to deal 15% damage.
|
Final Smash
True Monado
|
Alvis transforms the Monado into the True Monado, a huge beam of light emitting from the end of it as he slashes the entire's stage width with a calculated slash that deals either 45% on metered or 100% un-metered.
|
| Taunts
|
- Up Taunt - Alvis folds his arms as he leans back, the Monado appearing on his back. This adds additional frame data for his next attack.
- Side Taunt - Alvis grabs the Monado and holds it horizontally as the sigil for Monado Purge appears briefly. He asks "Is this feeling.... excitement?" as he holds the Monado.
- Down Taunt - Alvis faces away from the camera as he motions his arm, stating "We have not finished yet."
|
| Special Team-Up Names
|
- With Shulk - Monado Wielders
- With Geno - Secret Stars
|
| Unlock Conditions
|
| TBA
|
|
Tyrea
|
Tyrea is an agent of the mythical and religious Bionite Order, a religious group worshipping the organic god Bionis. The group is notriously zealous, and the same can be said for Tyrea. Tyrea works as a subject to the royal High Entia First Consort. She attacks with powerful kicks and able to shift into various arts that double her damage and topple opponents, allow her to drain characters' energy, bind opponents to their current position on the stage, or increase her defense. She can be a dangerous fighter to deal with, but also hard to utilize for newer players.
|
| Move
|
Description
|
| Entrance
|
Tyrea flys over to the stage before dropping and landing, slashing the air with daggers.
|
| Jump/Flight
|
Tyrea has a total of two jumps. When the player holds down the jump button, Tyrea instead floats near the ground, her wings giving her flight. This allows her to stay in air and do aerial attacks.
|
Neutral Special
Guilty Bomb
|
Tyrea launches a explosive attack from her weapons, dealing 11% damage and inflicting a brief period of Bind for 80 frames, which will prevent the opponent from moving but free to attack.
- Customs
- Custom 1 - Lock-On: Tyrea focuses on her enemy, casting a steel blue reticle on them. This will cause all her attacks to home onto her enemy, as well as avoiding the effects of counters.
- Custom 2 - Soul Read: Tyrea is able to increase her evasiveness, able to increase the invincibility frames of her dodges as well as being able to perform dodges and shields much faster.
- Custom 3 - Reparation: Briefly powers up Tyrea's attacks for both melee and ranged attacks, although at the cost of making her get knocked down in reaction to any attack, which will clear the status.
|
Side Special
Spiral Kick
|
Tyrea leaps forward and then kicks out with her legs, spinning in a spiral through the air. When she lands on her opponent, she gets knocked back as they go flying, and when they land they will be knocked to the ground, somewhat dazed. Deals 10% damage. Has a slight vertical lift.
- Customs
- Custom 1 - Cursed Light: Tyrea sends out a ball of light that circles around a character, locking them out of using their special moves for a limited time of 4 seconds.
- Custom 2 - Hypnotic Light: Tyrea sends out a blue ball of energy that inflicts sleep onto the target for 3-5 seconds, opening them to attacks.
- Custom 3 - Ether Shot: Tyrea fires a yellow shard of ether that inflicts Bind, a status that will prevent the opponent from being able to move, but they can still attack.
|
Up Special
Flying Bee
|
Tyrea kicks upwards as her wings activate, launching the opponent up before slamming them back down. This move deals 7% damage normally. This attack can knock down her opponent when they are at 80% or higher when they return to the ground, and the damage will double to 14%.
- Customs
- Custom 1 - Telepathic Command: Tyrea defends herself via telepathic shields, which will absorb up to 30% worth of damage. When Tyrea absorbs these attacks, she can power up her own defense and become immune to flinching.
- Custom 2 - Flying Wasp: Tyrea launches herself upwards using her wings, becoming encased in maroon flames as she deals 15% damage on her way up. She doesn't go very high and goes into a state of helpless afterwards, but can be used as a reliable kill move.
- Custom 3 - Soaring Bee: Tyrea spins her weapons around her as she takes flight, able to perform three extra jumps that have hurtboxes on them that deal 5-7% damage and spike.
|
Down Special
Energy Drain
|
Tyrea casts three rings around her, which on contact with other opponents, drains energy from their charged moves and charges Tyrea's own attacking power, dealing up to 2.5x as much damage. If Power Smash or Final Smash Meter is on, she will also drain meter from that.
- Customs
- Custom 1 - Decapitator: Tyrea performs a kick to her opponent's back that deals 8% damage. This attack can knock down her opponent when they are at 80% or higher, and the damage will double to 16%.
- Custom 2 - Down Kick: Tyrea kicks her opponent down while dealing 9% damage. This has a special stun state that will keep the opponent down for 120 frames.
- Custom 3 - Ether Storm: Tyrea will launch white comet-like projectiles down around her, dealing 3-8% damage per projectile. She can use this to edge guard as well, although she is unable to move while executing this move.
|
Final Smash
Mysterious Telethia
|
Tyrea will summon a Telethia, a giant creature that floats around and casts powerful ether spells, such as Ultimate Cannon IX, which will be send out as a giant beam that deals 100% damage, or on metered Final Smashes, it will instead use Super Nova VII deal 45% and prevent opponents from moving via the Bind status afterwards.
|
| Taunts
|
- Up Taunt - Tyrea grunts out "Rotten filth!" as she readies her weapon after pointing to the sky.
- Side Taunt - Tyrea snarls "Be gone from my sight!" as she poses with her weapon facing in the direction she's looking at.
- Down Taunt - Tyrea kneels down, putting her arm over her leg.
|
| Special Team-Up Names
|
TBA
|
| Alternate Costumes
|
|
|
| Unlock Conditions
|
| TBA
|
|
Morag
|
Morag is the Special Inquisitor of the Ardainian Empire, serving her younger brother who is the emperor of said empire. She is a Driver and is accompanied by her Blade, Brighid. She is called the "Flamebringer" and is known as the best Driver of the entire Ardainian Empire. She initially appears as a foe to Rex and his party in Xenoblade 2, but become allies later on in the adventure. She has a reserved nature and is offended when people hold back on her in battle, feeling she needs to be challenged.
Morag is a heavy weight character who uses long-reaching whip attacks and can summon Brighid to do devastating attacks alongside her driver. She can do a lot of damage quickly, making her a relative tank, and has options to kill projectiles and keep foes away from her, with one of her attacks being able to launch launched foes even further away. Her blade, Brighid, powers her attacks and her power will grow the closer she is to Morag. Morag's weaknesses are her recovery and the fact her powers are so closely tied with Brighid- off the stage she becomes much weaker without her blade's help.
|
| Move
|
Description
|
| Entrance
|
Morag appears aside Brighid in a burst of blue flame, cracking her whipswords which slowly float upwards.
|
Gimmick
Affinity
|
Morag and Brighid work in tandem with each other, although Brighid will not attack, instead staying by the sidelines in the background similar to the Pokemon Trainer character from past Smash games. She follows Morag around and offers her abilities to her. The closer Morag is to Brighid, the longer her range will become and the more powerful her flame attacks will become.
|
Neutral Special
Will-o'-the-Wisp
|
Morag cracks her whip vertically and creates three blue flames that home onto opponents, dealing 5-11% fire damage depending on how close Morag was to Brighid when she began the attack. Additionally, the flames deal 3% extra damage if the opponent is in their launch animation, launching them again. This is a great way to deal with a Rectoring Ridley.
- Customs
- Custom 1 - Azure II: Hellfire: Morag first does an upward lash with her right whipsword that interrupts aerial opponents for 8% damage then strikes against with her left whipsword that deals 9%, then finishes with a jumping downward slash releasing blue fire on her enemy, burning them for 16% damage. Covers a lot of options, but is unlikely to all three hits on a opponent. Pressing the special button during the first lash will allow Morag to command grab a opponent and pull them in for the second lash. The distance the whipswords travel becomes longer if Morag is closer to Brighid.
- Custom 2 - Armored Fist: Morag slams her fist towards the ground, which will deal 9% damage and interrupt any attack coming Morag's way with the exception of projectiles. It also inflicts the break status effect. Any follow up attack will knockdown the opponent.
- Custom 3 - Azure II: Bonfire: Morag launches a giant flaming strike with her whipswords that deals 12% damage and leaves a flaming area of effect that deals 8% damage on contact and stays active for 85 frames.
|
Side Special
Azure II: Judgement
|
Morag does a dodge animation in the direction the player tilts while using her whipswords to attack, dealing 12% fire damage and can be sweetspotted to deal 17% damage. While doing this attack, Morag evades both melee and projectile attacks. Has some end-lag associated with it. Due to it's quick nature, Brighid won't follow Morag until after the animation ends. The closer Morag was to Brighid when the move started, the quicker she can move again after performing the move.
- Customs
- Custom 1 - Azure II: Hellfire: Morag raises her whipswords then does a horizontal lash at her enemy. The distance the whipsword goes for grows the closer Morag is to Brighid, and can deal 8-9% damage on the whip overall but deals 18% if sweetspotted and will burn the opponent.
- Custom 2 - Twin Moonblade: Morag switches to twin rings and lights them aflame with Brighid's flames, which become more intense the closer Morag is to her. She the throws them forward and causes them to spin around in an area, dealing 2-5% damage in a loop while active. Morag can call back the twin rings when she uses an attack that utilizes the twin rings, but will be able to use any moves that use her whipswords while active without deactivating the field of effect. A lot of the start up can be shortened if Morag uses a move with the twin rings already active.
- Custom 3 - Takedown: Morag slams her fist forward with the armored claw attached to her knuckles, dealing 10% damage and launching opponents far back. Interestingly, ashes appear to fly off the opponent when they are hit with this, preventing them from being able to tech or use a Knockback Cancel. Additionally, the opponent's ability to directionally influence their knockback is reversed.
|
Up Special
Swirling Dragon
|
Morag jumps up into the air and twirls around her whipswords in a heated spiral. Morag will jump higher the closer Brighid is to her when the animation begins. At the end of the animation, a burst of blue flame appears that deals 17% damage and has the potential to spike appears as Morag falls into a helpless animation. Can act as a third jump but is overall very poor for recovery.
- Customs
- Custom 1 - Absorb Damage: Erect an barrier that absorbs damage, being destroyed when it has absorbed 40% damage and dealing 20% damage when it is destroyed, exploding. It is set up where Brighid's current location is. Acts as a shield. Crouching near it will allow Morag to take cover behind it, protecting her hitbox from one side entirely. Has no recovery usage.
- Custom 2 - Rising Dragon: Morag jumps high into the air, blue flaming wings appearing behind her back that deal 7-19% damage depending on how close to Brighid Morag was at the start of the animation. The wings also increase in size according to Affinity. Won't launch Morag as high as Swirling Dragon's max potential height. The height is not effected by Affinity.
- Custom 3 - Affectionate Dragon: Morag sacrifices damage potential in this move by having her Affinity drastically increase the height of this specialized jump, which causes Morag to appear with a blue flame trail that kills projectiles but won't actually deal damage. Launches Morag very high vertically but Morag's horizontal potential isn't as great.
|
Down Special
Heat Haze
|
Morag spins the whipswords around her, dealing 18% fire damage and stunlocking foes. Draws projectiles in as well, negating them via the attack's animation. This move can backfire if the drawn projectiles are not destroyed via the attack but are still drawn to Morag.
- Customs
- Custom 1 - Azure II: Blaze: Morag cross swipes her whipswords at the enemy, dealing 7-19% damage depending on how close she is to Brighid. Interrupts melee attacks and acts as a trapping for the duration of the attack, not allowing opponents to move or attack out of it.
- Custom 2 - Inferno Wheel: Morag switches to twin ring weapons, which become alit with Brighid's flame powers. The closer to Brighid Morag is, the more intense the flames. Morag then does two cutting strikes with the twin rings, dealing 8-19% damage per strike. Has a long start up and opponents with a lot of damage will get launched low and be able to escape the second hit. A lot of the start up can be shortened if Morag uses a move with the twin rings already active.
- Custom 3 - War Pyre: Morag evades an attack with a dodging animation, which makes her flames grow even more power by 1.3x. This attack effect stacks up to three times and will make her next attack more powerful- the attack has to land to be considered activated. While this effect is active, Brighid's affinity will no longer take effect. This is to combat Morag's poor off stage damage, but requires set up.
|
Final Smash
Azure III: Soulfire
|
Morag holds onto her right whipsword for a second before lashing it forward. If it connects with an opponent, they are transported into a cutscene where Morag and Brighid engulf the opponent in flames, dealing either 45% damage or 100% damage. The range of this Final Smash strike is influenced by Affinity, and a longer whipsword strike will be able to transport multiple opponents.
|
| Taunts
|
- Up Taunt - Morag whips her whipswords up into the air before they crash back down, emitting bursts of blue flame.
- Side Taunt - Morag's whipswords begin to float up around her before she strikes them out. This can deal 5% damage to nearby foes.
- Down Taunt - Morag points out her sword, alit by blue flames.
|
| Special Team-Up Names
|
- With Shulk - Blade Battlers
|
| Alternate Costumes
|
|
|
| Unlock Conditions
|
| Play 50 matches on the Cloud Sea stage.
|
|
Ninten
|
Ninten is from the original Mother/Earthbound Beginnings and has been compared to Ness due to them sharing similar traits. His story is much different though, featuring a less unruly Giygas that was raised by Ninten's great grandparents. Ninten plays somewhat similar to Ness, but features a couple differences, being that while he might fight with a bat, he tends to launch opponents upwards instead of downwards and his set of specials are entirely different, able to mess with the opponent by making them sleep or decreasing their defense. He also has a uniquely different teleport move and a completely different shield to use.
|
| Move
|
Description
|
| Entrance
|
Ninten appears from a black and white square, utilizing the 4th-D Slip before popping into battle. He then pulls out his grandfather's journal and studies the notes before getting ready for battle.
|
Neutral Special
Defense Down α
|
Ninten launches a series of blue lines near the direction he is facing. When near an opponent, it will decrease their defense considerably by half and deal 10% damage with no knockback, although it will spike when in the air.
- Customs
- Custom 1 - Defense Down β: Ninten releases the arrows from a higher starting point, but grounds his opponent and lower their defense by a 1/3rd. Deals 5% damage.
- Custom 2 - Defense Down γ: Ninten shoots out a series of arrows as projectiles, which lowers his opponent's defense by a 1/5th. Deals 7% damage.
- Custom 3 - Defense Down Ω: Ninten surrounds himself in blue arrows that lowers the opponent's defense to 1/5th of what it was. Deals no damage.
|
Side Special
Hypnosis α
|
Ninten lets out a swirling pattern that goes in a erratic zig-zag motion which will put opponents to sleep and deal 5% damage. Opponents can mash out of the sleep state, but generally this move puts opponents to sleep for 1-5 seconds.
- Customs
- Custom 1 - Hypnosis β: Ninten lauches a line of five psychic circles which deal 8% damage and put opponents to sleep. Launches opponents away, but not very far, only enough so that they are on the platform above them.
- Custom 2 - Hypnosis γ: Ninten releases a telekinetic triangle that homes onto a opponent and puts them to sleep and causes them to Bleed, dealing 3.2% damage per 1 second for 1-5 seconds.
- Custom 3 - Hypnosis Ω: Ninten wraps a swirling shield around himself that he then launches. The shield reflects projectiles and makes them deal 1.3x of the original damage.
|
Up Special
4th-D Slip
|
Ninten disappears through a black square with a white outline, able to direct this square as it's spinning to 8 different directions, which it will then launch and drop Ninten off at. This square is intangible and will not be effected by hits. Has some end-lag that allows Ninten be punished.
- Customs
- Custom 1 - 4th-D Slam: Ninten uses the 4th-D Slip but is able to use it to slam into opponents for 7% damage. Has less range and gives the 4th-D Slip a hurtbox.
- Custom 2 - 4th-D Smaaash: Ninten uses the 4th-D Slip on his bat, able to direct the box into opponents to deal 20% damage. Cannot teleport Ninten has a short range.
- Custom 3 - 4th-D Flee: Ninten uses the 4th-D Flee to appear just outside the stage, allowing him to fall down. This is the farthest range his 4th-D Slip can go, but puts Ninten in danger of hitting the boundary box.
|
Down Special
PowerShield α
|
The Franklin Badge shines on Ninten and makes his whole body reflective, making all projectiles for a total of 3 seconds reflect and deal the same amount of damage they would have originally done.
- Customs
- Custom 1 - PowerShield β: Ninten uses PowerShield to take 50% less damage and reflect projectiles at 1.5x the power they would usually do.
- Custom 2 - PowerShield γ: Ninten uses PowerShield to reflect projectiles at half of their power, but is healed 8% when the first projectile hits him.
- Custom 3 - PowerShield Ω: Ninten uses PowerShield to absorb projectiles and increase the power of his next attack. He can gather up to 20% more damage before the PowerShield breaks away and can unleash it whenever he attacks.
|
Final Smash
Eight Melodies
|
Ninten uses the power of the Eight Melodies, represented by the images of a doll, a canary, a singing monkey, a piano, a cactus, a dragon, Eve, and a gravestone which all swirl around Ninten as sound waves go across the screen. This either does 35% damage or 80% damage depending on whether the Final Smash is metered or unmetered.
|
| Taunts
|
- Up Taunt - Ninten pulls out a bent spoon and straightens and bends it back with his telekinetic powers.
- Side Taunt - Ninten waves his hand like a conductor's baton, telekinetic energy popping off from his finger.
- Down Taunt - Ninten hugs a penguin toy and puts it away.
|
| Special Team-Up Names
|
- With Ness - Defenders of Earth
- With Kumatora - Monkey Wranglers
- With Lucas - Telekinetic Kids
|
| Alternate Costumes
|
|
|
| Unlock Conditions
|
| TBA
|
|
Ness
|
Ness is a boy from Onett who is tasked with defeating Giygas, an interstellar threat that has control over the world. He, along with his friends that he made along the way, fight against strange enemies in a satirized version of America known as Eagleland in the beloved cult classic Earthbound. In Super Smash Bros. Discord, all of Ness' moves were overhauled to be things he could actually do in his game and generally gives him a weird set of projectiles to work with that have odd effects on his opponents. Additionally, he now has a new recovery move that allows him to teleport virtually anywhere on the stage provided he gets some kind of momentum as well as an active shield move that negates half of the damage inflicted on him.
|
| Move
|
Description
|
| Entrance
|
Ness runs out of a portal, covered in ash as he shakes himself off, putting his finger to his cap.
|
Neutral Special
PK Rockin' α
|
Ness sends out a projectile consisting of shifting psychedelic lights, which deals 8%. This projectile is unique in that debuffs shields even when they are not active. If an opponent uses their shield after getting hit, it only starts out at 75% of it's full size. A lingering effect appears over the opponent to indicate this weakened shield state.
- Customs
- Custom 1 - PK Rockin' β: A bigger version of PK Rockin' with a hitbox that vacuums opponents into it. However, it deals only 6% damage and makes shields start at 80%.
- Custom 2 - PK Rockin' γ: A smaller version of PK Rockin' with a hitbox that can be controlled by tilting the control stick. Deals only 10% damage and makes shields start at 60%.
- Custom 3 - PK Rockin' Ω: A homing version of PK Rockin' that cannot damage until the end of it's animation, where it explodes and deals 17% damage.
|
Side Special
PK Flash α
|
PK Flash is a projectile that starts from Ness's head and slowly arcs down towards the ground. When opponents are hit with it, they take 4% damage and are stunned for a short period of time, at least 60-120 frames.
- Customs
- Custom 1 - PK Flash β: The projectile starts at Ness's finger tips, giving it a shorter range but quicker to administer. Deals 6% damage but only is able to stun opponents for 30-60 frames.
- Custom 2 - PK Flash γ: A much bigger version of PK Flash that can absorb projectiles to become even more powerful. It's arc still exists and is much slower. Can deal 8-14% damage, although lacks it's stunning power.
- Custom 3 - PK Flash Ω: A smaller version of PK Flash that explodes on impact to deal 12% damage, although lacks launching power as it stuns opponents for 70-140% frames.
|
Up Special
PK Teleport α
|
Ness gains boosted speed for a short period of time. Ness needs to run and then he will disappear from the battlefield, with a black ball of energy representing where he will run out of. While running, Ness gains super armor while running to generate the teleport as well as gaining super armor when exiting the portal, dealing 8% damage on contact. Ness can teleport pretty much anywhere on the stage, although he will come out after 110 frames. In the air, Ness needs about five character lengths to fall down before he can teleport, and the teleportation is quicker but gives the player less range, giving Ness only 55 frames to work with.
- Customs
- Custom 1 - PK Teleport β: Ness' running distance is shorter, but his teleportation range and time are drastically cut in half, giving him only 45 frames to work with in both air and ground. Ness also loses super armor when he runs, but not when he comes out of the portal.
- Custom 2 - PK Teleport γ: Ness teleports by absorbing projectiles instead, black energy coating him as he holds up special. Ness can absorb up to three small projectiles or one really big one to get the fuel he needs to teleport. Lacks super armor when running out of the portal and deals no damage.
- Custom 3 - PK Teleport Ω: Ness teleports right away, the player having 60 frames to work with on both the ground and in the air. Does no damage and has a short range, but is more reliable.
|
Down Special
Shield α
|
Ness covers himself in a shield of light, which can be put on Ness as a active effect, allowing him to continue moving while using it. Ness's shield appears where ever he is facing, and is active for 10 seconds or for up to ten hits. Ness's shield does not protect him fully form attacks, instead taking half of the damage from it and negating knockback.
- Customs
- Custom 1 - Shield β: Shield lasts longer, up to 15 seconds and can take 20 hits before breaking. Cuts into Ness' own shield option, giving him only 50% of the shield when using it.
- Custom 2 - Shield γ: Shield protects Ness fully for damage, although can only take up to 3 hits and is only active for 5 seconds.
- Custom 3 - Shield Ω: Shield protects both Ness's back and front, lasting for 7 seconds or 5 hits.
|
Final Smash
Eight Melodies
|
Ness uses the power of the Sound Stone which plays the Eight Melodies. Images of the locations of Giant Step, Lilliput Steps, Milky Well, Rainy Circle, Magnet Hill, Pink Cloud, Lumine Hall, and Fire Spring all circle around Ness as sound waves go across the screen. This either does 35% damage or 80% damage depending on whether the Final Smash is metered or unmetered.
|
| Taunts
|
- Up Taunt - Ness turns to the screen and nods his head while saying "Okay".
- Side Taunt - Ness takes his bat out and points it in front of him.
- Down Taunt - Ness releases a wave of PSI from his finger.
|
| Special Team-Up Names
|
- With Lucas - Striped Shirts
- With Kumatora - PK Blues
- With Ninten - Defenders of Earth
- With Sans - Flesh and Bones
|
| Alternate Costumes
|
|
|
| Unlock Conditions
|
| TBA
|
|
Lucas
|
Lucas is timid and shy boy from Tazmily Village, who grew up with his family and friends there. One day, the Porky empire began to release some experiments there, turning the friendly and tame Dragos into monsters that killed his mother. Attempting to stop the urbanization and corruption of his village at the hands of the Porky empire, Lucas joins up with his dog, a thief, and a tomboy princess to save the world, realizing his true purpose as the puller of 7 needles that is said to bring peace to the world.
Lucas has been majorly revamped alongside Ness in his Super Smash Bros. Discord appearance, utilizing things he can actually do in his game, whereas previously not a single one of his special moves belonged to him. Rope Snake is now a side special and he has a unique counter-like move that can be utilized as an attack, pulling damage from various sources. His neutral special has been changed to PK Love, a powerful attack at close distances, and his up special has been changed to Offense Up, which allows Lucas to increase his power.
|
| Move
|
Description
|
| Entrance
|
Lucas rides in on a Mr. Saturn-style coffee table, then hops off.
|
Neutral Special
PK Love α
|
Lucas launches a psychedelic heart projectile that expands the further it goes, increasing it's range but decreasing the amount of damage it does. It can deal 12% damage at it's smallest, while dealing 5% damage at it's biggest. It goes in a straight line.
- Customs
- Custom 1 - PK Love β: Lucas releases a version of PK Love that wildly fluctuates in size, dealing 14%-2% depending on how big or small it is. The projectile also makes a heart beat sound. It goes in a straight line.
- Custom 2 - PK Love γ: Lucas fires a version of PK Love that goes in a upwards arc before crashing down, getting big at the start and getting smaller at the end. Deals 5%-13% damage.
- Custom 3 - PK Love Ω: Lucas fires a version of PK Love that stays small and doesn't have much range, but will do 15% damage and stun on impact. It also spins at it's released.
|
Side Special
Rope Snake
|
Lucas uses Rope Snake as a command grab, either pulling enemies towards him or by holding the control stick back after the grab, pulling himself towards enemies. He does 4% damage either way and can follow up with another attack. Additionally, it works on ledges, allowing him a tether recovery.
- Customs
- Custom 1 - Rope Python: Lucas uses a green version of Rope Snake that poisons after the grab, dealing 1% per 30 frames for a total of 4 seconds. Works the same as Rope Snake otherwise.
- Custom 2 - Rope Wyrm: Lucas uses a winged, orange version of Rope Snake that has a homing function, able to grab opponents in the air. Only deals 2% damage but lets Lucas recover better as well as grab aerial foes.
- Custom 3 - Rope Burn: Lucas uses a maroon version of Rope Snake that releases the burning effect when it grabs opponents. Has a smaller range as well.
|
Up Special
Offense Up α
|
Lucas channels psychic power, with wind effects that push nearby foes. Lucas's hands glow with power and the next attack he performs will do greater damage (1.4x). When Offense Up is charged, Lucas can create sparks around him that deal 6% damage to opponents around him that has little to no start up. Hitting with a smash attack or the spark allows Lucas to keep the charge, whereas missing will deplete the charge. This briefly changes his Neutral special to the spark attack.
- Customs
- Custom 1 - Offense Up β: Lucas performs a blue version of Offense Up that vacuums opponents near him when he performs it. His attacks increase in power by 1.6x and he releases a small icicle around him that freezes opponents when he presses the special button, which will deal no damage beyond the freeze.
- Custom 2 - Offense Up γ: Lucas performs a yellow version of Offense Up that burns opponents near him when he performs it. His attacks increases in power by 2x, although no attack besides PK Love will happen when he hits the special button.
- Custom 3 - Offense Up Ω: Lucas performs a red version of Offense Up that inflicts Bleed on impact, dealing 3.2% damage per second to a opponent for 4-5 seconds after he hits them. A small red spark will shield Lucas from attacks if he hits the special button, although if it does not guard against an attack, it will deplete Lucas' charge.
|
Down Special
PSI Counter α
|
Lucas creates a physic ball around him that absorbs half of the damage he takes and launches all the damage he would have taken in the form of a giant ball projectile that bounces. This ball only releases when Lucas lets go of the shield. He cannot move while this physic ball is around him. The ball projectile maxes out at 50% damage.
- Customs
- Custom 1 - PSI Counter β: Lucas performs PSI Counter, releasing the damage as a giant needle attack that jabs forward and can deal additional damage if it hits with the tip of the needle (12+X%).
- Custom 2 - PSI Counter γ: Lucas performs PSI Counter, and releases the energy stored as a dark red and pink wave that causes opponents to get dizzy and have reversed controls after they wake up for a total of 3 seconds. Deals only 5% damage no matter how much energy Lucas has stored.
- Custom 3 - PSI Counter Ω: Lucas creates a physic ball in front of him that absorbs all damage, although he can only keep it out for a maximum of 3 seconds and his back is still exposed. He still stands still when performing the move. When he launches it, it performs the same and still maxes out at 50% damage.
|
Final Smash
PK Starstorm
|
Lucas summons stars alongside his friends Boney and Duster to fall from the sky to annihilate his enemies. The comets descend in a straight line over Lucas and can sweep the screen with directional inputs to the left and right. Each of the comets deals 15% damage. On metered final Smashes, this lasts for 3 seconds, while unmetered it lasts for 7 seconds.
|
| Taunts
|
- Up Taunt - Lucas trips, shakes his head, and gets back up.
- Side Taunt - Duster's Rope Snake taps Lucas on the shoulder and has a brief conversation with him, as Lucas shrugs at it.
- Down Taunt - Lucas looks worried as his feet wobble before clenching his fists and looking brave.
|
| Special Team-Up Names
|
- With Ness - Striped Shirts
- With Kumatora - Needle Pullers
- With ??? - Telekinetic Kids
|
| Alternate Costumes
|
|
|
| Unlock Conditions
|
| TBA
|
|
Kumatora
|
Kumatora was orphaned when she was born and was raised by the eccentric Magypsies. She is a tomboy, in contrast with previous games' female party members and her fighting style uses her hands as opposed to using a frying pan. She is one of the stronger PSI users in her series and is impulsive and somewhat aggressive at times, although she still has a warm heart towards those she considers friends. In Super Smash Bros. Discord, she takes all of Ness' and Lucas' old moves (as they were all majorly revamped) and puts her own spin on them, although their old moves still appear as customs for her.
|
| Move
|
Description
|
| Entrance
|
Kumatora appears with a bear trap around her ankle, snapping it off with telekinetic energy and healing herself as she punches her palm.
|
Neutral Special
PK Freeze α
|
Kumatora pulls back her fist before launching it, a snowflake shaped blast of PSI energy emitting out as it freezes opponents. Tilting the control stick which launch the projectile at a different angle and holding the special button after launches will make it stronger. It is fast and deals 8-20% damage. Does not render Kumatora helpless in the air. The punch can deal an additional 9% damage and knock opponents directly into the freezing projectile.
- Customs
- Custom 1 - PK Freeze β: Kumatora emits a snowflake-shaped blast of PSI energy from her head that freezes opponents. The direction of the blast's path can be controlled by tilting the control stick, it can be made stronger by holding the special button and it can be concluded at a deceptively fast speed. It deals 9-22% damage. However, it renders Kumatora helpless if used in the air.
- Custom 2 - PK Freeze γ: Kumatora kicks forward, a snowflake-shaped blast of PSI energy launching quickly out that freezes opponents. Goes quickly in a horizontal line, slowly dropping over time. Deals 15% damage and does not take additional inputs. The kick deals an additional 8% damage that kicks the opponent into the freezing projectile.
- Custom 3 - PK Freeze Ω: Kumatora slams her fist into the ground, two snowflake-shaped blasts of PSI energy appearing from out of her hand that deal 14% damage each and freeze opponents. The slam deals 10% damage and can drop Kumatora quickly down from the air.
|
Side Special
PK Fire α
|
Kumatora points her finger like a gun and pops out a psychic projectile that resembles a ember, which explodes into sparks after Kumatora releases the button. The attack does 10-22% damage depending on how long Kumatora holds the button, with the longer held the more damage it'll do. Minimal launch.
- Customs
- Custom 1 - PK Fire β: Kumatora thrusts both of her hands forward to launch a bolt-shaped projectile that deals a fiery explosion of PSI energy that launches the opponent backwards for 9% damage. This version is an effective spacing tool, and works the same in both ground and air.
- Custom 2 - PK Fire γ: Kumatora fires a yellow, lightning bolt shaped projectile that travels until it hits an opponent or destructible property and transforms into a gradually-fading pillar of fire that deals 6% damage, but keeps opponents stuck in the flames for 220 frames. It fires downward in the air and can spike.
- Custom 3 - PK Fire Ω: Kumatora unleashes a powerful punch that deals 6% damage, while launching off a bouncing flame projectile that deals 2% damage and erupts into a giant pillar. The punch can hit the opponent back into the pillar and cause them to launch high.
|
Up Special
PK Thunder α
|
Kumatora creates a thunder ball in her hands and slams it into herself, launching her high into the air, electrified and dealing 18% damage on contact. Won't launch Kumatora as high as Ness' and Lucas' version of the move, but is more reliable and easier for newcomers to use.
- Customs
- Custom 1 - PK Thunder β: Kumatora emits a electrical PSI projectile from her head, which can be directed with the control stick and slows Kumatora's descent in the air. Can be directed into Kumatora to launch her at a high speed or be used to deal 4% damage. When Kumatora is launched, she deals 10% damage on impact and follows up with three hits that each deal 3% damage.
- Custom 2 - PK Thunder γ: Kumatora emits a electrical PSI projectile from her head, which can be directed with the control stick and slows Kumatora's descent in the air. Can be directed into Kumatora to launch her at a high speed or be used to deal 6% damage. When Kumatora is launched, she deals 22% damage on contact.
- Custom 3 - PK Thunder Ω: Kumatora creates two electrical PSI projectiles from her head, one of which homes onto a opponent to deal 6% damage and another to home directly onto her so she can launch at a high speed diagonally upwards. Kumatora cannot deal damage when launched.
|
Down Special
PSI Magnet α
|
Kumatora creates a ball of magnetizing PSI and then kicks it forward, dealing 7% damage which will also heal Kumatora 4% damage. The ball can absorb projectiles which has a healing effect for Kumatora, allowing her to heal 1.4x from each projectile absorbed. Kumatora however, has to stand still while using this move and is not protected in any real way unlike Ness and Lucas.
- Customs
- Custom 1 - PSI Magnet β: Kumatora unleashes a purple energy field around her which allows her to absorb any energy-based projectile. It can be held in order to use it repeatedly. Heals 1.4× the damage Kumatora would have taken, but only heals a maximum of 30% damage.
- Custom 2 - PSI Magnet γ: Kumatora thrust her arm forward to emit a glowing orb of PSI energy around her outstretched hand. It will absorb and heal her for 1.4x of the damage it would have originally given her. Her back is open when using this. It deals 8% damage when it dissipates and has spiking properties.
- Custom 3 - PSI Magnet Ω: Kumatora raises the glowing orb of PSI energy above her head and can direct it. It heals her 1.4x the original damage of the projectile and can she can hold this orb out for 3 seconds. Can be cancelled early if Kumatora lets go of the button.
|
Final Smash
PK Starstorm
|
Kumatora summons stars alongside her friends Salsa and Wess to fall from the sky to annihilate his enemies. The comets descend in a straight line over Kumatora and can sweep the screen with directional inputs to the left and right. Each of the comets deals 15% damage. On metered final Smashes, this lasts for 3 seconds, while unmetered it lasts for 7 seconds.
|
| Taunts
|
- Up Taunt - Kumatora kicks the air and sticks out her palm.
- Side Taunt - Kumatora performs the Osohe Dance from Mother 3.
- Down Taunt - Kumatora sticks her pointer finger up as a flame is released from her finger, watching it cackle.
|
| Special Team-Up Names
|
- With Ness - PSI Blues
- With Lucas - Needle Pullers
- With Ninten - Monkey Wranglers
|
| Alternate Costumes
|
|
|
| Unlock Conditions
|
| TBA
|
|
Captain Falcon
|
Captain Falcon is a mysterious racer with a bounty hunting side-gig. His fast speed in F-Zero races has made him a target for multiple antagonists in the series, including the dreaded Black Shadow and Deathborne. In Smash, Captain Falcon typically isn't actually seen using his gun or his car, instead utilizing his now-iconic moveset of fists and kicks. He is a rather fast character, but his greatest option is his trademark Falcon Punch, a orchestrated, slow-to-start punch that can be a powerful kill option. Blood Falcon appears as a alternate costume for Captain Falcon, altering some of his lines and some of the appearance of his attacks, as well as having his own set of customs made for him specifically.
|
| Move
|
Description
|
| Entrance
|
Captain Falcon hops out of the Blue Falcon and strikes a pose with his two fingers pointed to his helmet.
Blood Falcon hops out of the Blood Hawk, growling as he stretches out both hands to his side, baring his teeth.
|
Neutral Special
Falcon Punch
|
Captain Falcon's most iconic move. Captain Falcon loudly announces he's going to use it "FALCON..." as he starts up the charge for the punch, making it one of most orchestrated attacks in the game, but it packs quite the power when it's released "...PUNCH!!!", dealing 25%. When tilted away to do a reverse Falcon Punch, it deals 28% damage. Falcon now has a voice clip for the Reverse Falcon Punch, adding a quick "REVERSE!" when he lands the hit.
- Customs
- Custom 1 - Blood Punch: Captain Falcon charges his fist with a sinister crimson energy, creating the splitting image of a hawk when he releases his fist. The effect stuns the opponent while dealing 26% damage, but it won't launch opponents like the classic Falcon Punch. It can be reversed to deal 30% damage.
- Custom 2 - Mighty Falcon Punch: Captain Falcon's end explosion is larger and lingers longer, but only does 22% damage. It deals 24% damaged if reversed.
- Custom 3 - Blue Falcon Punch: Captain Falcon charges up his fist with blue energy, the punch coming out much faster but only dealing 15% damage with low knockback, with 18% damage done if it's reversed.
|
Side Special
Raptor Boost
|
Captain Falcon pauses, dashes forward, and unleashes a fiery uppercut to his opponent dealing 9% damage in the ground and 8% in the air. If there is no opponent to connect to, he just falls down and can be punished.
- Customs
- Custom 1 - Blood Boost: Captain Falcon pauses, dashes forward, and unleashes a crimson uppercut to his opponent, dealing 13% damage. If there is no opponent to connect to, he floats down as crimson energy flows away from him, dealing Bleed on contact, dealing 3.2% damage per second for 4-5 seconds. Drops him into a helpless state.
- Custom 2 - Mighty Raptor Boost: Captain Falcon dashes forward a further range, unleashing a paralyzing uppercut that deals 7% damage. Captain Falcon can then tilt the control stick back to boost his way back into the other direction.
- Custom 3 - Blue Raptor Boost: Captain Falcon unleashes a blue colored Raptor Boost that can be tilted in multiple directions, allowing him to deal 10% damage and boost himself up even further. Leaves him helpless after the boost up.
|
Up Special
Falcon Dive
|
Captain Falcon will rise into the air and outstretch his fist. If there's an opponent nearby, he'll command grab them and launch them with a fiery explosion that deals 5% on the grab and 12% on the throw. This will leave him in a freefall state afterwards.
- Customs
- Custom 1 - Blood Dive: Captain Falcon will rise into the air and outstretch his fist. If there's an opponent nearby, he'll grab them and launch them with a crimson blade that deals 13% damage, shooting them downwards in a meteor smash. This will leave him in a freefall state afterwards.
- Custom 2 - Mighty Falcon Dive: Captain Falcon's distance will be decreased, but he will deal 4% damage on the grab and 22% on the throw. Will render him in a helpless state and even stun him when he hits the ground. Did Captain Falcon exert too much energy here?
- Custom 3 - Blue Falcon Dive: Captain Falcon's range has become increased and he can launch himself off his opponent, spiking them downwards for 5% damage. Won't render him helpless.
|
Down Special
Falcon Kick
|
Captain Falcon charges up a kick and then unleashes it onto his opponent for 13% damage grounded, 17% damage if landing. It's similar to Falcon Punch but doesn't quite have the power or the long start up time. It'll also propel the Captain forward when performed.
- Customs
- Custom 1 - Blood Kick: Captain Falcon starts up a kick of crimson energy, and then zooms to the other side of the stage, taking any opponent in his path and just wales on them with a series of fast and flashy kicks that deal 4% damage on each hit dealing 4 kicks in total, finishing it off with a kick directed back to the stage.
- Custom 2 - Mighty Falcon Kick: Captain Falcon's distance is shortened and his start-up goes for much longer, but he deals 22% damage grounded, 25% if landing.
- Custom 3 - Blue Falcon Kick: Captain Falcon's distance is increased greatly, able to use the move as a horizontal recovery. When he kicks a opponent, he only deals 8% damage grounded and 11% damage on landing.
|
Final Smash
Super Falcon/Blue Falcon
|
Captain Falcon has two different Final Smashes depending on whether he uses it metered or unmetered. These are also altered if the player uses the Blood Falcon costume, in which the moves will feature the Super Hawk or Blood Hawk.
- Unmetered - When using the Smash Ball, Captain Falcon brings in the super-powered Super Falcon, which zips across the stage quickly in unmatchable stats, dealing 35% damage on hit, able to deal 3 hits to each opponent provided they don't dodge. He then jumps out of the Super Falcon as it zooms back into the background.
- Metered - When activating his Final Smash via the Final Smash meter, Captain Falcon teleports his opponents into a cutscene where they are brought to Mute City and are run over by the speeding Blue Falcon. It only deals 45% damage to a single character and has some high knockback, but won't KO unless the opponent is over 100%.
|
| Taunts
|
- Up Taunt - Captain Falcon charges himself up with a fiery aura, similar to Falcon Dive's startup.
- Side Taunt - Captain Falcon briefly pulls back his arm before thrusting it out and gesturing his opponent to come closer, exclaiming "Come on!".
- Down Taunt - Captain Falcon gives a salute to his right side while saying "Show me your moves!" When facing left, Captain Falcon extends his saluting arm behind him; this also shortens the taunt.
|
| Special Team-Up Names
|
- With Samus - Bounty Hunters
- With Dragon Queen - Dragon Punchers
|
| Alternate Costumes
|
|
|
| Unlock Conditions
|
| TBA
|
|
MC Adore
|
MC Adore is the leader of the group known as Love Posse, who specialize in rapping about love. The two rappers in her group repeat her phrases. The three are usually never seen apart and usually try to bring some lightness to dark settings, such as a rainy day at the airport. MC Adore is critical to her posse, but isn't afraid to give encouraging words after a good performance. They first appeared in Rhythm Heaven Fever and later appeared in Rhythm Heaven Megamix.
MC Adore is one of the oddest fighters in the game. They are easily the heaviest fighter on the roster and have three separate hitboxes, two of which will not launch them. Their runs and their landing can deal damage, but their jump is outright awful. Their attacks are also highly reliant on the idea of hitting the button at the right rhythm, which allows them to deal more damage and control the space around them. Some might say their aerial game is even worse than Little Mac's, which is somewhat true, although they do have options to punish opponents in the air. Learn to time their attacks and their insane power will become readily apparent.
|
| Move
|
Description
|
| Entrance
|
A plane flies overhead as MC Adore and her posse drive onto the stage, swerving as they face to the right.
|
Gimmick
Love Rap
|
MC Adore and the Love Posse ride in her car for the entire match, the rappers only ever getting out of the car during their neutral special Love Posse. MC Adore is a very strange fighter due to this, as their running animation will actually deal 4% damage on contact with a foe and lightly launch the opponent away. MC Adore's car, rappers, and the woman herself possess different hurtboxes.
- MC Adore's car takes 0.80x of the original damage dealt.
- The Love Posse (the two rappers) take 0.50x of the original damage dealt. They are considered separate beings like Luma and Nebby and primarily used in the side and neutral special. They also add more weight to the car when they are around. Dealing damage to them will not launch the car and they have knock-back resistance, however can only sustain 50% damage, which will only generate about 25% damage to MC Adore as a whole.
- MC Adore herself, who is laying or sitting on the car hood at all times, takes 1.50x of the original damage dealt however attacks done to her will NOT launch the car.
During Love Posse, the rappers can be temporarily destroyed if each takes 50% damage, which is halved for the overall damage meter. Their attacks will be rendered unusable until they respawn after 5 seconds.
|
| Jump/Lift
|
MC Adore's car has a total of three jumps, which are all very short. In fact, MC Adore's jump easily one of the worst in the game. When the player holds the jump hold button and there is ground below, a pair of metal stilts stick out from the car and allow the car to stand in space so long as the player holds the button. When the jump hold ceases, they can deal 8% damage to foes underneath and bury the opponent. This jump hold can be done in air to spike for 11% damage, although it cancels momentum.
|
Neutral Special
Love Posse
|
The rappers jump out of the car as the car faces the camera. When the rappers jump out to the right and left, they deal 5% damage and can launch opponents away. MC Adore will then sing a lyric, which then needs to be followed up on the beat with the neutral special button, which will deal 10% damage when successful. This has a lot of start up, but can game a whole area of the stage.
- Customs
- Custom 1 - Quick Posse: This move is executed quicker and MC Adore sings her lyrics faster, but it only deals 5% damage when successful.
- Custom 2 - Slow Posse: This move is executed slower and MC Adore sings her lyrics slower, but is more powerful, dealing 15% damage when successful. Additionally, a chronobox makes foes slower when near inside.
- Custom 3 - Freezy Posse: MC Adore's lyrics have a chillingly soft sound to them, which makes repeating the lyrics deal 8% damage and cause the frozen effect.
|
Side Special
Into You!
|
MC Adore's car roars forward, opening it's mouth in a biting motion that deals 13% damage with a lot of launching knockback. The rappers, if present, can rap musical projectiles that deal 6% additional damage and bounce and weave in the air. These musical projectiles also freeze opponents in the air, allowing for further juggling.
- Customs
- Custom 1 - Crazy Into You!: The car peels out as it spins, dealing 22% when it collides into opponents, dealing crazier knockback as well. The rappers' attacks are unchanged. Ignores ledges, so be careful.
- Custom 2 - All About You!: MC Adore's Car targets a character and runs towards them to deal 10% launching attack with it's hood. The rappers now attack at an angle to deal 4% damage and inflict the rusty status effect.
- Custom 3 - Fo' Sho'!: MC Adore's car does a spinning lunge in the direction it faces, dealing 27% damage. This provides some horizontal recovery and deals some significant damage, but will ignore ledges and cause helplessness in the air, hence the name.
|
Up Special
See Saw
|
MC Adore's car appears on a small see saw manned by Mr. Saw from See Saw that can launch the car upwards, dealing 20% damage to opponents above them when they are launched. The player must tap the special button at the right time to launch the car even higher. This works even in the air, although the timing becomes more precise.
- Customs
- Custom 1 - Air Rally: A plane from Air Rally picks up MC Adore's car, being able to tilt into any direction with some input delay. It should be noted that this move deals no damage.
- Custom 2 - Launch Party: A countdown box appears under the car, counting down from 3 seconds. When the countdown reaches zero, the player must tap the special button again to launch the car high into the air, dealing 8% damage to foes.
- Custom 3 - Fork Lifter: A giant fork from Fork Lifter lifts the car upwards, bringing opponents with it while inflicting 12% damage. The player can tilt the control stick to bring the car to a certain direction. Slow and doesn't provide a lot of recovery power.
|
Down Special
Packing Pests
|
MC Adore holds a basket as the two rappers run to the nearest opponent, throwing them up. The player must hit the special button at the right time to then launch them for 11% damage and have them fall into the basket, which MC Adore then punts for 9% damage. Knockback is doubled if a character is in the basket, making it incredibly effective as a killing move. If the rappers are not present, MC Adore punts the basket to deal 9% damage as an arc projectile.
- Customs
- Custom 1 - Board Meeting: A pig in a wheel chair from Board Meeting spins out from a door in MC Adore's car, doing a clothes-lining attack that deals 4% damage per hit and can trap opponents. He can deal up to 5-6 hits and the player can cancel the attack early by pressing the special attack button.
- Custom 2 - Micro-Row: A series of microbes squirm forward when the player taps the special button, dealing 10% per hit and dealing the wet status effect. The player can tilt the direction of the microbes, allowing the projectile to be aimed. The player can press the special attack button a total of 3 times.
- Custom 3 - Figure Fighter: A robotic boxer from Figure Fighter appears hooked up to MC Adore's car, who inflates and punches for 18% damage when the special attack button is hit. When he is puffed up, he can kill projectiles.
|
Final Smash
All About the Groove
|
MC Adore points her finger as a rainbow line extends out from her finger, teleportation her and the opponents that make contact with the line into her studio, where the Tap Troupe proceeds to run over the opponents by stomping on them for 15% damage. The captain from Flipper-Flop then commands a bunch of seals to run across the opponents to deal 20% damage, before MC Adore grabs the group and throws them to Karate Man, who proceeds to either deal 10% damage for the finishing blow (metered) or 65% damage for a powerful fiery kick (unmetered).
|
| Taunts
|
- Up Taunt - MC Adore high fives the rappers if they are present, crossing her arms if they are not present.
- Side Taunt - MC Adore does a wheelie in the car as the rappers stick out their arms.
- Down Taunt - The Rappers snap their fingers as MC Adore stretches out her arms.
|
| Special Team-Up Names
|
- With Mach Rider - Vehicle Brawlers
|
| Alternate Costumes
|
|
|
| Unlock Conditions
|
| TBA
|
|
Takamaru
|
Takamaru hails from The Mysterious Murasame Castle, being a samurai warrior that fights against an powerful alien creature that is influencing powerful lords behind the scenes. Takamaru is fairly level-headed as a character, although he is fairly overconfident in his ability and takes his failings super seriously. Additionally, Takamaru seems to be awkward around women, not exactly sure how to talk to any. Takamaru primarily attacks with his sword and shurikens, giving him both a ranged and melee option. Additionally, he can utilize a cloak and getting a lift from magical tanookis.
|
| Move
|
Description
|
| Entrance
|
Takamaru walks down the stage before readying his blade, facing the other way.
|
| Jump/Blue Sandals
|
Takamaru has a total of two jumps. If Takamaru holds the jump button while in the air, he activates the Blue Sandals, which allow him to stand while in the air for 120 frames before he descends.
|
Gimmick
Shogi Pieces
|
Shogi Pieces are pieces from a Japanese game that basically is Japanese chess, with each different Shogi piece having different movement options. These appeared in Takamaru's original game and effect Takamaru's projectiles when collected. In Smash, these don't just effect each of Takamaru's projectile attacks, but also his melee attacks! Below is a list of Shogi and their effects on Takamaru's projectile and melee attacks:
|
| Rook
|
Bishop
|
King
|
Phoenix
|
|
|
|
|
|
| The Rook Shogi allows Takamaru to toss four projectiles in the four cardinal directions around him. When used with his melee attacks, it allows him better reach and the ability to pierce in one of the four cardinal directions.
|
The Bishop Shogi allows Takamaru to throw three projectiles at a time, with them spreading out in the direction he throws them. When used with his melee attacks, it gives him a upwards swing that touches the ground.
|
The King Shogi allows Takamaru to throw three projectiles in a row, hitting after each other. When used with his melee attacks, he jabs a total of three times before sheathing back his blade.
|
The Phoenix Shogi allows Takamaru to throw three projectiles that spin in a circle. When used with his melee attacks, he does a full swing from the front of his vision all the way behind him.
|
|
Neutral Special
Shuriken
|
Takamaru throws a shuriken for 5% damage, which cannot flinch opponents. The Rook Shogi allows him to throw it in four cardinal directions, the Bishop Shogi allows him to throw three at a time as they spread, the King Shogi allows Takamaru to throw three in a row, with some knockback if all three connect, and the Phoenix Shogi has three projectiles rotate together in a spinning circle that deals 7% damage on contact but still doesn't cause flinching.
- Customs
- Custom 1 - Throwing Knife: Takamaru throws a throwing knife for 7% damage, which will launch opponents. The Rook Shogi allows him to throw it in four cardinal directions, the Bishop Shogi allows him to throw three at a time as they spread, the King Shogi allows Takamaru to throw three in a row, with some knockback if all three connect, and the Phoenix Shogi has three knives rotate together in a spinning circle that deals 9% damage on contact but won't launch opponents.
- Custom 2 - Fireball: Takamaru throws a fireball projectile that deals 11% damage. The Rook Shogi allows him to throw it in four cardinal directions at reduced 5% damage, the Bishop Shogi allows him to throw three at a time as they spread for 8% damage, the King Shogi allows Takamaru to throw three in a row, with the burning status inflicted onto his opponent if all three connect, and the Phoenix Shogi has three projectiles rotate together in a spinning flaming circle that deals 16% damage on contact and causes helplessness in the air.
- Custom 3 - Windmill Knife: Takamaru throws a spinning knife for 9% damage, which will daze opponents on impact. Rook throws it in four cardinal directions, Bishop throws it in a spread of three at the cost of damage, with each dealing 3%, King allows him to throw three in a row to deal 4% damage each and stuns opponents on impact, and Phoenix has him throw it as three spinning knives that spike opponents for 7% damage.
|
Side Special
Samurai Strike
|
Takamaru unsheathes a lightning fast sword strike that is active for 15 frames, making it one of the quickest moves in the game, dealing 6% damage. It has virtually no end lag or start up, and can be quickly unleashed whenever the player desires. It has a short range and some launching power when the opponent is over 40% damage. This move is altered when a Shoji piece is used.
- Customs
- Custom 1 - Windmill Sword: Takamaru spins his blade like a windmill, able to reflect projectiles while moving forward. It deals 8-9% damage on impact and has some slight launching power. Has some end-lag. Does not get effected by Shoji pieces.
- Custom 2 - Inazuma Blade: Takamaru pulls out his blade, diagonally slicing as thunder emits from the blade, paralyzing opponents while dealing 11% damage. Has a bit of a start up and end lag. Altered when Shoji pieces are in play, generally being slower than Samurai Strike but with paralyzing effects that make Takamaru's opponents open to attacks.
- Custom 3 - Flaming Slash: Takamaru's sword burns with flames before unleashing it in a flaming ball for a three character distance, dealing 15% damage. Has long start up. When using Shogi pieces, Takamaru's flaming ball will either be spread out in four cardinal directions near him (Rook), spread out in three directions in front of Takamaru (Bishop), be followed with two additional fireballs that deal 5% additional damage (King), or spin around as a larger, slower fire ball that deals 30% damage (Phoenix).
|
Up Special
Tanooki Lift
|
Takamaru is grabbed by three tanookis, which lift him up for a short distance. The Tanooki actually stay on Takamaru until he gets hit and glow a golden color when they are ready to lift again. Additionally, they do not stop him from attacking. They can only charge when on the ground, and charge faster when Takamaru runs, as well as lifting him up for a farther distance. They disappear upon getting hit, and Takamaru cannot summon them until after a five second cooldown.
- Customs
- Custom 1 - Inazuma Lightning: Takamaru outstretches his arm and releases a powerful lightning attack that can launch opponents far into the air, dealing 19% damage. Has a long start up.
- Custom 2 - Red Sandals: Takamaru's speed is increased by 2x, boosting his speed and decreasing the height of his jumps.
- Custom 3 - White Crossbow: Takamaru's projectile speed is increased by 1.5x, decreasing the amount of knockback they are able to do.
|
Down Special
Shogi Switch
|
Takamaru switches between Shogi pieces, either able to swap out in a set order via taps or holding it down to see all four Shogi options. Takamaru can stay in any Shogi option he desires for as long as he wants, but he will not be able to move when switching Shogi.
- Customs
- Custom 1 - Cloaked Shogi: Takamaru covers himself in an invisible cloak, able to change Shogi for 80 frames while invisible. Takamaru becomes immune to damage as well for that period of time as well. The invincibility frames Takamaru gets will work to keep him safe from Final Smashes. One downside to this is that Takamaru's attacks will become weaker when effected by Shogi.
- Custom 2 - Shifting Shogi: Takamaru changes Shogi every time he attacks with his neutral or side specials when this is activated, making each attack unique. This can be cancelled by hitting down special again.
- Custom 3 - Shogi Burst: Takamaru takes longer to switch Shogi, but when he activates a Shogi an explosion will occur around him, dealing 10% damage.
|
Final Smash
Invisibilty Cloak
|
Takamaru uses his Invisibility Cloak to transform into a invisible force, slashing enemies across the stage for 45% damage. On the Unmetered version of this Final Smash, he uses the Shogi Pieces to summon a ring of twenty five throwing knives, dealing an additional 10% damage per hit.
|
| Taunts
|
- Up Taunt - Takamaru tosses a throwing knife into the air before catching it.
- Side Taunt - Takamaru grips his blade, holding it close to the ground.
- Down Taunt - A Tanooki pops up from Takamaru's side, waving wildly before disappearing.
|
| Special Team-Up Names
|
- With Link - Evil-Slicing Warriors
|
| Alternate Costumes
|
|
|
| Unlock Conditions
|
| TBA
|
|
Shinobu
|
Shinobu assists ninjas in launching themselves with the Cannon of Justice, which needs to be lined up so ninjas can grab swords and garments while flying through the air. Grabbing all the kites would put these ninja warriors at full power. Shinobu joins Smash as a surprise entrant, using her skills to good use in her moveset.
|
| Move
|
Description
|
| Entrance
|
Shinobu wheels out the Cannon of Justice quickly from behind a bunch of bamboo.
|
Neutral Special
Flag Raise
|
Shinobu raises a flag over head which can do some damage with it's hidden hitbox, but primarily this is used to place flags down for her Side Special. There are three kinds of flags.
- A blue flag will add defense.
- A green flag will add speed.
- A red flag will add power.
When done in air, it allows her to glide. She can raise the flags by crouching.
- Customs
- Custom 1 - Flag Lower: Shinobu raises up a flag and lowers it down quickly, allowing her to do downwards aerial spikes and set traps, as when she puts the flag into the ground, it will launch once someone walks over it.
- Custom 2 - Quick Flag Raise: Shinobu will raise flags quicker, at the cost of lowering the flag's effects.
- Custom 3 - Flag Raise+: Shinobu takes longer to raise these flags, but they increase the flag's effects.
|
Side Special
Ninja Launcher
|
Shinobu pops into the Cannon of Justice and will go off after 2 seconds; this move has invincibility frames at the start and end of the animation. The player can aim the cannon for different arcs; flags placed down will add extra boosts that she can can temporarily boost herself. Landing on a opponent will do 10% damage.
- Customs
- Custom 1 - Speed Launch: Shinobu shoots off quicker but will only do 7% damage when landing on a opponent.
- Custom 2 - Slug Launch: Shinobu shoots off later, doing 13% damage when she lands on a opponent.
- Custom 3 - Star Launch: Shinobu can cancel after being launched, allowing her to jump and attack in the air after being launched, but the attack will be cancelled.
|
Up Special
Cannon Blast
|
Shinobu gets inside of a cannon that aims straight up and propels upwards vertically. If a opponent is in her way, she slashes at them for 7% damage and immediately cancels momentum.
- Customs
- Custom 1 - Super Cannon Blast: Shinobu launches higher and does 10% damage when slashing opponents, although this takes longer to launch.
- Custom 2 - Sakura Blast: Shinobu launches upwards and then floats down on a sakura petal leaf. Cannot slash opponents in her way.
- Custom 3 - Blast Cannon: Shinobu launches a red exploding cannonball in the air that does 9% damage, as opposed to launching herself.
|
Down Special
Scarecrow
|
Shinobu can displace herself with a scarecrow to quickly get out of harm's way as a counter move to attacks. The scarecrow will explode if attacked after the initial counter.
- Customs
- Custom 1 - Rocky Scarecrow: Shinobu displaces her self with a rock, which will crush people under it. Does not explode after being hit.
- Custom 2 - Atomic Scarecrow: Shinobu displaces herself with a scarecrow that goes off with a big explosion when hit. Shinobu can get caught up in this explosion too!
- Custom 3 - Skeleton Scarecrow: Shinobu displaces herself with a skeleton on a scarecrow pole, which has no effect when attacked but allows her to do this without having to counter.
|
Final Smash
Five Star Assault
|
Shinobu flies in the air, grabbing a golden flag to harass a golden set of armor and swords, slashing at the opponent that is in her path, doing 75% damage and severe knockback.
|
| Taunts
|
- Up Taunt - Shinobu waves a red flag, looking fierce.
- Side Taunt - Shinobu waves a green flag, looking happy.
- Down Taunt - Shinobu waves a white flag, looking defeated.
|
| Special Team-Up Names
|
|
|
Geolyte
|
Geolytes hail from the planet of Geolyte, and they are the main characters of Meteos, a DS Puzzle game directed by Masahiro Sakurai. The game revolved around gravity based block puzzles that required four of the same color to be lined up so that they could be launched above the screen to clear them and appear on the other opponent's screen. The first player to be overwhelmed by lines reaching to the top of the screen lost. Geolytes appeared as the main characters of Star Trip, where they battled other planets for resources to fight the evil galactic threat only known as Meteo.
In Smash, Geolyte uses the Meteos as part of his moveset, doing his best to connect at least three to launch as platforms. Geolyte has no true recovery move, but his Meteos do both damage as well as create platforms only he can use that launch upwards. Geolyte also has an war axe and a charging ram move involving the star ship Metamo Ark that can be used to damage opponents greatly. He's a true weirdo of a fighter!
|
| Move
|
Description
|
| Entrance
|
Geolyte arrives from the Metamo Ark, juggling a couple Meteos of random elements in it's hands.
|
Gimmick
Meteos
|
Geolyte's gimmick is that he is capable of using Meteos from his home planet, Geolyte. These have interesting effects when chained together in a group of three, although Geolyte cannot choose which Meteo type comes out when using his moves unless through customs. All three chained attacks deal the same amount of damage.
|
|
|
|
|
|
| Fire
|
Air
|
H20
|
Soil
|
Zoo
|
Chance
24.39%
|
Chance
24.39%
|
Chance
24.39%
|
Chance
24.39%
|
Chance
2.44%
|
| When connected, it explodes into a burning pattern as it launches upwards, inflicting Burn on it's victims.
|
When connected, it explodes into a windy pattern as it launches upwards, blowing opponents back far with windboxes.
|
When connected, it explodes into a aquatic pattern as it launches upwards, getting opponents wet.
|
When connected, it explodes into a ground pattern as it launches upwards, trapping opponents by burying them.
|
When connected, it explodes into a grassy pattern as it launches upwards, inflicting opponents with the Flower status.
|
|
Neutral Special
Meteos Fall
|
Geolyte summons a Meteo through the sky, which deals 5% damage on collision with an opponent. The Meteo will always be random and be from the same pull of five. When three are placed together in a chain, they will create a platform that lifts upwards quickly while the Meteos used to generate it begin to explode and deal 15% damage for opponents who attempt to step ontop of them (usually inflicting a random status effect).
- Customs
- Custom 1 - Heavy Meteos Fall: Geolyte summons Meteos that fall much heavier and deal 8% damage while burying opponents on collision. The platform does not rise as high and even descends towards the end of it's animation, and the Meteos explosion deals only 10% damage.
- Custom 2 - Fire and H20 Meteos: Geolyte only summons Fire and H20 Meteos.
- Custom 3 - Air and Soil Meteos: Geolyte only summons Air and Soil Meteos.
|
Side Special
Star Trip
|
Geolyte summons the Metomo Ark and hops aboard, riding it to deal 15% damage on contact. The player can tilt the control stick up and down to make it go into an above direction or below direction. The ship has a huge hurtbox that effects Geolyte, but will not explode unless it takes 100% damage or above. While inside the Metomo Ark, Geolyte takes halved damage.
- Customs
- Custom 1 - Time War: Geolyte summons the Metomo Ark, and slows opponents down with a chronobox around the radius of the ship. This allows Geolyte to tilt the route to further damage opponents, although it only deals 10% damage on contact and spikes opponents downwards.
- Custom 2 - Deluge: Geolyte summons five smaller Metomo Arks, which home onto opponents and can be destroyed, each projectile having 30% health. The Metomo Arks deal 12% damage on collision.
- Custom 3 - Simple: Geolyte summons the Metomo Ark, which speeds ahead for 25% damage after a long start up. Cannot be tilted to change course.
|
Up Special
Meteo Flick
|
Geolyte waves upwards and a stylus quickly appears on the screen to switch the Meteos around, connecting the Meteo blocks together to create chain reactions if possible. The stylus can work in a 5x5 grid, which appears when Geolyte waves. It deals no damage or helps the Geolyte in any way beyond creating chain reactions with the blocks that the Geolyte has summoned.
- Customs
- Custom 1 - Slow Flick: The stylus is much slower, but when it does it's flicking around, it deals 5% damage per hit. Opponents in the way could see themselves knocked around quite a bit.
- Custom 2 - Lightning Fast Flick: The stylus spins around for 30 frames before assembling the Meteos together as one amazing, fluid motion that is imperceptible to the human eye, meaning that the game just switches to the Meteo chain solutions in the next frame.
- Custom 3 - Manual Flick: When this is used, the Geolyte puts their hands on their head, allowing the player to play as the stylus instead. Each flick is performed by holding the standard attack button plus tilting the control stick in the direction you want to flick. Tilting the control stick will simply move the stylus. Hitting the special attack button will cancel the attack. Each flick deals 7% damage to opponents that come into it's path and can launch for quite a distance.
|
Down Special
War Axe
|
The Geolyte holds out a War Axe, which attacks the area around it with three powerful swings that deal 12% damage each and launch far. It attacks to the right of the Geolyte, then the left, and finally above the Geolyte.
- Customs
- Custom 1 - Fury Hammer: A faster version of the war hammer that swings five times (left, right, up, left, right), dealing 9% damage per swing. Won't launch foes as far.
- Custom 2 - Mini Weight: The Geolyte heaves a giant weight that it launches into the air, turning into a five-block high pillar of grey Meteos, which can spike in the air and deals 17% damage and buries opponents.
- Custom 3 - Eraser: Erases all of Geolyte's blocks by making them explode, dealing 5% damage where they explode as well as activating their explosion effect.
|
Final Smash
Invisible Bonds
|
The Geolyte hops onto the Metamo Ark, slamming the front of the ship into their opponent and launching them into space, where the alien races of Meteos fire thousands of lasers at them, dealing 45% damage metered and 100% damage unmetered.
|
| Taunts
|
- Up Taunt - Geolyte stretches it's arms up, and then slowly lurches down.
- Side Taunt - Geolyte dances from side to side.
- Down Taunt - Geolyte tosses pink flowers into the air from it's home planet.
|
| Special Team-Up Names
|
- With Mr. Game and Watch - Flatliners
- With Cosmetta - Galactic Fighters
|
| Alternate Costumes
|
|
|
| Unlock Conditions
|
| TBA
|
|
Oleanan
|
Oleanan is a member of a race of the same name, who hail from the water planet Oleanan. They appear in the game Meteos as a neighboring planet and race to the Geolytes. They are an underwater race based off jellyfish and a squid, exhibiting fish-like movement. While not a particularly notable race from the game, they were a good beginner planet to help players get a better grasp of the concept of the game and are some of the first foes you face on your journey though Star Trip.
In Smash, Oleanan is a Echo Fighter of Geolyte. They utilize the Meteos as part of her moveset, and are generally heavier than the Geolytes, almost as if they are underwater. They have better movement speed as well. They also come with a different set of Meteos- some of which share the same elements as Geolyte, but Zap and Dark being entirely new and Zoo now being one of the standard Meteos that Oleanan can use. She also floats off the ground at all times, giving her floaty properties.
|
| Move
|
Description
|
| Entrance
|
Oleanan arrives from the Metamo Ark, Meteos swirling around them.
|
Gimmick
Meteos
|
Oleanan's gimmick is that she is capable of using Meteos from her home planet, Oleana. These have interesting effects when chained together in a group of three, although Oleanan cannot choose which Meteo type comes out when using her moves unless through customs. All three chained attacks deal the same amount of damage.
|
|
|
|
|
|
| Air
|
Zap
|
H20
|
Zoo
|
Dark
|
Chance
27.08%
|
Chance
12.50%
|
Chance
41.67%
|
Chance
12.50%
|
Chance
6.25%
|
| When connected, it explodes into a windy pattern as it launches upwards, blowing opponents back far with windboxes.
|
When connected, it explodes into a electrical pattern as it launches upwards, inflicting Paralysis on it's victims.
|
When connected, it explodes into a aquatic pattern as it launches upwards, getting opponents wet.
|
When connected, it explodes into a grassy pattern as it launches upwards, inflicting opponents with the Flower status.
|
When connected, it explodes into a dark pattern as it launches upwards, inflicting opponents with the Umbra status.
|
|
Neutral Special
Heavy Meteos Fall
|
Oleanan summons Meteos that fall much heavier compared to Geolyte and deal 8% damage while burying opponents on collision. The platform does not rise as high and even descends towards the end of it's animation, and the Meteos explosion deals only 10% damage.
- Customs
- Custom 1 - Meteos Fall: Oleanan summons a Meteo through the sky, which deals 5% damage on collision with an opponent. The Meteo will always be random and be from the same pull of five. When three are placed together in a chain, they will create a platform that lifts upwards quickly while the Meteos used to generate it begin to explode and deal 15% damage for opponents who attempt to step ontop of them (usually inflicting a random status effect).
- Custom 2 - Air and Zap Meteos: Oleanan only summons Air and Zap Meteos.
- Custom 3 - H20 and Zoo Meteos: Oleanan only summons H20 and Zoo Meteos.
|
Side Special
Time War
|
Oleanan summons the Metomo Ark, and slows opponents down with a chronobox around the radius of the ship. This allows Oleanan to tilt the route to further damage opponents, although it only deals 10% damage on contact and spikes opponents downwards.
- Customs
- Custom 1 - Star Trip: Oleanan summons the Metomo Ark and hops aboard, riding it to deal 15% damage on contact. The player can tilt the control stick up and down to make it go into an above direction or below direction. The ship has a huge hurtbox that effects Geolyte, but will not explode unless it takes 100% damage or above. While inside the Metomo Ark, Geolyte takes halved damage.
- Custom 2 - Deluge: Oleanan summons five smaller Metomo Arks, which home onto opponents and can be destroyed, each projectile having 30% health. The Metomo Arks deal 12% damage on collision.
- Custom 3 - Simple: Oleanan summons the Metomo Ark, which speeds ahead for 25% damage after a long start up. Cannot be tilted to change course.
|
Up Special
Slow Flick
|
Oleanan waves upwards and a stylus appears on screen to switch the Meteos around, connecting the Meteo blocks together to create chain reactions if possible. The stylus can work in a 5x5 grid, which appears when Oleanan waves. The stylus is much slower compared to Geolyte, but when it does it's flicking around, it deals 5% damage per hit. Opponents in the way could see themselves knocked around quite a bit.
- Customs
- Custom 1 - Meteo Flick: Oleanan waves upwards and a stylus quickly appears on the screen to switch the Meteos around, connecting the Meteo blocks together to create chain reactions if possible. The stylus can work in a 5x5 grid, which appears when Geolyte waves. It deals no damage or helps the Geolyte in any way beyond creating chain reactions with the blocks that the Geolyte has summoned.
- Custom 2 - Lightning Fast Flick: The stylus spins around for 30 frames before assembling the Meteos together as one amazing, fluid motion that is imperceptible to the human eye, meaning that the game just switches to the Meteo chain solutions in the next frame.
- Custom 3 - Manual Flick: When this is used, the Oleanan lays down lazily, allowing the player to play as the stylus instead. Each flick is performed by holding the standard attack button plus tilting the control stick in the direction you want to flick. Tilting the control stick will simply move the stylus. Hitting the special attack button will cancel the attack. Each flick deals 7% damage to opponents that come into it's path and can launch for quite a distance.
|
Down Special
Eraser
|
Erases all of Oleanan's blocks by making them explode, dealing 5% damage where they explode as well as activating their explosion effect.
- Customs
- Custom 1 - War Axe: The Oleanan holds out a War Axe, which attacks the area around it with three powerful swings that deal 12% damage each and launch far. It attacks to the right of the Geolyte, then the left, and finally above the Oleanan.
- Custom 2 - Fury Hammer: A faster version of the war axe that swings five times (left, right, up, left, right), dealing 9% damage per swing. Won't launch foes as far.
- Custom 3 - Mini Weight: The Oleanan heaves a giant weight that it launches into the air, turning into a five-block high pillar of grey Meteos, which can spike in the air and deals 17% damage and buries opponents.
|
Final Smash
Invisible Bonds
|
The Oleanan hops onto the Metamo Ark, slamming the front of the ship into their opponent and launching them into space, where the alien races of Meteos fire thousands of lasers at them, dealing 45% damage metered and 100% damage unmetered.
|
| Taunts
|
- Up Taunt - Oleanan swerves around as it floats, her eye bouncing in it's socket.
- Side Taunt - Oleanan "swims" similar to a fish, hopping into the air before hopping on the ground like a fish out of water.
- Down Taunt - Oleanan bobs up and down like a jellyfish.
|
| Special Team-Up Names
|
- With Geolyte - Resourceful Aliens
|
| Alternate Costumes
|
|
|
| Unlock Conditions
|
| Play 10 matches on the stage Oleana.
|
|
Inkling
|
The Inkling is a fresh squid/kid out of Inkopolis, who participates in ink-based shooting battles for the sport of it. Fairly energetic, the Inkling can transform into a squid or a human-like form within seconds and can travel in their own ink. They are also able to produce their own colored ink and place it inside a tank on their back. In Smash, the Inkling is a fast firer with good firing options and good momentum based attacks, as well as being able to set their opponents up for even more damage by covering them in ink. They are great at being able to control the stage and situation, but lack many good defensive options.
|
| Move
|
Description
|
| Entrance
|
Inkling lands with a splash of ink in her squid form before transforming back, then flaps her arms excitedly before drawing her Splattershot.
|
Gimmick
Ink
|
Inkling has a unique Ink gimmick which informs almost of all of her attacks, which run off Ink. Ink is basically Inkling's ammo and you can see how much you have on both the tank on Inkling's back as well as on the character portrait for Inkling. When Inkling runs low or empty on ink, many of her attacks become useless or weaker. To replenish ink, Inkling must shield and then hit the attack button to replenish her ink, which will be faster if she's over her own ink puddles.
|
Neutral Special
Splattershot
|
Inkling fires ink projectiles out of her Splattershot for a medium distance, with the shots arcing downward. The player cannot move while firing, but can tilt the control stick to arc the shots. By holding down the special attack button, they can continuously fire until they run out of ink. The shots deal 4% damage each and cause opponents to flinch. They also cover the opponent in ink, which will increase the damage they take as well as making them slighty heavier.
- Customs
- Custom 1 - N-ZAP '85: Inkling fires ink projectiles out of the N-ZAP '85 at a faster rate than the Splattershot, but deals only 2% damage. The projectiles also do not cause opponents to flinch.
- Custom 2 - Splat Dualies: Inkling fires out of the Splat Dualies, which allow her to spray ink in two directions, dealing 3% damage. Uniquely, the Inkling's dodge becomes a roll when firing this weapon, and when performed she will crouch and fire lower to the ground but much further. Dodging again will reset Inkling back to a standing fire.
- Custom 3 - Luna Blaster: Inkling fires a single explosive ink projectile out of the Luna Blaster, dealing 7% damage. While slower than the Splattershot, it deals more damage and covers opponents with ink much faster. It can also stun opponents if shot cleanly.
|
Side Special
Splat Roller
|
Inkling will take out the Splat Roller and begin to slide it across the ground, covering the ground in Ink, which will slow opponents who walk across it. If a opponent is hit by the Roller, they are dealt 7% damage and will become buried. If an already buried opponent is rolled over, they will be launched for 9% damage. Additionally, while rolling, the player can tap the special button to attack directly with the roller for 11% damage at the cost of cancelling previous momentum. This is also the attack that is is used while in the air.
- Customs
- Custom 1 - Carbon Roller: The Inkling brings out the Carbon Roller, a faster and more mobile roller which weighs down her jump less, but deals 8% damage and can't bury opponents, instead launching them away. The roller can be used as an attack, dealing 8% damage in the air and when the player taps the special button while in rolling mode, and unlike the Splat Roller it won't cancel previous momentum.
- Custom 2 - Dynamo Roller: The Inkling brings out the Dynamo Roller, a slower but larger roller which deals 17% damage on impact and buries opponents much longer than the Splat Roller. It can be used as an attack in the air and when the special button is tapped to deal 17% damage, although it completely halts the Inkling's momentum and has lag for beginning the rolling animation again.
- Custom 3 - Flingza Roller: Inkling brings out the Flingza Roller, which has the same general mobility of the Carbon Roller but deals 6% damage. It's real strength is in it's swings, which are performed in the air or when the player taps the special button while rolling, dealing 14% damage while merely halving previous momentum.
|
Up Special
Super Jump
|
Inkling turns into the squid form and launches upwards before falling back down. Tilting the control stick will control the angle that the Inkling goes up. It deals 7% damage with colliding opponents.
- Customs
- Custom 1 - Booyah: Inkling is able to control where she lands, indicated by a small circle of light that appears when the player tilts the control stick. Has more horizontal distance and is good for moving around the stage, but lacks vertical distance and can't be cancelled unless a opponent attacks her in the air. Additionally, she only deals 5% damage when colliding into opponents.
- Custom 2 - Come On: Inkling performs Super Jump with a longer charge, but launches much farther into the air and deals 11% damage when colliding with opponents.
- Custom 3 - This Way: Inkling's Squid Form leans to the side, launching much farther horizontally and dealing 9% damage. The player can tilt the control stick to control the angle Inkling launches at.
|
Down Special
Splat Bomb
|
Inkling throws a pyramid shaped bomb forward that will explode and damage enemies in it's radius, with the distance and arc determined by how long the player holds the button. A short press will toss it at a low range, while a long press will toss it much further. The bomb will detonate after a set time before exploding, dealing 22% damage. If she cannot create a Splat Bomb, the Inkling just looks at her ink tank worriedly.
- Customs
- Custom 1 - Burst Bomb: Inkling throws a spherical bomb that explodes faster and deals less damage, dealing 11% damage. The distance and arc are dependent on how long the Inkling holds the button. It overall uses less ink, although the Inkling cannot create one without ink.
- Custom 2 - Kraken: The Inkling transforms briefly into the Kraken, able to move around the ground monstrously quick while spreading ink across the ground. Deals 11% damage on contact and 22% damage if the player taps the attack button near an opponent. Lasts only for 5 seconds with a 7 second cooldown.
- Custom 3 - Splash Wall: The Inkling creates a Splash Wall, a small device that continuously sprays ink and slows opponents, as well as dealing 2% per hit when in it's radius. It can be damaged to break it via attacks, having 30% health.
|
Final Smash
Killer Wail
|
Inkling puts down a giant megaphone-like machine and slams it to the ground, with the machine emitting large sound waves that can act as directional windboxes. The Killer Wail then emits ink, damaging fighters with ink for either 45% metered damage or 100% damage unmetered. Inkling is able to move around after the Killer Wail is active.
|
| Taunts
|
- Up Taunt - Inkling fires her Splattershot into the air with one hand while making a "gun" sign with her other hand.
- Side Taunt - Inkling jumps happily on the spot while smiling.
- Down Taunt - Inkling raises her Splattershot several times into the air in a celebratory cheer.
|
| Special Team-Up Names
|
- With Dante - Fresh & Stylish Team
|
| Alternate Costumes
|
Male Inkling (Splatoon 2) Female Inkling (Splatoon 2) Male Inkling (Alt Outfit?) Female Inkling (Schoolgirl Outfit) Male Inkling (Alt Outfit 2?) |
| Unlock Conditions
|
| TBA
|
|
Mach Rider
|
Mach Rider is from the old Nintendo game Mach Rider, which took place in a post apocalyptic future overrun by criminals known as the Quadrunners. Mach Rider was the hero that took them down with their gunning bike. In Smash, Mach Rider uses their bike as both a means of transportation and attack, able to ride it in battle and fire at opponents with the Blaster Bolt. They can also transform the bike into Wheelers, a weapon that uses the wheels from the bike to rev up against opponents and do crazy follow-ups while putting the Mach Rider's feet on the ground. Choose either a male or female Mach Rider and then get crazy!
|
| Move
|
Description
|
| Entrance
|
Mach Rider's chain whip appears and grabs onto the edge of the stage, with Mach Rider's bike rolling down it as it skids to a stop.
|
| Jump/Rocket Float
|
Mach Rider has two low jumps on the motorcycle, and a jump hold that causes the motorcycle to float while in the air, descending slowly with some horizontal movement. This jump hold can be used in junction with their other moves, although will cancel the jump hold. Be careful!
While in wheeler mode, Mach Rider has two higher jumps and gains their second jump from a rocket on the wheelers. They lack the jump hold on the motorcycle.
|
Gimmick
Mach Bike/Mach Wheelers
|
Mach Rider has two distinct styles that they use to fight with. These are changed via their Down Special, Alter Mode.
- The first default style is the Mach Bike. This has a set of low jumps and a jump hold that sees the bike slowly descend while in the air. This is a fast, hard hitting style of play that sees the player ram into others with the Mach Bike, but doesn't offer much control and isn't great for tight battle spaces.
- The second style is the Mach Wheelers. The Mach Rider transforms the motorcycle into a set of weapons that are made from the wheels of the motorcycle, and can use them to attack. The Mach Rider is no where near as destructive as the Mach Bike or fast, but they gain a much more refined control over movement and is better for tighter battle space.
|
Neutral Special
Blaster Bolt/Roller Rave
|
Mach Rider has two neutral specials depending on whether they are on the bike or not.
Blaster Bolt is fired from the Mach Bike's machine guns, firing stunning projectiles that deal 4/8% damage each. They knock the opponent away with each bullet, and deal more damage from behind than in front of the opponent.
Roller Rave sees the Mach Rider using the Wheelers as buzz saws and lunging them forward as spikes come out, dealing 12% with a close range attack. This move does not differ if the Mach Rider is attacking from front or behind. By tilting the control stick, the Mach Rider can roll the opponent above their head and launch them for an additional 6% damage.
- Customs
- Custom 1 - Bomber Ball: The Mach Rider sets down a ball that goes off on contact with a character or projectile, dealing 12% damage. It is the same across both the Bike and Wheeler forms.
- Custom 2 - Oil Drum: The Mach Rider punts forward an oil drum that deals 14% damage and bounces twice. When fire projectiles touch it, it explodes prematurely for 24% damage. This move is more or less the same across both styles, with Bike Mode punting it low to have it bounce closer to the ground and Wheeler Mode punting hit higher, causing it to bounce more erratically.
- Custom 3 - Azure Rock: The Mach Rider sets down a blue sloped rock. In Bike Mode, this acts as a ramp that they will do a spinning wheel trick off, dealing 15% damage on contact with foes, where as for Wheeler Mode it acts as a cover for them, allowing them fire projectiles by tapping the button that deal 3% damage with flinch whereas holding it will allow them to stay behind the rock, completely covered for that side against attacks.
|
Side Special
Chain Slash
|
The Mach Rider uses a chain with a dagger attached to the end to stick into opponents or the stage ledge, dealing 6% damage. If on the Mach Bike, the Mach Rider quickly drags the opponent towards them and can follow up with another attack. If using the Rollers, Mach Rider instead is pulled towards the opponent by using their wheels against the chain, and can follow up with an attack from there.
- Customs
- Custom 1 - Puddle: The Mach Rider releases water from the wheels, creating a puddle behind them that can stretch for 7 character lengths and cause slipping and the wet effect for 7% damage. More or less the same across both styles. The puddle dries up after 130 frames.
- Custom 2 - Oil Slick: The Mach Rider releases oil from the wheels, which acts similar to puddle in that it can be stretched for 5 character lengths and cause slipping, dealing 9% damage. Fire attacks or the blaster bolt can light the puddle aflame, causing it to deal 11% damage on contact and burn opponents. More or less the same across both styles. The puddle dries up after 70 frames.
- Custom 3 - Tacks: The Mach Rider releases tacks behind them for 3 character lengths, which deal 3% damage on contact and cause opponents to flinch when stepped on. More or less the same across both style modes.
|
Up Special
Gear Shift
|
The Mach Rider changes their speed through gear shifting. This changes for each of the two modes and they have a total of four gears, with Mach Rider in first gear by default. Each tap with the button will shift the gear, with it going in a loop. In Mach Bike mode, this acts as a charged dash forward that can deal 10%, 15%, 20%, or 25% damage if the player holds the button. This momentum carries for the rest of their movement. By just tapping the button, it will merely just change the speed.
In Wheeler mode, this changes how fast the wheels on the wheelers spin. Higher gears mean faster follow-ups but lowered knockback. By holding the button, the player can charge up a lunging attack with both of the wheelers that deals 8%, 10%, 12%, or 16% damage, although it will reset back to first gear after the strike.
- Customs
- Custom 1 - Super Gear Shift: The Mach Rider changes gears faster at the cost of reduced damage (5%, 10%, 15%, 20% damage for the charge bike dash, 4%, 6%, 8%, 14% damage for the wheelers charge) as well as losing frame data that was previously part of Gear Shift that caused them to not move after changing gears.
- Custom 2 - Down Shift: The Mach Rider will automatically up-shift to 4th gear during gameplay, shifting up a gear every 5 seconds. This move is used to shift them into slower gears instead. Generally everything stays the same, including the hold charge moves.
- Custom 3 - Blink Gear Shift: The Mach Rider switches between 1st and 4th gear, with no inbetween. The charge moves remain the same.
|
Down Special
Alter Mode
|
The Mach Rider switches between modes, transforming the bike into the wheelers and vice versa. While done in the air, the Mach Rider gains a slight air boost from transforming into the Wheeler form, with windboxes that send the opponents blown back to the left or right. Does no actual damage.
- Customs
- Custom 1 - Alter Shield: While transforming, the Wheelers serve as a reflective shield that reflects projectiles for 1.3x the original damage. Loses the boost in air that the Wheeler shift provides.
- Custom 2 - Alter Counter: While transforming, the Wheelers serve as a counter against melee opponents, dealing 1.6x the original damage with a short range. Loses the boost in air that the Wheeler shift provides.
- Custom 3 - Alter 'Nade: While transforming, the Mach Rider is covered in a explosion that deals 11% damage. Loses the boost in air that the Wheeler shift provides.
|
Final Smash
Quadrunners 2112
|
The Mach Rider rams the bike or wheelers into the opponent, and they are then transported into a cutscene where a series of Quadrunners run over them for 30% damage before Mach Rider themselves blasts at them for 15% damage metered or 70% damage unmetered.
|
| Taunts
|
- Up Taunt - Mach Rider takes off their helmet for a second, revealing their face as they hold their helmet before placing it back on. (Rev Mode)
Mach Rider spins the Mach Bike in a circle on the ground, kicking up dust. (Bike Mode)
- Side Taunt - Mach Rider fires off a blank into the sky. (Rev Mode)
Mach Rider has the Mach Bike do a wheelie trick as they spin around. (Bike Mode)
- Down Taunt - Mach Rider puts both wheels together as they spin and run up against each other. (Rev Mode)
Mach Rider sticks their foot out as the Mach Bike comes to stop. (Bike Mode)
|
| Special Team-Up Names
|
- With Samus - Armored Women (Female Mach Rider Only)
|
| Alternate Costumes
|
|
|
| Unlock Conditions
|
| TBA
|
|
Mr. Game and Watch
|
Mr. Game and Watch is not exactly a character, but an amalgamation of all the characters that appeared in various Game & Watch titles, using their powers and moves in a cohesive moveset. Mr. Game and Watch is also a entity that serves as a source of Shadow Bugs and has no sense of right or wrong, allowing him to be manipulated during the events of the Subspace Emissary as well as transform into a dangerous creature known as Risk and Watch. In Super Smash Bros. Discord, Mr. Game and Watch has gained new special moves but overall his set more or less remains the same, with Oil Drum now having explosive properties for physical fire attacks but many of his moves can also be tilted to give him more options while attacking.
|
| Move
|
Description
|
| Entrance
|
Mr. Game and Watch moves along a row of Game & Watch LCD frames until reaching the foreground.
|
Detail
LCD Frames
|
Mr. Game and Watch mostly returns to how he animated in previous games prior to Ultimate, but now LCD frames appear around his attacks to show the angles he can tilt his attacks or to show where the attack will land. As such, his hitboxes are now more consistent and the player now has a better idea of where attacks can be tilted to or where they will be projected to show up. These LCD frames appear gray and semi-transparent. On stages where this might be harder to discern, they instead take on the color of the player's port as seen on the right.
|
Neutral Special
Chef
|
Mr. Game and Watch flips food out of a frying pan, which can be sausages, fish, eggs, bacon, shrimp, or even a pufferfish (which is not random- it appears when Mr. Game and Watch has over 60% and appears every sixth time he uses the move). All of them except the pufferfish do 5%- the pufferfish does 3% damage but does 10% damage if it is hit prior to connecting with a opponent. Can be used to cancel attack animations of opponents and can be used to edgegaurd against opponents with linear recoveries. The pan deals 5% when first used or when flipping, and deals fire damage. It can spike opponents as well. Tilt the control stick to fling the food faster as well as flipping them at different trajectories- flipping up has a higher height to the food but a shorter range, while flipping down will give the food a lower height but a longer range. Flip it in the middle to get the normal results.
- Customs
- Custom 1 - XXL Chef: Mr. Game and Watch flings giant versions of the food which deal more damage (9%) but are much slower and the flipping takes a much longer period of time. The screen shakes slightly when used. The pufferfish does not appear in this version of chef. The pan only deals 2% damage when used as an attack but still has spiking properties.
- Custom 2 - Safebuster: Mr. Game and Watch can load up to three bombs inside of a tub and then spill them out to deal explosive damage, ranging from 5-25% damage, depending on how many bombs Mr. Game and Watch stored in side prior to dumping it out, as well as how close his opponent is to the impact zone. This new move is based off the game Safebuster.
- Custom 3 - Circus: Mr. Game and Watch appears on a barrel, able to move across the stage at a fast speed but cannot jump. As he is on the barrel, he can send pineapples to attack his opponent for 8% damage, appearing above their head in the direction Mr. Game and Watch appears in. This buries them and inflicts the lemon scent effect afterwards. This new move is based off the game Donkey Kong Circus.
|
Side Special
Judge
|
Mr. Game and Watch throws a hammer forward and holds up a sign. The number on the sign indicates which attack Mr. Game and Watch uses. It is completely random, being one of the few moves with a random property.
| #
|
Description
|
Damage
|
|
|
A very weak hit that does not inflict flinching or knockback, and inflicts 12% recoil damage regardless of whether or not it hits.
|
2%
|
|
|
Has minimal knockback. It has a 20% chance of tripping an opponent.
|
4%
|
|
|
Makes a paper sound as it hits, launching the opponent towards Mr. Game & Watch and will deal a lot of damage to a shield.
|
6%
|
|
|
Inflicts a slashing attack that launches opponents diagonally.
|
8%
|
|
|
Produces four electrical charges that inflict 3% damage each that zap the opponent, making them rise slightly.
|
12% total
|
|
|
Deals flame damage and spikes downwards, making it a threat to recovering opponents. Has the second strongest knock-back out of all the judge attacks.
|
12%
|
|
|
Deals moderate damage and awards Mr. Game and Watch with an apple, which can heal back 5% damage.
|
14%
|
|
|
Freezes the opponent and makes a loud "PING!" sound. Has fixed vertical knockback.
|
9%
|
|
|
Deals massive knockback and makes the "PING!" sound, able to KO below 10% for lighter opponents and can KO heavier opponents with 13% damage. After the attack, Mr. Game and Watch plays a bell taunt that can be cancelled.
|
32%
|
- Customs
- Custom 1 - Extreme Judge: Only allows Mr. Game and Watch to do Judge attacks 1 or 9. You only have a 20% chance of getting an 9, although the recoil damage to Mr. Game and Watch upon getting a 1 is 5% and 1 will now deal 5% damage. 9 will only do 26% damage and has less powerful knockback.
- Custom 2 - Chain Judge: Mr. Game and Watch does a number of hits that are reflected on what number the sign is, with each hit dealing 4% damage. As such, the maximum damage Mr. Game and Watch can inflict with this is 36%. Numbers towards the middle are more common.
- Custom 3 - Judge Cycle: Mr. Game and Watch's Judge Numbers are no longer random, instead happening in a straight forward cycle of 1 through 9. None of the effects are changed, although the move has more endlag and the bell taunt at the end of 9 is longer and cannot be cancelled.
|
Up Special
Fire
|
Mr. Game and Watch jumps off a trampoline and then descends while wearing a parachute. Cancels into any move while falling. Deals 6% damage upon jumping off it and can spike using the trampoline. Can also be used against fast-fallers and heavyweights after Mr. Game and Watch's up throw.
- Customs
- Custom 1 - Firemen: Mr. Game and Watch jumps off a trampoline, but does not sprout a parachute, instead having two firemen bring the trampoline in the direction he's heading, dealing 6% damage on contact and knocking foes away. Allows Mr. Game and Watch to bounce off twice, becoming a better recovery, but lacks spiking properties.
- Custom 2 - Heavy Trampoline: Mr. Game and Watch bounces lower but the jump deals 16% damage and has a heavier spike property to it. Not as good for recovery.
- Custom 3 - Trampoline Launch: Mr. Game and Watch launches off from the trampoline, ascending up vertically as the jump deals 10% damage. Has no lasting hitbox or parachute.
|
Down Special
Oil Panic
|
Mr. Game and Watch holds a oil drum, which absorbs energy-based projectiles. Up to three can be absorbed and turns into a powerful attack that inflicts 2.8× the accumulated damage of the absorbed attacks, capping to 60%. The oil spill that Mr. Game and Watch releases is not considered a projectile. Physical fire attacks can explode the Oil Drum, destroying any absorbed projectiles in the barrel and resetting it while dealing recoil damage to both Mr. Game and Watch and his opponent, which is 0.7x the damage of the original attack on top of the original attack damage.
- Customs
- Custom 1 - Efficient Panic: Only takes a single projectile to charge up the oil drum, but since it soaked up less damage, it's less powerful and has less range.
- Custom 2 - Panic Counter: Mr. Game and Watch can collect physical energy through countering with the oil drum, able to collect up to three physical attacks and then release it as a burst of exploding oil that deals 2.8× the accumulated damage of the absorbed attacks, capping to 65%. It cannot absorb energy projectiles.
- Custom 3 - Pocket Panic: Mr. Game and Watch can now collect any projectile in his oil drum and release it for 1.5x the original damage, somewhat similar to Villager's pocket, but the reflected projectile will have an angle that Mr. Game and Watch can control via tilting.
|
Final Smash
Risk & Watch
|
Mr. Game and Watch transforms into Risk and Watch, the boss from Devilish Smash Bros., dashing forward with his chainsaw rollers and dealing 15% light or dark damage on contact, swooping across the stage twice. He then pulls opponents together with a vacuum attack before unleashing Judgement Breath, an attack that does all the Judge attacks in a row, dealing a total of 99% damage. Judgement Breath can be avoided with a dodge roll if you managed to be vacuumed with his attack and will deal 12% damage to Mr. Game and Watch. Judgement Breath does not occur on the metered version of this Final Smash, but will occur if the Final Smash is activated via a Smash Ball.
|
| Taunts
|
- Up Taunt - Mr. Game and Watch rings his bell at a high angle. This originates from the Game & Watch's alarm feature.
- Side Taunt - Mr. Game and Watch transforms into a tiny octopus, splashing around as a reference to his old Final Smash and the game Octopus.
- Down Taunt - Mr. Game and Watch sits down and sighs. Originates from the Game & Watch version of Mario Bros. when Mario and Luigi finished a level.
|
| Special Team-Up Names
|
- With Pac-Man: Golden Oldies
- With Geolyte: Flat-Out Weirdos
|
| Alternate Costumes
|
Shadow Bugs Mr. Game and Watch |
| Unlock Conditions
|
| Play on Flat Zone Infinity for 10 Matches.
|
|
Wii Fit Trainer
|
Wii Fit Trainer is the instructor for the game Wii Fit, existing as a guide to do several different poses as well as being a motivator to stay fit. The Wii Fit Trainer can either be female or male, although the default is female. They also have a different voice for each region in the game. Wii Fit Trainer is a odd character who has strange hitboxes to most of their attacks due to their agile nature. While they haven't been completely retooled from the ground up, many of their custom moves are brand new and Deep Breathing has new properties. Additionally, opponents fighting Wii Fit Trainer are gradually treated as lighter characters the longer they fight her, allowing her to kill them at higher percents even if they heal back damage. Wii Fit Trainer also does less damage to them but the knockback is higher, so Wii Fit Trainer can build up a lot of damage with her opponent earlier in the game and then focus on creating a precise killing blow.
|
| Move
|
Description
|
| Entrance
|
Wii Fit Trainer balances on the Wii Fit board before stepping off, with the Wii Fit Board floating away and waving goodbye.
|
Gimmick
Strength Training
|
Wii Fit Trainer has a new gimmick that is meant to capture her role as a teacher better known as Strength Training. Over the course of fighting Wii Fit Trainer, fighters become lighter exclusively to Wii Fit Trainer but will take less damage from her attacks. As such, she can inflict more knockback to them, but her damage onto her opponents will decrease. Small numbers appear above her opponents periodically to reflect her "training", with these numbers only going up as she continues to hit them and can go down if they hit her more.
|
Neutral Special
Sun Salutation
|
Wii Fit Trainer strikes a yoga pose where she raises both hands up, able to charge up a project of solar energy. It can be stored and used later similar to a Charge Shot. This moves heals Wii Fit Trainer by 2% when shot when fully charged up. The move deals 5% damage uncharged and 15% damage fully charged. It has a push back effect as well.
- Customs
- Custom 1 - Enriched Sun Salutation: Wii Fit Trainer's solar projectile shrinks as it charges and only deals 3% damage at it's lowest charge, but will deal 21% damage when fully charged. This will not heal Wii Fit Trainer.
- Custom 2 - Sweeping Sun Salutation: Wii Fit Trainer's solar projectile deals 1.2% damage uncharged and 1.5% fully charged, but can drag opponents as it fires through them, dealing damage on a loop. Additionally, Wii Fit Trainer heals 1% per 50 frames so long as opponents are trapped, which increases the more opponents are trapped.
- Custom 3 - Push Up and Side Plank: Wii Fit Trainer quickly drops to the ground to do a push up, which can drop her instantly to the ground and bury opponents as well as dealing 7% before sweeping to the side to do a side plank that deals 8% damage. Holding the special button allows Wii Fit Trainer to perform another side plank that deals 10% damage.
|
Side Special
Header
|
Wii Fit Trainer hits a green soccer ball with her head. Depending on how long the player holds the special button, it will either travel further or stop closer in range. Additionally, the player can tap the special button when the ball begins to fall to launch it at a different set of angles. As such, the mindgame potential for this move is vast. She can also air dodge out of the attack to drop the ball which can then be launched with other attacks. The headbutt itself deals 15%-10% damage and can meteor smash if clean. Boosts Wii Fit Trainer while in the air. It cannot be used again until Wii Fit Trainer hits the ground.
- Customs
- Custom 1 - Huge Header: Wii Fit Trainer heads a giant red soccer ball with her head. The soccer ball is much larger, but is slower and deals less damage (4-7%). It stays on the stage for a longer time overall, and can hit opponents multiple times if it bounces off the stage and touches the opponent again.
- Custom 2 - Weighted Header: Wii Fit Trainer headbutts a small, silver colored soccerball with her head. The soccer ball deals 10-17% damage and drops much faster to the ground, but stays active for way less time. It also has less range overall due to it's weight.
- Custom 3 - Spine Extension: The Wii Fit Trainer keeps her arms tied around her back as she bows down, doing a small head thrust. This move deals 9% damage and has a sweetspot with Wii Fit Trainer's head bump that makes it do 15% damage and spike.
|
Up Special
Super Hoop
|
Wii Fit Trainer hula hoops around herself to ascend further up. Button mashing will make Wii Fit Trainer ascend higher and faster while tilting the control stick influences the direction Wii Fit Trainer ascends to. The hoops deal 5% damage when falling and can meteor spike, but this is very difficult to do.
- Customs
- Custom 1 - Jumbo Hoop: Wii Fit Trainer hula hoops around herself to cover minimal vertical distance, but covers considerable horizontal distance. Has larger hoops that deal 6% damage. Hard to interrupt as well aside from projectile attacks.
- Custom 2 - Hoop Hurricane: Wii Fit Trainer's hula hoops take on a gold, silver, and bronze color and suck in opponents to deal 2% damage on a first loop before finishing off with a loop that deals 4% damage. Doesn't cover a ton of vertical distance without button mashing, although button mashing will end the looping attack hitboxes early with a spiking attack that deals 4% damage.
- Custom 3 - Bend and Extend: The Wii Fit Trainer bends her knees and then extends them, doing a super high jump that gives her a bit of a float and deals 8% damage to airborne opponent. Press the special button again before hitting the ground to bounce and deal 12% damage with a successive higher bounce.
|
Down Special
Deep Breathing
|
Wii Fit Trainer takes a deep breath, allowing her to deal for 5% damage initially. This also lowers the weight of characters around her by 20% and increases her damage output by 20%. Has a large recharge time. Has a long start up animation. No longer punishes subsequent uses of the move and has an area of effect.
- Customs
- Custom 1 - Breathe In: Wii Fit Trainer breathes in, pulling opponents close in with windboxes before attacking with a swirling wind attack that deals 3% damage on loop for every 40 frames and keeps opponents in hitstun, able to keep opponents in for 60 frames to 4 seconds depending on knockback. The more knockback, the easier it is for them to escape. Wii Fit Trainer can exit from the wind spiral and follow up with other attacks.
- Custom 2 - Breathe Out: Wii Fit Trainer breathes out, pushing opponents away with windboxes before creating two columns, one of solar energy on the right and one of wind energy on the right. The solar column will deal 8% damage, while the wind column blasts opponents into the air and deals 3% damage but a lot of knockback.
- Custom 3 - Spinal Twist: The Wii Fit Trainer drops onto her back, dealing 8% damage and launching foes for a lot of damage before exhaling, bending her right knee, crossing it over to the left, and holding it down to create a area of effect around her that deals 10% damage and bleed, knocking foes away up into the air. She can perform down smashes as well as Push Up and Side Plank easily from this move, although other moves add more frame data to her next attack as she stands up.
|
Final Smash
Wii Fit
|
Wii Fit Trainer extends out her arms in the Warrior pose, emitting several multicolored afterimages forward, with each afterimage dealing 7%-4% damage and launching any opponents hit. The final after image, which covers the most area, deals 25% damage metered and 55% damage unmetered. She can also now move during the Final Smash, with the after images radiating off her as she moves around with a darkened background.
|
| Taunts
|
- Up Taunt - Wii Fit Trainer stretches her arms above her head, saying "Let's get a good stretch."
- Side Taunt - Wii Fit Trainer stretches her shoulders, saying "Stretch those shoulders."
- Down Taunt - Wii Fit Trainer sits down and stretches her legs, saying "Let's stretch our legs."
|
| Special Team-Up Names
|
- With Zero Suit Samus - Body Contrortionists
|
| Alternate Costumes
|
Wii Fit Trainer (Jazzercise) |
| Unlock Conditions
|
| TBA
|
|
Wii Fit U Trainer
|
Wii Fit U Trainer is identical in role to the original Wii Fit Trainer, being a fitness instructor that teaches players how to hold certain poses for strength training or yoga and being a general motivator or giving advice. In Smash, she acts as an Echo Fighter for the original Wii Fit Trainer that scrapes the Strength Training gimmick and utilizes different customs as her default moveset. She has also has some different properties to her moves that can weaken her opponents or enhance her own stats.
|
| Move
|
Description
|
| Entrance
|
Wii Fit U Trainer holds both hands in a almost prayer-like way as she drifts down to the battlefield on top of a Wii Fit board, which pops off from underneath her and waves good bye as she gets into a runner's stance.
|
Neutral Special
Push Up and Side Plank
|
Wii Fit U Trainer quickly drops to the ground to do a push up, which can drop her instantly to the ground and bury opponents as well as dealing 7% before sweeping to the side to do a side plank that deals 8% damage. Holding the special button allows Wii Fit U Trainer to perform another side plank that deals 10% damage.
- Customs
- Custom 1 - Sun Salutation: Wii Fit U Trainer strikes a yoga pose where she raises both hands up, able to charge up a project of solar energy. It can be stored and used later similar to a Charge Shot. This moves heals Wii Fit U Trainer by 2% when shot when fully charged up. The move deals 5% damage uncharged and 15% damage fully charged. It has a push back effect as well.
- Custom 2 - Enriched Sun Salutation: Wii Fit U Trainer's solar projectile shrinks as it charges and only deals 3% damage at it's lowest charge, but will deal 21% damage when fully charged. This will not heal Wii Fit U Trainer.
- Custom 3 - Sweeping Sun Salutation: Wii Fit U Trainer's solar projectile deals 1.2% damage uncharged and 1.5% fully charged, but can drag opponents as it fires through them, dealing damage on a loop. Additionally, Wii Fit U Trainer heals 1% per 50 frames so long as opponents are trapped, which increases the more opponents are trapped.
|
Side Special
Spine Extension
|
The Wii Fit U Trainer keeps her arms tied around her back as she bows down, doing a small head thrust. This move deals 9% damage and has a sweetspot with Wii Fit U Trainer's head bump that makes it do 15% damage and deals the bleed status effect.
- Customs
- Custom 1 - Header: Wii Fit U Trainer hits a blue soccer ball with her head. Depending on how long the player holds the special button, it will either travel further or stop closer in range. Additionally, the player can tap the special button when the ball begins to fall to launch it at a different set of angles. As such, the mindgame potential for this move is vast. She can also air dodge out of the attack to drop the ball which can then be launched with other attacks. The headbutt itself deals 15%-10% damage and can meteor smash if clean. Boosts Wii Fit U Trainer while in the air. It cannot be used again until Wii Fit U Trainer hits the ground.
- Custom 2 - Huge Header: Wii Fit U Trainer heads a giant purple soccer ball with her head. The soccer ball is much larger, but is slower and deals less damage (4-7%). It stays on the stage for a longer time overall, and can hit opponents multiple times if it bounces off the stage and touches the opponent again.
- Custom 3 - Weighted Header: Wii Fit U Trainer headbutts a small, rusty colored soccerball with her head. The soccer ball deals 9-15% damage as well as dealing the rusty status effect and drops much faster to the ground, but stays active for way less time. It also has less range overall due to it's weight.
|
Up Special
Bend and Extend
|
The Wii Fit U Trainer bends her knees and then extends them, doing a super high jump that gives her a bit of a float and deals 9% damage to airborne opponent. Press the special button again before hitting the ground to bounce and deal 11% damage with a successive higher bounce.
- Customs
- Custom 1 - Super Hoop: Wii Fit U Trainer hula hoops around herself to ascend further up. Button mashing will make Wii Fit U Trainer ascend higher and faster while tilting the control stick influences the direction Wii Fit U Trainer ascends to. The hoops deal 8% damage when falling, homing onto opponents.
- Custom 2 - Jumbo Hoop: Wii Fit U Trainer hula hoops around herself to cover minimal vertical distance, but covers considerable horizontal distance. Has larger hoops that deal 6% damage. Hard to interrupt as well aside from projectile attacks.
- Custom 3 - Hoop Hurricane: Wii Fit U Trainer's hula hoops take on a checkerboard, houndstooth, and blue striped pattern and sucks in opponents to deal 1.5% damage on a first loop before finishing off with a loop that deals 6% damage. Doesn't cover a ton of vertical distance without button mashing, although button mashing will end the looping attack hitboxes early with a spiking attack that deals 4% damage.
|
Down Special
Spinal Twist
|
The Wii Fit U Trainer drops onto her back, dealing 8% damage and launching foes for a lot of damage before exhaling, bending her right knee, crossing it over to the left, and holding it down to create a area of effect around her that deals 10% damage and bleed, knocking foes away up into the air. She can perform down smashes as well as Push Up and Side Plank easily from this move, although other moves add more frame data to her next attack as she stands up.
- Customs
- Custom 1 - Breathe In: Wii Fit U Trainer breathes in, pulling opponents close in with windboxes before attacking with a swirling wind attack that deals 3% damage on loop for every 40 frames and keeps opponents in hitstun, able to keep opponents in for 60 frames to 4 seconds depending on knockback. The more knockback, the easier it is for them to escape. Wii Fit U Trainer can exit from the wind spiral and follow up with other attacks.
- Custom 2 - Breathe Out: Wii Fit U Trainer breathes out, pushing opponents away with windboxes before creating two columns, one of solar energy on the right and one of wind energy on the right. The solar column will deal 8% damage, while the wind column blasts opponents into the air and deals 3% damage but a lot of knockback.
- Custom 3 - Deep Breathing: Wii Fit U Trainer takes a deep breath, allowing her to deal for 5% damage initially. This also causes characters around her to gain the sore status effect and increases her speed by 20%. Has a large recharge time. Has a long start up animation. No longer punishes subsequent uses of the move and has an area of effect.
|
Final Smash
Wii Fit U
|
Wii Fit U Trainer extends out her arms in the Warrior pose, emitting several multicolored afterimages forward, with each afterimage dealing 7%-4% damage and launching any opponents hit. The final after image, which covers the most area, deals 25% damage metered and 55% damage unmetered. She can also now move during the Final Smash, with the after images radiating off her as she moves around with a darkened background.
|
| Taunts
|
- Up Taunt - Wii Fit U Trainer sticks out her thumb, stating "Keep it up!"
- Side Taunt - Wii Fit U Trainer stretches with her hands upraised, grunting "Stretching your spine will help stimulate your body!"
- Down Taunt - Wii Fit U Trainer lays on her back and raises her feet, reaching for her toes. She states "Firm up those abs!"
|
| Special Team-Up Names
|
- With Wii Fit Trainer - Trainers of the Fit
|
| Alternate Costumes
|
|
|
| Unlock Conditions
|
| TBA
|
|
Dr. Coyle
|
Dr. Coyle is the director of ARMS Laboratories, and a certified genius. Fascinated with ARMS since she was a young girl, Dr. Coyle was born without them while her friend Max Brass had them. During her research to find the cause of ARMS and to get her own pair, she has seemingly gone mad and is responsible for the creation of the Cell and the dreaded Hedlok, as well as other strange experiments. In Smash, Dr. Coyle is the heavy weight of the ARMS characters and is one of the very few characters to actually lack a proper jump. Her fast dashes can make her a tricky character to fight, and her power is immense, especially if she gets the opportunity to charge up her attacks.
|
| Move
|
Description
|
| Entrance
|
Dr. Coyle cackles as she comes out from seemingly nowhere, before punching her arms fully out towards the camera.
|
| Float
|
Dr. Coyle does not possess a jump, instead floating at all times. This gives her slower descent in air and she can rise higher while on the ground when the player holds the jump button. By letting go of the jump button, Dr. Coyle will begin to drop down until she hits the ground, where she will resume floating. Her Up Specials act as somewhat of a jump instead, which gives her a lot less recovery options than the usual fighter, although she can continue to float off the edge of stages as long as she wants so long as she isn't spiked downwards or isn't knocked down while in this state. She is... very unusual for a Smash fighter, for sure.
|
Neutral Special
Lokjaw
|
Dr. Coyle punches forward with a jab with Lokjaw, which bites opponents and launches them away for 11% damage. The player can either tap the special button to follow up with Dr. Coyle's arm (dealing 11% more damage) or just hold it to charge it, which will launch a projectile that deals 18% damage upon explosion when it makes contact with another opponent.
- Customs
- Custom 1 - Parabola: Dr. Coyle punches forward with the Parabola ARMs, which unfold as she punches them into opponents dealing 9% damage per punch. If held to charge, it will release a shocking effect that causes paralysis.
- Custom 2 - Brrchunk: Dr. Coyle punches forward with the Brrchunk ARMs, which spin forward for 30 frames and deals 17% damage. The charged variant does 18% damage and freezes opponents.
- Custom 3 - Megawatt: Dr. Coyle punches forward with the Megawatt ARMs, which cause opponents to flinch on contact and deals 20% damage. They deal 25% charged and cause paralysis.
|
Side Special
Triple Threat
|
Dr. Coyle charges up, creating a third arm above either her left or right. This is a single use arm that can be used with her Neutral Special, adding an additional set of damage when jabbed forward. The ARM she creates is based off the player's neutral special. Has a bit of a start up, although she can dash while charging so long as the player holds down the button.
- Customs
- Custom 1 - Quadruple Threat: Dr. Coyle takes longer to charge up and cannot dash while charging. When Dr. Coyle charges fully, she creates a second set of arms, which add two additional sets of damage when used to punch with both arms, although the player can jab forward once and follow up with a second arm later to deal the damage. They are one-use attachments.
- Custom 2 - Pulsing Threat: Dr. Coyle charges her body with electricity, causing heavy stun when she attacks with the charge state active for a total of 3.4 seconds.
- Custom 3 - Rusting Threat: Dr. Coyle's ARMs take on a rustic color when she uses this charge move, which will turn her attacks into rust inducing attacks for a single use.
|
Up Special
Deranged Coil
|
Dr. Coyle slams her ARMs into the ground, bouncing into the direction that the player tilts the control stick in. If there is no ground below her, she will just boost via the jet pack on her back instead, which has a total limit of three times she can execute this move if not near something considered ground. It does not give her much vertical direction, but is good for moving horizontally.
- Customs
- Custom 1 - Rearranged Coil: Dr. Coyle slams her ARMs into the ground, boosting herself upwards with a boosted jump, which allows her to float from that position. She also deals 7% damage when executing the move. If there is no ground, she can bounce off opponents or projectiles instead to launch herself, her arms automatically homing to the nearest opponent or projectile, which will give this jump somewhat of a twisted trajectory.
- Custom 2 - Coil Driver: Dr. Coyle's ARMs buzz with energy before releasing it in the form of a jet boost on her back, which allows her to move forward, dealing 9% damage on contact and twirling in the direction of the control stick. Has some start up and doesn't go for very long, but is very quick and fast.
- Custom 3 - Telsa Drive: Dr. Coyle's ARMs buzz with energy before a triangle appears on her back, allowing her to float around faster and higher up into the air. Effects only her movement and floating capabilities.
|
Down Special
Disappear
|
Dr. Coyle guards as she begins to turn invisible, which also lowers her damage intake to 0.7x for a short period of time. She becomes visible after she either attacks again or after 3 seconds.
- Customs
- Custom 1 - Blink Disappear: Dr. Coyle becomes invisible super quickly, but can only stay invisible for a second. Her damage intake is lowered to 0.1x.
- Custom 2 - Mimicry: Master Mummy: Dr. Coyle uses her fighter data to mimic Master Mummy's abilities for 5 seconds. This gives her the ability heal by 1% per 20 frames while blocking via a shield and being immune to attacks that deal flinching.
- Custom 3 - Mimicry: Max Brass: Dr. Coyle uses her fighter data to mimic Max Brass, which causes her arms and body to get slightly bigger as her punches become constantly fully charged for 5 seconds.
|
Final Smash
[NAME REDACTED]
|
Dr. Coyle grabs a opponent and spins them around, teleporting them into a cutscene where they arrive at her home stage in ARMS known as [NAME REDACTED]. She wears Hedlok and begins to pummel them into the ground with 6 arms before firing off a series of powerful laser shots. This move deals 45% damage metered and 100% damage unmetered.
|
| Taunts
|
- Up Taunt - Dr. Coyle holds one of her hands up like a fist, hanging her other one by her side.
- Side Taunt - Dr. Coyle sits down, tearing out pages from her notepad and spreading them everywhere. Can cause opponents to trip.
- Down Taunt - Dr. Coyle puts her head down, laughing manically before punching towards the camera as electricity pulses through her body.
|
| Special Team-Up Names
|
- With Spring Man - Coiling Fighters
- With Min Min - Tasteless and Tasty
|
| Alternate Costumes
|
|
|
| Unlock Conditions
|
| TBA
|
|
Ring Fit Trainer
|
The protagonist of Ring Fit Adventure, who uses a mysterious talking ring to help save the world from a bodybuilding demon named Dragaux. While at first glance she may appear similar to another trainer on the roster, they could not be any more different in how they play or act. Ring Fit Trainer mostly uses projectile attacks even when her attacks appear to be ranged attacks as she is using the Ring to project ghostly arms, torso, legs, and lotuses. She also attack primarily with wind, able to blow or suck opponents in towards her. Constantly moving will also power her up and allow her to deal more damage.
|
| Move
|
Description
|
| Entrance
|
Ring Fit Trainer jogs onto the battlefield before halting and jogging in place.
|
Gimmick
Active Body
|
When the Ring Fit Trainer is moving, different parts of their body will light up as if it's aflame, typically the hair. You want to be moving as much as possible as the part of the body that are considered active and aflame will gain additional power while attacking. Not preparing these parts of the body before attacking will not do as much damage. If you stop moving at any point, the effects will flicker off and you need to build them up again.
|
Shield
Ab Guard
|
The Ring Fit Trainer holds the Ring towards her abs, creating a guard that requires the player to continue to hold down against attacks to minimize the damage it would normally do. It can reduce up to 80% of the damage and cancel knockback so long as the player has held down the Ab Guard for 25+ frames. However, holding too long will cause the Ab Guard to shatter.
|
Neutral Special
Air Ring
|
The Ring Fit Trainer creates a blast of air from the Ring that deals 4% damage and can be tilted. Tilt down to blast the Ring Fit Trainer into the air, allowing you to jump again two more times. A unique property of this move is it's windbox that pushes opponents back. It can also instantly break crates and other capsule items without having to pick them up.
- Customs
- Custom 2 - Air Vortex: The Ring Fit Trainer pulls out the ring to pull opponents and objects with a wind vortex. Projectiles caught in the vortex will heal a minimal amount of damage to the Ring Fit Trainer.
- Custom 2 - Paddle Ring: The Ring Fit Trainer transforms the ring into a set of paddles, dealing 5% damage with each swing forward as water rises under her feet. It is easy to combo into given the right timing, as successfully keeping in rhythm will grant superarmor at the beginning of the paddle animation.
- Custom 3 - Wing Ring: The Ring Fit Trainer transforms the ring into a set of wings, allowing her to dash into opponents for 10% damage, causing significant knock-back and stunning the Ring Fit Trainer afterwards. When used in the air, it allows the Ring Fit Trainer to glide horizontally without loosing much momentum.
|
Side Special
Bow Pull
|
Ring Fit Trainer stretches out the Ring like a bow and then releases, pushing out a red hand from above that slams into the opponent from above for 8-13% damage depending on how long the player waits before releasing. A line of sight is created while charging, showing the opponent targeted. Ring Fit Trainer can target multiple opponents if they get in the line of sight before executing the move. Once targeted, the hand will slam down on the opponent even if Ring Fit Trainer is far from them. Can be shielded. Can spike opponents.
- Customs
- Custom 1 - Tree Pose : Ring Fit Trainer holds the Ring up and balances on a single foot. She leans in the direction that the player tilts the control stick, dealing damage with a falling green lotus that deals 8% damage.
- Custom 2 - Front Press: Ring Fit Trainer squats down and squeezes down the ring to send out a flaming fist from the ground to punch opponents for 11% damage, dealing low knockback.
- Custom 3 - Warrior Pose III: Ring Fit Trainer holds the ring in front of her as she balances on a foot, attacking with a falling lotus that deals 10% damage and can act as a ducking lunge to avoid tall projectiles.
|
Up Special
Overhead Lunge Twist
|
Ring Fit Trainer holds the Ring in her hands and then twists to make the torso she's generating fit and swole. The longer the player holds the button, the more fit the torso will be and deal more damage. She can deal 6-13% damage with it. The torso swings down similar to a hammer.
- Customs
- Custom 1 - Abdominal Press: Ring Fit Trainer holds the ring to her stomach, pressing onto it before letting go and releasing a torso of varying size away from her horizontally. The longer held down, the bigger it'll be. Deals 10% damage irregardless of size.
- Custom 2 - Squat Goals: Ring Fit Trainer squats down and then jumps up into the air, jumping higher depending on the level of charge. While it won't deal damage, she can get quite a lot of air off the ground and interrupt airborne opponents to put them in a state of helplessness.
- Custom 3 - Knee to Chest: The Ring Fit Trainer gets on the ground and pulls her knees to her chest and then kicks out. If connected, she deals 5% damage with the kick and 10% damage with the yellow torso that hammers the opponent into the ground, burying them.
|
Down Special
Hinge Pose
|
A green aura sphere appears around Ring Fit Trainer as she does the hinge pose, attaching green lotuses to her opponents that touch it. She then pulls the Ring down to deal 7-12 damage depending on the timing. It can also spike as well as be guarded against.
- Customs
- Custom 1 - Chair Pose: The Ring Fit Trainer steadies herself and sticks her lower back out as she lifts and lowers the Ring to create a green lotus that slams into the opponent from below and above, dealing 6% damage each time. The lotus is created anywhere in a space of two character lengths and can spike a opponent or knock them upwards.
- Custom 2 - Squat: The Ring Fit Trainer squats down and then pulls up to unleash a blue foot that deals 5-11 damage depending on the level of charge before releasing, kicking the opponent upwards.
- Custom 3 - Thigh Press: The Ring Fit Trainer holds the Ring between her legs and squeezes it together before releasing in the form of a homing foot that attacks from above, spiking opponents to deal 6-9 damage depending on how long Ring Fit Trainer holds the move for.
|
Final Smash
Roll Ring
|
The Ring Fit Trainer lifts the ring over her head as a platform appears underneath her, allowing her to roll ahead into opponents and block low attacks while doing so. When hitting opponents, she will stun and knock them back, dealing 12% damage unmetered or 6% damage metered on contact. She can also twist around the platform to reverse direction. She cannot jump though or go off ledges. She also gain invincibility when unmetered.
|
| Taunts
|
- Up Taunt - Ring Fit Trainer jogs quietly in place, her body becoming alit and aflame.
- Side Taunt - Ring Fit Trainer squeezes the Ring in a little, the muscles in her back glowing aflame.
- Down Taunt - Ring Fit Trainer holds the Ring above her and then pulls back a bit, with her upper half glowing completely aflame.
|
| Special Team-Up Names
|
- With Wii Fit Trainer - Exercise Masters
|
| Alternate Costumes
|
|
|
| Unlock Conditions
|
| Play every minigame mode once.
|
|
Silver Zin
|
Silver Zin is a dimension traveling Herald hailing from the Zaxinian Lifts, being a former dictator of it before he was frozen in time. When he awoke, he lost his memories and ended up becoming a hero of the Lifts, if somewhat reluctantly. He holds great power, but his true passion is his own mind and time to reflect on. In Smash, he uses his dark but mighty powers to battle, using various techniques over his many adventures that he has honed himself that range from dark magic attacks to hypnotic pendulum attacks. Silver is a fairly frail character that mostly attacks from a distance, although he has options for melee encounters as well.
|
| Move
|
Description
|
| Entrance
|
Silver Zin appears from a black portal with x-shaped particles emitting from it, looking somewhat uninterested in the fight.
|
Neutral Special
Devil's Snatch
|
Silver Zin sends out a shadowy hand that can grab items and ledges and pull Silver towards them. He can also pull himself into foes, following up with a dark magic blast from his Mind Weaver, dealing 6% damage. This move has a small range while on the ground, while in the air it goes a further distance and homes in on opponents.
- Customs
- Custom 1 - Devil's Bringer: Silver Zin brings the foe to him instead, while dealing no damage. Can be followed up with any attack.
- Custom 2 - Asphyxia Blessing: Silver Zin releases a small light ball that travels across the ball and explodes for 11% damage when the player lets go of the button. Requires the button to be held down. Can be safely cancelled.
- Custom 3 - Obsidian King: Silver Zin sends out a dark pulse that travels across the ground for a limited distance, leaving Silver Zin open while he executes the attack. This dark pulse, when it finds a opponent, slashes at them in a frenzy of black energy sword attacks for 14% damage.
|
Side Special
Darkness Draw
|
Silver crouches before sliding forward and performing a back flip near his starting posistion when he hits an opponent to deal 8% damage. It is a reliable launch move and allows Silver to quickly move into other attacks after performing it, however it has a start up animation that makes it easy to tell when Silver is about to use it and is unreliable for horizontal recovery.
- Customs
- Custom 1 - Lightning Spear: Silver forms a lightning spear from his palm and fires it horizontally to deal 7% damage. It lasts around 3 seconds before dying out. Up to three can be fired at a time.
- Custom 2 - Dark Duke: Silver holds out his hand, shaking as a shadow trails across the ground, joling nearing fores to paralyze foes and deal 5% damage. In the air it will launch from a portal as a shadowy arm that grabs foes and then swings them down for 8% damage.
- Custom 3 - Negative Blast: Silver will glide to the side with rapidly increased movement, holding his hands out as a magical ball of darkness charges. Silver can hurl it forward by letting go of the button, dealing 4-11% damage depending on the charge, or deal 5-12% damage if he collides into a opponent, which will also harmlessly knock him back.
|
Up Special
Weaver Slash
|
Silver cuts forward with his Mind Weaver weapon in multiple strikes, dealing 8-11% damage. The player can continually tap the button to continue the combo if wanted, which will deal 3% damage per strike. It can also be used to block melee attacks. If a projectile hits it, it will generate an explosion that damages for 12%.
- Customs
- Custom 1 - Weaver 13: Silver slashes forward with the Mind Weaver, dealing three slashes before slamming the Mindweaver into the opponent's stomach and erupting a dark magic spell into their sternum, with the full attack dealing 14% damage, but can be interrupted by other attacks.
- Custom 2 - Ink Queen: Silver punches his arm forward, a jet of black magic coming underneath him that allows him to dodge attacks as well as deal an uppercut attack that deals 11% damage. He gains superarmor while going up. Not quite an effective recovery move.
- Custom 3 - Hanging Zin: Silver's body hangs limply as it goes back and forth like a pendulum, floating upwards as it does so. It can be moved in any direction, but Silver snaps out of it after 3.5 seconds. Each pendulum swing does 5-9% damage.
|
Down Special
Mind Weaver Store
|
Silver taps down the Mind Weaver, which releases a magnetizing spear of light that pulls projectiles towards it and then stores it. When Silver does this move again, it will release the released projectiles in his direction, dealing 1.3x the damage of the original projectiles.
- Customs
- Custom 1 - Sadistic Nightmare: Silver clicks his tongue and a pendulum will appear over the nearest opponent. Silver can then continue to tap the special button in rhythm to the pendulum while standing still to inflict nightmarish hallucinations that both increase the knockback the opponent does as well as slow down their speed. The effect will persist even after Silver is hit out of effecting the pendulum's effects until the opponent either is knocked to the ground or after 500 frames.
- Custom 2 - Ebony Rook: Silver generates a bunch of black bricks which he then telekinetically launches into his opponent to deal 7-11% damage.
- Custom 3 - Eruption: Silver releases dark pulsing energy bombs that explode in a big pulse of darkness (dealing 21-27% damage) and leave fire on the ground in their wake. The explosions can harm Silver too, so this is a risky move!
|
Final Smash
Master's Pendulum
|
Silver Zin uses his Zaxinian Sage Badge to transform into Suzerain Silver, who ties his opponents in chains and slams them together like some sort of sadistic set of pendulums, before launching them off the stage. He can also move their position in all directions. In the metered version of this Final Smash, only the first part of this Final Smash occurs where all the opponents are tied together and then slam together, dealing 35% damage to all opponents involved.
|
| Taunts
|
- Up Taunt - Silver hums to the tune of Metallica's "Orion" as he straightens out his robes, removing wrinkles.
- Side Taunt - Silver pulls out a canister of Hell Ramen, slurping out a couple of noodles before resuming his idle stance.
- Down Taunt - Silver leans back and floats for a bit before falling down on his back, groaning as he telekinetically pulls up his limp body back to his idle.
|
| Special Team-Up Names
|
- With Robin - Twilightborne
|
| Alternate Costumes
|
|
|
| Unlock Conditions
|
| TBA
|
|
Bunea
|
Bunea is a thief who finds herself on odd adventures to save her universe, which was all mostly bottled up by the Mistress of Weird. Bunea is a fairly easy going character who can flirt with most of her biggest opponents or attack them and take their souls for her own. Either way, she leads quite the interesting life. In Smash, Bunea is a character that has a lot of aerial power, with a lot of her moves providing aerial recovery and has a variety of jumps similar to Mario. Her moves generally differ depending on the situation, although she moves quick and flashy. She has a lightweight, requiring players to dodge their opponents attacks with speed and grace while using Bunea's other tools to inflict damage.
|
| Move
|
Description
|
| Entrance
|
Bunea dashes out from a world gate, looking kind of confused before readying for battle.
|
Neutral Special
Dash
|
Bunea's trademark dash move allows her to move quickly forward while dodging attacks. She can do it in the air to gain horizontal recovery at a set distance both forward and back. She cannot gain more distance while in the air than the first time she dashes forward, instead dashing back when the move is pressed again. While in the move, she can dodge just about any attack she dashes through, including projectiles and melee attacks. She can also dash again with little start up, but her hurtboxes return as soon as she exits the animation.
- Customs
- Custom 1 - Shoulder Dash: A heavier dash that allows Bunea to deal damage via a shoulder charge. She deals 8% damage when she connects and can launch lightweights and stun heavyweights. The dash ends when she either connects with her opponent or after the end of the animation. The player can continue the dash when on the ground by tapping the special button, although this will ignore ledges. In the air, she will drop slowly while performing the move.
- Custom 2 - Parry Dash: Bunea changes into her Regal Form and performs the Parry Dash, charging the Dragonstar shield forward. The dash will parry any attack it goes through during the 95 frames it's active for, following up with a parry attack that deals 20% damage flat regardless of the attack. Will kill projectiles.
- Custom 3 - Comet Dash: Bunea changes into her Nova Form and peforms the Comet Dash, a floating dash that deals 12% damage on impact and allows her to keep charging forward, launching lightweights and stunning heavyweights. Unlike her other dashes, Bunea has end-lag at the end of her dash that allows her to be punished.
|
Side Special
Rippertide
|
Bunea spins rapidly in a lunge, holding out a dagger that deals 6-7% damage. She can continue to do this while in the air, although her distance will begin to decrease as her gravity pushes her down. While on the ground, she follows up with a knife attack that deals 3-4% damage.
- Customs
- Custom 1 - Lunatide: Bunea spins rapidly forward as she switches into her Nova Form, launching off a powerful cannon attack that deals 25% damage. This move has a lot of start up and will decrease the rate of damage that Bunea deals by 0.7x for the next 7 seconds as she switches out.
- Custom 2 - Dragonstar Charge: Bunea switches into her Regal Form, charging forward with the Dragonstar and dealing 15% damage as she plows through foes, knocking them back. It also guards against both melee and projectile attacks.
- Custom 3 - Shift Trickster: Bunea switches into her Shift Form, kicking her foot out near a opponent. If it makes contact, she teleports behind them to deal a swift 10% damage kick to their back that can spike foes or bury them. Will render Bunea helpless in the air.
|
Up Special
Lancer Leap
|
Bunea jumps upwards, firing off a shot from the Lancer that shoots diagonally downwards with an better homing effect that deals 7% damage.
- Customs
- Custom 1 - Balloonagus: Bunea pulls out a Balloonagus, which inflates her hood like a balloon and carries herself upwards via the hood balloon. It deals 4% damage on aerial opponents but pops when attacked. Bunea does not drop into a helpless state when it is popped, although she will end up in that state after a dash.
- Custom 2 - Logzuna Drop: Bunea pulls out the Shifter Axe, going high up in the air as she spins before dropping a log down on foes that deals 10%. She can Dash at the apex of the jump after releasing the log.
- Custom 3 - Jelly Bounce: Bunea jumps on the top of a Jelly Shelly Shell, which can boost her with a third jump. The shell propels forward in the direction she was facing, dealing 5% damage on hit.
|
Down Special
Reaction Command/Dexa Blast
|
When near a opponent, Bunea can do a variety of Reaction Commands that range from command grabbing the opponent and dealing 5% damage per hit with a multi-hitting stab move, or countering the opponent by kicking their projectile back to them or catching the blade and following up with a swift kick. If Bunea has nothing to interact with, she instead uses Dexa to fire a laser that deals 3% damage each 30 frames as she aims it up and down.
- Customs
- Custom 1 - Reflect Bubble: A reflective bubble surrounds Bunea as she switches to her Regal Form, reflecting projectiles for 1.5x of their original damage. She can break the shield early to deal 12% damage to nearby foes.
- Custom 2 - Bunea Whirl: Bunea charges up energy in her Nova Form and releases it in the form of a homing laser disc that can deal 12-25% damage depending on the charge. The more powerful it is, the less homing property it has.
- Custom 3 - Sleep: Bunea brings out a pillow and lays it on the ground as she recovers 2% health per 20 frames when asleep. Has some start up and puts Bunea in a healing Sleep state, which prevents her from doing anything. Holding down the button will make Bunea sleep for longer. Very punishable.
|
Final Smash
Motorblade
|
Bunea brings out the Motorblade, a gift from Camila. She slashes forward with it in a series of increasing slashes as a style meter appears on the screen, before finishing it off by running down her foes in the weapon's motorcycle form. It deals 100% damage umetered and 45% damage metered.
|
| Taunts
|
- Up Taunt - Bunea squishes a Borb inbetween her index and thumb.
- Side Taunt - Bunea stretches out her arm and performs a snap with her fingers before twirling around and winking.
- Down Taunt - Bunea shakes her finger sternly before crossing her arms.
|
| Special Team-Up Names
|
- With Silver Zin - Insiders to Souls
- With Sans - Fast Dodgers
- With Sora - Seekers of the Heart
- With Dante - Style Fanatics
- With Wario - Charge-O-Maniacs
|
| Alternate Costumes
|
|
|
| Unlock Conditions
|
| TBA
|
|
Mega Man
|
Mega Man, known as Rock Man in Japan and also known by the nickname the Blue Bomber is a robot-fighting robot created by Dr. Light. Mega Man is able to copy the abilities from the Robot Masters he defeats and has grown quite the database over a period of years, with new entries coming hot off Mega Man 11. Mega Man has had his fundamentals changed a bit with a new way to do his charge shot and slide, but overall his moves have been buffed and his weight has been made somewhat lighter. He still is a mostly projectile based fighter, but is able to chain his attacks together to make him more dangerous.
|
| Move
|
Description
|
| Entrance
|
Mega Man warps down on to the stage, similar to how he does so in the classic Mega Man games.
|
Jab
Mega Buster
|
Mega Man's jab attacks are replaced with the Mega Buster, which fires projectiles that deal 5% damage. Uniquely, Mega Man can charge his jab by holding down the attack button, which will charge the projectile to deal 6-12% damage depending on how long the charge is held. Additionally, Mega Man can move while charging, although he cannot attack until he releases the charge. His body will charge with electricity pulsing off it as his body begins to flash light blue.
|
Down Standard Attack
Slide
|
Mega Man can pull off a slide by either inputting down + the standard attack button or by crouching and then attacking. This is uniquely the only move Mega Man can pull of while charging his jab and he can do it multiple times. It acts as somewhat of a horizontal recovery in the air, although the range is short. It deals 7% damage.
|
Neutral Special
Metal Blade
|
Mega Man sends out a spinning saw blade which deals 4% damage and can be thrown in 8 directions. The blade can fall onto the ground and become a object, dealing 8% damage if thrown again. Mega Man can send out two at a time and it is a valuable tool for edge guarding and initiating shield break combos.
- Customs
- Custom 1 - Hyper Bomb: Mega Man throws a bomb and will explode on contact with the ground or enemy. It has an arcing motion and deals 10-8% damage.
- Custom 2 - Shadow Blade: Mega Man throws a shuriken that has a boomerang effect, returning to the same position it was thrown from. Deals 8% damage, cannot stick on the ground, has less range, can be thrown in eight directions.
- Custom 3 - Guts Block: Mega Man performs the Super Arm, summoning a giant brick block that he can then throw in an arc that deals 12% damage.
|
Side Special
Crash Bomber
|
Mega Man throws a grappling bomb attached to a drill that latches on to any surface or fighter it touches, dealing 16% on explosion. Like the Gooey Bomb, it can be transferred between players on contact. Mega Man can now detonate the bomb early by attempting to use the move again. It can be latched onto the ground as well. It is also useful in competitive play for forcing the opponent to either shield or run towards Mega Man.
- Customs
- Custom 1 - Ice Slasher: Mega Man fires an arrowhead-shaped ice projectile that deals 4% damage but can go through multiple enemies and also freeze them on contact, provided that they have sustained a moderate amount of damage beforehand.
- Custom 2 - Danger Wrap: Mega Man fire an explosive projectile that arcs steeply upwards, dealing 3% damage on multiple hits before exploding on the end of it's animation. This has KOing power but is harder to use.
- Custom 3 - Chain Blast: Mega Man throws a bomb into the air that floats on the screen. Mega Man can chain up to four bombs in a chain, with each bomb dealing 6% damage and exploding on contact. When multiple bombs are chained together, they explode in a chain. A powerful anti-air and stage control device.
|
Up Special
Rush Coil
|
Mega Man jumps off Rush, who has a spring on his back. A second bounce will make Mega Man jump even higher than the first bounce. Other players will also be able to bounce on Rush, even if he is in the air. Mega Man is unable to summon Rush again until he lands, or is hit by an attack after using it.
- Customs
- Custom 1 - Tornado Hold: Mega Man drops a spinning fan on the ground that hits multiple times for 1% on the sides and 2% damage in the center. When used in the air, it will propel Mega Man a bit further into the air. Can combo into other attacks.
- Custom 2 - Beat: Mega Man blows a whistle calling for Beat, which he grabs onto as he lifts him upwards with greater horizontal distance but less speed than the Rush Coil. Can help Mega Man fly under Final Destination.
- Custom 3 - Rush Jet: Mega Man hops onto Rush, able to ride onto him like a sled. The player can make Rush fly higher or lower by tapping the special button. Mega Man is able to use his jab while using Rush Jet, able to fire pellets at his usual rate. Rush Jet last for 2.4 seconds.
|
Down Special
Leaf Shield
|
Mega Man has a bunch of leaves surround him electromagnetically and blocks projectiles. He deals 4% damage on contact and can rush it forward to deal a multi-hit attack that deals 5% damage per hit. Works with grabs. Can hit up to four times.
- Customs
- Custom 1 - Skull Barrier: The Skull Barrier does no damage on contact and is weaker when thrown, dealing only 2% damage each hit. It can continue forward unlike the Leaf shield which has one of it's leaves fall off on each hit.
- Custom 2 - Plant Barrier: The Plant Barrier deals 6% damage on contact and 8% damage per hit when thrown, but it's distance is very short. It also is slow. The leaves do not vanish upon hit.
- Custom 3 - Acid Barrier: Mega Man has an acid barrier surround him as his standard jab is transformed into acidic projectiles that kill shields much faster and deal 5% damage. The acid shield kills projectiles and deals 5% damage on contact, but will only halve the damage Mega Man takes from attacks.
|
Final Smash
Mega Legends
|
Mega Man fires a Black Hole Bomb, Galaxy Man's weapon from Mega Man 9, in front of him. This sucks in nearby opponents and teleports them into a cutscene where Mega Man and his various other incarnations (Mega Man X, Mega Man Volnutt, Mega Man .EXE, Geo Stelar, and Bad Box Art Mega Man) fire a giant laser that deals 45% damage metered or 100% damage unmetered.
|
| Taunts
|
- Up Taunt - Mega Man changes his outstretched hand into a Mega Buster, then pumps his Buster arm.
- Side Taunt - Mega Man turns and strikes a pose with his back facing the camera as he smiles.
- Down Taunt - Mega Man warps out of and immediately back onto the stage, similar to his teleporting animation in the classic Mega Man games. Can now be used to dodge projectiles like his original game.
|
| Special Team-Up Names
|
- With Roll - Robot Blasters
|
| Alternate Costumes
|
Mega Man now transforms his body similar to Mega Man 11 for most of his special attacks, although this comes at the cost of having no alternative outfits beyond the Master Shadow costume. These do not effect the colors of his costume, so palette swaps for Mega Man still exist.
Master Shadow Mega Man |
| Unlock Conditions
|
| TBA
|
|
Quint
|
Quint is Mega Man from a future where Wily had reformed and become peaceful. Wily from the past comes into this future and convinces his future self to abduct and reprogram Mega Man and send him into the past to defeat Mega Man during the events of Mega Man II and Mega Man V, titles of the Game Boy system that have their own versions of events and characters. Quint plays more or less identically to Mega Man, but has two new moves. The first is his trademark Sakugarne, which acts as a jackhammer and pogo stick and gives him unique new options that are primarily air-based and melee based, allowing him to spike opponents and deal damage through shockwaves. His other new move is the Magnet Missile, which allows him to have a homing projectile attack. Additionally, he does not fire charge shots, but rather a charged swing of energy.
|
| Move
|
Description
|
| Entrance
|
Quint warps down on to the stage on top of Sakugarne, hopping off as he holds it to his side.
|
Jab
Mega Buster
|
Quint's jab attacks are replaced with the Mega Buster, which fires projectiles that deal 5% damage. Quint can charge his jab by holding down the attack button, which will instead launch a laser sword that has close melee range that deals 4-10% damage depending on how clean the hit was and how long Quint was charged for. Additionally, Quint can move while charging, although he cannot attack until he releases the charge. His body will charge with electricity pulsing off it as his body begins to flash light green.
|
Down Standard Attack
Slide
|
Quint can pull off a slide by either inputting down + the standard attack button or by crouching and then attacking. This is uniquely the only move Quint can pull of while charging his jab and he can do it multiple times. It acts as somewhat of a horizontal recovery in the air, although the range is short. It deals 7% damage.
|
Neutral Special
Shadow Blade
|
Quint throws a shuriken that has a boomerang effect, returning to the same position it was thrown from. Deals 8% damage, cannot stick on the ground, has less range, can be thrown in eight directions.
- Customs
- Custom 1 - Hyper Bomb: Quint throws a bomb and will explode on contact with the ground or enemy. It has an arcing motion and deals 10-8% damage.
- Custom 2 - Metal Blade: Quint sends out a spinning saw blade which deals 4% damage and can be thrown in 8 directions. The blade can fall onto the ground and become a object, dealing 8% damage if thrown again. Quint can send out two at a time and it is a valuable tool for edge guarding and initiating shield break combos.
- Custom 3 - Guts Block: Quint performs the Super Arm, summoning a giant brick block that he can then throw in an arc that deals 12% damage.
|
Side Special
Magnet Missile
|
Quint throws a projectile that goes across horizontally until it finds a opponent, and then speeds down onto the opponent vertically. This move deals 8% damage and has a homing effect, although it loses it's homing effect when it begins to move up or down in a vertical direction. Effective for either on the ground or in the air for Quint, the one draw back for this move is that it can easily be dodged. Quint can send out three at a time.
- Customs
- Custom 1 - Ice Slasher: Quint fires an arrowhead-shaped ice projectile that deals 4% damage but can go through multiple enemies and also freeze them on contact, provided that they have sustained a moderate amount of damage beforehand.
- Custom 2 - Danger Wrap: Quint fires an explosive projectile that arcs steeply upwards, dealing 3% damage on multiple hits before exploding on the end of it's animation. This has KOing power but is harder to use.
- Custom 3 - Chain Blast: Quint throws a bomb into the air that floats on the screen. Quint can chain up to four bombs in a chain, with each bomb dealing 6% damage and exploding on contact. When multiple bombs are chained together, they explode in a chain. A powerful anti-air and stage control device.
|
Up Special
Tornado Hold
|
Quint drops a spinning fan on the ground that hits multiple times for 1% on the sides and 2% damage in the center. When used in the air, it will propel Quint a bit further into the air. Can combo into other attacks.
- Customs
- Custom 1 - Treble Coil: Quint jumps off Treble, who has a spring on his back. A second bounce will make Quint jump even higher than the first bounce. Other players will also be able to bounce on Rush, even if he is in the air. Quint is unable to summon Treble again until he lands, or is hit by an attack after using it.
- Custom 2 - Treble Rescue: Quint blows a whistle calling for Treble, which he grabs onto as he lifts him upwards with greater horizontal distance but less speed than the Treble Coil. Can help Quint fly under Final Destination.
- Custom 3 - Treble Jet: Quint hops onto Treble, able to ride onto him like a sled. The player can make Quint fly higher or lower by tapping the special button. Quint is able to use his jab while using Treble Jet, able to fire pellets at his usual rate. Treble Jet lasts for 2.4 seconds.
|
Down Special
Sakugarne
|
Quint's trademark move has him hop onto a jackhammer/pogo stick hybrid. Quint is only able to move through jumping, although while in the air Quint is able to drop down quickly with the special attack button and deal 13% damage, meteor smashing opponents below. If he does this against grounded opponents, he can bury them into the ground. Quint can press the special attack button to drill on the ground and create shockwaves that deal 5% damage and stuns foes.
- Customs
- Custom 1 - Skull Barrier: The Skull Barrier surrounds Quint in four skulls that circle around him like a shield. It does no damage on contact and is weaker when thrown, dealing only 2% damage each hit. It can continue forward unlike the Leaf Shield which has one of it's leaves fall off on each hit.
- Custom 2 - Plant Barrier: The Planet Barrier surrounds Quint in four spotted leaves that circle around him like a shield. The Plant Barrier deals 6% damage on contact and 8% damage per hit when thrown, but it's distance is very short. It also is slow. The leaves do not vanish upon hit.
- Custom 3 - Acid Barrier: Quint has an acid barrier surround him as his standard jab is transformed into acidic projectiles that kill shields much faster and deal 5% damage. The acid shield kills projectiles and deals 5% damage on contact, but will only halve the damage Quint takes from attacks.
|
Final Smash
Mega Man Killers
|
Quint fires a Black Hole Bomb, Galaxy Man's weapon from Mega Man 9, in front of him. This sucks in nearby opponents and teleports them into a cutscene where Quint and the Mega Man Killers (Enker, Punk, and Ballade) attack them with their respective weapons, dealing 45% damage metered or 100% damage unmetered.
|
| Taunts
|
- Up Taunt - Quint pulls out Sakugarne, tapping it on the head as he points to his opponent.
- Side Taunt - Quint twists his buster to reveal a blue blast of energy.
- Down Taunt - Quint takes off his helmet to reveal his hair, similar to how Mega Man did in his original games.
|
| Special Team-Up Names
|
- With Mega Man - Time-Crossed Rivals
|
| Alternate Costumes
|
|
|
| Unlock Conditions
|
| TBA
|
|
Roll
|
Roll is a helper robot created by Dr. Light to do chores and maintenance around the lab. Being one of the very few female characters introduced in the Classic Megaman series, Roll is a fan favorite due to her supportive personality and would be reflected in other Megaman media with other Roll variants, such as Roll Caskett. In Smash, Roll has many of the same mechanics as Megaman does, but uses her broom instead of a mega buster, giving her melee attacks over the blue bomber. Additionally, her moves give her a lot of different options for follow-ups, able to inflict different status effects onto her opponents as well as having several anti-air and edge guarding options. Roll knows how to keep a battlefield tidy even on it's roughest day.
|
| Move
|
Description
|
| Entrance
|
Roll warps down on the stage, sweeping with a broom absentmindly before suddenly realizing where she is, spinning the broom and getting into a combat stance.
|
Jab
Roll Broom
|
Roll's jab attacks are to whack opponents with a giant broom, which has a longer range than most standard attacks, dealing 5% damage on the swing. Roll can charge up the broom by holding down the attack button, which will replace the whacking attack with a charged broom thrust that travels across the ground, gathering dust to become more powerful, dealing 8% melee damage when fully charged and can do up to 16% damage if it travels far enough before hitting opponents as a ground based projectile. Roll cannot attack while charging the move, with electricity pulsing off her body as it flashes light red.
|
Down Standard Attack
Slide
|
Like Mega Man, Roll can pull off a slide by either inputting down + the standard attack button or by crouching and then attacking. This is uniquely the only move Roll can pull off while charging her jab and she can do it multiple times. It acts as somewhat of a horizontal recovery in the air, being longer in distance than Mega Man's but deals only 4% damage.
|
Neutral Special
Roll Broom Swing
|
Roll swings her broom with all her might, able to reflect projectiles and knock down opponents for 8% damage. She can then follow up with a sweeping jab that deals 10% damage for knocked down opponents, which will bury them into the ground.
- Customs
- Custom 1 - Roll Buster: Roll fires from her Roll Buster, which takes a longer time to shoot out shots but are more powerful as a result, dealing 8% damage per pellet. Roll can fire 2 pellets per second, and can contentiously fire while moving, although executing a different move will add frame data to the next move she executes.
- Custom 2 - Exploding Bouquet: Roll pulls out a bomb disguised as a bouquet of flowers and tosses it in an arc, which explodes upon contact with a opponent, projectile, or ground. It deals 10% damage and is effective as a anti-air option.
- Custom 3 - Water Balloon: Roll releases a water balloon, Aqua Man's special weapon from Mega Man 8. The water balloon deals only 6% damage and causes the wet effect, but Roll can release many water balloons at once, which have a delay when fired before they begin to drop down. It's a good aerial move to hit opponents down below.
|
Side Special
Rocket Broom
|
Roll gets on her broom, which boosts forward. By tilting the control stick in any direction, the player can briefly control Roll on the broom, able to make her travel upwards as well as speed forwards. She deals 6% damage and meteor smashes opponents while in the air when she collides with them. The broom is only active for up to 1.5 seconds before Roll falls down. If she attempts to do the move again before reaching the ground, she will become helpless but she can follow up with literally any of her other attacks while in this state. A pretty good recovery move.
- Customs
- Custom 1 - Rush Drill: Roll hops into Rush, who transforms into a drill and pierces opponents with a 15% damage attack. It's slow and doesn't have a lot of momentum, but can deal a lot of damage at close range.
- Custom 2 - Super Arrow: Roll fires a Super Arrow from Mega Man 5 that deals 4% damage, but can also stick to platforms and opponents to create platforms for Roll. Additionally, while on a Super Arrow, Roll can press down to then swing around it, dealing 9% damage. The Super Arrow stays active for 5 seconds before disappearing. Roll can fire up to three.
- Custom 3 - Mega Ball: Roll fires a Mega Ball from Mega Man 8, which drops onto the ground. When Roll touches it, she kicks it for 10% damage, and it can bounce off walls and platforms to increase it's power. Pressing up while kicking it will kick it even higher, making it somewhat powerful for anti-air.
|
Up Special
Roll Splash
|
Roll grabs a bucket of water, creating a arc of water that deals 3% damage and makes foes wet. It also blows them back and can be used to edge-guard, as it will cause opponents hanging on the ledge to slip off. Additionally, it creates a puddle on the ground that will guarantee opponents slip and deal 3% damage to themselves. While on the surface, it appears to be one of Roll's weakest moves and doesn't even have recovery potential, it's a incredibly powerful move if you know how to use it.
- Customs
- Custom 1 - Beat Plane: Roll calls Beat to turn into a plane, propelling her up into the air for up 2 seconds, able to turn and ascend via the control stick. Roll cannot deal damage with this attack, only serving to recover.
- Custom 2 - Pop 'n Beat: Roll calls into Beat, who transforms into a car. The car is able to deal 6% damage via twirling attacks with the special button and can jump into the air, with a small glide. It can only jump once in the air and all of Roll's other attacks are restricted. Roll can cancel via the shield button.
- Custom 3 - Eddie: Roll calls in Eddie, who drops bombs that deal 7% damage each when summoned, walking forward in the direction Roll is facing when he appears. Due to the frame data between the call and Eddie appearing, it is possible to switch Roll's direction and the direction that Eddie faces between the two actions. Eddie drops a total of five bombs before disappearing. He can be killed early, having 30% health. If Eddie is killed, Roll cannot call him for 3 seconds.
|
Down Special
Time Slow
|
Using the power from Time Man from Mega Man: Powered Up, Roll is able to slow time around her after a brief pause, creating a chronobox that slows opponents down when they enter the radius. Roll can follow up with any attack if she wishes while her opponents are trapped inside. Additionally, this attack will fire two clock hands if charged, one at an upwards angle, and the other at a downwards angle. These can spike and launch opponents for 12% damage.
- Customs
- Custom 1 - Roll Power Up!: Roll powers up her broom, which deals 1.5x more damage and increases her knockback received by 1.5x. This powers any broom based attacks, such as many of her standard moves and her original neutral and side specials.
- Custom 2 - Oil Slider: Roll shoots an oil blob from Oil Man from Mega Man Powered Up. This deals 3% damage as a drop projectile, but Roll can hop onto it and slide forward, dealing 11% damage as she does. It goes for seven character lengths before slowing to a halt. Opponents walking in the oil puddle will simply slip and be dealt 4%.
- Custom 3 - Lil' Yellow Devil: Roll summons a projectile that appears in front of her before dispersing far away, about six character lengths, dealing 7% damage as it reassembles itself. It resembles the Yellow Devil boss that appears in multiple Mega Man games.
|
Final Smash
Hyper Roll
|
Roll fires a Black Hole Bomb, Galaxy Man's weapon from Mega Man 9, in front of him. Roll then calls upon the help of Rush, Eddie and Beat to transform into the bigger Hyper Roll from Marvel vs. Capcom 2, who launches projectiles that look like Rush, Eddie, and Beat to the opponents she has kept hostage in a cutscene, dealing either 45% damage metered or 100% damage unmetered.
|
| Taunts
|
- Up Taunt - Roll rolls her hands into fists and gets into an angry pose.
- Side Taunt - Roll hums as she sweeps across the ground, surprised at how much dust appears to be on the ground. The dust, if swept onto the opponent, will inflict them with the lemon scent effect.
- Down Taunt - Roll gets on her broom and flies on it briefly like a witch before hopping off.
|
| Special Team-Up Names
|
- With Mega Man - Robot Blasters
|
| Alternate Costumes
|
|
|
| Unlock Conditions
|
| TBA
|
|
Sonic the Hedgehog
|
Sonic the Hedgehog is the fastest hedgehog and perhaps lifeform in general, able to easily break the sound barrier and approaches the speed of light when he wants to. His cool and easy-going attitude made him a powerful rival to the straight-laced Mario back in the 90's, although these days these two are known more as friends than rivals. Character development? Sonic in Super Smash Bros. Discord has been a little revamped, with his jumps being effected the most, having a single jump that can become two different attacks as well as connect into his other attacks. Sonic also has a new side special that gives him good stage control, with his old side special moved to a down special and having new properties. His speedy moveset allows him to quickly administer damage but lacks KOing power for the most part.
|
| Move
|
Description
|
| Entrance
|
Sonic hops off the Tornado that is manned by Tails, striking a pose as he lands and the Tornado flies off into the background.
|
Jump
Drop Dash
Insta-Shield
|
Sonic has a single long jump, which will gimp a lot of his normal recovery options. Pressing the jump button while in the air will cause Sonic to perform the Drop Dash that deals 10% damage and lets him boost forward, even on sloped surfaces. While in the air, Sonic can tap the shield button to perform the Insta-Shield, which can deal 7% damage and kills projectiles, although this attack is very short and has to be timed more or less perfectly.
|
Neutral Special
Homing Attack
|
Sonic curls into a ball while ascending, dealing 3% damage while ascending. Pressing the special button will launch Sonic onto the nearest opponent to deal 5-12% damage depending on how clean the hit was. No longer shows a reticle to show where Sonic will launch to. Cannot be used after a jump, although when Sonic jumps he can immediately tap the special button to perform a homing attack.
- Customs
- Custom 1 - Boost: Sonic dashes forward, launching opponents far without actually inflicting damage if he dashes into them. This dash can cover the entirety of Final Destination and aside from it's speed and launching properties, is completely useless. It can be done in the air for half the distance and launching power.
- Custom 2 - Light Speed Dash: Sonic creates a row of rings in front of him and then dashes forward, dealing 5% damage during the dash and 7% damage at the end of the animation. This move can be tilted prior to the attack to change the angle of the attack, although this adds additional start up to the move.
- Custom 3 - Sonic Drive: Sonic grabs a ring and throws it, being able to control the angle of which it's thrown at by tilting the control stick. Holding the special button allows Sonic to throw it further. The ring deals 2.5% damage and causes flinching. When the player lets go of the special button, he dashes after it, dealing 8% damage with this dash.
|
Side Special
Sonic Wind
|
Sonic slashes the air around him, and then causes a slashing ring of wind appear around his nearest opponent within certain radius. This attack can be guarded, run out of, or jumped out of, as it only damages towards the end of it's animation, but it deals 9% damage and causes flinching at the end of the attack. This allows Sonic some good control around his opponent, but has a small cooldown of 4 seconds where this attack then becomes a slashing blue attack that deals 5% damage when near a opponent.
- Customs
- Custom 1 - Rocket Accel: Sonic spins into a ball quickly and then propels forward, dealing 5% damage. Has high launching power and magnetizing properties, although is less powerful than the spindash when fully charged.
- Custom 2 - Sonic Cracker: Sonic spins while holding a landmine and throws it, which will explode on either contact with a opponent or if Sonic attempts to use the move again, which will cause it to explode. It deals 7% damage and causes the burn effect.
- Custom 3 - Caliburn: Sonic lurches forward with Caliburn from Sonic and the Black Knight, slashing for 9% damage and launching opponents far but low. This move, given that Sonic isn't really a sword-fighter, doesn't have more to it and has low priority. It also cancels Sonic's momentum.
|
Up Special
Blue Tornado
|
Sonic unleashes the Blue Tornado, a spinning vortex that can trap opponents and deal 5-13% damage. It can be done in the air or on the ground and if a opponent swirls inside the vortex, they can be launched upwards. Slows Sonic's momentum in the air and can be used after a jump to gain a little more air.
- Customs
- Custom 1 - Spring Jump: Sonic jumps off a spring. Can be used to jump an additional time while in the air. The spring falls in the air and deals 4% damage on contact. Can be used to gimp recovery for opponents.
- Custom 2 - Bumper Jump: Sonic jumps off a bumper. The bumper stays active for a total of 5 seconds and can be used by opponents and Sonic alike. Sonic can bounce off it multiple times, although he will be angled off where he landed. Less vertical distance than Spring Jump and deals no damage.
- Custom 3 - Speed Up: Sonic becomes enveloped in a aura, his speed increasing by 2x and his jump height being decreased 0.5x. Lasts for 4.5 seconds.
|
Down Special
Spin Dash
|
Sonic curls into a ball and then rolls forward. Pressing the special button repeatedly will charge the spin faster and make it even faster, dealing 6%/7%. Can be charged in the air, although Sonic's gravity will not slow. While in the air, Sonic can perform the Sonic Meteor, which drops him straight to the ground and deals 8% damage.
- Customs
- Custom 1 - Spin Charge: Sonic rolls into a ball like Spin Dash, but charges much faster and can charge without mashing the special button. Deals 4/5% damage and can be charged while in the air. While in the air, Sonic can perform the Sonic Meteor, which drops him straight to the ground and deals 14% damage.
- Custom 2 - Super Peel-Out: Sonic moves his legs very quickly, forming an infinity shape with his legs. It can then be launched, dealing 8% damage on contact, although if it is cancelled by jumping, it will cancel a lot of Sonic's momentum. Good for getting a good running start and can be charged even when Sonic is not allowed to move.
- Custom 3 - Sonic Wave: Sonic starts the Spin Dash animation but then lets off a cyan wave that deals 10% damage, which is a grounded projectile that causes stun on impact. Sonic will then stand up at the end of his animation and can move afterwards.
|
Final Smash
Super Sonic
|
Sonic takes the power of the seven Chaos Emeralds and transforms into Super Sonic, speeding across the stage and dealing 15% damage with flying dashes. This stays active for 3 seconds metered and 7 seconds unmetered.
|
| Taunts
|
- Up Taunt - Sonic somersaults and then crosses his arms with his index finger pointing out, one of his signature poses, while making three tsking sounds.
- Side Taunt - Sonic performs the Super Peel Out, saying either "Sonic Speed!" or "You're too slow!"
- Down Taunt - Sonic performs the windmill, a breakdancing move, while saying "C'mon!"
|
| Special Team-Up Names
|
|
| Alternate Costumes
|
|
|
| Unlock Conditions
|
| TBA
|
|
Shadow the Hedgehog
|
Shadow the Hedgehog is Sonic's dark rival, focusing more so on power than speed, although his jet shoes allow him to be nearly on par with Sonic's speed. He was created as a possible cure for Gerald Robotonik's daughter who had a uncurable disease, although he ended up being much more by the time he was injected with powerful Black Arms DNA. Since then, Shadow mostly operates with his own team, consisting of the reformed bat thief Rouge and E-123 Omega, a Eggman robot that defected to join Shadow.
In Smash, Shadow does not even resemble a Sonic echo, instead being very much his own character that acts as a powerful, somewhat speedy character with several different options to attack via his guns and his Chaos powers. He shares some fundamentals with Sonic in how they jump, but the similarities end there. Shadow is a powerful character that can use his timeslowing abilities to have great combos, although he does not particularly excel at being a damaging or speed character. Additionally, while his moveset is easier to control than Bayonetta's, he still requires a good amount of skill to use effectively.
|
| Move
|
Description
|
| Entrance
|
Shadow warps in via the Green Chaos Emerald, which he tosses carelessly in the air before catching it and striking a pose.
|
Jump
Dark Drop
Doom Guard
|
Shadow has a single jump like Sonic, and has similar jump mechanics to him. By tapping the jump button while in the air, Shadow can drop down to the ground and create a stunning impact that deals 5% damage, which stuns opponents. While in the air, Shadow can also perform a Doom Guard, a black energy attack that stabs forward to launch opponents with the bleed effect. These are corruptions of Sonic's Drop Dash and Insta Shield respectively, although Doom Guard is based off Shadow's Black Arms DNA.
|
Tilts
Shadow Bullets
|
Unlike other characters in the roster, who generally possess tilt attacks that usually are strong melee attacks, Shadow fires guns for his tilts, firing his guns contentiously instead of charging strong melee attacks. Each bullet deals 1.5% damage and does not cause flinching, although each bullet is fired out each 15 frames. At the end of his tilt animations, Shadow pistol whips for 4% damage and causing low grounded knockback.
|
Neutral Special
Shadow Rifle
|
Shadow pulls out the Shadow Rifle, which is a large edged rifle that fires upon being aimed to deal 11% damage with low knockback. The control stick can be used to aim the gun at various angles and has sniping properties, the projectiles moving very quickly when fired. Has some start up frame data that makes it punishable.
- Customs
- Custom 1 - Omochao Gun: Shadow fires the Omochao Gun, firing a powerful bouncing projectile that is in the shape of Omochao's head. It deals 11% damage and does not stop after it collides with a opponent, only phasing out after a second. It cannot be tilted to aim it and it's projectile power is wildly unpredictable.
- Custom 2 - Samurai Blade: Shadow uses a long samurai blade that can deal 9% per swing, but breaks after three hits, requiring Shadow to use another complete move to be able to use the move again.
- Custom 3 - Vacuum Pod: Shadow uses the Vacuum pod to vacuum items, projectiles and extremely lightweight opponents and then launches them as projectiles, dealing either 1.6x of the original damage or 10% damage.
|
Side Special
Chaos Spear
|
Shadow swings his hand forward, launching a spear of energy that deals 12% damage on impact and 3% damage on contact after it has been embedded into something. It stays active until Shadow launches another one or after 2.5 seconds. In the air, he gains a float until he launches the spear.
- Customs
- Custom 1 - Rocket Accel: Shadow charges into a ball before rocketing off, black flames behind him. Stops at ledges and deals 10% damage to opponents with high knockback. Can be performed in the air, but is effected by gravity. Fairly good horizontal recovery move.
- Custom 2 - Chaos Punishment: Shadow pulls out Ddraig Goch, a sword, and slashes forward. This move can either be used as a 8% damage slashing move that causes opponents to get knocked down or allows Shadow to teleport forward if he can't connect with an opponent.
- Custom 3 - Grenade Launcher: Shadow fires off up to six grenade projectiles that explode to deal 14% damage. After firing off six grenade projectiles, Shadow needs to switch to another move and complete the whole animation before being able to use the Grenade Launcher again. A reticle appears near Shadow's firing range that can be controlled via the control stick.
|
Up Special
Chaos Control
|
Shadows hold the green Chaos Emerald in his hand and becomes covered in energy. When the player holds down the button, chronoboxes surround his area, slowing opponents down. The player can then tilt to teleport into a direction six character lengths away, causing Shadow to re-emerge with a energy field that deals 6% damage and inflicts bleed to those in the field. The player can cancel the move via shielding or jumping, although opponents will be still briefly trapped in a chronobox that allows Shadow to follow up with his own attacks.
- Customs
- Custom 1 - Black Tornado: Shadow encircles his opponent in a black vortex of wind, dealing 15% damage and knocking them to the ground. Can be used to stall his movement in the air, which can be followed up with other moves.
- Custom 2 - Air Shoes: Shadow uses his Air Shoes to float, being able to float in the air for 5 seconds. Additionally, by holding the special button, Shadow can charge up a boosting explosion dealing 8% damage that propels Shadow into the air that can be then floats in the air for 2.5 seconds.
- Custom 3 - Satellite Gun: Shadow pulls out the Satellite Gun, hitting the back as a glowing circle appears on the ground, with a laser appearing down from the sky a second later. The move deals 28% damage but cannot be moved or cancelled and is very easy to dodge in most cases.
|
Down Special
Roaming Chaos
|
Shadow creates a energy field of purple and black waves that slows opponents that run into it via a chronobox, which Shadow can then launch away from him for 12% damage while the opponent is still slowed in time, allowing for further follow ups.
- Customs
- Custom 1 - Dark Spin Dash: Shadow spins with dark energy around him, with the player able to charge the move by mashing the special attack button. When the dash is launched off, it deals 7% damage as Shadow's path generates red goo that can be controlled via the control stick to go in any direction, including up. It is much slower than Sonic's spin dash but has more directional control and good recovery potential.
- Custom 2 - Overturn: Shadow leans down and begins to pick up his opponent before overturning them in what is a command grab with a low hitbox, dealing 12% damage and knocking his opponent down to the ground.
- Custom 3 - Egg Vacuum: Shadow uses the Egg Vacuum to suck in enemies, items, projectiles, or even lightweight characters and absorbs them into a giant egg at the end of the weapon, which explodes after sucking in five items. This explosion deals 30% damage to whatever is inside as well as to any opponents near the site of the explosion, however this weapon needs to remain active and cannot be put away or it will reset the charge and let go of the items in it without actually dealing damage.
|
Final Smash
Chaos Blast
|
Shadow becomes enraged and covered with red Chaos energy. He then unleashes Chaos Blast, a powerful attack that causes three rings that deal 15/35% damage and deals severe knock-back. When using it with the Final Smash meter, it is less powerful, but umetered it deals more damage and knockback.
|
| Taunts
|
- Up Taunt - Shadow crosses his arms as he stares at the camera.
- Side Taunt - Shadow turns the rings on his wrists, glancing to the opposite side of him, saying "You best try your hardest, or else you'll get hurt."
- Down Taunt - Shadow states "Anybody who gets in my way is my enemy." before clutching the Chaos Emerald and green energy pulses around him.
|
| Special Team-Up Names
|
|
| Alternate Costumes
|
|
|
| Unlock Conditions
|
| TBA
|
|
Infinite
|
Infinite is a jackal that was the leader of his own squad, which was defeated by Shadow the Hedgehog who called him worthless. The comment would be the thing that set him off onto a path of further villainy, seeking further power. He would receive it in the form of the Phantom Ruby, a powerful gem that seemed to distort reality. These were mere illusions, however, and Infinite's power is only as powerful as others see him. This holds true for his Smash appearance; Infinite has some truly powerful moves that all have a glaring weakness, whether it be the start-up time of his attacks or his general vulnerability while using them. Infinite has powerful tools that allow him to be easily punished if he does not use them right.
|
| Move
|
Description
|
| Entrance
|
The Phantom Ruby warps in with it's trademark noise as Infinite phases in to grab it, placing it on his chest. He then cackles.
|
| Jump/Float
|
Infinite has a total of two jumps. While in the air, the player can hold the jump button to make him float in place, allowing him to stay floating as long as he's above ground. If there is no ground below him, the jump hold can only last 3 seconds before Infinite enters a helpless state.
|
Neutral Special
Phantom Cube
|
Infinite creates a cube in the direction he's facing, which will deal 5% on creation if it hits a player's hurtbox. By holding down the button, the player can expand it's size, dealing 5% as it expands. It can expand to a 4x4 size. While holding down the button, the player can tilt the control stick to move these cubes around, dealing 5% damage on contact and inflicting Bleed onto opponents. While commanding this projectile, Infinite is actually completely open to attacks.
- Customs
- Custom 1 - Phantom Wave: Infinite creates a 4x2 cube wave that goes in the direction he's facing, which will deal 8% damage and inflict Bleed. It cannot be controlled by the player or be made bigger. Infinite's back will be exposed during the attack and he cannot deal another attack until the wave disappears either on contact or after 110 frames.
- Custom 2 - Phantom Ripper: Infinite creates a spear of cubes that can be quickly tilted with the control stick to deal 8% damage and inflict Bleed. It cannot be made bigger and Infinite will stand still for the entirety of the attack, allowing players to punish him.
- Custom 3 - Phantom Ball: Infinite creates a ball of cubes that are shot in the direction he faces. It starts as a 3x3 ball and holding the button down allows it to be expanded by 6x6, although it will only deal 5% damage and inflict Bleed.
|
Side Special
Phantom Replica
|
Infinite summons either a replica of Chaos, Zavok, or Metal Sonic to deal an attack. Chaos attacks with a water attack that deals 7% damage and makes opponents wet. Zavok deals a slow piledriver attack that can bury opponents and deal 12% damage. Metal Sonic dashes into his opponent with a golden shield around him, dealing significant launching damage and dealing 9% damage. These replicas always appear in the same order (Chaos, Zavok, and then Metal Sonic) but have some start up to each time Infinite summons the replica.
- Customs
- Custom 1 - Replica Chaos: Infinite only summons Chaos, who attacks with a water attack that deals 7% damage and makes opponents wet.
- Custom 2 - Replica Zavok: Infinite only summons Zavok, who deals a slow piledriver attack that can bury opponents and deal 12% damage.
- Custom 3 - Replica Metal Sonic: Infinite only summons Metal Sonic, who dashes into his opponent with a golden shield around him, dealing significant launching damage and dealing 9% damage.
|
Up Special
Infinite Barrier
|
Infinite activates the power of the Phantom Ruby, creating a red radius around him that acts as a circular chronobox that slows down opponents as well as lifts them up into the air. This disrupts attacks and projectiles, as well as slows momentum and kills charged states and positive status effects. Infinite can either follow up this move by tapping the control stick in the direction the player wants him to float to or firing a yellow projectile that deals 6% damage and launches the trapped opponent out of his radius. Infinite can be punished after using this barrier due to it's long end-lag, although he will not seem fatigued, more just proud of his power.
- Customs
- Custom 1 - Infinite Warp: Infinite activates the power of the Phantom Ruby and slows opponents around him as he chooses the direction of his teleport via the control stick, then appears. Infinite can actually warp around very quickly a total of five times before becoming exhausted and punishable.
- Custom 2 - Cube Pillar: Infinite summons a giant cube pillar that launches opponents high into the sky to deal 8% damage and causes Bleed. Has some end lag that allows Infinite to be punished. The pillar will protect him against projectiles.
- Custom 3 - Phantom Down: Infinite suddenly warps to his opponent if they are in radius and deals 8% damage with a slashing effect, knocking his opponent down. It can spike in the air. It can whiff but overall is actually one of the hardest Infinite moves to punish in 1v1, although it's long end-lag allows opponents in 2v2 or other match-ups to punish him easily. This also one of the fastest moves to go stale.
|
Down Special
Null Space
|
Infinite counters melee attacks by snapping his fingers and creating a pillar of black and red cubes, which entrap the opponent into Null Space, a dimension inside the Phantom Ruby. Infinite disappears from the fight as a radius forms around the trapped fighter, allowing Infinite to fire projectiles that deal 8% damage per hit while inside. The fighter can dodge or shield against the projectiles, but resistance is futile... hahah. The Null radius lasts for 100 frames and Infinite appears vulnerable for a total of 30 frames afterwards.
- Customs
- Custom 1 - Warped Infinite: Infinite creates a warped, elongated clone of himself that appears at the edge of a stage if it's not occupied by someone on the edge already that attacks opponents for 8% damage and launching knockback if they try to go over to that side of the stage where it is facing. From behind, they can be destroyed in a single attack. It's a very effective edge guarding tool but only lasts 150 frames. If the ledge is occupied, Infinite deals a simple 1% damage attack that knocks opponents off the ledge.
- Custom 2 - Null Dodge: Infinite disappears into Null space, appearing as a radius of red energy that can deal the Bleed status effect if the player presses the special attack button. It lasts for 40 frames, although Infinite can move around freely. Has a lot of punishable end lag.
- Custom 3 - Infinite's Game: Infinite creates 8 clones of himself and then quickly shuffles them around, able to float around as 9 Infinites, although he cannot do attacks. Each of the clones can be defeated in one attack, although will deal no damage to Infinite himself. Infinite's position is always randomized. If the opponent does not find the real Infinite in 90 frames, he will release a red energy attack that deals Bleed and significant knockback.
|
Final Smash
Phantom Sun
|
Infinite generates power to the Phantom Ruby, gathering energy to create a giant sun like at the end of Sonic Forces. Infinite then drops it down as he teleports safely away from the stage. The sun either deals 45% damage metered or 100% damage metered to opponents that get caught up in the massive projectile, which will touch the stage's main platform's surface.
|
| Taunts
|
- Up Taunt - Infinite throws his arms out and yells "I'm NOT weak!"
- Side Taunt - Infinite snaps his fingers as red cubes swarm around him, stating "I'll show you how outclassed you truly are...", almost in a smirking way.
- Down Taunt - Infinite screams "I... am... REBORN!" as red energy pulses around him as he makes fists.
|
| Special Team-Up Names
|
- With Shadow - Red Power
- With Silver Zin - Powerful Illusionists
|
| Alternate Costumes
|
|
|
| Unlock Conditions
|
| TBA
|
|
Bayonetta
|
Bayonetta is one of the last of the near-extinct Umbra Witches clan. She's a master of the Bullet Arts and can use her hair as a conduit to bring forth Infernal Demons. Like Dante, she emphasizes style and cockiness into her fighting style and can actually pull it off with grace. Bayonetta specializes in aerial combos and every single one of her moves has a ton of different options, leaving your opponent sometimes unsure of what you'll do next. While she has been nerfed a tad to make her more manageable for all kind of players and to balance the game better, she still possesses a lot of the things that made her deadly to begin with. She requires a ton of skill to master as well as to fight against.
|
| Move
|
Description
|
| Entrance
|
Bayonetta emerges from her Bat Within form while surrounded by the Umbra Witches' symbol, then proceeds to wield her guns.
|
Gimmick 1
Bullet Arts
|
Bullet Arts is the name of Bayonetta's first gimmick as a fighter. At the end of her attacks, she will fire her guns, dealing 0.5% damage per bullet, which fires at a rate of every 10 frames. They have been significantly toned down from their last appearance, now being able to be killed through projectile killing attacks and attempts to reflect the bullets will now successfully work. That being said, Bayonetta's Bullet Arts is a handy gimmick due to how it transistions out of her attacks and helps build up damage. These bullets do not flinch opponents.
|
Gimmick 2
Bat Within
|
Bayonetta has a secondary gimmick known as Bat Within that changes her dodges to Bat Within when she is being attacked, allowing her to teleport and cover more distance when transforming into a swarm of bats. This also occurs when she performs Witch Time too late. It is a handy extension of her dodge that makes her take halved damage.
|
Neutral Special
Bullet Climax
|
Bayonetta fires bullets at a slight angle for 1.3% damage. When held, Bayonetta fires Charge Bullets which deal 2.7% damage but are only effective during the first two shots. Bayonetta can hold the charge and cancel actually firing it by shielding or dodging it, allowing her to preserve it for up to a single second (a nerf introduced in this game). It's angle allows for good edge-guarding and aerial approaches. Bayonetta also has two unique animations that do not change the trajectory of the bullets, but has her either fire her pistols in her hands or use the guns on her heels to fire.
- Customs
- Custom 1 - Kafka: Bayonetta fires a demonic bow with arrows made of flies and can shoot up to three times before Bayonetta runs out of ammo. Each projectile deals 4% damage and when used on opponents with high percentages, can poison them. Charging this move will deal 6% damage and causes the flower effect instead.
- Custom 2 - Shuraba: Bayonetta pulls out a demonic katana, slashing forward for 7% damage. If Bayonetta keeps holding the special attack button when executing the attack, she continues to slash for 2.4% damage continuously, allowing her to extend into a melee combo while keeping her fairly punishable. The charge variant of this has her sheathe the sword and then unleash it in a Iaijutsu slash, dealing 11% damage but cannot follow up with Bullet Arts and has some endlag.
- Custom 3 - Pillow Talk: Bayonettta pulls out a glowing green neon sword that slashes forward for 9% damage. If Bayonetta keeps holding the special attack button when executing the attack, it continues to slash for 1.2% damage continuously, allowing her to extend her combos. Due to the bigger knockback, combos are much tougher. The charge variant has her sheathe the sword and then unleash it in a Iaijutsu slash, dealing 15% damage but cannot be followed up with Bullet Arts and has a lengthy end-lag animation.
|
Side Special
Heel Slide
or
After Burner Kick
|
Bayonetta slides forward with her heels, dealing 9% damage. If the button is held, she follows up with a kick that sends her opponent into the air. If done in the air, this move becomes After Burner Kick, which deals 7% damage and launches the opponent sideways. She then can follow up with a second After Burner Kick. A downwards variant can be performed by tilting the control stick, which will launch opponents away from Bayonetta.
- Customs
- Custom 1 - Kulshedra: Bayonetta uses the Kulshedra whip to hit opponents from afar, dealing 3% damage. If held, she will bring the opponent to her instead and follow up with a spiking kick that deals 4% damage. At the end of the animation, if she uses Bullet Arts, she will whip around her to launch her opponents into the air.
- Custom 2 - Alruna: Bayonetta wields a dual set of whips that go by the name of Alruna. She can tap the button to attack with 2% damage flinching whip attacks, or hold the button to ensnare the opponent and bring Bayonetta close to them for a follow up attack. The Bullet Arts variant of this has the whip lash around wildly, launching opponents into the air.
- Custom 3 - Chernobog: Bayonetta wields a triple blade scythe called Chernobog with some build up before swinging it wildly vertically, dealing a set of three hits that each deal 6% damage. The charge variant of this slashes upwards for the same amount of damage. The Bullet Arts variant of this shoots the blades forward to deal 5% additional damage for each scythe, although it cannot be fired contentiously and leaves Bayonetta vulnerable.
|
Up Special
Witch Twist
|
Bayonetta performs a ascending corkscrew pistol whip, which hits multiple times to deal 7-9% but covers minimal vertical distance. When using it to recover, it can be used to extend Bayonetta's jumps if it is used first, then Bayonetta's first jump, then again, and then her second jump, making a total of four jumps.
- Customs
- Custom 1 - Arwing Guns: Bayonetta's guns are swapped out for Airwing Guns, which give her less weight and increase her jump height by 1.5x. Additionally, they change Bullet Arts to become homing bullets with a certain radius, although each Bullet Art bullet now deals 0.3% damage.
- Custom 2 - Lt. Col. Kilgore: Bayonetta summons two tonfa rocket launchers that allow her to fire heat-seeking missiles that deal 11% damage, but they are slow to fire and do not give Bayonetta any advantages from attempting to charge them. They can be used as either as a melee weapon when close to a opponent, or as a ranged weapon if she's far away from an opponent.
- Custom 3 - Wings of Malphas: Bayonetta summons the wings of the Infernal Crow Malphas, allowing her to fly up via tapping the button. She is not able to attack, although tilting the control stick allows her to use Bat Within to quickly teleport dodge away.
|
Down Special
Witch Time
|
Bayonetta performs Witch Time as a counter move. It is one of the most bizarre counters in the game, surrounding your opponent with chronoboxes that can last from a 2 seconds to 30 frames. Each successive use of Witch Time will be less useful, but the successfulness of Witch Time resets each stock. Additionally, opponents last longer if they have taken more damage. This allows Bayonetta to follow up the counter with anything she pleases.
- Customs
- Custom 1 - Undine: Bayonetta either hits or kicks forward with Undine, causing 7% damage and either burning or freezing the opponent depending on whether Bayonetta has activated the flame or ice aspect of the weapon, which will either switch upon activation or after the end of her attack with Bullet Arts.
- Custom 2 - Chain Chomp: Bayonetta has a Chain Chomp attached to her leg, which will shoot forward to deal 15% damage after a obvious start up. When charged, it will become a passive effect instead, acting as a combo extender that deals 7% damage at the end of one of Bayonetta's attacks should it be given the time to attack.
- Custom 3 - Takemikazuchi: Bayonetta pulls out Takemikazuchi, a giant electrical hammer that is slow to swing but deals 18% damage and good knockback. Super punishable. When charged, it deals 22% damage across a shockwave attack that travels across the ground, stunning foes.
|
Final Smash
Infernal Climax
|
Bayonetta activates Witch Time to effect the whole stage. Bayonetta can deal damage to her opponents to fill up the Climax Gauge. When the Climax Gauge is filled, she needs to deal knockback to her opponent before a cutscene occurs. The cutscene consists of her using her hair as a conduit to summon Gomorrah, who then damages any opponents suffering hitstun from Bayonetta's attacks by chomping them four times for a total of 35% before they are launched with set knockback. The attack button can be mashed during the attack to fill a second Climax Gauge that deals an additional 15% after the cutscene. On metered Final Smash, the entire Witch Time segment is cut in favor of just summoning Gomorrah and deals less launching distance.
|
Team Final Smash
Jackpot
|
If Bayonetta and Dante are on a team together with no other members, they perform a unique Final Smash together that is a reference to Devil May Cry 3. In this Final Smash, Dante and Bayonetta press their guns together and shout "Jackpot!", with two energy bullets (one red, one purple) spinning out the guns and twirling together to deal 45% metered and 100% damage unmetered. This Final Smash is unique; no other set of characters have a shared Final Smash together like this.
|
| Taunts
|
- Up Taunt - Bayonetta twirls around, moves both arms around her in a graceful manner, then strikes a pose with both arms over her head, saying, "If you need to learn how to talk to a lady, ask your mum."
- Side Taunt - Bayonetta gracefully spins around, then points both guns directly in front of herself, saying, "New 'do, dead you."
- Down Taunt - Bayonetta strikes a number of poses while flourishing her guns before looking away and then looking forward, while her glasses briefly emit a light purple glint upon concluding.
|
| Special Team-Up Names
|
- With Palutena - Angelic Light and Umbran Darkness
- With Pit - Angel and Witch
- With Dante - Witch and Devil
|
| Alternate Costumes
|
|
|
| Unlock Conditions
|
| TBA
|
|
Rosa
|
Rosa is the mother of Bayonetta, who was imprisoned for falling in love with a Lumen Sage and birthing a daughter from their union, she was one of the figures responsible for inadvertently setting forth the Clan Wars. Chained to prevent her from utilizing her full potential, she is still immensely powerful. During the events of Bayonetta 2, Bayonetta and her mother fight alongside each other in the past, although Bayonetta is not able to prevent her death at the hand of Loptr.
Rosa is a echo of Bayonetta who has many of her same abilities, but amplified to do 3x the damage. However, she takes three time as much as damage from all attacks, which means her survival rate is really low. Additionally, her Cobra Within differs from Bat Within in that it won't halve her damage taken. Her customs are also much more limited in comparison, as her power is sealed. She is also much heavier and somewhat slower, making her somewhat of a Ganondorf scenario for Bayonetta. A very odd character that has good potential but is set back given the various disadvantages she has.
|
| Move
|
Description
|
| Entrance
|
Rosa spins onto the stage and brandishes out her guns known as the Unforgiven set, striking a pose.
|
Gimmick 1
Bullet Arts
|
Rosa is capable of using Bayonetta's Bullet Arts gimmick. At the end of her attacks, she will fire her guns, dealing 1.5% damage per bullet, which fires at a rate of every 30 frames. These bullets can be killed through projectile killing attacks and can be reflected. These bullets do not flinch opponents.
|
Gimmick 2
Cobra Within
|
Rosa has a secondary gimmick known as Cobra Within that changes her dodges to Cobra Within when she is being attacked, allowing her to cover more distance when transforming into a cobra snake. This also occurs when she performs Witch Time too late. It is a handy extension of her dodge, but unlike Bat Within, it does not halve her damage and has a longer, albeit thinner hitbox.
|
Neutral Special
Bullet Climax
|
Rosa fires bullets at a slight angle for 3.9% damage. When held, Rosa fires Charge Bullets which deal 8.1% damage but are only effective during the first two shots. Rosa can hold the charge and cancel actually firing it by shielding or dodging it, allowing her to preserve it for up to a single second. It's angle allows for good edge-guarding and aerial approaches. Rosa also has two unique animations that do not change the trajectory of the bullets, but has her either fire her pistols in her hands or use the guns on her heels to fire.
- Customs
- Custom 1 - Bullet Riser: Rosa fires bullets in a sweeping up and down motion, dealing 4% damage per bullet and cannot flinch opponents, but slowly rises them upwards into the air and forces them to use their aerial options. Cannot be charged.
- Custom 1 - Bullet Anti-Climax: Rosa fires bullets at a slight downward angle, which can interrupt attacks but if the opponent is not attacking, it won't let them flinch. It deals 3.5% damage per bullet and the interrupt status is only true for the first two shots at the start of the animation. It can be used to jab lock.
- Custom 3 - Bullet Toxins: Rosa fires a a flurry of intoxicating bullets and can shoot up to three times before she runs out of ammo. Each projectile deals 12% damage and when used on opponents with high percentages, can poison them. Charging this move will deal 18% damage and causes the umbra effect instead.
|
Side Special
Heel Slide
or
After Burner Kick
|
Rosa slides forward with her heels, dealing 27% damage. If the button is held, she follows up with a kick that sends her opponent into the air. If done in the air, this move becomes After Burner Kick, which deals 21% damage and launches the opponent sideways. She then can follow up with a second After Burner Kick. A downwards variant can be performed by tilting the control stick, which will launch opponents away from Rosa.
- Customs
- Custom 1 - Time Slide/Before Burner Kick: Rosa slides forward with her heels, dealing 20% damage as a chronobox is placed on the opponent to slow them down after impact. If done in air, it will deal 17% damage while anything she makes contact with has their time slowed down with a longer lasting chronobox. The downwards variant will speed up opponents as they fall.
- Custom 2 - Frost Slide/After Freeze Kick: Rosa slides forward with her heels, dealing 29% damage and freezing her opponent on high percents. Has a lot of endlag as Rosa slowly get up and shakes frost from her boots. In the air, this becomes a spinning kick that deals 27% damage and freezes opponents on contact, but will make Rosa helpless after performing.
- Custom 3 - Alter Slide/Alter Burner Kick: Rosa slides forward with her heels, doing 15% damage before appearing at the other side of her opponent, allowing for fast follow-ups but can be read very easily. Rosa always faces in the opposite direction when performing the attack. In the air, it has similar properties and deals 17% damage.
|
Up Special
Witch Twist
|
Rosa performs an ascending corkscrew pistol whip, which hits multiple times to deal 21-27% but covers minimal vertical distance. When using it to recover, it can be used to extend Rosa's jumps if it is used first, then Rosa's first jump, then again, and then her second jump, making a total of four jumps.
- Customs
- Custom 1 - Lich Twist: Rosa performs an ascending corkscrew that has less height than the standard attack it's based off, but deals 15-19% damage and drains 5-10% damage from opponents to heal Rosa. It lacks the extra jump potential.
- Custom 2 - Thorn Twist: Rosa performs an ascending corkscrew that unleashes itself as a hoop of thorns as Rosa takes off into the air, acting as expanding close range projectiles that deal 27-31% damage. It lacks the extra jump potential.
- Custom 3 - Khepri Twist: Rosa summons the wings of the demoness Madama Khepri, who hosts her powers to summon fists and legs for her tilt attacks, allowing her to fly up via tapping the button. She is not able to attack, although tilting the control stick allows her to use Cobra Within to quickly teleport dodge away.
|
Down Special
Witch Time
|
Rosa performs Witch Time as a counter move. It is one of the most bizarre counters in the game, surrounding your opponent with chronoboxes that can last from a 2 seconds to 30 frames. Each successive use of Witch Time will be less useful, but the successfulness of Witch Time resets each stock. Additionally, opponents last longer if they have taken more damage. This allows Rosa to follow up the counter with anything she pleases.
- Customs
- Custom 1 - Heavy Witch Time: Rosa can only perform Witch Time once a stock, but it will add additional weight to the opponent while they're under the effects of Witch Time via graviboxes, which can make spiking them much easier. The effects of Heavy Witch Time last 2.5 seconds.
- Custom 2 - Light Witch Time: Rosa can only perform Witch Time three times a stock, but it will decrease weight from the opponent while they're under the effects of Witch Time via graviboxes, which can make launching them much easier. The effects of Heavy Witch Time last 1.5 seconds.
- Custom 3 - Chain Chomp: Rosa has a Chain Chomp attached to her leg, which will shoot forward to deal 45% damage after a obvious start up. When charged, it will become a passive effect instead, acting as a combo extender that deals 21% damage at the end of one of Rosa's attacks should it be given the time to attack. Rosa's chain chimp is golden and takes much longer to charge than Bayonetta's, as well as adding additional weight to her to slow her down.
|
Final Smash
Umbran Armor
|
Rosa activates Witch Time to effect the whole stage. Rosa can deal damage to her opponents to fill up the Climax Gauge. When the Climax Gauge is filled, she needs to deal knockback to her opponent before a cutscene occurs. The cutscene consists of her summoning Umbran Armor, a mech that she can then use to damage any opponents suffering hitstun from Rosa's attacks by chomping them four times for a total of 35% before they are launched with set knockback. The attack button can be mashed during the attack to fill a second Climax Gauge that deals an additional 15% after the cutscene. On metered Final Smash, the entire Witch Time segment is cut in favor of just summoning the Umbran Armor and deals less launching distance.
|
| Taunts
|
- Up Taunt - Rosa twirls around, her chains rattling as she does, then strikes a pose with both arms behind her back as she leans forward, saying, "Nothing can contain me!"
- Side Taunt - Rosa puts both hands behind her head as she poses with her back facing away from the camera, stating "No need to hold back!"
- Down Taunt - Rosa sticks her foot up as she leans towards the direction she's facing, stating "You're not even a challenge."
|
| Special Team-Up Names
|
- With Bayonetta - Umbra Family
|
| Alternate Costumes
|
|
|
| Unlock Conditions
|
| Defeat Bayonetta in 15 matches. This includes Possession Battles and battles in X Marks the Spot.
|
|
Pac-Man
|
Pac-Man is a big gaming icon that is mostly known for the classic game of chomping down pellets and staying away from ghosts. While he has had other games, none have been a big success in the same way that the classic game has been. Despite this, his rich background gives him quite the resume for Smash, and he's older than Mario and Donkey Kong, so his time in Smash is more than well deserved.
Pac-Man has seen a huge overhaul to his moveset, although a good majority of his original moveset is now customs. His base moves are now based off Pac-Man World and feature speed options as well as ground and aerial options while offering good recovery. Additionally, Pac-Man has a jump hold that allows him to slow his descent and a gimmick that allows him to gain super armor to dash attacks and influences his stun attacks and speed.
|
| Move
|
Description
|
| Entrance
|
Pac-Man zips onto the stage in his 2D wedge form as rainbow afterimages trail behind him, stopping to open his mouth to then transform into his ball form.
|
Gimmick
Championship Edition
|
Pac-Man gains rainbow after-images after continuing to land successive hits on opponents and will gain super-armor to his dash attacks when these rainbow after-images appear. He also becomes slightly faster and his attacks have more stun to them. Hitting him will stop the after-images and these effects.
|
| Jump/Fairy Float
|
Pac-Man has a total of two jumps and while in the air, if the jump button is held, he can slightly slow his descent via a fairy from Pac-Land. If Pac-Man is using the Pac-Land costume, it appears from his cap, but in his normal costume it circles around him. Pac-Man can't hold it for too long (70 frames) or he'll drop like a rock and won't be able to use the jump hold again until he touches ground.
|
Neutral Special
Pac-Pellet
|
Pac-Man can throw a Pac-Pellet to deal 4% damage to his enemies without inflicting flinch or knock-back, and can aim the trajectory before throwing them. These Pac-Pellets have unique properties in that if they are thrown back or reflected at a Pac-Man, they will just eat it as opposed to getting damaged and will even recover 1% health.
- Customs
- Custom 1 - Ghost Throw: Pac-Man tosses a ghost, of which goes through a four color cycle. Pac-Man first throws Blinky, who chases after the nearest opponent. Pac-Man then throws Pinky, who tries to get in front of the nearest opponent. Pac-Man will then throw Inky, who also attempts to get in front of the nearest opponent, but uses data of other ghosts positioning to influence his movement. Finally, Pac-Man throws Clyde, who actively tries to get away from nearby opponents. All the ghosts deal 8% damage except for Clyde, who deals 15% damage and spikes. The ghosts disappear after Pac-Man takes 30% damage or after 4.5 seconds. Pac-Man can send up to two ghosts at a time.
- Custom 2 - Ghost Barrier: Pac-Man throws out a wall containing the outlines of four ghosts, which negate projectiles and cannot be passed through by opponents. Pac-Man can keep it active as long as 10 seconds or touch the wall to collect it, which will cause Pac-Man to glow with green energy. His next attack, regardless of if it hits or misses, will have four ghosts dash from a distance between Pac-Man's area of attack. As such, it can be used to deal 9% damage to opponents from behind.
- Custom 3 - Red Ring: Pac-Man slams a hammer onto the ground or in the air, dealing 10% damage and breaks shields instantly and can spike. This move is fast but has an incredibly short range, being localized entirely to the front of Pac-Man when he executes the move. This move is taken from Pac-In-Time.
|
Side Special
Rev Roll
|
Pac-Man runs in place quickly, with the player able to hold this for more speed. When released, Pac-Man runs forward, with him running faster and for more distance when held down for longer periods of time. Pac-Man can be interrupted by hitting a opponent while launching from the Rev-Roll and will deal 10% damage to anything he runs into, but will be bounced back slightly. When launching from Rev-Roll, Pac-Man is able to easily go up steep surfaces and it increases the momentum of his jumps.
- Customs
- Custom 1 - Power Pellet: Pac-Man extends a trail of dots that ends with a Power Pellet and then transforms into his wedge form before propelling himself to eat them in a trail, with six total dots. Hitting the special button again while Pac-Man eats the trail allows him to dash. Collecting the Power Pellet will activate Super Armor and counts towards putting Pac-Man into Championship Edition mode. Pac-Man deals 10% damage at the start of the move, 14% damage at the end, and his dash deals 5% damage. Cancelled if Pac-Man hits a surface during the move.
- Custom 2 - Blue Ring: Pac-Man releases bubble projectiles from his hands that float upwards and deal 4% damage per hit, being able to hit multiple times and can ascend the opponent into the air. This move is taken from Pac-In-Time.
- Custom 3 - Snowman: Pac-Man fires off a freezing gale from his mouth that freezes opponents and deals 7% ice damage. Pac-Man's momentum completely stops when he uses this move. This move is taken from Pac & Pal.
|
Up Special
Pac-Chain
|
Pac-Man creates a red Pac-Pellet in his hand that he then eats, following a chain of Pac-Pellets that he can control via tilting the control stick in any direction. The Pac-Chain can be cancelled and lasts for up to 4 seconds. Heavy attacks can interrupt Pac-Man. If Pac-Man's chain goes through a opponent, it deals 8% damage. It has somewhat of a slow movement compared to other free-roaming recovery attacks, but gives Pac-Man a lot of options while in the air. Cancelled if Pac-Man hits a surface during the move.
- Customs
- Custom 1 - Pac-Jump: Pac-Man transforms into his wedge shape and produces a trampoline to bounce off. Comes out on frame one and offers four bounces before the trampoline breaks and the user is rendered helpless. Pac-Man can hit opponents while ascending, dealing 7% damage if clean. Opponents are forced to jump upon contact with the trampoline, allowing it to interrupt grounded combos.
- Custom 2 - Green Ring: Pac-Man jumps through a green ring and then creates a rope that can tether and connect to any surface, including floors and ceilings, and then tilt the control stick to become a wrecking ball that deals 3-9% damage depending on how much momentum Pac-Man gets. Pac-Man can only stay tethered for 2.5 seconds before he drops into a helpless state. This move is taken from Pac-In-Time.
- Custom 3 - Pac-Blast: Pac-Man shoots off pac pellets underneath him that deal 9% damage and boost him into the air. He can fire off to three before going into a helpless state. This move is based off a mechanic in the cancelled Pac-Man Ghost Zone.
|
Down Special
Butt Bounce
|
Pac-Man does a ground pound that allows him to bounce up further into the air and deals 11% damage to opponents and can spike aerial opponents. He can bounce multiple times, although bouncing off an opponent will veer Pac-Man into either the left or right direction, which can be influenced by tilting the control stick.
- Customs
- Custom 1 - Fire Hydrant: Pac-Man plops down a fire hydrant that shoots out bursts of water that push opponents away and make opponents wet if they get too close to it when it starts shooting out jets of water. Pac-Man can push it slightly from it's original position as well as kick it to deal 15% damage, which it will bounce off and tumble before disappearing.
- Custom 2 - Pac-Replica: Pac-Man creates micro Pac-Man from Pac n' Pal which he either throws to the ground to have them move in the direction he's facing, or can throw them down while in the air, which can gimp aerial opponents. The micro Pac-Man do 1% damage per loop, but interrupt many different attacks and can keep opponents stuck in hitstun for up to 2-3 seconds depending on how light or heavy a opponent is. Heavier opponents can shake off the micro Pac-Men easier.
- Custom 3 - Pac-Bomb: Pac-Man can drop a bomb while moving, although this slows his monumentum down significantly afterwards. The bomb deals 5% damage but does huge knockback. This will also cancel his Championship Edition effects if they are active. The bomb explodes on contact with a opponent and cannot go off early with projectiles or other attacks unless the projectiles are of a ghostly nature.
|
Final Smash
256/Super Pac-Man
|
Pac-Man has two final smashes depending on whether he activates it using meter or the Smash Ball:
- 256 is his metered Final Smash. Pac-Man has the original four ghosts from Pac-Man circle around him in a cutscene as glitchy effects appear around the screen, engulfing the edges of the stage. Pac-Man has a ghost shield that deals 11% damage on contact and launches opponents towards the glitchy mess on the ends of the stages. Touching the glitchy effects will deal 45% damage. The Final Smash only occurs for a total of 2 seconds and 56 frames in total after the glitchy effects begin appearing.
- Super Pac-Man is his unmetered Final Smash. Pac-Man automatically moves forward and loops around the screen at a diagonal angle. The player has no direct control over Pac-Man but can gradually adjust his trajectory by tilting the control stick up or down. Pac-Man homes generally towards opponents, dealing 25% damage. Pac-Man can also eat items while in this form. Pac-Man can deal a total of 100% damage overall with four bites.
|
| Taunts
|
- Up Taunt - Pac-Man performs the "Namco Roulette", which produces sprites of classic Namco items, characters and enemies, similarly to Bonus Fruit. It is the only taunt in the game with variable visual and sound effects.
- Side Taunt - Pac-Man transforms into his wedge form and chomps to the right and left at varying intervals while emitting his iconic chomping sound.
- Down Taunt - Pac-Man lays down while Blinky, Pinky, and music notes hover over him while an arrangement of the first five notes of the intermission theme from Pac-Man plays.
|
| Special Team-Up Names
|
- With Mr. Game and Watch - Golden Oldies
|
| Alternate Costumes
|
|
|
| Unlock Conditions
|
| Play 10 matches in either Pac-Maze or Pac-Maze 256.
|
|
Ms. Pac-Man
|
Ms. Pac-Man is Pac-Man's female counterpart and appeared in her own game and is wildly considered one of the first female video game characters. She acts extremely similar to Pac-Man in that she can gobble down pellets and has to run from ghosts, but her game differs in design in many different ways and is considered better as a result. She made two more starring roles in Ms. Pac-Man: Maze Madness and Ms. Pac-Man: Quest for the Golden Maze, 3D Maze games that had a sense of adventure to them. She is also the mother to Pac Jr. and is generally seen with Pac-Man in most of his appearances.
Ms. Pac-Man is Pac-Man's Echo Fighter. She differs in that she drops the Championship Edition gimmick and has a different set of default moves that returns Pac-Man's old Bonus Fruit move and uses moves that are based off Ms. Pac-Man: Maze Madness that gives her a new higher recovery and allows her to boost forward with the aid of a booster. As such, she generally has better recovery. Bonus Fruit also allows her a ton of new options that Pac-Man simply doesn't have.
|
| Move
|
Description
|
| Entrance
|
Ms. Pac-Man appears with the Pactrometer from Ms. Pac-Man Maze Madness in her hand, having teleported into the battle.
|
| Jump/Fairy Float
|
Ms. Pac-Man has a total of two jumps and while in the air, if the jump button is held, she can slightly slow her descent via a fairy from Pac-Land. Ms. Pac-Man can't hold it for too long (70 frames) or she'll drop like a rock and won't be able to use the jump hold again until she touches ground.
|
Neutral Special
Bonus Fruit
|
A chargeable move, Ms. Pac-Man holds out a bonus item from his original appearance and cycles through them, starting at the iconic Cherry. The items cycle in the same order they do in the original arcade game: Cherry, Strawberry, Orange, Apple, Melon, Galaxian, Bell, and Key. Ms. Pac-Man cannot cycle past the key, and will instead put the key away for later use. After reaching the Orange, each item takes longer to charge. If Ms. Pac-Man grabs a Bonus Fruit after it's been fired off, she can cycle forward the projectile again until it turns into a Key.
| Fruit
|
Behavior
|
Damage
|
Cherry
|
Bounces twice and lands for a moment before disappearing.
|
4% per hit
|
Strawberry
|
Bounces three times and lands for a moment before disappearing. Travels slightly more total distance than the cherry, and can travel almost the length of Final Destination if thrown from a short hop.
|
6% per hit
|
Orange
|
Travels in a straight line for about roughly half the length of Final Destination's platform before disappearing. Knocks characters in a semi-spike angle.
|
8%
|
Apple
|
Bounces across the floor four times in quick hops before disappearing. Thrown at a strong diagonal angle downwards, useful for interrupting offstage opponents attempting to jump towards an edge. Deals mostly vertical knockback, and can travel almost the length of Final Destination if thrown from a short hop, though slightly less than the strawberry.
|
9%
|
Melon
|
Travels slowly in a very slight arc, and has considerable knockback. Flies slow enough that Ms. Pac-Man is able to run up to catch it. Can be used to stop approaches and will KO at high percents.
|
12%
|
Galaxian
|
Does a quick shuttle loop before continuing to fly off either straight ahead or at several angles diagonally upward from the direction it was thrown. Inflicts the same amount of damage every time it connects. Passes through enemies, but immediately stops and drops as an item if it hits a wall.
|
9% per hit
|
Bell
|
Travels slowly in a high arc before suddenly stopping short and falling straight down, passing through opponents. Causes paralysis if it connects (unless dropped lightly in the air as an item), and bounces thrice upon hitting the ground before disappearing, which can also cause paralysis if an opponent touches it then. Notably passes through all solid ground during the initial high travel arc.
|
8% per hit
|
Key
|
Travels at high speed in a straight line and deals high damage and knockback. Passes through opponents and has the highest knockback out of all Bonus Fruit charges, being the most reliable KOing projectile out of all fruits.
|
18%
|
|
Neutral Special
Customs
|
- Customs
- Custom 1 - Ghost Throw: Ms. Pac-Man tosses a ghost, of which goes through a four color cycle. Ms. Pac-Man first throws Blinky, who chases after the nearest opponent. Ms. Pac-Man then throws Pinky, who tries to get in front of the nearest opponent. Ms. Pac-Man will then throw Inky, who also attempts to get in front of the nearest opponent, but uses data of other ghosts positioning to influence her movement. Finally, Ms. Pac-Man throws Clyde, who actively tries to get away from nearby opponents. All the ghosts deal 8% damage except for Clyde, who deals 15% damage and spikes. The ghosts disappear after Ms. Pac-Man takes 30% damage or after 4.5 seconds. Ms. Pac-Man can send up to two ghosts at a time.
- Custom 2 - Ghost Barrier: Ms. Pac-Man throws out a wall containing the outlines of four ghosts, which negate projectiles and cannot be passed through by opponents. Ms. Pac-Man can keep it active as long as 10 seconds or touch the wall to collect it, which will cause Ms. Pac-Man to glow with green energy. Her next attack, regardless of if it hits or misses, will have four ghosts dash from a distance between Ms. Pac-Man's area of attack. As such, it can be used to deal 9% damage to opponents from behind.
- Custom 3 - Red Ring: Ms. Pac-Man slams a hammer onto the ground or in the air, dealing 10% damage and breaks shields instantly and can spike. This move is fast but has an incredibly short range, being localized entirely to the front of Ms. Pac-Man when she executes the move. This move is taken from Pac-In-Time.
|
Side Special
Booster
|
Ms. Pac-Man is boosted forward by a boosting machine that appears to her side, giving her a quick, jumping burst of speed that deals 11% damage to opponents. There is no charge mechanic and Ms. Pac-Man has to no way to halt her momentum for the first 15 frames. Ms. Pac-Man can easily go up steep surfaces and it acts as a horizontal leaping jump. This move is based off the Boosters seen in Ms. Pac Man: Maze Madness.
- Customs
- Custom 1 - Power Pellet: Ms. Pac-Man extends a trail of dots that ends with a Power Pellet and then transforms into her wedge form before propelling herself to eat them in a trail, with six total dots. Hitting the special button again while Ms. Pac-Man eats the trail allows her to dash. Collecting the Power Pellet will activate Super Armor. Ms. Pac-Man deals 10% damage at the start of the move, 14% damage at the end, and her dash deals 5% damage. Cancelled if Ms. Pac-Man hits a surface during the move.
- Custom 2 - Blue Ring: Ms. Pac-Man releases bubble projectiles from her hands that float upwards and deal 4% damage per hit, being able to hit multiple times and can ascend the opponent into the air. This move is taken from Pac-In-Time.
- Custom 3 - Snowman: Ms. Pac-Man fires off a freezing gale from her mouth that freezes opponents and deals 7% ice damage. Pac-Man's momentum completely stops when she uses this move. This move is taken from Pac & Pal.
|
Up Special
Spring Tile
|
Ms. Pac-Man jumps off a green spring, launching herself up into the air for a very high vertical distance. While ascending, Ms. Pac-Man cannot move horizontally too much, but while descending she can extend her horizontal distance. Deals no damage and unlike other spring moves, it lasts only long enough for Ms. Pac-Man to jump once.
- Customs
- Custom 1 - Pac-Jump: Ms. Pac-Man transforms into her wedge shape and produces a trampoline to bounce off. Comes out on frame one and offers four bounces before the trampoline breaks and the user is rendered helpless. Ms. Pac-Man can hit opponents while ascending, dealing 7% damage if clean. Opponents are forced to jump upon contact with the trampoline, allowing it to interrupt grounded combos.
- Custom 2 - Green Ring: Ms. Pac-Man jumps through a green ring and then creates a rope that can tether and connect to any surface, including floors and ceilings, and then tilt the control stick to become a wrecking ball that deals 3-9% damage depending on how much momentum Ms. Pac-Man gets. Ms. Pac-Man can only stay tethered for 2.5 seconds before she drops into a helpless state. This move is taken from Pac-In-Time.
- Custom 3 - Pac-Blast: Ms. Pac-Man shoots off pac pellets underneath her that deal 9% damage and boost her into the air. She can fire off to three before going into a helpless state. This move is based off a mechanic in the cancelled Pac-Man Ghost Zone.
|
Down Special
Pac-Replica
|
Ms. Pac-Man creates micro Pac-Men from Pac n' Pal which she either throws to the ground to have them move in the direction she's facing, or can throw them down while in the air, which can gimp aerial opponents. The micro Pac-Men do 1% damage per loop, but interrupt many different attacks and can keep opponents stuck in hitstun for up to 2-3 seconds depending on how light or heavy a opponent is. Heavier opponents can shake off the micro Pac-Men easier.
- Customs
- Custom 1 - Fire Hydrant: Ms. Pac-Man plops down a fire hydrant that shoots out bursts of water that push opponents away and make opponents wet if they get too close to it when it starts shooting out jets of water. Ms. Pac-Man can push it slightly from it's original position as well as kick it to deal 15% damage, which it will bounce off and tumble before disappearing.
- Custom 2 - Butt Bounce: Ms. Pac-Man does a ground pound that allows her to bounce up further into the air and deals 11% damage to opponents and can spike aerial opponents. She can bounce multiple times, although bouncing off an opponent will veer Ms. Pac-Man into either the left or right direction, which can be influenced by tilting the control stick.
- Custom 3 - Pac-Bomb: Ms. Pac-Man can drop a bomb while moving, although this slows her monumentum down significantly afterwards. The bomb deals 5% damage but does huge knockback. The bomb explodes on contact with a opponent and cannot go off early with projectiles or other attacks unless the projectiles are of a ghostly nature.
|
Final Smash
256/Super Ms. Pac-Man
|
Ms. Pac-Man has two final smashes depending on whether she activates it using meter or the Smash Ball:
- 256 is her metered Final Smash. Ms. Pac-Man has the original four ghosts from Pac-Man circle around her in a cutscene as glitchy effects appear around the screen, engulfing the edges of the stage. Ms. Pac-Man has a ghost shield that deals 11% damage on contact and launches opponents towards the glitchy mess on the ends of the stages. Touching the glitchy effects will deal 45% damage. The Final Smash only occurs for a total of 2 seconds and 56 frames in total after the glitchy effects begin appearing.
- Super Ms. Pac-Man is her unmetered Final Smash. Ms. Pac-Man automatically moves forward and loops around the screen at a diagonal angle. The player has no direct control over Ms. Pac-Man but can gradually adjust her trajectory by tilting the control stick up or down. Ms. Pac-Man homes generally towards opponents, dealing 25% damage. Ms. Pac-Man can also eat items while in this form. Ms. Pac-Man can deal a total of 100% damage overall with four bites.
|
| Taunts
|
- Up Taunt - Ms. Pac-Man swoons and mockingly falls over before getting right back up.
- Side Taunt - Ms. Pac-Man twirls the bow on her head, which whirrs like a helicopter rotor.
- Down Taunt - Ms. Pac-Man pulls out an ice-cream cone and eats it whole in her Pac form, reverting back to her ball form.
|
| Special Team-Up Names
|
- With Pac-Man - Pac-Parents
|
| Alternate Costumes
|
|
|
| Unlock Conditions
|
| Play 50 matches in either Pac-Maze or Pac-Maze 256.
|
|
Kyo Kusanagi
|
The main character of the King of Fighters franchise, Kyo is introduced as a cocky teen who is the heir of the Kusanagi clan, one of the three clans that sealed the legendary snake entity, Orochi, 1,800 years ago. Wielding a powerful fire ability that would be sought after in the later NESTS saga, Kyo would become rivals with Yasakani heir Iori, who he has battled multiple times with no clear victor at the end of their duels.
In Smash, Kyo Kusanagi is a powerful fire wielding brawler who can combo into many of his moves one after another, although his ability off the ground is not great. He can still deal with airborne opponents, but he lacks many good recovery options that don't send him horizontal. Still, Kyo is a very powerful rekka fighter who can chain attacks effortlessly together, really making him stand out from other fighters even compared to Dante and Bayonetta, who are combo focused as well.
|
| Move
|
Description
|
| Entrance
|
A flame appears in Kyo's right hand before he sweeps it down, and then gets into a combat idle.
|
| Deflect
|
When shielding, Kyo can perform a deflect move with the standard attack button that will cause projectiles to bounce off him for no damage and can interrupt melee moves. Hit the standard attack button again and he will spread out his arms to deal 6% damage and push the opponent back while returning to his original position.
|
Fighting Style Note
Why the numbers?
|
Kyo's attacks all have numbers in their names, which is associated with the Kusanagi style of ancient martial arts, a Japanese style of empty handed combat taught only to the Kusanagi clan members. Like most of the clan members in modern times, these are labeled as Method/Style with numbers.
|
Neutral Special
114 Shiki - Aragami
|
Kyo punches forward with an explosive punch that blows the opponent back while putting Kyo in his original position, dealing 6% damage (9% damage on the explosive hurtbox with burn effect applied). Great for spacing, although does low knockback.
- Customs
- Custom 1 - 128 Shiki - Konokizu: Kyo throws one punch forward that deals 7% fire damage, pulling back for a second uppercut that launches the opponent forward for 6% fire damage. This can knock the opponent down on low percents but on higher percents his opponent has a fast time recovering.
- Custom 2 - 127 Shiki - Yanosabi: Kyo punches forward for 9% fire damage, which will cause his opponent to flinch, and then follows up with a with an uppercut that deals 4% damage and then a spiking punch punch down that burns the opponent as they get knocked down. Can't launch but deals a lot of damage. The first punch actually has quite a bit of range as Kyo lurches forward, but if he whiffs, he will continue to do the rest of the attack which allows for a punish.
- Custom 3 - 125 Shiki - Nanase: Kyo punches forward for 5% fire damage, pulls back and hits with his elbow which will launch the opponent lightly back while applying the burning effect, dealing 3% damage, before following up with a kick that sends the opponent flying horizontally that deals 6%. While not very effective for launching, it's great for kicking the opponent off the stage and having them deal with their recovery options while you can follow up with another attack.
|
Side Special
108 Shiki - Yamibari
|
Kyo creates a flame in his fingers that he then tosses to the ground, creating a ground crawling projectile that flashes and deals 9% damage and burns the opponent. In air, this instead becomes a flaming wave of energy that acts more or less identical, except puts the opponent into a helpless state.
- Customs
- Custom 1 - 100 Shiki - Oniyaki: Kyo performs an flying upper cut on his opponent that deals 8% damage and burns them. Does low knockback but will knockdown the foe.
- Custom 2 - 75 Shiki - Kai: Kyo performs a twin set of kicks, each dealing 7% damage (14% if both connect). Has low knockback will knockdown the foe. Has limited range compared to other attacks.
- Custom 3 - 212 Shiki - Kototsuki Yo: Kyo runs forward and command grabs the opponent, hoisting them into the air before causing an explosion that deals 15% damage, with the opponent falling to the ground afterwards.
|
Up Special
R.E.D. Kick
|
Kyo jumps into the air and begins to move horizontally as he leaps, ending with a kick downwards that deals 12% damage and knocks down his foe onto the ground. While not great for recoveries, it's potential to interrupt foes is great.
- Customs
- Custom 1 - 101 Shiki - Oboroguruma: A shorter leaping kick that knocks down foes and makes them helpless in the air, dealing 15% damage. Has some spiking properties. If it hits in the sweetspot of Kyo's foot, he will perform three kicks that deal 5% more damage and allow him to move more distance.
- Custom 2 - 401 Shiki: Tumiyomi: Kyo does a far rolling hook that then follows into a backhand uppercut, launching his opponent into the air for 11% damage. Safe on approach but doesn't have much recovery potential.
- Custom 3 - 402 Shiki: Batuyomi: Kyo Kyo jumps into the air, and does a back shoulder check into the opponent, spiking his opponent into the air for 12% damage. Doesn't have much recovery potential but can spike opponents.
|
Down Special
Ura 108 Shiki - Orochinagi
|
Kyo has a flash appear on his finger tips before lunging forward with his arms as a wave of flame appears near him, burning opponents and dealing 17% damage. Good for spacing and has decently high priority, but highly telegraphed. You can hold the grab button to delay it to catch your opponent off guard.
- Customs
- Custom 1 - Ura 108 Shiki - Orochinagi (MAX): Kyo has a flash appear on his finger tips as his whole body becomes enveloped in flame, which has a hurtbox that deals 3% damage and knocks the opponent slightly forward, before performing a wave of flame around him that travels out further. Has more start up and end lag and is one of the few moves in the game that does not register to buffer inputs.
- Custom 2 - 104 Shiki: Aragami: Kyo throws a hook with some autoguard on it, which it makes it safe if your opponent attempts to shield. If it hits, Kyo follows up with an explosive attack that deals 12% damage.
- Custom 3 - Saishu Kessen Ougi: MU-Shiki: Kyo quickly powers up and summons a large pillar of fire before unleashing a quick combo that sets the enemy on fire, all while having super armor. The pillar of fire will deal 10% damage and the combo itself will deal 13% damage. Has a lot of start up lag and is easily telegraphed.
|
Final Smash
Saishu Kessen Ougi: Totsuka
|
Kyo snaps his fingers as a flame appears before covering the entire screen in flames, either doing 45% damage metered or 100% damage unmetered, with the damage being of the flame element. This covers the entire screen and can only be avoided if you're off screen or have some sort of crazy evasion move that allows you to phase out for the duration of the attack.
|
| Taunts
|
- Up Taunt - Kyo stands up straight, with his right hand on his hip, and he waves his left hand index finger and says: "Nani kusubutten da?" (What are you smoking for?)
- Side Taunt - Kyo blows off the flame off his left hand index finger and says: "Rekishi ga chigaundayo!" (We didn't go through the same past!)
- Down Taunt - Kyo raises his left arm at the same level where he blows off the flames on his index finger. Then Kyo turns away from the opponent, brings his hand down and clenches his fist and says: "Anta ja moene~ na..." (I'm not having any fun with you...)
|
| Special Team-Up Names
|
- With Mai Shiranui - Burn to Fight
- With Ryu - Millennium Fighters 2000
|
| Alternate Costumes
|
|
|
| Unlock Conditions
|
| TBA
|
|
Mai Shiranui
|
Mai Shiranui is the granddaughter of Hanzo Shiranui, master of ninjitsu and Koppo-ken. Mai learned from her father the secrets of Ninjitsu and her fighting style overall. Mai is known for her fiery fight style, which often sees her go into the air or bounce off walls, being a rather bouncy fighter as well. She attacks via fans and flames, which mix rather well. She tends to also be somewhat of an airhead and admires any kind of beauty or attractiveness, which sometimes comes across as being vain.
In Smash, Mai is a quick fighter that has projectiles, aerial attacks, and various physical attacks. Her moves are powerful and have a lot of ways to counter opponents or deal with them. Her aerial prowess is rather great as well- if you're in the air, you're in Mai's space and she'll be able to punish you. However, a lot of her moves do not actually launch opponents, instead knocking them to the ground or otherwise dealing low knockback. As such, her ability to KO is somewhat set-back, although she can reliably spike with a lot of her moves.
|
| Move
|
Description
|
| Entrance
|
Mai leaps onto the stage and waves her fan in the direction she's facing.
|
| Unique Entrance
|
If Mai faces off against Chun Li, the player might be confused to see two Chun-Lis enter into battle, only for one to reveal themselves as Mai simply disguising herself as Chun-Li and throwing off the disguise to reveal the blossom ninja herself!
|
| Jump/Wall Jump
|
Mai has two jumps for the air, with her second jump using fans to blow herself into the air. She can also cling to walls and then wall jump off them, following them up with a variety of attacks or even gain additional power from being nearby a wall.
|
Neutral Special
Kachousen
|
Mai throws a fan forward, which spins while in the air. It is effected by windboxes and has low priority, but deals 8% damage on contact. Mai can hold onto the fan to infuse it with flames, which will deal up to 14% damage and gain higher priority. She can send two at a time.
- Customs
- Custom 1 - Sayo Chidori: Mai swings down her fan in a large swipe down that will bury opponents into the ground and deal 10% damage. It also negates projectiles, killing them on contact.
- Custom 2 - Hakuro no Mai: Mai throws three fans forward that deal 5% damage each. Mai can charge the move beforehand to add flames to the fans, dealing 7% damage each with each fan. Charges fairly fast, although if Mai holds it too long the move will just cancel. It lacks projectile killing properties. It also knocks the opponent down as opposing to launching them.
- Custom 3 - Mizudori Cho Sen: Mai throws a big fan that slowly spins while in the air, dealing 12% damage. It doesn't go very far and goes back to Mai's original position while going back. Only one can be sent out a time. Deals low knockback. Mai can perform other moves while it's active, allowing for mix-up opportunities.
|
Side Special
Ryuuenbu
|
Mai twists her body, sprouting flames from her tassels that deals 11% damage to nearby opponents and acts as a projectile killer. Lasts 17 frames, making it a quick counter for projectiles as well as a way to launch and knock down opponents.
- Customs
- Custom 1 - Hissatsu Shinobi-Bachi: Mai performs a cartwheel kick that deals 7% damage before following up with a slow-dropping flaming elbow strike that deals 8% damage. Has some horizontal recovery potential and the flaming elbow strike can kill at 85% and higher.
- Custom 2 - Hishou Ryuuenjin: Mai performs a flaming somersault kick that can launch opponents straight up into the air, which is notably good for follow ups and is tough for directional inputs. It deals 10% damage and has a burning effect for opponents with 45% health or higher.
- Custom 3 - Ryu-Enbu: Mai spins with her whole body, creating a ring of fire around her as she rolls towards her opponent, dealing 2% damage on loop and dealing low knockback. It can also burn opponents with higher percents.
|
Up Special
Ukihane
|
Mai uses her fans to slow her descent. The player can tilt the control stick to alter her trajectory and then hit the attack button again to fall onto her target with a knee-drop that spikes and deals 12%. This move has a massive hitbox that can stuff or trade with anti-airs and even stop air-to-air attempts to counter this attack. This move also causes a hard knockdown, which can set up Mai for offensive pressure or give her time to back off and reestablish her zoning.
- Customs
- Custom 1 - Flying Squirrel Furiante: Mai jumps into the air and rushes diagonally towards the opponent, striking them and sending them flying back, dealing 14% damage. Good for keeping away but not great for recovery aside from ledge trumping.
- Custom 2 - Yume-Zakura: An aerial grab that sees Mai grab an aerial opponent and spike them into the ground, and then leaping away as they fall down on the ground in either a knockdown state or just being sent to their doom below in a stun state. This deals 9% damage as well. If done with no opponent around, Mai instead just does a spinning kick that deals 7% damage and can reflect projectiles.
- Custom 3 - Houou no Mai: Mai jumps up and comes down in a wheel of flame, burning her opponent with a burning blast that deals 15% damage but has a low range. It is effective as anti-air due the duration she gets while in the air.
|
Down Special
Kagerou no Mai
|
Mai surrounds herself in columns of flames, dealing 15% damage to nearby opponents while rising them into the air with the columns of flames. The hitbox is around Mai, so it's short range, but it can reach fairly high above Mai, being about double her size in height, somewhat similar to Palutena's up-tilt. Will deal a burning effect as well.
- Customs
- Custom 1 - Fuusha Kuzushi: Mai grabs the opponent with her legs, flips them over, and slams them into the ground for 12% combined damage. It's a great command grab that can be done in the air, but won't launch opponents far, instead just knocking them to the ground.
- Custom 2 - Hakuro no Mai: Mai spins around with her fans and tassels outstretched, hitting any surrounding opponents to deal 5% damage per hit, of which there are a total of three. Won't launch but will flinch, stunning the opponent if all three hits connect. Can kill shields as well.
- Custom 3 - Musasabi no Mai: Mai crouches, then jumps back and then dashes in a diagonal direction towards her opponent to knock them down, dealing 11% damage. If done against a wall, it'll gain additional speed and power, dealing 14% damage.
|
Final Smash
Shiranui Ryu: Kunoichi no Mai
|
This move has two variants depending on whether it's activated via Smash Ball or Smash Meter:
- Metered: Mai strikes a nearby enemy and then uses her speed to attack from multiple directions to deal 35% damage before slamming them into the ground with their head caught between her feet as she strikes a laying pose, dealing an additional 10% damage and keeping them knocked down.
- Unmetered: Mai strikes the enemy then uses her speed to attack from multiple directions to deal 65% damage, afterwards she strikes a pose, launching a screen wide fireball that deals 5% damage on contact, as well as burning foes.
|
| Taunts
|
- Up Taunt - Mai spins around with an umbrella in her hand, obscuring her for a moment before she comes out dressed like either Zero Suit Samus, Bunea, Princess Peach, Chun-Li, Princess Rosalina, or Palutena, before swinging her umbrella back to go back into her normal outfit.
- Side Taunt - Mai swings her fan up and down before holding it up to her chin, stating "かかってらっしゃい!" (Come at me!)
- Down Taunt - Mai turns away from her opponent and points her fan towards them as she puts her hand on her knee, stating "どうしたの?" (What's the matter?)
|
| Special Team-Up Names
|
- With Kyo Kusanagi - Burn to Fight
- With Chun-Li - Queens of Fighters
|
| Alternate Costumes
|
Mai Shiranui (Max Impact) Mai Shiranui (Rollerblader) |
| Unlock Conditions
|
| TBA
|
|
Dante
|
A devil hunter who runs the business known as Devil May Cry, Dante is also the second son of Sparda, a demon swordsman who married a human woman known as Eva. Wise-cracking and incredibly flippant to even the most terrifying looking demons, Dante can shrug off just about any wound that would normally kill a human, such as being outright impaled. While coming off as incredibly aloof at times, Dante has a heart of gold that becomes evident as people spend more time with him. He attacks with a sword primarily, being able to use a pair of pistols to stagger off opponents and then following up with an attack. Additionally, with his Stylish Ranking gimmick, Dante is one of the few characters that benefits from not being stale with their moves.
|
| Move
|
Description
|
| Entrance
|
Dante appears with his feet on a desk before kicking it away and bringing out Rebellion, his blade.
|
Gimmick
Stylish Ranking
|
Dante gains boosted knockback and occasionally extra damage with the more mix-ups he does with his moves, while is punished for performing the same moves over and over to make them stale. As such, Dante is more punished for stale moves while is rewarded for consistently changing up his moves. The rankings go from D to S and are listed below in how they boost his knockback and damage output. Taunting prior to an attack will skip Dante's Stylish ranking to a B.
| D
|
C
|
B
|
A
|
S
|
|
Dull
|
Cool!
|
Bravo!
|
Absolute!
|
Stylish!
|
| -5%
|
0%
|
5%
|
10%
|
15%
|
|
Neutral Special
Ebony and Ivory
|
Dante fires his guns known as Ebony & Ivory, which are generally weak projectile attacks that deal .5% damage per fire, with two fires each 30 frames. However, when a total of 6 fires happen in succession and land on the opponent, they become locked into a hitstun state that Dante can then follow up with another attack!
- Customs
- Custom 1 - Revolver: Dante fires the revolver, which causes an immediate hit-stun but has a reload animation that will leave Dante with some end-lag. It deals 3% damage.
- Custom 2 - Grenadegun: Dante fires off a Gernadegun that has a long start up but deals 11% damage. Has some end lag as well.
- Custom 3 - Nightmare-β: Dante can shoot weak horizontal green laser beams with the Nightmare-β (dealing 2.5% damage), but by charging the Nightmare-β, you can deal almost 20% damage with enough of a charge.
|
Side Special
Stinger
|
Dante strikes forward with his sword, having a bit of a start up but when released Dante will move forward horizontally quite a bit and deal 15% damage. It can be used as a horizontal recovery as well, having quite the range with it.
- Customs
- Custom 1 - Vortex: Dante spins around with his sword, able to knock opponents back with it. Vortex doesn't work as much as a horizontal recovery for Dante, but deals 18% damage with increased knockback. It must also start in air or Dante which just release a electrical barrier in front of him.
- Custom 2 - Ifrit Combo: Dante begins with a flaming punch and then continues for a successive three punches and kicks, knocking the opponent way back for a total of 35% damage. This move has a ton of start up time, being four moves essentially played together. The player has to tap the input each time, with the final move having the most endlag.
- Custom 3 - Round Trip: Dante throws his sword like a boomerang, doing 10% damage on the first hit and then 12% damage on the second. It goes quite the distance and leaves him unable to pull off any sword-based move until it returns back to him.
|
Up Special
Air Hike
|
Air Hike creates a glyph under Dante's feet and acts as a second, additional jump that can be used for vertical recovery. It is quite useful, although it deals no damage whatsoever.
- Customs
- Custom 1 - Kick 13: Dante launches up in the air with a sweeping roundhouse kick that puts opponents into a helpless state as they ascend up, allowing Dante to follow up with another move. It deals 12% damage.
- Custom 2 - Air Raid: Dante jumps into the air in a floating state, allowing him to throw thunder at foes that deals 9% damage on hit. Floating state lasts 120 frames before Dante goes back to the ground.
- Custom 3 - Helm Breaker: A powerful jumping overhead swing that deals 20% damage but goes straight down with the blade, making it fairly bad as a recovery if not cancelled in time.
|
Down Special
Royal Guard & Release
|
Dante blocks attacks and then can follow up with a parry attack that deals two times the original damage of what original attack was. Unlike most counters in the game, this deals entirely as a block until you let go of the button, in which Dante will parry. This means that it has a timing window that opponents need to be mindful of, because if they continue to try and attack a blocking Dante, they will increase the amount of damage he does to them. This also means that Dante needs to time it so that his opponents don't run before he can follow up or lose the window to deal the parry, since this can happen 45 frames after the last hit.
- Customs
- Custom 1 - Million Stab: Dante quickly stabs the enemy with blinding speed creating enough momentum to blast them backward, dealing a total of 11% damage. Has a bit of endlag.
- Custom 2 - Drive: Dante's Rebellion glows red and then releases an attack with a slow start that sends a powerful shockwave towards distant enemies, dealing 12%. The buildup of Drive can be held for longer to launch a stronger shockwave, which can deal 17%.
- Custom 3 - Crazy Dance: Dante plants Rebellion into the ground and spins around it, kicking all opponents in the immediate vicinity, causing hitstun. Deals 7%, which is then followed up with a devastating slash that deals 10% which sends enemies flying.
|
Final Smash
Devil Trigger
|
Dante transforms into his Devil Trigger form, which causes a explosion around that disrupts attacks being done onto them and deals 10% damage to opponents on blow back. In this form, Dante fires off meteor projectiles that deal 15% damage to opponents, as well being able to use Vortex to swerve in other directions. At the end of this Final Smash, Dante releases a giant dragon that deals 50% damage. In the weakened meter version of this Smash, Dante gets less time and lacks the Dragon finisher.
|
Team Final Smash
Jackpot
|
If Bayonetta and Dante are on a team together with no other members, they perform a unique Final Smash together that is a reference to Devil May Cry 3. In this Final Smash, Dante and Bayonetta press their guns together and shout "Jackpot!", with two energy bullets (one red, one purple) spinning out the guns and twirling together to deal 45% metered and 100% damage unmetered. This Final Smash is unique; no other set of characters have a shared Final Smash together like this.
|
| Taunts
|
- Up Taunt - Dante waves both of his hands back, saying "Come on, wimp."
- Side Taunt - Dante waves a single hand foward, saying "Come and get me!"
- Down Taunt - Dante crouches down while clapping his hands before waving one up, saying "Hey, what's up?"
|
| Special Team-Up Names
|
|
| Alternate Costumes
|
|
|
| Unlock Conditions
|
| TBA
|
|
Roxas
|
Roxas is Sora's Nobody, the result of his heart being lost to darkness but still having the will to live on. Roxas does not actually understand what he is for much of his existence, although he joins Organization 13 for possible answers. After a difficult and emotionally taxing journey, Roxas is put into a virtual Twilight Town to join him and Sora together into a complete being again. Roxas is unique in that he is able to use two Keyblades and he is Sora's Echo Fighter, with the main difference being that Roxas hits twice with most of his attacks due to having two Keyblades. He is also much more aggressive than Sora with his fighting style, abandoning any semblance of having any defense moves.
|
| Move
|
Description
|
| Entrance
|
A black orb appears on the stage and Roxas steps out of it, brandishing two Keyblades.
|
| Jump/Glide
|
Roxas has a high first jump and a second smaller jump. When the player holds down the button, Roxas enters into a fast glide that is so fast it actually has a lens flare at the start of the animation. This also makes him descend faster than Sora's glide, which is a bit slower in that regard.
|
Neutral Special
Dual Judgement
|
Roxas leans forward as he tosses Oathkeeper as a spinning projectile that deals multi-hitting damage that deals 2% damage per 30 frames, and an additional 3% damage when at the end of the animation. Pressing the button again will allow Roxas to throw Oblivion as an additional projectile with the same properties. This disallows Roxas from performing more attacks. After going a certain length, about five character lengths wide, it reappears back in Roxas' hand with some end lag.
- Customs
- Custom 1 - Blizzard Edge: Roxas performs a high, leaping slash that deals 5% damage and causes ice to burst from the ground for an additional 6% damage, freezing opponents on the sweetspot.
- Custom 2 - Quick Blitz: Roxas performs a simple arced slash onto his opponent, dealing 7% damage. He then follows up with another arced slash pointed upwards, launching his opponent into the air for 6% damage. Has no start-up lag but a bit at the end.
- Custom 3 - Tornado Strike: Roxas performs a spin attack and creates a vortex that lifts enemies into the air, dealing 1% per 15 frames and an additional 5% damage at the end of the animation. The vortex can only stay on screen for 3.4 seconds before vanishing.
|
Side Special
Sonic Blade
|
Roxas performs Sonic Blade, which allows him to quickly twirl through the air with his Keyblades charged an upwards to six times through tapping the attack button. He gains superarmor during the first charge, although loses it with each successive attack. Sonic Blade deals 6% damage each attack and causes the opponent to flinch when used. When Roxas performs Sonic Blade six times, he falls into a helpless state.
- Customs
- Custom 1 - Prism Windmill: Roxas spins forward with their Keyblades, spinning it around as they boost forward onto the foe, dealing a multi-hit attack that deals 4% damage per 25 frames before launching them away. Has some end lag and if Roxas were to do this in air and then do another aerial attack, he would be forced into a helpless state. His version of the attack has a larger hit box than Sora's, but deals less overall damage.
- Custom 2 - Chain Rave: Roxas holds his Keyblades by the chain instead of by the handle, swinging them back and forward and dealing 5% damage per swing to both sides his body, of which there are three total swings. When done in air, Roxas will be able to pull off another aerial attack before being forced into a helpless state.
- Custom 3 - Fire Windmill: Roxas spins forward with Oathkeeper, spinning it around as they boost forward onto the foe, dealing a multi-hit attack that deals 1% damage per 20 frames before launching them away with an attack from Oathkeeper that deals 10% damage. Has a lot of end lag and forces Roxas into a helpless state afterwards.
|
Up Special
Aerial Recovery
|
Roxas can cancel knockback done to him with aerial recovery, which sets him upright and allows him to perform aerial attacks without going into a helpless state for a short time.
- Customs
- Custom 1 - Athletic Flow: Roxas glows with a violet energy, able to jump off the ground or wall and leap into any direction that the control stick is aimed at. Additionally, pressing the special attack button again will have Roxas perform a powerful energy attack with the Keyblade, dealing 10% damage to opponents. He can bounce off walls or other characters when in contact, dealing 5% damage. However, he has no superarmor when performing this, and will be rendered into a helpless state when attacked.
- Custom 2 - Homing Glide: Roxas can glide at a high speed as swords surround him. Charges straight towards a foe on either the ground or air. Deals 6% damage on contact, however it's recovery uses are very minimal.
- Custom 3 - Sonic Impact/Double Impact: Roxas charges forward with both Keyblades and knocks foes away for 9% damage, able to follow it up by tapping the special attack button again with Double Impact to do a attack that deals 11% damage. Will put Roxas into a helpless state if he deals Double Impact in the air.
|
Down Special
Stun Impact
|
Roxas creates a bluish transparent sphere around him with a shockwave that stuns opponents and deals 8% damage, allowing for follow ups. Has a bit of an end lag, longer than Sora's version of the attack.
- Customs
- Custom 1 - Deck Command: Roxas is able to cycle through magic commands to cast Fire, Blizzard, and Thunder. When casting a spell, it will change to the next attack in the list, so if Roxas casts Fire, he would cast Blizzard next and it loops. Fire deals 6% damage and causes opponents to flinch, Blizzard deals 3% damage and freezes opponents, and Thunder deals 7% damage and has the shortest range out of all them, but is by far the fastest.
- Custom 2 - Whirlwind Swing: Roxas charges Oathkeeper and Oblivion with energy before swinging them outward, generating a swirling vortex of slashes around him to repeatedly strike any nearby opponent for 3% damage per slash, with a total of nine quick slashes occurring around the vortex.
- Custom 3 - Hurricane Blast: Roxas throws Oathkeeper and Oblivion forward a short distance while making them spin around like buzz saws, repeatedly hitting the opponent for 3% damage per 25 frames and drawing them in closer if they connect, before summoning them back to his hands.
|
Final Smash
Magic Hour
|
Roxas fires spheres of blue light at the opponent. If they hit, the opponent is blinded by the blasts as Roxas empowers his Keyblades with light, charges at the opponent, and cuts them down with a slash to the chest, dealing 45%. Roxas then leaps into the air and begins floating in place, forming some pillars of light into a circle around him as the Nobody symbol appears in the center of them. Roxas then crosses his Keyblades over his chest before swinging them outward and calling down a barrage of light beams from the sky to rain down on the opponent, finishing his foe off by calling down one final beam to strike them before exploding. This will deal 100% damage in total. In the Metered version of this Final Smash, only the slash to the chest occurs.
|
| Taunts
|
- Up Taunt - Roxas sits down as he eats a Sea Salt Popsicle.
- Side Taunt - Roxas readies his stance, looking incredibly aggressive.
- Down Taunt - Roxas asks "Why don't you quit?" as he grips the Keyblades and assumes a wide stance.
|
| Special Team-Up Names
|
- With Sora - Complete Heart
|
| Alternate Costumes
|
Roxas (Kingdom Hearts II) |
| Unlock Conditions
|
| TBA
|
|
Jade
|
Jade is an expert martial artist who traveled with an mysterious elderly man named Rab. She is a purely offensive character with no real support moves in Dragon Quest 11. She is able to dish out a lot of damage with grace and beauty. As a offensive character, she doesn't have much in the way of support skills, making her fairly powerful and a little speedy but not much in the way of defense. Re-vamp is a fairly powerful move in her default set that allows her to power herself up for four attacks before wearing off and needing to wait out the cooldown. She can also use kicking and spear attacks to inflict tons of damage as well as keep her opponents down. Her specials hone these skills as well as play with them, allowing her to inflict enemies to sleep or use multi-hitting spear and claw attacks.
|
| Move
|
Description
|
| Entrance
|
Jade kicks in from the stage, slamming her spear in like a javelin as she hops down and readies it.
|
Neutral Special
Re-vamp
|
Re-vamp transforms Jade into a dark bunny-girl with a vampiric appearance. This boosts her stats all the way across, boosting her speed, defense, and attack power. These last for four attacks and inflicting the boost will drain the MP meter over her portrait. This boost effects her entire moveset for four attacks, so make these four attacks count! She also becomes resistant to any kind of stun, paralysis, or poison effect while in this state.
- Customs
- Custom 1 - Propeller Blade: Jade juts forward with the Propeller Blade claws, dealing 9% damage with the initial strike, before a gust of wind sends the opponent into the air and Jade follows up with a 11% damage spiking attack. Can't be cancelled once the first hit lands.
- Custom 2 - Can Opener: Jade juts forward with a long claw that deals 5% damage on the first hit before following up with 15% damage that leaves the opponent stunned.
- Custom 3 - Crone's Claw: Jade attacks with a claw attack that deals 10% damage equally across both strikes. It drains both Power Smash meter as well as any other meter that the opponent has on them.
|
Side Special
Multi-Thrust
|
Jade strikes forward with her spear, thrusting it a total of three times by default and dealing 8% damage with each thrust. This attack can be cancelled into a roll for evasion.
- Customs
- Custom 1 - Lightning Thrust: Jade jumps into the air as her spear is electrified, slamming it into the foe to either deal 15% damage or on a 40% chance, deal 23% instead.
- Custom 2 - Crushed Ice: Jade's spear gains an icy tip, allowing her to bash it onto foes a total of three times while ice breaks off, which deals 4% damage in between the bashing that deals 6% damage. This can total up to 26% damage.
- Custom 3 - Lightning Storm: Jade slams her spear into the ground as a pulse of lightning shoots forward, paralyzing foes while dealing 14% damage.
|
Up Special
Harvest Moon
|
A sweeping kick with both of her legs upwards into the sky, this knocks airborne foes far away from her and deals 12% damage. It's quick, it's powerful, but it needs to be hit precisely right or it'll whiff.
- Customs
- Custom 1 - Miracle Moon: Jade jumps in the air with a kick that will deal 9% damage to foes before slamming back down with another set of spinning kicks that deal 10% damage. This segmented attack gives her less recovery but deals more damage.
- Custom 2 - Pink Typhoon: Jade spins as a pink tornado surrounds her, which deals 12% damage while sending opponents up into the air. Can be used as a recovery move but has a lot of end lag and may instead rocket your opponents upwards with you.
- Custom 3 - Pep-Up: Jade peps herself up, becoming faster and more resistant against knock-back at the cost of attack power.
|
Down Special
Legsweep
|
Jade gets low to the ground, sweeping with her legs to knock opponents down to the ground in a brief stunned state. While this move does only 5% damage, it allows Jade to follow up with an punishment of attacks.
- Customs
- Custom 1 - Vacuum Smash: Jade attacks with a wind-based spinning kick that draws opponents into the attack when she executes it, dealing 13% damage.
- Custom 2 - Femme Fatale: Jade poses with her arm bent as she leans in, heart-shaped projectiles homing onto opponents while dealing 13% damage. Has a chance to inflict sleep.
- Custom 3 - Hip Drop: Jade walks forward and then launches themselves posterior-first in a seductive manner, dealing 16% damage.
|
Final Smash
Electric Light
|
Jade, Hero, and Sylv appear in front of of a curtain, posing and generally being pepped up before Jade reveals what is behind the curtain: a group of Metal Slimes! The Metal Slimes bounce around and attack the other characters that have been transported into this cutscene, dealing a total of 50% damage. The Final Smash ends when a King Metal Slime bounces on top of one character, dealing 80% damage. In the metered version of this Final Smash, the King Metal Slime is absent.
|
| Taunts
|
- Up Taunt - Jade twirls her spear before holding it horizontally, backing it away before putting it by her side.
- Side Taunt - Jade rests the spear's tip into the ground while leaning into it before going back into idle.
- Down Taunt - Jade performs a high kick before slowly putting her foot down.
|
| Special Team-Up Names
|
TBA
|
| Alternate Costumes
|
Uniform de l'Academie Jade |
| Unlock Conditions
|
| TBA
|
|
Travis Touchdown
|
A assassin with a beam katana that he won off an auction site, Travis joined the United Assassins Association so he could make more money. Climbing the ladder to become the number 1 assassin in the United Assassins Association, Travis eventually retires from his life as an assassin, living in a RV out in the woods. Travis uses his signature beam katana to battle opponents, which can be charged to increase it's range and strength. It also charges his base recovery move, which relies on it to be more useful for the assassin. Travis' strengths are that he can unleash quick attacks and has a lot of melee options, but doesn't really have anything for projectiles except for Dark Step, which can guard against them and works as a counter. He can be easily punished via Charge Mode or missing with some variants of his moves.
|
| Move
|
Description
|
| Entrance
|
Travis jumps out from his Schpeltiger motorcycle and pulls out the Beam Katana.
|
Neutral Special
Charge Mode
|
Travis shakes his laser katana to extend the reach and damage it does, carrying out to all attacks including standard attacks. The range extends about another 3 character lengths and deals an additional 1.3x damage. It leaves Travis incredibly vulnerable. The charge left for the laser katana is shown by the meter next to Travis' portrait, which depletes 1 of 10 pips for every 3 successful attacks.
- Customs
- Custom 1 - Quick Charge: Charging is quicker but the more it is performed, the higher chance it has to tire out Travis, preventing movement after a charge, leaving Travis even more vulnerable.
- Custom 2 - Berry Charge: Charging is somewhat slower but lasts longer for special attacks, depleting the meter by 5 successful attacks per pip as opposed to 3.
- Custom 3 - Cherry Charge: The longest charge variation, but enemies will be slowed via chronoboxes around Travis during the apex of his charge, allowing him to cleanly attack them while their movement is slowed.
|
Side Special
Strawberry on the Shortcake
|
Travis strikes forward, doing about 4% damage before unleashing with a swing attack that does 6% damage. Charge Mode can extend this move's reach and it's damage. It's fast speed allows it to deal quick damage. Characters striked will have white lines across their bodies to represent them being sliced by the attack. When Charge Mode is enabled, it knocks the opponent down at the end of the animation but adds additional frame data at the end of the move.
- Customs
- Custom 1 - Strawberry Speed: Travis unleashes a quicker variant of this move that deals 3% damage on the first strike and 9% damage on the second strike. This move has more endlag as well, meaning that while Travis strikes much more powerfully on the follow up, if the opponent is knocked out of range by the initial lunge, not only does it do less damage but is far more punishable. Unaffected by Charge Mode.
- Custom 2 - Grasshopper Strike: Travis has a start up animation where the laser katana surges with electricity before striking with an axe motion downwards, dealing 15% damage. Has more start-up but deals more damage and has overall better range. Unaffected by Charge Mode.
- Custom 3 - Silent Strawberry: During the initial lunge forward, Travis will not do any damage although will still deal some knockback, but the strike afterwards will do 20% damage. This has better reach under the effects of Charge Mode and deals more damage (26%).
|
Up Special
Getting Trashed
|
Travis puts on a rocket pack. This move adds gravity to Travis, but also gives him multiple pushes up into the air, allowing him to have a total of 10 rocket powered jumps that are very short and very weighty. This move can be cancelled by doing a smash attack or hitting the ground. The amount of energy Travis has for the move is dependent on Charge Mode.
- Customs
- Custom 1 - Cranberry Chocolate Sundae: Travis swings upwards with the laser katana to deal 5%, pulling off a leap before slamming down into the ground to deal 7% damage. Can be cancelled while in the air as well as having a directional input.
- Custom 2 - Guard Cranberry: Travis doesn't deal any damage with this custom, as he hoists the katana to do a block that reflects projectiles.
- Custom 3 - Strike Cranberry: Travis strikes the ground, releasing a shockwave of lightning across the ground.
|
Down Special
Dark Step
|
Travis gets into a defense stance, able to guard against projectiles by killing them and can be used as a counter move where the screen gets dark as Travis unleashes a flurry of slashes that deals 15-23% damage depending on whether the move is charged or not. The timing window gets much tighter with each successive use.
- Customs
- Custom 1 - Earthquake Maker: Travis releases a small minature version of the Earthquake Maker, which shakes the ground around it and deals damage. Unaffected by Charge Mode.
- Custom 2 - Blueberry Cheese Brownie: Travis puts his laser katana out in a defensive stance, able to reflect and parry projectile attacks for 1.4x the original damage. The parry window will get longer if Charge Mode is used.
- Custom 3 - Slow Blueberry: This variant of the Dark Step has a long reaction window, but does the least amount of damage, dealing only 10% damage uncharged and 15% damage charged.
|
Final Smash
Tiger Touchdown
|
Travis transforms into a tiger, able to move across the stage quickly and cannot flinch or get damaged. He deals 10% damage via slash attacks and can do two low jumps. Metered this lasts for 3 seconds, while unmetered it lasts for 7 seconds.
|
| Taunts
|
- Up Taunt - Travis pets his cat Jeane.
- Side Taunt - Flips his laser katana in the air before grabbing it again.
- Down Taunt - Puts on a VR Helmet, playing Hotline Miami.
|
| Special Team-Up Names
|
|
| Alternate Costumes
|
|
|
| Unlock Conditions
|
| TBA
|
|
Shinobu Jacobs
|
Shinobu Jacobs was an assassin that Travis encountered during the first No More Heroes, who believed that Travis killed her father with a beam katana. In actuality, it was likely his twin brother Henry, as Travis was actually a big fan of her father but had never met him in person. She is a fairly young assassin, still seen to be in school during the first No More Heroes, but in actuality her age is 18 in the first game. In the second game, where she is now 21, she develops a crush on Travis that Travis seems offput by, making it one of the few female relationships he has where he actually respects them and doesn't view them as a object of desire or have to kill them in order to ascend the assassin hierarchy. Shinobu takes over for a couple of levels in No More Heroes 2 and is slated to have a whole DLC campaign in Travis Strikes Back.
Shinobu Jacobs is an Echo Fighter of Travis Touchdown, possessing pretty much all of his moves with a few minor additions, although her Side Special, Sonic Sword, is entirely new. Shinobu sharpens her sword as opposed to charging it and has a overall longer charge and boasts more power and speed than Travis, but doesn't have the range he does when he uses Charge Mode. Additionally, she is more precise in her fighting style, unable to really buffer attacks while running. As such, this gives her somewhat of a disadvantage even against other sword users, although she can buffer attacks in the ending frames of her run.
|
| Move
|
Description
|
| Entrance
|
Shinobu hops onto the stage, bouncing around before landing and unsheathing her sword.
|
Neutral Special
Sharpen Mode
|
Shinobu sharpens her katana with her nails to increase the speed and damage it does, carrying out to all attacks including standard attacks. Shinobu's attacks become 1.2x times faster and deal 1.4x more damage when her katana is sharpened. This move leaves Shinobu vulnerable but she gains an overall longer charge than Travis, depleting 1 out of 10 pips for every 6 successful attacks. Tapping the button will only restore a single pip, where as holding it can restore all the pips but takes longer.
- Customs
- Custom 1 - Quick Sharpen: Sharpening is quicker but the more it is performed, the higher chance it has to tire out Shinobu, preventing movement after a charge, leaving Shinobu even more vulnerable.
- Custom 2 - Berry Sharpen: Sharpening is somewhat slower but lasts longer for special attacks, depleting the meter by 8 successful attacks per pip as opposed to 6.
- Custom 3 - Cherry Sharpen: The longest charge variation, but enemies will be slowed via chronoboxes around Shinobu during the apex of her charge, allowing her to cleanly attack them while their movement is slowed.
|
Side Special
Sonic Sword
|
Shinobu's blade glows the player port color (P1 - Red, P2 - Blue, etc) and then Shinobu swings to unleash a energy blast in that color that deals 9% damage and causes bleed if the blade is sharp. Aside from it's start up lag, it's a good horizontal projectile that is immune to being reflected, just being killed upon attempts to reflect it. It however, can be pocketed or sucked up via Vacpack.
- Customs
- Custom 1 - Strawberry on the Shortcake: Shinobu strikes forward, doing about 4% damage before unleashing with a swing attack that does 6% damage. Sharpen Mode can extend this move's reach and it's damage. It's fast speed allows it to deal quick damage. Characters striked will have white lines across their bodies to represent them being sliced by the attack. When Sharpen Mode is enabled, it knocks the opponent down at the end of the animation but adds additional frame data at the end of the move.
- Custom 2 - Strawberry Speed: Shinobu unleashes a quicker variant of this move that deals 3% damage on the first strike and 9% damage on the second strike. This move has more endlag as well, meaning that while Shinobu strikes much more powerfully on the follow up, if the opponent is knocked out of range by the initial lunge, not only does it do less damage but is far more punishable. Unaffected by Sharpen Mode.
- Custom 3 - Silent Strawberry: During the initial lunge forward, Shinobu will not do any damage although will still deal some knockback, but the strike afterwards will do 20% damage. This has better reach under the effects of Sharpen Mode and deals more damage (26%).
|
Up Special
Cranberry Chocolate Sundae
|
Shinobu swings upwards with the katana to deal 5%, pulling off a spinning leap before slamming down into the ground to deal 7% damage. Can be cancelled while in the air as well as having a directional input.
- Customs
- Custom 1 - Getting Trashed: Shinobu puts on a rocket pack. This move adds gravity to Shinobu, but also gives her multiple pushes up into the air, allowing her to have a total of 10 rocket powered jumps that are very short and very weighty. This move can be cancelled by doing a smash attack or hitting the ground. The amount of energy Shinobu has for the move is dependent on Sharpen Mode, which depletes at the same rate that Travis does.
- Custom 2 - Guard Cranberry: Shinobu doesn't deal any damage with this custom, as she hoists the katana to do a block that reflects projectiles.
- Custom 3 - Strike Cranberry: Shinobu strikes the ground, releasing a shockwave of lightning across the ground that deals 7% damage and causes heavy stun.
|
Down Special
Dark Step
|
Shinobu gets into a defense stance, able to reflect projectiles if her katana is sharpened and can be used as a counter move where the screen gets dark as Shinobu unleashes a flurry of slashes that deals 15-23% damage depending on whether the move is charged or not. The timing window gets much tighter with each successive use.
- Customs
- Custom 1 - Earthquake Maker: Shinobu releases a small minature version of the Earthquake Maker, which shakes the ground around it and deals damage. Unaffected by Sharpen Mode.
- Custom 2 - Blueberry Cheese Brownie: Shinobu puts her katana out in a defensive stance, able to reflect and parry projectile attacks for 1.4x the original damage. The parry window will get longer if Sharpen Mode is used.
- Custom 3 - Slow Blueberry: This variant of the Dark Step has a long reaction window, but does the least amount of damage, dealing only 10% damage unsharpened and 15% damage sharpened.
|
Final Smash
Slasher Finish
|
Shinobu strikes forward in a lunge, phasing through opponents. Any that she goes through get trapped in a cutscene against a black background where Shinobu quickly slices them with the katana before slicing across the top to deal either 45% damage metered or 100% unmetered.
|
| Taunts
|
- Up Taunt - Shinobu slams the hilt of her blade onto her palm, shouting "Loser!"
- Side Taunt - Shinobu flings a slice of pizza and shouts "Moe!"
- Down Taunt - Shinobu points her blade in the direction she's facing and then twists it, stating "If you can kill me, you can fight Travis, but that's a huge IF." This is a reference to her opening line against Million Gunman in No More Heroes: Desperate Struggle.
|
| Special Team-Up Names
|
|
| Alternate Costumes
|
Shinobu Jacobs (No More Heroes) |
| Unlock Conditions
|
| TBA
|
|
Shovel Knight
|
A practitioner bound to the Code of Shovelry, Shovel Knight is able to do a lot with their signature weapon known as the Shovel Blade. Their quick thinking and ingenuity has gotten them out several scrapes, even with their small stature. Honest and helpful, their creed is "Slash Mercilessly and Dig Tirelessly!" The player can switch between either a male Shovel Knight or a female Shovel Knight before entering battle. In battle, they utilize Relic Moves which cost magic to execute, which Shovel Knight gains through loot they dig up. Shovel Knight is quite the unique fighter in this respect.
|
| Move
|
Description
|
| Entrance
|
Shovel Knight jumps onto the stage and hoists their Shovel Blade up.
|
Gimmick
Relic Moves
|
Shovel Knight earns magic points through using their Shovel Blade, which drops loot that powers up a meter of 50 magic points. Some of Shovel Knight's moves drain this magic point meter, requiring Shovel Knight to continually collect loot from their opponents to continue using their Side Special and Up Special.
|
Neutral Special
Tireless Dig
|
Shovel Knight can attack with their Shovel Blade, knocking gems and treasure away from their opponent, dealing 5% damage per strike. They can restore their magic through this move.
- Customs
- Custom 1 - Tired Dig: A slower version of the move that deals 7% damage and results in more loot.
- Custom 2 - Frenzied Dig: A faster version of the move that deals 3% damage and results in less loot.
- Custom 3 - Spade Dig: Shovel Knight uses a Spade Blade, which has a smaller hitbox but deals 9% damage and a lot more loot. It also buries opponents on impact.
|
Side Special
Chaos Sphere
|
Shovel Knight unleashes a green sphere that darts around the stage in random directions, dealing 10% damage. It disappears after 200 frames. This is a relic move that costs 6 out of 50 magic points.
- Customs
- Custom 1 - Dust Knuckles: Shovel Knight punches forward quickly with golden gauntlets, dealing 6% damage with significant knockback and draining 2 magic points out of 50.
- Custom 2 - Alchemy Coin: Shovel Knight throws a golden coin that has the chance to make opponents drop a ton of loot for Shovel Knight to collect. It costs 8 magic points out of 50.
- Custom 3 - Fishing Rod: Shovel Knight draws a fishing line, knocking opponents away for 6% damage or if used at the edge of a stage will have a chance to draw up a healthy amount of loot. Shovel Knight can also use this to rescue allies in team battles should they get thrown off a edge. It drains 6 magic points out of 50.
|
Up Special
Flare Wand
|
Shovel Knight can fire a giant Kirby-sized fireball that damages foes for 4% damage, with a incredibly wide range. They can also tilt the control stick to fire it in different directions. This is a relic move that costs 4 out of 50 magic points to use. It deals burn on impact.
- Customs
- Custom 1 - Throwing Anchor: Shovel Knight throws a powerful anchor that goes up in an arc that deals 7% damage and costs 6 magic points out of 50 to execute.
- Custom 2 - Mobile Gear: Shovel Knight increases their speed on a speeding gear that allows them to grind their foes from below, dealing 5% damage. Costs 6 magic points out of 50 to execute.
- Custom 3 - Propeller Dagger: Shovel Knight pulls out the Propeller Dagger that makes them fly across horizontally, dealing 7% damage. Costs 4 magic points out of 50 to execute.
|
Down Special
Shovel Drop
|
Shovel Knight can do this move to drop down on their opponent and bounce off them, gaining extra height they normally wouldn't have. They also drops loot and magic restoring bottles from the opponent, which Shovel Knight can pick up if they desire. This move noticeably does not spike and deals 7% damage.
- Customs
- Custom 1 - Weighted Shovel Drop: Shovel Knight descends much faster, with a heavier bounce and dealing 10% damage. This version of the move does spike.
- Custom 2 - Floaty Shovel Drop: Shovel Knight descends much slower, with a lighter bounce and dealing 3% damage.
- Custom 3 - Super Shovel Drop: This golden colored Shovel allows Shovel Knight to descend somewhat slower, dealing only 4% damage to foes. Shovel Knight can also press the attack button while in the air to execute a faster drop with a higher bounce, dealing 7% damage.
|
Final Smash
War Horn
|
Shovel Knight unleashes a powerful move that damages opponents around him for 100% damage unmetered and 45% metered but temporarily prevents Shovel Knight from using any of their Relic moves like the Chaos Sphere or Flare Wand.
|
| Taunts
|
- Up Taunt - Drinks from a Troupple Chalice.
- Side Taunt - Digs at the ground aimlessly.
- Down Taunt - Rests by a fire.
|
| Special Team-Up Names
|
|
| Alternate Costumes
|
|
|
| Unlock Conditions
|
| TBA
|
|
Beatrix LeBau
|
Beatrix LeBau is a slime rancher equipped with a Vacpack and Jet Pack, allowing her to effectively roam the Far, Far Range effectively to find slimes that she can feed to effectively farm them for Plorts. Beatrix is described as a fit and outdoorsy type that can appreciate the small things in life, being a farmer and all. Beatrix is a very different kind of fighter in Smash, with her moveset mostly revolving around the Vacpack. She can store multiple items in it and is very effective against projectile fighters and has good recovery with her jetpack and Phosphor Slimes. Beatrix's main weaknesses are her reliance on her opponent; if they don't have many projectiles to use against her, she can't be used to her full potential. Additionally her suction does not work like a typical grab and melee opponents can do a lot of damage to her given the chance. While this is a weakpoint for her, she still has a lot of tools to deal with them.
|
| Move
|
Description
|
| Entrance
|
Beatrix flies onto the stage via a jetpack and lands down on the stage, looking around.
|
Gimmick
Vacpack
|
The Vacpack is Beatrix's weapon of choice and is what the name implies- a vaccuuming gun that can pull items and projectiles in. This is unique from Villager's Pocket or King K. Rool's Blunderbuss in that it has four slots, of which can hold multiple of the same element, being able to hold up to 20 of the same stacked item in each slot. For example, Beatrix can hold 20 of Bowser Jr's cannonball in one slot and can fire off 20 as needed. Projectiles held by Beatrix lose their charge if they had one.
The Vacpack is utilized through 3 of Beatrix's special moves. Each of Beatrix's four slots can be seen below her character portrait and highlights the one active currently.
|
| Jump/Jet Pack
|
Beatrix can jump twice. While in the air, Beatrix can hold to extend her jump for 2.5 seconds, using a jetpack to slowly rise while moving forward. A small blue energy bar appears above her portrait to indicate how much energy she has left; this bar does not recharge until she hits the ground, however Beatrix can stop and resume her jumphold at any time because of this.
|
Neutral Special
Vacpack Suction
|
Beatrix uses the suction function of her Vacpack, sucking in items, projectiles, or even foes and can suck them into one of her four slots. Opponents can not be sucked in, although they will be attracted in and Beatrix can hold them for as long as she wants so long as she holds down on the button. However, this does not work like a grab. There is an initial flinch when opponents are sucked in, but they are free to attack after the stun state. Beatrix must quickly then launch them with her side special in order to avoid being punished.
- Customs
- Custom 1 - Vacpack Tornado: This variant on Vacpack Suction has a smaller range but the stun state lasts longer, up to 90 frames for lightweights and 120 frames for heavyweights.
- Custom 2 - Vacpack Snatch: This variant on Vacpack Suction has a bigger range but the stun state is shorter, lasting 20 seconds for lightweights and 40 frames for heavyweights.
- Custom 3 - Pulse Wave: By tapping the button, Beatrix unleashes a quick pulse around her that knocks foes away but won't deal damage, being reliant on their knockback that has been built up. Holding the button allows Beatrix to only vacuum up items and projectiles, with opponents that are attracted to the suction merely just being knocked away.
|
Side Special
Vacpack Release
|
Beatrix fires either her opponent attached to the front of her Vacpack for 5% damage or fires whatever is currently in her active slot. If she has nothing in her active slot, she does not do anything, showing an animation where the Vacpack just fires a blank. All projectiles shot out are at their normal, uncharged damage.
- Customs
- Custom 1 - Vacpack Charger: Beatrix takes longer to launch from the Vacpack to charge projectiles whenever possible, maximizing a charge. This varies from projectile to projectile. She also holds onto foes longer to launch them for 11% damage.
- Custom 2 - Vacpack Whirlwind: Beatrix sends an projectile or opponent spinning when fired, giving it a less predictable pattern to dodge. Beatrix sends the opponent into the ground, burying them when used, dealing 7% damage and launching them for less distance. Not a good kill move for opponents.
- Custom 3 - Vacpack Spread: Beatrix fires off three projectiles from her slot at the same time, creating a spread of projectiles. When firing a opponent, Beatrix can fire them at a upwards diagonal, straight ahead, or down to the ground for 6% damage with no other effects. Tilting the control stick before firing will allow Beatrix to direct the projectiles from these three angles.
|
Up Special
Phosphor Slime
|
Beatrix summons a Phosphor Slime to take her into the air, giving her a high lift up before letting her float freely. Combined with her jetpack jump hold, Beatrix has a super good recovery because of this. When Beatrix lands or cancels with the Phosphor Slime, the slime will bounce forward and stay active for 5 seconds, although it will attempt to jump off the stage when possible. Beatrix can Vacpack the slime and use it as a projectile that deals 6% damage, and can suck it back up multiple times.
- Customs
- Custom 1 - Pink Slime Jump: Beatrix summons a pink slime that she bounces off, acting as an additional jump to her two she has. The pink slime drops straight to the ground and jumps towards the nearest ledge. Like the Phosphor Slime, it can be Vacpacked and fired for 8% damage, although it has a shorter range.
- Custom 2 - Rock Slime Jump: Beatrix summons a rock slime that she bounces off, being dealt 3% damage but jumping higher because of it. Beatrix can Vacpack the slime and fire it for 12% damage, although it has the shortest range of all her projectiles.
- Custom 3 - Hen Hen: Beatrix holds a Hen Hen in her hands, lightly floating down to the ground. By tapping any other input, Beatrix will throw the Hen Hen and fall normally. Beatrix can suck up the Hen Hen and use it as a projectile, dealing 5% damage with it.
|
Down Special
Slot Switch/Water Geyser
|
Beatrix switches between her four slots, changing to the current active one. This move takes two frames to input and can be held down to have Beatrix go into a defensive stance, which then allows her to fire off a spring of water that does 5-9% damage and puts the wet status effect on opponents.
- Customs
- Custom 1 - Slot Breaker: Beatrix switches between her four slots, changing to the current active one. Holding down on the button makes Beatrix fire off all projectiles in the active slot wildly at once, dealing normal uncharged damage for projectiles she has.
- Custom 2 - Slot Covert: Beatrix switches between her four slots, changing to the current active one. Holding down on the button converts the held items in the slot to water, which can then be used to push opponents back while dealing 6% damage and the wet effect. The more items in the slot that was converted, the more water Beatrix will have to use.
- Custom 3 - Golden Sureshot: Beatrix switches between her four slots, changing to the current active one. Holding down on the button allows Beatrix to lock onto her foe for 3 seconds, allowing for a homing effect to her projectiles that increases the damage they do by 1.3x.
|
Final Smash
Slime Corral
|
Beatrix builds a slime corral around a certain area, trapping opponents in as she unleashes a flurry of various slimes from her Vacpack, dealing 45% damage metered and 100% damage unmetered.
|
| Taunts
|
- Up Taunt - Beatrix spins around on one foot before slamming down her other foot and getting into a combat position.
- Side Taunt - Beatrix hugs a pink slime plush as she reads her Star Mail on a holographic screen.
- Down Taunt - Beatrix does a palm salute and then holds her Vacpack in a pose similar to her idle animation from Slime Rancher.
|
| Special Team-Up Names
|
- With Luigi - Vacuum Fighters
|
| Alternate Costumes
|
|
|
| Unlock Conditions
|
| TBA
|
|
J.J. Macfield
|
J.J. Macfield's story is told in The Missing: J.J. Macfield and the Island of Memories, a puzzle-platformer with a horror twist. She is a girl who is searching for her love interest, Emily, after she mysteriously disappears during their camping trip together. After lightning strikes her, she gains an immunity to the concept of death and has to contort her body to solve the puzzles scattered in her path. In Smash, J.J. Macfield is one of the oddest character concepts yet; a fighter that willingly harms themselves to inflict damage and can reconstitute the damage done to their body. J.J. is a powerful character that can feel very awkward at times, not being particularly strong or fast, as well as her specials constantly changing based off the damage she takes.
|
| Move
|
Description
|
| Entrance
|
J.J. Macfield runs in and and is struck by lightning, appearing barely phased as they look around.
|
| Jump
|
J.J. Macfield has a total of two jumps. The first is a standard jump that sees J.J. rise a bit off the ground, while her second jump has her stick out her legs as she leaps, giving her more horizontal movement while in the air.
|
Gimmick
Self Harm
|
J.J. Macfield has a small body icon appear next to her health bar that shows what body parts have been removed from her, or any other status infliction. This is effected by damage from other opponents, although J.J. Macfield can also inflict damage on her body herself. This allows her to perform different moves as well as fluidly move from damage into attack. Her body also becomes entirely black to obscure what has happened to her. J.J. is able to reconstitute her body at any time, although the damage percentage will remain the same.
This is a list of all the painful transformations and how it effects J.J.'s movement and moves.
| Pain
|
Info
|
Missing
Right Leg
|
J.J's right leg pops after after 25% damage has been done to her or she touches a harmful object she has set down. This slows her movement speed and transforms her Down Special to Leg Throw. Her Side Special is disabled from this point forward.
|
Missing
Left Arm
|
J.J.'s left arm pops off next at 45% or when she touches another harmful object. Her movement speed is doubly effected as she practically crawls across the ground, and Down Special turns into Arm Swing when she's near it.
|
Missing
Legs
|
J.J.'s left leg pops off next at 67% or when she touches a harmful object. Her movement becomes a much more painful crawl. Powers her moves with adrenaline.
|
Missing
Torso
|
J.J. is just left with her head, which is the fastest, as well as the smallest target opponents have to work with, transforming into this at 100% damage. J.J. can't do much besides her down special, which is now Bite. If she takes 120% and starts to flash white, any more hits will end her stock early and she needs to use Reconstitute.
|
|
Neutral Special
Reconstitute
|
J.J. reforms her body back to normal, resetting the damage she or her opponents have done to it. This also has a magnetizing effect to it with nearby opponents.
- Customs
- Custom 1 - Breezing Reconstitute: J.J. reforms her body back to normal with a pushback effect to nearby opponents.
- Custom 2 - Freezing Reconstitute: J.J. reforms her body back to normal with a freezing radius effect that deals 8% damage and inflicts the freeze status onto her opponent.
- Custom 3 - Absorbing Reconstitute: J.J. reforms her body back to normal as a rainbow aura surrounds her, causing projectiles around her to be absorbed and replenished into health. A projectile can heal 3-8% damage depending on it's power.
|
Side Special
Shot Gun
|
J.J. Macfield pulls out a shot gun, firing it for a total of 22% damage on hit. It has strong end-lag but a big spread of damage, as well as knocking foes back. It can only be used when J.J.'s body is complete.
- Customs
- Custom 1 - Box Cutter: J.J. Macfield pulls out a giant box cutter, cutting in maniac slash with both hands, dealing 20% damage with heavy knockback and dealing Bleed (3.2% damage every second for 3-5 seconds) to opponents. It can only be used when J.J.'s body is complete.
- Custom 2 - Barbed Bat: J.J. Macfield pulls back with a barbed baseball bat in both of her hands, swinging it forward to deal 24% damage. Has a long start up animation but a high launch. It can only be used when J.J.'s body is complete.
- Custom 3 - Donut Box: J.J. Macfield attacks by pulling out a donut box, able to throw donuts that act as projectiles, dealing 8% damage. Much faster than Shot Gun and J.J. Macfield can run while holding the donut box, allowing her to keep the frame data to continue without seeing the start up animation again that would allow opponents frames to punish her. It can only be used when J.J.'s body is complete.
|
Up Special
Barbed Jump
|
J.J. Macfield sets a block of barbed wire underneath her, which will remove a body part as she jumps onto it, as well as destroy free body parts. When just a head, it will end J.J.'s stock early. Opponents who attempt to jump onto it will become damaged for 18% damage.
- Customs
- Custom 1 - Aflame Macfield: J.J. Macfield sets down a camp fire, which causes her body to burn up and deal 6% damage on contact. This burning state is active for 330 frames and will deal 1% damage to her every second unless she uses Reconstitute.
- Custom 2 - Head Snapper: J.J. Macfield snaps her neck, her head hanging upside down as she floats up with reversed gravity. A very powerful recovery move, J.J. will fall to the blast zones unless she either Reconstitutes after using the move, or finds the undercling of a platform to stand underneath.
- Custom 3 - F.K. Triple Donut: F.K., the bunny toy, appears and springs out three donut projectiles into the air that deal 3% damage but deal high knockback before vanishing.
|
Down Special
Push Box/Leg Throw/Arm Swing/Bite
|
This move has a lot of moving parts, so let's break it down.
Push Box sees J.J. Macfield slowly pushing box, which can defend her from melee and projectile attacks as well as serving as a platform for her. She can also duck and move to bypass it, which no other fighter will be able to do it.
Leg Throw sees J.J. grab her own leg and throw it for 12% damage. She can aim it by holding down the special button.
Arm Swing sees J.J. swing her arm while she's on the ground, able to deal 17% damage with good reach.
Bite deals 27% damage and has no knockback. It also has no real range either, although J.J.'s head has homing properties when this move is pressed.
- Customs
- Custom 1 - Break It Down: J.J. Macfield quickly changes to one of her pain forms, with each successive use of it destroying more limbs. Deals 5% damage to herself.
- Custom 2 - Donut Roll: J.J. Macfield rolls a giant donut at foes, dealing 12% damage on impact, which will also crumble the giant donut. Can only be used if J.J. has a complete body.
- Custom 3 - Text Messages: J.J. Macfield sinks into the background as she looks through her phone. This acts as a prolonged dodge and will prevent J.J. Macfield from being hit for up to 85 frames. She will be left vulnerable after reentering the battle.
|
Final Smash
Jackie Jameson's Regeneration
|
J.J. Macfield glows with golden energy as she is invincible to any kind of harm that comes her way. She is able to attack freely on the battle field, with her down special becoming a more powerful Donut Roll that deals 22% damage. Her attacks overall are powered by 1.5x. Reconstitute's side effects have a farther range as well. This lasts 5 seconds metered and 11 seconds unmetered.
|
| Taunts
|
- Up Taunt - J.J. Macfield picks up a hat and examines it closely.
- Side Taunt - J.J. Macfield shouts for Emily, both hands by her mouth as she calls.
- Down Taunt - J.J. Macfield checks her phone.
|
| Special Team-Up Names
|
TBA
|
| Alternate Costumes
|
|
|
| Unlock Conditions
|
| TBA
|
|
Sans
|
Sans is a skeleton hailing from an underground world populated by monsters. Sans may not seem to be much more than a wise-cracking skeleton that has his head on tighter than his brother Papyrus, but when the player faces him later on in the game after committing to killing monsters, Sans shows the true extent of his power, becoming one of the hardest bosses in the game to impede the player's progress to prevent them from killing off even more characters. He is easily one of the most lightest characters in the game with a somewhat slow walk speed, but his attacks are not just fast, but fairly powerful as well. This means that while Sans can be knocked out at comically small damage percentages, Sans is still very much a force to be reckoned with.
|
| Move
|
Description
|
| Entrance
|
Sans appears through a door with rainbow light emitting from it, taking his hands out of his pockets before slowly facing towards his opponent.
|
Neutral Special
Sidestep Dodge
|
Sidestep Dodge is easily the most useful special move Sans can perform to make up for his disadvantages in defense and speed. Sans performs a side-stepping dodge that will whiff both melee attacks intended for him, as well as dodge projectiles as he briefly pops out from the fighting pane, ala Yoshi's tongue in Melee. It does no damage, but there is virtually no lag for this move.
- Customs
- Custom 1 - Blue Mode: Sans snaps his fingers and points to his opponent, a blue line appearing for a three character range. When the opponent is hit, they are unable to move unless they jump, with their aerial momentum allowing them to move. This lasts for 120 frames. Does no damage.
- Custom 2 - Blue Reverse: Sans snaps his fingers and points to his opponent, a cyan sphere appearing from his finger. This projectile deals 1% damage and sends the opponent flying upwards upside down for 150 frames, trapped in a helpless state.
- Custom 3 - Karmic Retribution: Sans' right eye glows purple, adding an additional effect to his attacks that inflicts 1% damage per 2 frames, which will occur over a period of 10 frames. This status can stack with each move Sans pulls off. This effect can only be adminstered out for only 100 frames for Sans, but can rack up the damage he does considerably. Has a cooldown of 15 seconds.
|
Side Special
Bone Slide
|
Sans sends out a wave of bones forward, able to cover a total of four character lengths in front of him. If the opponent makes contact with this attack, it will deal 5% damage per hit, and the bone slide animation is a total of 140 frames long. Sans remains still while doing this attack, although can cancel out of it with a dodge roll.
- Customs
- Custom 1 - Bone Wave: A much bigger version of Bone Slide that covers more distance but also summons platforms above it, allowing quick-footed opponents the potential to jump right into Sans and punish him. Can't be canceled, but each hit will deal 8% damage.
- Custom 2 - Bone Pillar: Sans sends off a small bone that is buried into the ground, with a small space in between the bigger bone floating above it for a total of 8 character lengths. It deals 10% damage, although the small space in between allows for characters to dodge roll through it.
- Custom 3 - Blue Bone Pillar: Sans fires off a massive blue bone pillar with no space to dodge roll, however if the player remains absolutely still, it will deal no damage. Goes 8 character lengths and deals 11% damage.
|
Up Special
Gaster Blasters
|
Sans summons a single Gaster Blaster, able to summon up to four at a time. The Gaster Blaster will home towards the nearest opponent for 55 frames and then unleash a laser that deals 20% damage. The opponent can dodge these attacks as the Gaster Blaster has a start up animation, but getting hit will not result in a good time.
- Customs
- Custom 1 - Blue Jump: Sans transforms himself into Blue Mode, disallowing him to move for a total of 160 frames, but it boosts his jump considerably.
- Custom 2 - Gaster Blaster Dark: Sans sends out a single black Gaster Blaster that rotates around him as it fires off a dark beam that deals 25% damage.
- Custom 3 - Blue Shove: Sans transforms all of his opponents within a four character radius into blue mode briefly, shoving them into a bunch of bones, dealing 7% damage per hit, of which there are four in total. as he messes with their gravity to the left or right. By jumping when he motions his hands, his opponents can dodge the attack.
|
Down Special
San's Special Attack
|
Sans unleashes a black orb that keeps his opponent inside a black box, keeping them trapped inside as he keeps reverting their position to the center of the box if the opponent moves. Karma will deal 3% damage per 30 frames. The opponent's attacks are fairly useless. This move lasts 1-5 seconds, depending on whether Sans cancels into an attack or keeps them there. However, doing this move as long as you can is a bad idea as it'll put Sans to sleep, allowing him to be incredibly open to attacks.
- Customs
- Custom 1 - Blue Bones: Sans unleashes three blue bones that jab out of the ground. If the opponent does not move, it will do no damage, but if they move it will deal 15% damage with a lot of knock-back, being a reliable kill attack.
- Custom 2 - Gaster Shield: Sans summons a Gaster Blaster that moves around him, blocking attacks for a total of 200 frames before disappearing.
- Custom 3 - Blue Shield: Sans summons a shield that allows him to ignore damage so long as he stands still. This effect lasts for a total of 180 frames.
|
Final Smash
Judgement
|
Sans surrounds a player with Gaster Blasters, saying a different line depending on how many KOs the player has prior to the Final Smash being activated:
- do you think even the worst person can change...? (1 KO)
- so good you had to do it twice...? (2 KOs)
- third time's the charm... (3 KOs)
- that expression that you're wearing... well, i won't grace it with a description. (4-6 KOs)
- you're really kind of a freak, huh? (9-999 KOs)
The Gaster Blasters then unleash a bunch of powerful beams, either dealing 50% damage or 100% damage depending on whether the Final Smash is metered or not.
|
| Taunts
|
- Up Taunt - Sans winks as he shrugs his hands out.
- Side Taunt - Sans plays the trombone for four notes of "Megalovania" or very very rarely, four notes of the "Onett" theme from Earthbound, of which he will wink immediately afterwards.
- Down Taunt - Sans rides a tricycle in a circle before hopping off.
|
| Special Team-Up Names
|
- With Undyne - Monsters from the Underground
- With Ness - Flesh and Bones
|
| Alternate Costumes
|
|
|
| Unlock Conditions
|
| TBA
|
|
Undyne
|
Undyne is the leader of the Royal Guard of the Underground, being massively powerful and filled with Determination, which is a source of energy within the Undertale universe. Passionate and quick to act, Undyne is a fair character even with her mission to kill the human that fell into the Underground world. Undyne acts as almost the complete opposite of Sans, being a powerful character with a lot of defense, at the cost of her speed. She attacks via spears, which can be used to jab and prod at opponents even from a distance. She also has her undying will play into her attacks, preventing her from being launched and thus being KO'd. On higher percentages, it will start to hurt her to continue utilizing these moves and her determination will begin to melt away her body.
|
| Move
|
Description
|
| Entrance
|
Undyne appears off a tall pile of rock before slamming down into the ground with her spear.
|
Neutral Special
Soul Shield
|
A circle and a shield appear around Undyne, requiring her to stand still as the player holds down the button to deflect melee attacks and cancel projectiles. The player can tilt the control stick up, down, left, or right when the button is held down to direct the shield around them. Works in air and will work as long as the shield is held. However, it leaves Undyne open on two sides of herself at all times (3 in the air) requiring the shield to move around constantly to avoid getting hit.
- Customs
- Custom 1 - Green Mode: Undyne throws a green spear at her opponent, locking them in place with a shield around them as she throws a volley of spears around them. The spears deal 6% per hit. The opponent can control the shield similar to Soul Shield, however the pattern of spears is fast and random. This move lasts for 150 frames.
- Custom 2 - Spear Parry: Undyne thrusts her spear forward, killing projectiles and launching back foes for 6% damage, or deflecting melee attacks for 2x the original damage.
- Custom 3 - Bouncing Bullets: Undyne throws out three small yellow spear projectiles that go directly forward, before bouncing over the opponent and attacking them in the back. They can be destroyed with an attack after the bounce if their target faces them. The bullets deal 5% damage each.
|
Side Special
Spear Toss
|
Undyne sents up to three spears out at a time in the direction she faces, acting as small projectiles that deal 9% damage each. They go for a five character distance, not descending or ascending. In air, they will be sent directly down, dealing 10% damage.
- Customs
- Custom 1 - Spear Strike: Undyne can freely control her spear while it's in the air, although she stands still while controlling it, dealing 15% damage. She can also summon only a single spear, which can only be active for a total of 180 frames. She can immediately send out another after the spear lands or disappears.
- Custom 2 - Spear Swing: Undyne does a fierce swing with her spear, launching opponents for 21% damage.
- Custom 3 - Eat Your Greens: Undyne prepares to attack with a green spear, which if the opponent attempts to attack or counter in anyway, Undyne will just chomp on the spear and ignore damage done, healing by 6%.
|
Up Special
Suplex Boulder
|
Undyne kicks the ground, causing a large boulder to rise before grabbing it and doing a suplex. This deals 25% damage if it hits an opponent and will allow Undyne to gain some air, although she cannot cancel out of it.
- Customs
- Custom 1 - Nerd Suplex: Undyne grabs her opponent and suplexes them high into the air before letting go and spiking them directly downwards with a spear.
- Custom 2 - Perfect Revenge: Undyne attacks upwards with a flaming frying pan, which sets the opponent on fire and launches them into the air, dealing 7% damage on impact and 1% damage per 30 frames afterwards.
- Custom 3 - Spear Dive: Undyne hoists her spear up and then her body spirals around as she is lifted into the air, dealing 8% damage as she rises into the air. She falls into a helpless state afterwards.
|
Down Special
Undying Determination
|
This is easily one of Undyne's more risky moves. She forties her body with determination for 10 seconds, preventing any kind of knockback and increasing the power of her moves by 1.3x in power. While she won't take knockback, she will still take knockback as usual and this move has a 3 second cooldown. On 150% or higher, this move lasts 15 seconds, but she will "melt" while doing so, taking more damage. On 200% and higher, she can only last 5 seconds or she will melt entirely, however she still will not take any knockback and will be uneffected by spiking or launching moves.
- Customs
- Custom 1 - Undying Blow: Undyne leaps forward quickly. If this hits a melee or projectile attack, Undyne will blast the opponent back for 30% damage with no knockback, huffing on higher percentages as her body starts to disintegrate.
- Custom 2 - Undying Strike: Undyne strikes in a diagonal slash with super armor. The more percentage she has, the more damage she will deal, dealing 10-40% damage. She will take 5-15% damage after the strike.
- Custom 3 - Determined Strike: Undyne lurches forwards as the spear flashes green, red, and white, protected by super armor as she deals a 15% damage attack. Has a slow start-up and some end-lag, but she will not be launched by attacks.
|
Final Smash
En Guarde!
|
Undyne leaps down from a giant mountain, timing slowing down as they prepare to impale a player. She says a different line depending on how many KOs the player has prior to the Final Smash being activated:
- You're just a coward! (1 KO)
- Prepare however you want... I will KILL you. (2 KOs)
- Honestly, killing you now is an act of mercy...! (3 KOs)
- I, UNDYNE, will strike you down! (4-6 KOs)
- Right now, everyone in the world... I can feel their hearts beating as one. And we all have ONE goal. To defeat YOU. (9-999 KOs)
Undyne then impales the opponent, dealing 45% damage, before a ring of spears surrounds the opponent to deal a total of 100% damage. The ring of spears do not appear in the metered version of this Final Smash.
|
| Taunts
|
- Up Taunt - Undyne laughs manically, stamping her spear into the ground.
- Side Taunt - Undyne holds a blue soul in her hand, gritting her teeth before it disappears.
- Down Taunt - Monster Kid pops out from behind Undyne, scared as Undyne holds their spear defiantly.
|
| Special Team-Up Names
|
- With Sans - Monsters from the Underground
- With Corrin - Boiling Water
|
| Alternate Costumes
|
|
|
| Unlock Conditions
|
| TBA
|
|
Mii Soul
|
Mii Soul is the replacement for Mii Fighters in Super Smash Bros. Discord. Mii Souls, unlike Mii Fighters, are able to take on the moveset of anyone unlocked in the roster, gaining access to all their standard attacks and special attacks, and can switch out their customs much like the fighters they are based off. Additionally, the Mii Soul uses a Chakra-like system to determine things like weight, speed, jumping power, strength, and defense upon creation.
|
| Creation Features
|
Here is a list of how the Mii Souls can be customized.
- Mii Souls can either be male or female, although all genders can wear the same outfits. Mii Souls can now be accessories to add ears, glasses, even tattoos.
- All outfits have customization colors and patterns. Additionally, each outfit set comes with a hat, shirt, pants, and shoes, which can be switched between.
- Mii Souls have their stats determined by a 50 point Chakra grid, which allows the player to input points to boost the Mii Souls' stats.
- Mii Souls take all their moves and animations from the fighter they "Echo". They also have access to all their customs, which can be switched out as the player sees fit. Animations include entrance and taunts, as well as victory and losing animations.
- Mii Souls can have a color assigned to them, which will also effect the color of their attack auras.
- Additionally, some movesets allow the Mii Soul to change out the weapon visually used with one from a outfit set. As such, all swords can be switched out (save for the Monado, which can instead take on different colors based off the fighter's attack aura).
- Mii Souls can be used online in specific modes, although they are generally not used in more competitive modes. Additionally, "unsafe" Mii Souls will be obscured in blackness if they are deemed inappropriate.
- Some characters, such as MC Adore and Dr. Coyle, features stuff very important to their moveset. In most cases like this, the Mii Soul has a holographic representation of what is needed to make their moveset work such as MC Adore's car and Love Posse or Dr. Coyle's long spring arms. They are colored according to the Mii Soul's attack aura.
|
| Unlock Conditions
|
| Mii Souls are unlocked by creating them in either the Vault section of the game or on the menu of the character select.
|


")

")
")
")
")
")
")


")
")
")
")
")
")
")
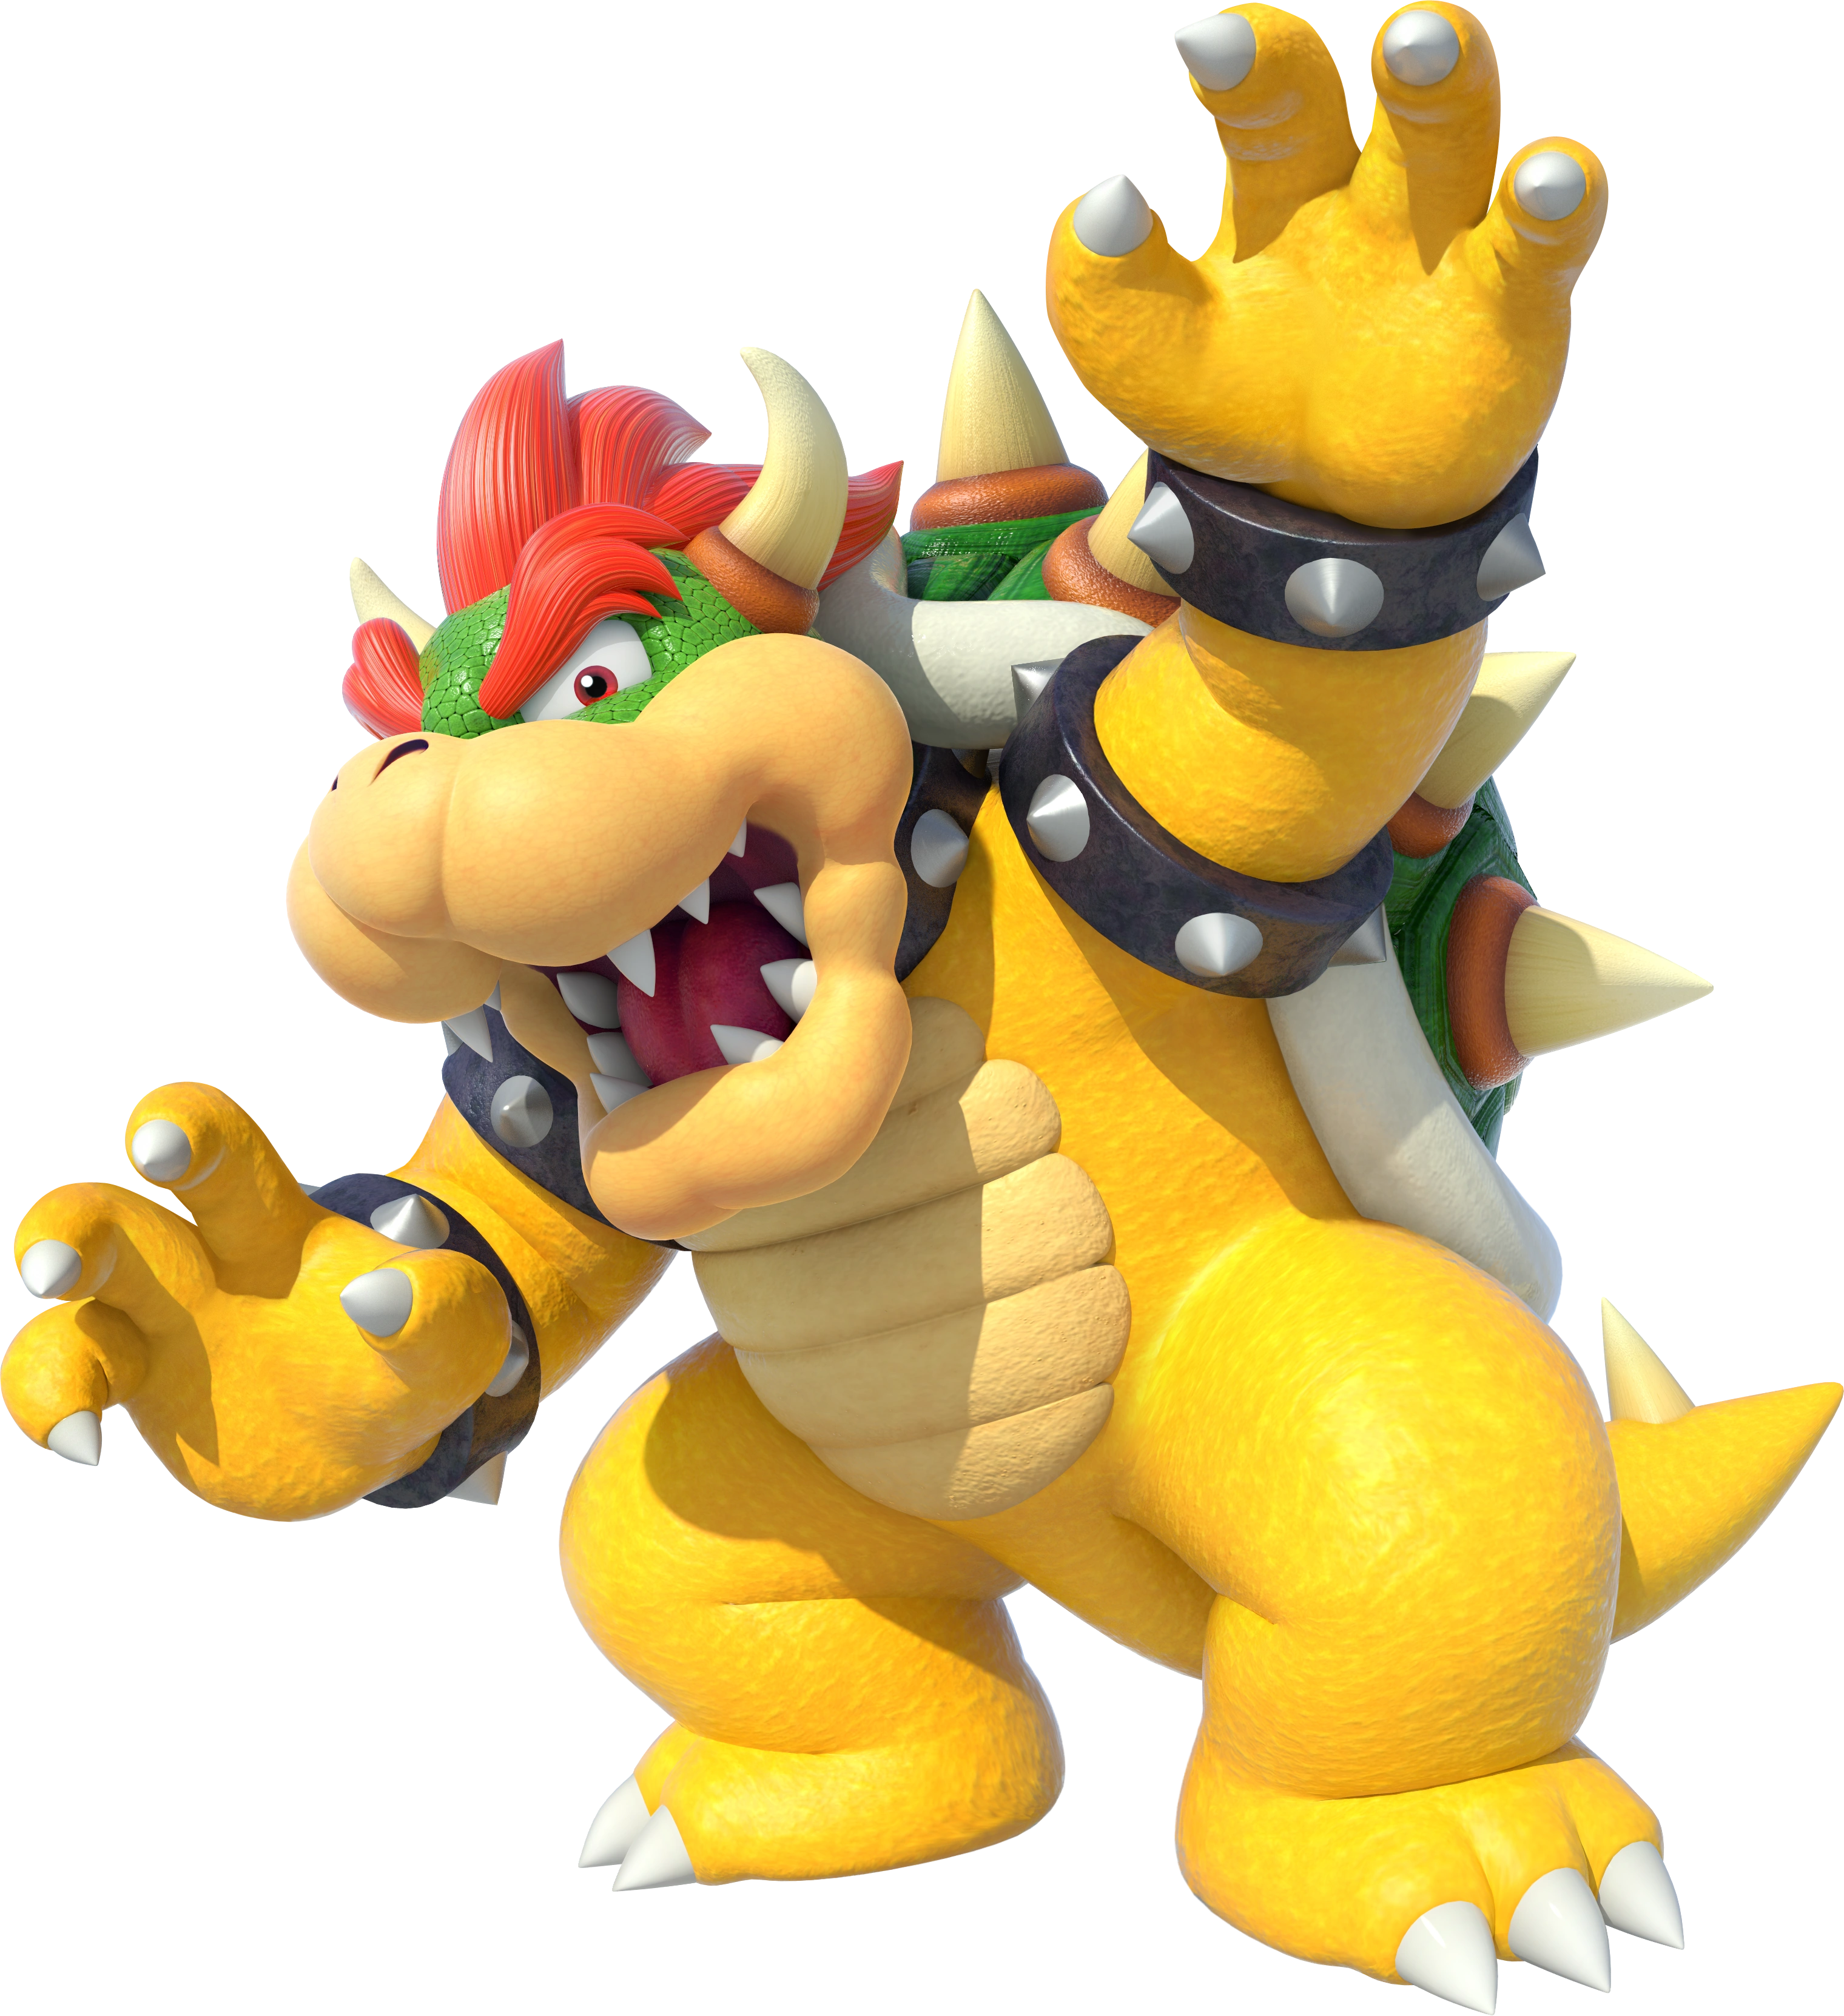
")
")
")
")
")
")
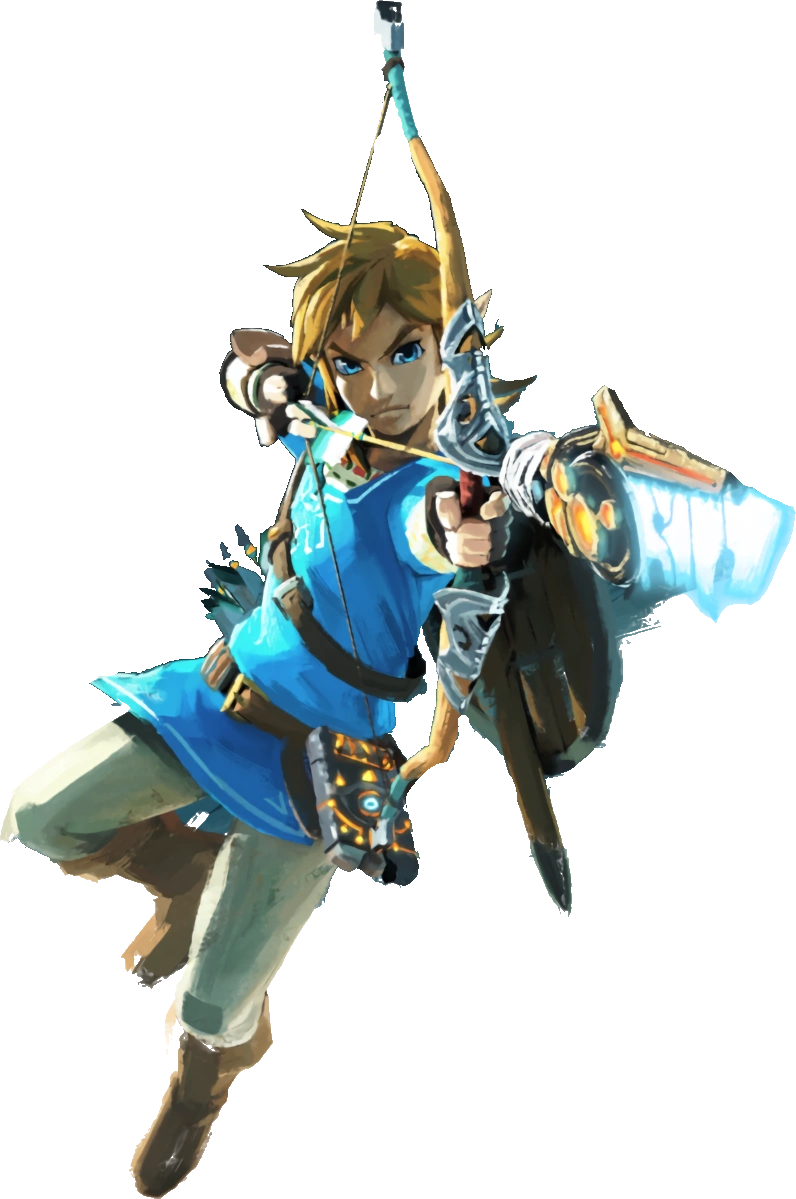

")
")
")

")
")
")
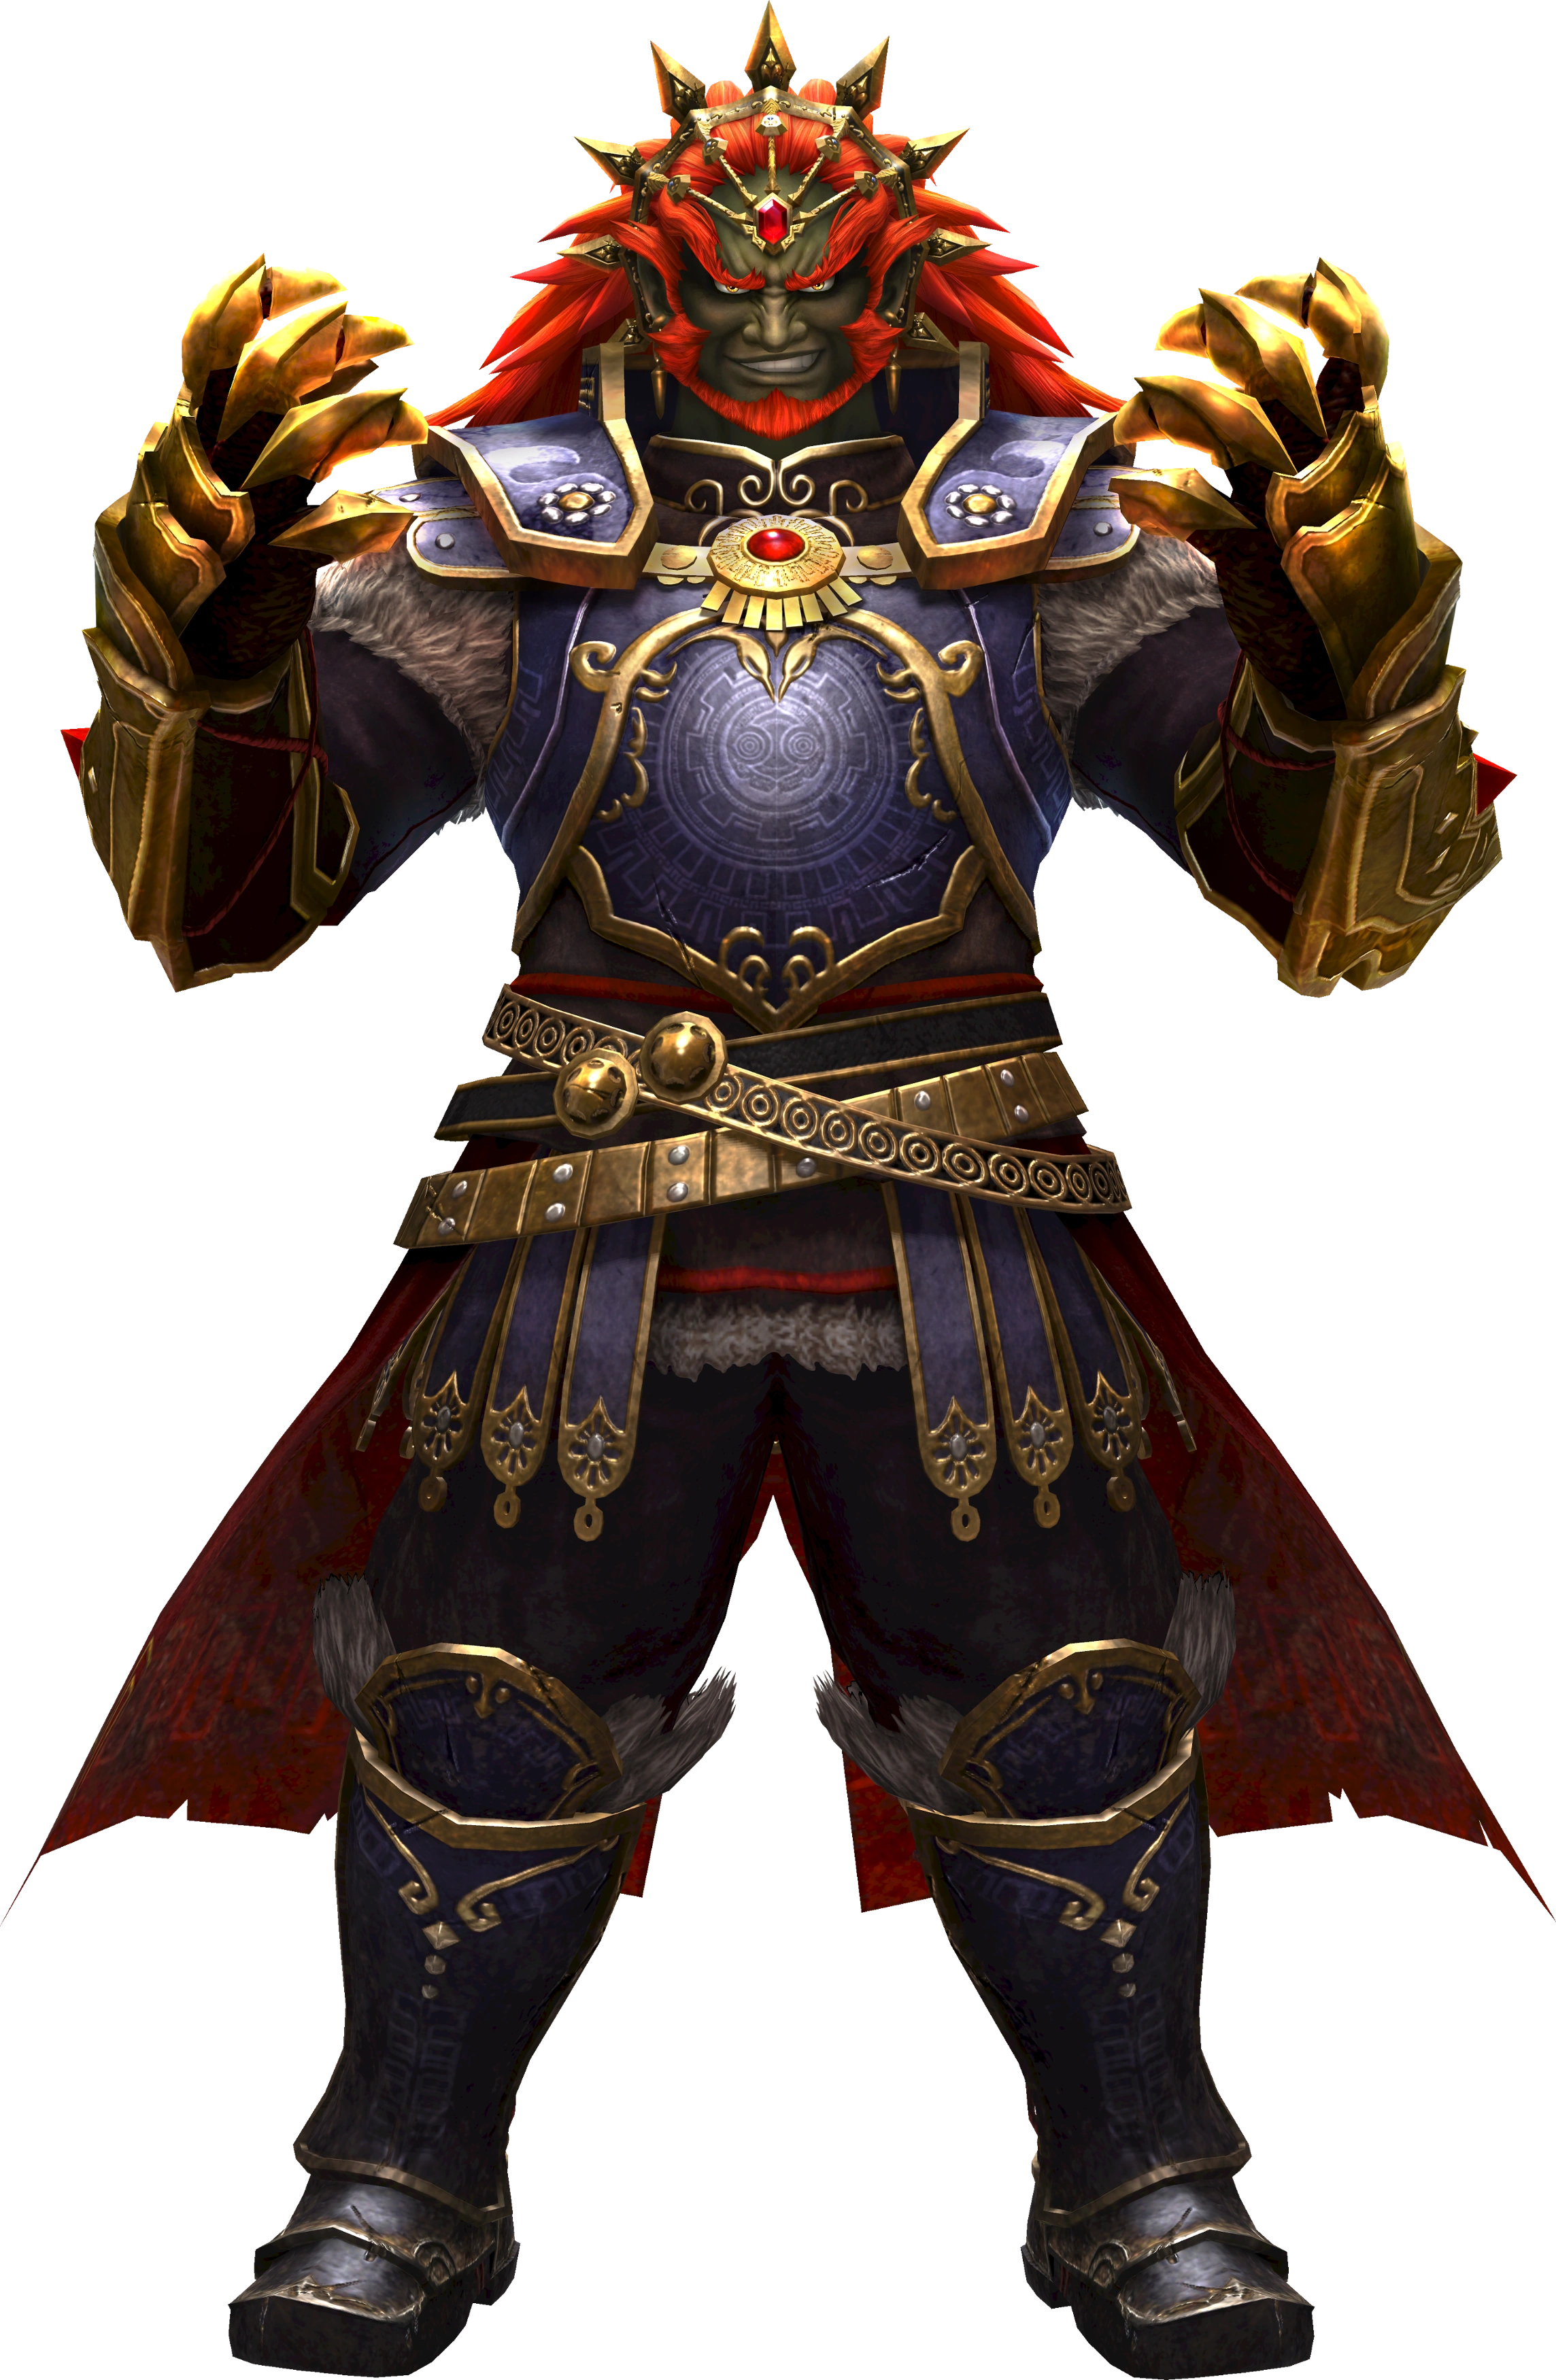
")
")
")
")
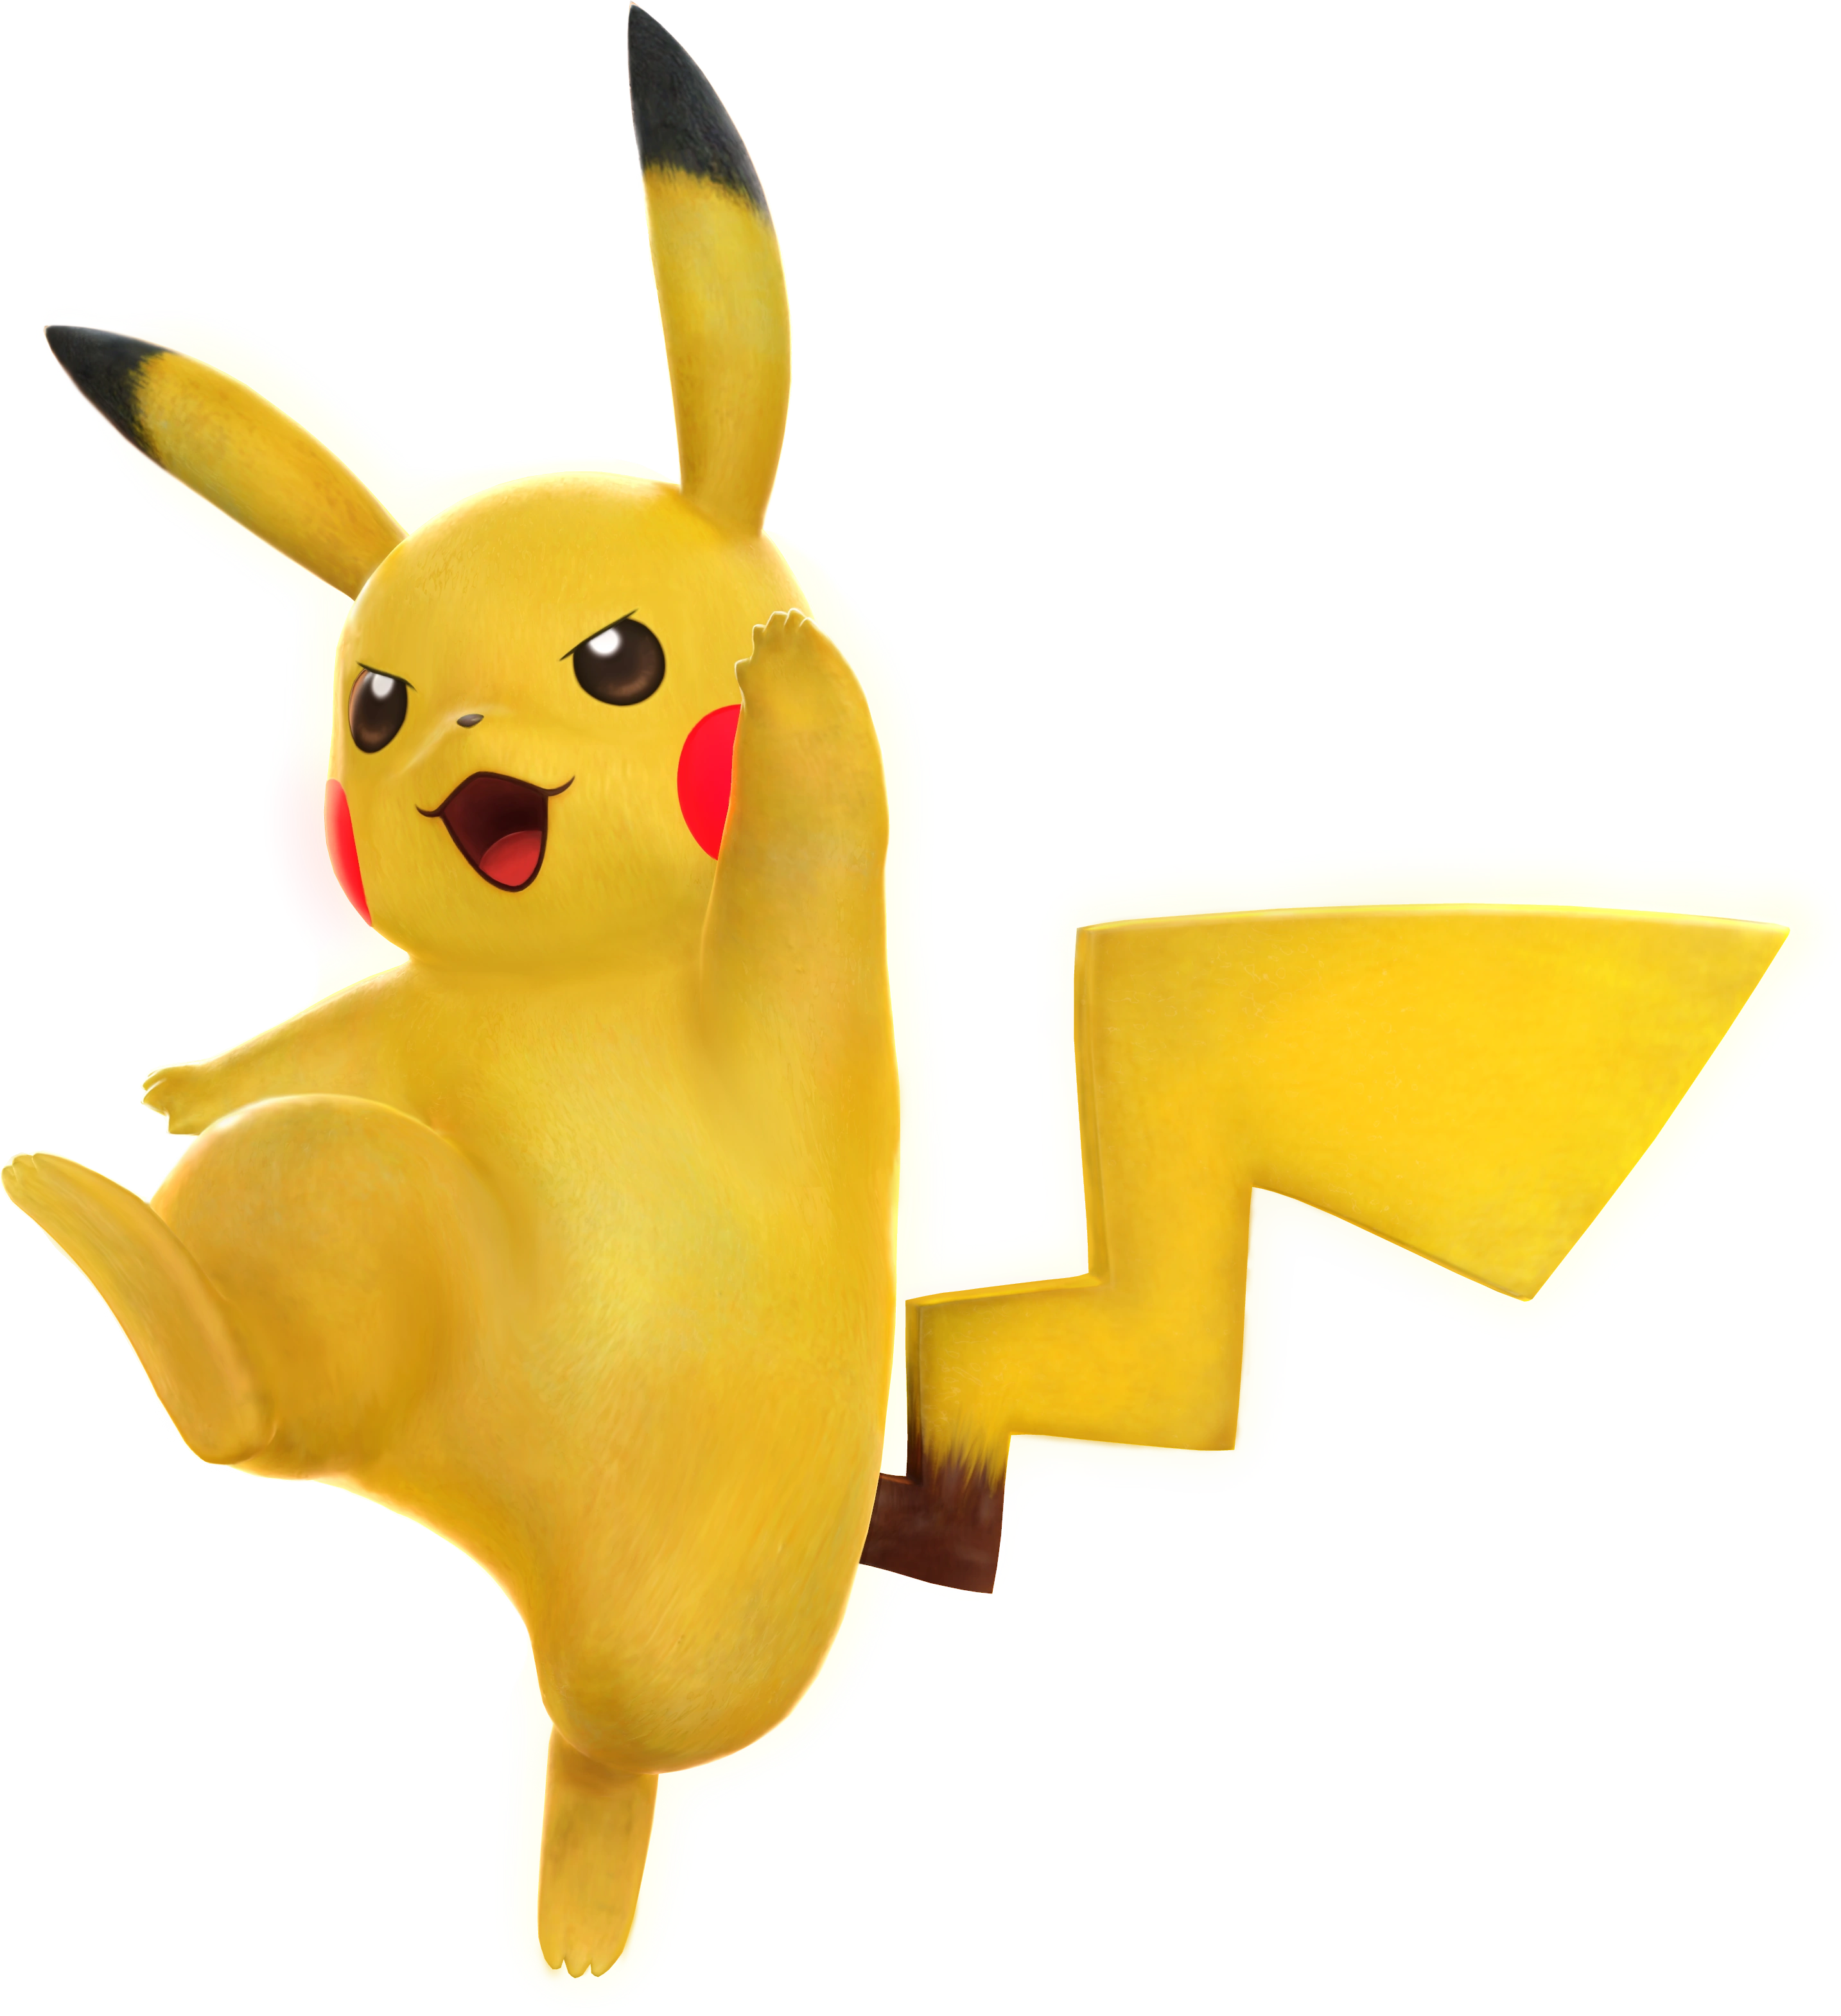
")
")
")
")
")
")
")
")
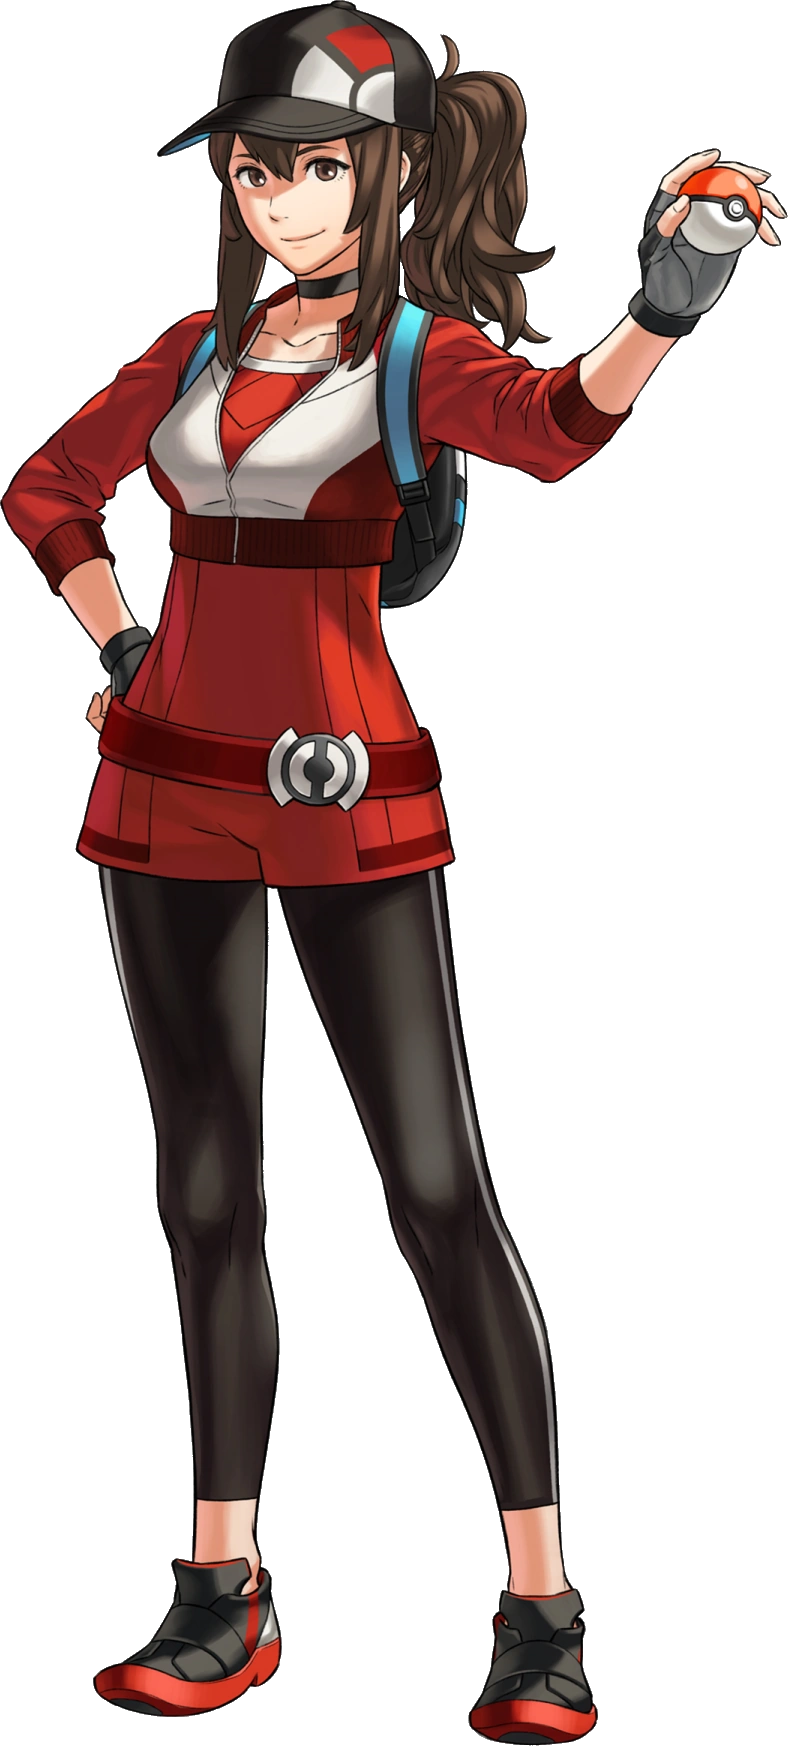
")
")
")
")
")
")
")
")
")
")
")
")
")
")
")

")
")
")

")
")
")
")
")
")
")
")
")
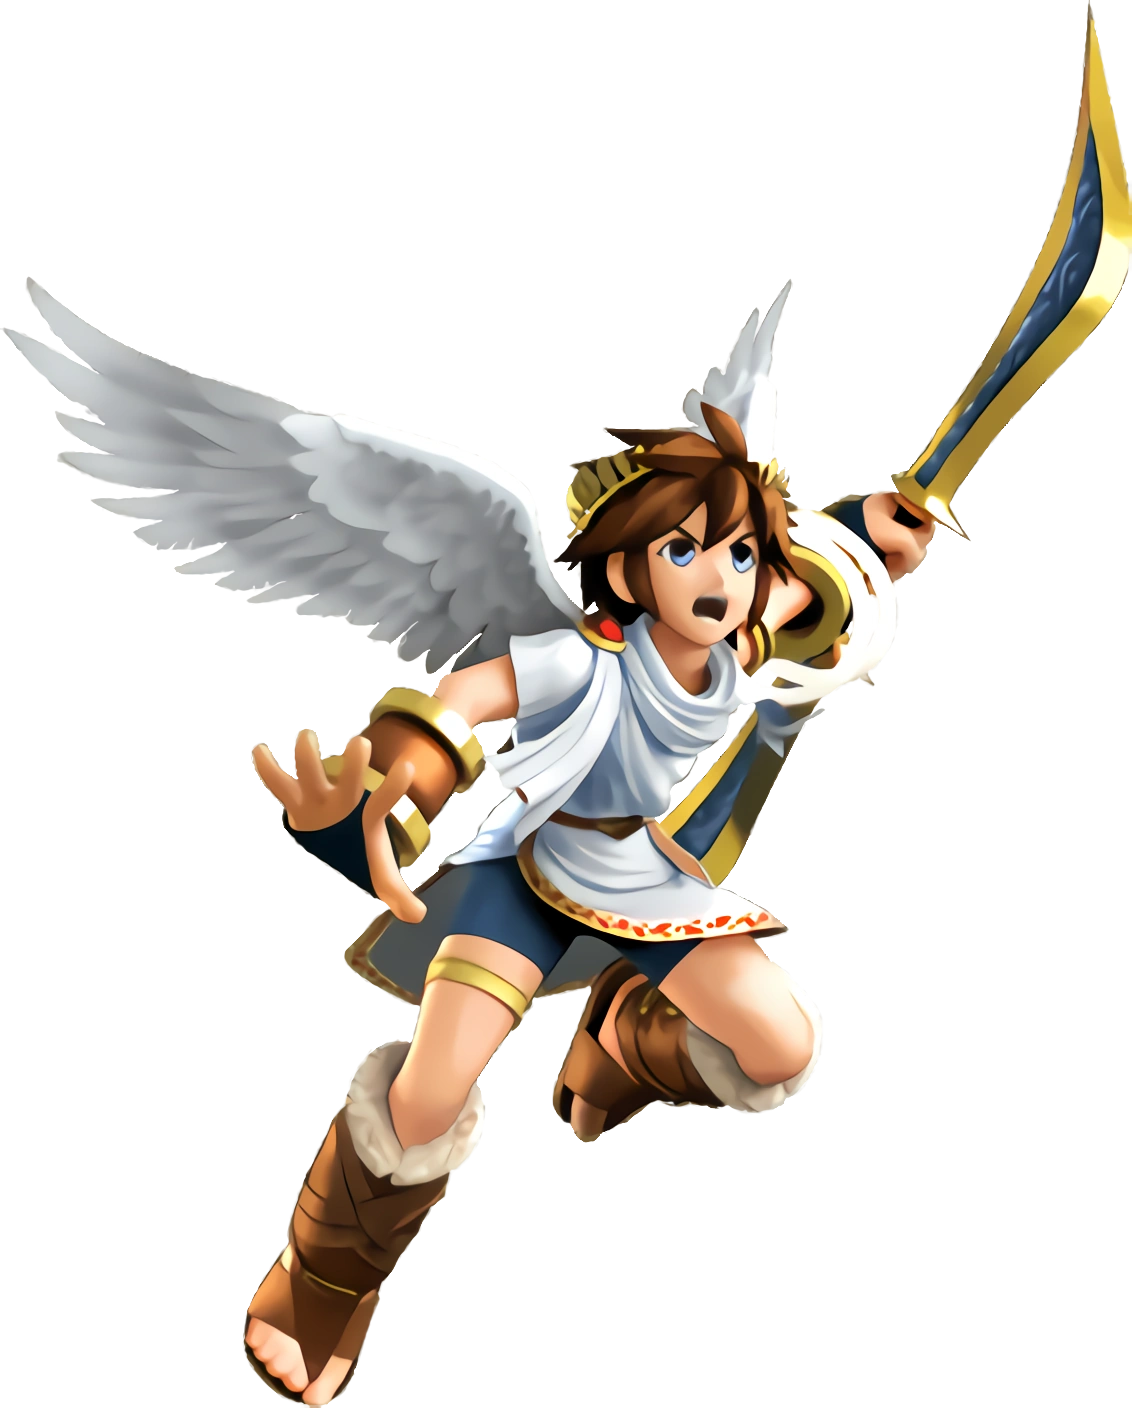
")
")
.png "Pit (Revived).png (2.25 MB)")
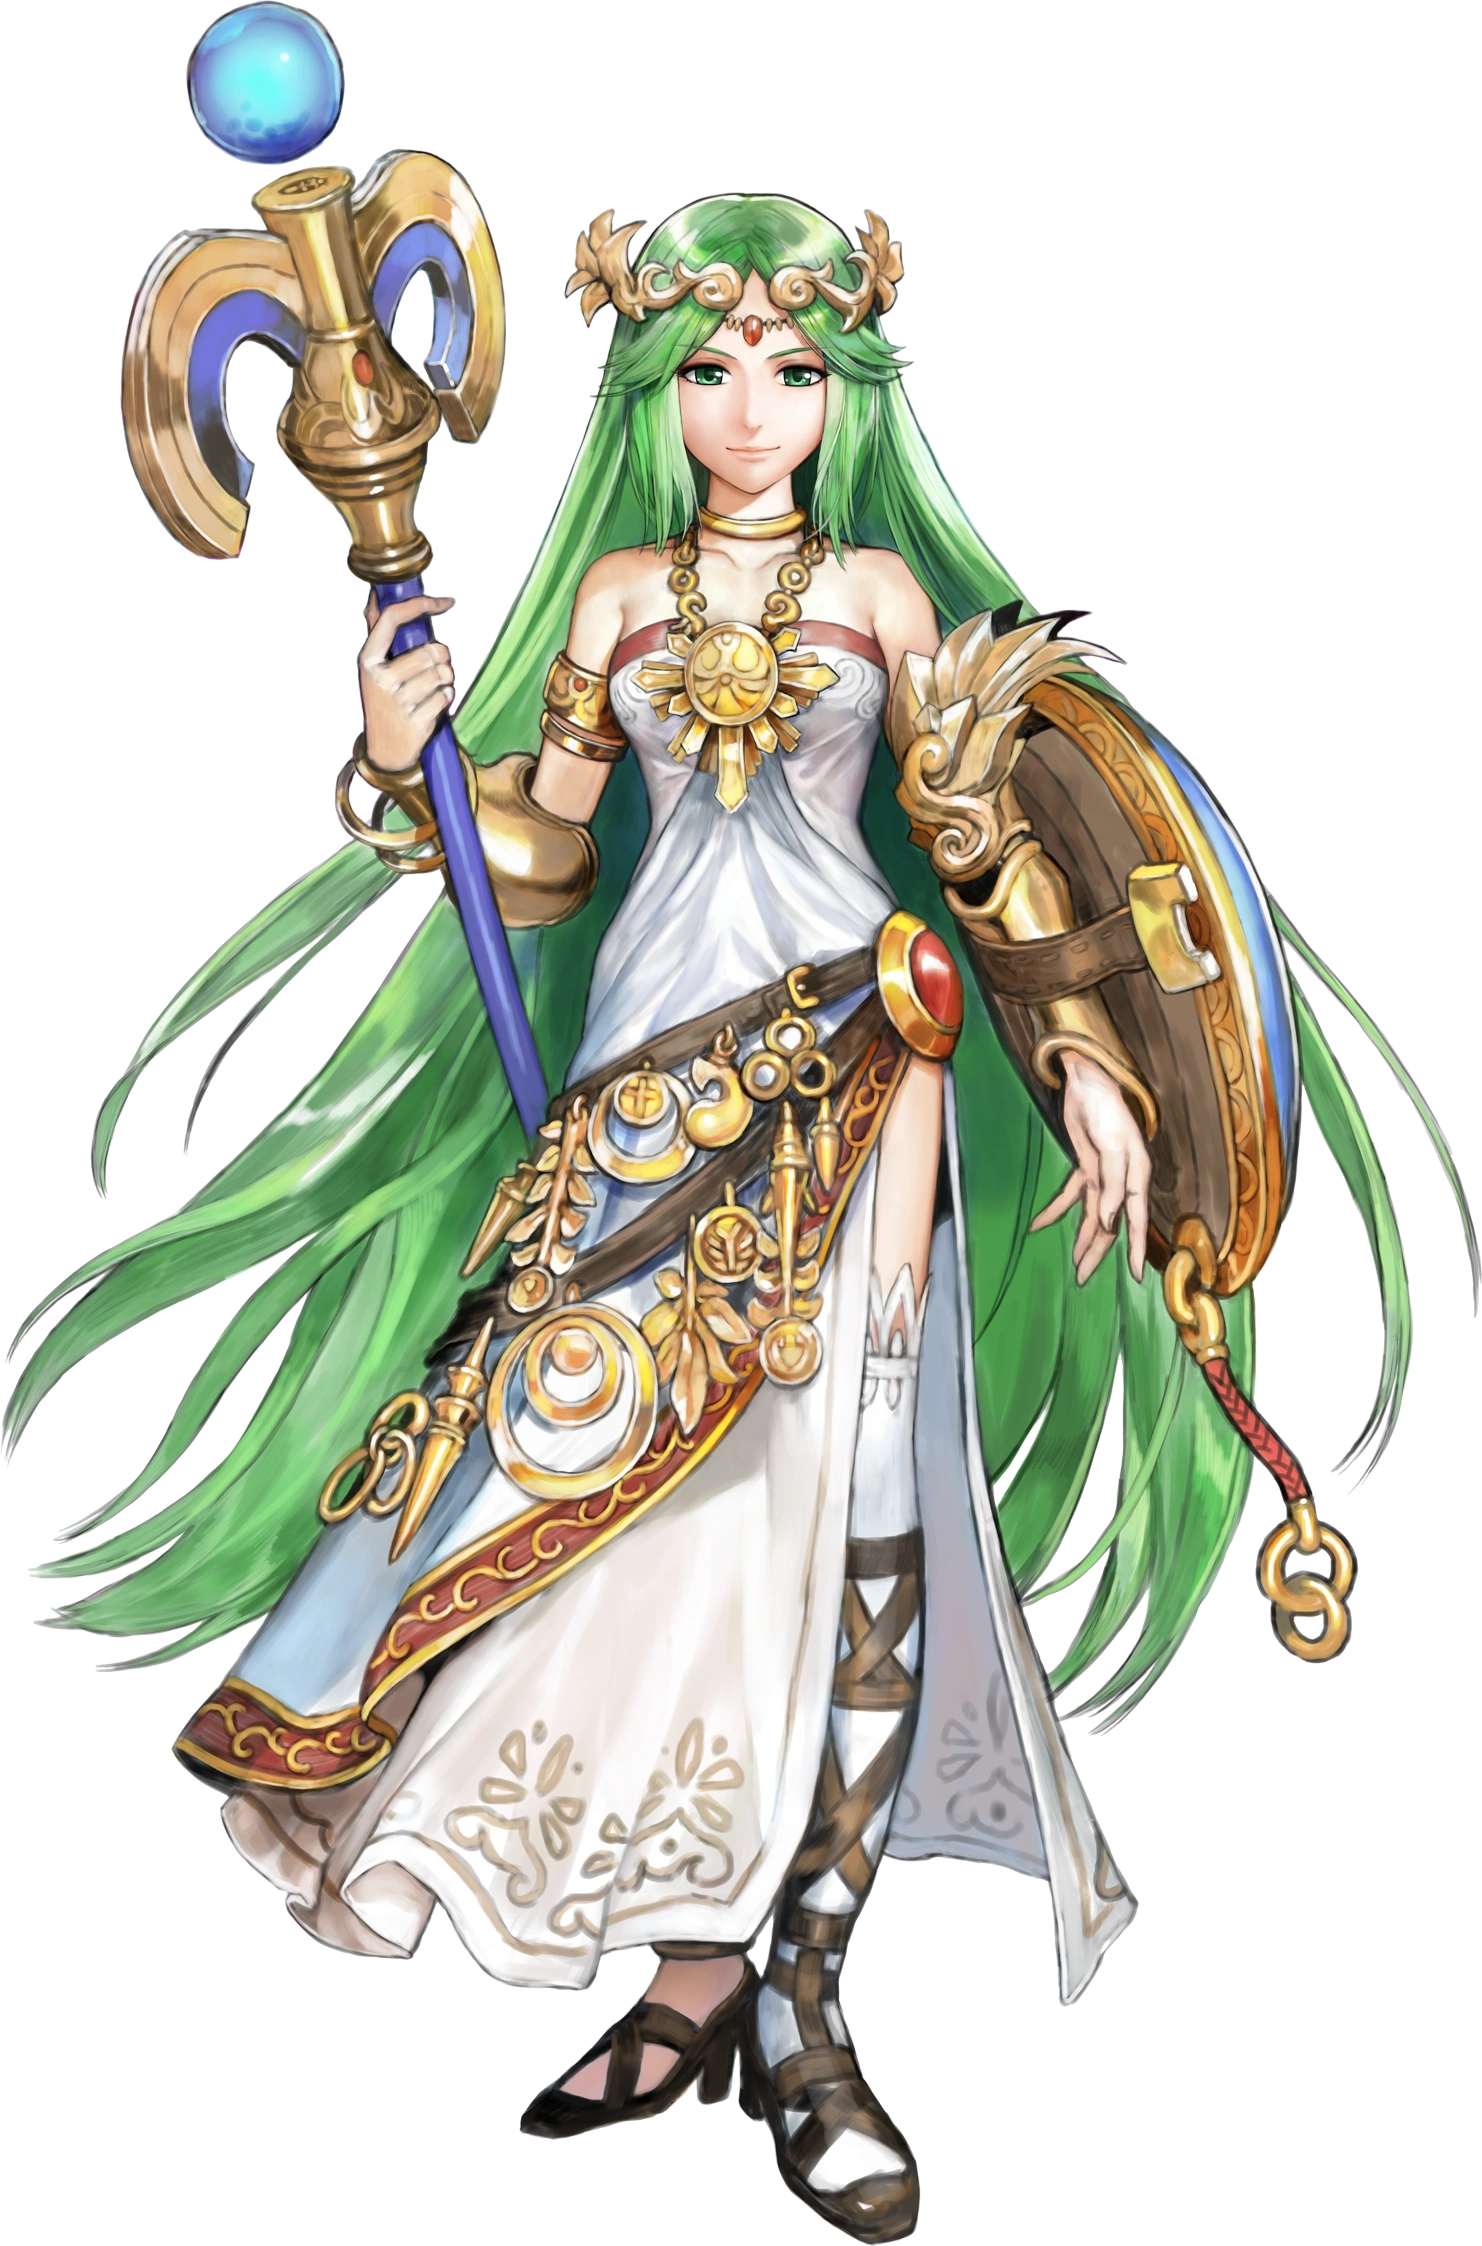
")
")
")
")
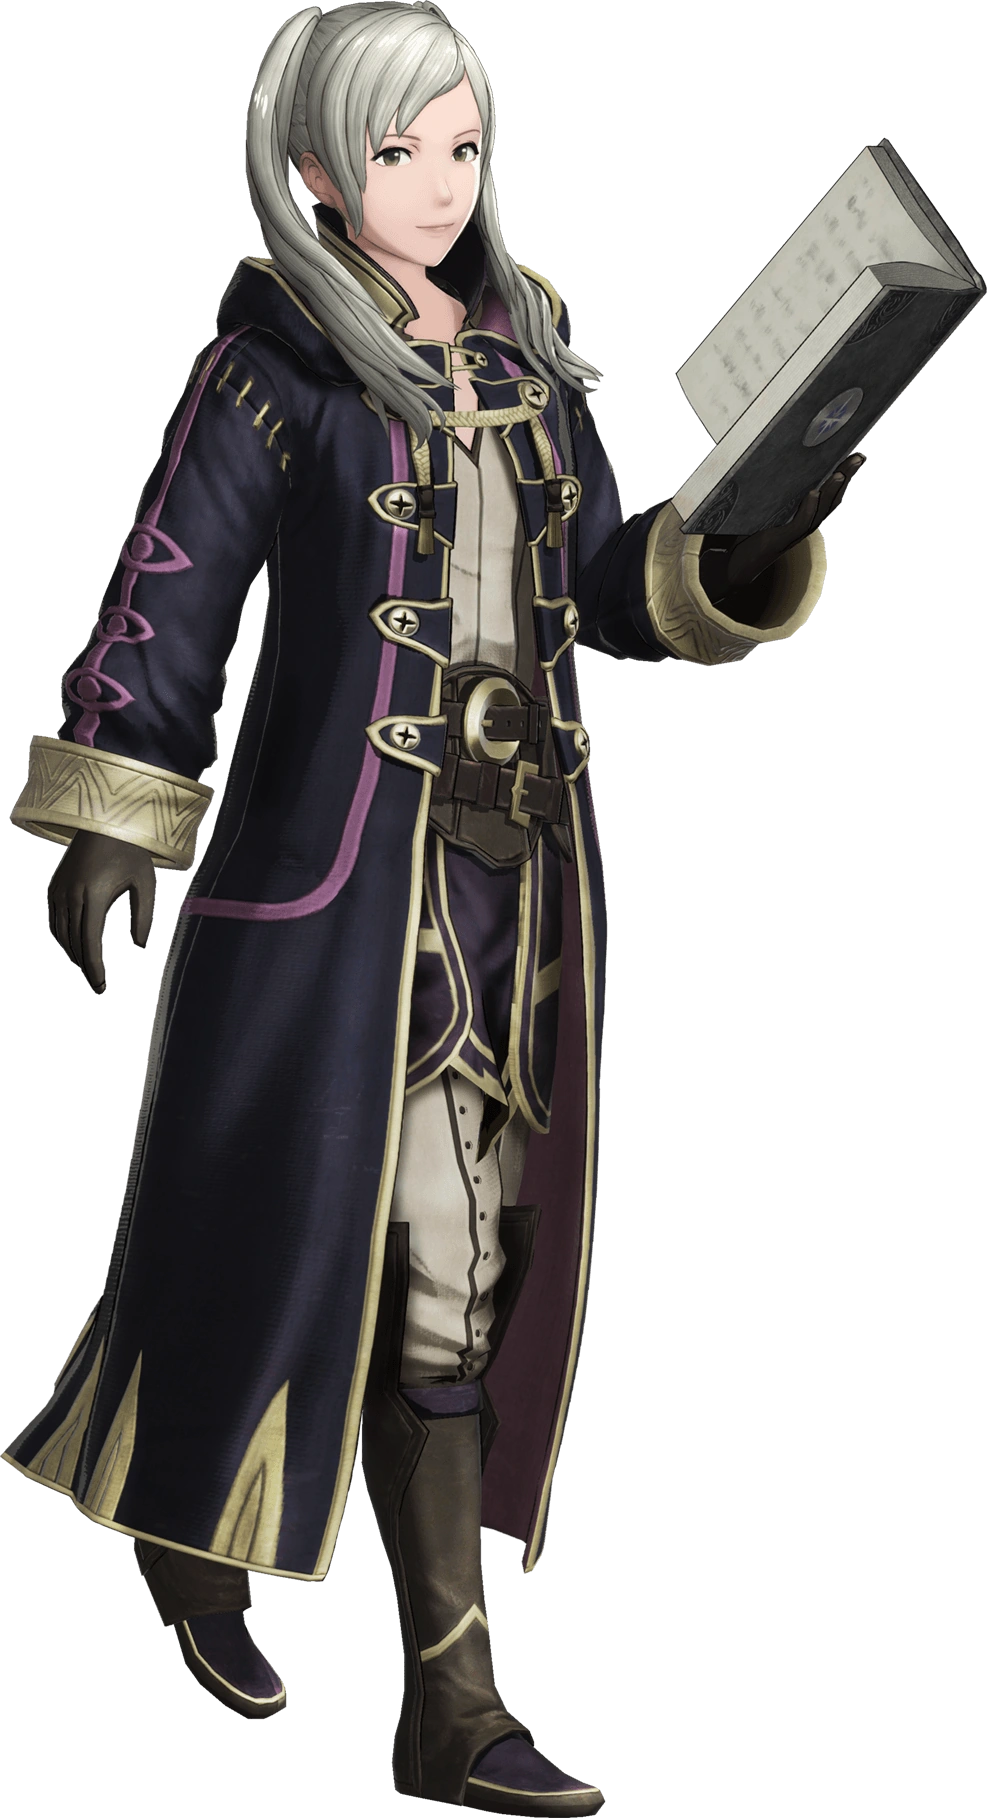
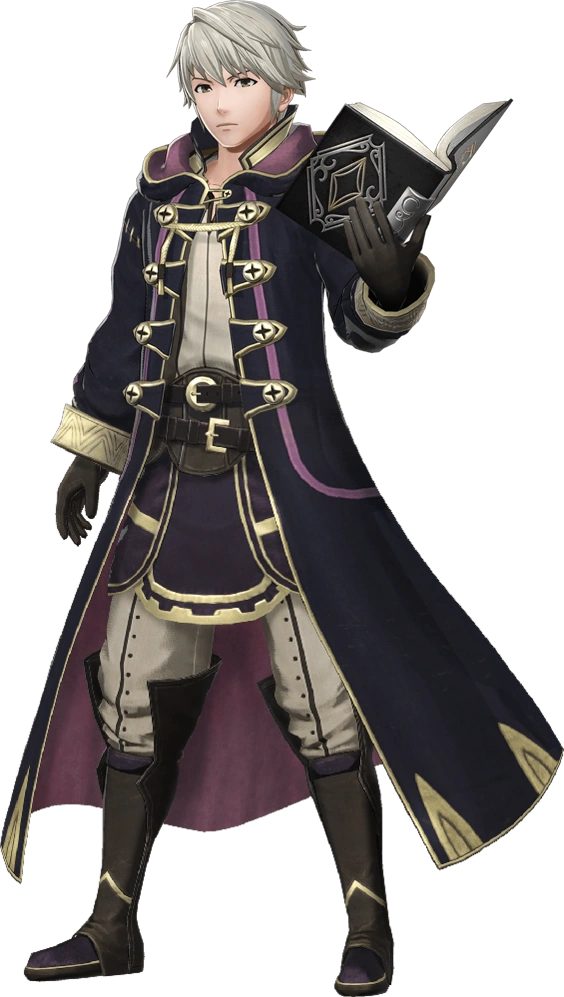
_Portrait.png "FemaleRobin (Ylissean Summer) Portrait.png (1.82 MB)")
")
")
")


")
_Heroes.png "Corrin (Happy New Year) Heroes.png (1.5 MB)")
")
")
")
")
")
")
")


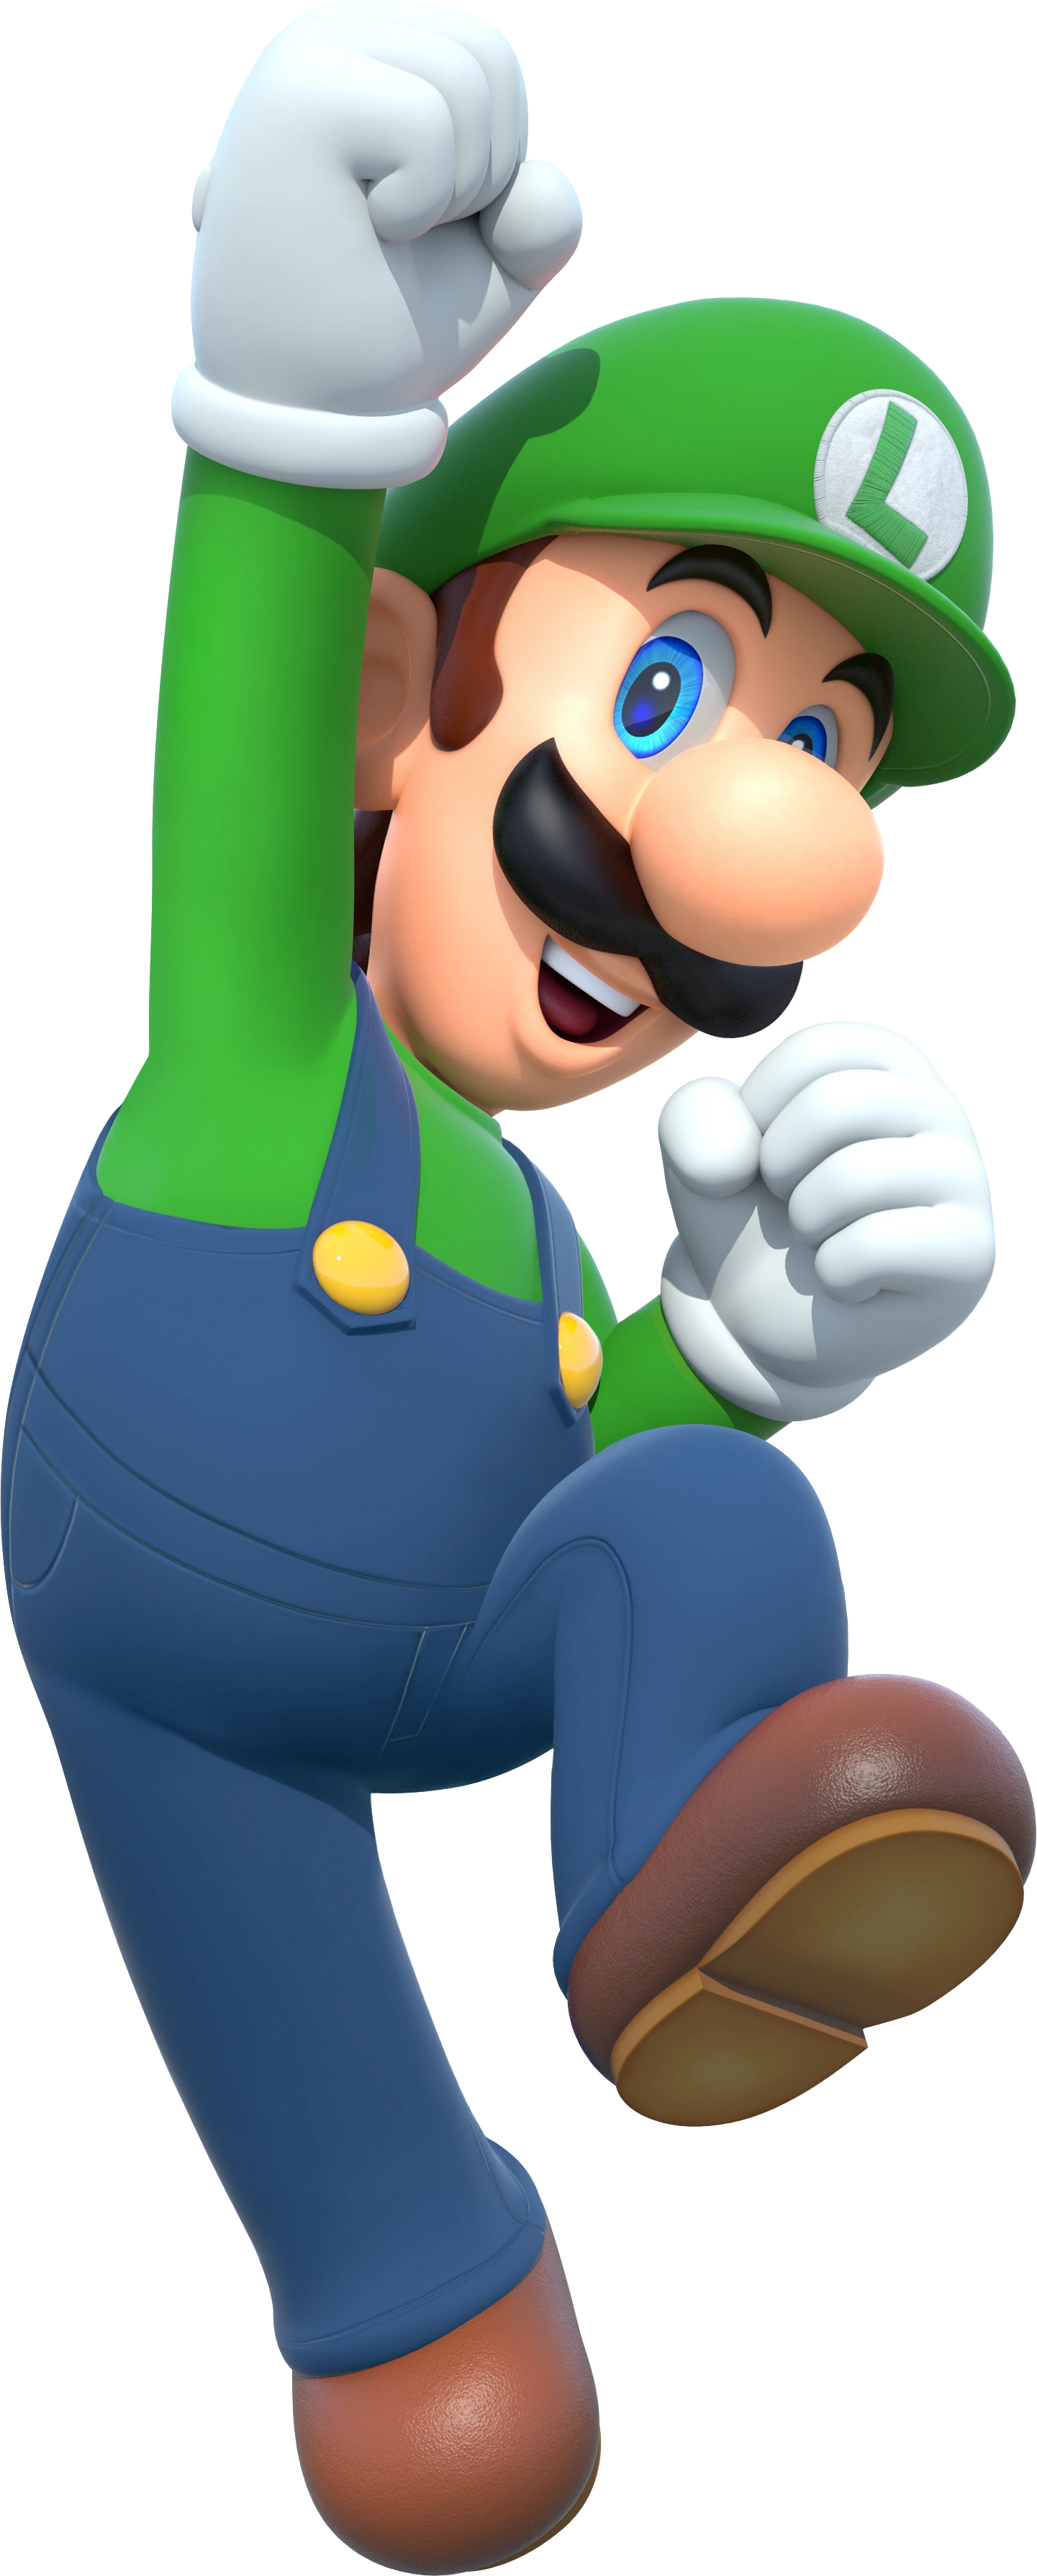

")
")
")
")
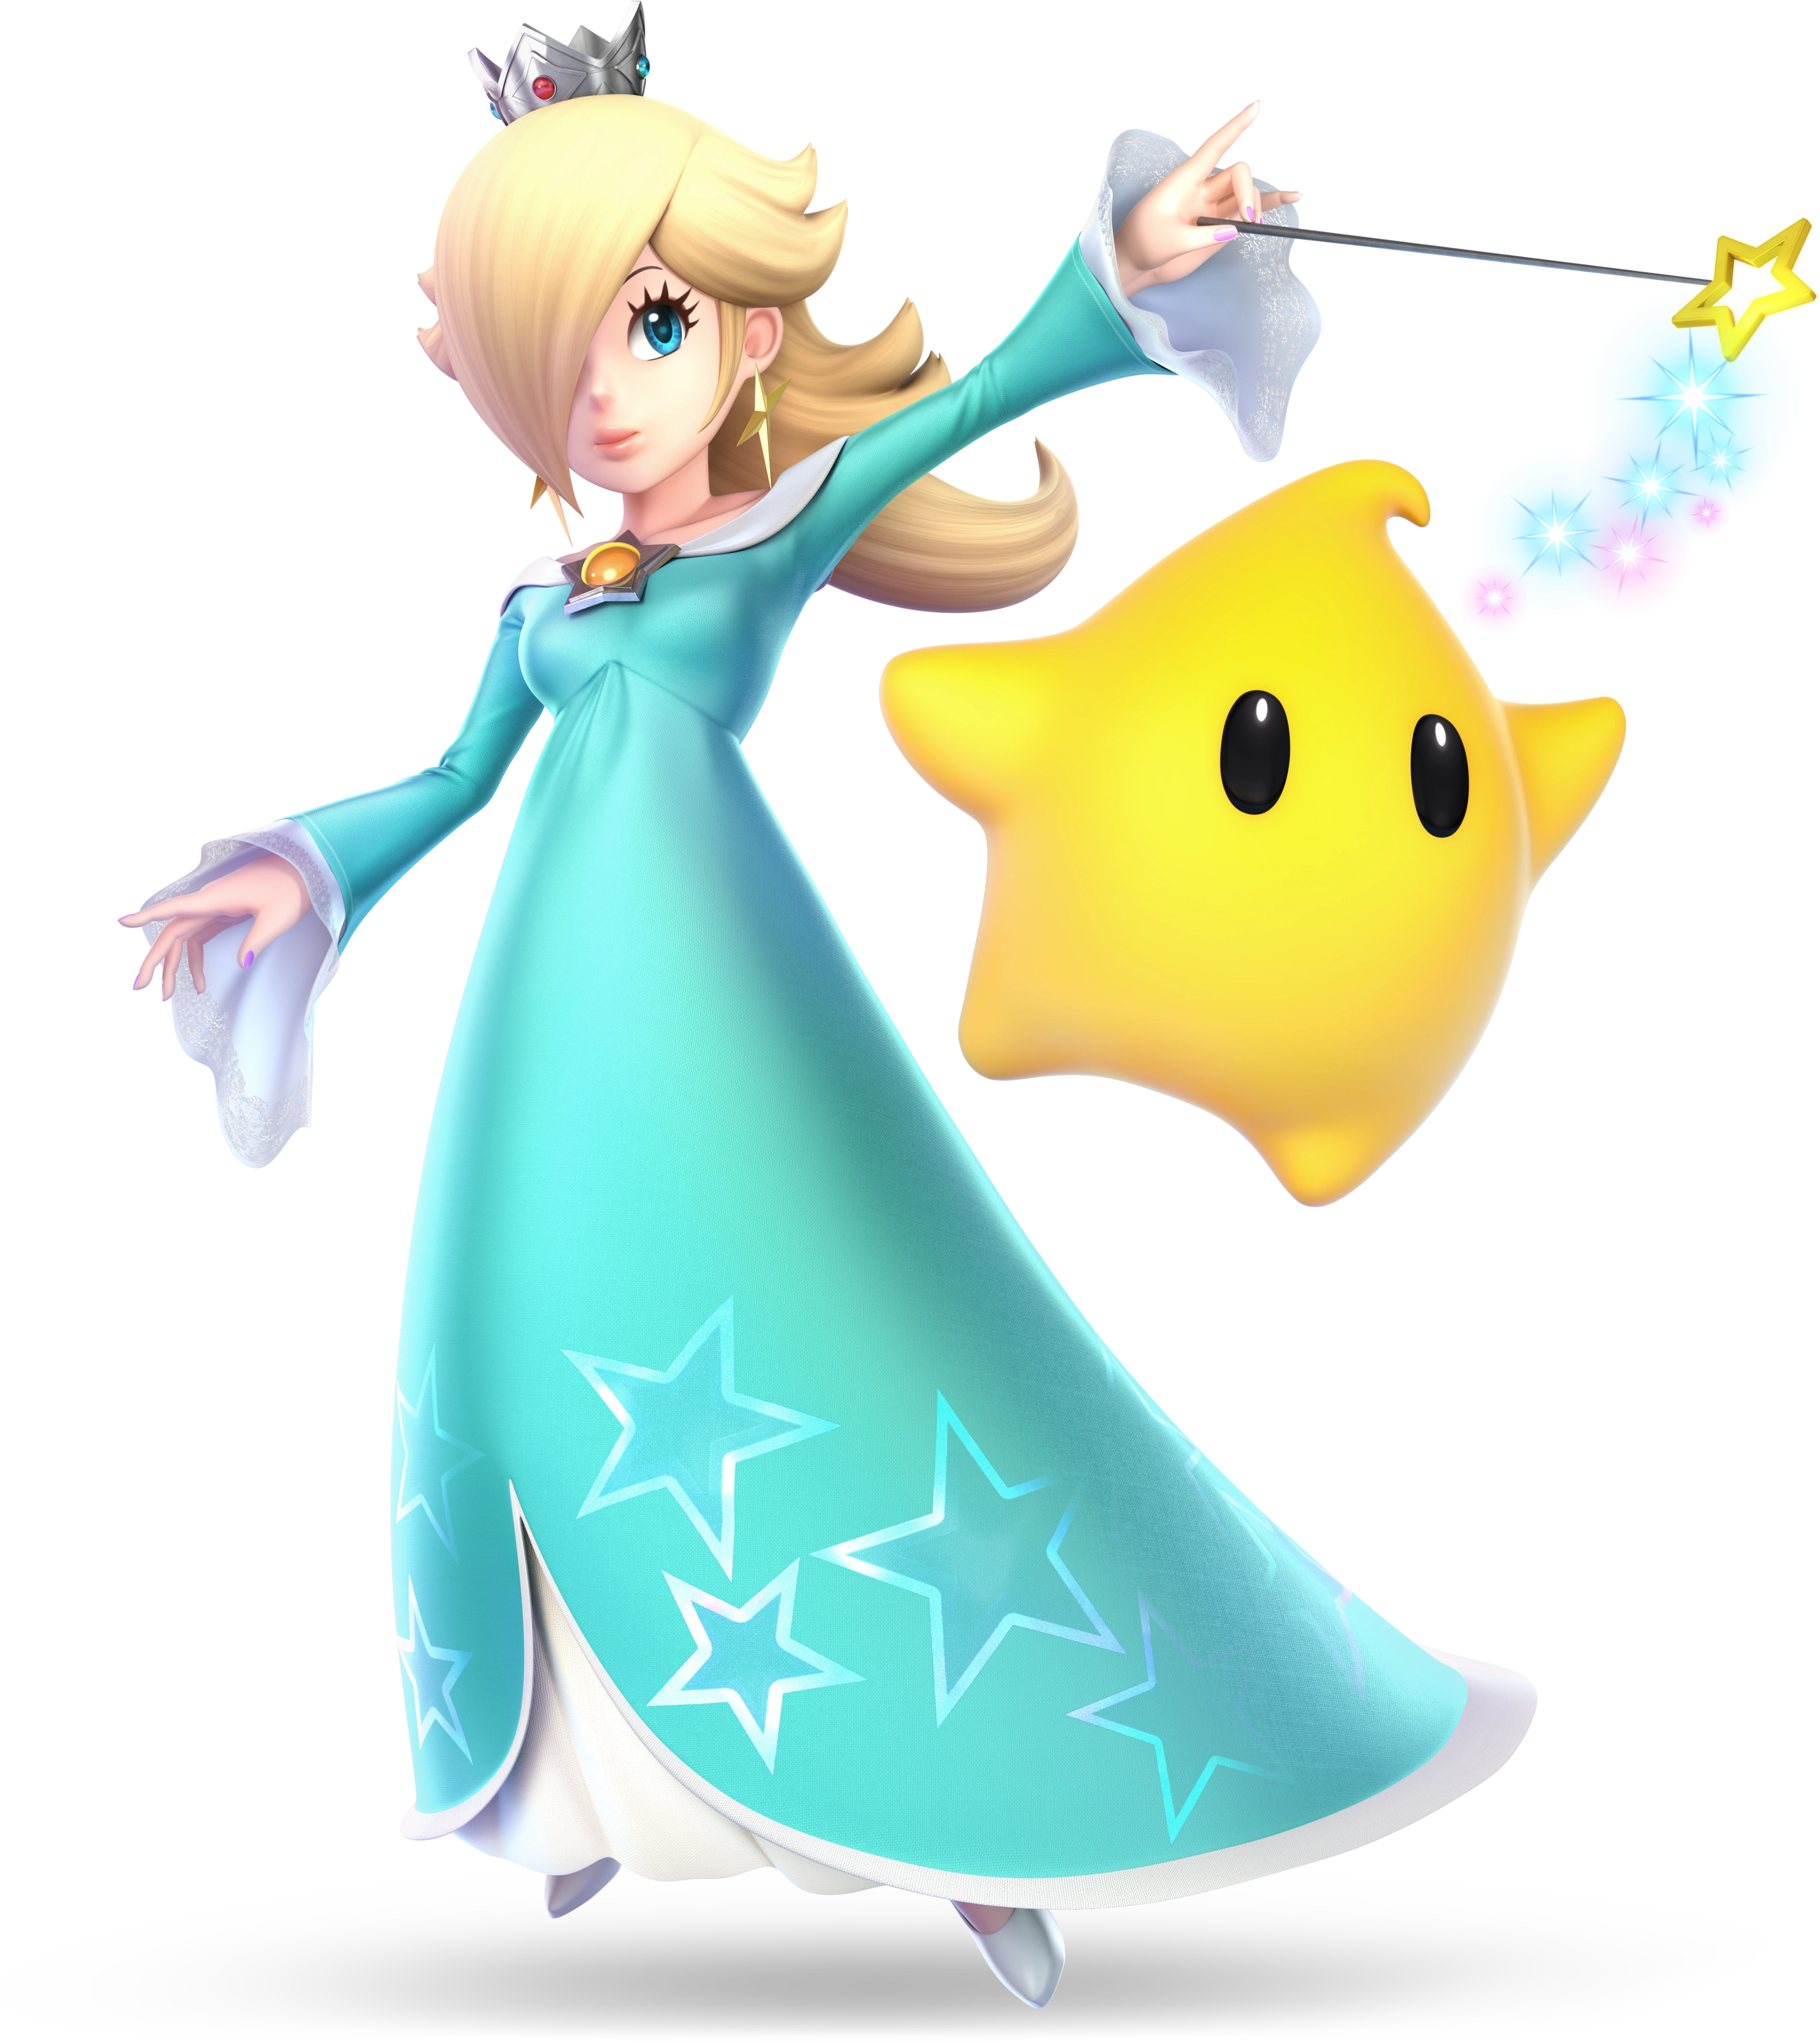

")
")
")
")
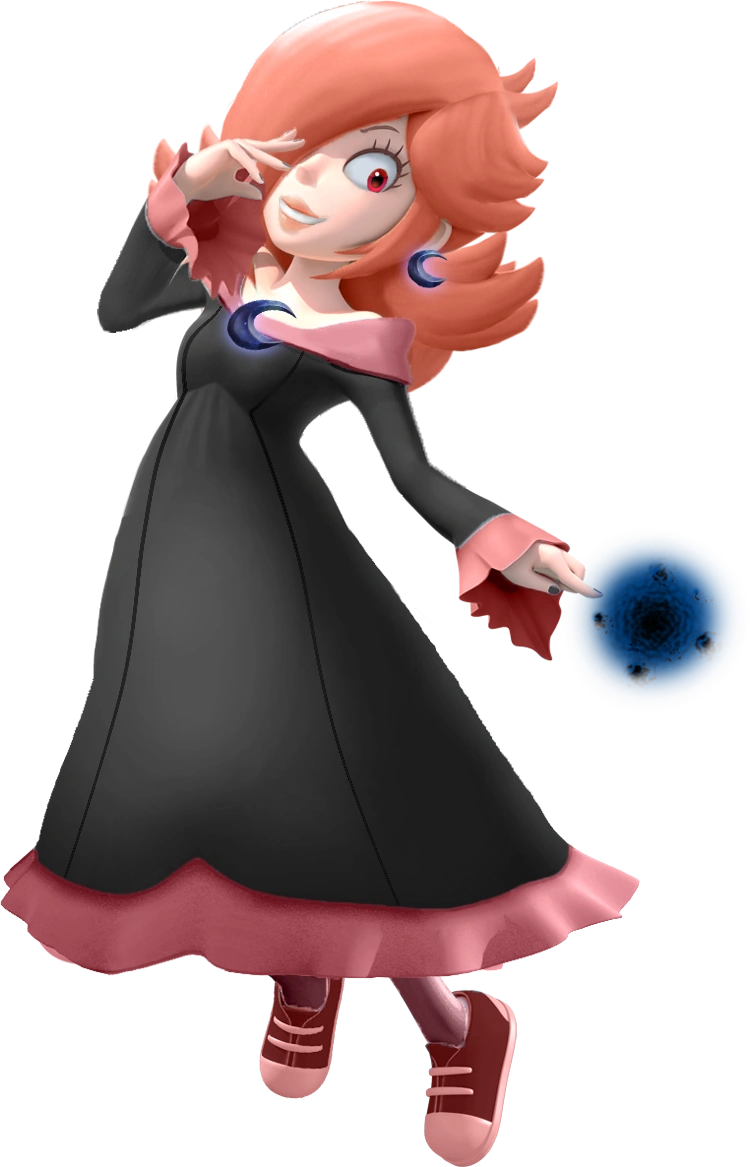


")
")

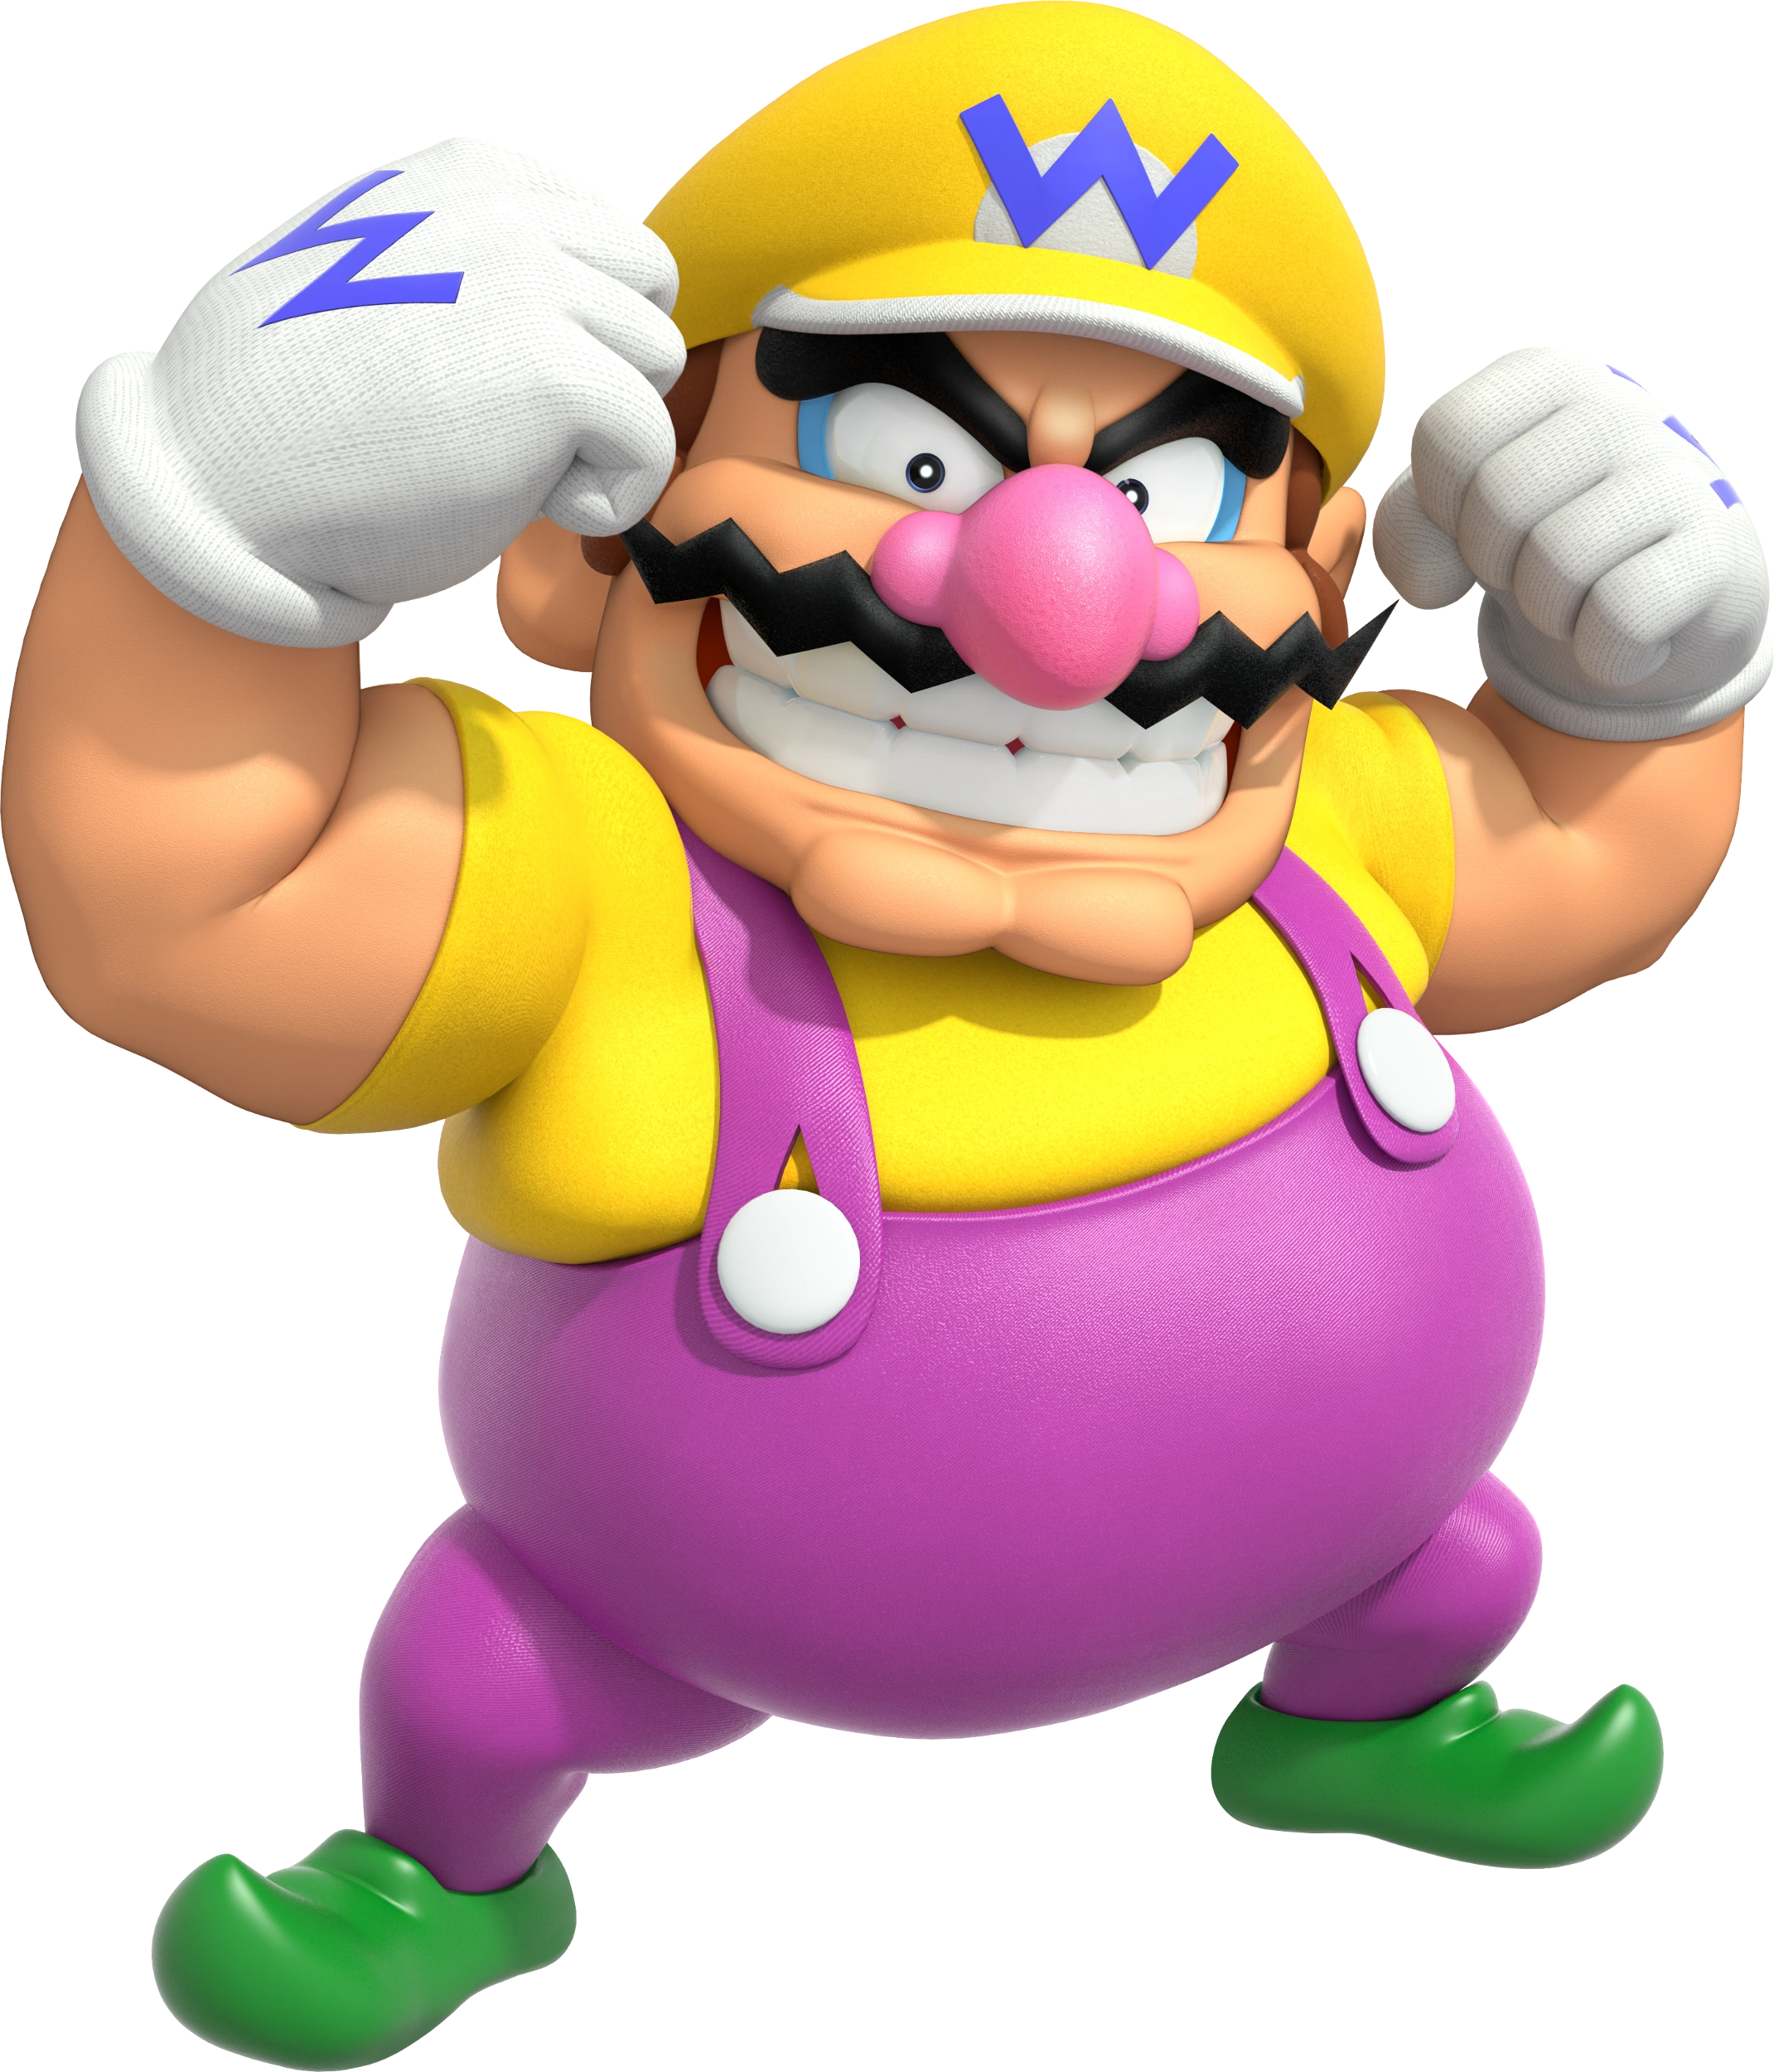

")


")
")
")
")
")
")
")
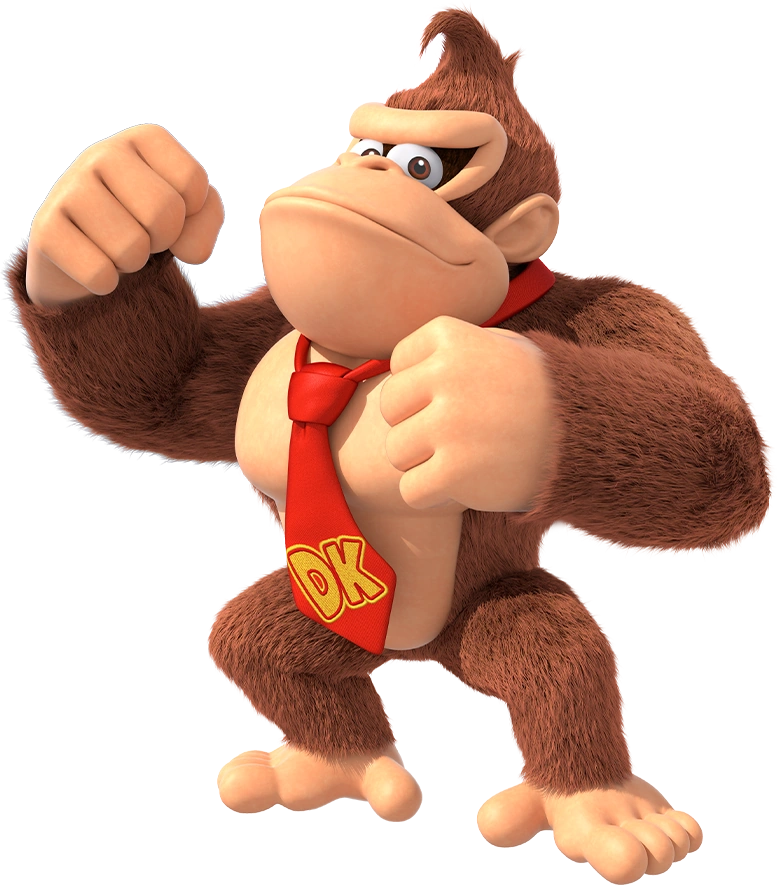
")
")
")
")
")
")
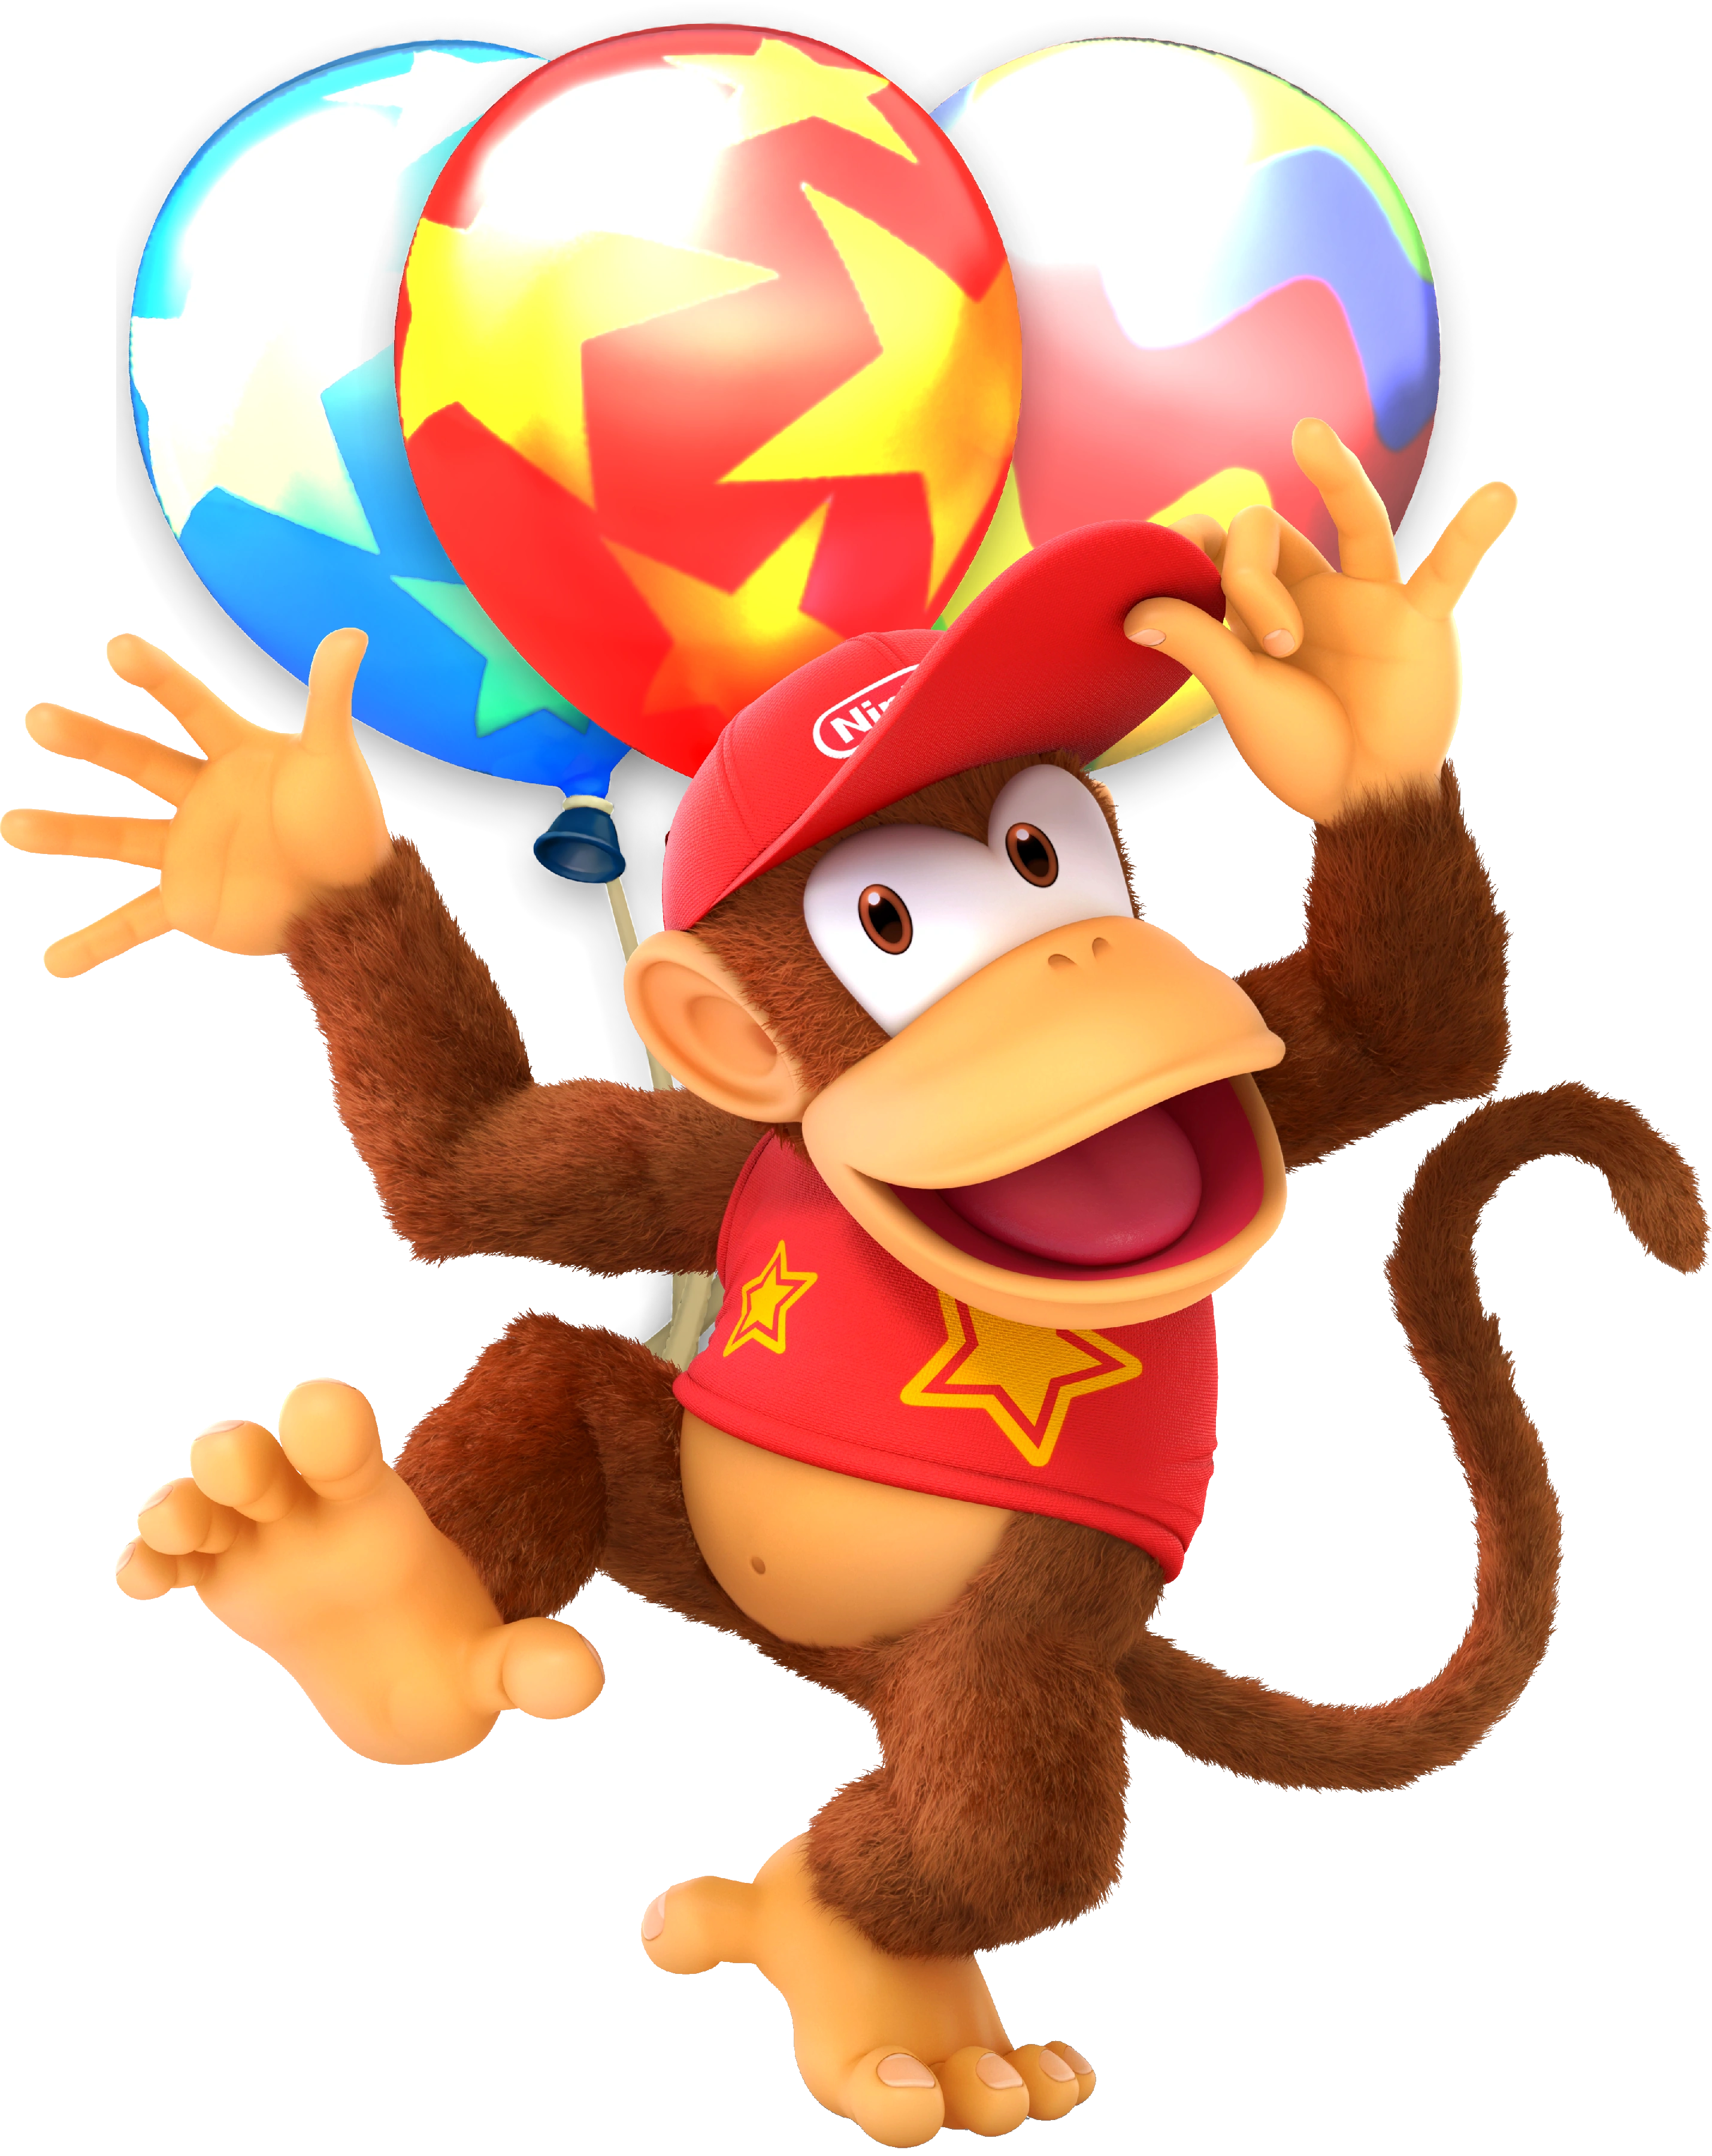
")
")
")
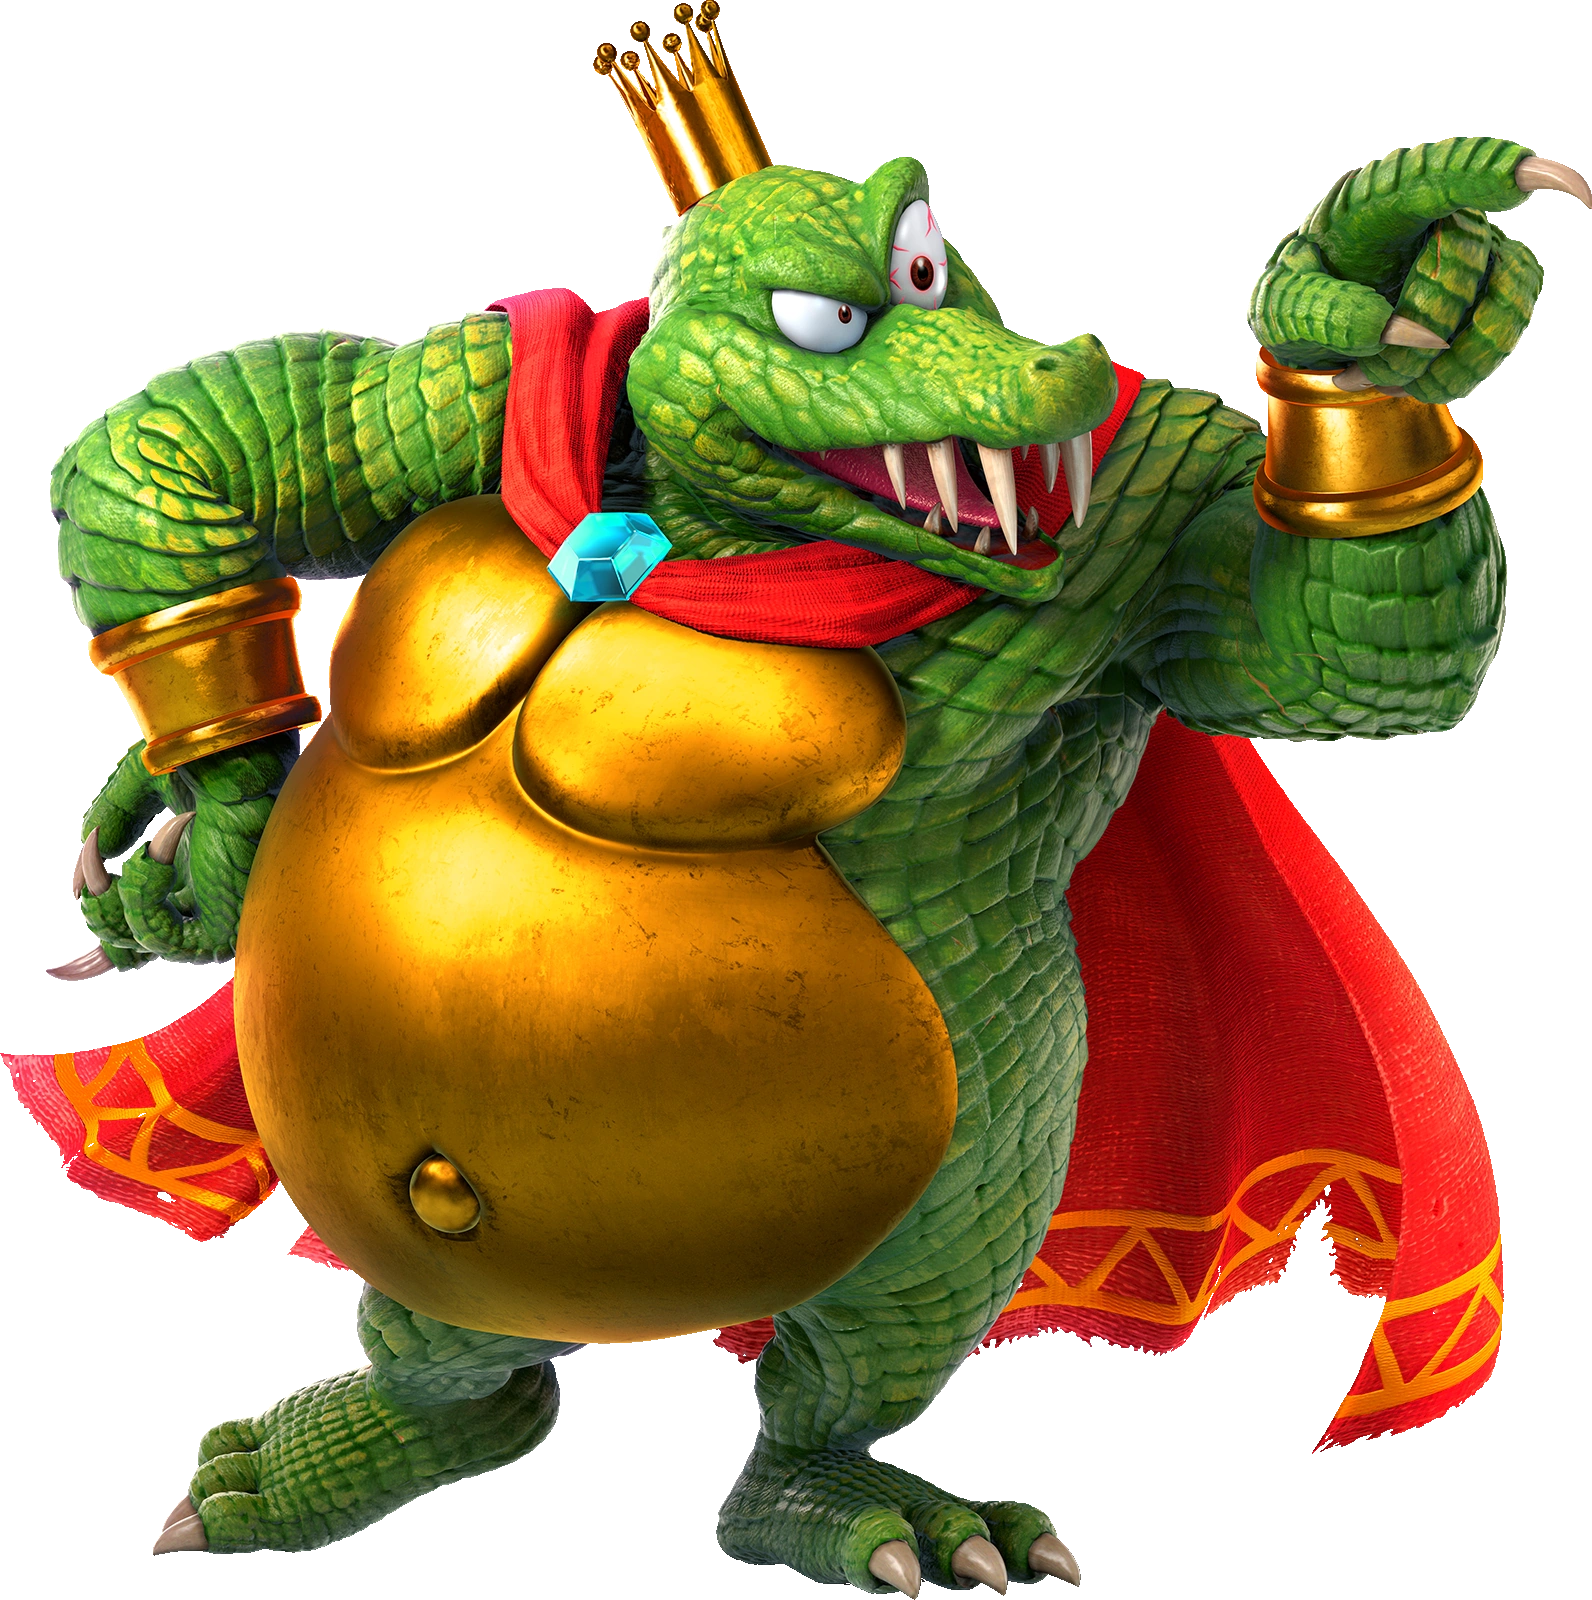

")
")
")
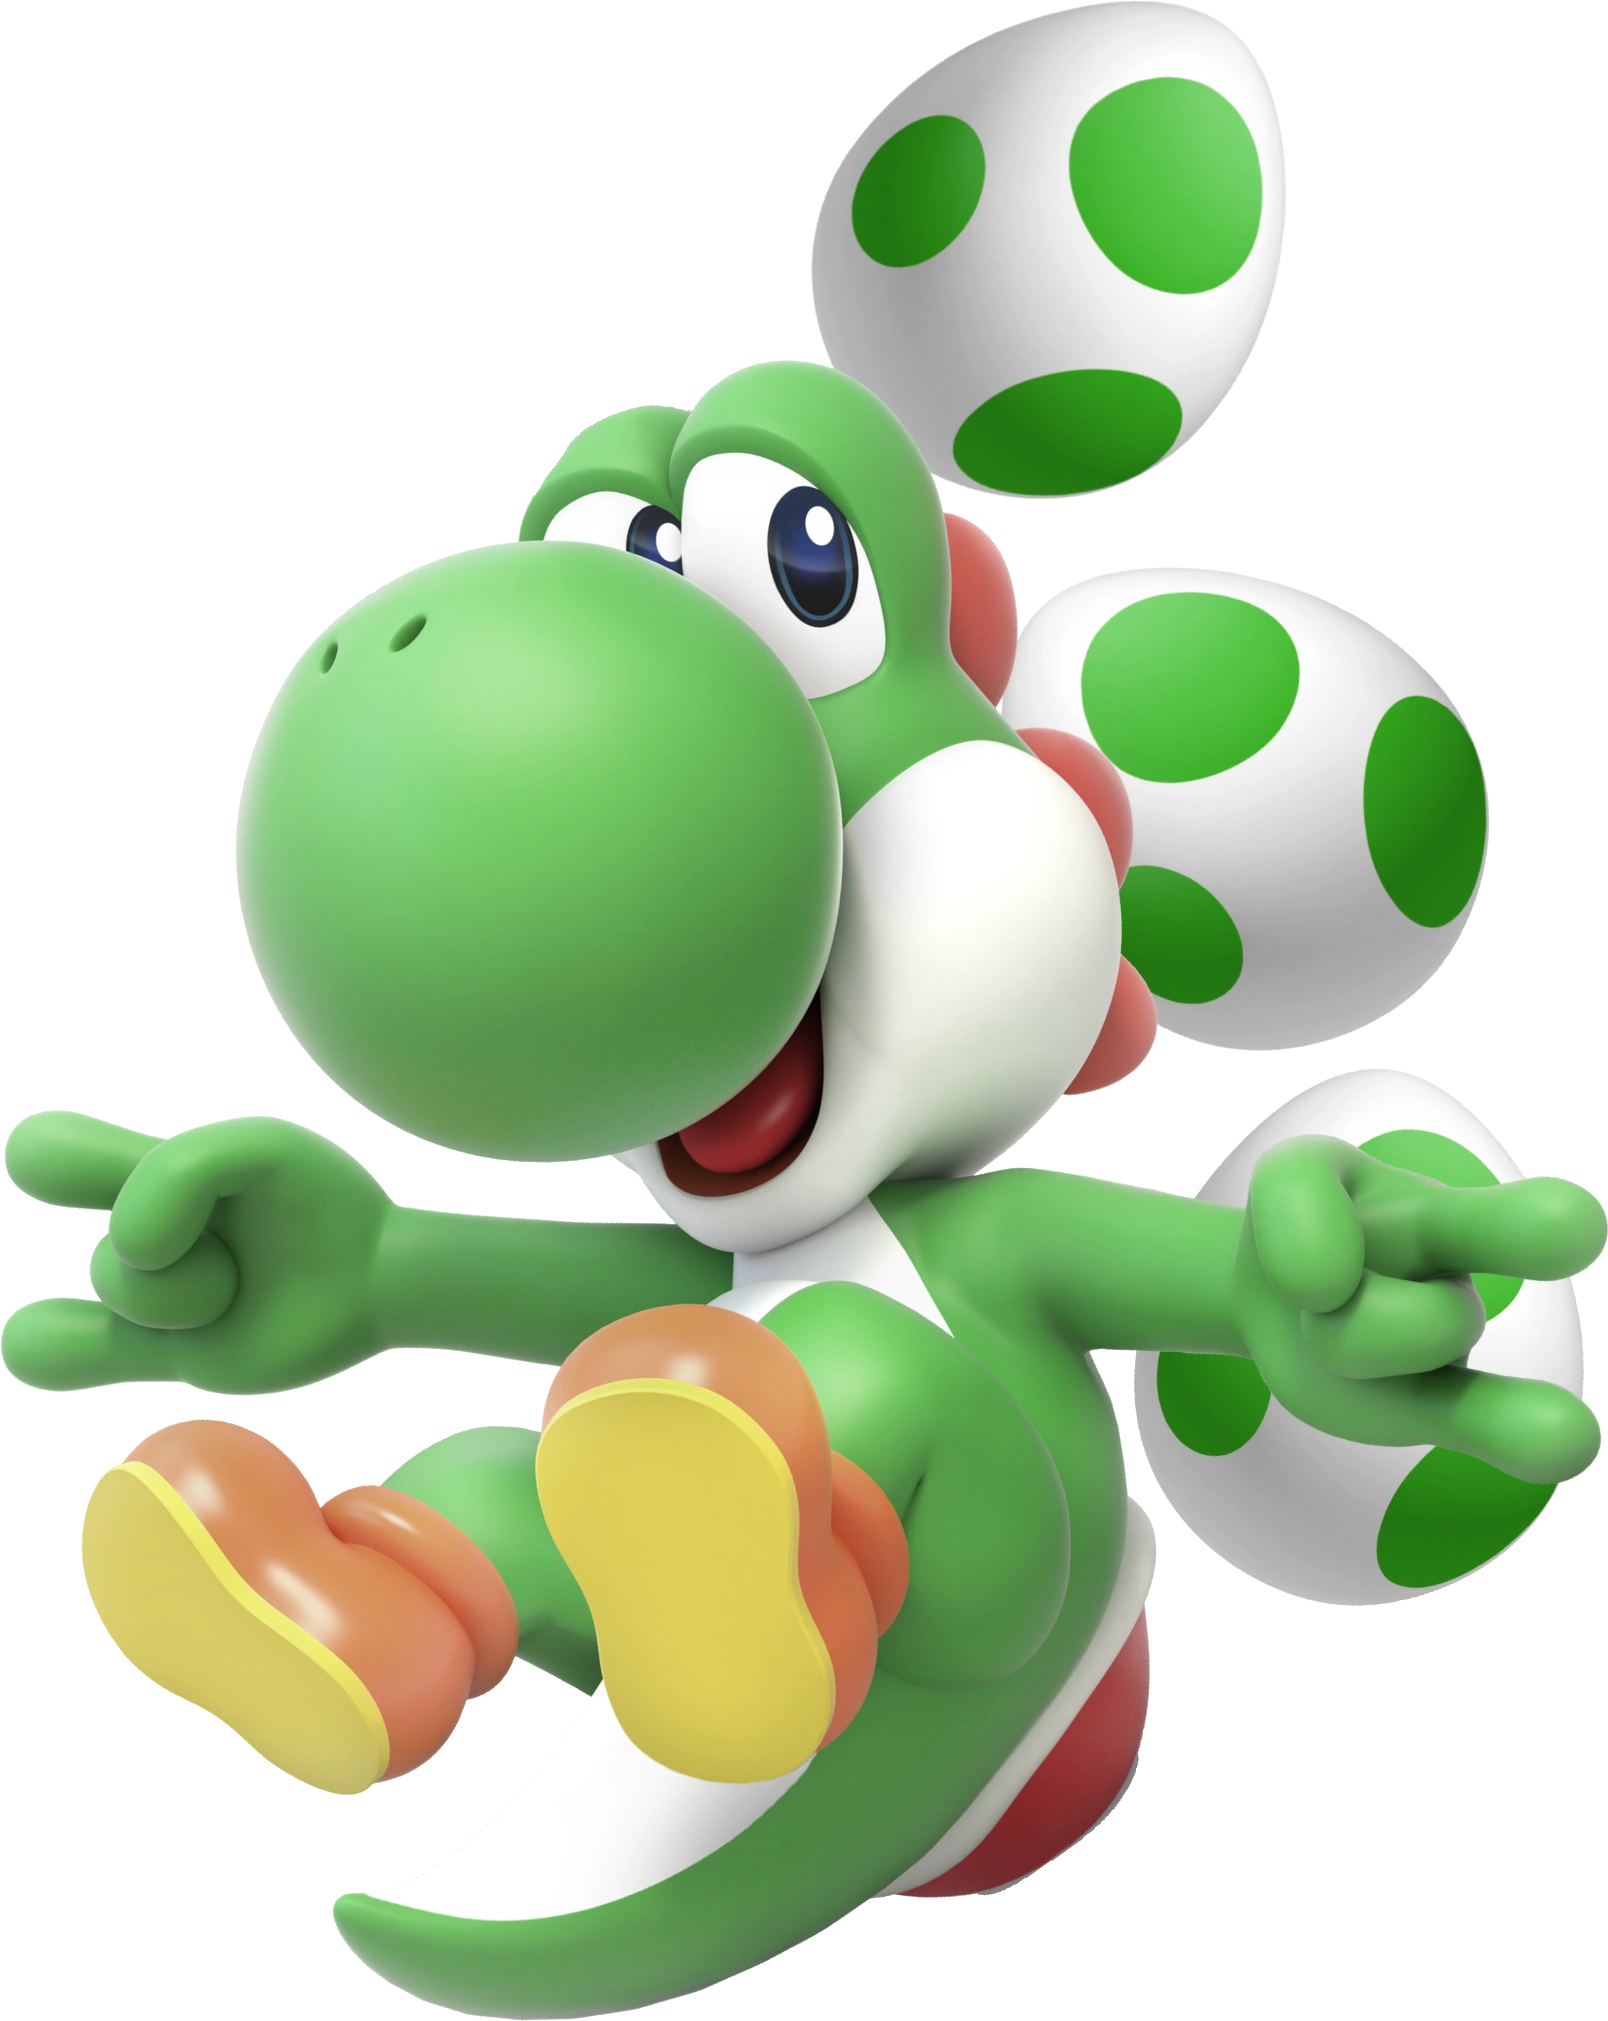

")
.png "Yoshi SSBUltimate (Crafted World).png (6.96 MB)")
")
")


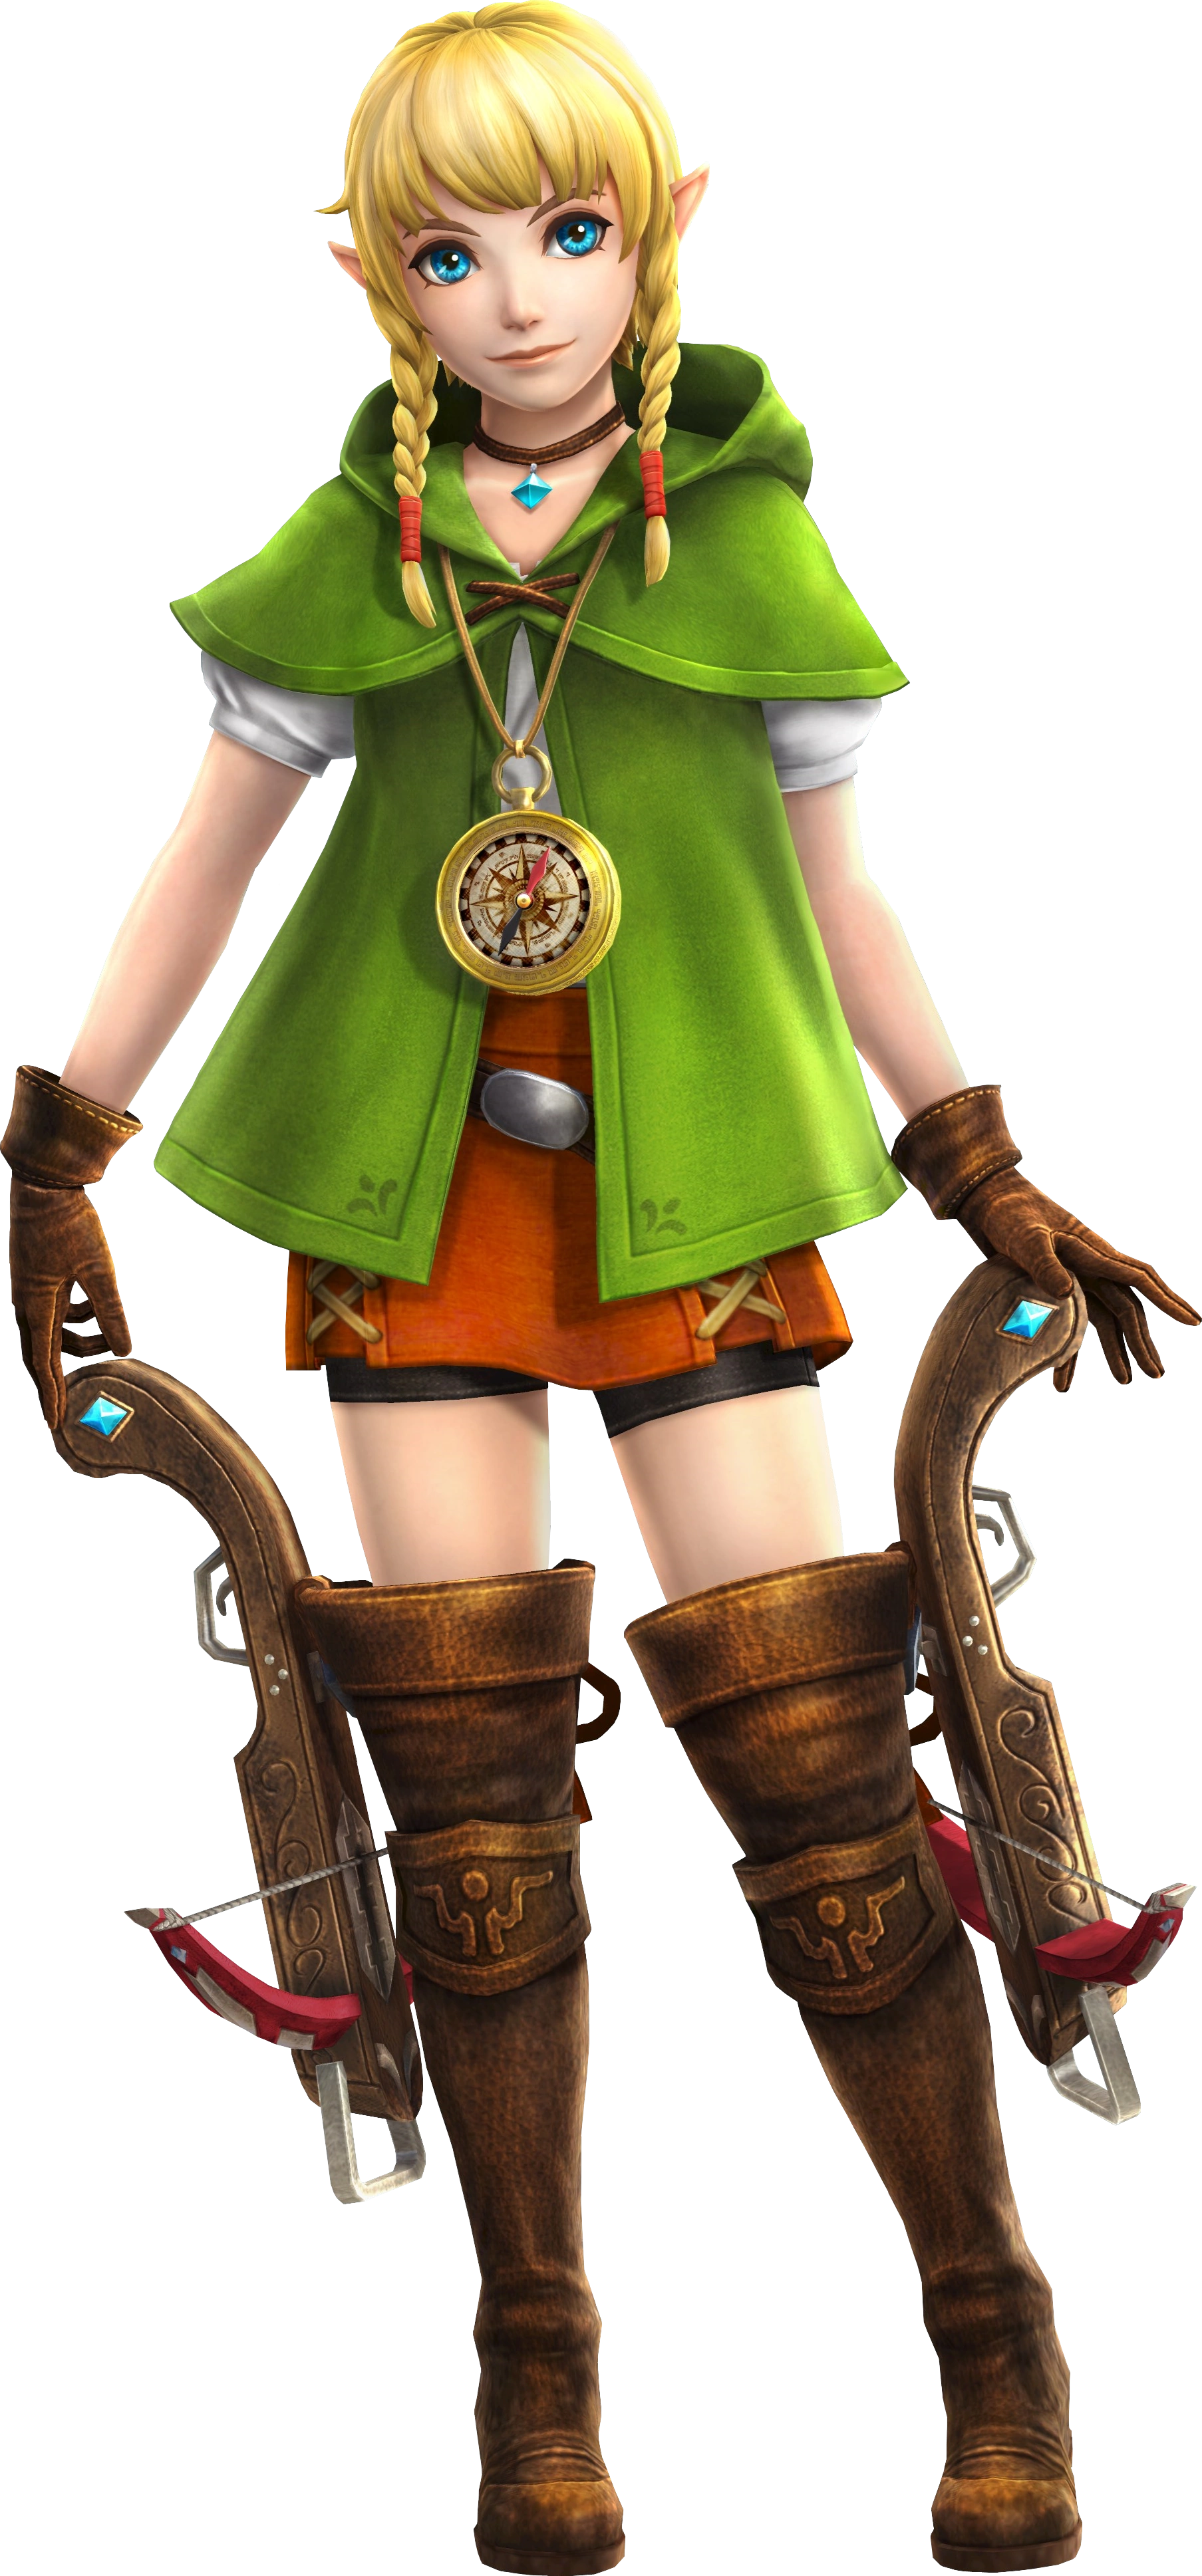
")
")
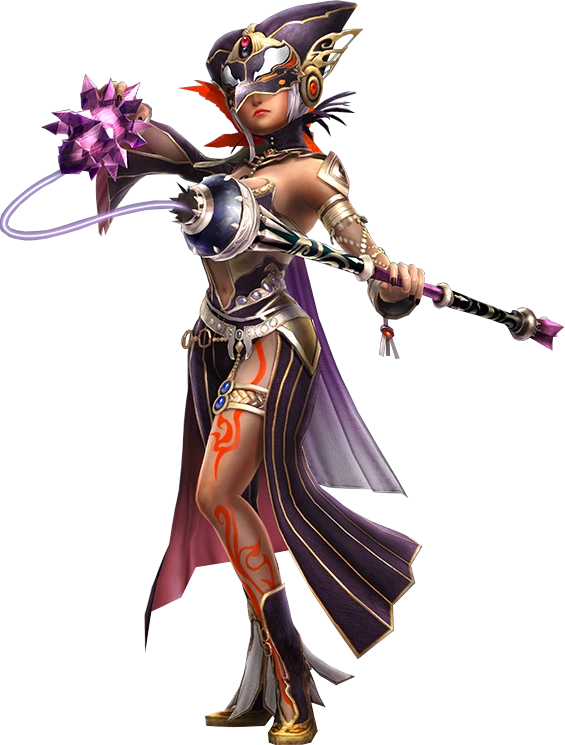
")
")
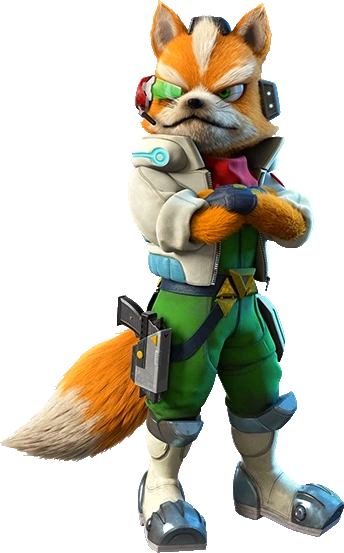
")
")
")
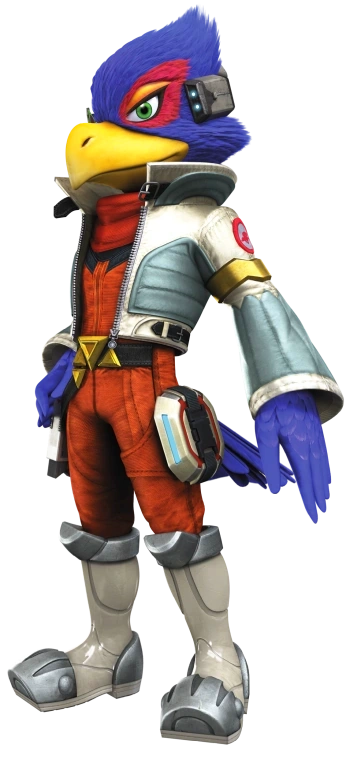
")
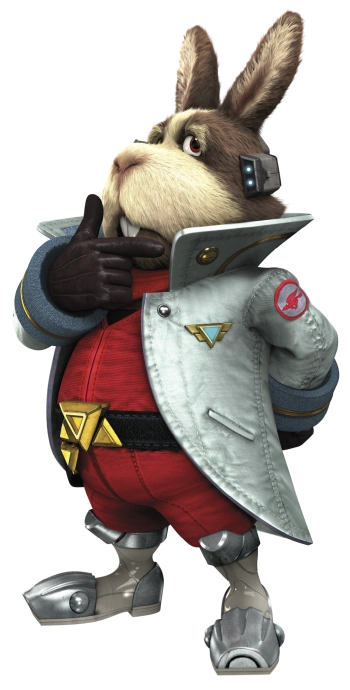
")
")
")
")
")
")
")
")
.png "Ridley SSBUltimate (Meta).png (5.56 MB)")
")
")
")
")
")
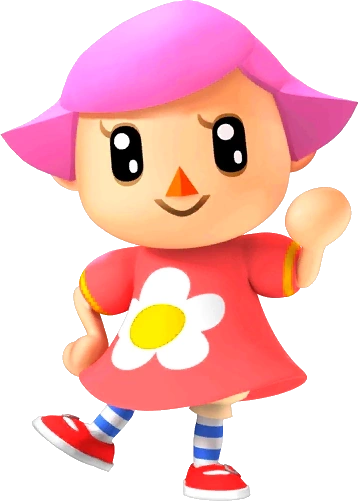
")
")
")
")
")
")
")
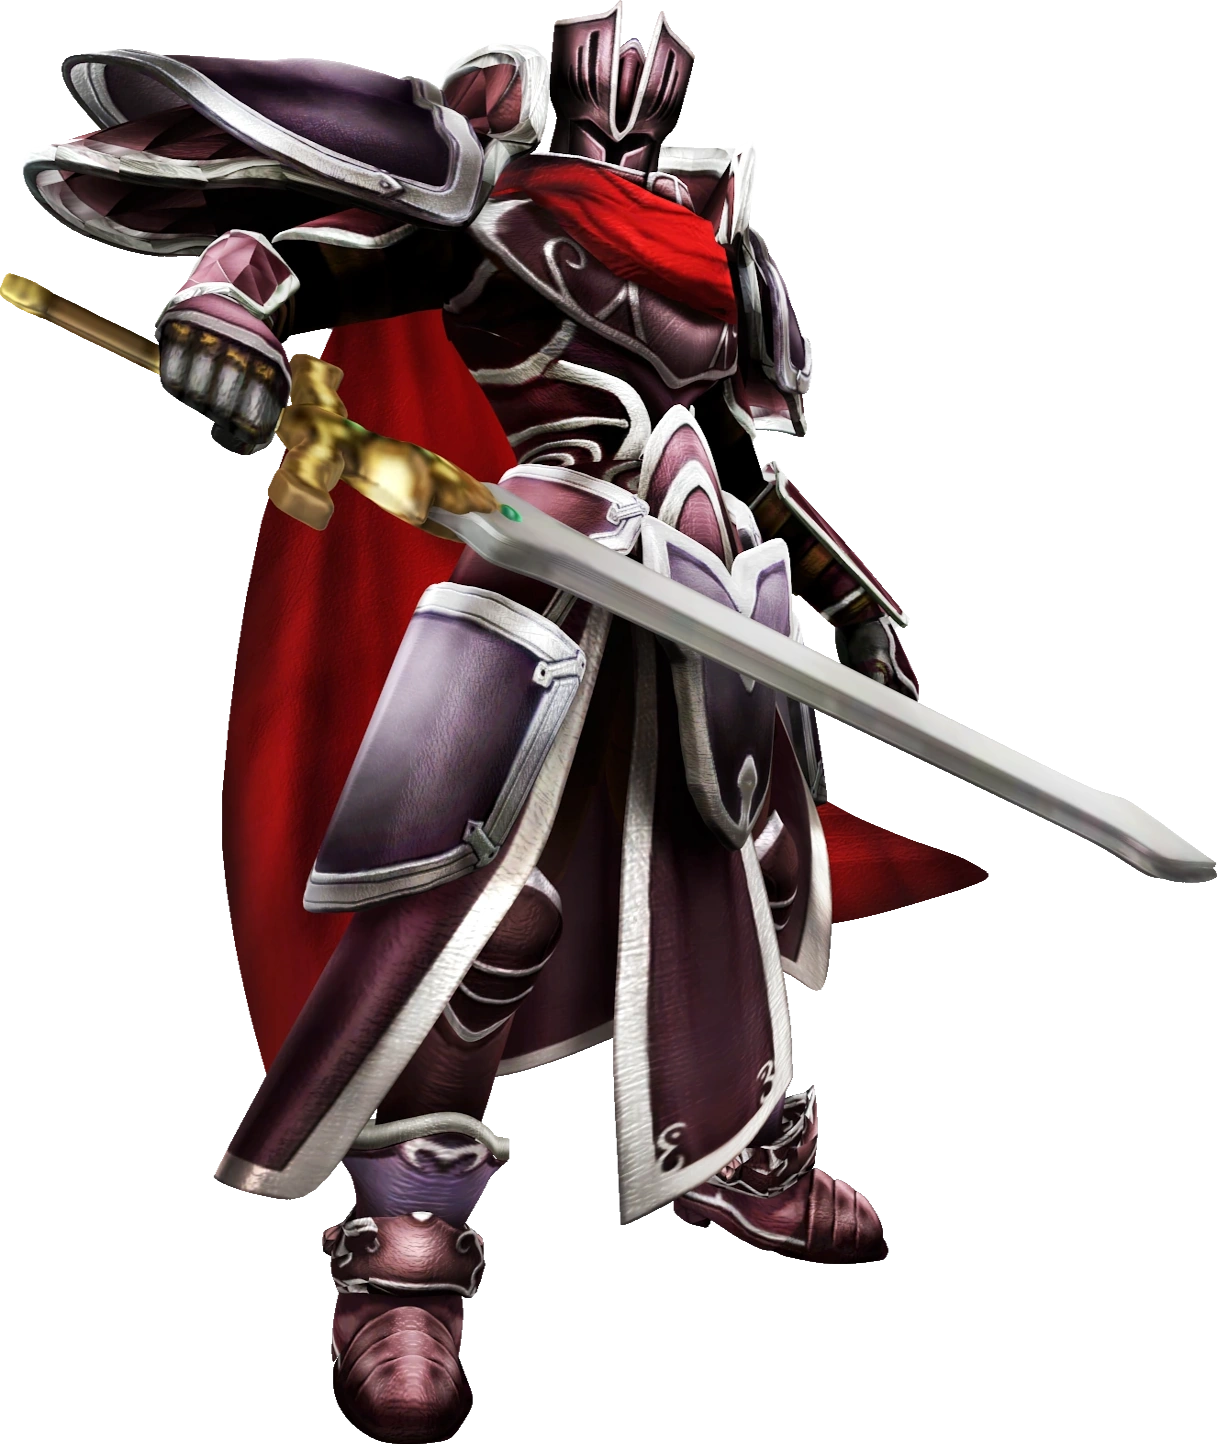
")
")
")

")
_Heroes.png "Tharja (Winter's Envoy) Heroes.png (1.36 MB)")
_Heroes.png "Tharja (Bridal Bloom) Heroes.png (2.9 MB)")
")
")
")

")

")
")
")
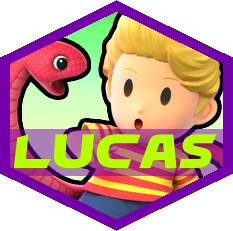
")
_SSB4_(Wii_U).png "Claus) SSB4 (Wii U).png (67 KB)")
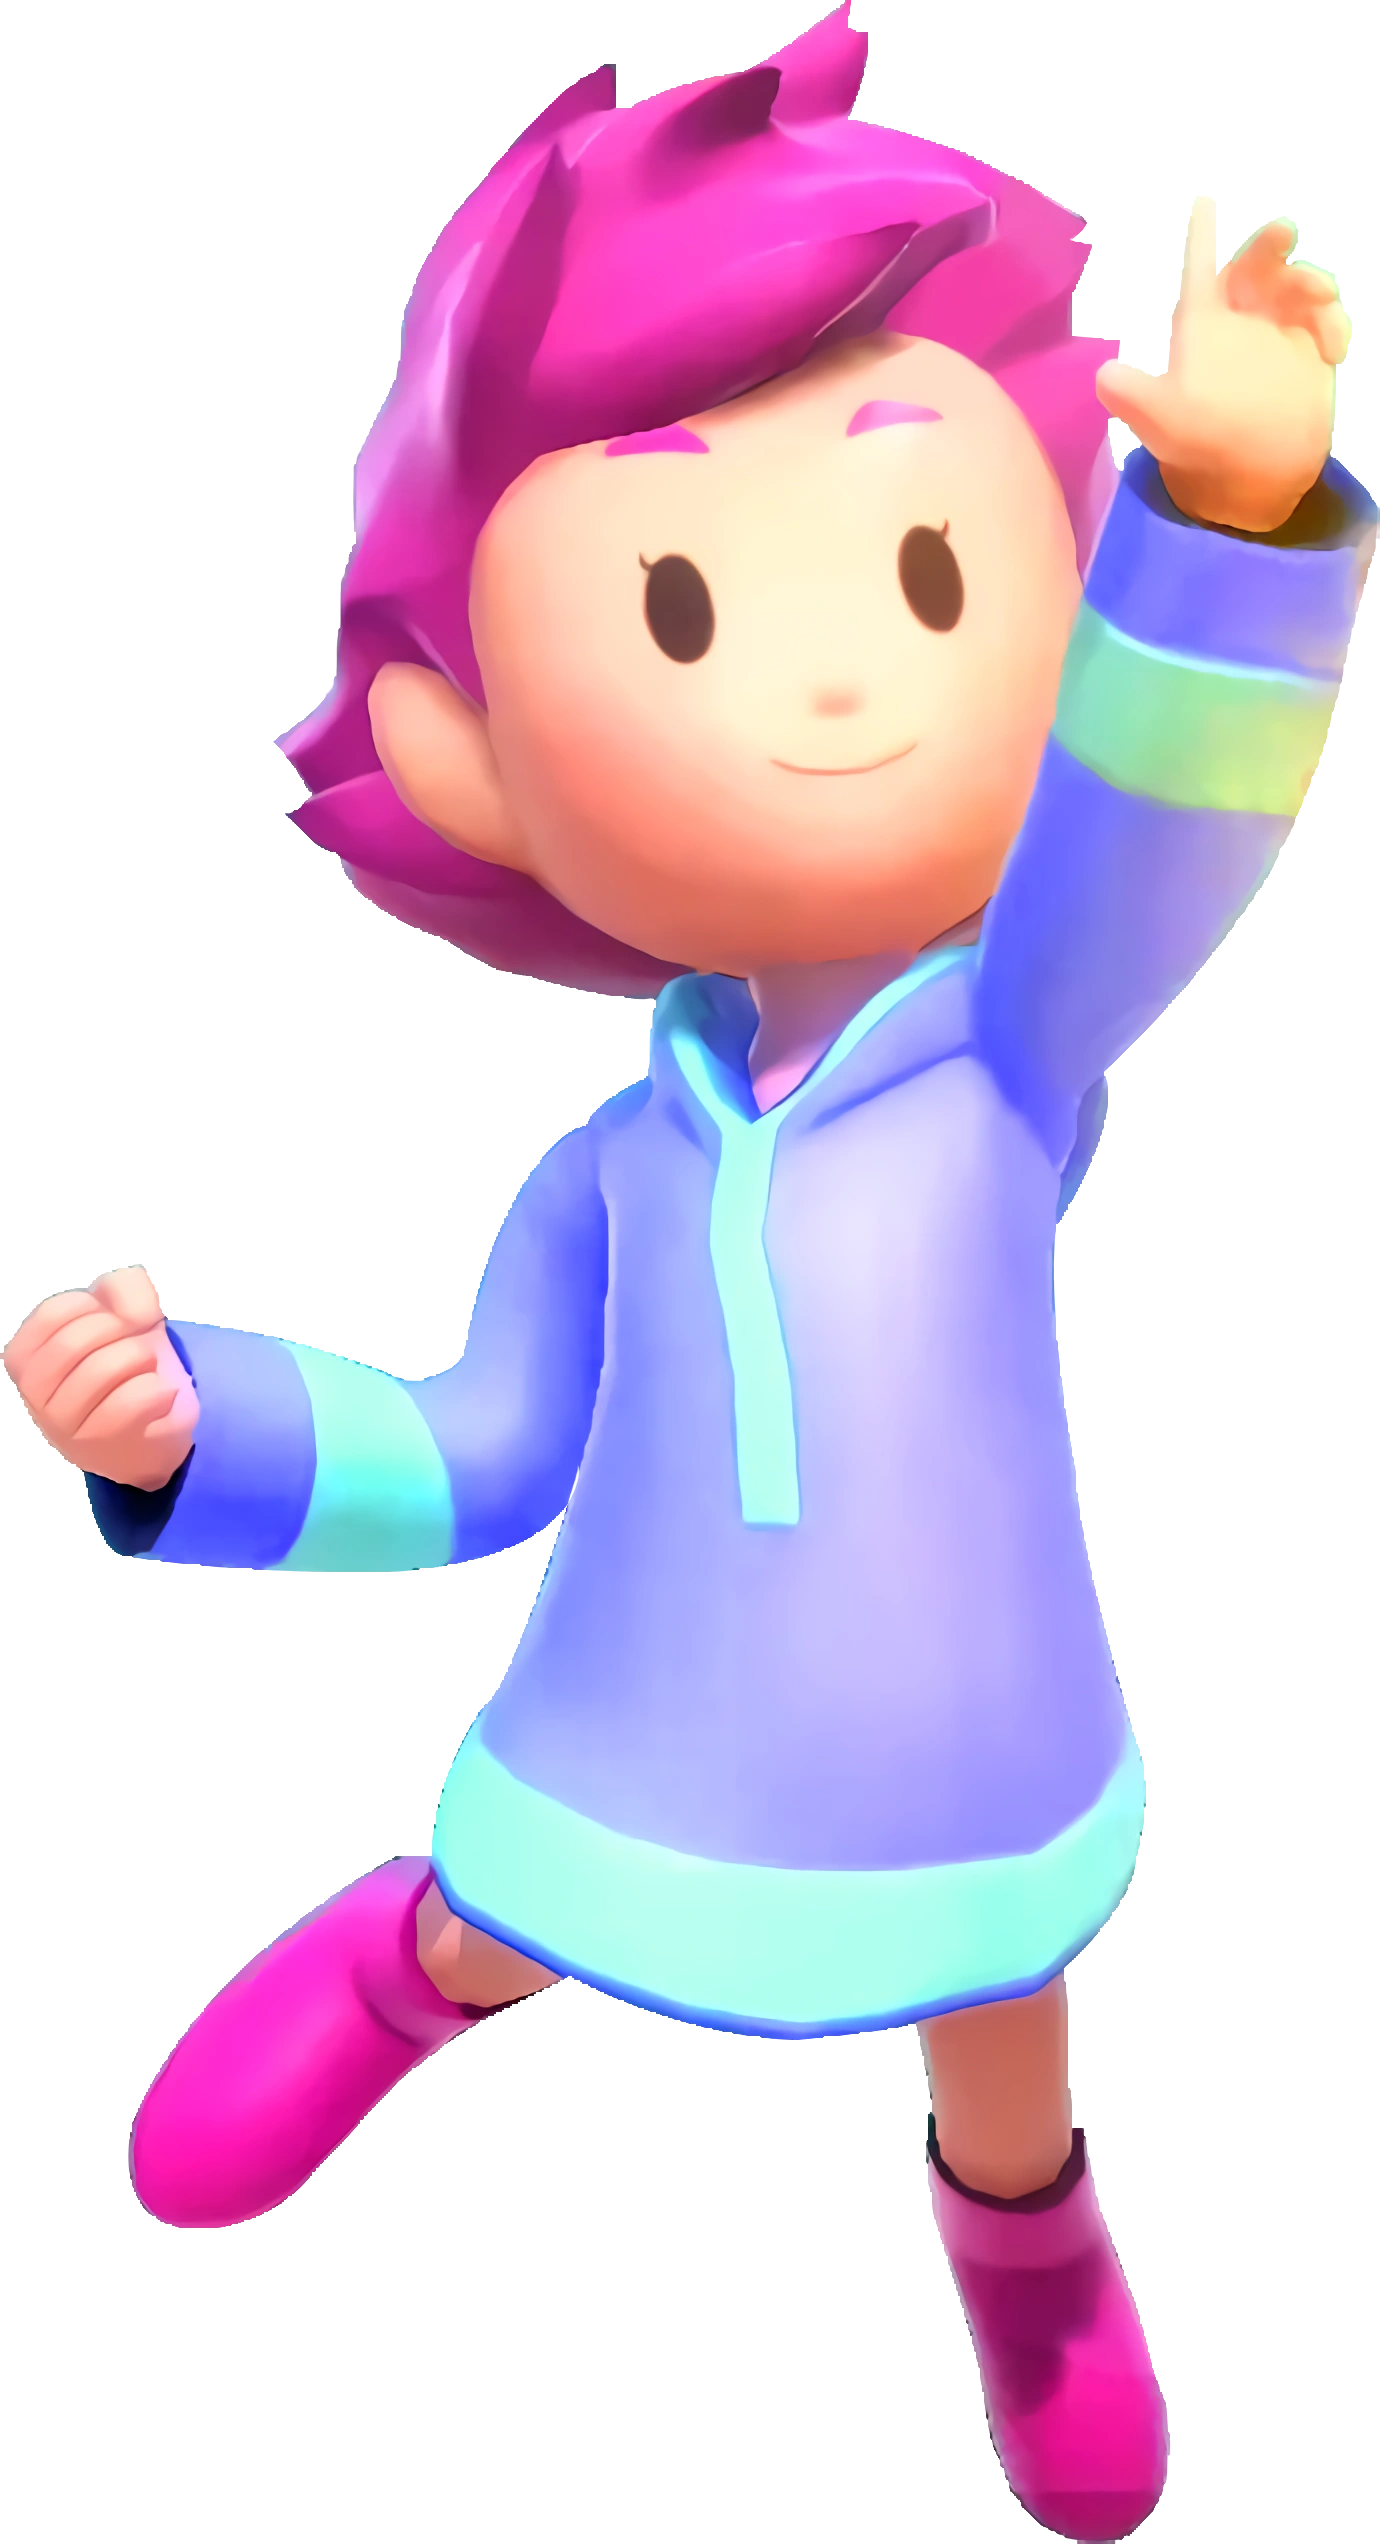
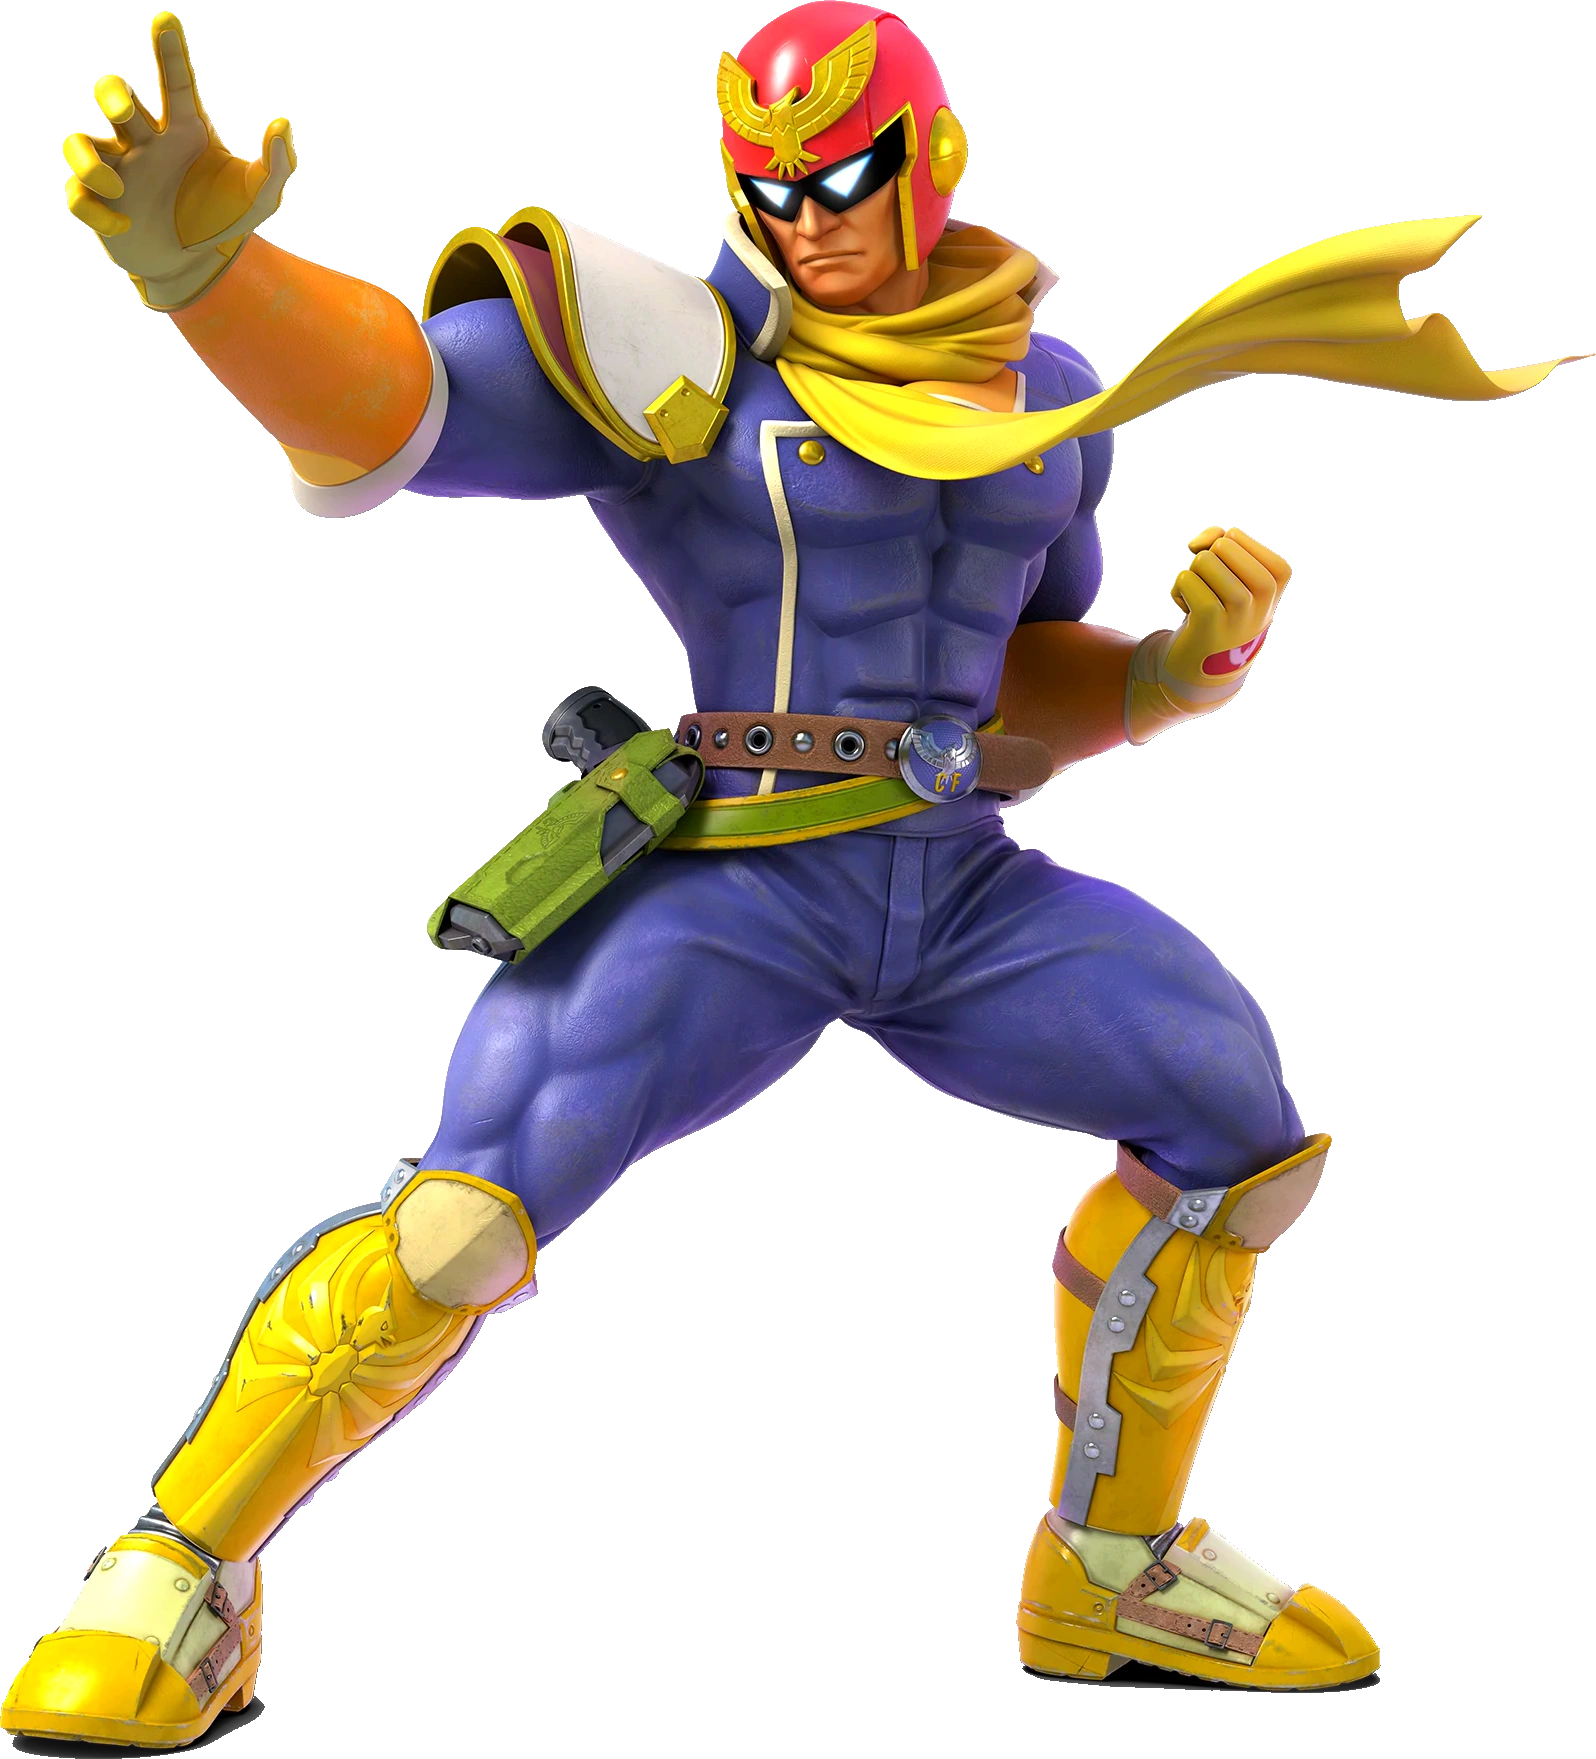
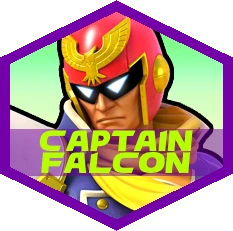
")

")
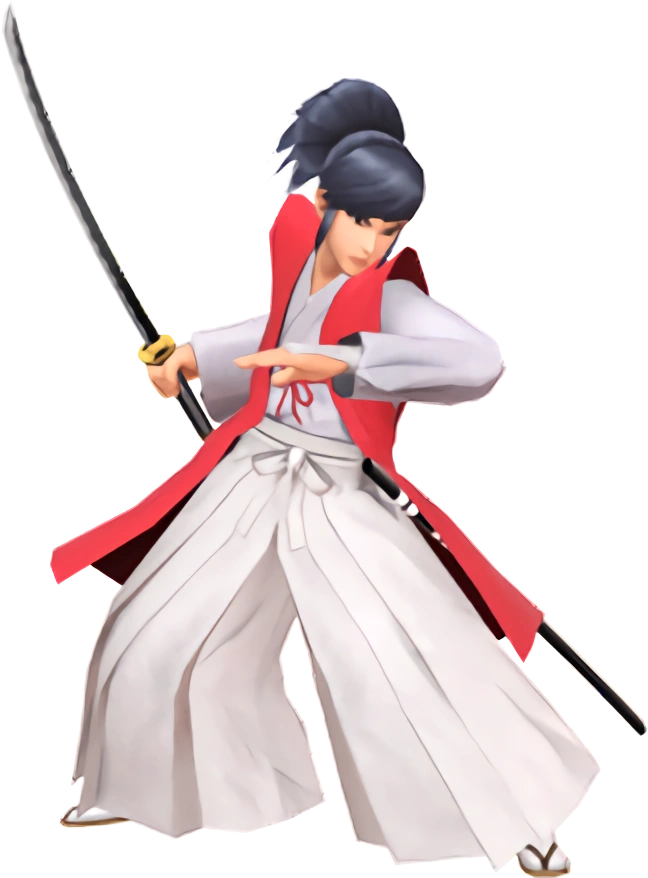
")
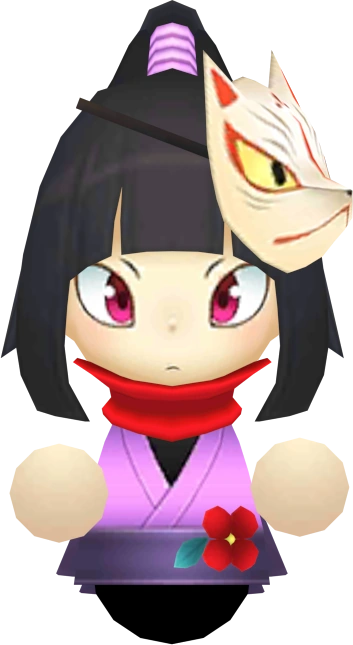


")
")
")


")
")
")
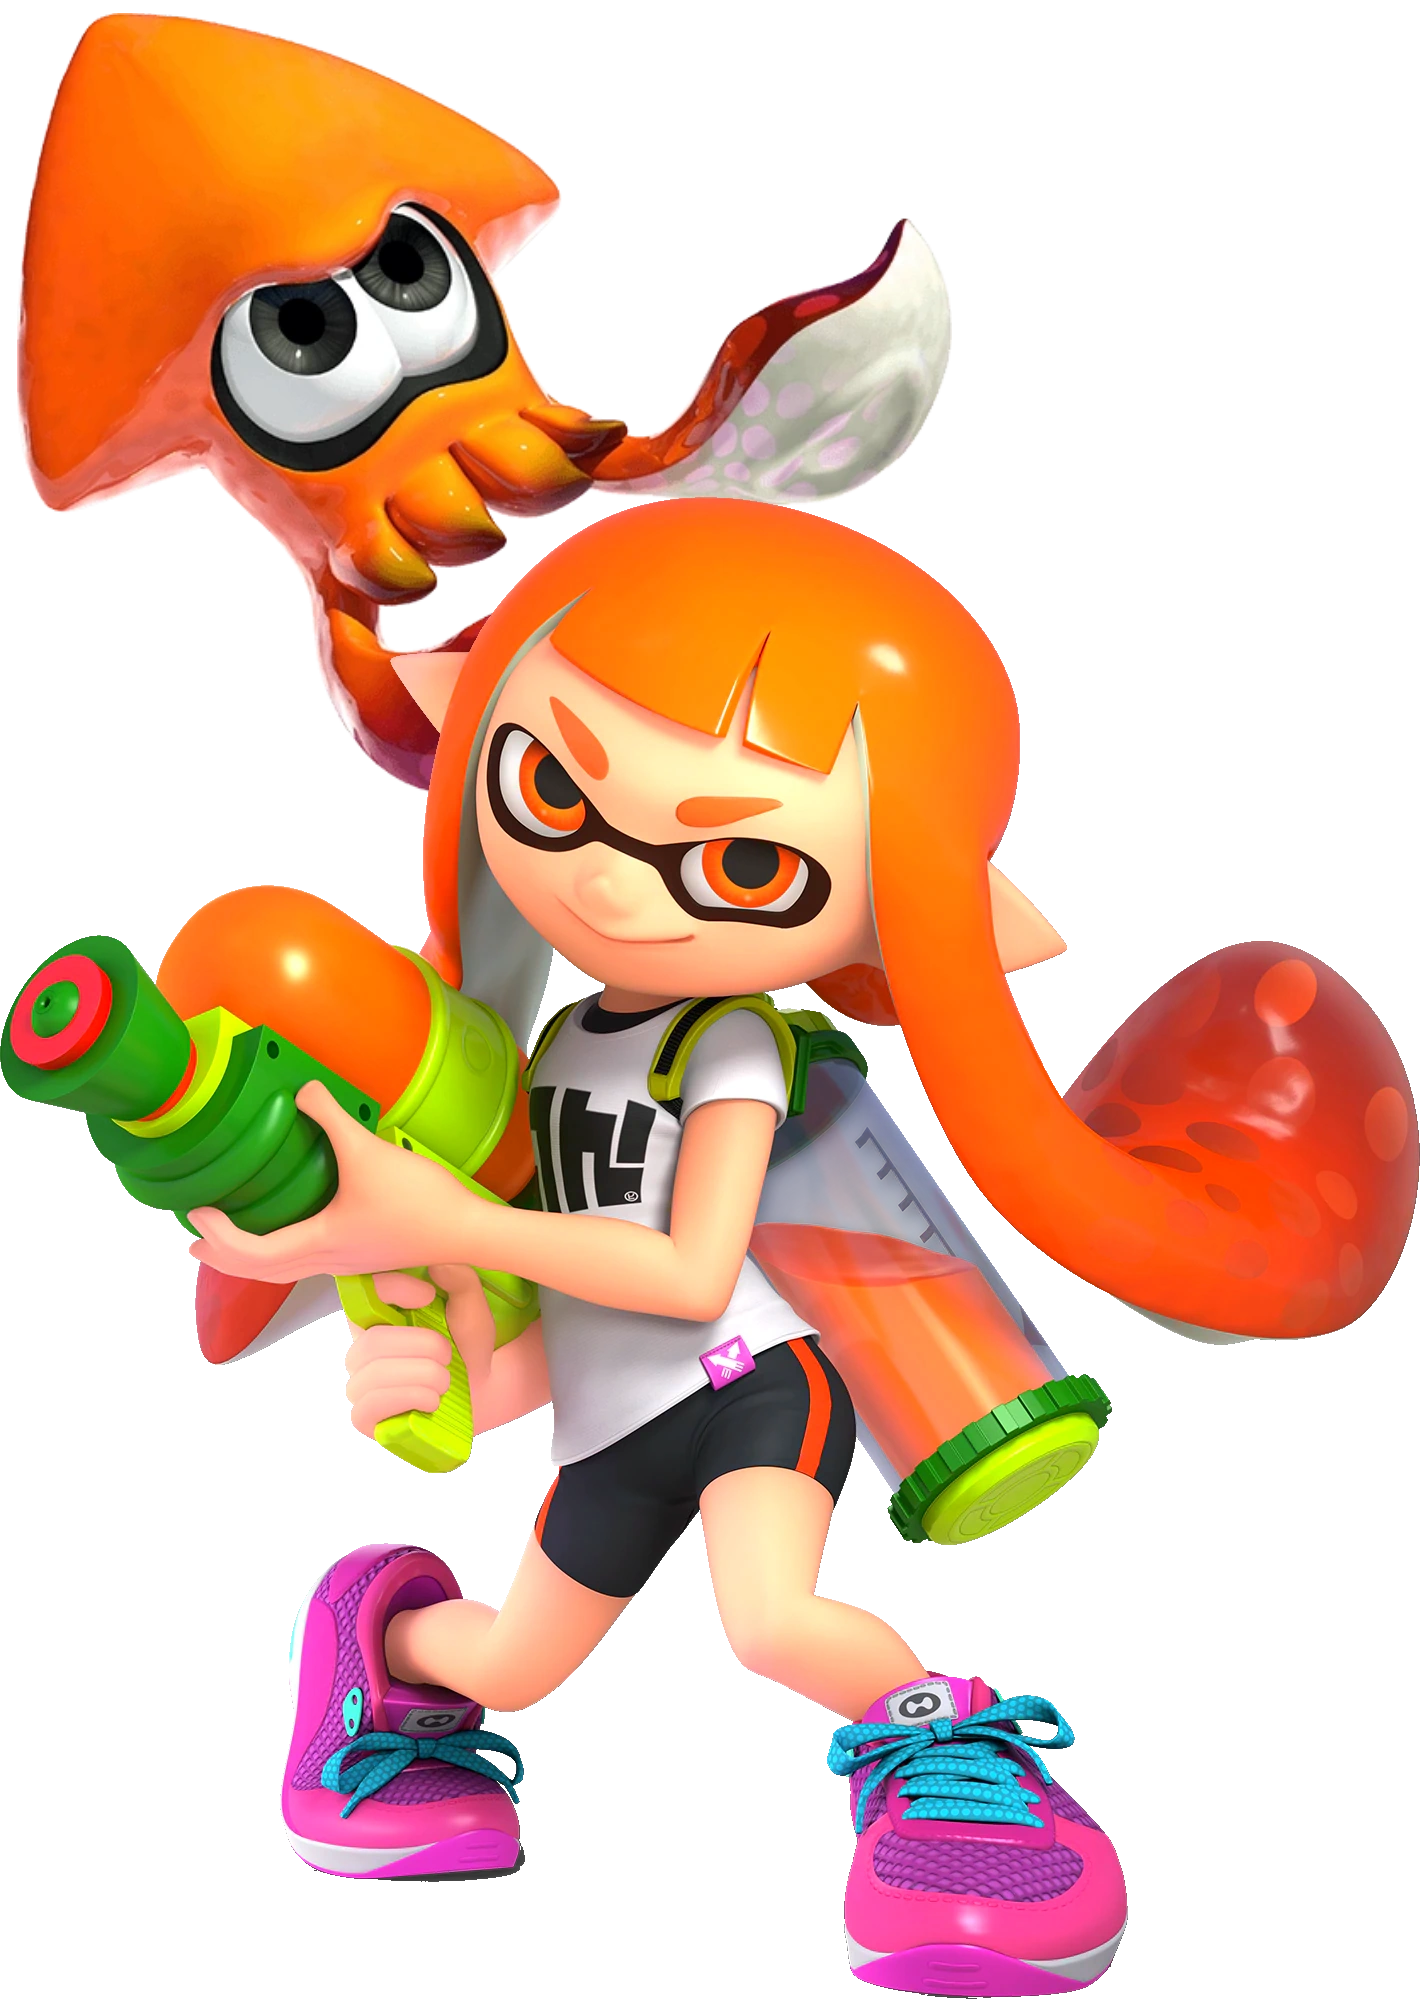
")
")
")
")
")
")
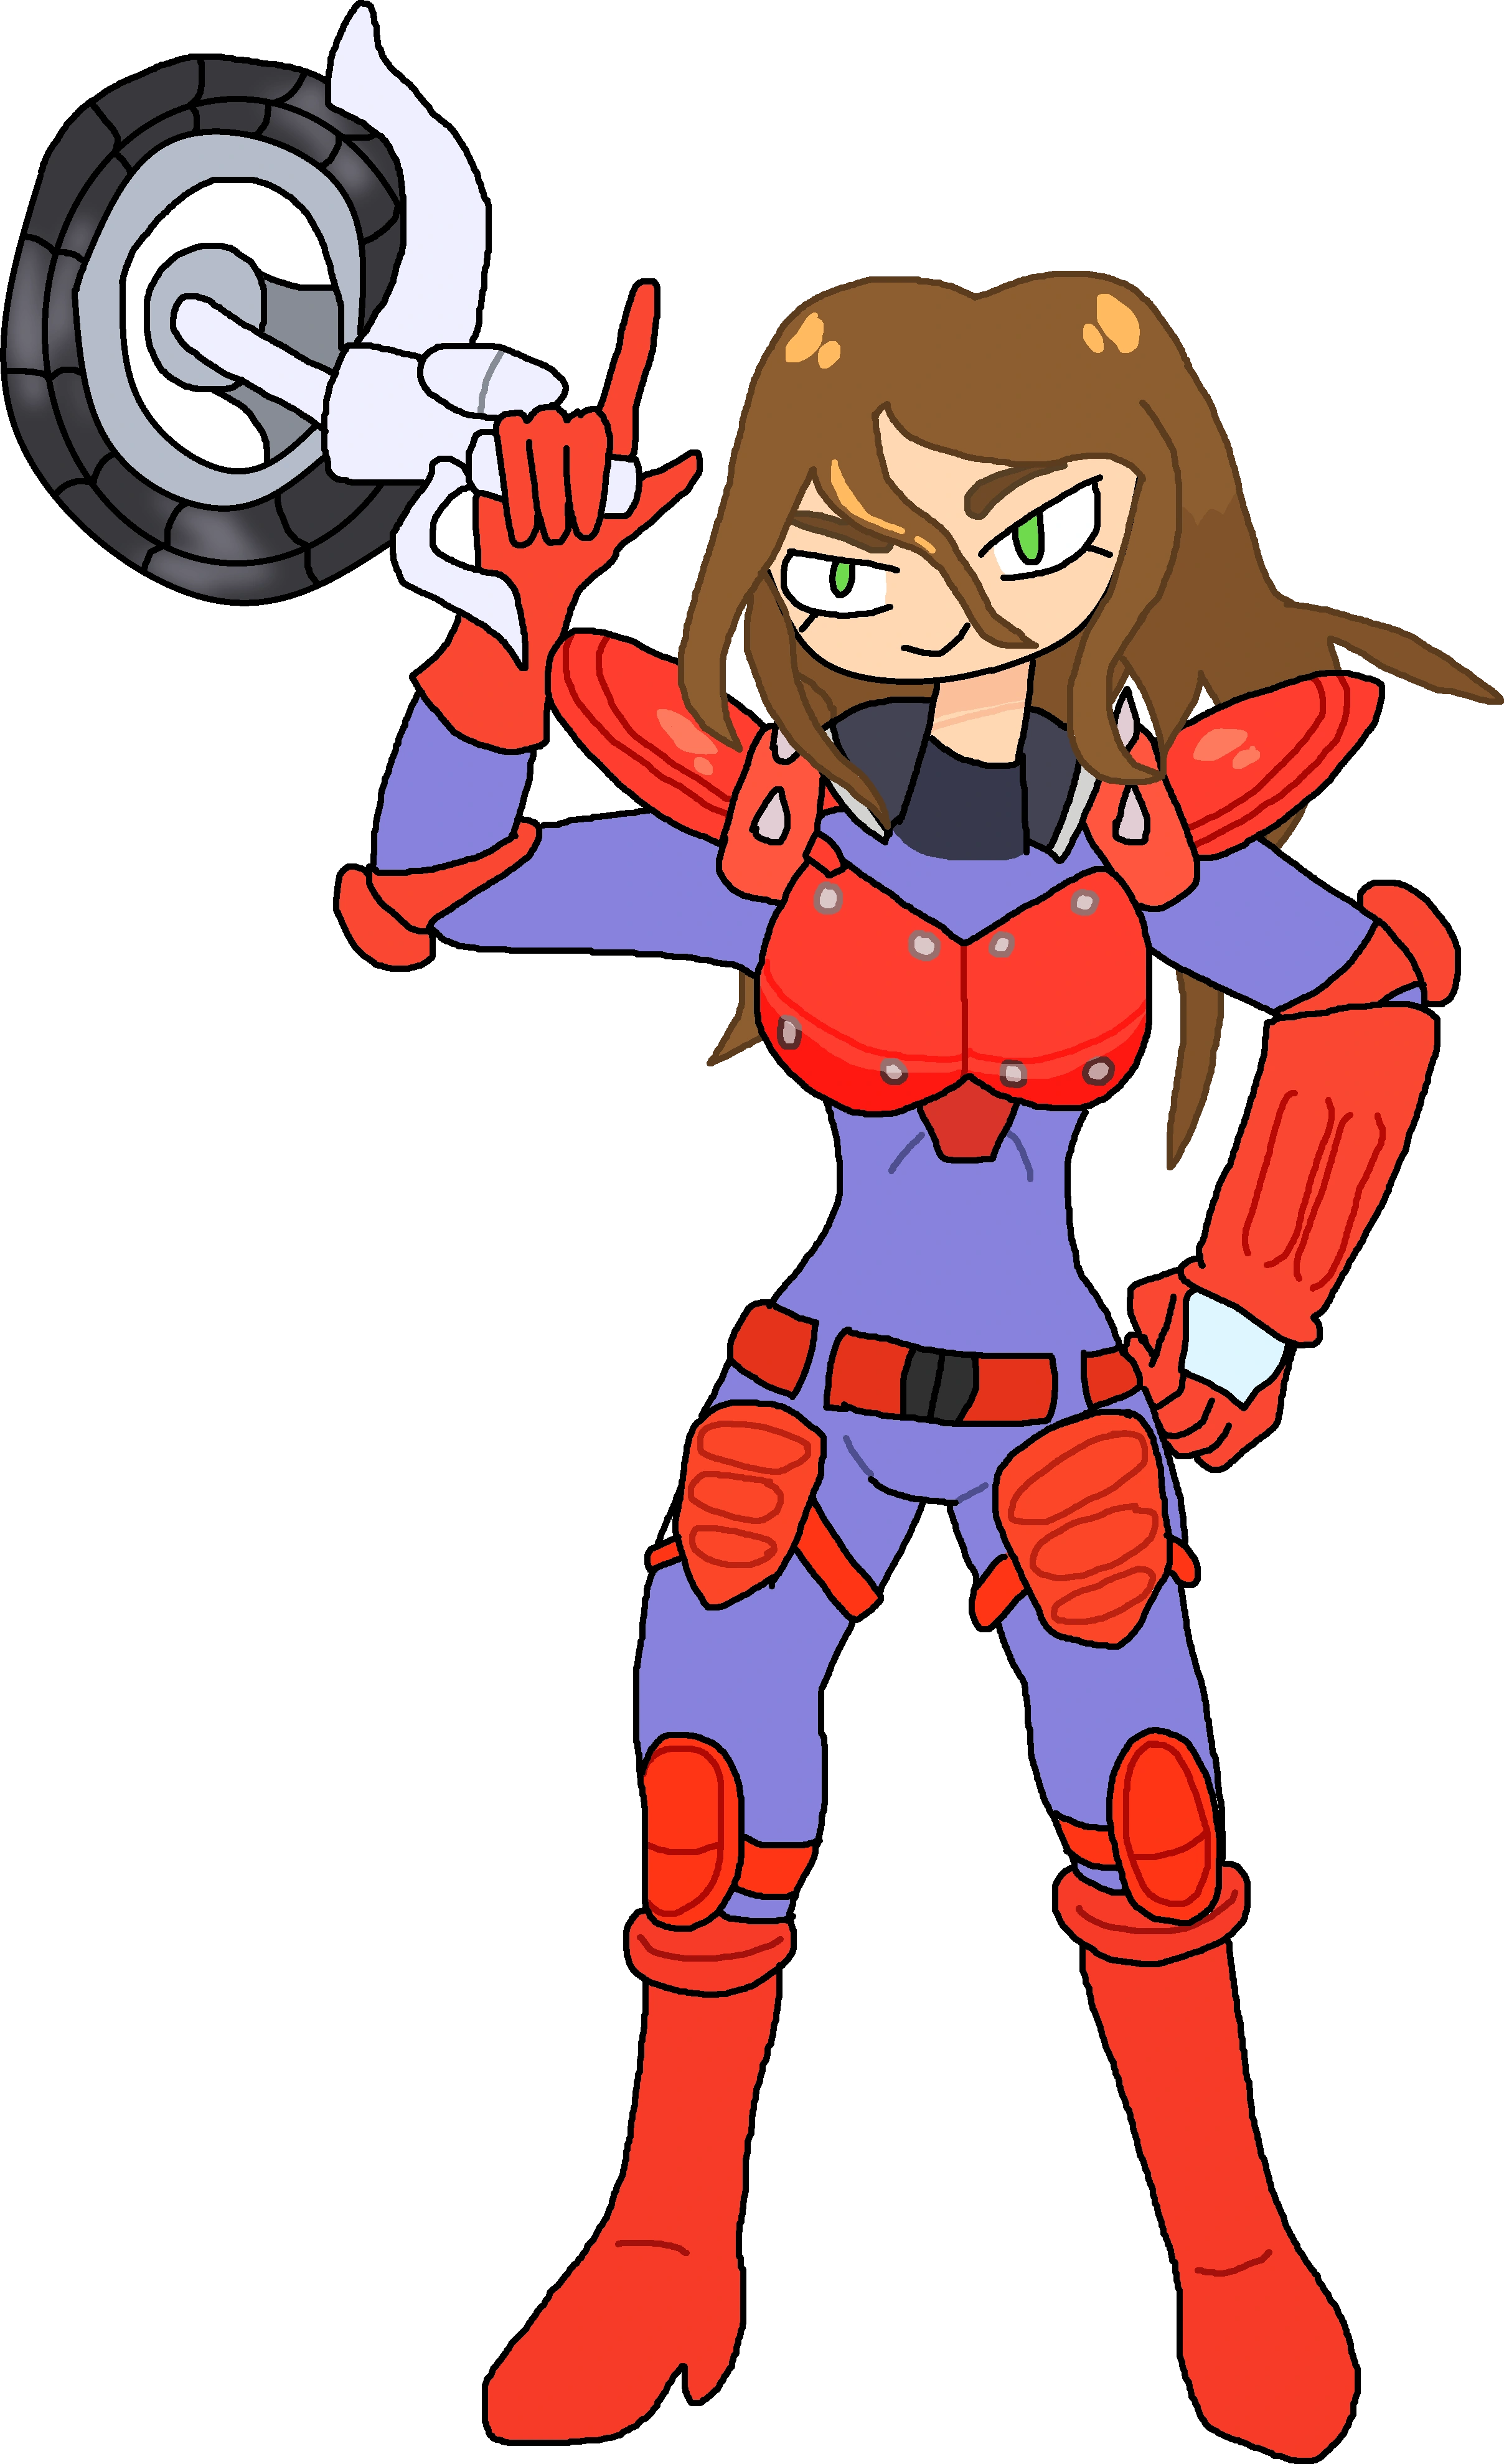

")
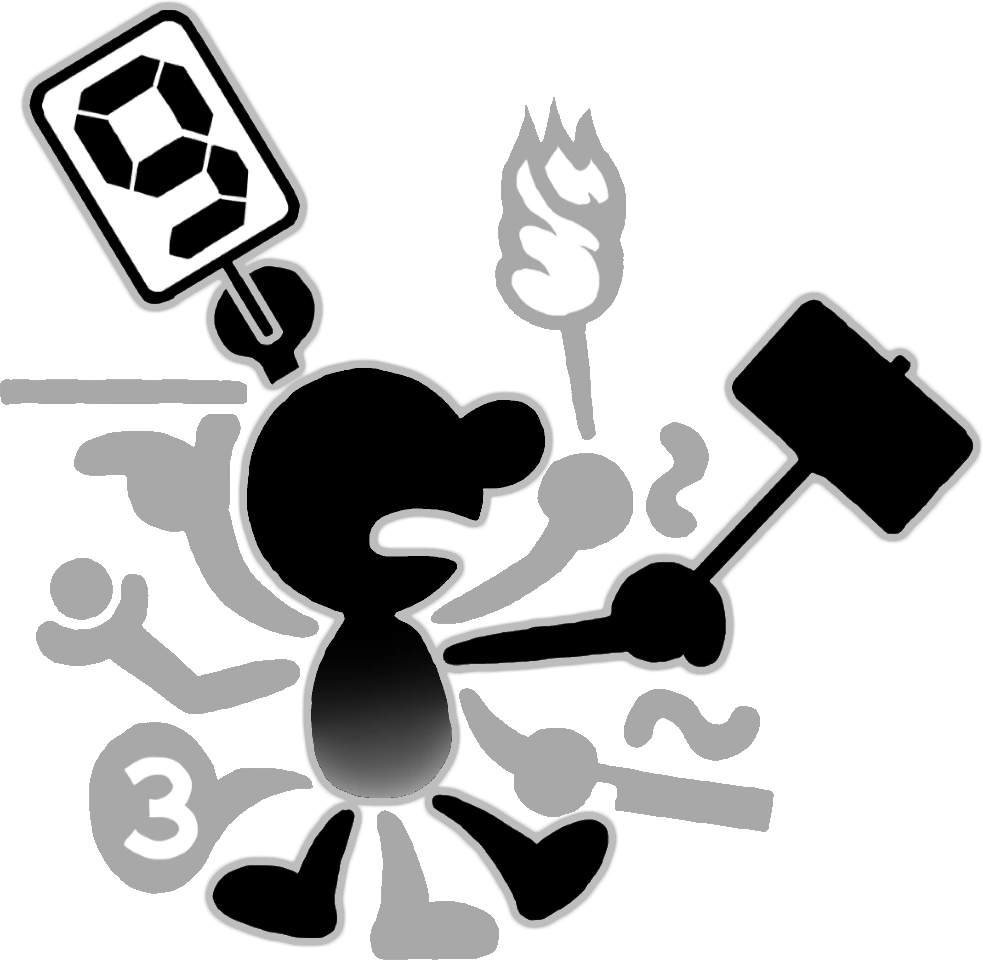

")
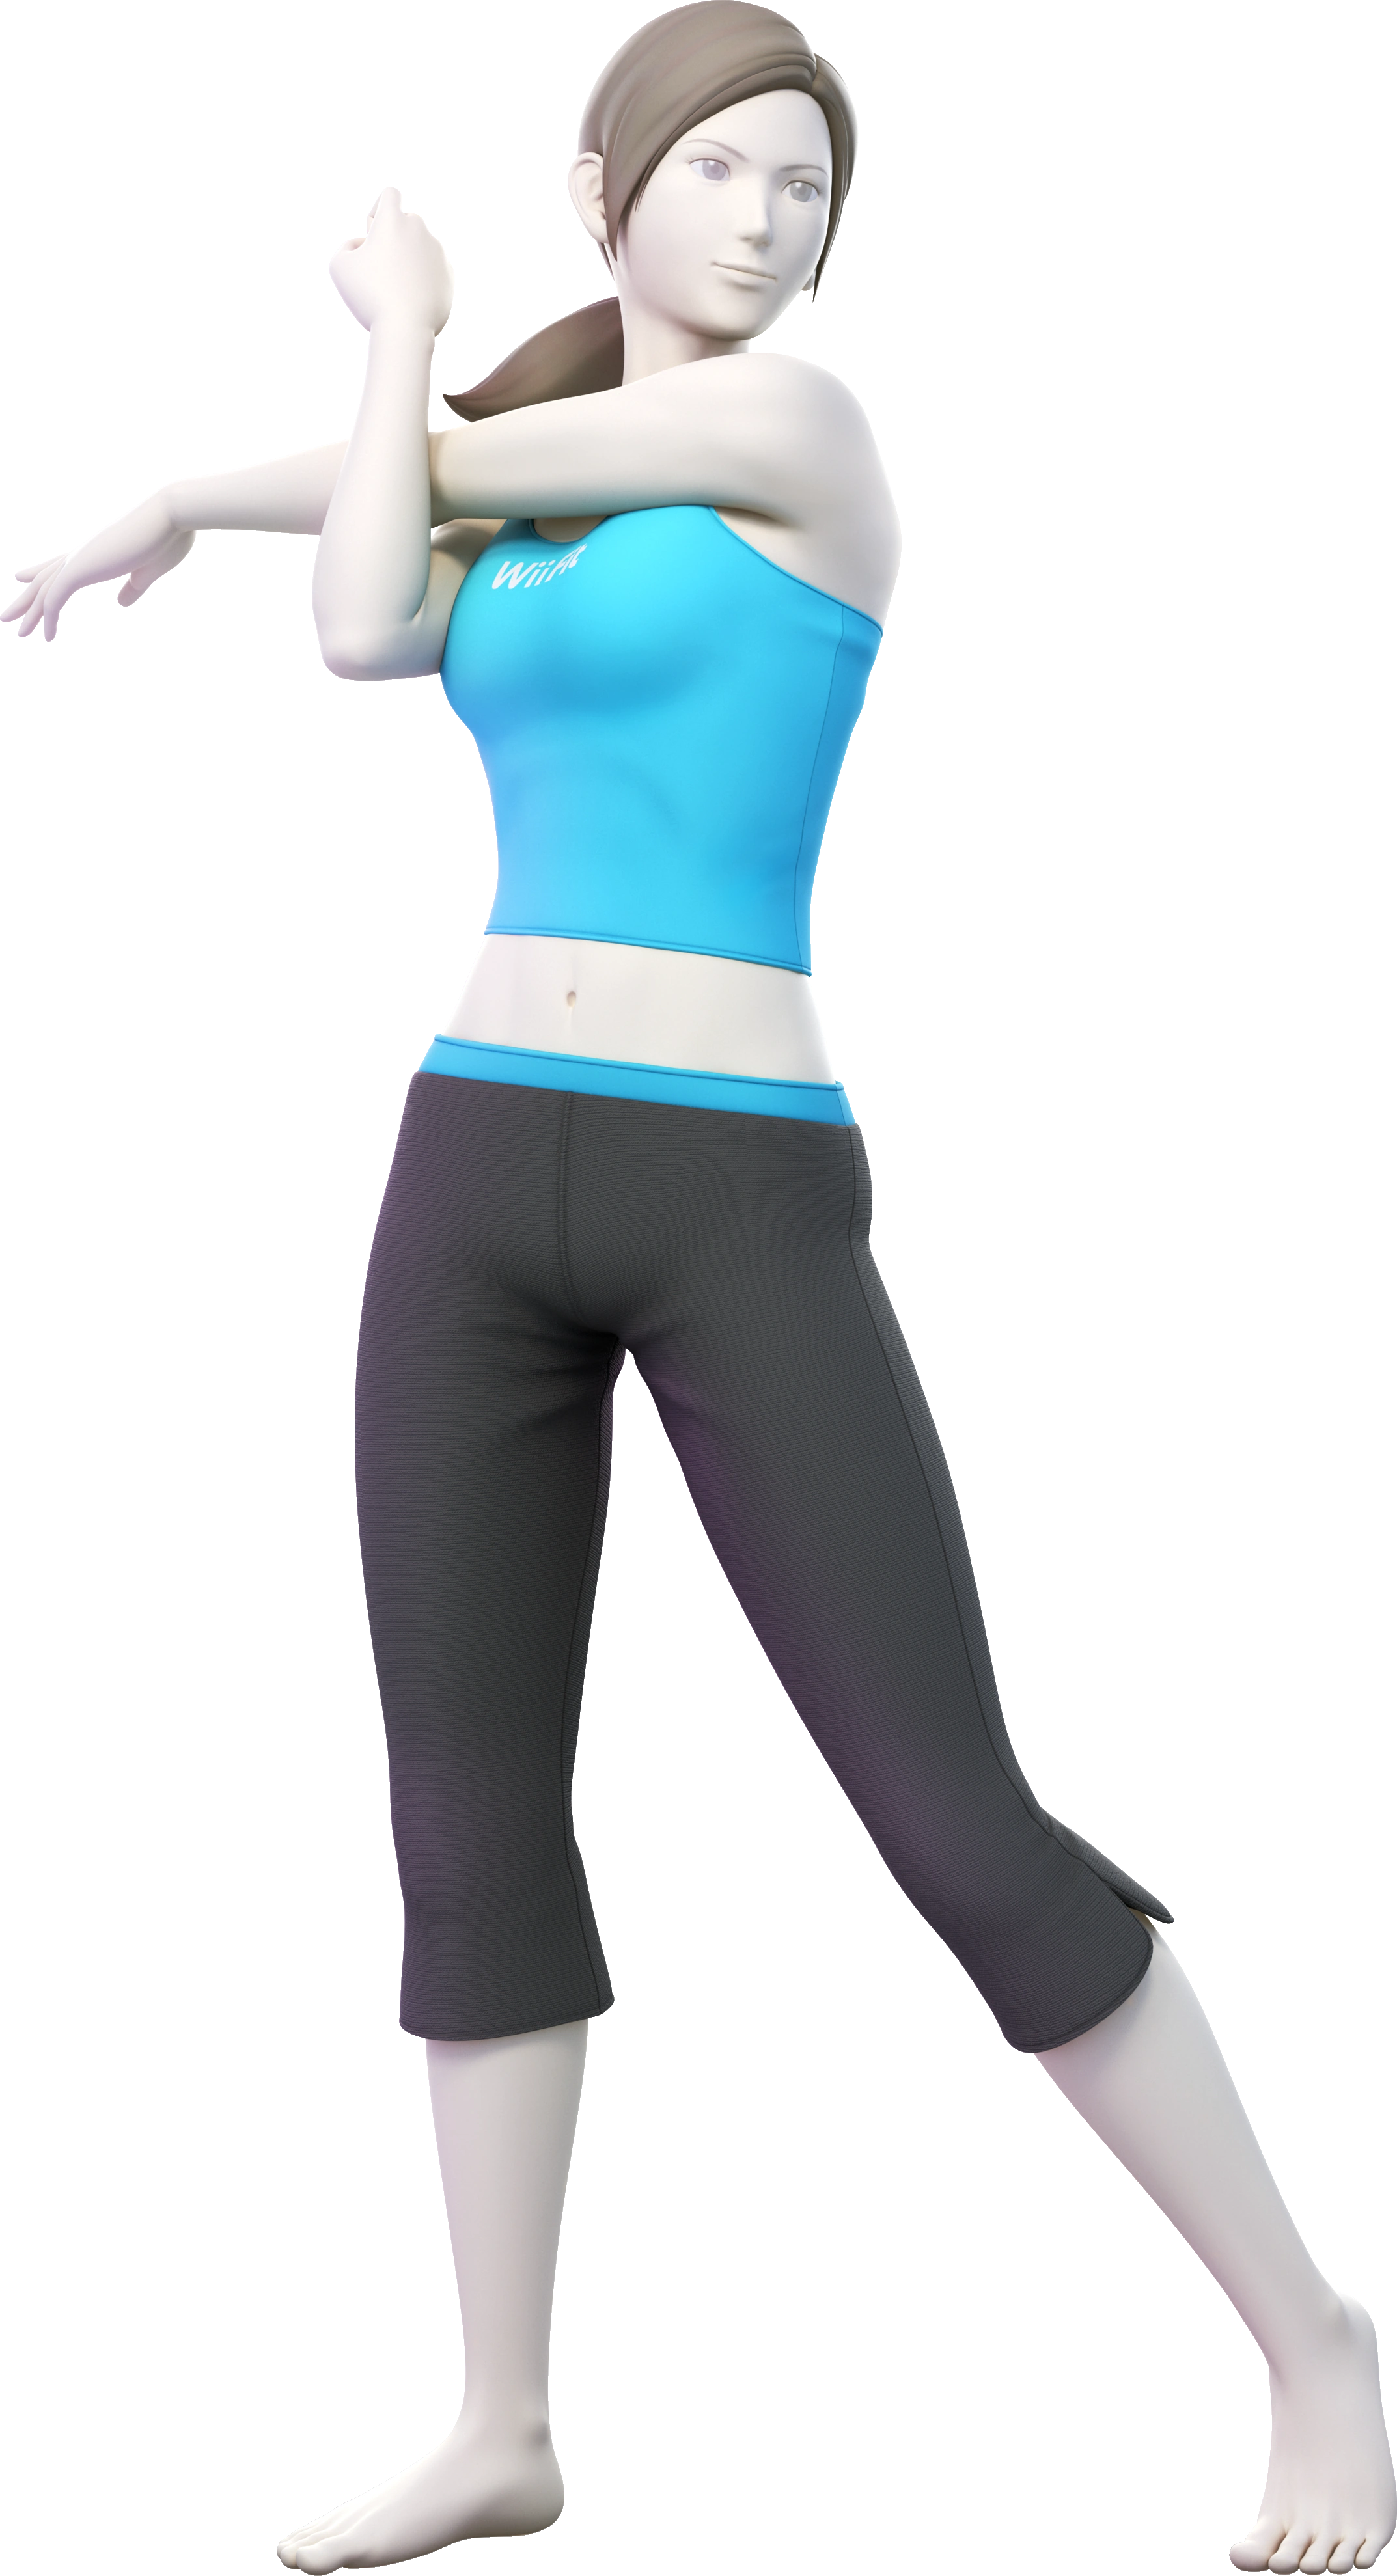
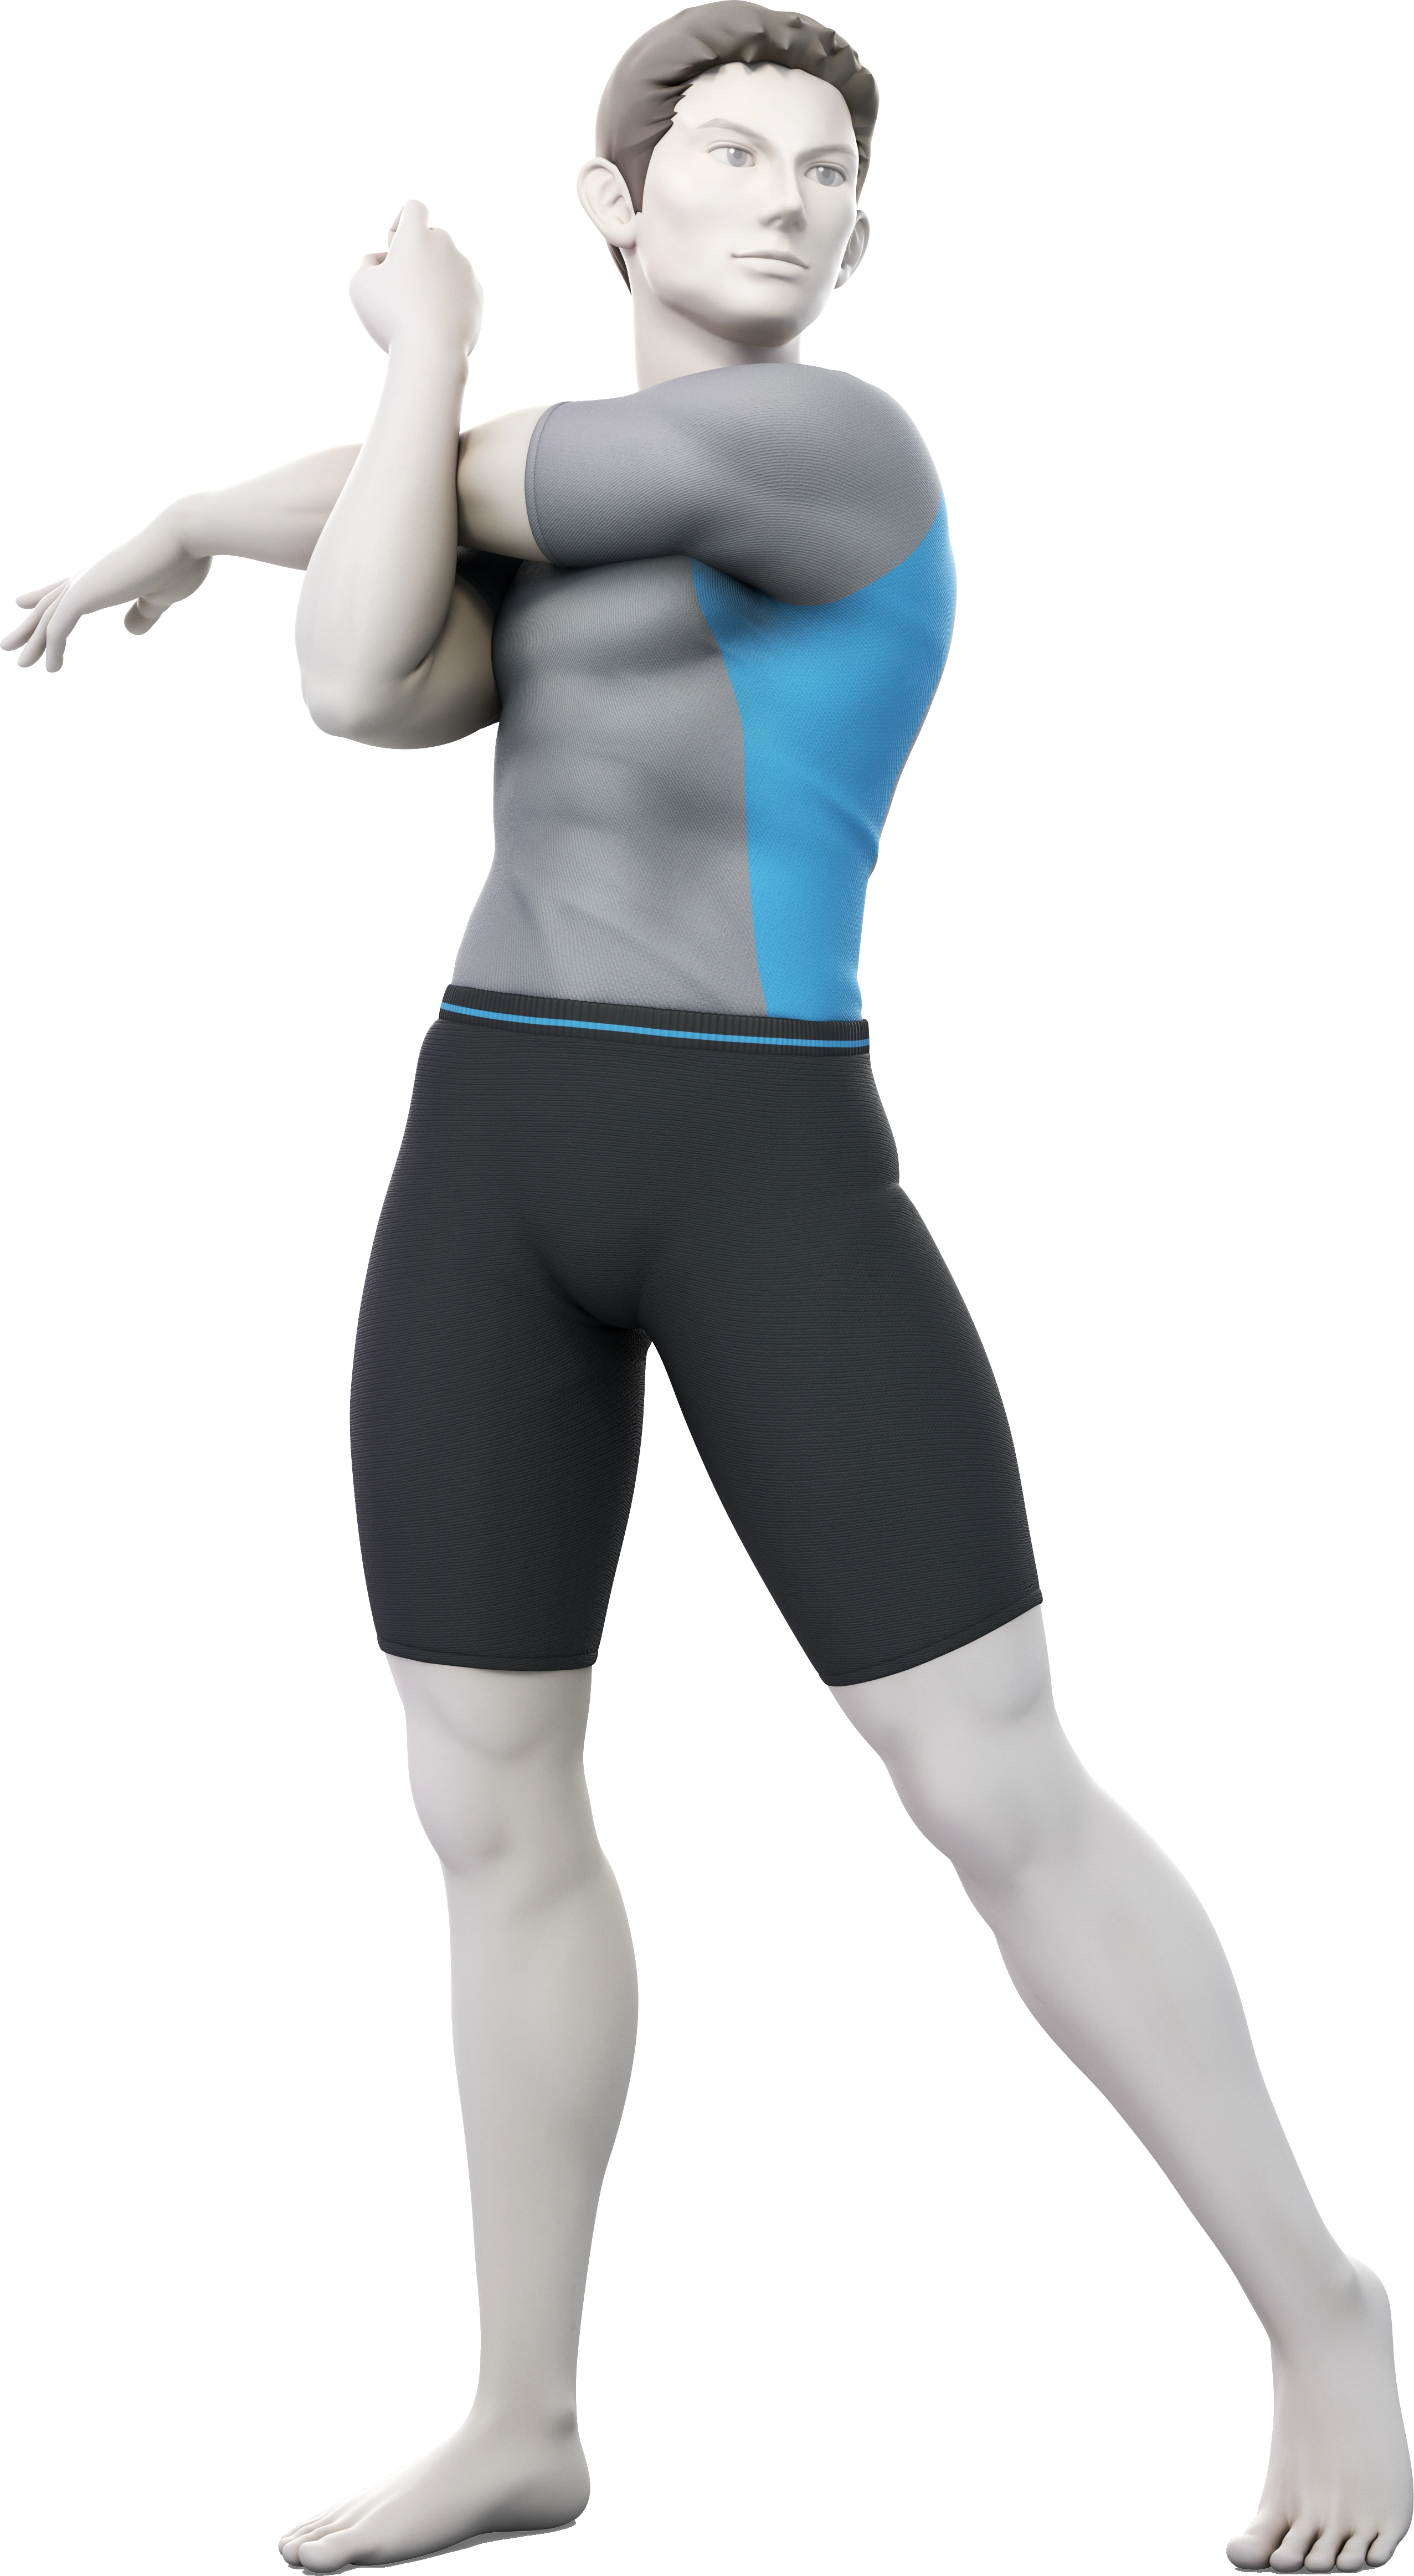
")
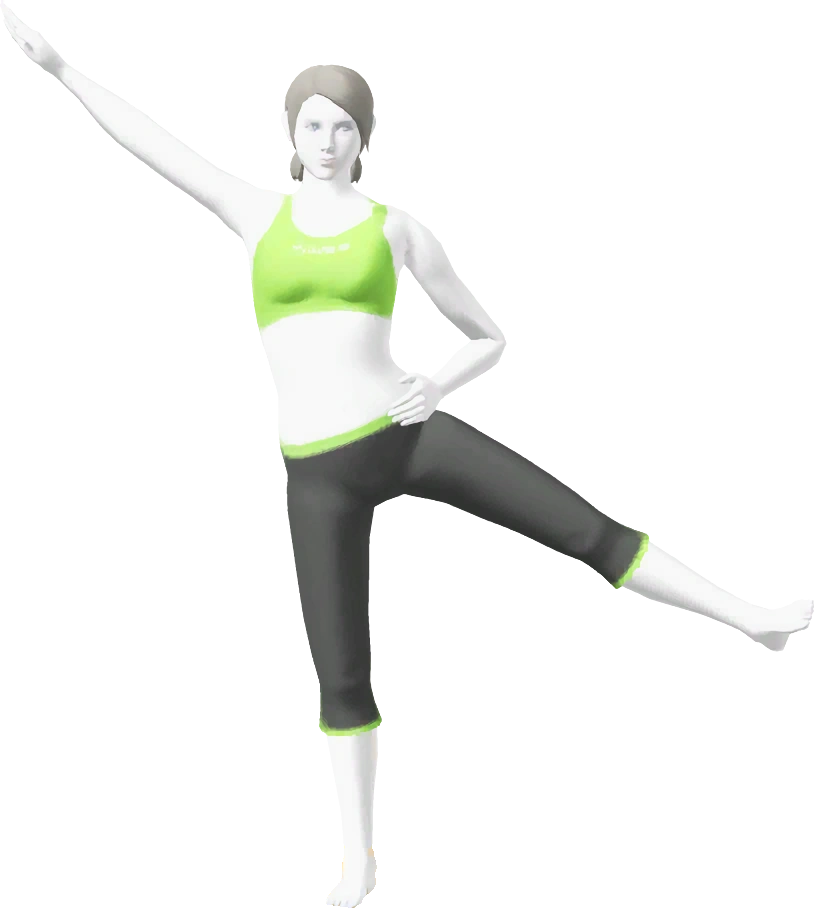

")
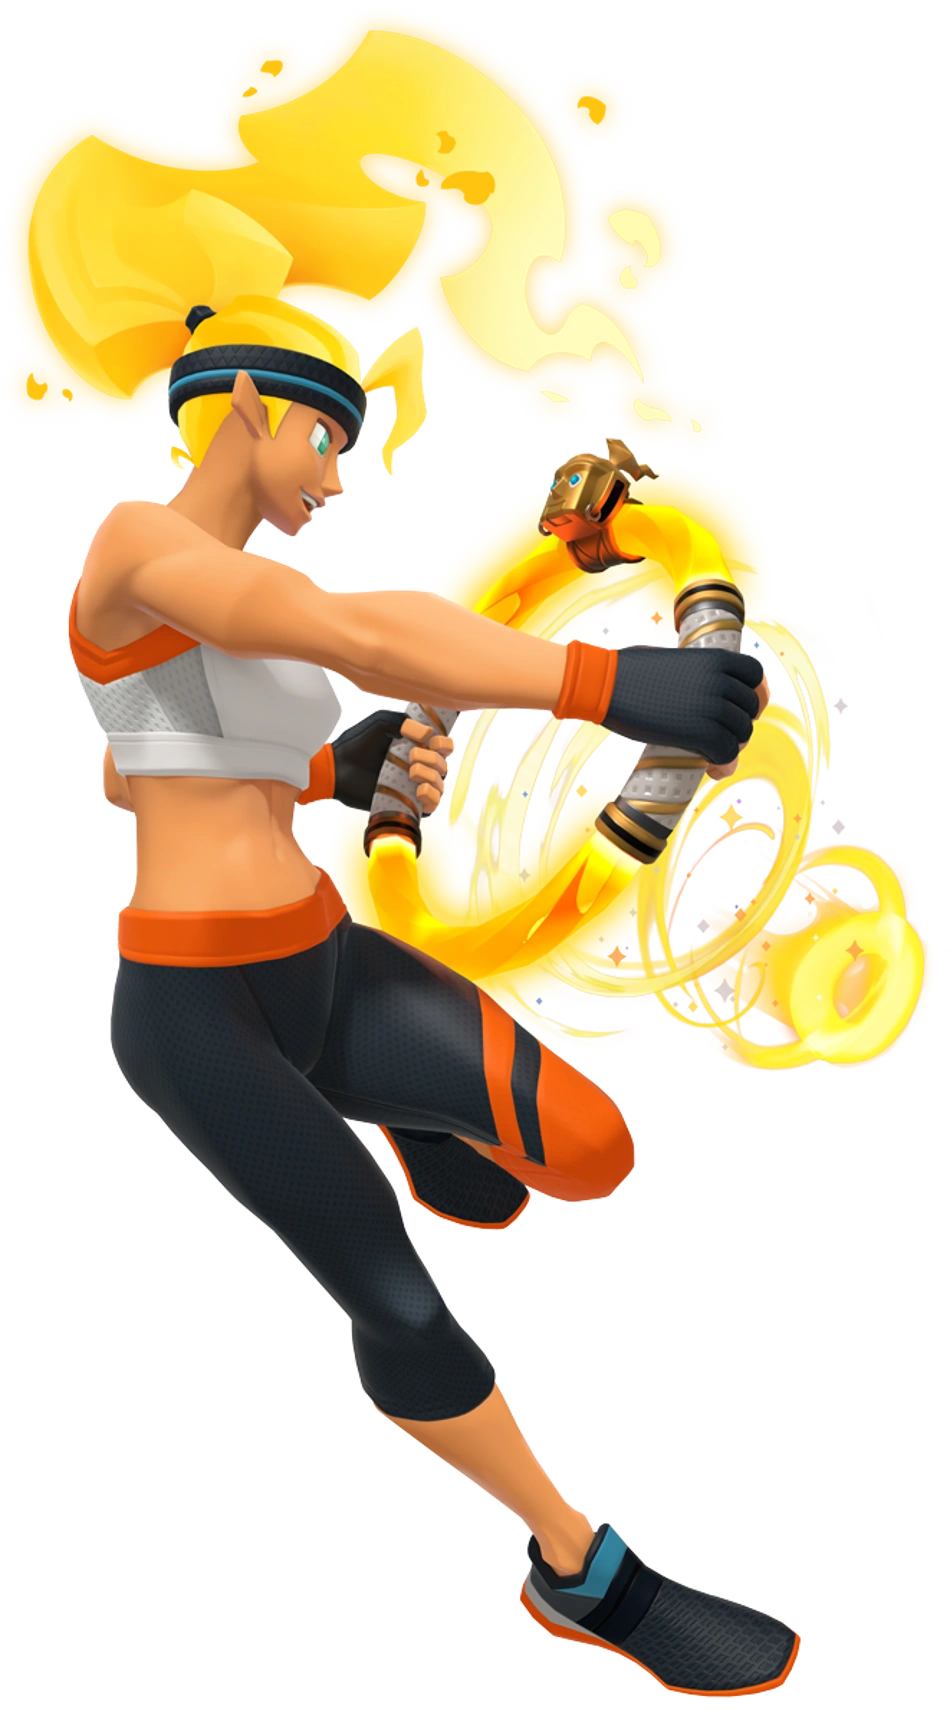

")
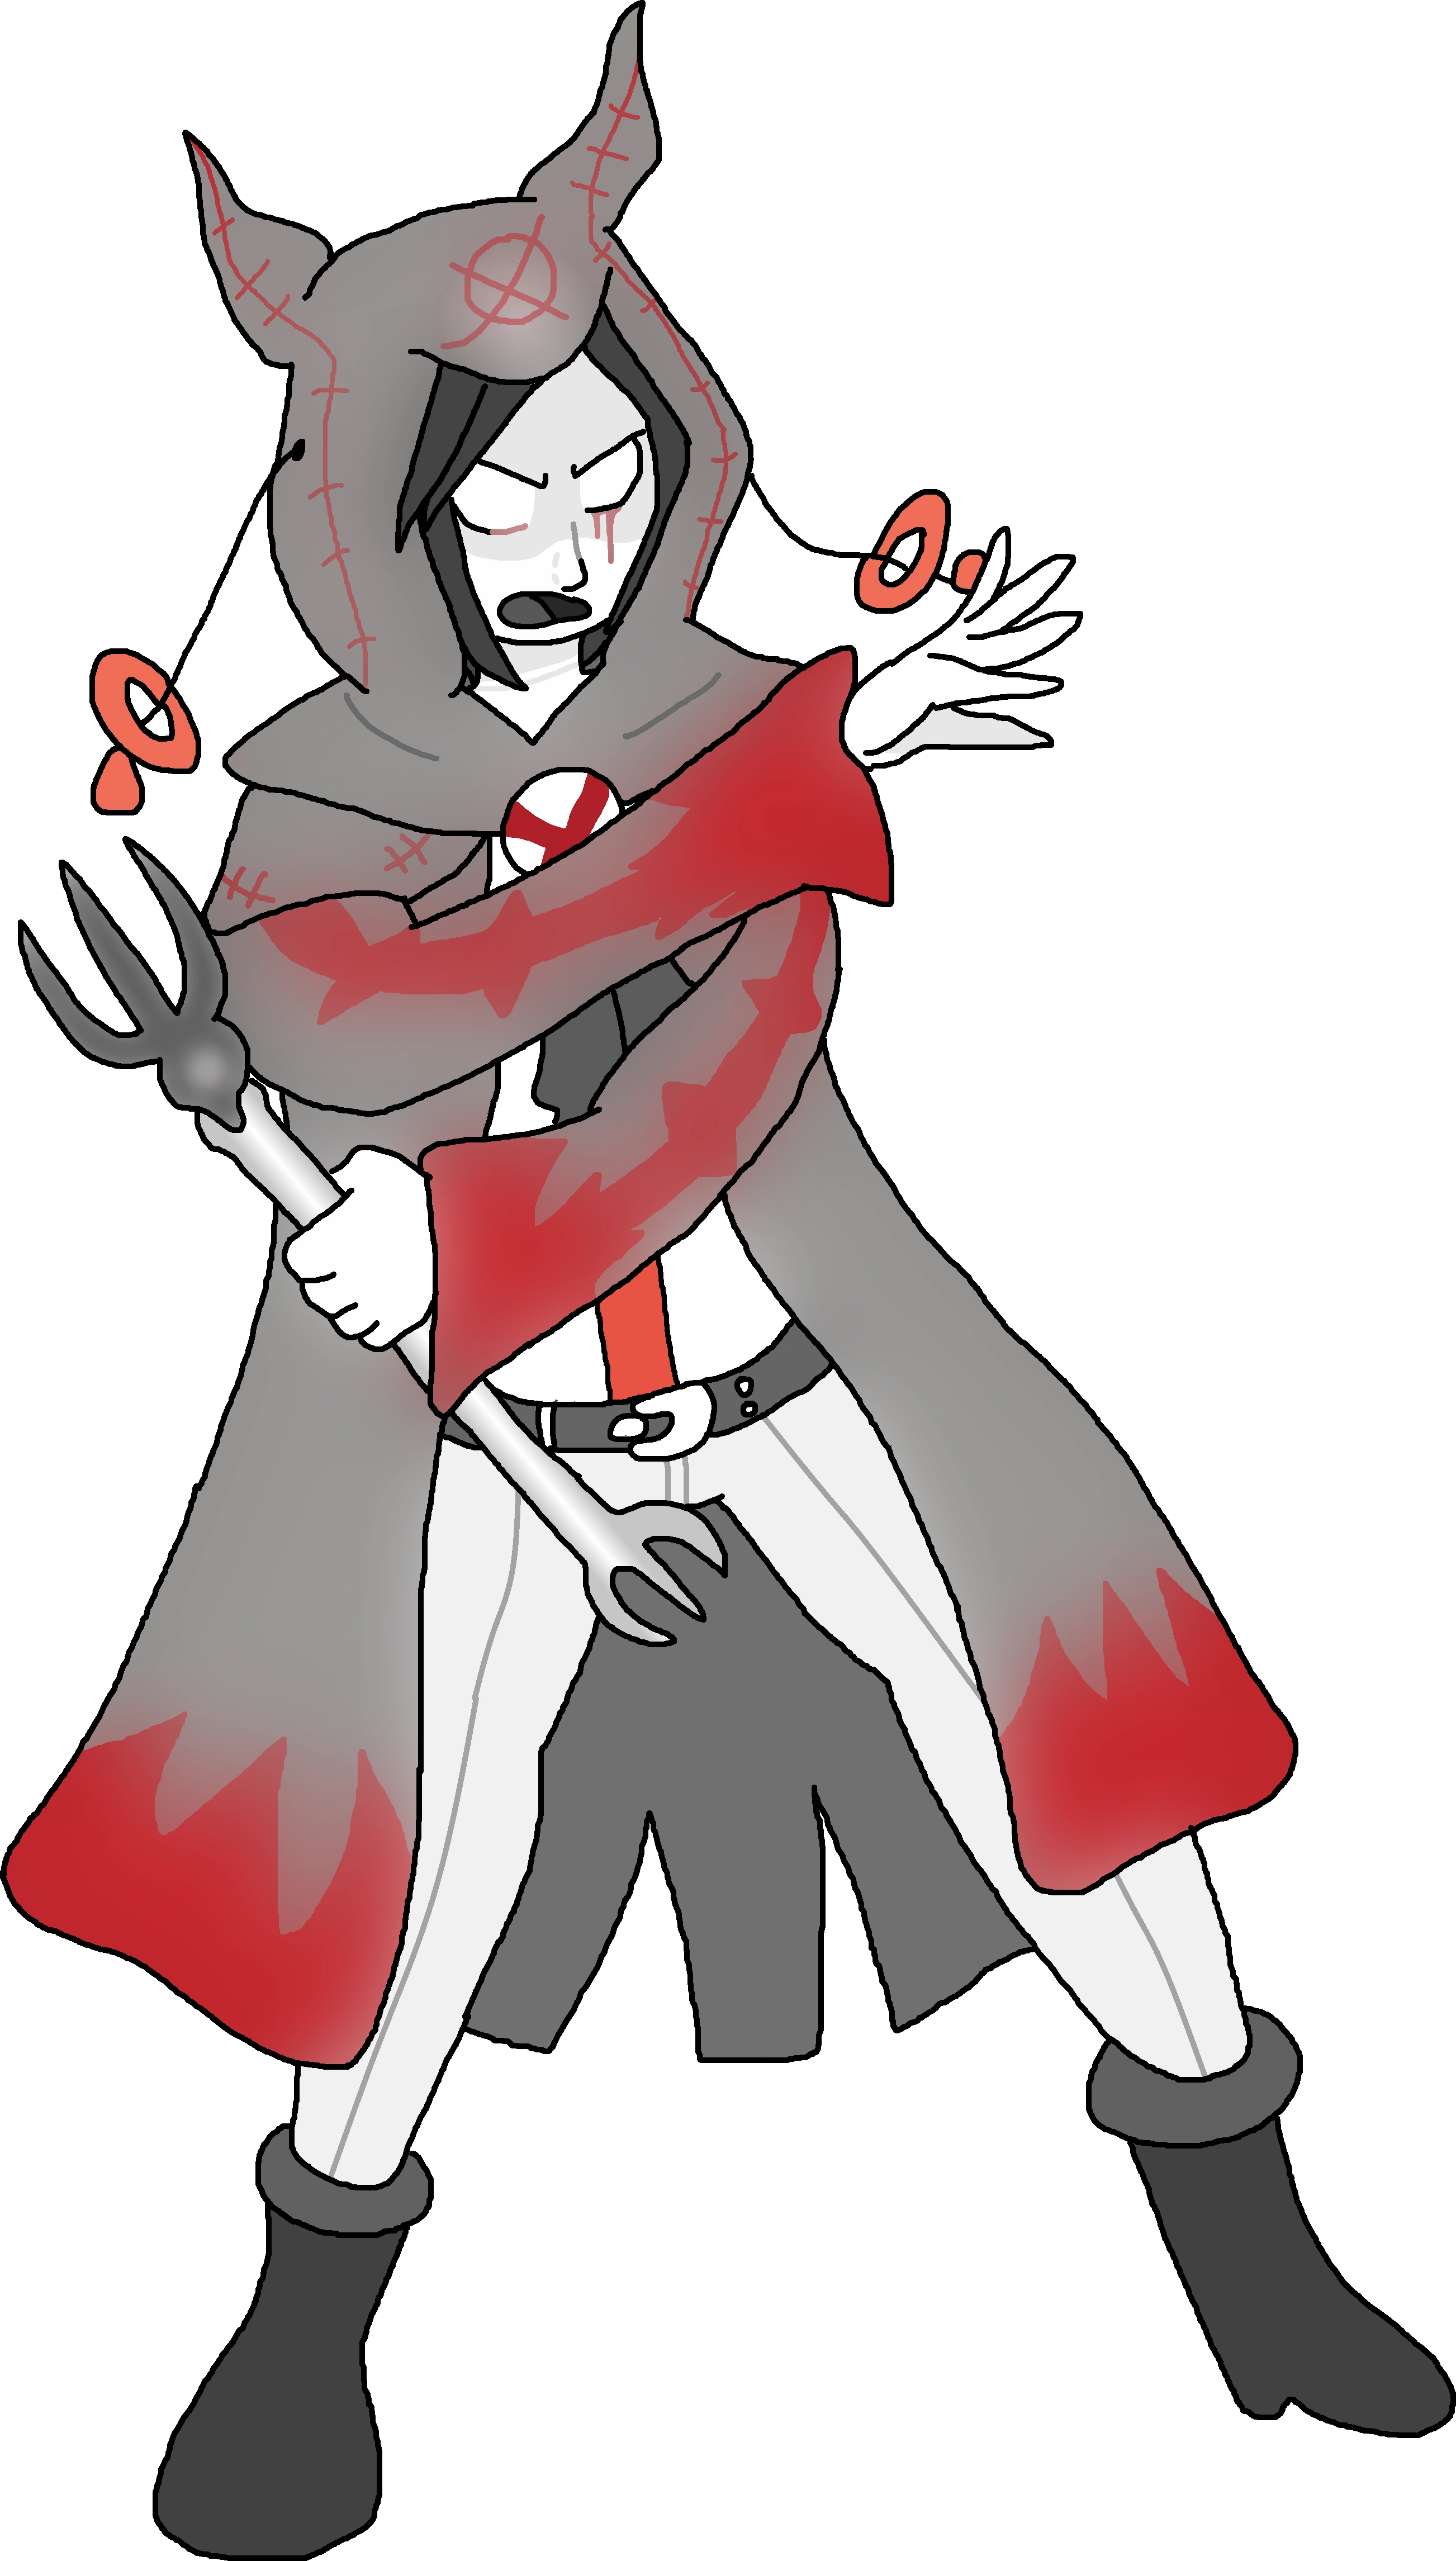
")
")
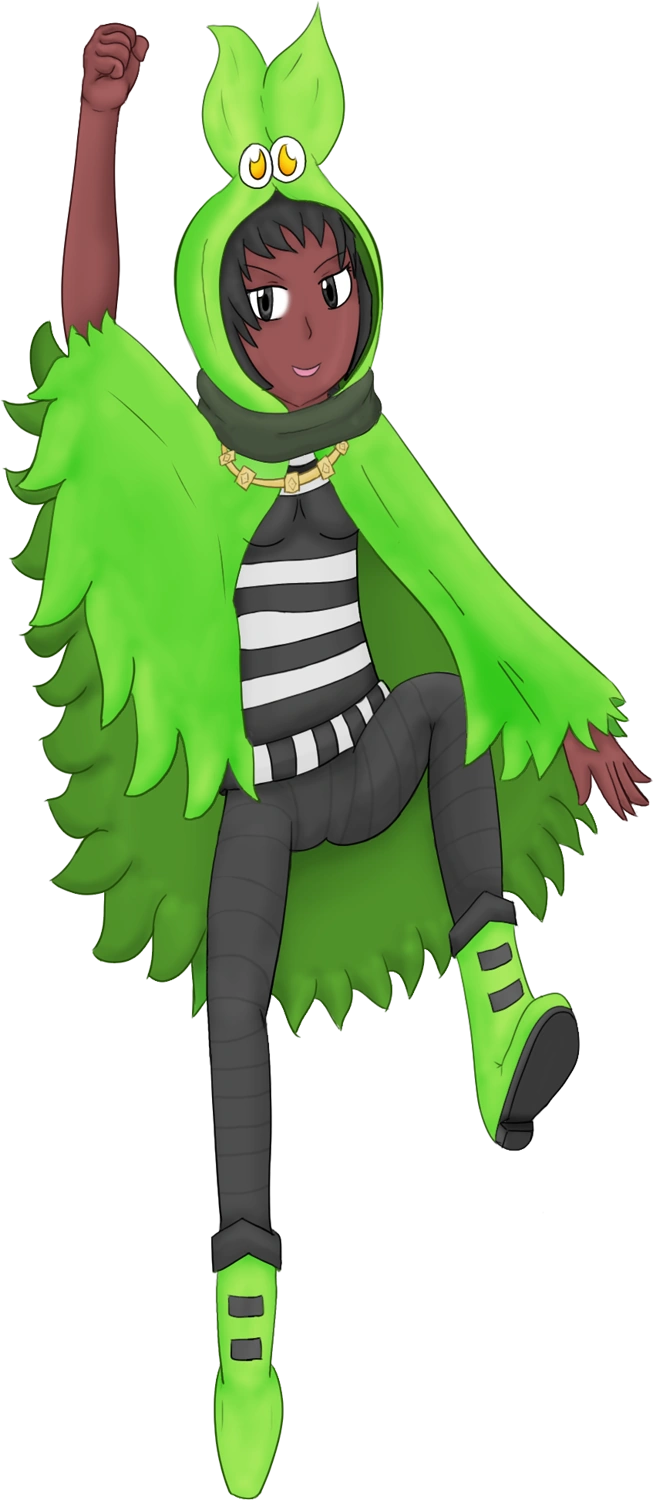
")
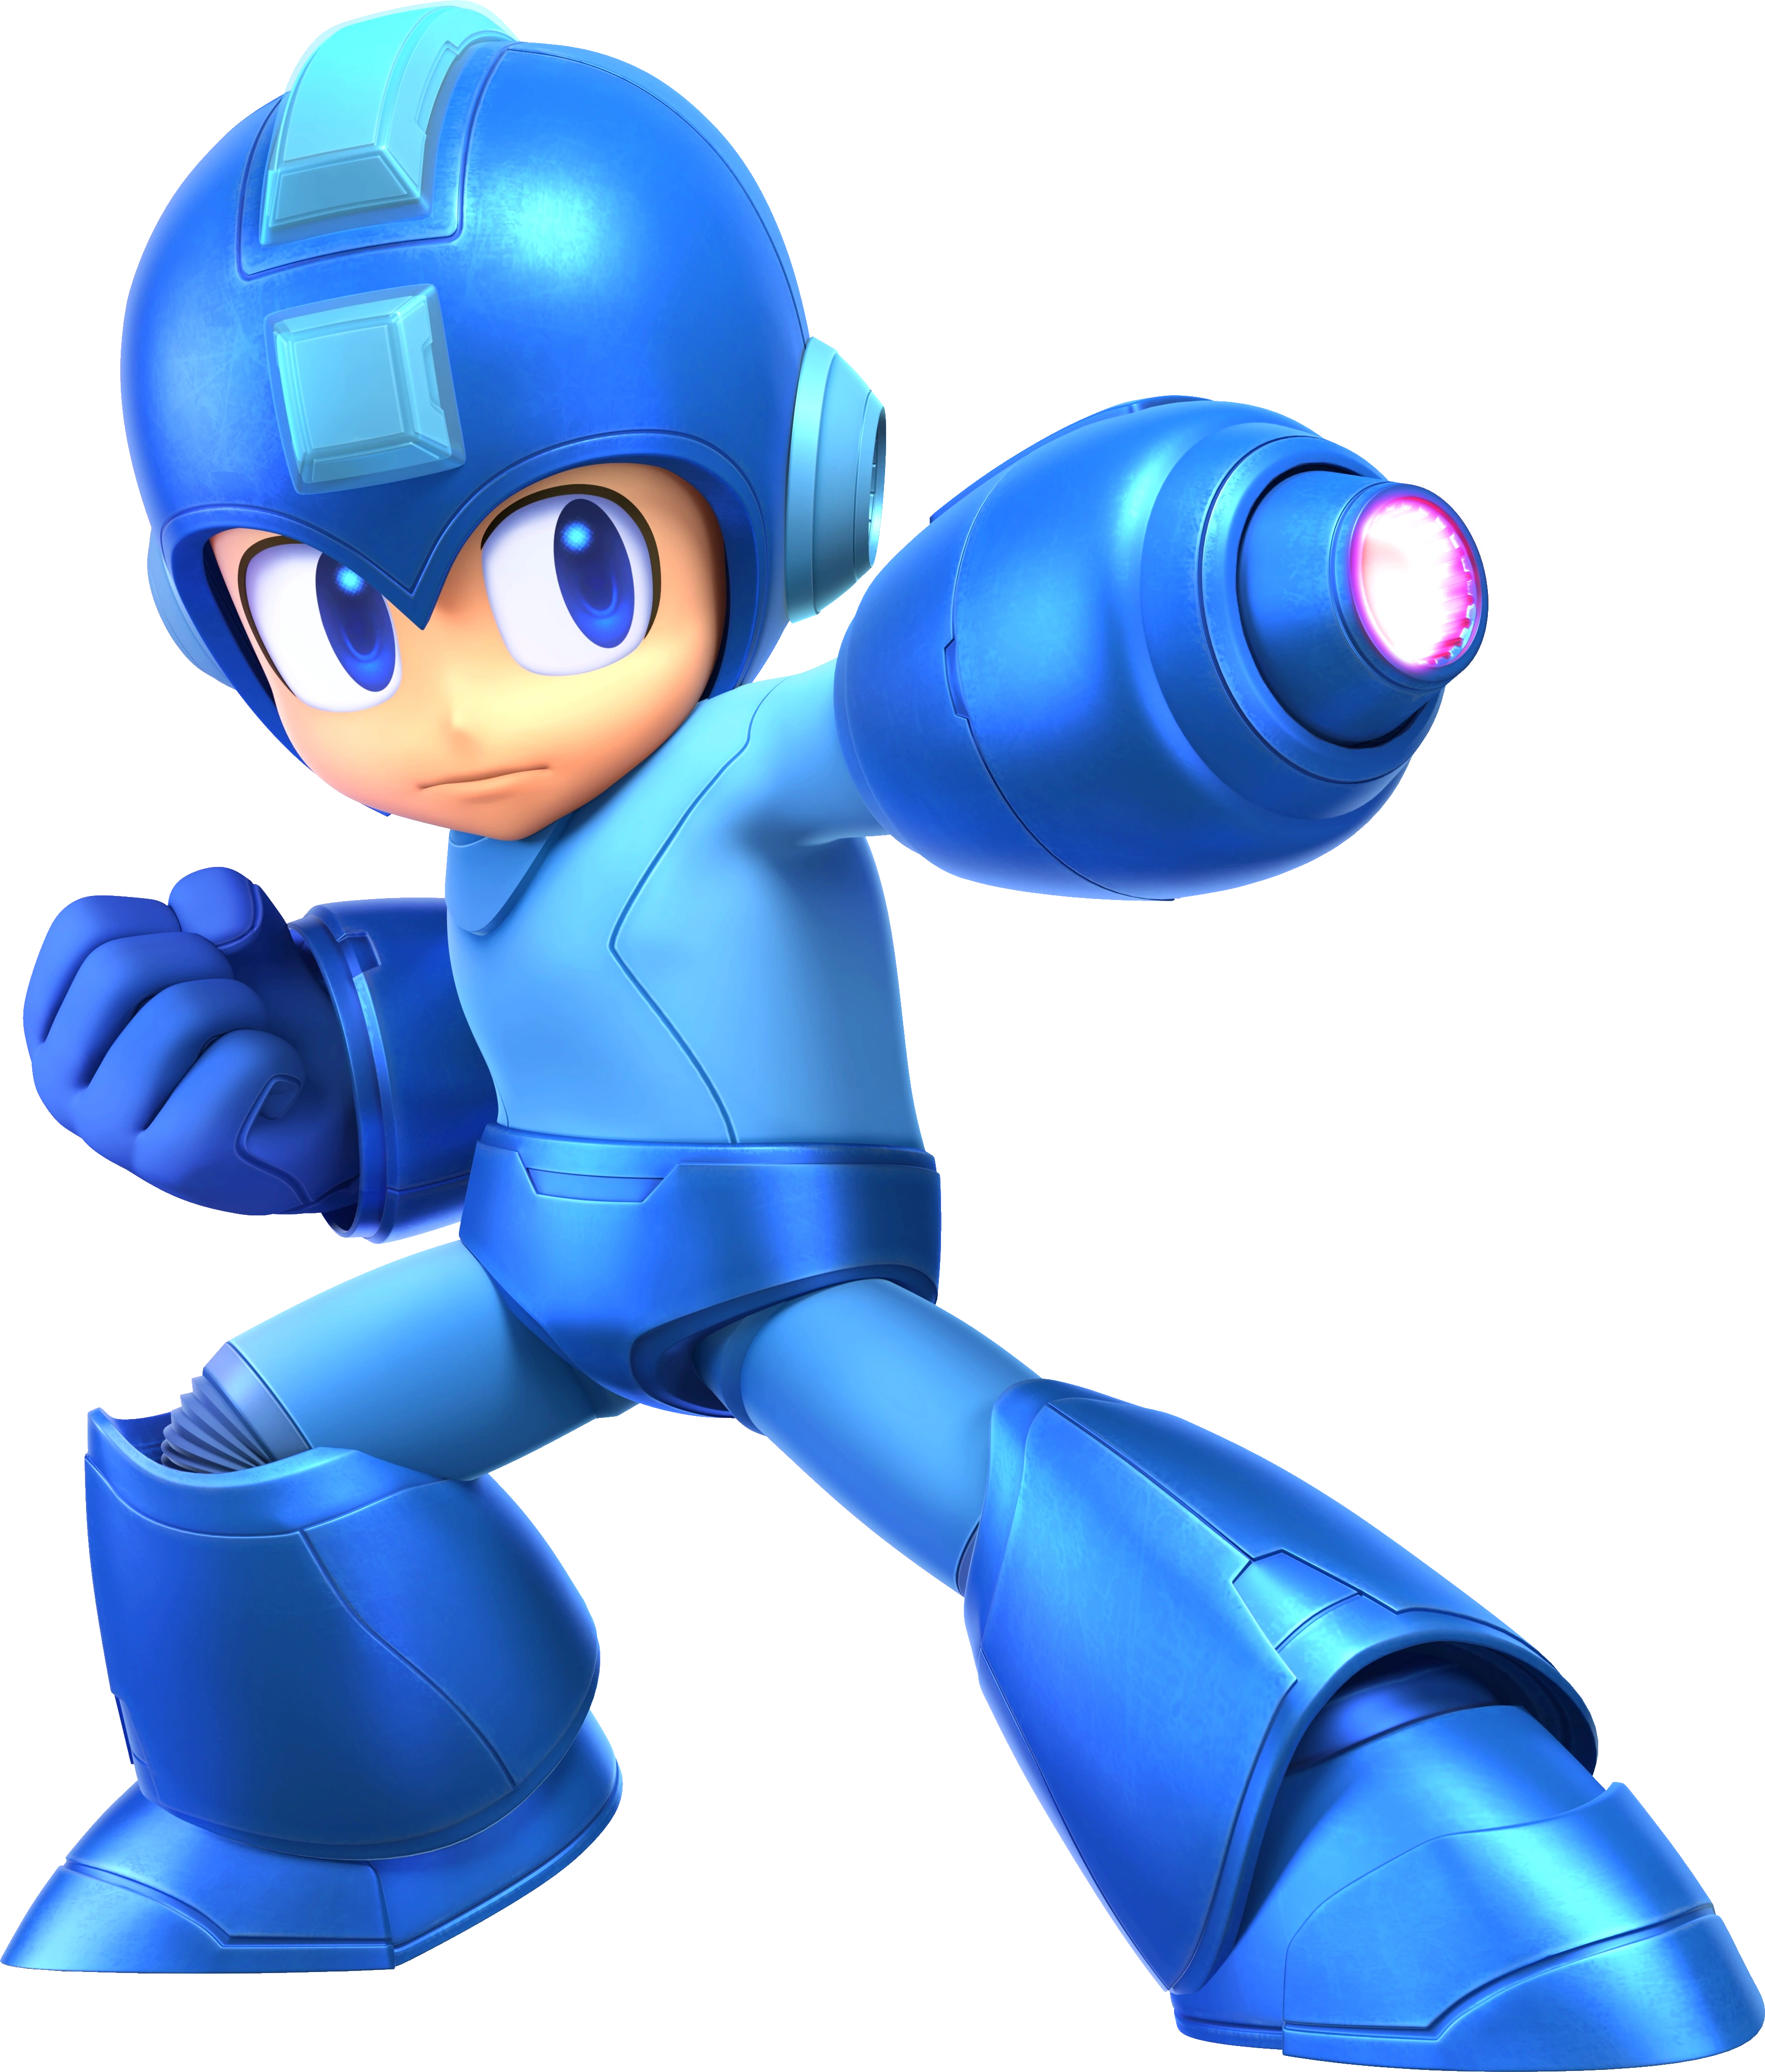
")
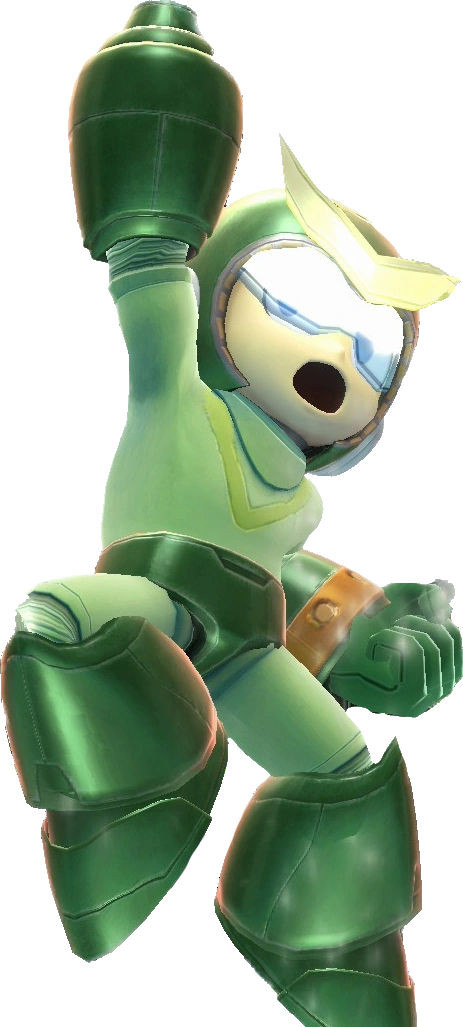


")
")

")
")
")
")
")
")
.png "Mephiles (Shadow Form).png (2.28 MB)")
")
")

")
")
")
")
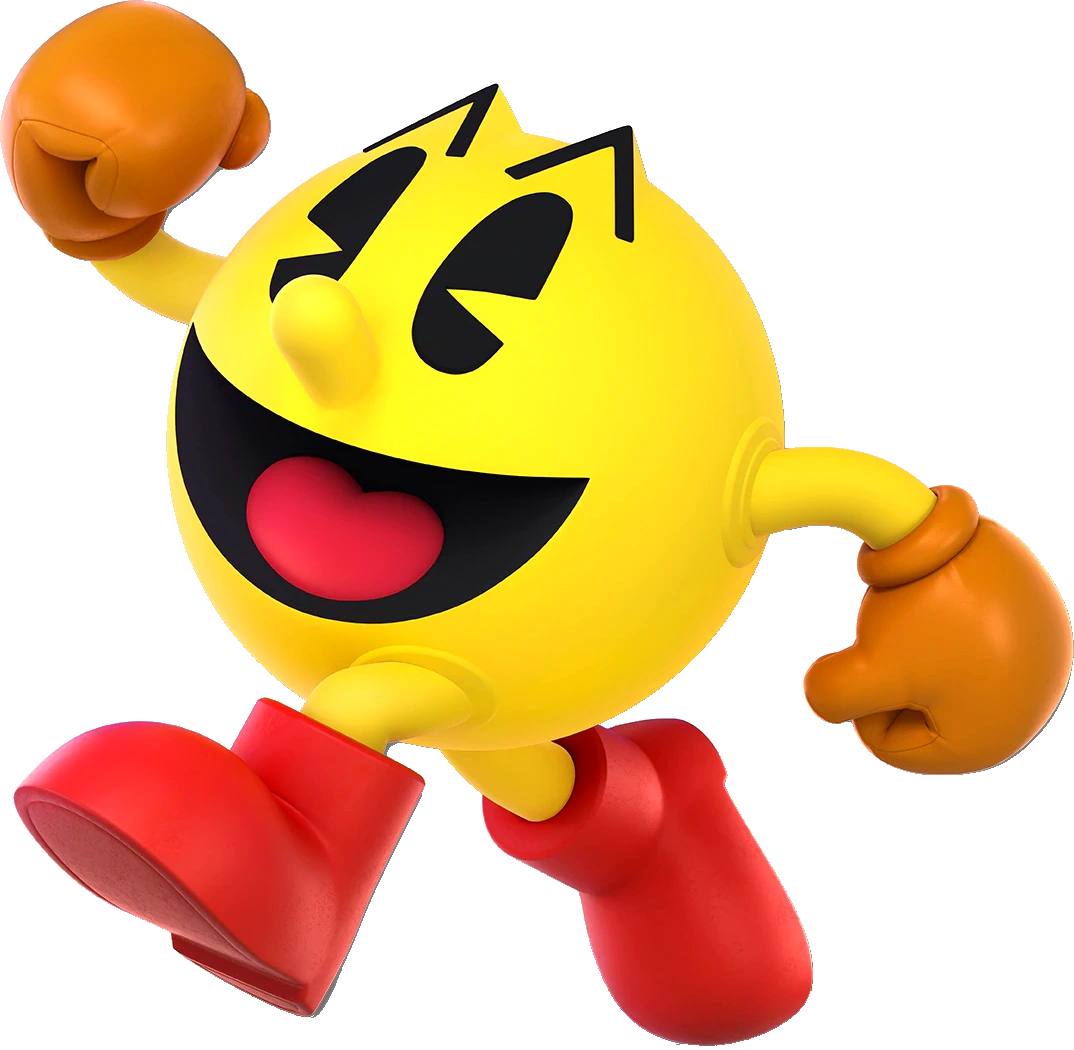
")
")
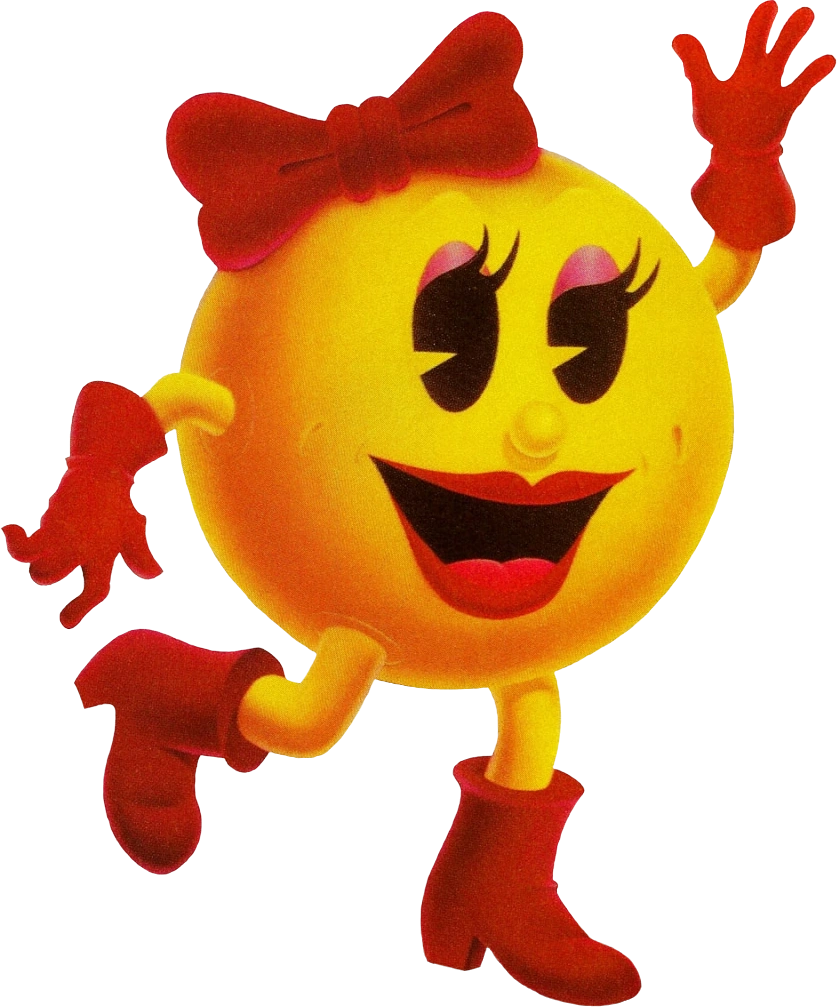
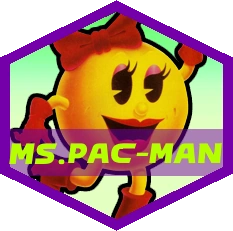


")
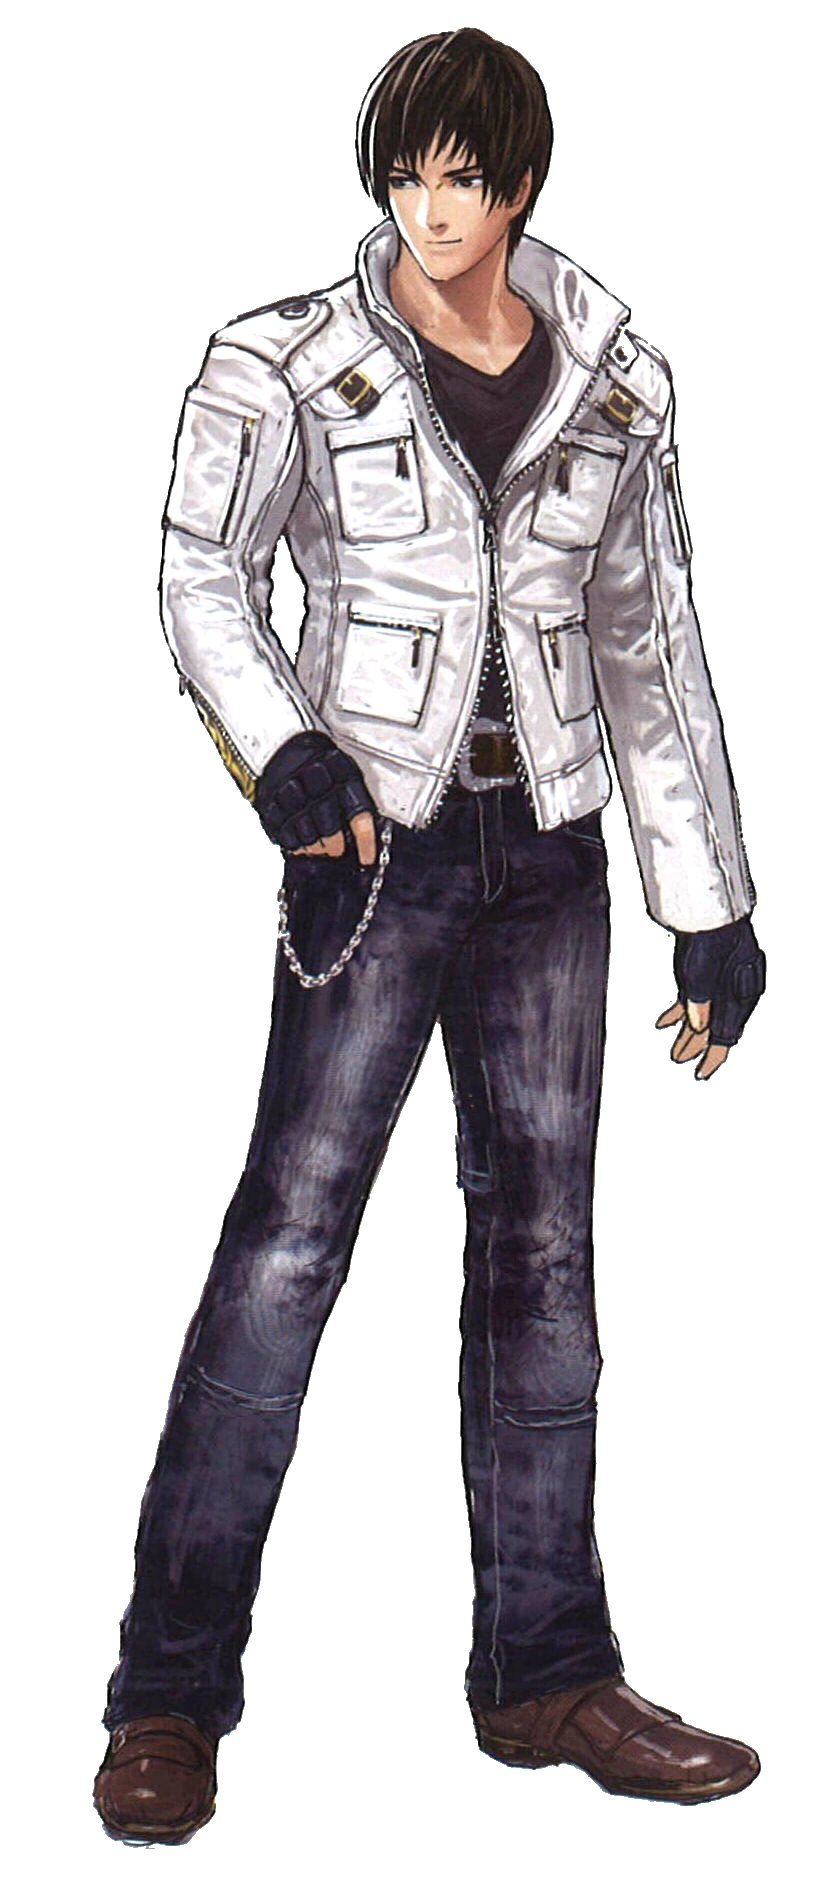
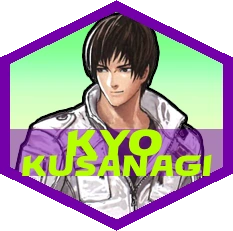
")
")
")
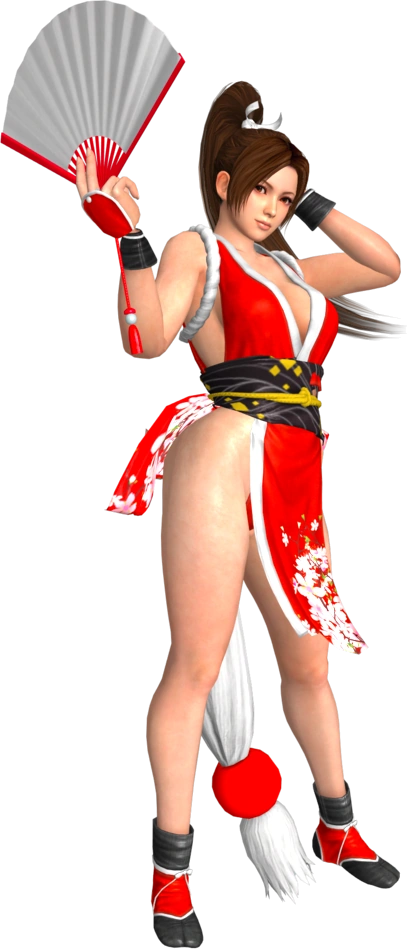
")
")
")
")
")
")
")
")
")
")
")
")
")
")
")
")

")
")

")
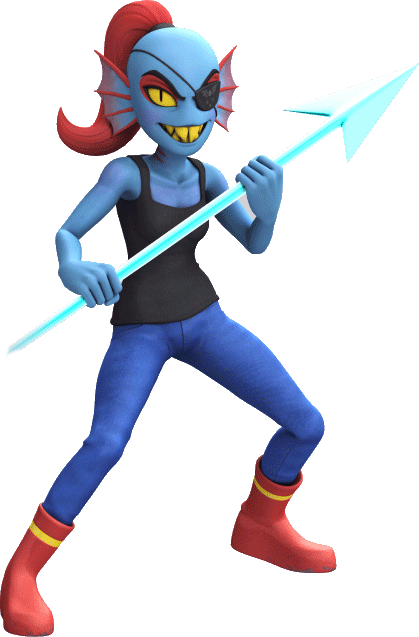
")

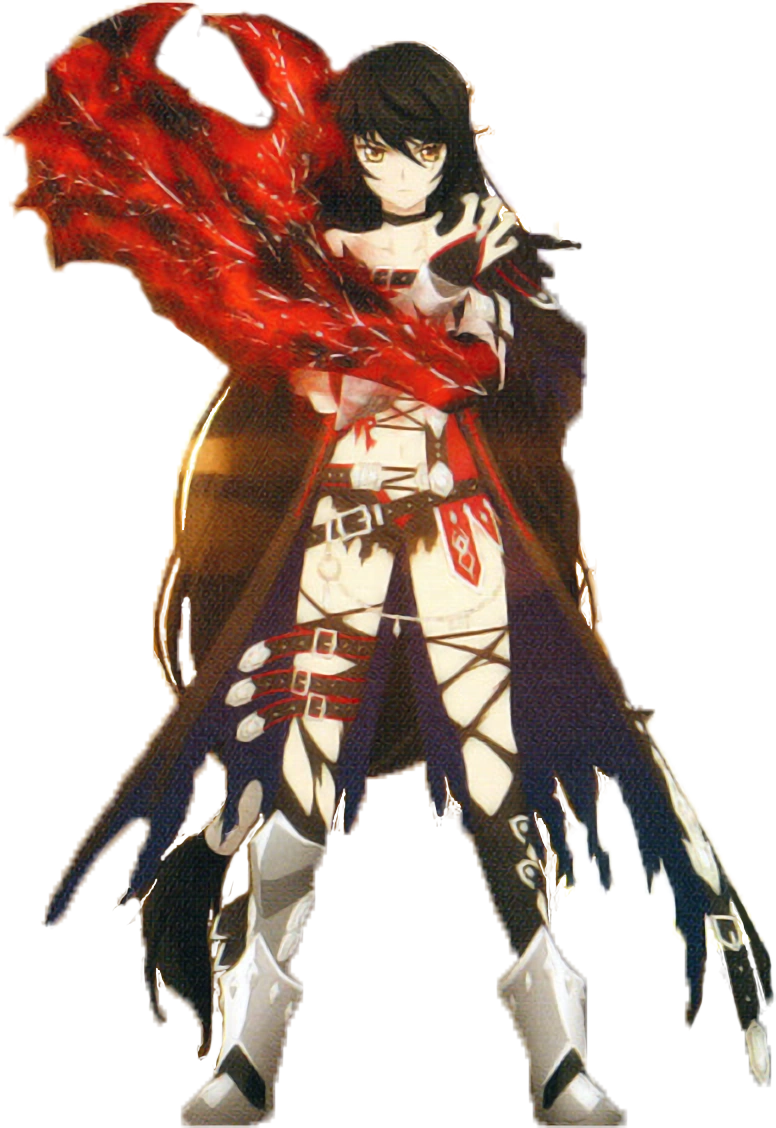
")
")
")
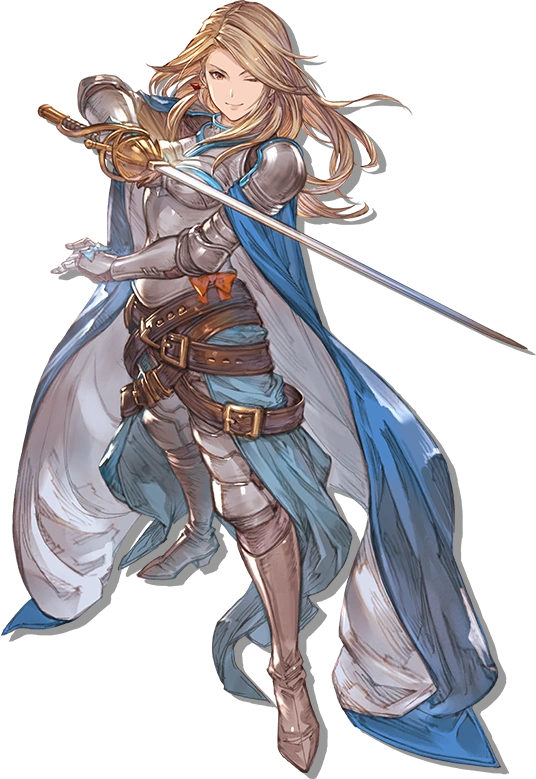
")
")
")
")
")