This page is under construction. Please excuse its informal appearance while it is being worked on. We hope to complete it as soon as possible!
Super Smash Bros. X Universe (pronounced Cross Universe) is a crossover platform fighting game developed by Purity Studios and released for the Nintendo Switch. The game is the sixth entry in the Super Smash Bros. series, following Super Smash Bros. Ultimate, and is the first game in the series since Super Smash Bros. for Nintendo 3DS and Wii U to not be developed by Bandai Namco. X Universe is also notable for being the first game in the entire series to not be directed by series creator Masahiro Sakurai, as well as being the first time that a Super Smash Bros. game was released on the same console as its predecessor.
The game is heavily built off of Super Smash Bros. Ultimate, with it reusing that game's engine and many of its assets. Because of this, X Universe could be viewed as an expanded and enhanced version of Ultimate, although it is still considered a separate entry in the series. The game as a whole was developed to be a soft reboot of sorts for the Super Smash Bros. series, with many of the characters from previous installments being completely redesigned, in addition to new mechanics and game modes being added in order to freshen up the gameplay, and make it stand out due to the fact that the Nintendo Switch already had a Super Smash Bros. game on it. X Universe takes inspiration from several other games in the genre, such as Dan Fornace's Rivals of Aether, and Capcom's Marvel vs Capcom series.
The gameplay of X Universe is very similar to that of previous Super Smash Bros. games, with the general feel of the game being closest to Ultimate. Unlike traditional fighting games where players must lower their opponent's health bar in order to win, X Universe is a platform fighting game where attacks will deal a certain amount of damage, which is labeled as a percentage and displayed near the bottom of the screen. The higher a player's percentage is, the farther they will fly when hit by an opponent's attacks. The goal of the game is to rack up your opponent's percentage, then send them flying off-screen and into the Blast Zone, resulting in a KO.
Characters have a wide variety of attacks to use during battle, such as Tilt Attacks that change depending on which direction the control stick is held in, Smash Attacks that can be charged to deal more damage and also change depending on the direction held, and Aerial Attacks that are used in midair. Some attacks have special effects to them, which include being able to bury opponents, where they must mash the attack button in order to escape, sending opponents straight downwards, which is known as a "meteor smash" or "spike", as well as "armor", which allows the user to take damage without interrupting the animation of certain attacks, among others. Players can use four different Special Moves, having their own button dedicated to them, which vary in utility and function. Additionally, characters have access to a Grab, which also has a dedicated button for it. Once an opponent is grabbed, they can be pummeled or thrown into one of four directions, although it is possible to escape the grab by mashing the attack button.
Finally, characters have a Shield that can be put up in order to protect them from attacks, with some exceptions such as Grabs or any move that functions like one. While shielding, players can perform a Spot Dodge, where the character will stand in place but lean or move into the background in order to avoid an attack. Players can also dash forward or backward, which grants them temporary invulnerability, although the effect will gradually last a shorter amount of time if this is done too often. If the shield button is pressed while in midair, the player will perform an Air Dodge, which can be done while stationary or while holding down on the control stick, causing the character to move in the given direction. While holding out a Shield, it will begin to shrink, and will eventually break if it gets too small, leaving the player temporarily dizzy. The Shield will slowly return to its normal size when not in use.
New Mechanics[]
X Universe introduces several new techniques and moves that were not featured in previous games, as well as changes to how previous mechanics worked.
Gliding: Returning from Super Smash Bros. Brawl, several characters have the ability to glide by holding up on the control stick after their final midair jump. During this, up and down on the control stick can be used to change their flight pattern, though they are vulnerable until they use an attack or land. Some attacks will automatically put the user into a gliding state.
Custom Moves: Custom Moves are also returning from Super Smash Bros. for Nintendo 3DS and Wii U. Every character has two Custom Moves for each of their Special Moves, all of which are available right from the beginning of the game. Most Custom Moves are simple variations of the default move, although there are some that are completely different from the original.
Perfect Shielding: Perfect Shielding can now be done by using a shield right as an attack hits the user like in previous Super Smash Bros. games or by letting go of a shield just as an attack hits like in Ultimate. Both variants allow the user to parry the attack and use any move like in Ultimate.
Guard Specials: Guard Specials are Special Moves used by pressing the special button while shielding. This mechanic was present in Ultimate, but it was only used by Inkling. Now, several characters have Guard Specials, which are usually connected to a certain move or the character's gimmick.
Counters: Counters, which were previously exclusive to certain characters, can now be utilized by the entire roster with a new input dedicated to them. The user enters a defensive state, and if attacked during this time, they will dodge and counterattack. Most Counters only counter physical attacks and deal 1.5x the damage and knockback, although some have special effects to them.
Bash Attacks: Bash Attacks are aerial versions of Smash Attacks. They cannot be charged for as long as Smash Attacks, and while the player's falling speed is stalled, this does not stop their horizontal momentum.
Final Forms: After grabbing a Smash Ball or filling the Final Smash Meter, the player can press the Counter Button instead of the Special Button to activate their Final Form, where the character transforms into a more powerful version of themselves, though they aren't invincible and can still suffer damage and knockback. They keep this state indefinitely until they are KOd.
Character Selection[]
Fighter Info: By pressing a certain while a character is selected, you can read a brief description of their moveset, and any gimmicks that they character may have, similarly to Rivals of Aether.
Crash Test: You can play test the fighter by pressing a certain button while they are selected similarly to Rivals of Aether. This will place you into a small confined area with a Sandbag for you to test their moves on.
Organization: The placement and order of characters on the character select screen can be completely customized.
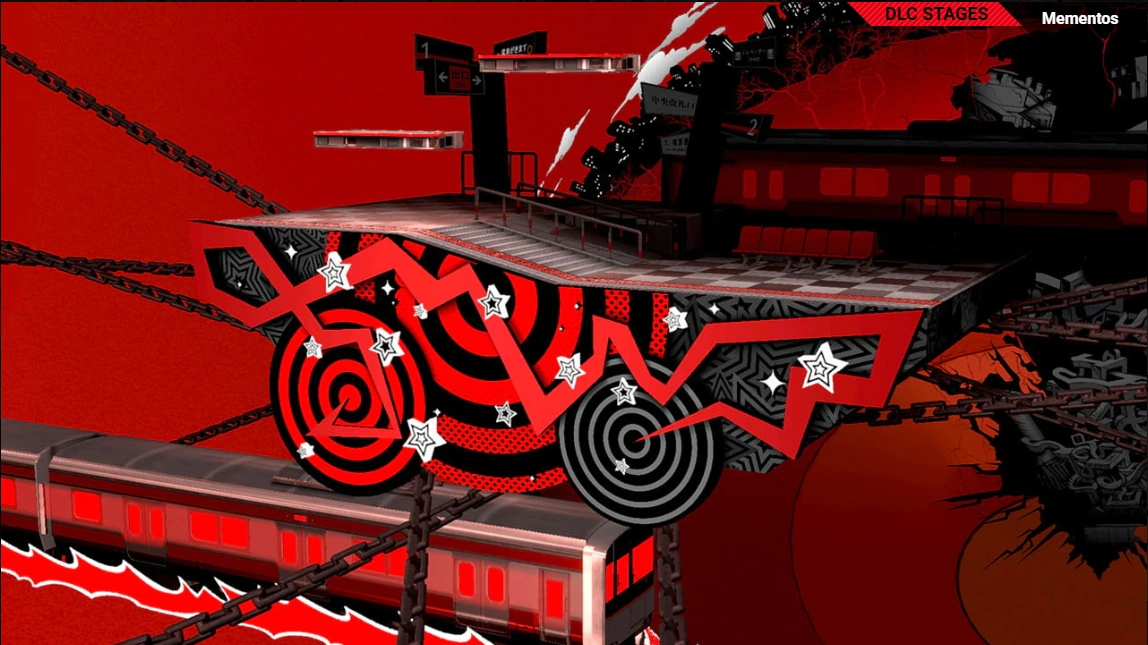
Stage Selection[]
Organization: The game's stages are separated into different tabs by the title that they debuted in.
Hazard Toggle: You are now able to toggle the Stage Hazards on or off from the stage select screen, unlike in Ultimate.
Alpha Stages: The Battlefield forms of stages are now referred to as Alpha Stages, to match with the naming of the Omega Stages.
Stage Skins: Some stages such as Battlefield, Final Destination, and the stages from the original Super Smash Bros., have alternate skins that can be used. These include both modern and retro versions of the original N64 stages, as well as every past incarnation of Battlefield and Final Destination. These skins can be accessed by holding one of the trigger buttons while selecting the stage, which will bring up a small menu where you can select the version that you wish to play on.
Miscellaneous[]
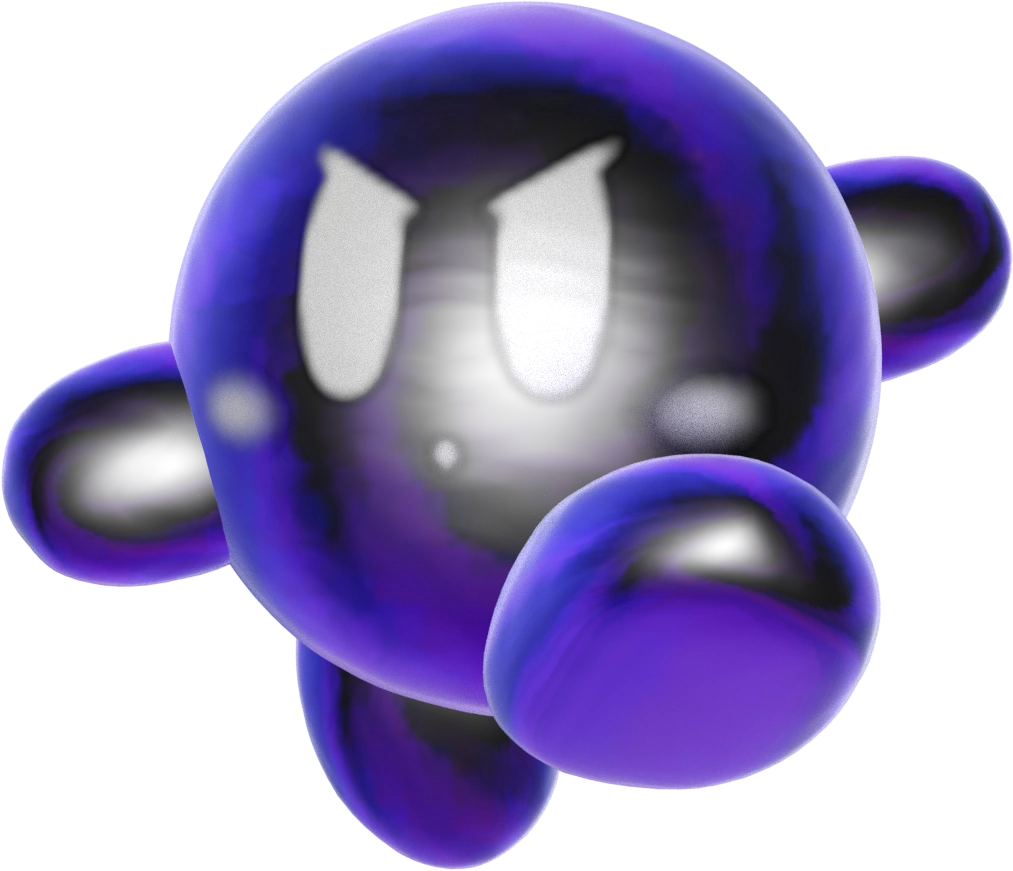
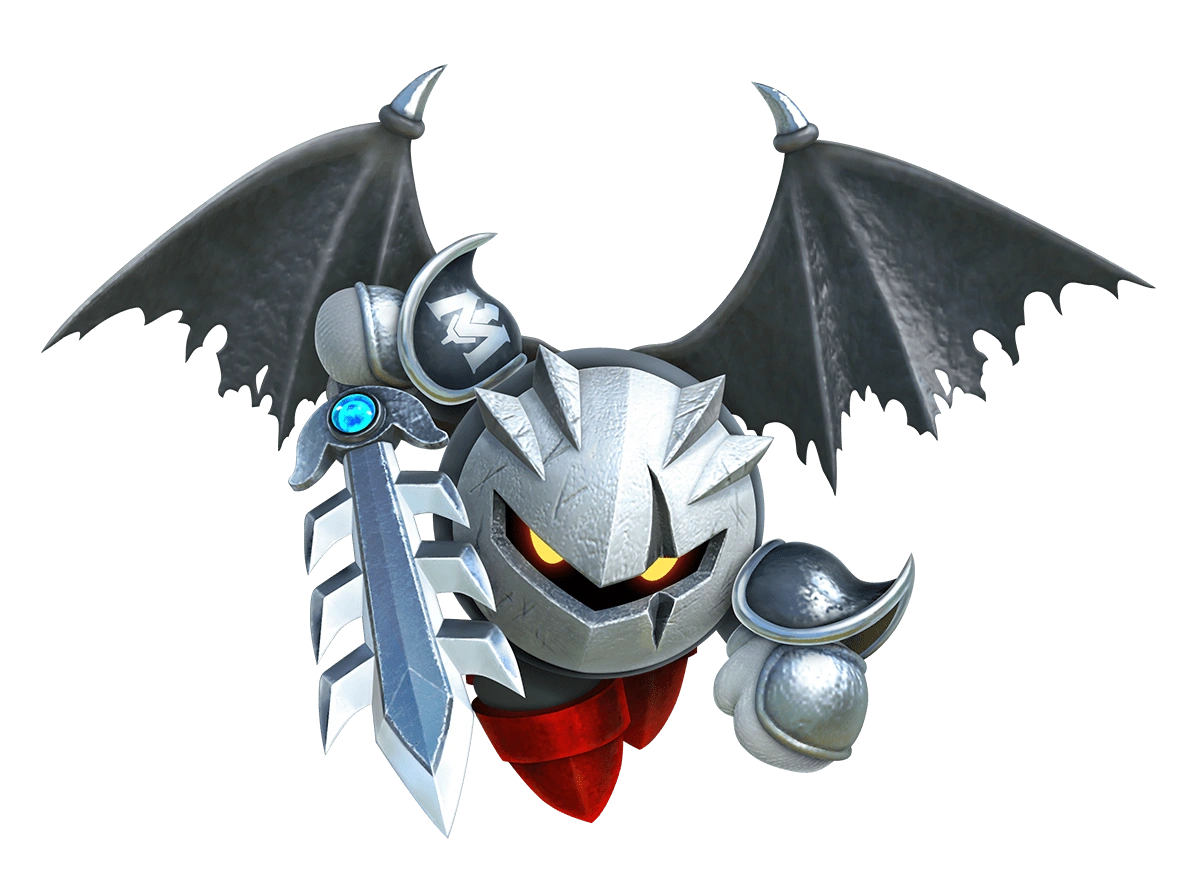
Battle Damage: Certain characters will show visible damage on themselves as the fight progresses, however, this is only cosmetic. Examples include Meta Knight's mask cracking, Little Mac's face being bruised and bandaged, and Dark Matter bleeding.
Combo Counter: Once you've landed at least four moves in succession, a number will appear next to your character's portrait that keeps track of how many hits you've done in a single combo, with the announcer shouting phrases such as "Amazing!" and "Insane!" depending on how big the combo is when it ends.
Characters[]
X Universe features the largest roster out of any game in the series, with the majority of fighters from the past games returning. Many of the veteran characters have had their movesets tweaked or completely remade to better represent their abilities and personalities, as well as generally being more faithful to the source material.
While the majority of the roster originates from Nintendo's own franchise, there is also a wide variety of characters from third party companies, including but not limited to: SEGA, Konami, Capcom, Bandai Namco, Square Enix, Microsoft, and several indie studios. This is also the very game in the series to include characters who haven't originated from video games.
The concept of Echo Fighters returns from Ultimate, albeit with some changes. These fighters, which are marked by an Epsilon (ϵ) symbol, are heavily based on another character, to the point of sharing some moves with them, and can either be displayed separate from their source characters, or combined with them into one slot on the character select screen. Several of the Echoes from the previous game have been turned into unique fighters, and the brand new Echoes generally have more differences from their characters of origin than past ones.
Additionally, X Universe introduces a brand new type of character known as Cross Fighters, marked by a Chi (χ) symbol. As their name suggests, these fighters are a cross between two or more characters, combining their moves and traits to form a new moveset. Unlike Echo Fighters, Cross Fighters cannot be combined with their source characters on the character select screen.
Characters are organized by franchise. Click on one to skip to their moveset. Darkened characters are not yet finished
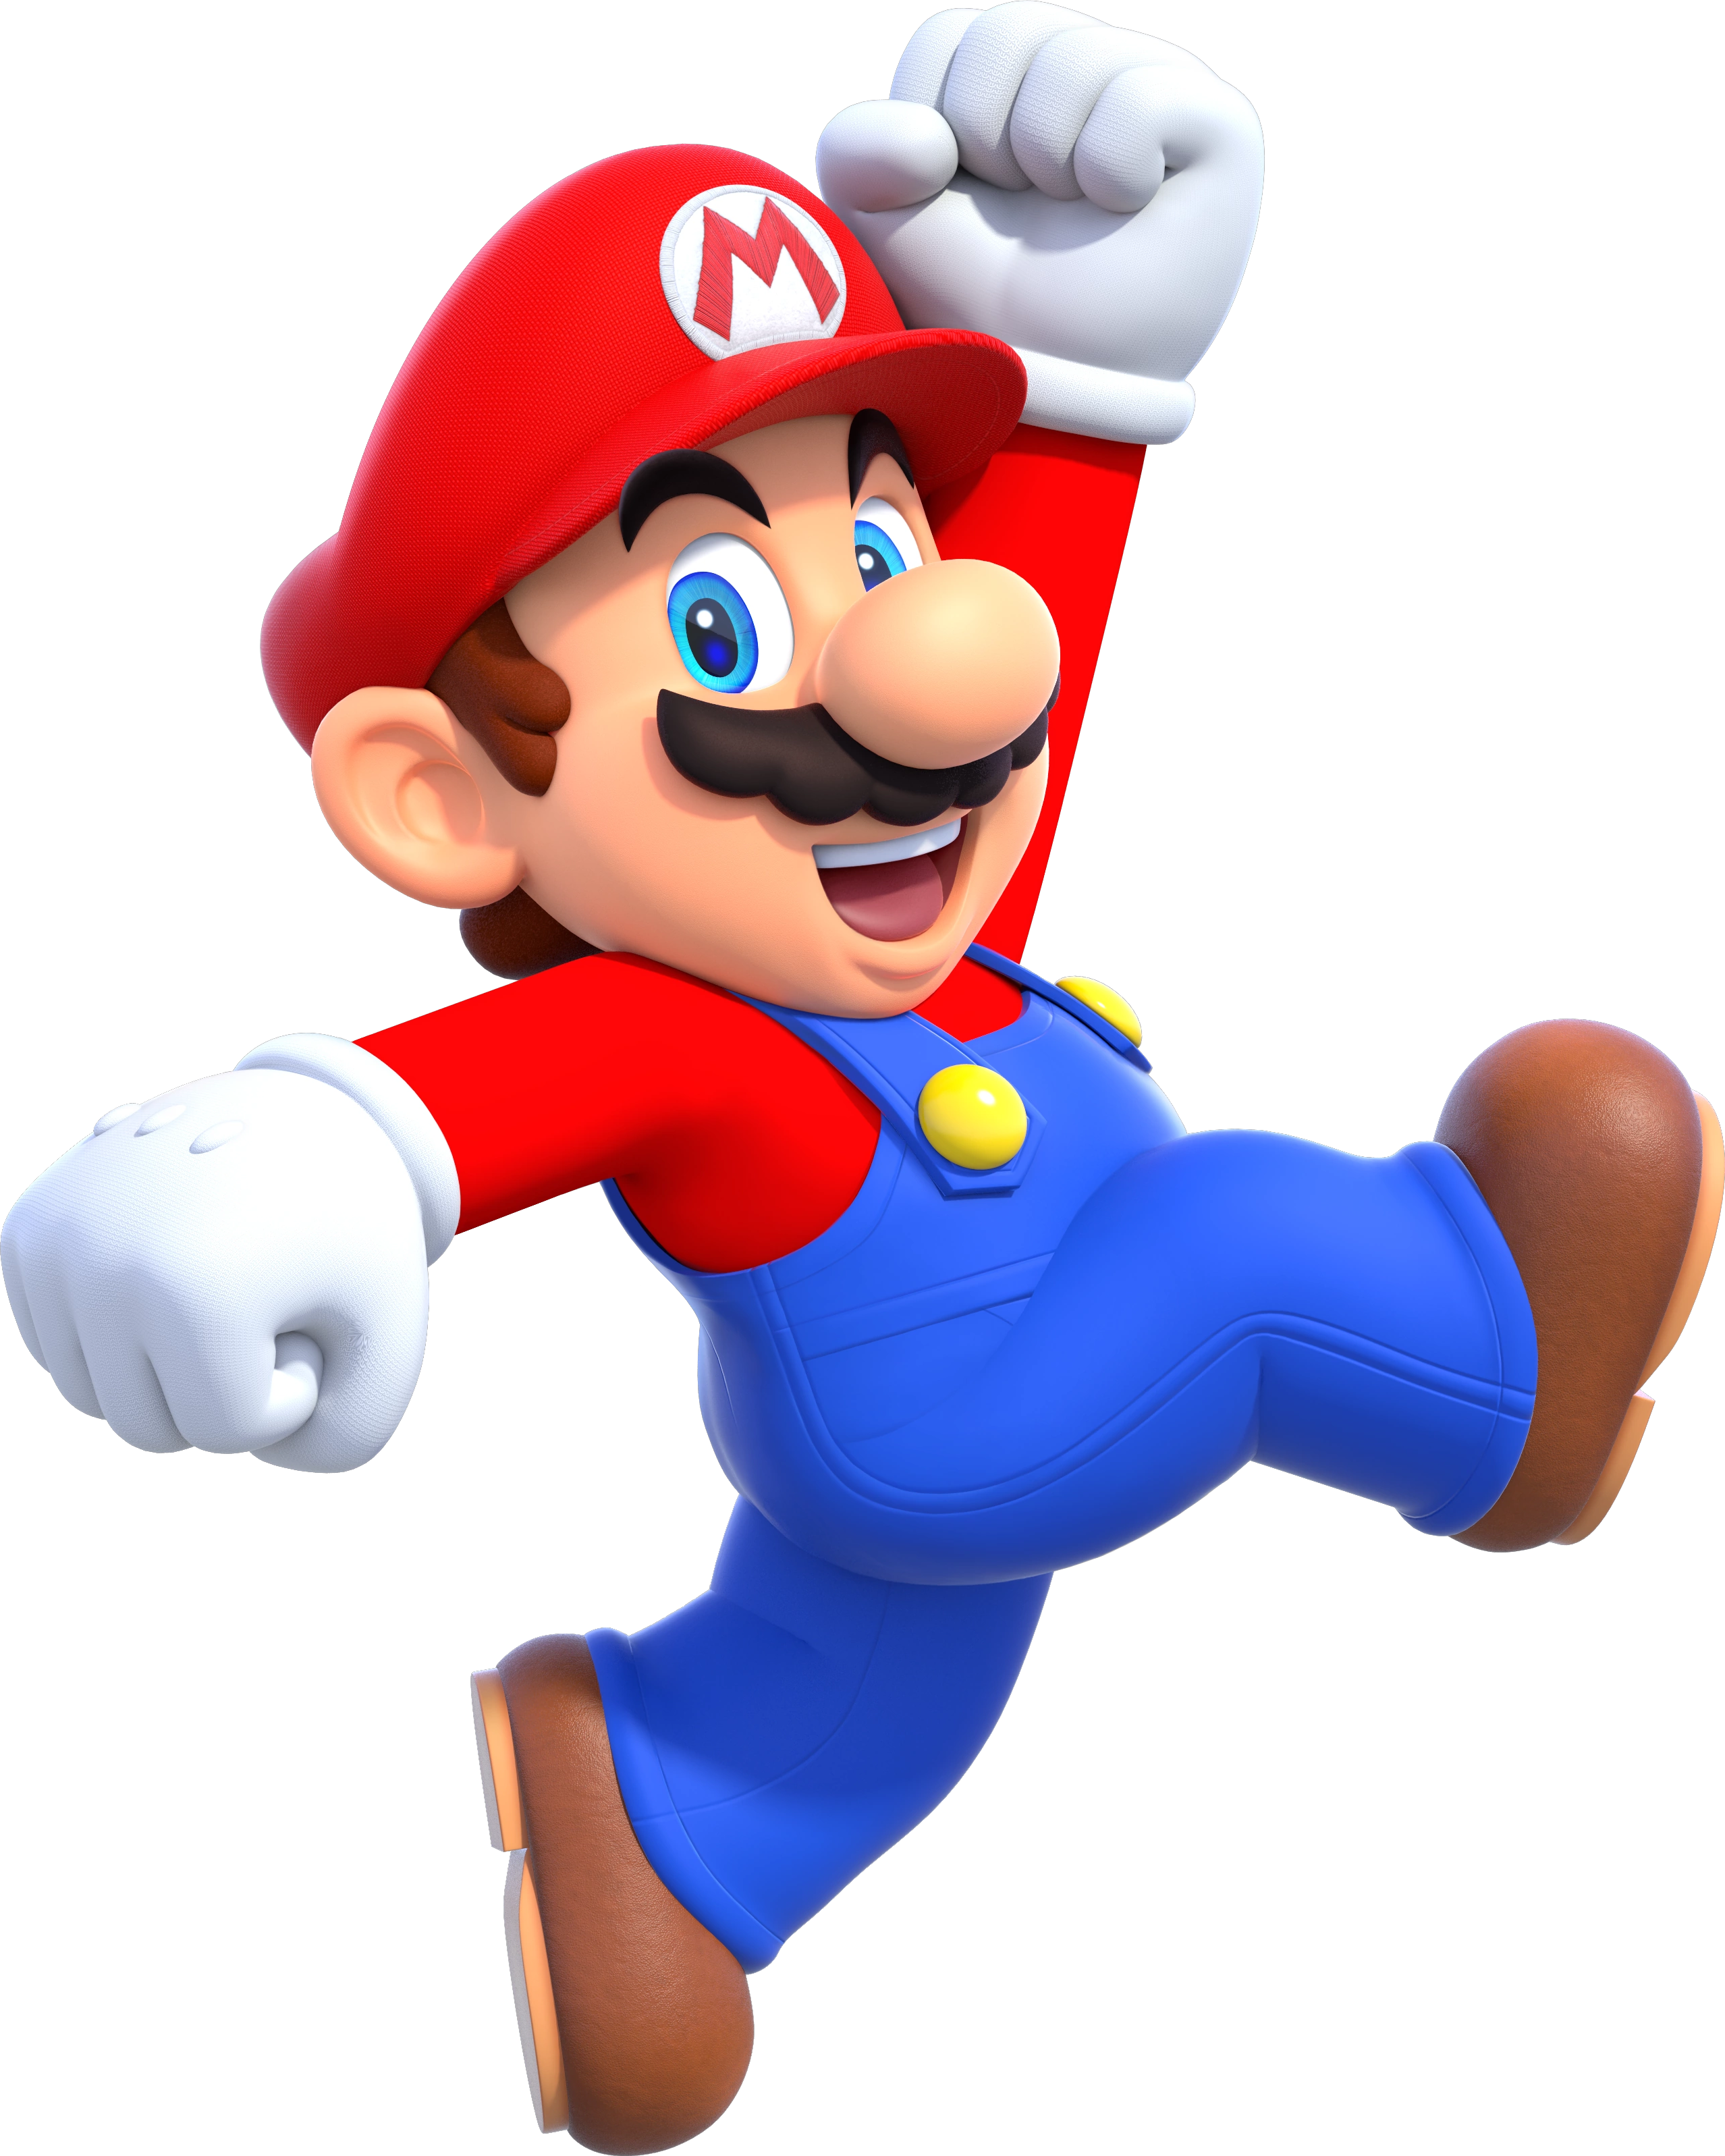
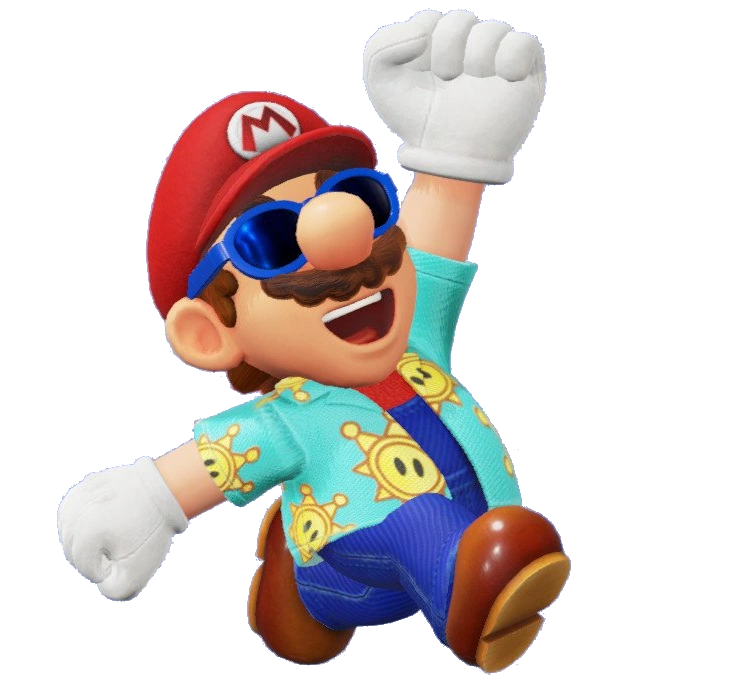
Mario is the main protagonist of the Super Mario series, as well as the mascot of Nintendo. Mario has appeared in over 200 games, ranging from platformers, RPGs, sports games, racing games, party games, and many more. He has gone on countless adventures alongside his brother Luigi, protecting the world and saving Princess Peach from whatever evil decides to show up that day, most commonly Bowser, the King of the Koopas. He has made many friends and enemies along the way, such as Cappy, a being that resides inside of Mario's hat.
Mario is a middleweight fighter with average stats who is designed to be beginner friendly while still having a lot of depth for more experienced players. He has several different tools at his disposal that allow him to take many approaches to any given situation, as well as a plethora of combo starters. Many of Mario's attacks are directly based on moves featured in games such as Super Mario 64 and Super Mario Odyssey.
Jab: Mario throws a one-two punch combo followed by a kick, taken directly from his attack combo in Super Mario 64.
Forward Tilt: Mario grabs Cappy off of his head and throws him forward, spinning in place before returning back to Mario and damaging opponents multiple times before launching them.
Forward Smash: Mario lifts a large hammer over his head before slamming it on the ground in front of him, based on the hammer moves featured in the Mario & Luigi series. This move can bury opponents while fully charged.
Up Tilt: Mario jumps while rapidly spinning, damaging opponents multiple times before launching them. This is based on the Spin Jump from Super Mario World and the New Super Mario Bros. series.
Up Smash: Mario takes out a large hammer and swings it overhead.
Down Tilt: Mario rolls along the ground, which can be jumped out of and is based on a move from Super Mario Odyssey. If the attack button is pressed again during the roll, Mario will perform a long jump, which covers great distance and grants him armor. This move originated in Super Mario 64.
Down Smash: Mario performs a breakdance sweep, based on the same move that can be done in Super Mario 64.
Dash Attack: Mario dives forward and slides along the ground, a move that has appeared in several Super Mario games. If the attack button is pressed again during the slide, Mario will hop forward afterward, which can be cancelled into any move.
Counter: Mario thrusts his palm forward as flames burst from it, based on the Firebrand ability from Mario & Luigi: Superstar Saga.
Neutral Aerial: Mario spins around with his arms outstretched while Baby Luma appears from underneath his hat, based on the same move that can be performed in the Super Mario Galaxy games. This move causes Mario to slightly rise upward, and is capable of reflecting projectiles at the start of it.
Forward Aerial: Mario takes out a large hammer and swings it downward.
Forward Bash: Mario throws a flaming overhead punch, which can spike opponents.
Back Aerial: Mario takes out a large hammer and swings it behind him.
Back Bash: Mario throws a drop kick.
Up Aerial: Mario grabs Cappy and swings him overhead.
Up Bash: Mario throws a bicycle kick.
Down Aerial: Mario throws a spinning drill kick, damaging opponents multiple times before launching them.
Down Bash: Mario performs a stall-then-fall ground pound, which can spike opponents.
Grab: Mario grabs Cappy and throws him forward, capturing any opponent he touches. Once an opponent is captured, they will don Mario's hat and mustache. This is based on Cappy's signature ability to let Mario possess enemies in Super Mario Odyssey.
Pummel: Mario forces the opponent to slam their own face on the ground.
Forward Throw: Mario jumps out of the opponent and kicks them forward.
Back Throw: Mario jumps out of the opponent and grabs them by the legs before spinning around and throwing them behind him.
Up Throw: Mario jumps out of the opponent and grabs them before hovering upward using F.L.U.D.D.'s Hover Nozzle from Super Mario Sunshine. He then falls back down to the stage and slams the opponent on the ground.
Down Throw: Mario jumps out of the opponent and stomps on their head, burying them.
Neutral Special - Fireball: Mario throws out a fireball that bounces along the ground before disappearing. Up to two fireballs can be thrown in succession.
Custom 1 - Iceball: Mario throws out an iceball that is slower, but has a chance to freeze opponents.
Custom 2 - Goldball: Mario throws out a ball of solid gold that can only be used once in succession, but explodes into coins on impact, damaging opponents multiple times before launching them.
Side Special - Cap Throw: Mario grabs Cappy and throws him forward, dealing damage to anyone he hits before returning back to him. If the special button is held down, Cappy will spin in place for a bit before he comes back. If Mario touches Cappy at all during the move, he will bounce off of him and into the air before falling into a helpless state. This is based on the way Cappy functions as a projectile/spring in Super Mario Odyssey.
Custom 1 - Ricochet Cap Throw: Mario cannot bounce on Cappy. However, when thrown, Cappy will immediately target a nearby opponent and hit them. If another is close by, he travels to them afterward. This continues until no opponents are in range, and Cappy returns to Mario.
Custom 2 - Cape: Mario powers up using the Cape Feather, donning a large yellow cape, and rapidly spins. This move can turn opponents around on contact, reflect projectiles, and briefly halt Mario's descent when used in midair.
Up Special - Super Jump Punch: Mario throws a jumping uppercut, damaging opponents multiple times before launching them. During this, coins will pop out of them.
Custom 1 - Red Jump Punch: The move doesn't go as high, and it only hits opponents once, but the move is generally stronger and causes a Red Coin to come out the opponent.
Custom 2 - Rocket Nozzle: Instead of an uppercut, Mario blasts upward using F.L.U.D.D.'s Rocket Nozzle. The move can be charged to increase its height.
Down Special - F.L.U.D.D.: Mario summons F.L.U.D.D., who squirts water at opponents to push them away. He can continue squirting water if the special button is held. Directional inputs can also be used to aim the stream up and down. The stream will eventually get weaker until F.L.U.D.D. can no longer squirt water. The move will recharge itself when not in use, and can be cancelled into any other attack.
Custom 1 - F.L.U.D.D. Burst: Mario equips F.L.U.D.D. and shoots out a single burst of water that deals non-flinching damage to opponents. This move can be somewhat spammed.
Custom 2 - Mario Tornado: Mario begins to rapidly spin with his arms outstretched, damaging opponents multiple times before launching them. Mario can move left or right during this, and will rise into the air if the special button is repeatedly pressed.
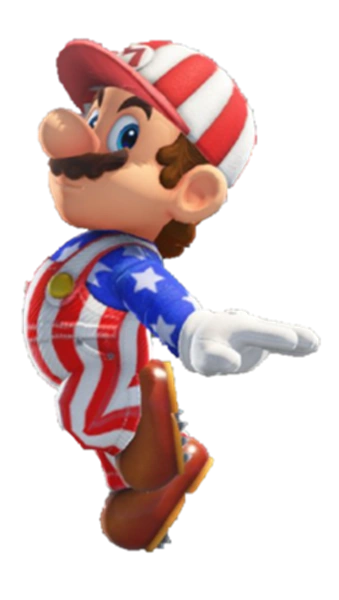
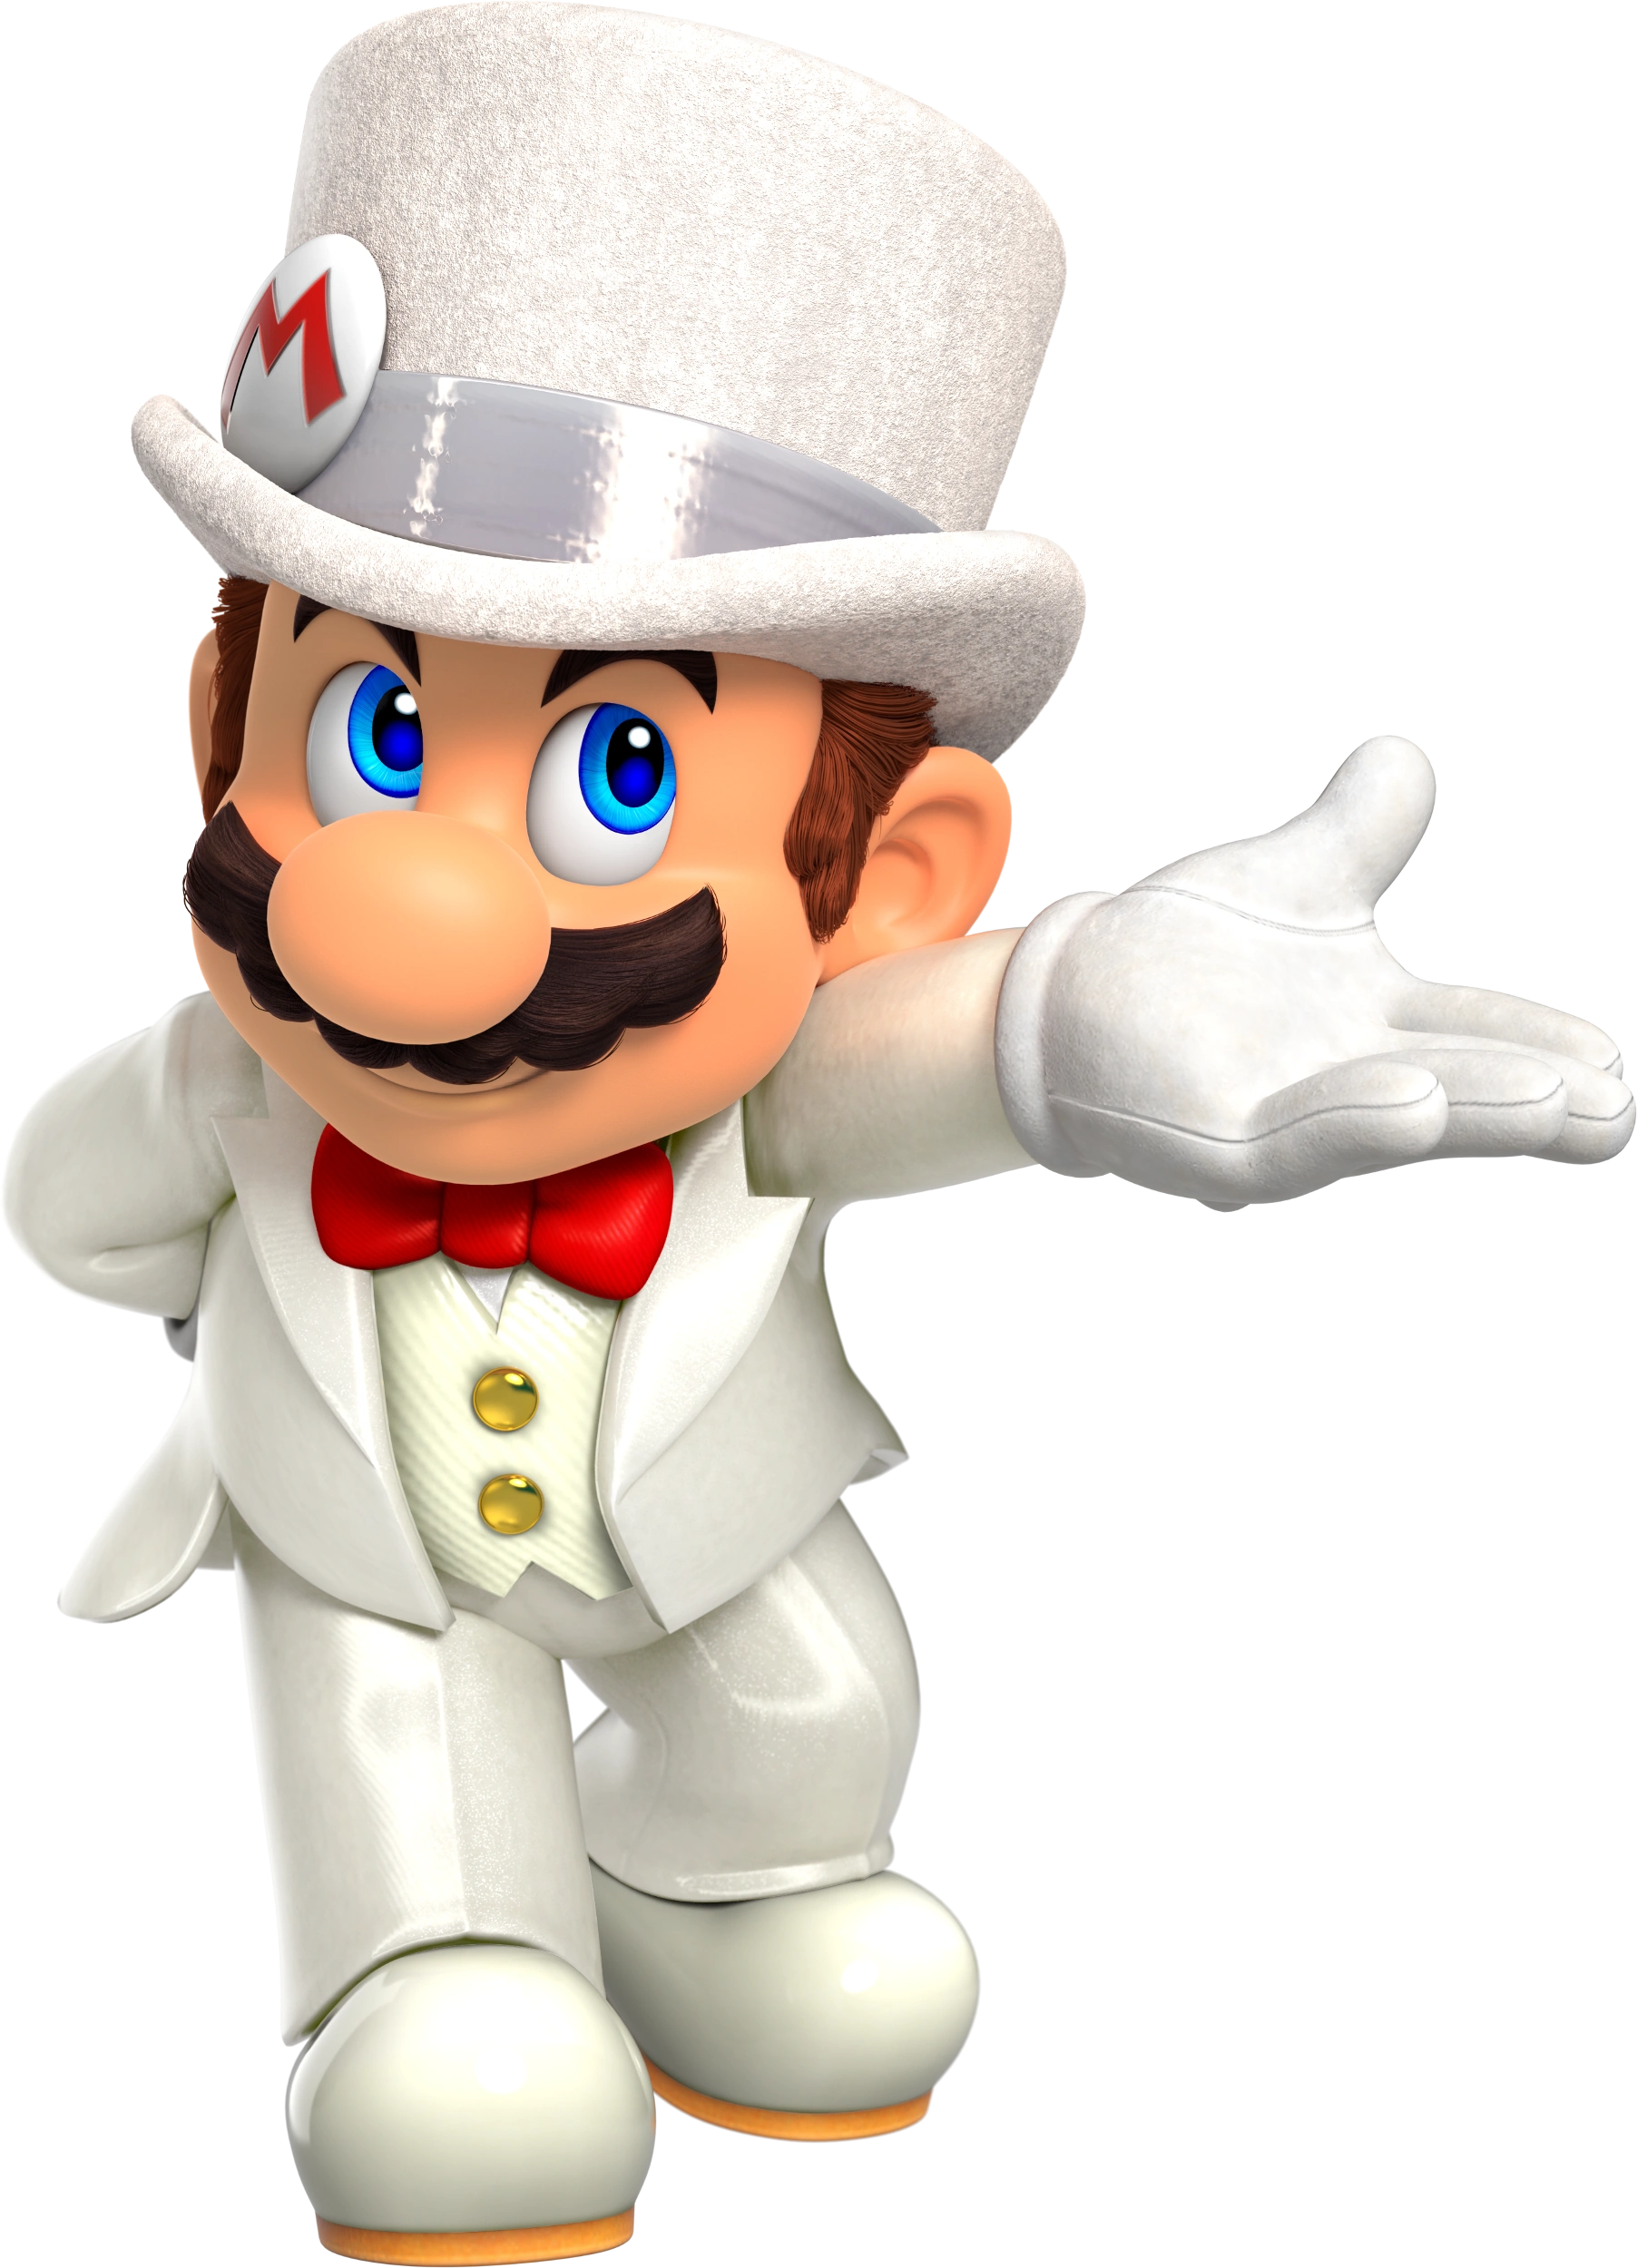
Final Form - White Tanooki Mario: Mario uses a White Tanooki Leaf to become White Tanooki Mario. In this state, Mario can jump much higher and falls slower, in addition to being faster and receiving less knockback from attacks.
Final Smash - Superstar Slam: Mario rushes forward using F.L.U.D.D.'s Turbo Nozzle to deliver an uppercut. If he hits an opponent, they are locked in a cinematic where Mario repeatedly strikes them with a large hammer as Cappy slams into them from all angles. The move ends with Mario leaping high into the air and stomping on the opponent's head, launching them or instantly KOing them if they've accumulated over 100% damage before the end of the attack.
Entrance: The Odyssey lands down on the stage as Mario jumps out, saying his iconic "Let's-a-go!"
Up Taunt: Mario grows to a large size before shrinking back down, complete with classic sound effects.
Side Taunt: Mario throws Cappy in a circle before grabbing him out of the air and placing him back on his head.
Down Taunt: Mario turns his back to the camera and gives a thumbs up while winking.
Victory Animation 1: Mario jumps into the air while spinning and lands in a strongman pose while saying "Here we go!"
Victory Animation 2: Mario grabs Cappy and throws him towards the camera, before he returns and lands back on Mario's head.
Victory Animation 3: Mario slides down a flagpole and jumps off before posing with a V-sign.
Can Crawl: Yes.
Can Wall Jump: Yes.
Can Wall Cling: No.
Footstool: Mario's footstool does 10% damage, as well as spiking opponents.
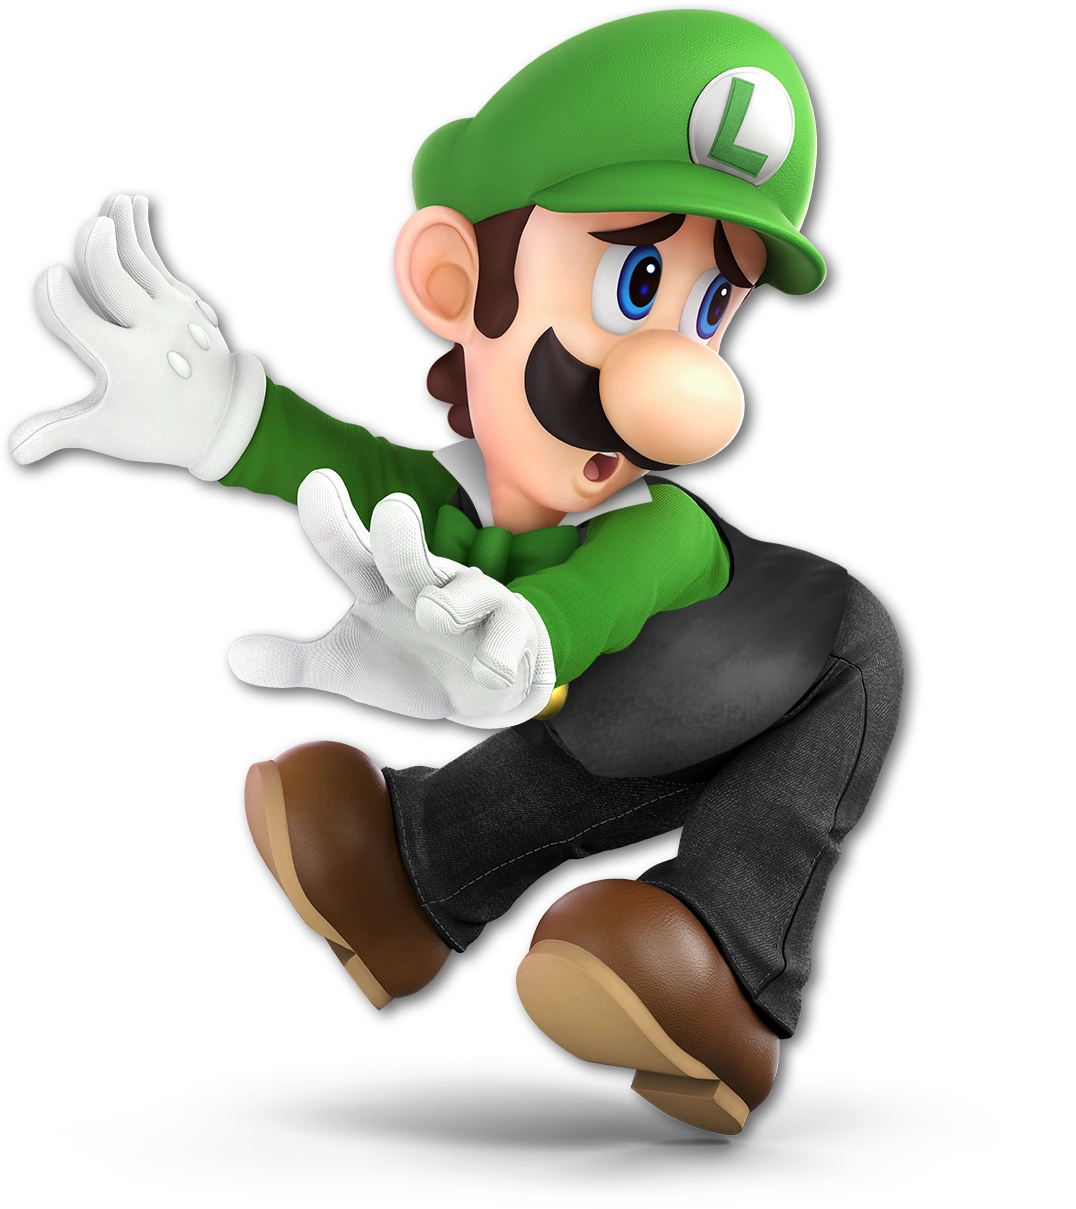
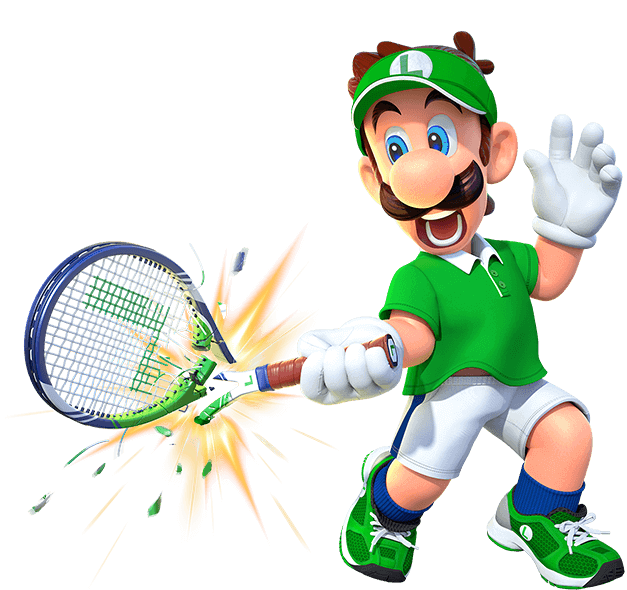
Luigi is one of the main characters in the Super Mario series, as well as the star of his own series, Luigi's Mansion. Originally being nothing more than just a green version of Mario that served the role of Player 2, Luigi has slowly received his own identity, personality, and abilities over the years. Years of living in his brother's shadow has made Luigi awkward, shy, and cowardly, but despite that, he has tagged along with Mario on several of his adventures, and even has to rescue him every now and again. His own series of adventures see him using the various Poltergust inventions, created by Professor E. Gadd, to hunt down ghosts and thwart the plans of the evil King Boo.
Luigi is a middleweight fighter with above average speed and a floaty jump, but poor air mobility. He also has the unique property of sliding across the ground when trying to turn around. Luigi's attacks mostly consist of him using the Poltergust G-00 and its various abilities, such as the Burst, Suction Shot, and Slam from Luigi's Mansion 3, as well as the Elemental Medals from the first game. His moveset is designed around waiting for opponents to create openings and capitalizing on their mistakes with plenty of range on his attacks, but also a lot of endlag.
Jab: Luigi swings the head of the Poltergust G-00 in front of him before performing an uppercut-like swing. If the attack button is repeatedly pressed, Luigi will spin the vacuum in front of him like a propeller, damaging opponents multiple times before launching them with a final swing.
Forward Tilt: Polterpup appears from underneath Luigi's hat and lunges forward to bite.
Forward Smash: Luigi attaches the Strobulb to the Poltergust G-00 and unleashes a large flash of light that stuns opponents the longer the move is charged for.
Up Tilt: Polterpup jumps up from underneath Luigi's hat, hitting opponents above him.
Up Smash: Luigi swings a large hammer upwards, with its weight causing him to fall back and slam it on the ground behind him.
Down Tilt: Luigi shines an ultraviolet ray from his flashlight at the ground in front of him, causing a Spirit Ball to rise up and burst.
Down Smash: Luigi performs a breakdance sweep.
Dash Attack: Luigi trips, does a flip, and falls on his rear.
Counter: Luigi looks away as he pokes forward, shocking the opponent with electricity.
Neutral Aerial: Luigi throws an electrified sex kick that sends opponents straight up.
Forward Aerial: Luigi swings the Poltergust G-00 downwards as it creates a stream of flames.
Forward Bash: Luigi throws an electrified downwards knifehand strike.
Back Aerial: Luigi swings the Poltergust G-00 behind him as it creates a stream of ice that can freeze opponents.
Back Bash: Luigi throws an electrified dropkick.
Up Aerial: Luigi swings the Poltergust G-00 overhead as it sprays out a stream of water that pushes opponents upwards.
Up Bash: Luigi throws an electrified bicycle kick.
Down Aerial: Luigi aims the Poltergust G-00 below him as an explosion bursts from it, which can spike opponents.
Down Bash: Luigi throws an electrified corkscrew stomp, which can spike opponents.
Grab: Luigi fires a plunger from the Poltergust G-00, pulling opponents towards him. This can also be used in midair as a tether recovery.
Pummel: Luigi lifts the opponent overhead and slams them on the ground. He will alternate between the left and right sides of himself each time the move is used.
Forward Throw: Luigi lifts the opponent up before launching them away with a blast of fire.
Back Throw: Luigi swings the opponent around and launches them behind him with a blast of ice.
Up Throw: Luigi swings the opponent overhead before launching them upward with a blast of water.
Down Throw: Polterpup jumps out from underneath Luigi's hat and tackles the opponent, licking them several times before launching them with a final lick.
Neutral Special - Thunderhand: Luigi fires an orb of electricity from his palm that flies forward, stunning opponents on contact. This move is based on the Thunderhand ability from Mario & Luigi: Superstar Saga.
Custom 1 - Fireball: Luigi fires a green fireball from his finger that travels forward in a circular motion, dealing more damage but moving slower. The fireballs are based on the green ones that appear in Mario Bros.
Custom 2 - Boo Shot: Luigi launches a Boo out of the Poltergust G-00, which bounces along the ground and puts a poison effect on opponents.
Side Special - Suction Surge: Luigi activates the vacuum attachment of the Poltergust G-00 to pull in opponents with a very far and wide-ranged tornado-like effect. While Luigi cannot move, he can aim the vacuum forward or diagonally upwards. If an opponent is too close to Luigi, a bright green surge of electricity pulls them into the vacuum, before he launches the opponent outwards, upwards, or backwards.
Custom 1 - Suck Up: The move doesn't have as much range and is overall smaller, on top of not being able to suck in opponents. However, the move will suck in any projectiles and fire them back out, with them dealing more damage than normal.
Custom 2 - Green Missile: Luigi climbs atop the Poltergust G-00 as it blasts forward like a rocket, causing opponents to be hit by Luigi's head. The move can be charged to cover more distance and deal more damage. There is a 1/4 chance that the move will fly faster, farther, and deal more damage than its fully charged form, known as a Misfire.
Up Special - Burst: Luigi releases air pressure from the Poltergust G-00, causing him to be launched upward. Luigi does not fall into a helpless state after this, and the move also creates windboxes that can push opponents away.
Custom 1 - Balloon Berry: Luigi attaches a Balloon Berry from Luigi's Mansion: Dark Moon to the Poltergust G-00 and inflates it, causing him to be lifted into the air. Luigi will rise higher if the special button is repeatedly pressed, before the balloon deflates and he falls into a helpless state. The balloon can also be popped by opponents' attacks.
Custom 2 - Super Jump Punch: Luigi throws a jumping uppercut before falling into a helpless state. If an opponent is hit at the very start of the move, they will be dealt massive damage and knockback, however, if they are hit at any other point of the attack, they will be dealt light damage and no knockback.
Down Special - Elemental Medals: Luigi releases a stream of flames from the Poltergust G-00 that deals multiple hits of light damage to opponents standing in it. The stream can be angled up and down, but will gradually decrease in size as time goes on, and will need time to recharge before returning to full size. By using his Guard Special, Luigi can switch out the fire for water that pushes opponents away, or ice that has a chance to freeze opponents, with the one he has currently selected being displayed near his portrait.
Custom 1 - Blown Away: Luigi begins blowing air out of the Poltergust G-00, creating a windbox that will push opponents away, as well as nullify any physical projectiles.
Custom 2 - Luigi Cyclone: Luigi spins rapidly with his arms outstretched, damaging opponents multiple times before launching them. Luigi can move left and right during this, and will rise into the air if the special button is repeatedly pressed.
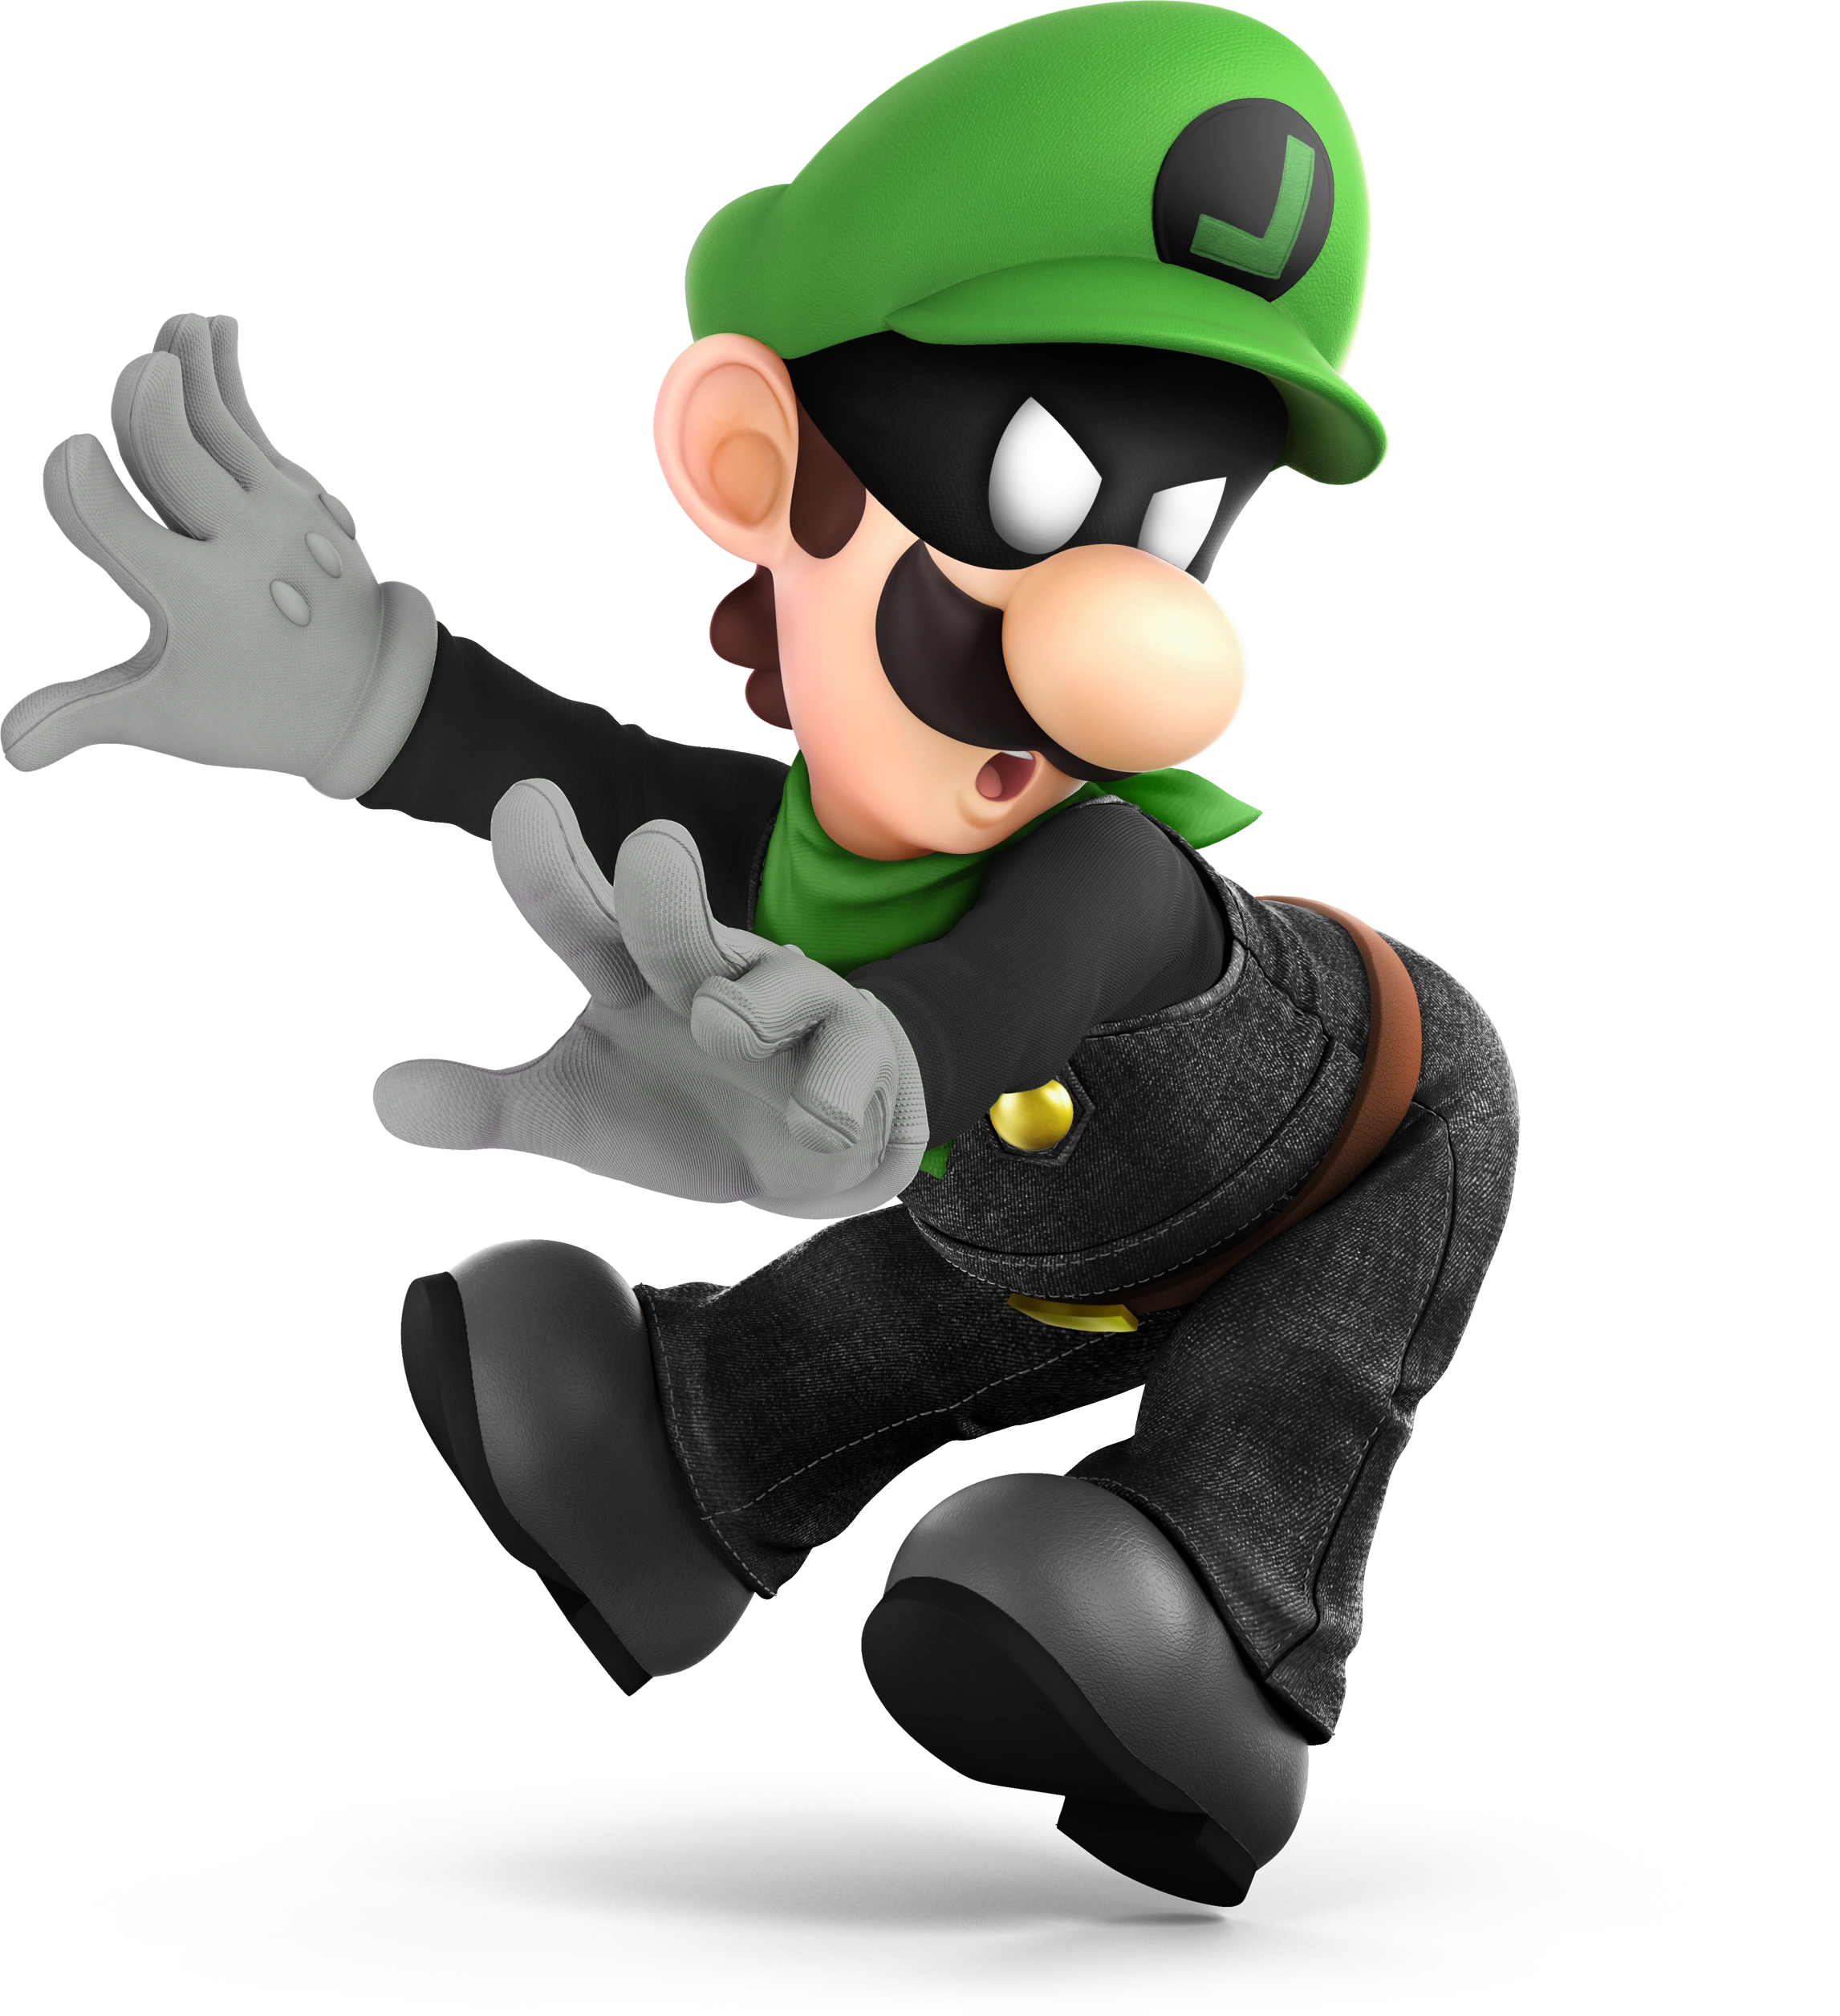
Final Form - Negative Luigi: Luigi dances, causing him to gain a negative color scheme. In this state, he has much faster air speed and much slower air speed. His moves also deal more damage, and most of them are darkness-empowered as well.
Final Smash - Ghost Portrificationizer: Luigi readies the Poltergust G-00 as the vacuum attachment on it goes haywire and starts sucking in anything nearby. If any opponents are caught, the scene will transition to show the Ghost Portrificationizer from the first Luigi's Mansion, as the fighters pass through as flattened versions of themselves. Their flat forms are pressed out, zapped, put through a machine, and, finally, onto a portrait. Luigi holds the portrait victoriously, before it bursts in a puff of smoke, launching the opponents. This move will instantly KO any fighters who had accumulated over 100% damage before the move ended.
Entrance: Luigi digitizes onto the stage in a burst of pixels, based on how he enters areas in Luigi's Mansion: Dark Moon.
Up Taunt: Luigi does five quick poses, one after the other. These include him flashing a peace sign, him pointing both his fingers in the direction he is facing while looking frightened, him holding his finger under his nose and looking at the player, him crouching down to the floor with his back turned to the player, and assuming a fearful position with his hands on his cheeks, mimicking his pose on the boxart of Luigi's Mansion.
Side Taunt: Luigi planks on the ground. If the taunt button is held Luigi will continue to repeat the action, alternating between left and right.
Down Taunt: Luigi bashfully kicks the ground while sighing, knocking anyone close to it into the air. If an opponent is hanging onto the ledge, this taunt will result in a spike
Victory Animation 1: Luigi turns around and makes gun motions with his fingers, saying "Bang, bang." Afterwards, he alternates between pointing his fingers and nose to the right and left.
Victory Animation 2: Luigi twirls around before he flashes a peace sign at the camera with his right hand and a wide grin while nodding, a reference to when Luigi finds a key in a chest during the events of Luigi's Mansion.
Victory Animation 3: Luigi is seen in the middle of trying to catch a Boo, being dragged around the screen before he finally catches the ghost and wipes the sweat off his forehead.
Can Crawl: Yes.
Can Wall Jump: No.
Can Wall Cling: No.
Footstool: Luigi's footstool does 10% damage, as well as spiking opponents.
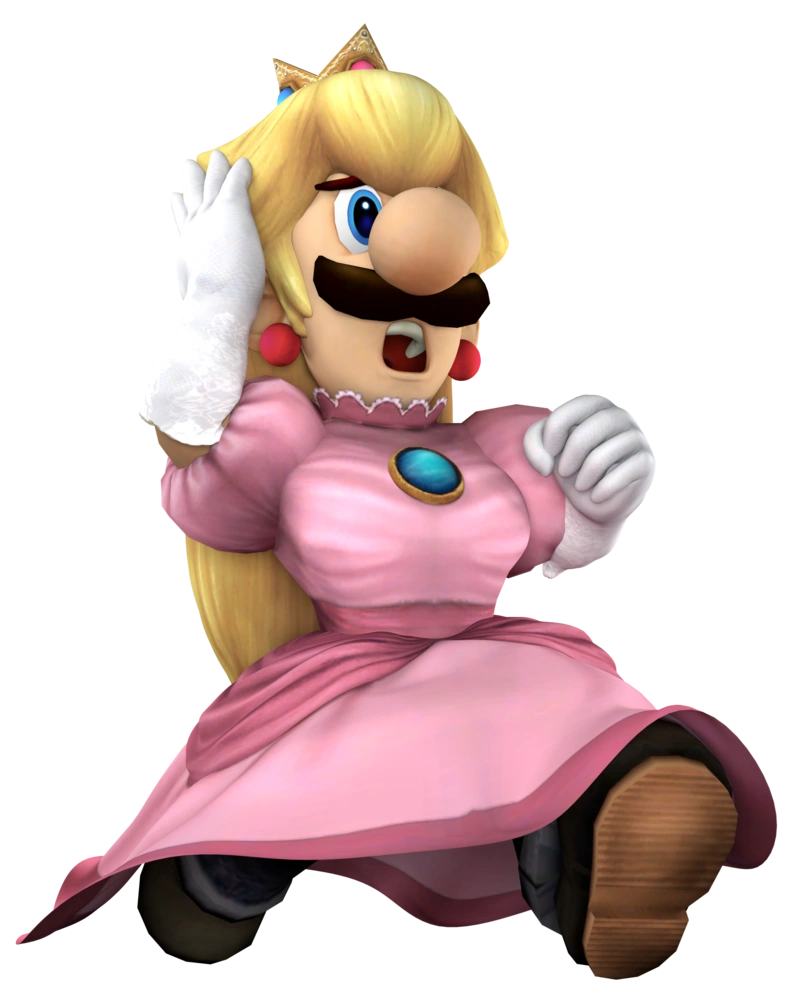
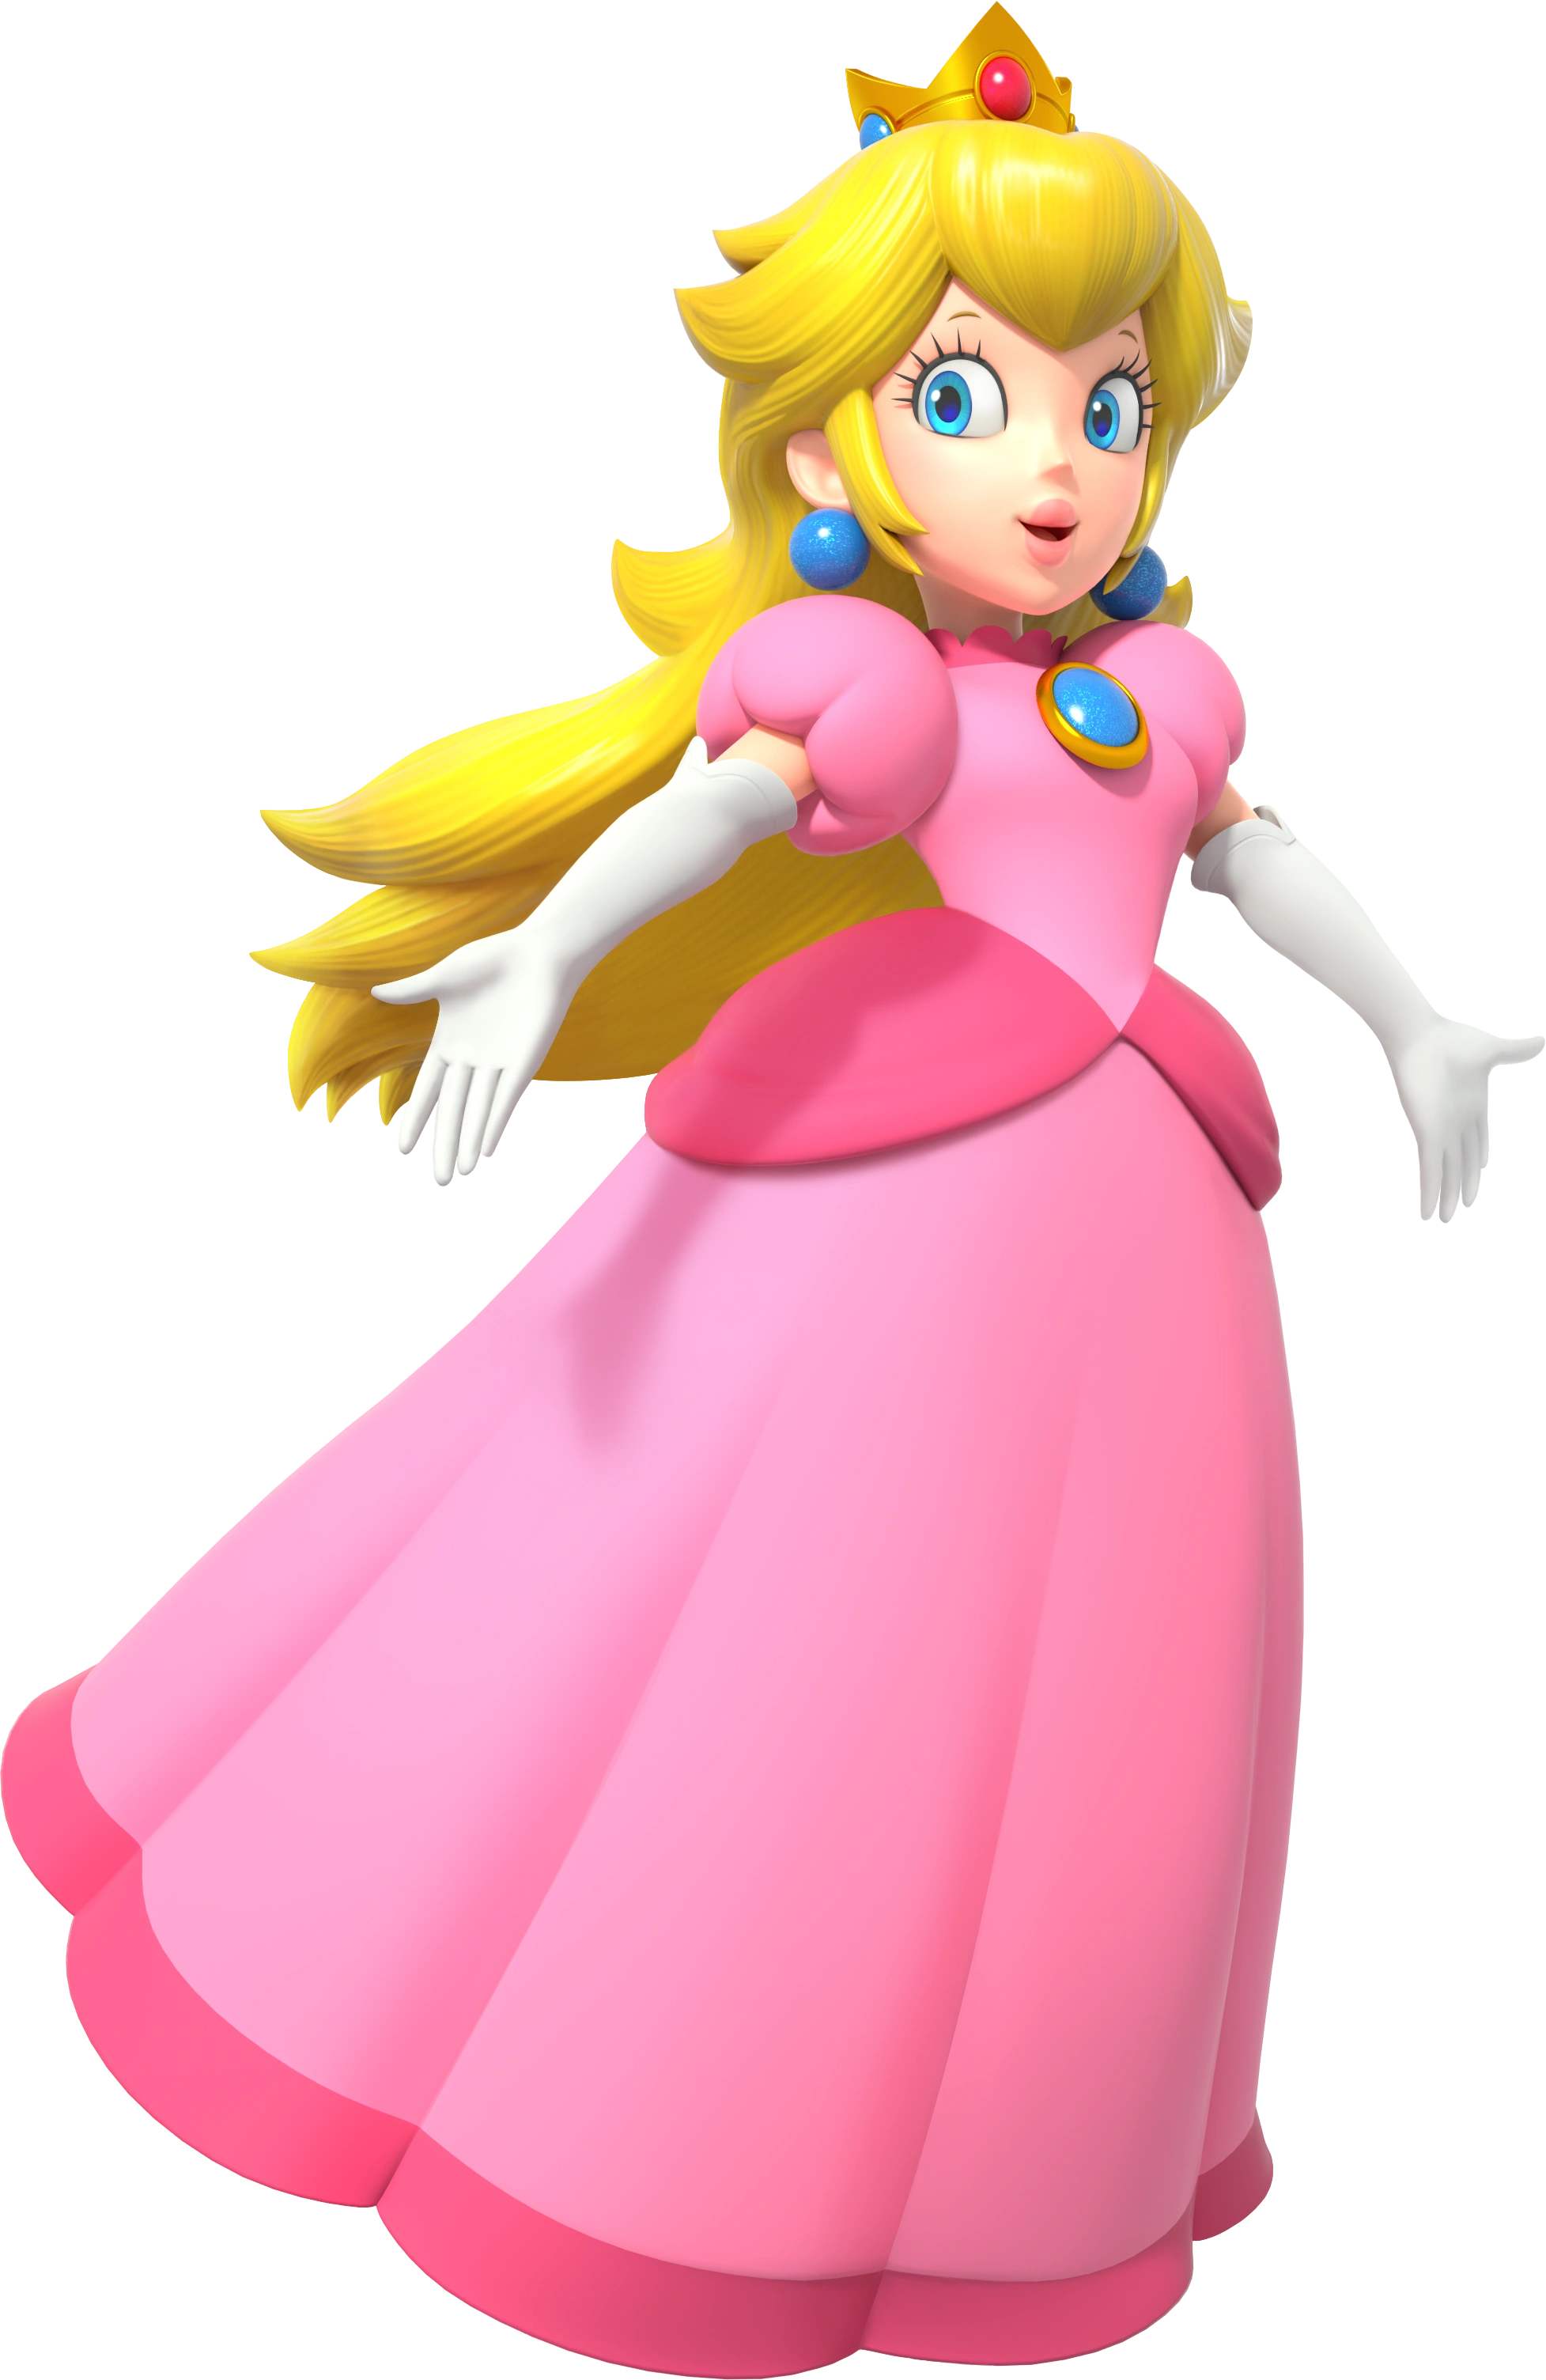
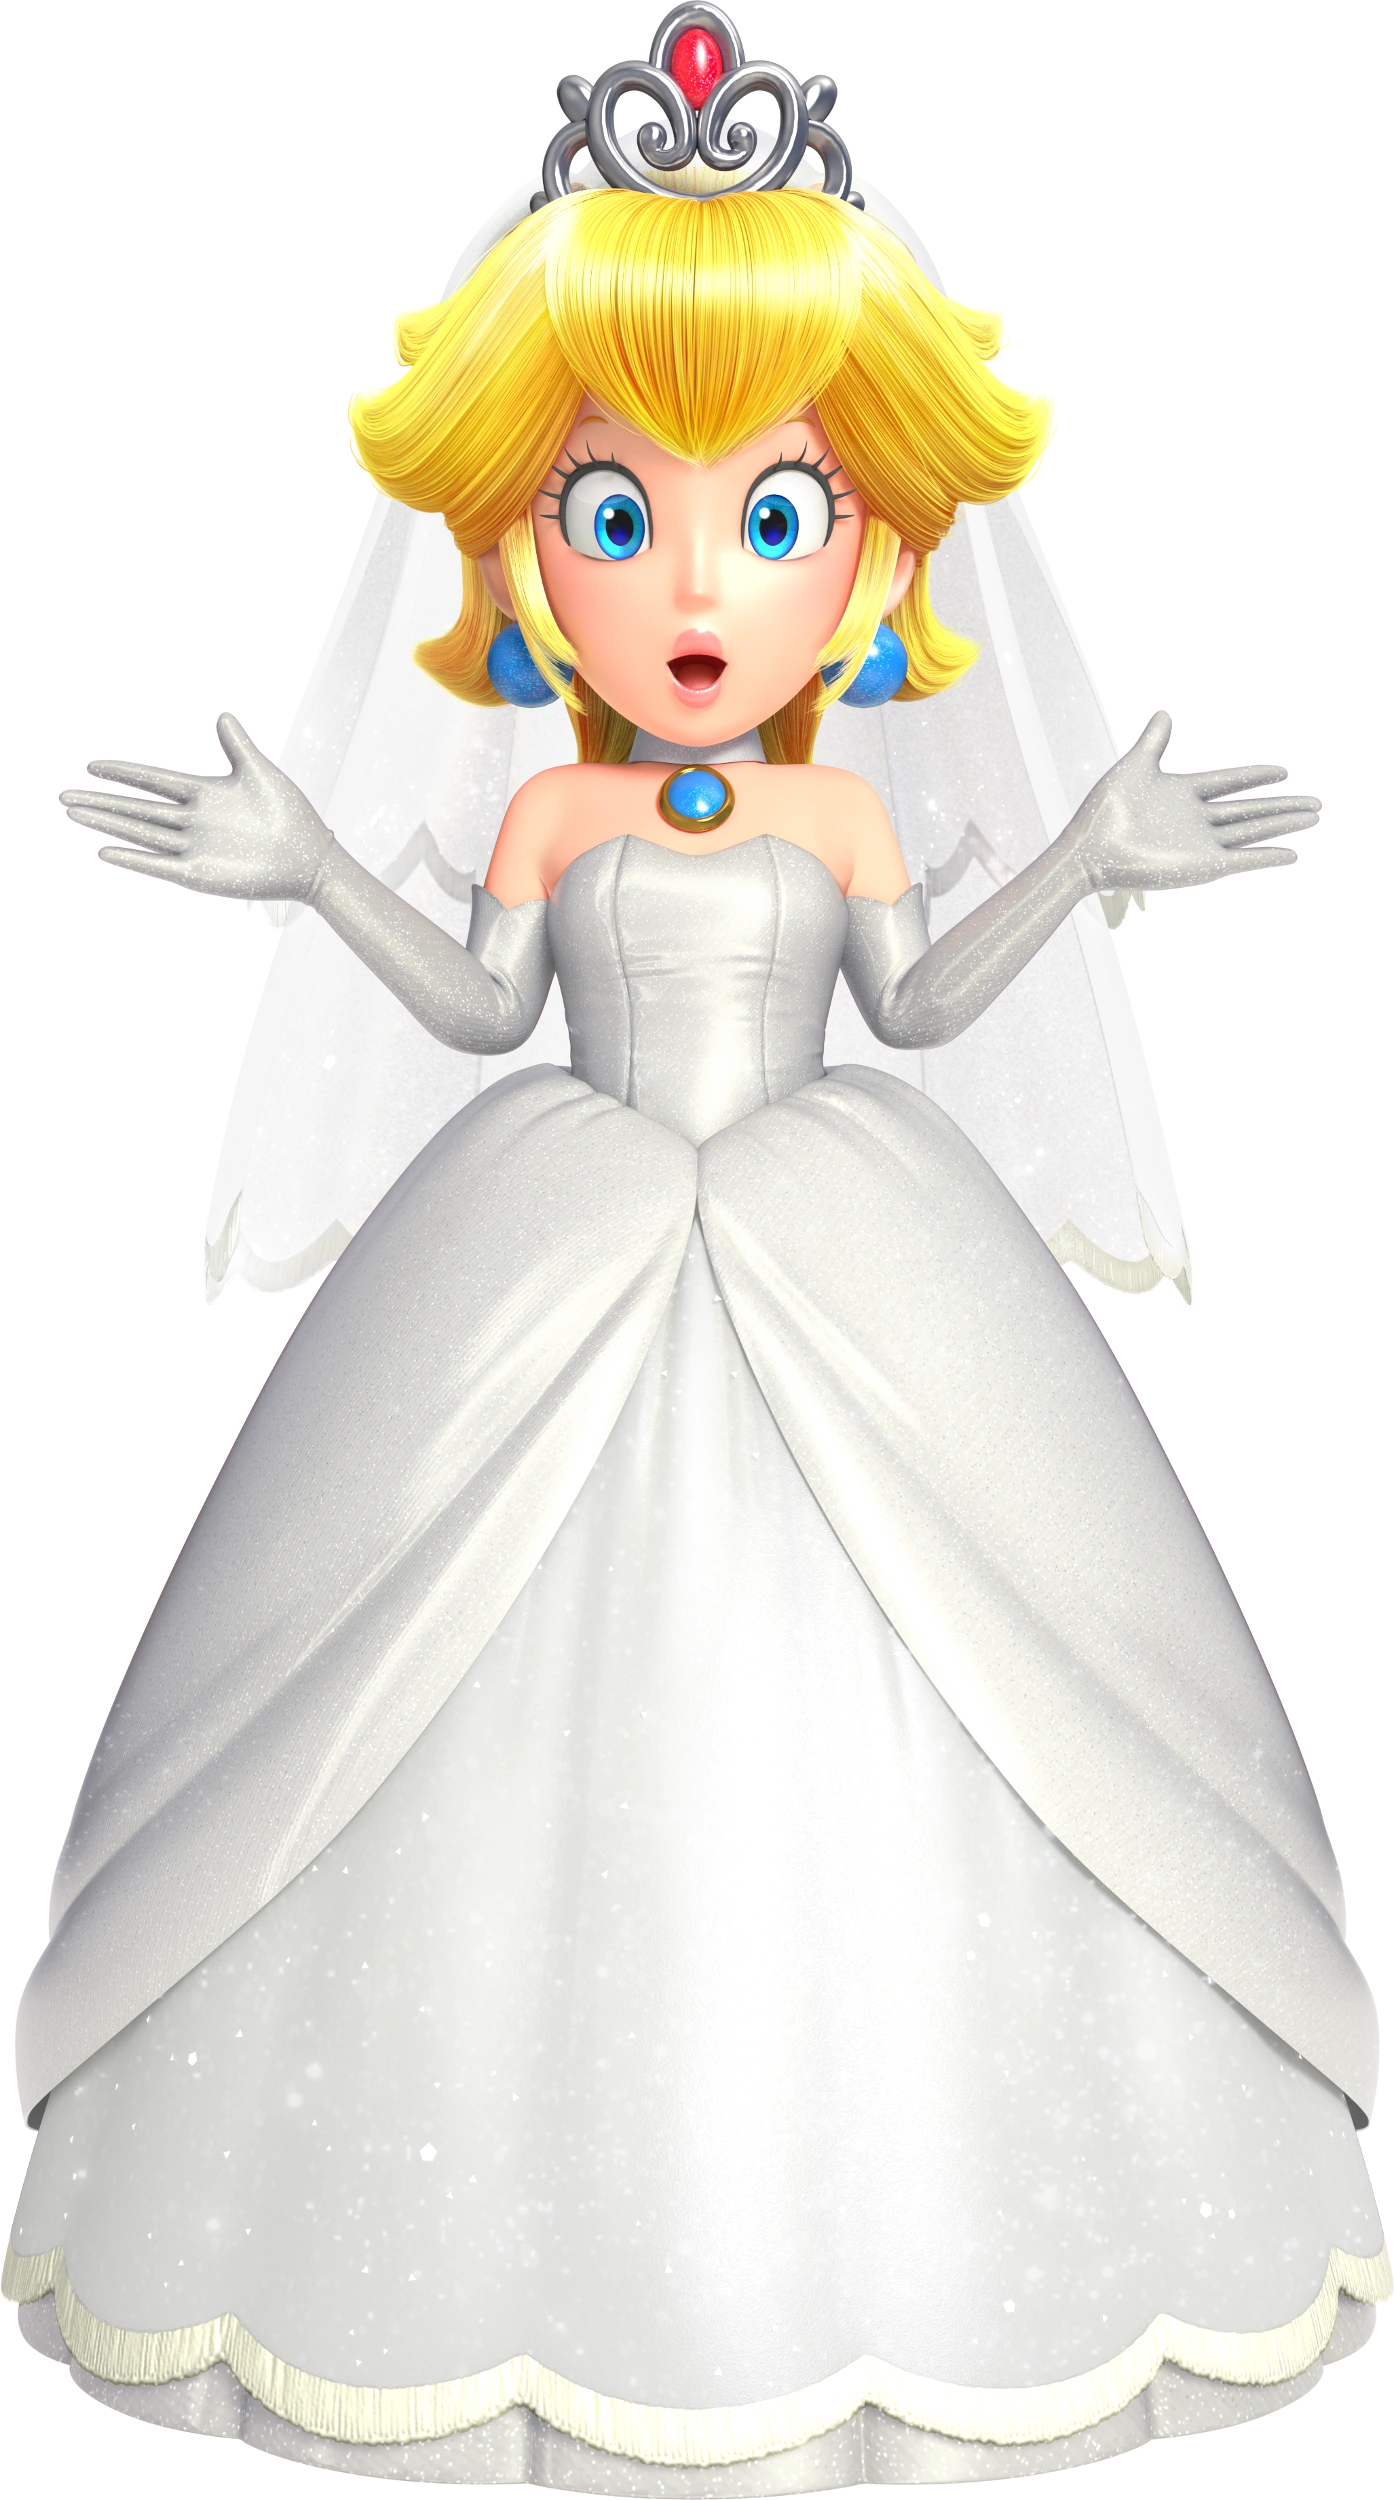
Princess Peach is one of the main characters in the Super Mario series, and more often than not serves as the damsel in distress that must be rescued in each game. She is the ruler of the Mushroom Kingdom and all of it's inhabitants, which makes her a primary target for Bowser, who wishes to marry her and have the kingdom to himself. Despite frequent kidnappings, Peach has tagged along with Mario and Luigi from time to time, with her most notable appearances being in Super Mario Bros. 2 and Super Mario 3D World. Peach even starred in her own game, Super Princess Peach, where the tables were turned and she had to rescue the Mario Bros. after they were captured., with the help of a living parasol named Perry, who also joins her this time around in Super Smash Bros. X Universe. With all of this, you would think that she'd be more than capable of defending herself and not getting kidnapped, but I guess old habits die hard.
Peach is a slow but powerful middleweight fighter, whose movesets pokes fun at the fact that she doesn't do much fighting despite her being perfectly capable of doing so. The majority of her attacks aren't actually fighting moves, but rather Peach accidentally hitting her opponents without meaning to. Peach is capable of floating in midair by holding up on the control stick after she jumps, which allows her to drift left and right as well as use her aerial attacks without falling, an ability taken directly from her playable appearances in Super Mario Bros. 2 and Super Mario 3D World
Jab: Peach playfully swings Perry forward twice before opening him.
Forward Tilt: Peach does an outward swing with Perry.
Forward Smash: Peach struggles to open Perry before he bursts open violently, which can reflect projectiles if timed correctly.
Up Tilt: Peach raises her arm into the air as she creates a burst of heart-shaped magic from her hand.
Up Smash: Peach spins while twirling a ribbon around herself.
Down Tilt: Peach sweeps the ground with her hand, which can spike opponents.
Down Smash: Peach swings Perry around herself in a circular motion.
Dash Attack: Peach does a ballerina-like spin, damaging opponents multiple times before launching them.
Counter: Toadsworth appears in front of Peach and whacks opponents with his cane.
Neutral Aerial: Peach does a spin with her arms outstretched.
Forward Aerial: Peach does a downwards swing with Perry.
Forward Bash: Peach thrusts Perry forward and opens him.
Back Aerial: Peach turns around and swings Perry behind her.
Back Bash: Peach turns around and opens Perry.
Up Aerial: Peach swings Perry overhead.
Up Bash: Peach hoists Perry upward before opening him, giving her a small burst of upward momentum.
Down Aerial: Peach opens Perry underneath her and spins him around, damaging opponents multiple times before launching them.
Down Bash: Peach opens Perry underneath her as she falls downwards, which can spike opponents.
Grab: Perry lunges forward to swallow the opponent.
Pummel: Perry chews on the opponent.
Forward Throw: Perry spits the opponent forward.
Back Throw: Peach turns around as Perry spits the opponent backward.
Up Throw: Perry spits the opponent upward.
Down Throw: Perry spits the opponent at the ground.
Neutral Special - Piece of Cake: Peach conjures an oven out of nowhere and begins to bake a cake, which will take around five seconds. The process of baking the cake can be cancelled and stored by shielding. Once the cake is finished, pressing the special button again will cause Peach to pull it out, only to trip and drop it. The cake will deal light damage to opponents hit by it, as well as temporarily making them slower.
Custom 1 - Explosive Cake: The cake takes longer to bake, but will explode on contact with an opponent.
Custom 2 - Spoiled Cake: The cake takes less time to bake, but Peach will immediately drop the cake once it is finished. The cake will put a poison effect on opponents for a short time.
Side Special - Elder Defender: Toadsworth appears in front of Peach and runs forward a short distance before disappearing. If the special button is pressed again while Toadsworth is out, he will perform a lunging headbutt, launching opponents upwards.
Custom 1 - Mushroom Defender: A randomly colored Toad appears in front of Peach and runs forward a short distance before disappearing. If the special button is pressed again while the Toad is out, he will perform a tackle, launching opponents backwards.
Custom 2 - Noble Defender: A randomly colored Toad wielding a spear appears in front of Peach and runs forward a short distance before disappearing. If the special button is pressed again while the Toad is out, he will thrust his spear forward, launching opponents.
Up Special - Floatbrella: Peach pulls out Perry and leaps into the air, damaging opponents multiple times before launching them. At the peak of her jump, she opens up Perry, allowing her to float downward. While open, Perry will damage opponents that touch him. Holding the control stick down will have Peach fall into a helpless state, while holding up will have her open Perry again and continue floating.
Custom 1 - Perry Leap: Peach jumps higher and deals more damage, but does not open Perry to float downward.
Custom 2 - Light Floatbrella: Peach doesn't jump initially, but instead opens Perry immediately. She will float upward, damaging opponents she hits. She will fall into a helpless state after a while or if the control stick is held down.
Down Special - Vegetable: Peach plucks a turnip out of the ground, which can then be thrown as a regular item. The turnip's facial expression determines how much damage it will do, with the angrier faces dealing the most. There is also a 10% chance that Peach will pull out a Mr. Saturn or a Red Shell.
Custom 1 - Heavy Veggie: Peach takes longer to pull Vegetables, but they are larger and deal more damage.
Custom 2 - Bomb: Peach pulls out bombs instead of turnips, which explode on impact but can't be thrown as far.
Final Form - Peachy Keen: Peach dances around before empowering herself with hearts. In this state she is faster, deals more damage, and can jump higher.
Final Smash - Empress Peach: Peach jumps up as she glows bright pink while sprouting wings and a giant crown that resembles a halo. She then curls up in a protective position, sucking in any opponents close to her, before releasing a flash from her wings, launching anyone caught in it.
Entrance: Peach floats down onto the stage, saying "Hi!" to the camera.
Up Taunt: Peach twirls Perry in her hand, saying "Sweet!"
Side Taunt: Peach spins with her finger wagging and one eye closed, saying "Uh, huh!".
Down Taunt: Peach does a small dance with music notes appearing around her.
Victory Animation 1: Peach spins Perry around her, saying "Oh, did I win?"
Victory Animation 2: Peach twirls while saying "This is fun!"
Victory Animation 3: Peach waves and blows a kiss to the camera.
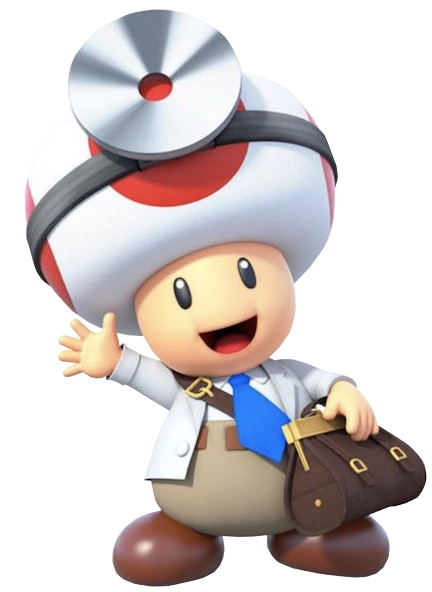
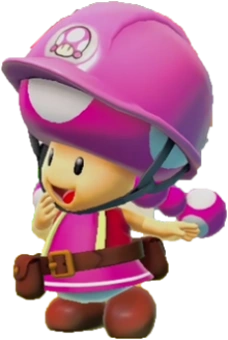
Toad is a recurring character in the Super Mario series. He is actually a singular character among an entire species of look-alikes also named Toad, which can lead to some confusion over which Toad is the main one. He is the loyal servant of Princess Peach, and sometimes joins Mario and Luigi on their adventures to help using his surprising strength. Although he is somewhat cowardly, he is always willing to help the Mario Bros. should they need it. Toad has even starred in his own game, in the form of Captain Toad: Treasure Tracker. Previously, he appeared in the Super Smash Bros. games as Peach's Neutral Special.
Toad is just a tad shorter than Mario and is one of the fastest characters in the game, a callback to his high speed in Super Mario Bros. 2 and Super Mario 3D World, but this comes at the cost of him being very light and having a low jump, another trait taken from those two games. Toad has the unique ability to carry heavy objects like Crates and Barrels, without Toad's movement being hindered at all. He can run, jump, double jump, and crouch, all while holding a big item over his head. Toad's moveset consists of him using his large head and pickaxe, his ability to create spores, and a variety of powerups featured in the Super Mario series, mostly ones that take the form of a Mushroom of some kind.
Jab: Toad throws two punches followed by a headbutt.
Forward Tilt: Toad throws a lunging headbutt.
Forward Smash: Toad swings his pickaxe forward up to three times depending on the level of charge. The first two hits trap opponents with the third hit launching them.
Up Tilt: Toad pulls a sprout from the ground, causing a coin to pop up and damage opponents
Up Smash: Toad throws a headbutt from front to back.
Down Tilt: Toad grows a tiny mushroom in front of himself.
Down Smash: Toad spawns two mushrooms on both sides of himself that grow upwards.
Dash Attack: Toad hops on his head and spins across the stage before throwing a kick. If the button is held, he will spin for a bit longer, and he can change directions while spinning.
Counter: Toad releases a cloud of spores around himself, which can put a mushroom on the opponent's head.
Neutral Aerial: Toad performs a spin in the air, giving him a small boost of upward momentum.
Forward Aerial: Toad throws a flying kick.
Forward Bash: Toad swings his pickaxe downwards, spiking opponents if they are hit with the tip of it.
Back Aerial: Toad does a backflip to hit opponents with his head.
Back Bash: Toad turns around and swings his pickaxe behind him.
Up Aerial: Toad releases a cloud of spores above himself that has a chance to put a mushroom on the opponent's head.
Up Bash: Toad throws an upwards headbutt.
Down Aerial: Toad turns upside down and falls downward, which can spike opponents and bounce him upward.
Down Bash: Toad stomps downwards, which can spike opponents.
Grab: Toad reaches out to grab the opponent with both hands.
Pummel: Toad headbutts the opponent.
Forward Throw: Toad lifts the opponent over his head, where he can then run around the stage while holding them without his weight or movement being affected. If the button is pressed again, Toad will throw the opponent forwards, which can damage others.
Back Throw: Toad lifts the opponent over his head, before throwing them backwards.
Up Throw: Toad throws the opponent into the air and then hits them with an upward headbutt.
Down Throw: Toad throws the opponent on the ground and then jumps on them head-first.
Neutral Special - Spore Shot: Toad puffs up his cheeks before releasing spores on both sides of him that don't deal damage, but will push opponents away. If fully charged, the spores will make opponents dizzy.
Custom 1 - Toxic Shot: Toad's spores will put a poison effect on opponents, but it loses the windbox.
Custom 2 - Fungus Shot: Toad's spores will put a mushroom on the heads of opponents, but it will not make them dizzy.
Side Special - Golden Mushroom: Toad's head transforms into a Golden Mushroom from the Mario Kart series as he dashes forward at high speeds launching opponents in his way. Toad cannot turn around during the dash, and has access to a single jump, but if the special button is pressed again just as the dash ends he will gain another burst of speed. This can be continued as long as the special button is continuously pressed at the right time.
Custom 1 - Dash Mushroom: Toad's head will turn into a regular Mushroom instead. This version can only be used once, but the dash lasts longer and Toad can turn around during it.
Custom 2 - Rotten Mushroom: Toad's head turns into a Rotten Mushroom. This version will damage opponents multiple times before launching them at the end of the dash, but the move is overall slower.
Up Special - Propeller Mushroom: Toad uses a Propeller Mushroom and spins into the air, damaging opponents multiple times before slowly falling back down. If the button is pressed again during this, Toad will fall to the stage like a drill, which can also damage opponents.
Custom 1 - Chopper Mushroom: The move goes higher, but Toad cannot fall like a drill.
Custom 2 - Spinning Mushroom: Toad has more control over where he goes, but the move does not deal any damage.
Down Special - Turnip Toss: Toad pulls out a large turnip to throw, however, unlike Peach, Toad can only jump once while holding one, and the damage is always the same. If Toad falls off a platform or ledge he will drop the turnip, which can still damage opponents if it falls on top of them. If this move is used in midair and Toad is right above the opponent, Toad will grab whoever is underneath him and automatically throw them forward.
Custom 1 - Mushroom Block: Toad pulls out a Mushroom Block instead. These deal more damage than the turnips, but can't be thrown as far.
Custom 2 - POW Block: Toad pulls out a POW Block instead. These don't deal as much damage as the turnips, but will create a shockwave that can damage nearby opponents.
Final Form - 1-Up Mushroom: Toad pulls out a 1-Up Mushroom and eats it, causing him to glow green. In this state his jump height and air mobility are increased, as well as his attacks dealing more damage and knockback
Final Smash - Mega Mushroom: Toad uses a Mega Mushroom to grow to an enormous size, before pulling out a Double Cherry to create a clone of himself. The two Toads then jump up and perform a ground pound, launching all grounded opponents directly upward.
Entrance: A Toad House appears on screen as Toad exists before it disappears into a puff of smoke.
Up Taunt: Toad jumps up and gives a peace sign.
Side Taunt: Toad pulls out a Power Star and examines it, before placing it back in his pocket.
Down Taunt: Toad hops up and down before pumping his fist in the air.
Victory Animation 1: Toad clumsily spins and poses while holding a Green Star.
Victory Animation 2: Toad rides forward in a minecart before jumping out and posing.
Victory Animation 3: Toad sits on top of Toad Brigade ship and waves at the camera.
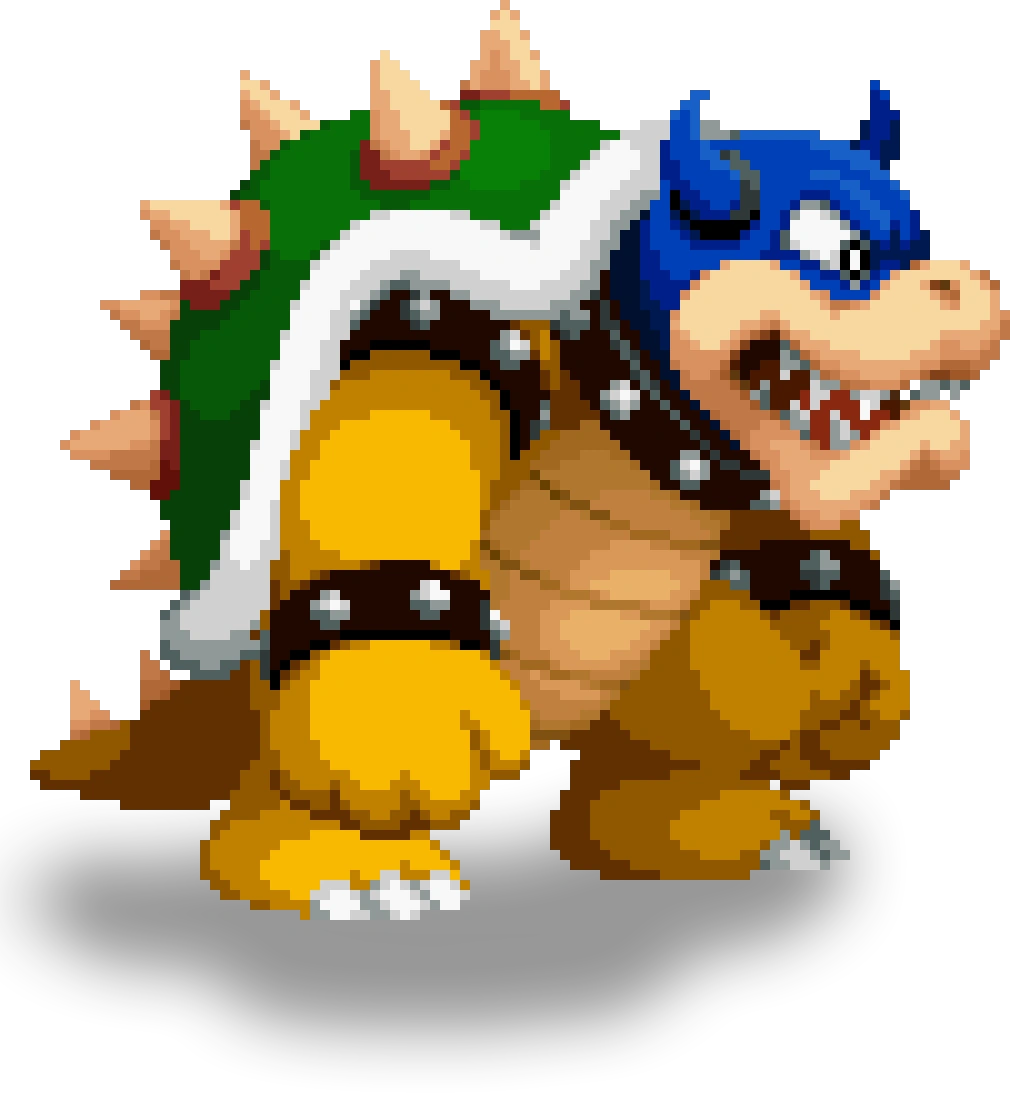
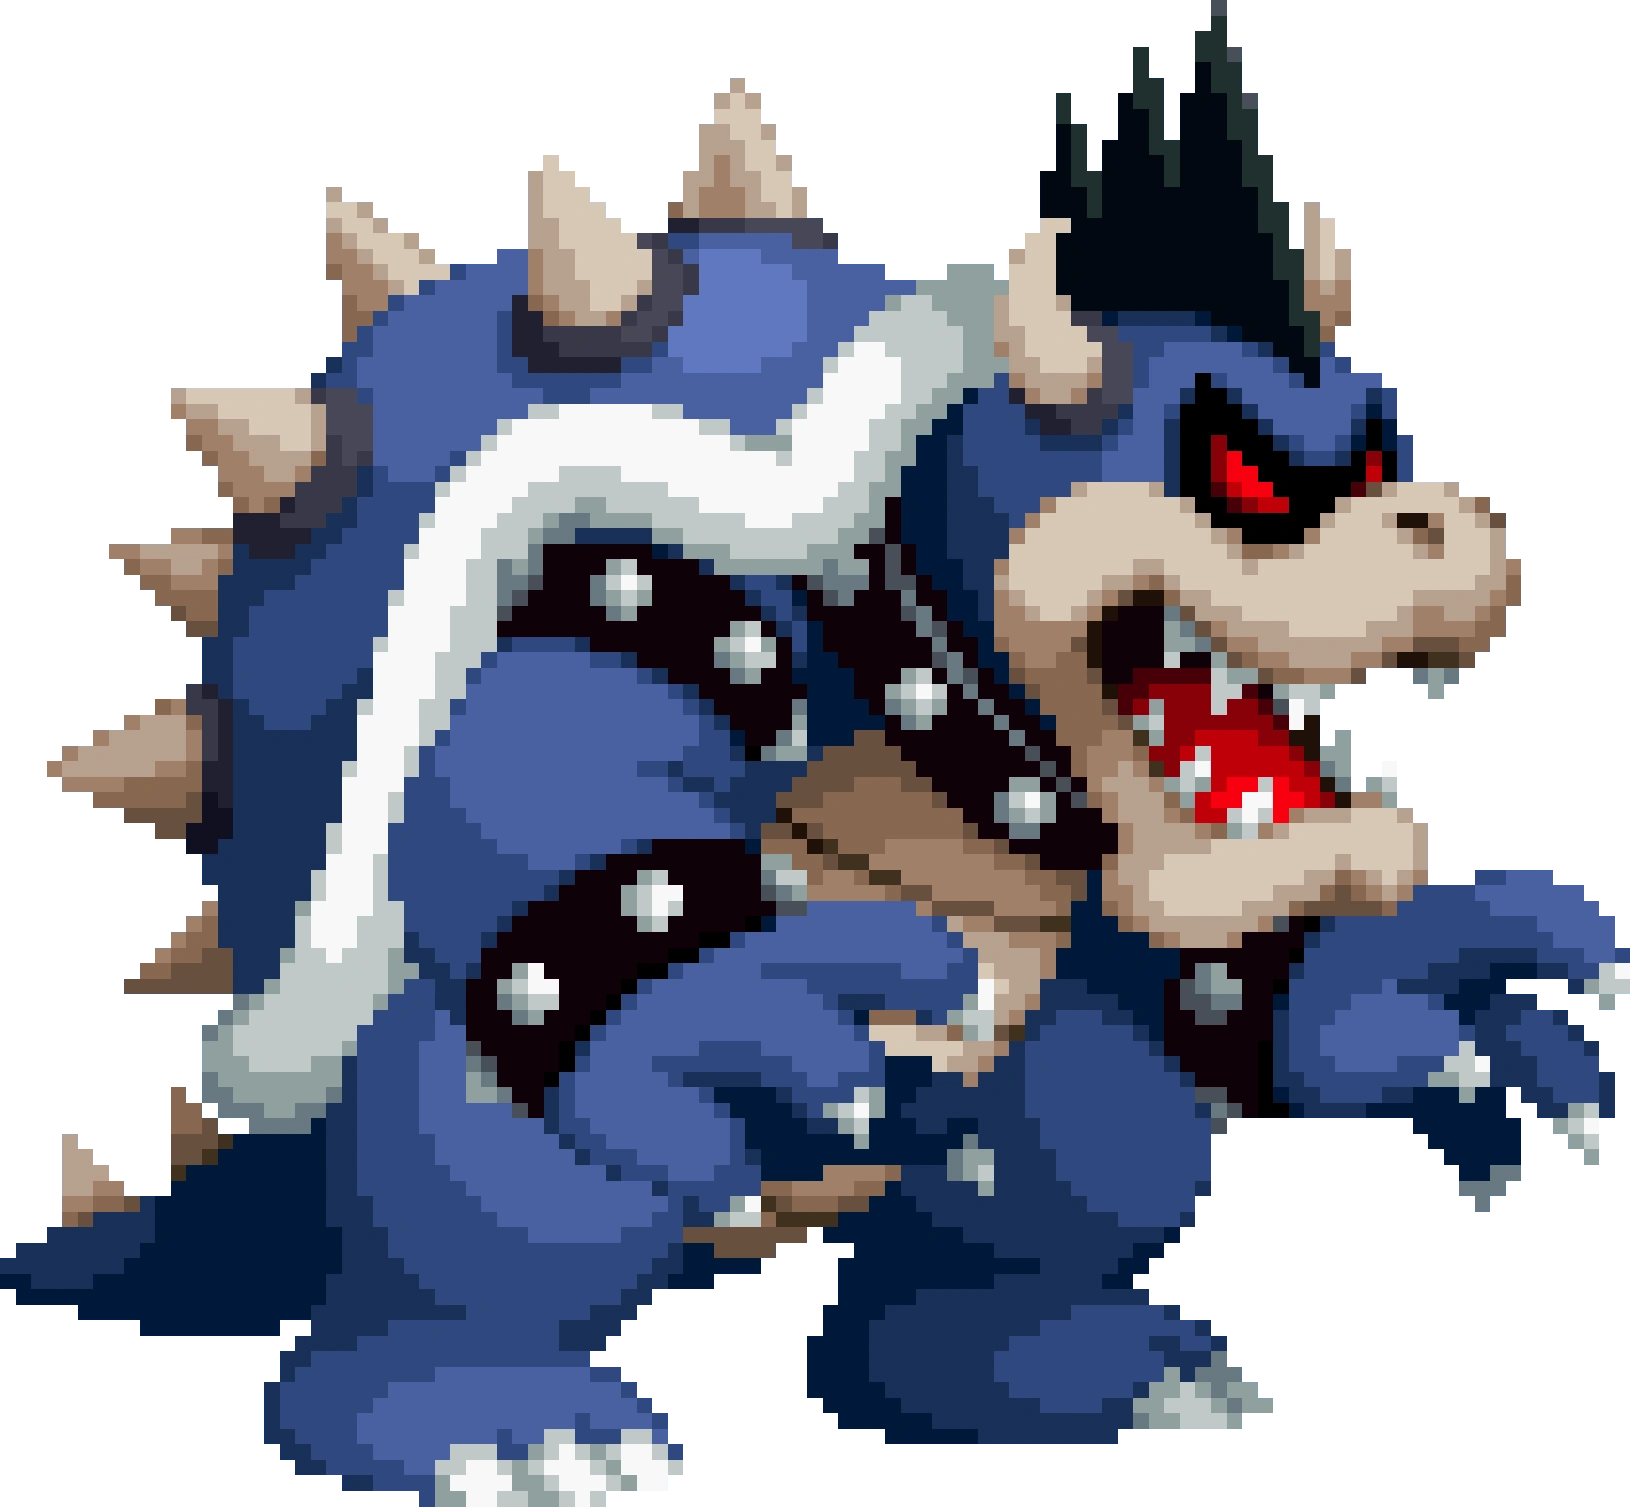
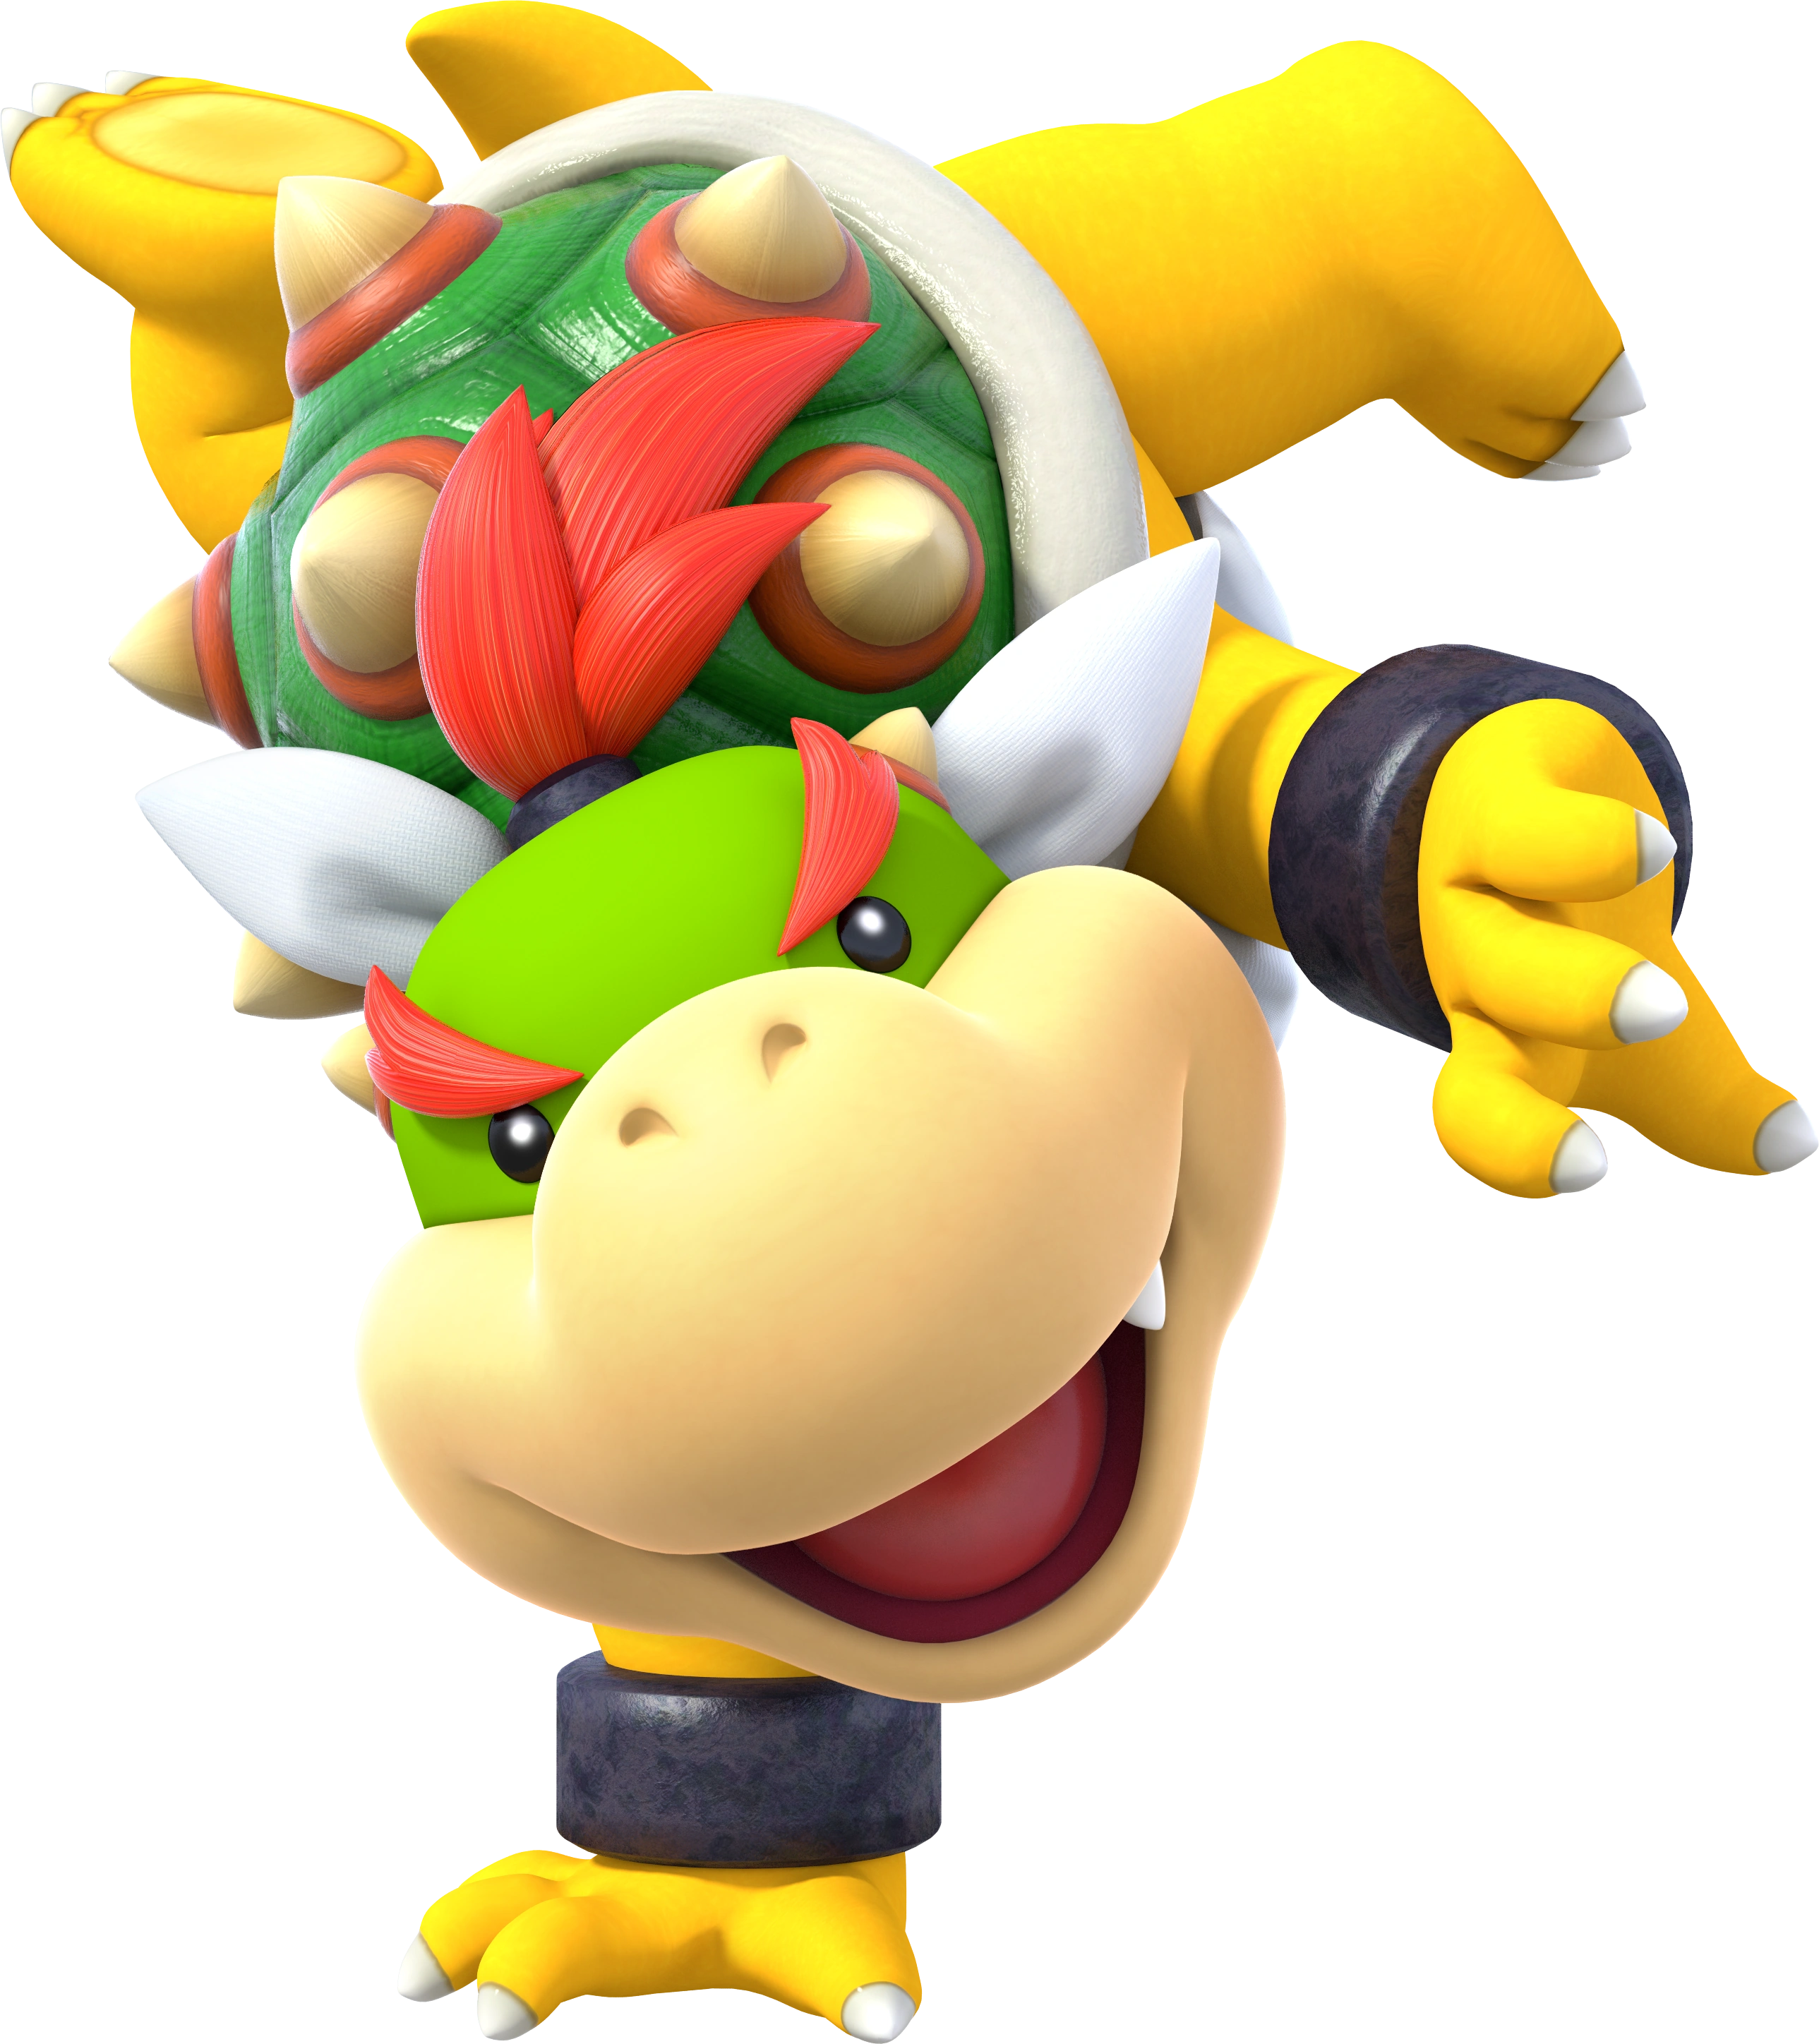
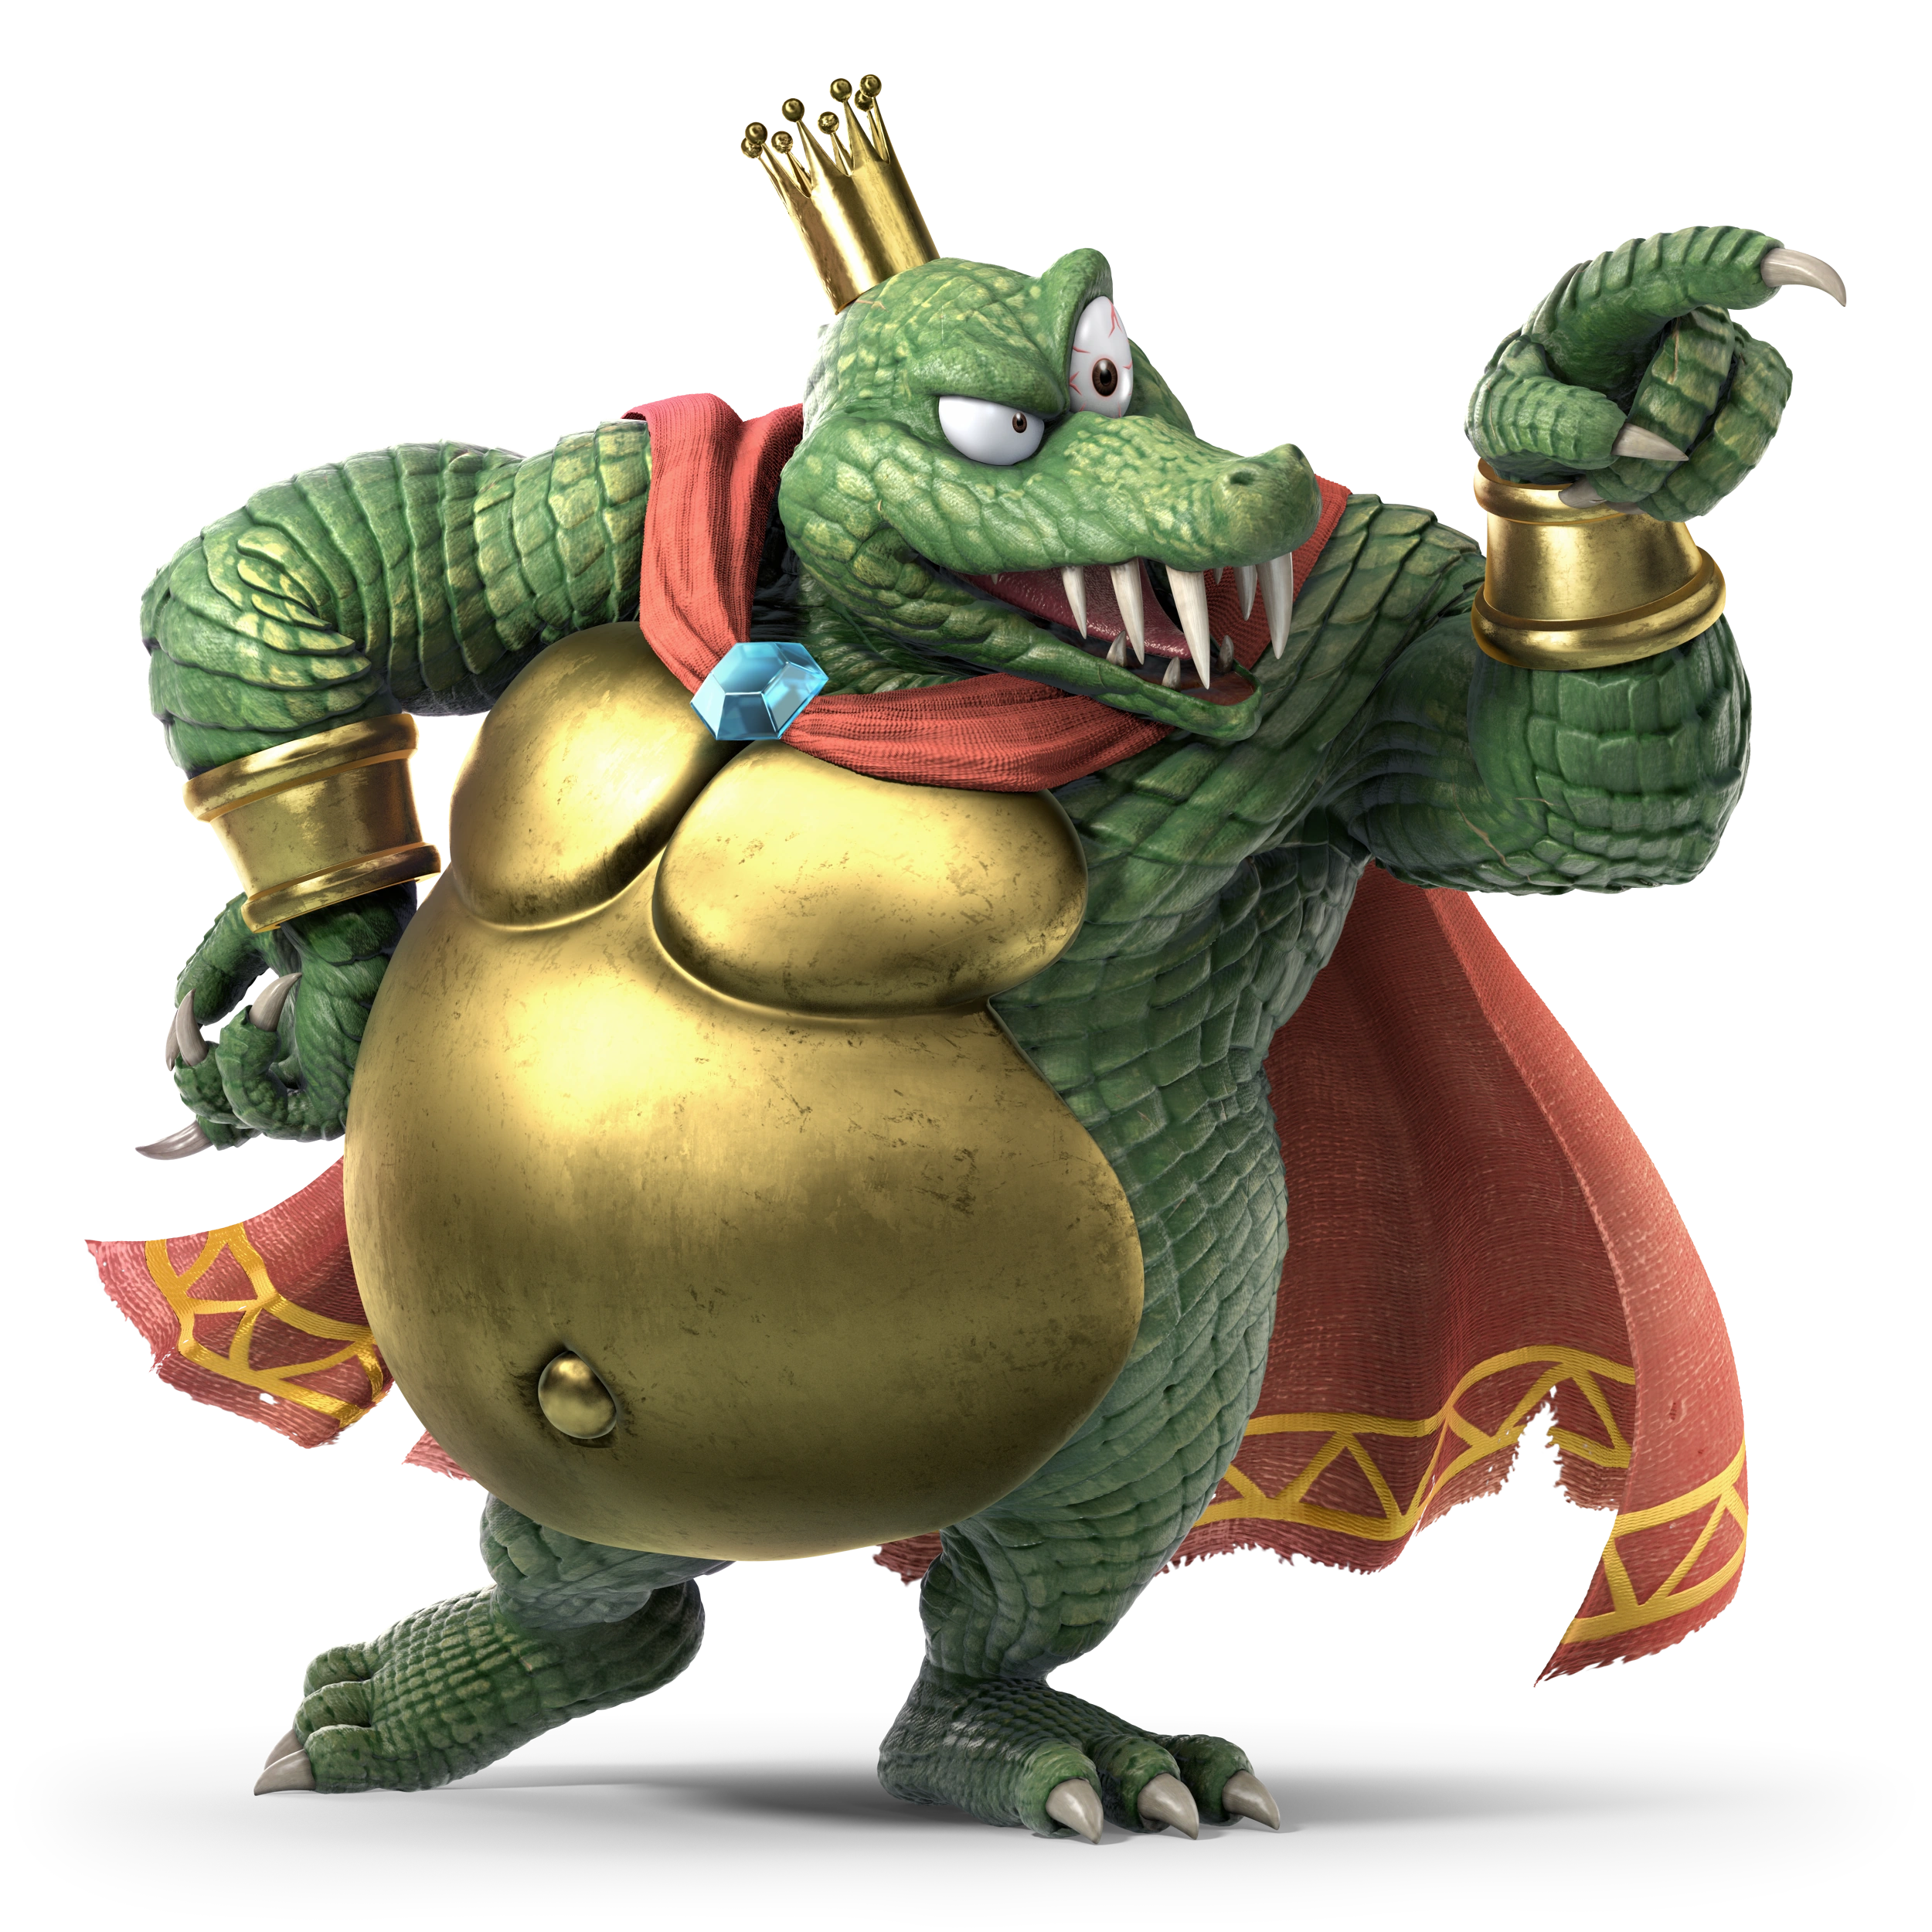
Bowser is the king of the Koopa Troop, and the main antagonist of the Super Mario series. He has appeared as the villain of nearly every game, on his never ending quest to capture Princess Peach, however his plans have been foiled every single time by the Mario Bros. Despite his villainous status, he has teamed up with Mario on more than one occasion, to take on greater evils like Smithy and Fawful. His immense strength, large fireballs, and a flying machine known as the Koopa Clown Car, make him a formidable foe.
Bowser is the single heaviest character in the game, with slow movement speed and powerful attacks. He has an ability known as "Tough Guy", which is a universal super armor that allows him to power through attacks that deal 5% or less without flinching. Additionally, any moves where Bowser enters his shell grant him full invincibility for their duration. The majority of Bowser's moves consist of claw swipes, breathing fire, or utilizing his wide array of minions.
Jab: Bowser slashes twice with his claws before throwing a headbutt. If the attack button is repeatedly pressed, Bowser will rapidly slash in front of him before throwing a punch that launches opponents.
Forward Tilt: Bowser breathes a small stream of flames from his mouth, damaging opponents multiple times before launching them.
Forward Smash: Bowser rears his fist back before throwing a punch. When the move is fully charged, it will create an explosion on impact as well as having the word "Excellent!" appear above Bowser's head.
Up Tilt: Bowser does an overhead swipe with his claws.
Up Smash: Bowser crouches down before jumping up and hitting opponents with the spikes on his shell.
Down Tilt: Bowser swipes along the ground. If the attack button is pressed again he will follow up with a second swipe.
Down Smash: Bowser tucks inside of his shell and spins, damaging opponents multiple times before launching them.
Dash Attack: Bowser throws a body tackle.
Counter: Bowser throws a dropkick.
Neutral Aerial: Bowser tucks inside of his shell and spins.
Forward Aerial: Bowser throws a downward slash with his claws.
Forward Bash: Bowser throws a forward slash with his claws.
Back Aerial: Bowser thrusts his shell behind him.
Back Bash: Bowser throws a dropkick.
Up Aerial: Bowser throws an upwards headbutt.
Up Bash: Bowser does an overhead swing with a hammer.
Down Aerial: Bowser enters his shell and spins downward, damaging opponents multiple times before launching them.
Down Bash:Bowser does a stall-then-fall slam as he falls down and lands on his rear, which can spike aerial opponents and bury grounded ones. This is inspired by an attack that Bowser performs in Super Mario Bros. 3.
Grab: Bowser reaches out to grab the opponent with both hands.
Pummel: Bowser headbutts the opponent.
Forward Throw: Bowser grabs the opponent by the legs and spins them over his head before throwing them forward.
Back Throw: Bowser lifts the opponent over his head and throws them backward.
Up Throw: Bowser throws the opponent upward and enters his shell, spinning to damage the opponent with his spikes.
Down Throw: Bowser drops the opponent on the ground and body slams them.
Neutral Special - Fire Breath: Bowser expels flames from his mouth. If the special button is tapped, Bowser will spit a fireball that travels a short distance and explodes on impact, damaging opponents. If the special button is held, he will shoot a stream of flames that damage opponents multiple times. Both the stream and fireballs can be angled with directional inputs. Use of either variation will make the attack weaker, though it will recharge when not in use.
Custom 1 - Hammer: Bowser throws out a large hammer that travels in an arc. Up to three hammers can be thrown in succession.
Custom 2 - Fiery Rain: Bowser spits a fireball upwards that falls down to the ground and will remain there for a short while. The fire will damage opponents who come into contact with it, and up to two fireballs can be on stage at a time.
Side Special - Flying Slam: Bowser lunges forward to grab an opponent, if the attack lands Bowser will grab the opponent, backflip into the air, and spin while falling to the ground, making an explosion when he lands.
Custom 1 - Koopa Claw: Bowser lunges forward to grab an opponent, if the attack lands Bowser will grab the opponent, where he can then bite them, throw them forwards or backwards, or slam them into the ground.
Custom 2 - Vacuum Block: Bowser begins to inhale, creating a vortex in front of him that will suck in anything and anyone nearby. If an opponent is sucked into his mouth, Bowser can either bite down on them, or spit them out forwards or backwards.
Up Special - Koopa Clown Car: Bowser enters his Koopa Clown Car and begins to fly upwards, damaging opponents with the propellers multiple times before launching them. While flying, he can move left and right, and can rise higher if the special button is tapped repeatedly, before he falls into a helpless state.
Custom 1 - Whirling Fortress: Bowser enters his shell and begins spinning around, damaging opponents multiple times before launching them. While spinning, he can move left and right. If used in midair, Bowser rises upward, and can rise higher if the special button is tapped repeatedly, before he falls into a helpless state.
Custom 2 - Koopa Slam: Bowser leaps high into the air before slamming down on the ground, creating a shockwave that travels outward, damaging opponents who touch it.
Down Special - Minion Toss: Bowser pulls out one of his minions and tosses them forward. There are five different kinds of minions, each functioning differently. If the special button is tapped, Bowser throws out a random minion, but if the special button is held down, a menu will appear where a specific minion can be selected to bring out. Only two minions can be out at a time. The minions that Bowser can use include:
Goomba: The Goomba will slowly waddle forward until it is KOd or falls off of the stage. If an opponent is near, the Goomba will charge towards them, dealing moderate damage and knockback. The Goomba can be defeated by attacking it or jumping on its head.
Koopa Troopa: The Koopa Troopa will trot forward until it is KOd or falls off of the stage. If an opponent is near, the Koopa Troopa will lunge forward and attack. If the Koopa Troopa is attacked, it will retreat into its shell, which can then be picked up and thrown.
Koopa Paratroopa: The Koopa Paratroopa will stay in the spot it was summoned while flying up and down. If an opponent enters its line of sight, it will fly towards them and attack. The Koopa Paratroopa can be defeated by attacking it, however, if it is jumped on, it will lose its wings and become a regular Red Koopa Troopa. In this state, the Red Koopa Troopa will walk forward, turning around once it reaches the edge of a platform or the stage. If an opponent is nearby, the Red Koopa Troopa will lunge forward and attack. If they are attacked in this state, they will retreat into their shell, which can then be picked up and thrown.
Buzzy Beetle: The Buzzy Beetle will walk forward until it is KOd or falls off of the stage. Due to its hard shell, the Buzzy Beetle is immune to all projectiles, and can only be KOd using physical attacks or throws. If the Buzzy Beetle is jumped on, it will retreat into its shell, which can then be picked up and thrown.
Spiny: The Spiny is initially thrown in an arc, which can damage opponents, before beginning to walk forward until it is KOd or falls off of the stage. The Spiny cannot be jumped on or grabbed due to the spikes on its shell, so it must be dealt with using physical attacks.
Custom 1 - Mini Minion Toss: Bowser can have four minions out at a time, however, they are smaller and deal less damage.
Custom 2 - Mega Minion Toss: Bowser can only have one minion out at a time, however, they are larger and deal more damage, as well as requiring more damage to KO.
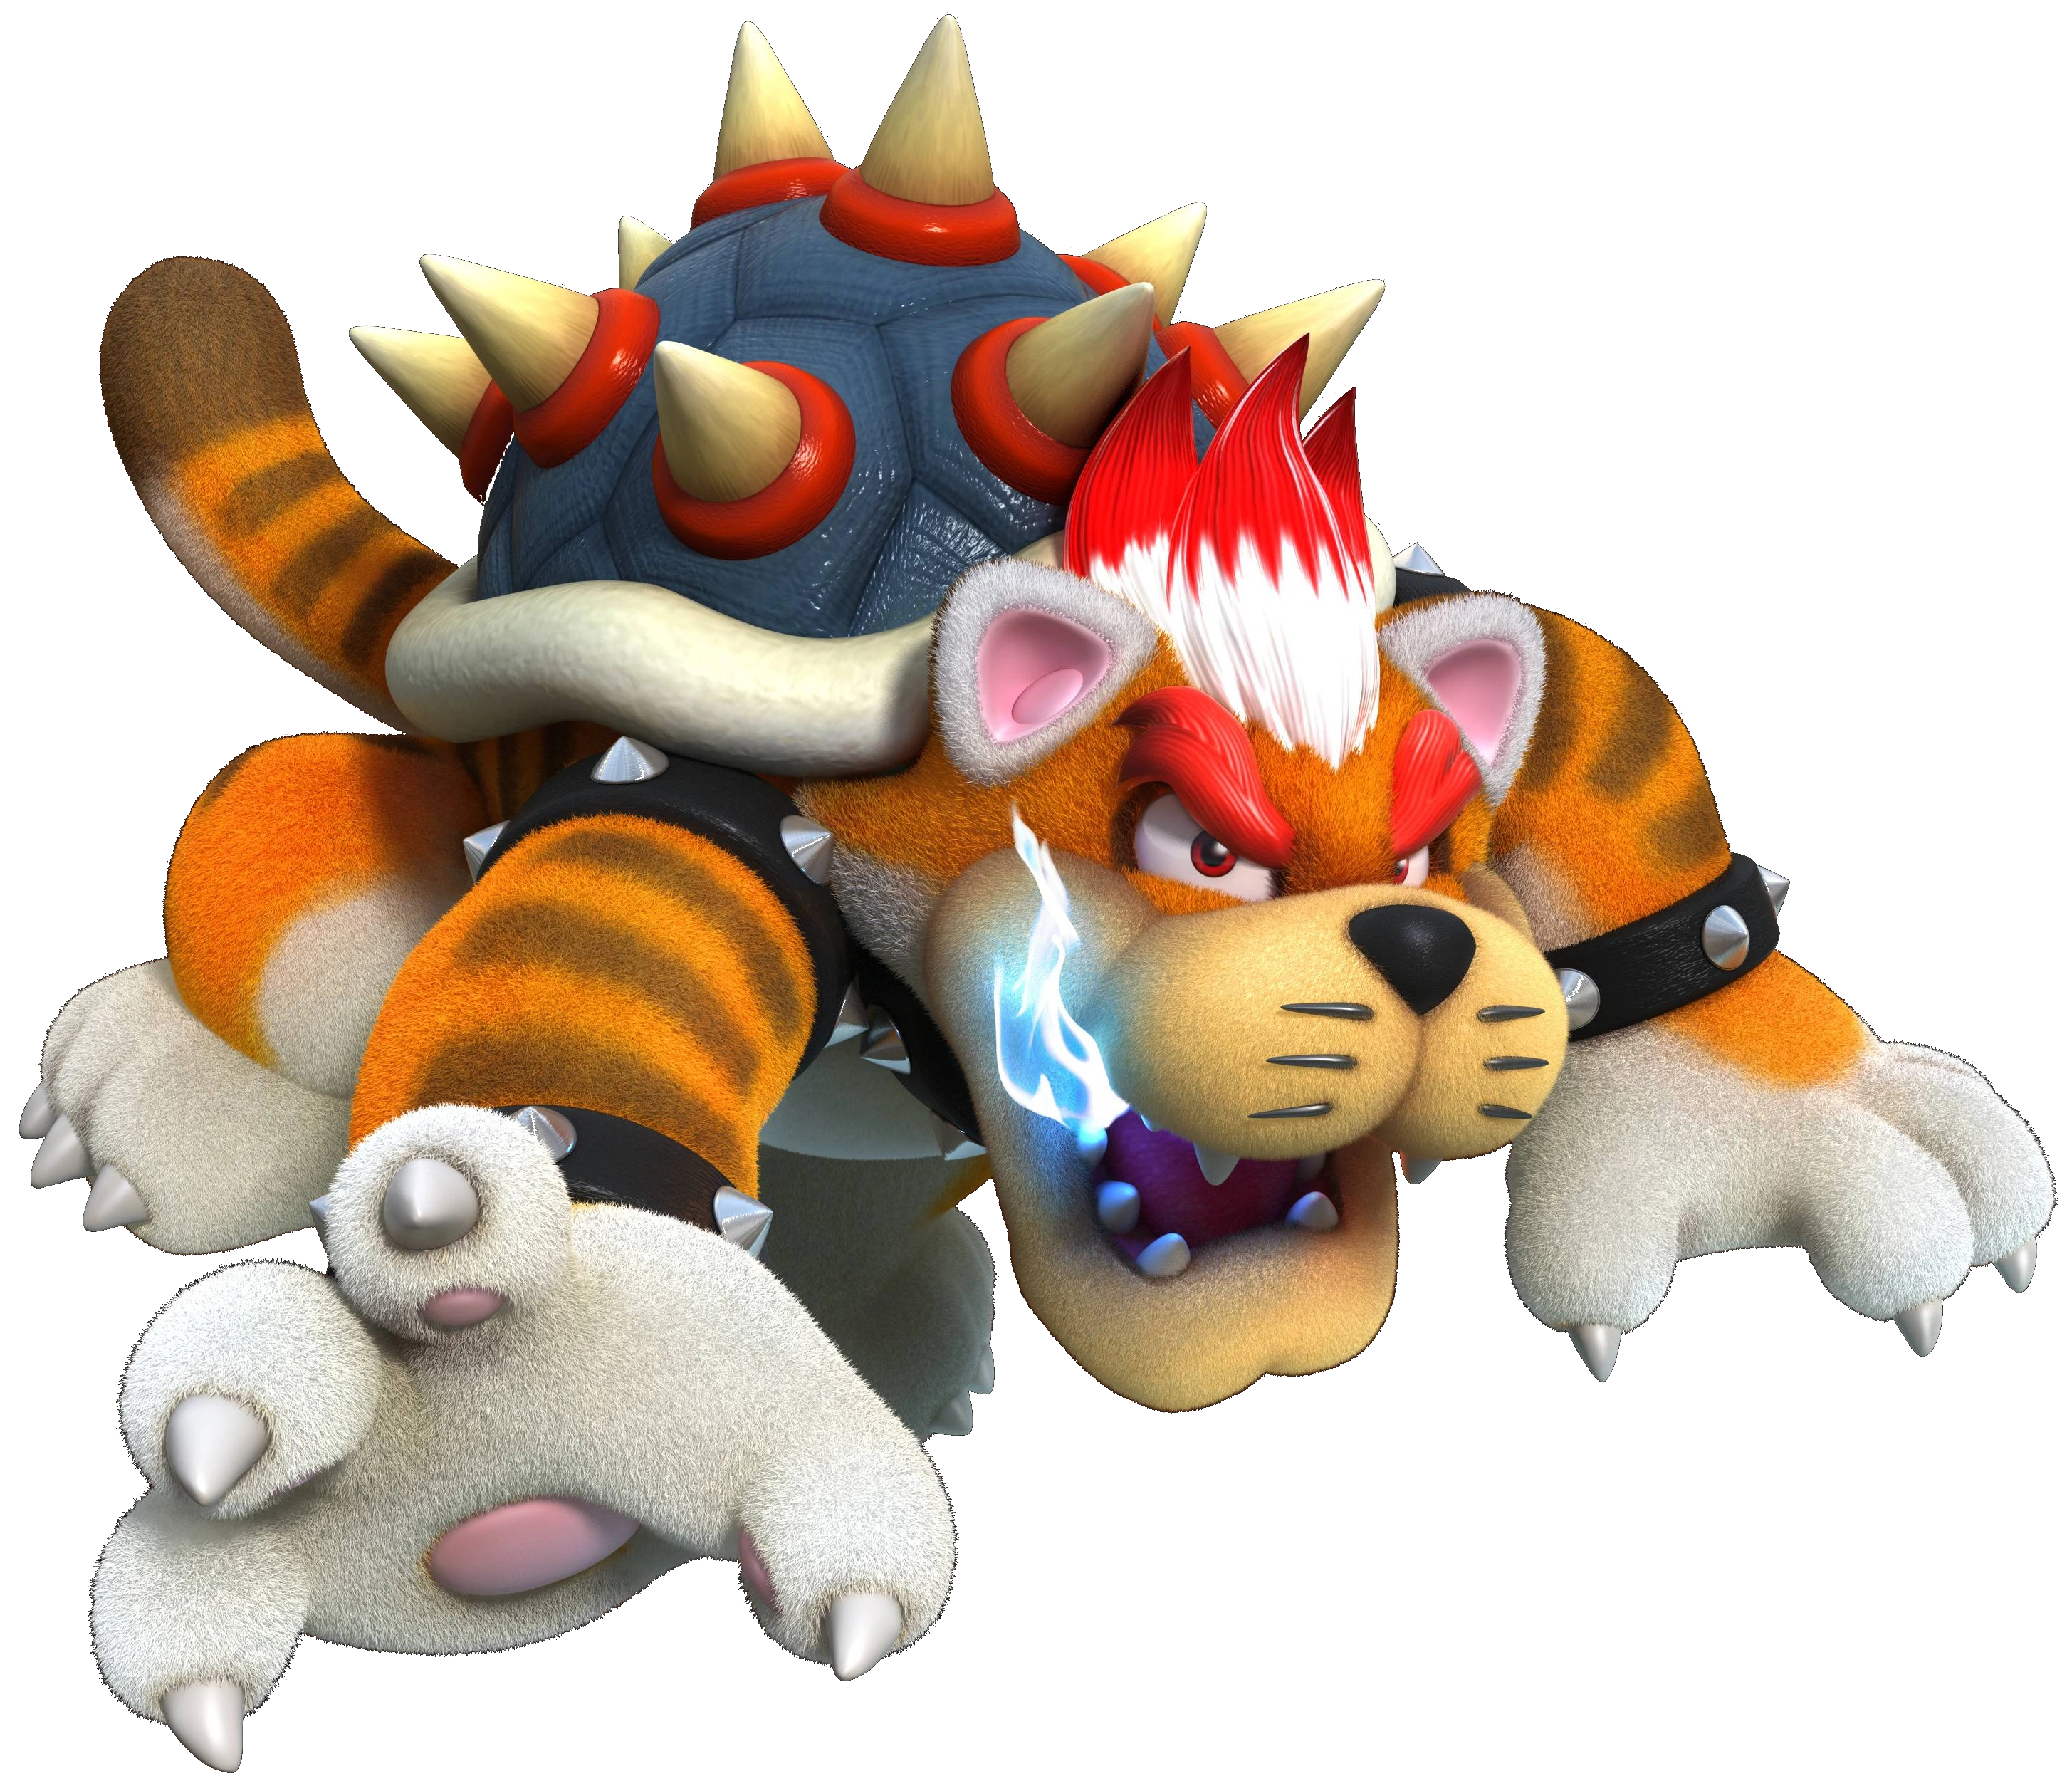
Final Form - Dreamy Bowser: Bowser transforms into Dreamy Bowser, gaining a rainbow coloration. In this state, his attacks have much larger range and deal more damage, with many of his attacks being enhanced with different effects. He can also run faster and jump higher.
Final Smash - Giga Bowser: Bowser transforms into Giga Bowser and teleports behind the stage while growing to a massive size. He then throws a punch, which can be aimed with directional inputs. Opponents over 100% damage will be instantly KOd. After this, he returns to the stage and reverts to his normal state.
Entrance: An airship appears in the background, where Bowser jumps off and onto the stage while saying "Showtime!".
Up Taunt: Bowser pounds his fist into his hand twice while growling.
Side Taunt: Bowser laughs menacingly.
Down Taunt: Bowser crosses his arms and smirks.
Victory Animation 1: Bowser runs towards the screen and slashes with his claws twice.
Victory Animation 2: Bowser stomps the ground and assumes a fearsome pose while roaring.
Victory Animation 3: Bowser blows a stream of fire before crossing his arms and saying "I rule!".
Can Crawl: Yes.
Can Wall Jump: No.
Can Wall Cling: No.
Footstool: If Bowser is footstooled while crouching the opponent will take 10% damage, due to the spikes on his shell damaging them.
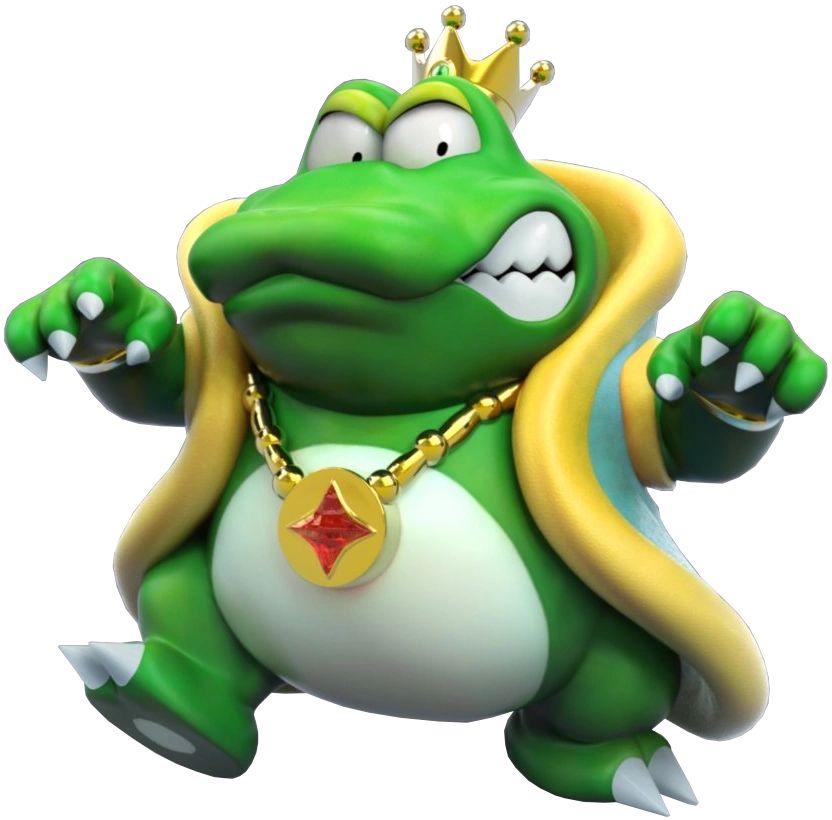
Wart is the main antagonist of Yume Kōjō: Doki Doki Panic, which was retooled into Super Mario Bros. 2 for its western release. He is a large frog who invaded the dream world of Subcon and took control of their Dream Machine, which resulted in the natives, known as Subcons, having to contact Mario, Luigi, Princess Peach, and Toad in order to help them stop Wart. Eventually he was defeated by the quartet, who took advantage of his weakness to vegetables, and he has not been seen since, except for, oddly enough, The Legend of Zelda: Link's Awakening and its remake on the Nintendo Switch.
Wart is a heavyweight and slow fighter, with an impressive jump height due to his amphibian nature. Several of his attacks revolve around him biting or using items from his game of origin. Uniquely, most attacks will only deal 0.4x the knockback against Wart. However, when he opens his mouth, which happens in several of his attacks, he will instead take 1.7x the amount of knockback the attack would have done normally.
Jab: Wart throws a palm strike followed by a punch.
Forward Tilt: Wart throws a backhand punch.
Forward Smash: Wart opens his mouth and blows a bubble, with it popping once the move is released. Grounded opponents damaged by the bubble will be put to sleep, while aerial opponents suffer light knockback.
Up Tilt: Wart jumps up and throws an upwards headbutt.
Up Smash: Wart pulls out a bomb and tosses it upwards in an arc, where it will explode on impact. Charging the move will increase the distance that the bomb is thrown, and directional inputs can be used to angle the trajectory of it.
Down Tilt: Wart bites forward.
Down Smash: Wart puffs out his stomach before leaping up and slamming down on the ground, which can bury opponents.
Dash Attack: Wart lunges forward and bites.
Counter: Wart puffs out his stomach and body slams the opponent.
Neutral Aerial: Wart does an aerial cartwheel.
Forward Aerial: Wart throws a flying kick.
Forward Bash: Wart throws a downward slash.
Back Aerial: Wart throws a dropkick.
Back Bash: Wart turns around and throws a punch.
Up Aerial: Wart lunges upwards and bites.
Up Bash: Wart blows a bubble above himself.
Down Aerial: Wart bites downwards, which can spike opponents.
Down Bash: Wart throws a bomb downward.
Grab: Wart reaches out to grab the opponent.
Pummel: Wart headbutts the opponent.
Forward Throw: Wart shoves the opponent forward with his stomach.
Back Throw: Wart spins around with the opponent in tow and throws them backward.
Up Throw: Wart heaves the opponent upward.
Down Throw: Wart slams the opponent into the ground and stomps on them.
Neutral Special - Bubble Breath: Wart opens his mouth and begins charging. The charge can be cancelled and stored by shielding. If the special button is pressed again or the move reaches full charge, Wart will spit up to eight bubbles which fly forward at gradually decreasing distances and arcs, damaging opponents they hit. The bubbles can also neutralize projectiles.
Custom 1 - Bubble Bombs: The bubbles don't travel as far and can't neutralize projectiles, but they will explode on impact and deal more damage.
Custom 2 - Rotten Bubbles: The move takes longer to charge, but the bubbles can place a mushroom on opponents' heads.
Side Special - Egg Shot: Wart opens his mouth and spits a fast-travelling egg that flies in a straight line. These eggs are solid, and can be stood on top of like platforms as they fly forward. They can also be grabbed out of the air and thrown back at Wart. The move can be charged, allowing him to spit up to five eggs in rapid succession. They don't deal much knockback, but combined they can deal a good chunk of damage. The charge can also be cancelled and stored by pressing the special button.
Custom 1 - Boiled Egg Shot: Wart can only ever spit one egg, and it travels much less distance. However, it will explode on impact and deals much more damage, especially the closer the opponent is to Wart. These eggs can still be used as platforms, however, they cannot be grabbed and thrown.
Custom 2 - Shocking Egg Shot: Wart only fires one egg and it cannot be charged. However, it is electrically-enhanced and can inflict paralysis on opponents. These eggs cannot be stood on top of or grabbed.
Up Special - Pidgit's Carpet: Wart hops on a magic carpet. In this state, he can float freely through the air for a short time before it disappears or he is hit off of it and he falls into a helpless state. While on the carpet, he can use any of his ground or special attacks, and the move can be cancelled by touching a ledge or the ground.
Custom 1 - Magic Carpet: Wart has super armor while riding the carpet, and cannot be knocked off of it. However, he cannot travel as fast.
Custom 2 - Soaring Carpet: The carpet will move upward automatically. Wart also cannot attack, but he will damage any opponents he hits. This makes it function as a traditional recovery move.
Down Special - Dream Machine: Wart summons the Dream Machine, which appears behind him and fires out a random vegetable that flies forward. These vegetables deal decent damage, but if timed correctly they can be grabbed out of the air by opponents and thrown.
Custom 1 - Daydream Machine: The vegetables can be fired in rapid succession, but they are smaller and deal less damage.
Custom 2 - Nightmare Machine: The vegetables will put a poison effect on opponents, but don't travel as far.
Final Form - Bubbly Wart: Wart blows a giant bubble around himself, which pops, causing him to glow blue and have bubbles emitting from him. In this state, Wart is much faster, his defense against attacks is greatly increased, and he can jump higher.
Final Smash - Robirdo: Wart charges forward. If an opponent is hit, they are locked in a cinematic where Robirdo appears, and Wart jumps inside. Robirdo fires a giant egg, launching the opponent into Wart's throne room, where Mouser is waiting with a bomb in his hand. Mouser places the bomb down and plugs his ears, with the bomb exploding just as the opponent lands there, launching both them and Mouser.
Entrance: Wart bursts out of a red door, laughing maniacally.
Up Taunt: Wart stands proud, grinning.
Side Taunt: Wart blows a bubble with his mouth before it pops, startling him.
Down Taunt: Wart pulls out a random vegetable and crushes it in his hand.
Victory Animation 1: Wart spins a turnip on his finger before dropping it on the ground and crushing it with his foot.
Victory Animation 2: Wart stomps the ground and poses triumphantly, shouting "I am the great Wart!"
Victory Animation 3: Birdo, Mouser, Fryguy, Clawgrip and Tryclyde are all carrying Wart while he's sitting on his throne, who laughs before flipping his cape.
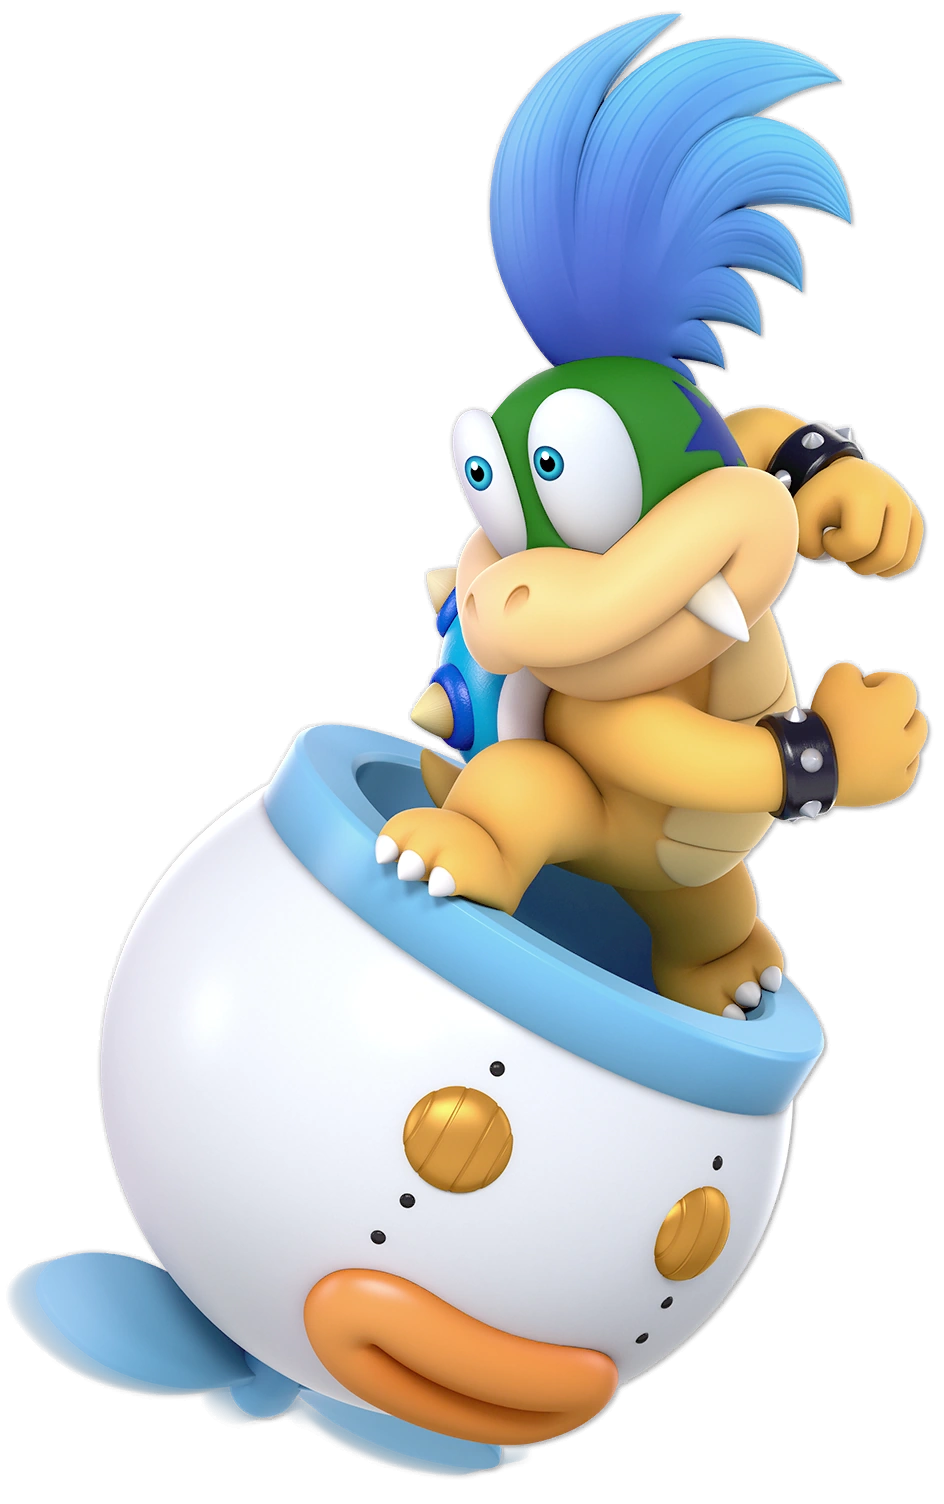
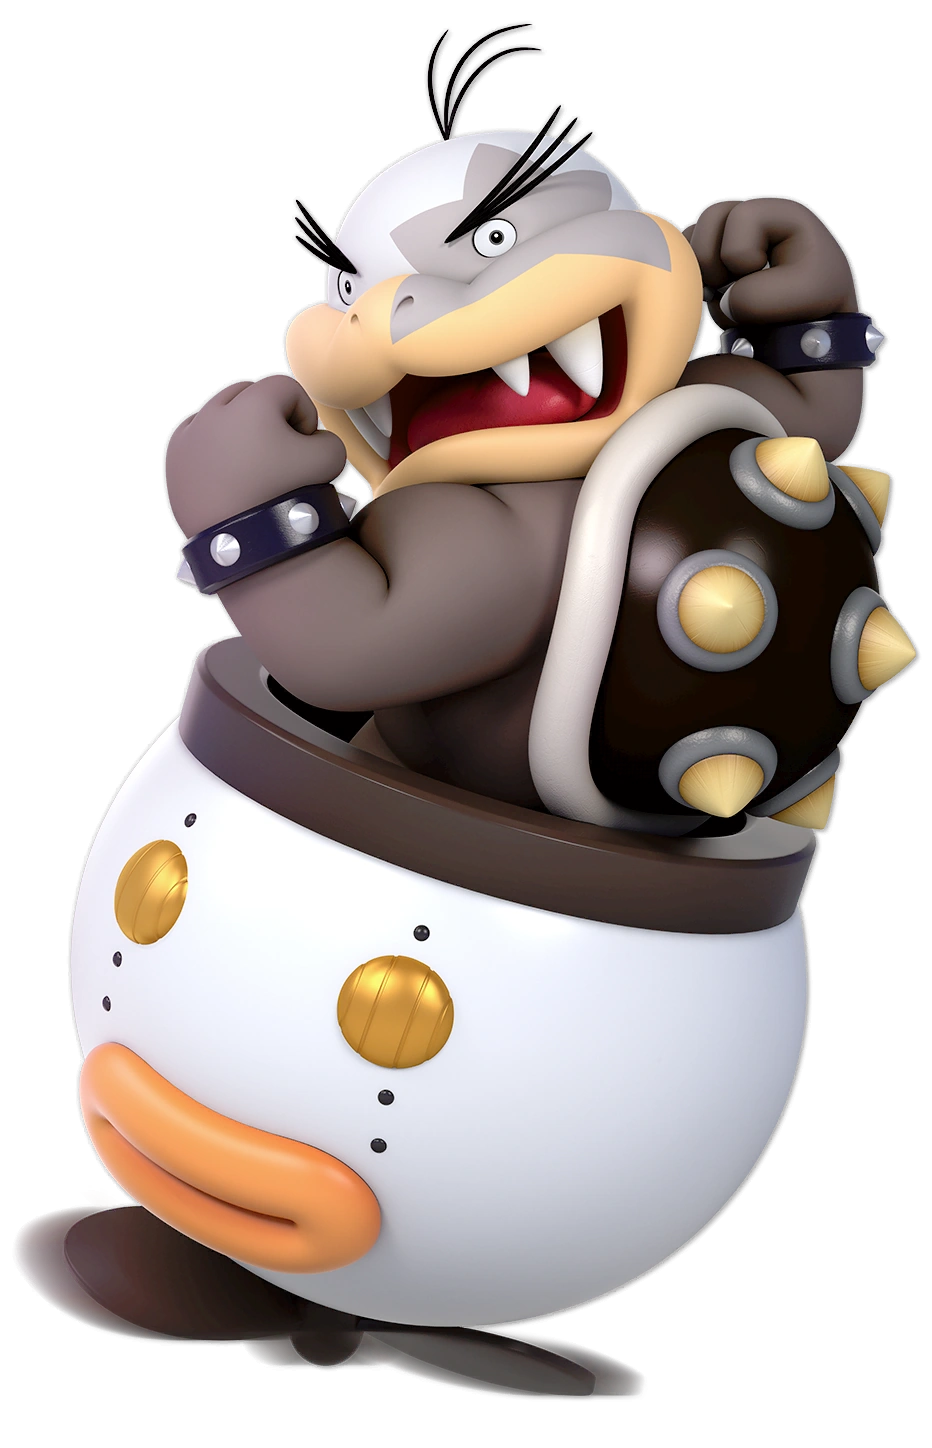
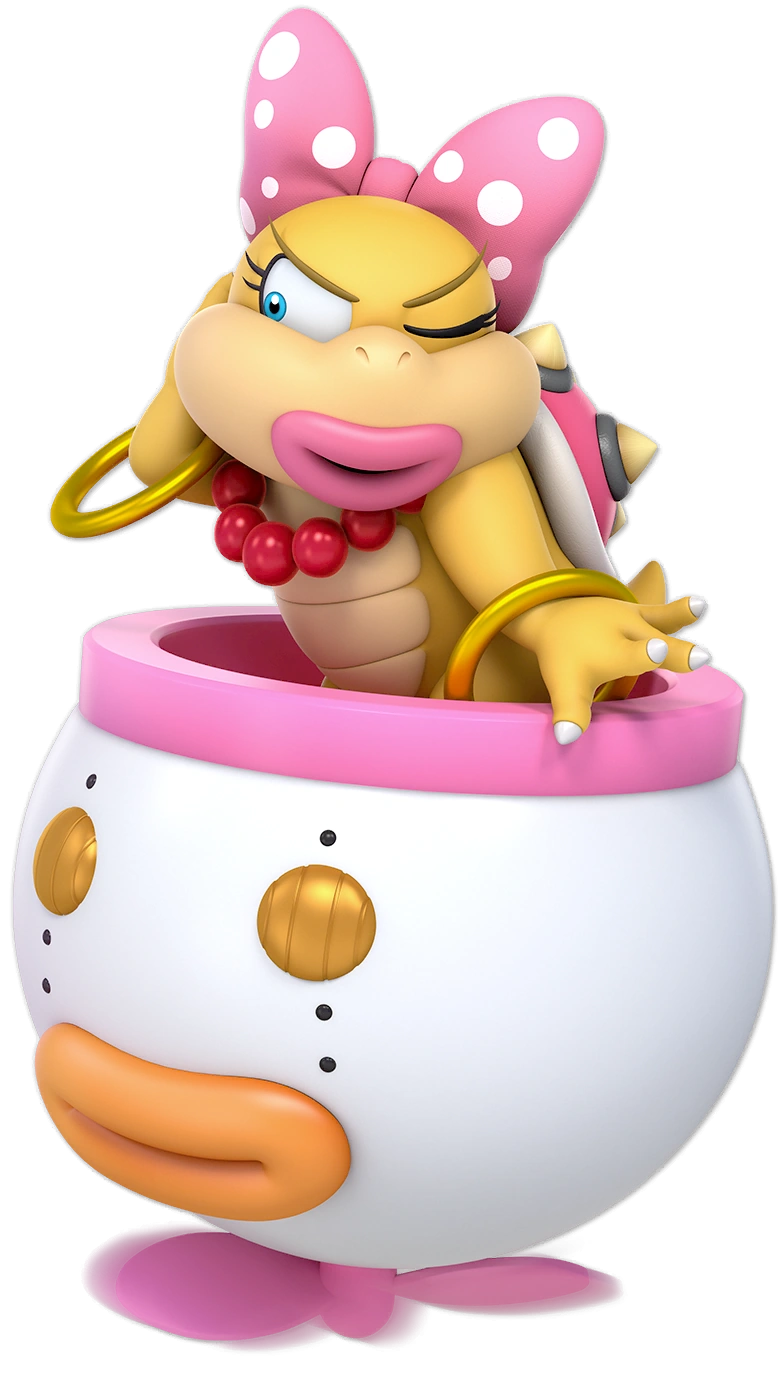
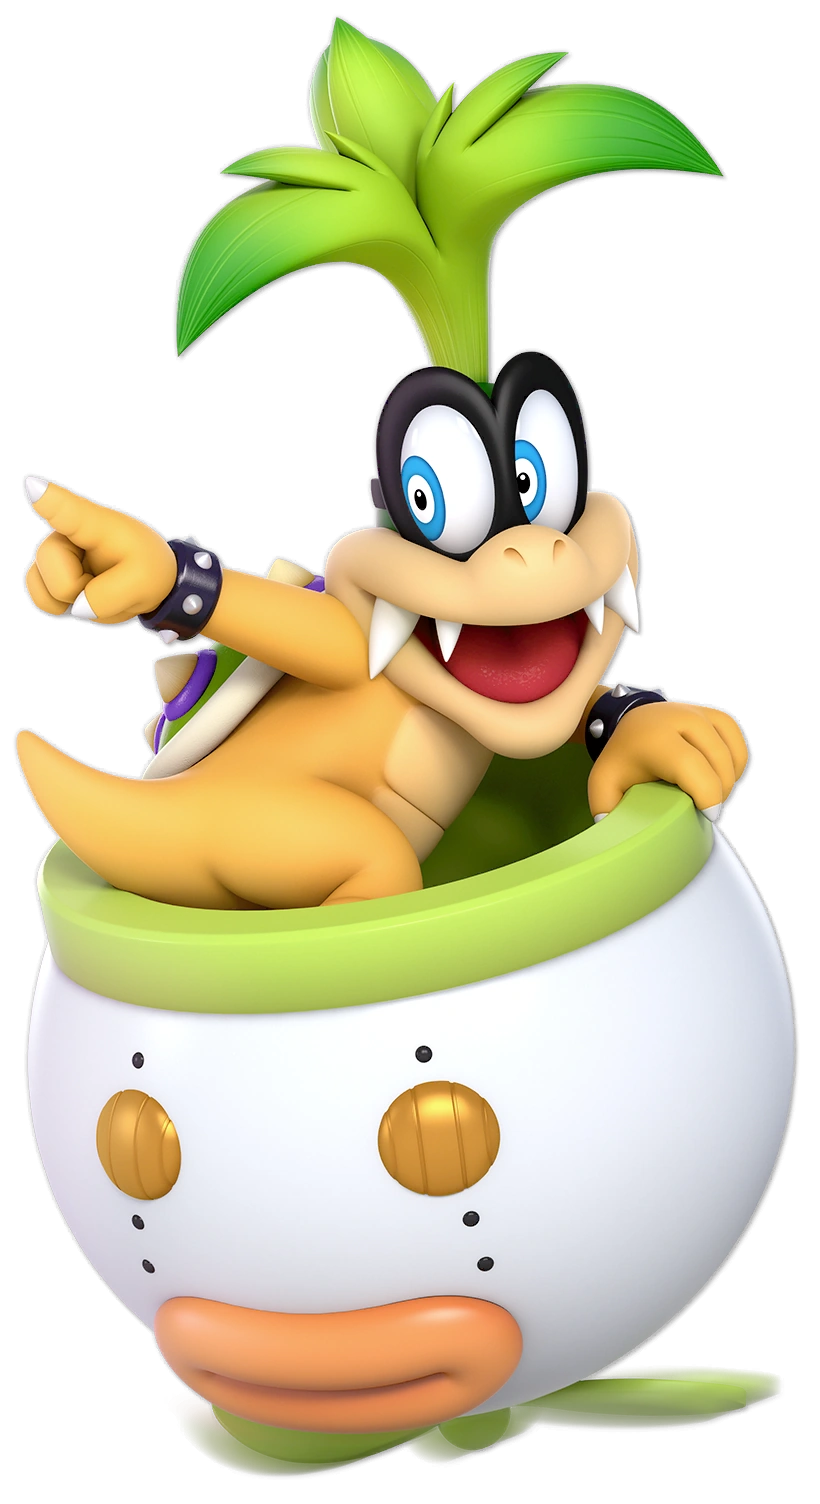
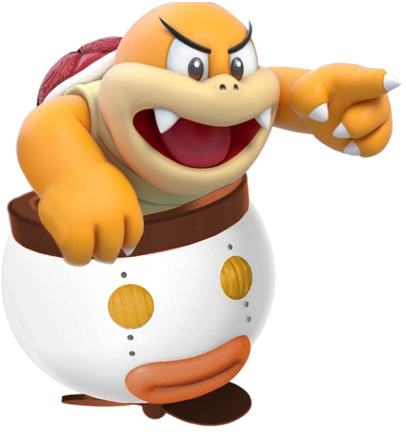
The Koopalings are a group of recurring villains throughout the Super Mario series. They are the seven siblings that all work for Bowser, and frequently attempt to stop Mario in his tracks. All seven of them are named after a famous musician, and contrary to popular belief, they are not Bowser's children, but are simply servants to him. They first appeared in Super Mario Bros. 3, and went on to reappear in Super Mario World. For a while after that, they were missing in action, before finally making their return in New Super Mario Bros. Wii, and since then they have begun to appear in spinoffs such as the Mario Kart series. The group consists of Larry; the youngest as well as the leader, Morton; the strong and grouchy one, Wendy; the female Koopaling who is very tomboyish and bratty, Iggy; the hyperactive and crazy one, Roy; the bully of the group, Lemmy; the naive and innocent one, and Ludwig; the eldest and most intelligent of the Koopalings.
The Koopalings are heavyweight fighters who battle within the confines of the Jr. Clown Car, using a wide array of gadgets as well as various moves seen in their boss fights throughout the Super Mario series. The Koopalings can also temporarily float in midair by holding up on the control stick after jumping. Additionally, they have a unique attribute where attacks that hit the Jr. Clown Car will deal 0.5x the damage, as well as universal super armor; attacks that deal 20 units or less of knockback that hit the Jr. Clown Car will not make the Koopalings flinch.
Jab: The Jr. Clown Car throws a one-two punch combo with boxing gloves before following up with a flurry of punches, finishing off with an uppercut.
Forward Tilt: The Koopaling launches a blue fireball out of their wand, Larry's signature attack, that travels forward a short distance before disappearing.
Forward Smash: The Jr. Clown Car uses two drills to drill the opponent in place, damaging them multiple times before launching them. If the attack button is held, the Koopaling will continue drilling the opponent, though they will eventually be knocked out of the attack.
Up Tilt: The Koopaling tosses one of Wendy's Candy Rings into the air, damaging opponents multiple times before launching them.
Up Smash: The Koopaling performs a handstand to attack with the Jr. Clown Car's spinning propellers. The attack has a windbox and vacuumbox; the former pushes opponents above the Koopaling upwards while the latter pulls opponents near them into the attack.
Down Tilt: The Jr. Clown Car uses its tongue to lick opponents, damaging them three times. If used near a food item, it will have 1.7x the healing effect.
Down Smash: A Chain Chomp appears, attached to the Jr. Clown Car by a chain. The Chain Chomp then runs circles around the car, hitting opponents on both sides before disappearing.
Dash Attack: The Jr. Clown Car transforms into a large rubber ball, with the Koopaling running on top as it rams into opponents, damaging them multiple times before they are launched.
Counter: The Jr. Clown Car opens its mouth as a boot swings out.
Neutral Aerial: The Jr. Clown Car spins around with its boxing gloves extended.
Forward Aerial: The Jr. Clown Car swings a wrecking ball downwards.
Forward Bash: The Koopaling does a downwards swing with Morton's giant hammer, which can spike opponents.
Back Aerial: The Jr. Clown Car turns around and opens its mouth to reveal a Burner, which shoots flames forward, damaging opponents multiple times before launching them.
Back Bash: The Jr. Clown Car turns around and swings a wrecking ball backward.
Up Aerial: The Koopaling enters their shell and spins, damaging opponents multiple times before launching them.
Up Bash: The Koopalilng swings their wand overhead.
Down Aerial: The Jr. Clown Car extends a drill from its underside and drills opponents, damaging them multiple times before launching them.
Down Bash: Two Bill Blasters appear on both sides of the Jr. Clown Car and fire Bullet Bills downward that explode on impact.
Grab: The Jr. Clown Car extends a metal claw forwards.
Pummel: The Koopaling hits the opponent with their wand.
Forward Throw: The Jr. Clown Car uppercuts the opponent with a boxing glove.
Back Throw: The Jr. Clown Car swallows the opponent. Afterwards, they are launched out of a cannon that extends from behind.
Up Throw: The Jr. Clown Car flings the opponent upwards.
Down Throw: The Jr. Clown Car throws the opponent onto the ground and extends a drill from its underside to drill them.
Neutral Special - Clown Cannon: The mouth of the Jr. Clown Car opens to reveal a cannon, which fires a cannonball forward. It can be charged by holding the special button, the Koopaling can uniquely move back and forth and even jump and float while charging, but not change direction. The cannonball's speed, strength, and distance are increased depending on how long the move is charged, and it also deals a lot of shield damage.
Custom 1 - Bullet Bill: Instead of firing a cannonball, the cannon fires a Bullet Bill that travels faster. It doesn't explode on impact, but passes through opponents instead.
Custom 2 - Fire Cannon: Instead of firing a cannonball, shoots out a fireball that flies forward and explodes on impact, damaging opponents multiple times before launching them.
Side Special - Mechakoopa: A hatch on the Jr. Clown Car opens as a Mechakoopa tumbles out of it. Afterwards, it will begin moving around the area and explode shortly afterwards. The Koopaling can also pick it up and throw it as an item, exploding on impact after being thrown. The Mechakoopa can come in two sizes depending on if the special button is tapped or held; tapped will drop a smaller Mechakoopa while held will drop a larger one. The smaller ones can trip up opponents they touch and explode on them, while the larger ones will pass through opponents and need to be thrown at them. Up to three Mechakoopas can be on-stage at once.
Custom 1 - Blasta Mechakoopa: The Mechakoopas only come in one size, but they are red and fire missiles that hone in on opponents.
Custom 2 - Zappa Mechakoopa: The Mechakoopas only come in one size, but they are blue and fire a wide and long ranged laser beam that damages opponents multiple times before launching them.
Up Special - Abandon Ship!: The Koopaling ejects themselves out of the Jr. Clown Car as it falls down. While in the air, they enter a unique helpless state where they have two attacks; pressing the attack button will have the Koopaling swing their wand sideways to damage opponents, and pressing the special button will have them swing it downwards to spike opponents. After landing or grabbing a ledge, another Jr. Clown Car will spawn under them. The Jr. Clown Car that the Koopaling ejected from can be picked up and used as an item, exploding on impact after being thrown. Otherwise, it will explode on its own after five seconds.
Custom 1 - Self-Destruct: Instead of leaping out of the Jr. Clown Car, it will explode, sending the Koopaling upward and damaging all opponents in the blast radius.
Custom 2 - Koopa Meteor: The Koopaling ducks inside the Jr. Clown Car as it rises upward. It explodes after a short time, sending them downward.
Down Special - Koopa Shells: The Koopaling crouches inside of the Junior Clown Car before throwing out two Koopa Shells on both sides of themselves. These Koopa Shells act similarly to the ones that can spawn regularly in matches, however, if an opponent lands on top of one, it will be destroyed. This move has a slight cooldown after it has been used.
Custom 1 - Grinder: Instead of throwing out Koopa Shells, the Jr. Clown Car releases a Grinder from its mouth. It rolls across the ground, damaging opponents multiple times before launching them.
Custom 2 - Big Steely: Instead of throwing out Koopa Shells, the Jr. Clown Car releases a Big Steely from its mouth. It will roll slowly across the stage, burying opponents it rolls over. Only one Big Steely can be at play at once.
Final Form - Fire Clown Car: The Fire Clown Car from Super Mario Maker falls from above and lands in front of the Koopaling. They then hop out of the Jr. Clown Car and kick it away before jumping into the Fire Clown Car and assuming control over it. The Fire Clown Car's attacks have fire effects and deal much more damage and knockback, as well as having more range. It also has four midair jumps available, and grants much more weight.
Final Smash - Airship Barrage: The Koopaling summons an Airship, which they hop aboard before commanding the ship to fire Bullet Bills and Cannonballs at the opponents. Finally, the Koopaling launches a Banzai Bill, which crashes into the stage and explodes, launching all opponents.
Entrance: The Koopaling flies onto the stage in the Jr. Clown Car and makes a taunting facial expression toward the camera.
Up Taunt: The Koopaling jumps up, sits on the rim of the Jr. Clown Car, and exhales a tiny flame while chuckling.
Side Taunt: The Koopaling pulls out their wand and swings it around twice.
Down Taunt: The Jr. Clown Car turns into its go-kart form, sports an angry expression while performing a doughnut, then returns to normal.
Victory Animation 1: The Koopaling jumps out of the Jr. Clown Car, hops in celebration a few times, then poses.
Victory Animation 2: The Koopaling drives the Jr. Clown Car around like a go-kart, then stops and pulls out their wand.
Victory Animation 3: The Koopaling gets out of the Jr. Clown Car and rubs it with their right hand.
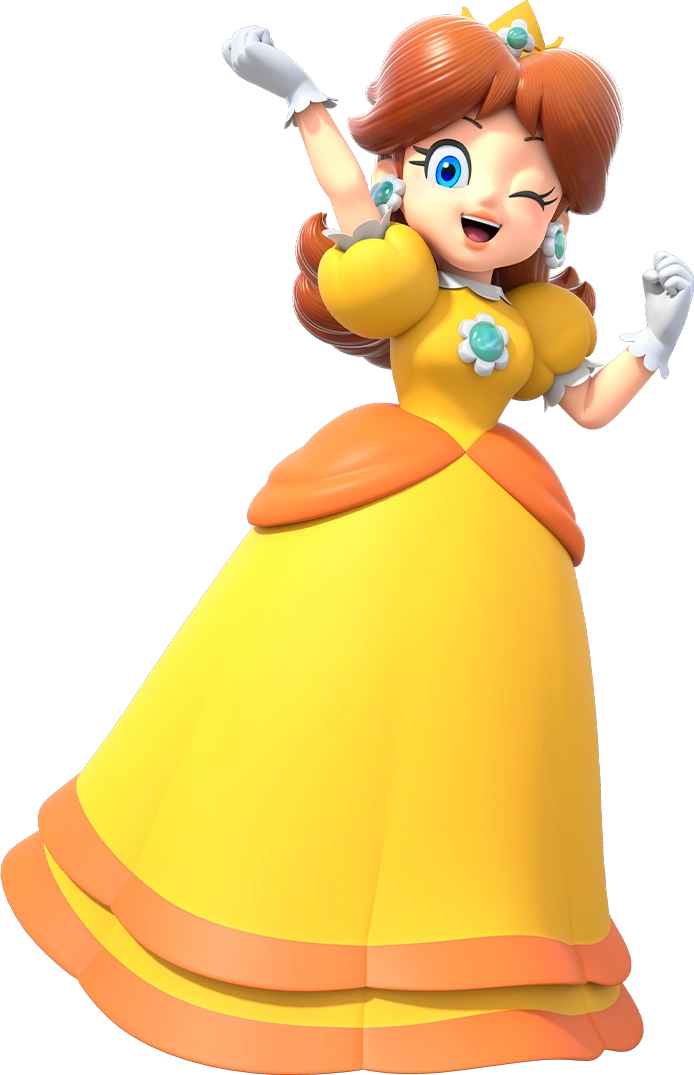
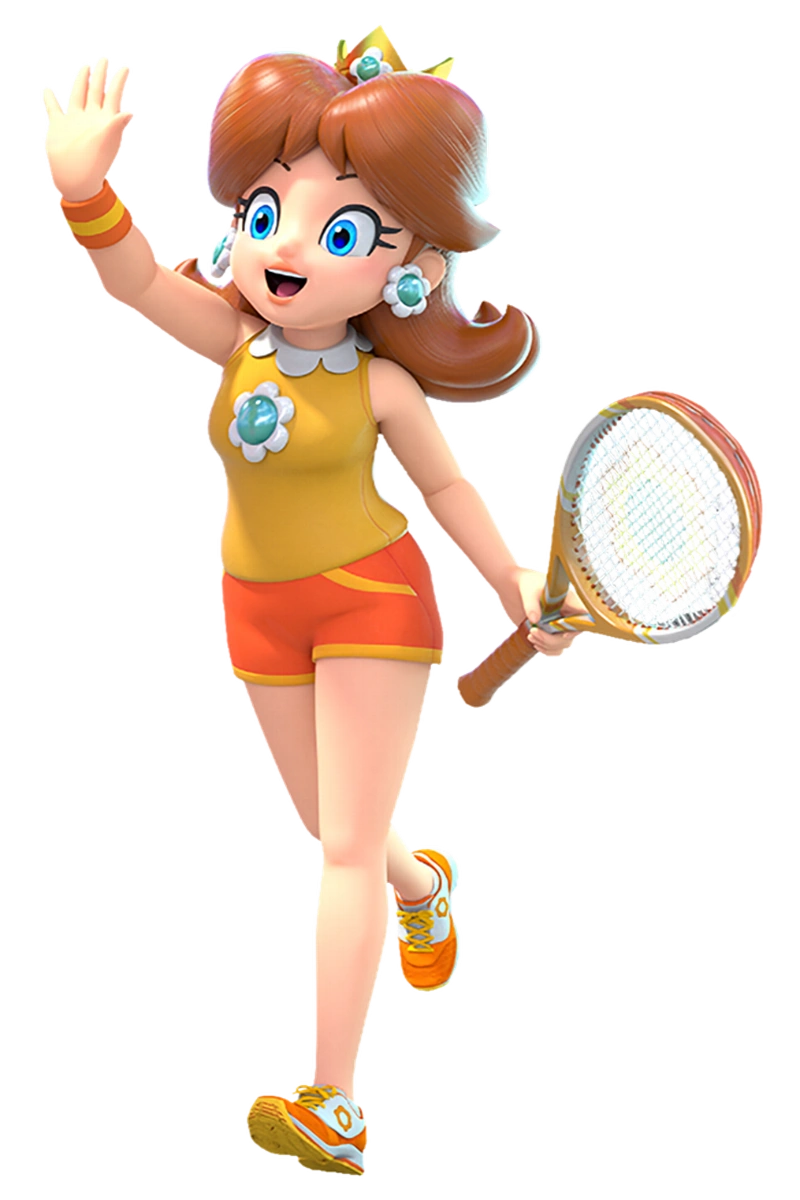
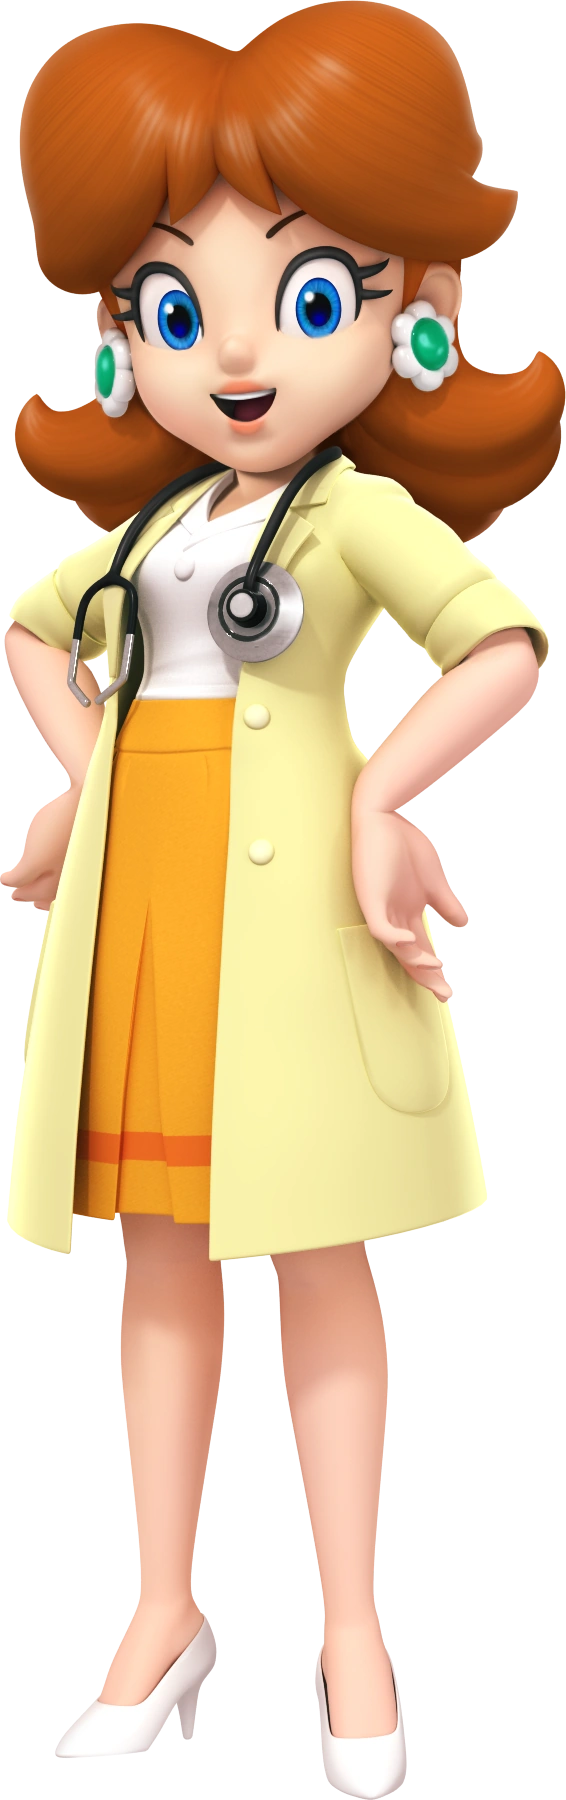
Daisy is a recurring character in the Super Mario series, with her only mainline appearance being in Super Mario Land for the Gameboy, where she had to be rescued by Mario from the evil alien Tatanga. She soon faded into obscurity, until Mario Tennis on the N64, when the developers at Camelot decided to bring her back as Peach's tennis partner, and since then she has been a mainstay in almost every Super Mario spinoff game. Initially Daisy was simply a living palette swap of Peach, however as time went on, she began to get her own identity. In Mario Party 4, she got a slight redesign, and received a more competitive and tomboyish personality.
Daisy is a middleweight fighter with a total of three jumps, and a much more aggressive playstyle when compared to Peach. She utilizes punches, kicks, and various sports equipment. Additionally, Daisy has references to her debut game, Super Mario Land.
Jab: Daisy throws a one-two punch combo, followed by a sidekick.
Forward Tilt: Daisy throws a hook punch.
Forward Smash: Daisy pulls out a hockey stick, a baseball bat, or a golf club depending on the angle the control stick is held in and swings it forward. The hockey stick launches opponents horizontally, the baseball bat launches them upwards and deals the most damage, and the golf club launches them the farthest, but does the least damage.
Up Tilt: Daisy throws an upwards headbutt.
Up Smash: Daisy throws a jumping uppercut.
Down Tilt: Daisy throws a shin kick, which can spike opponents.
Down Smash: Daisy throws a spinning kick.
Dash Attack: Daisy throws a sliding kick.
Counter: Daisy summons a Gao, who breathes fire to damage the opponent multiple times.
Neutral Aerial: Daisy spins around with her arms outstretched.
Forward Aerial: Daisy takes off her crown and swings it forward.
Forward Bash: Daisy swings a tennis racket forward.
Back Aerial: Daisy strikes behind her with her rear.
Back Bash: Daisy turns around and swings a golf club behind her.
Up Aerial: Daisy throws a bicycle kick.
Up Bash: Daisy throws an upwards headbutt.
Down Aerial: Daisy throws a stall-then-fall axe kick, which can spike opponents.
Down Bash: Daisy does a downwards swing with a baseball bat, which can spike opponents.
Grab: Daisy summons a Gao, who reaches out to grab an opponent.
Pummel: The Gao chews on the opponent.
Forward Throw: The Gao flings the opponent forward.
Back Throw: The Gao swings the opponent backward.
Up Throw: The Gao flings the opponent upward and shoots a fireball at them.
Down Throw: The Gao pins the opponent on the ground and breathes fire on them.
Neutral Special - Superball: Daisy throws a metal ball forwards, downwards, or upwards depending on directional inputs. It will bounce along surfaces and the edges of the screen, damaging opponents they hit, before disappearing after a short while. Up to three balls can be at play at once.
Custom 1 - Superbomb: The ball is active for less time, but it explodes when it hits an opponent, damaging them multiple times before launching them.
Custom 2 - Dual Superball: Daisy throws two balls at once, one upward and one downward. Only two can be active at a time and they deal less damage, but they travel faster.
Side Special - Flower Bomber: Daisy flies forward with her rear, causing a flowery explosion on contact with an opponent and damaging them. If she hits an opponent, she gains a burst of upward momentum.
Custom 1 - Mushroom Bomber: Daisy deals less damage, but hitting opponents will cause a mushroom to grow on their heads.
Custom 2 - Explosive Bomber: Daisy causes a fiery explosion on impact with an opponent. Deals more damage and knockback, but Daisy travels less distance.
Up Special - Flower Jump: Daisy pulls out a large flower and leaps into the air while holding on to the stem, damaging opponents multiple times before launching them. At the peak of her jump, the bud opens up, allowing her to float downward. While open, the flower will damage opponents that touch it. Holding the control stick down will have Daisy fall into a helpless state, while holding up will have her open the flower again and continue floating.
Custom 1 - Flower Leap: Daisy jumps higher and deals more damage, but does not open the parasol to float downward.
Custom 2 - Light Flower: Daisy doesn't jump initially, but instead opens the flower immediately. She will float upward, damaging opponents she hits. She will fall into a helpless state after a while or if the control stick is held down.
Down Special - Piranha Plant: Daisy places down a potted Piranha Plant, which will remain on stage for five seconds before disappearing. If an opponent gets too close to it, the Piranha Plant will bite down on them before throwing them towards Daisy. The Piranha Plant can be defeated if hit by opponents.
Custom 1 - Fire Piranha Plant: Daisy places down a Fire Piranha Plant, which only stays on stage for three seconds, but will breath flames onto the opponent before throwing them, resulting in more damage.
Custom 2 - Inky Piranha Plant: Daisy places down an Inky Piranha Plant that deals less damage when throwing opponents, but will put a poison effect on them.
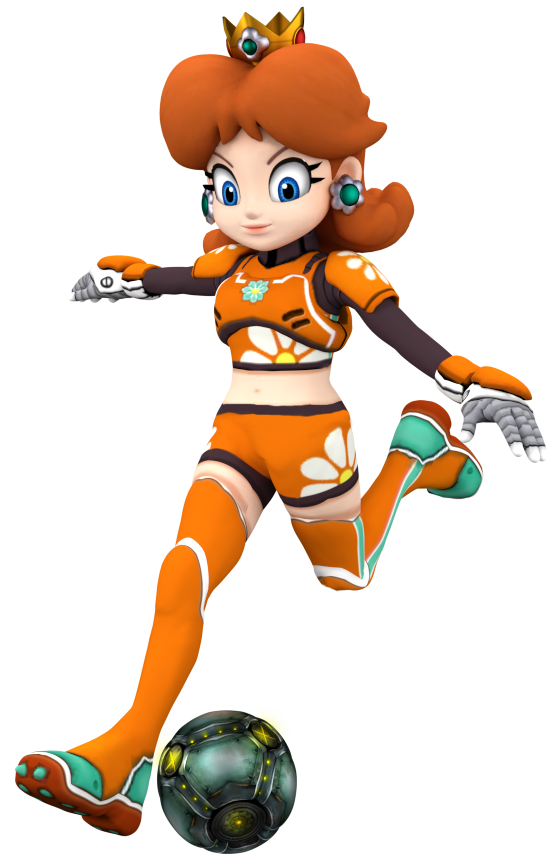
Final Form - Crystallized Daisy: Daisy's arms become encased in crystals and her skin turns teal-black. In this state, her attacks deal more damage and knockback, and she is much faster.
Final Smash - Crystal Smash: Daisy rushes forward with her shoulder out. If an opponent is hit they will be trapped in a cinematic where Daisy flies in riding the Sky Pop from Super Mario Land, after which she jumps out and raises her arm into the air as she turns into her Crystallized form. She then throws a single punch that sends the opponent flying.
Entrance: Daisy floats down onto the stage, waving to the camera while saying "Yo!".
Up Taunt: Daisy waves and says "Hi, I'm Daisy!" tauntingly.
Side Taunt: Daisy spins and does a peace sign.
Down Taunt: Daisy pumps her fist in the air.
Victory Animation 1: Daisy stretches and pumps her fist in the air.
Victory Animation 2: Daisy jumps in the air and poses triumphantly.
Victory Animation 3: Daisy spins and does a peace sign.
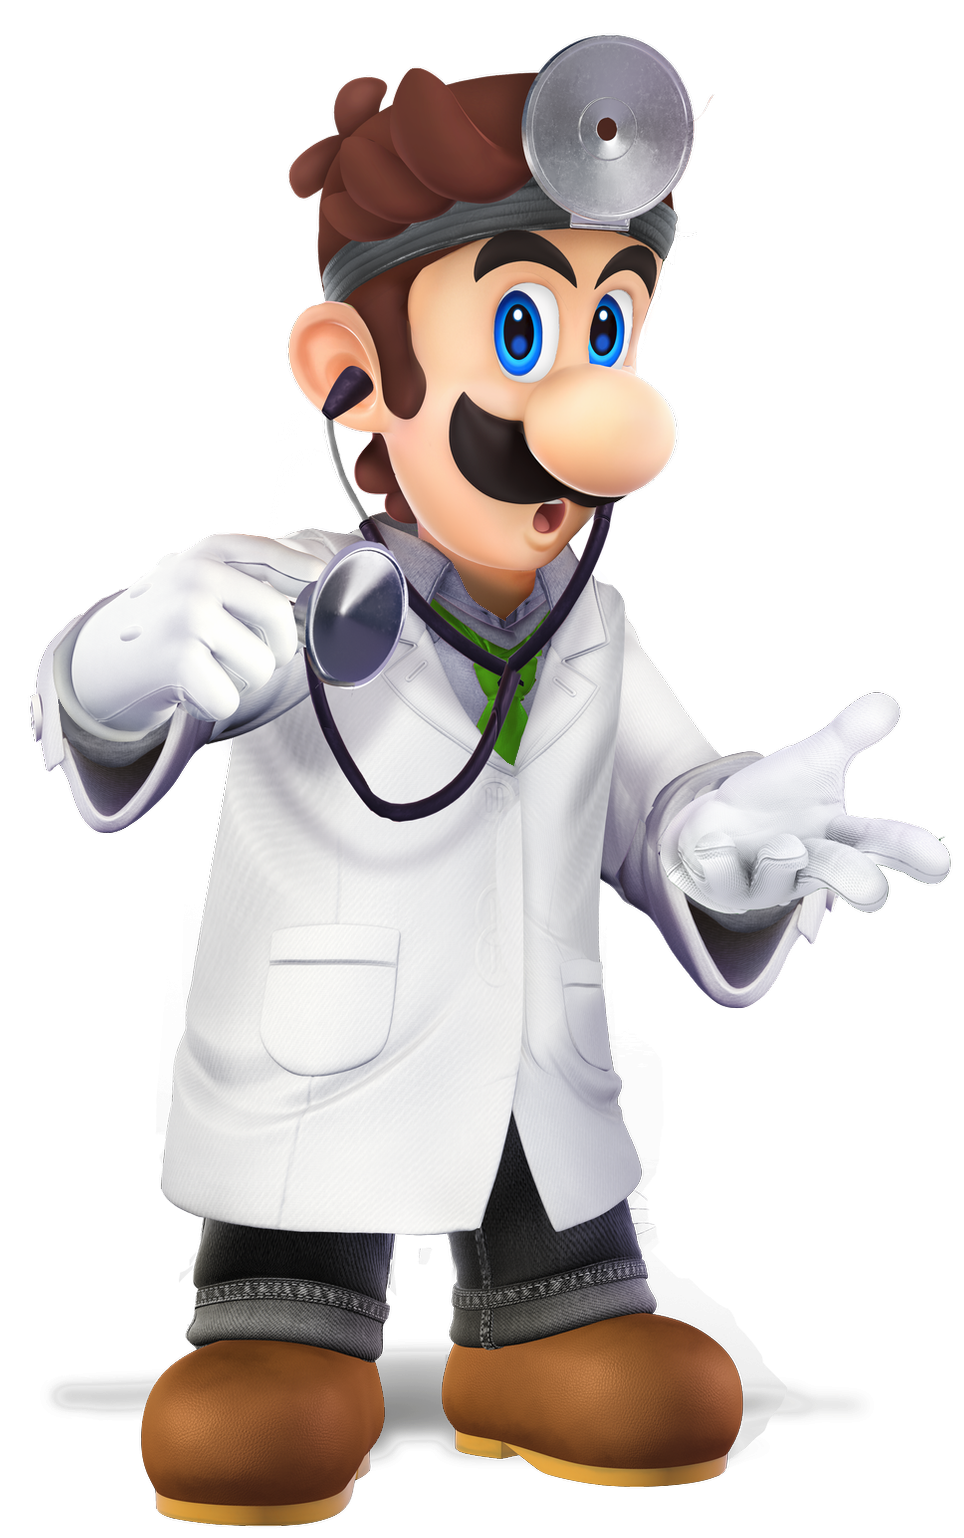
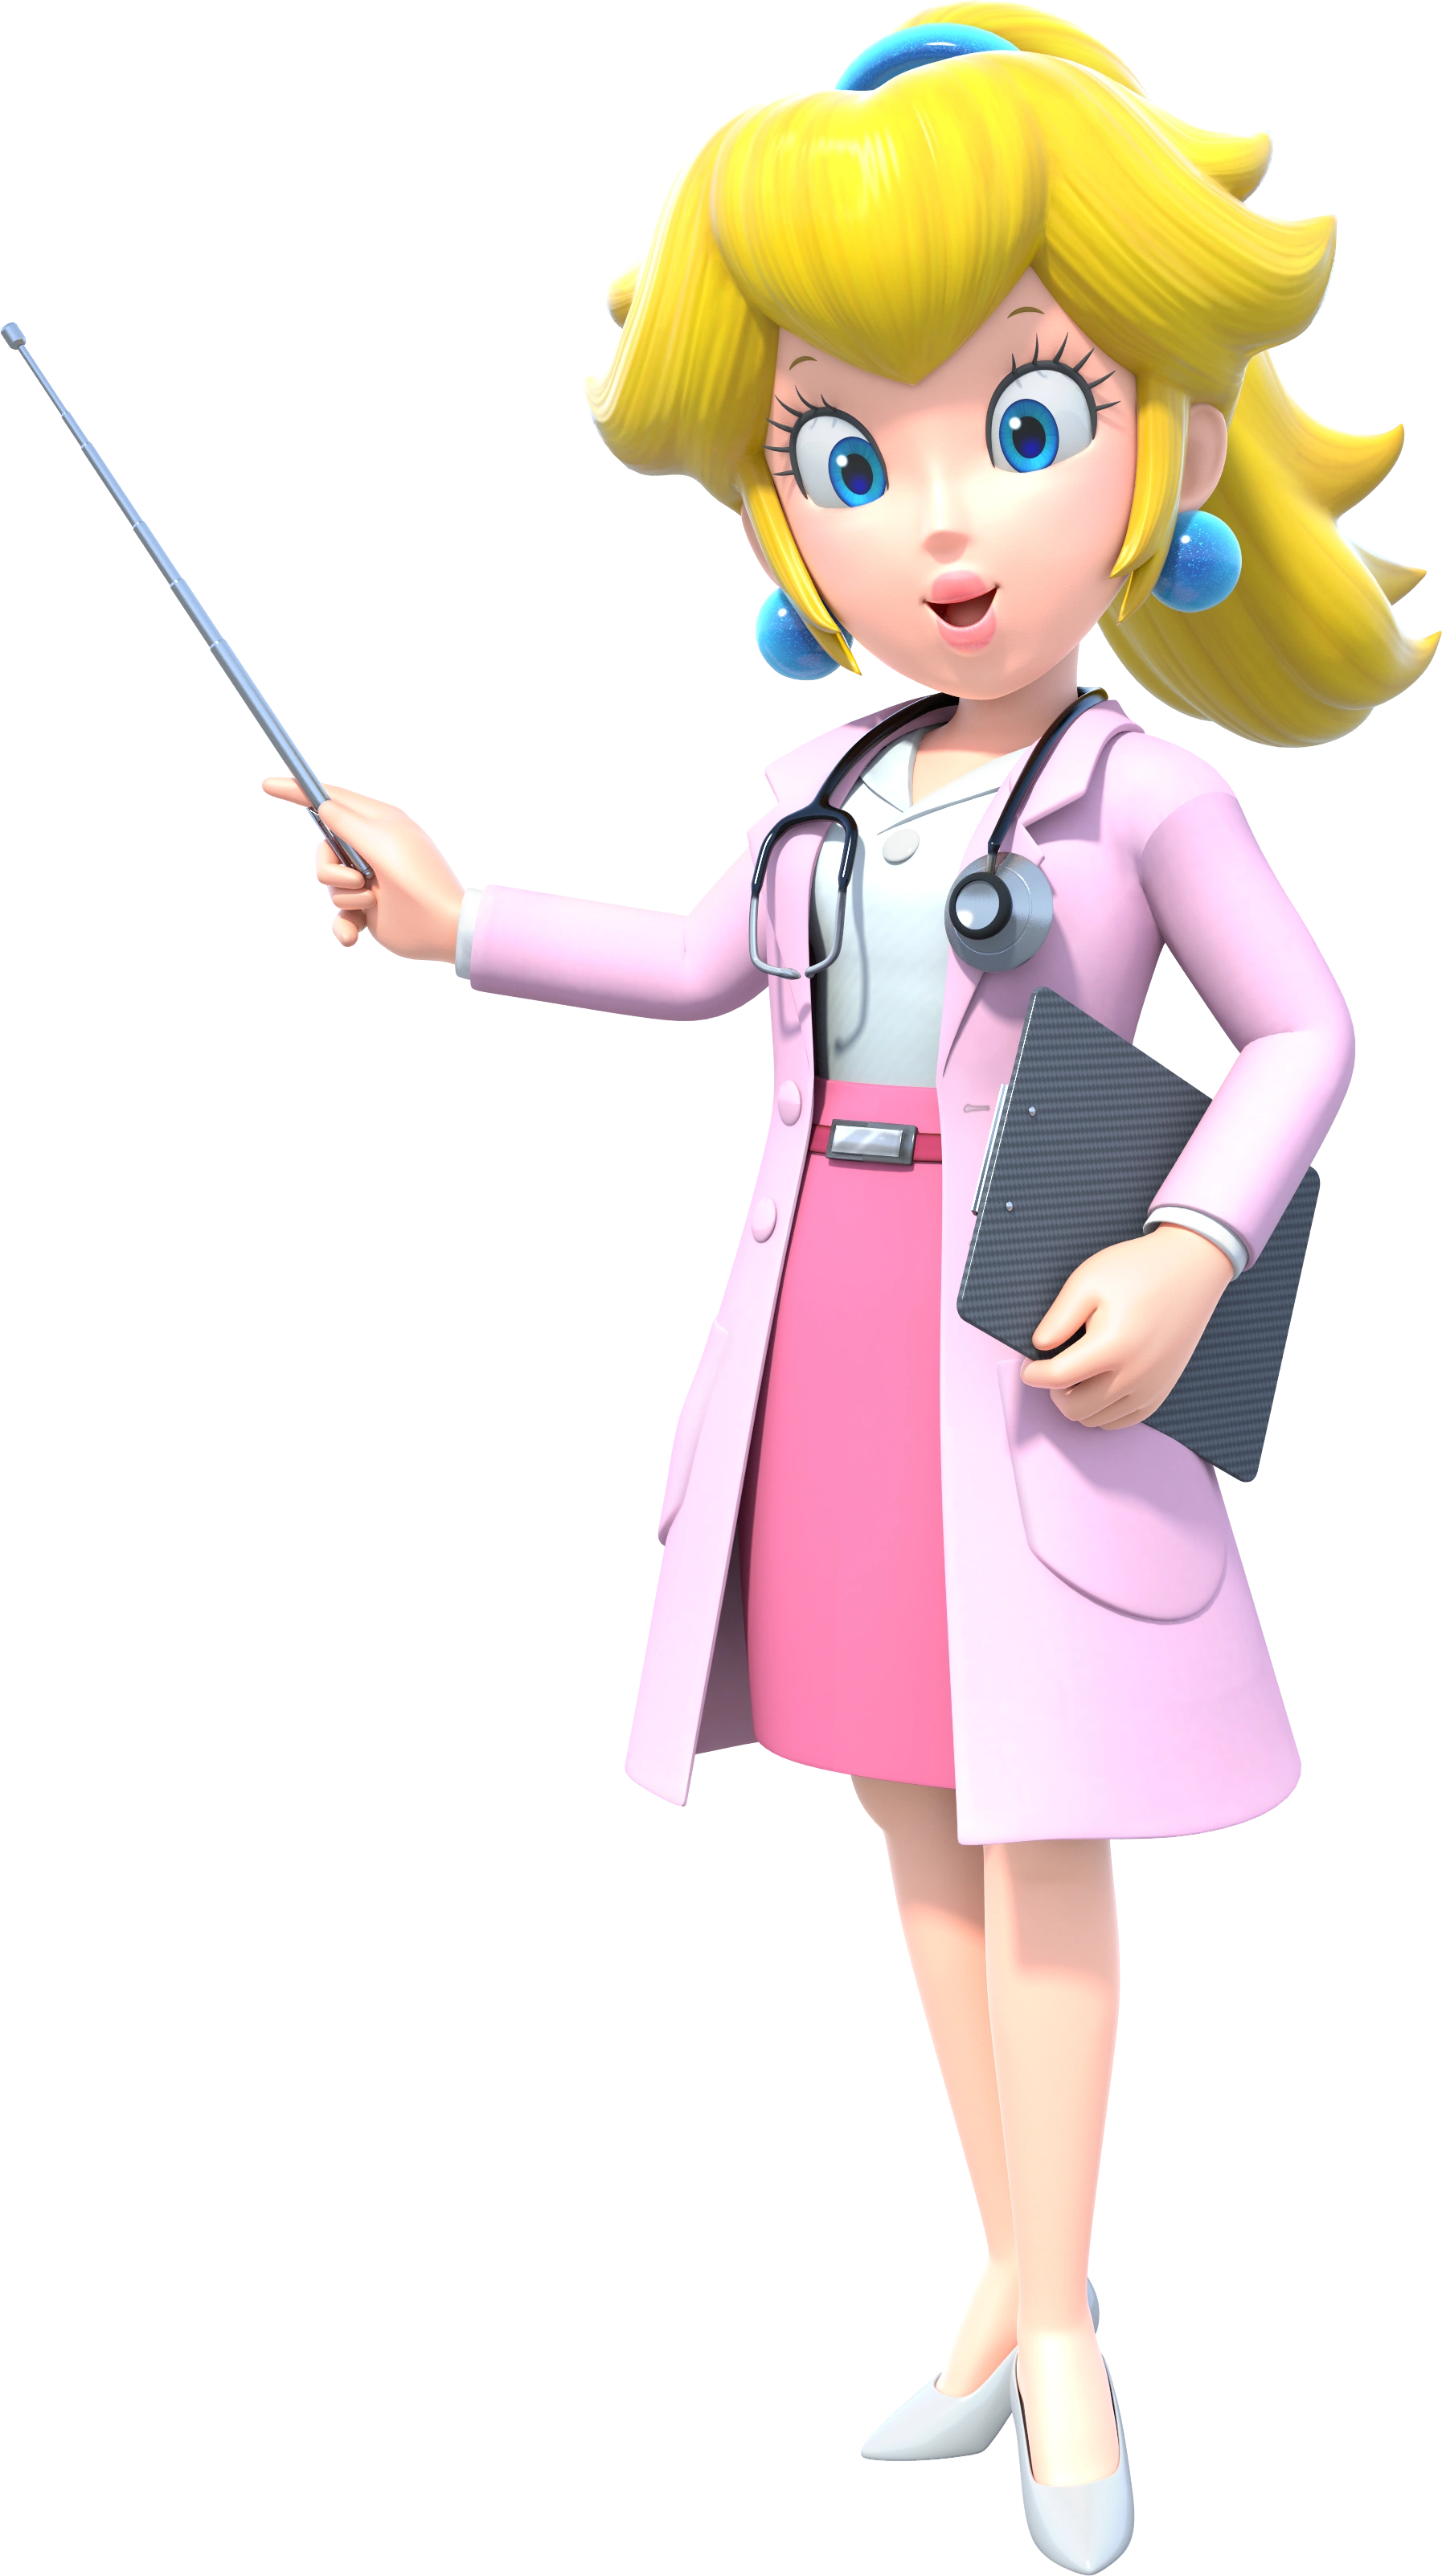
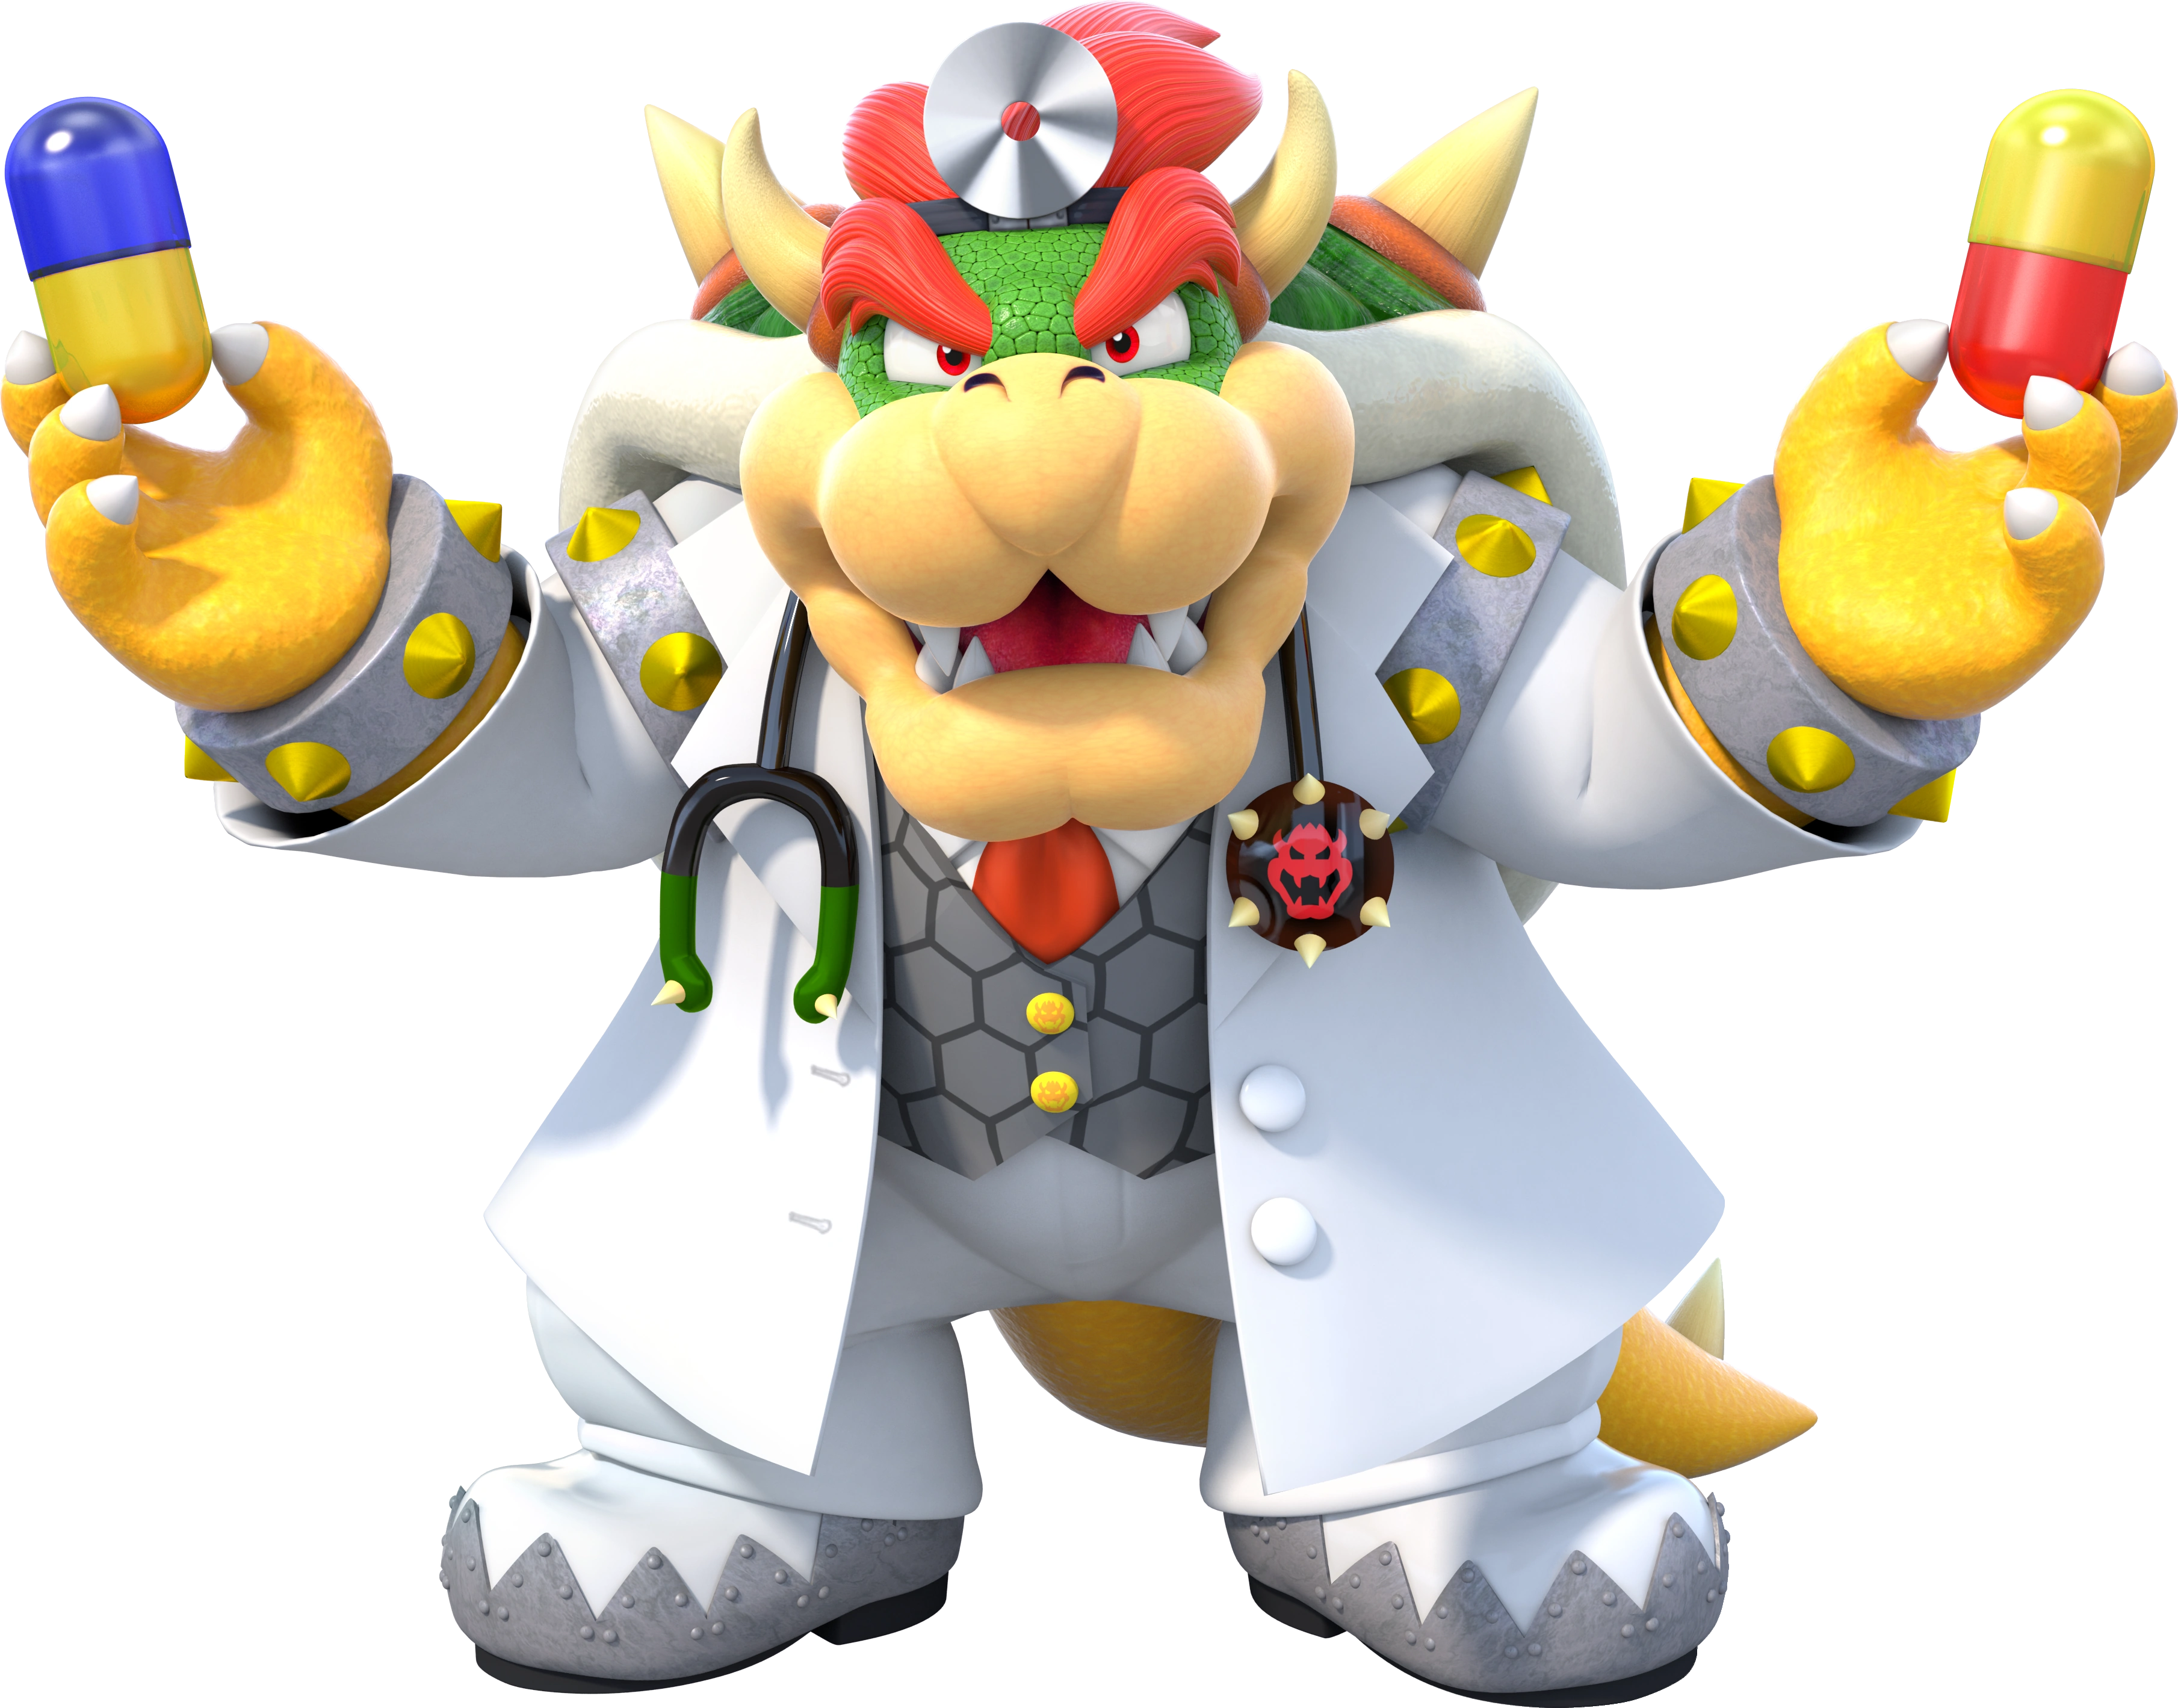
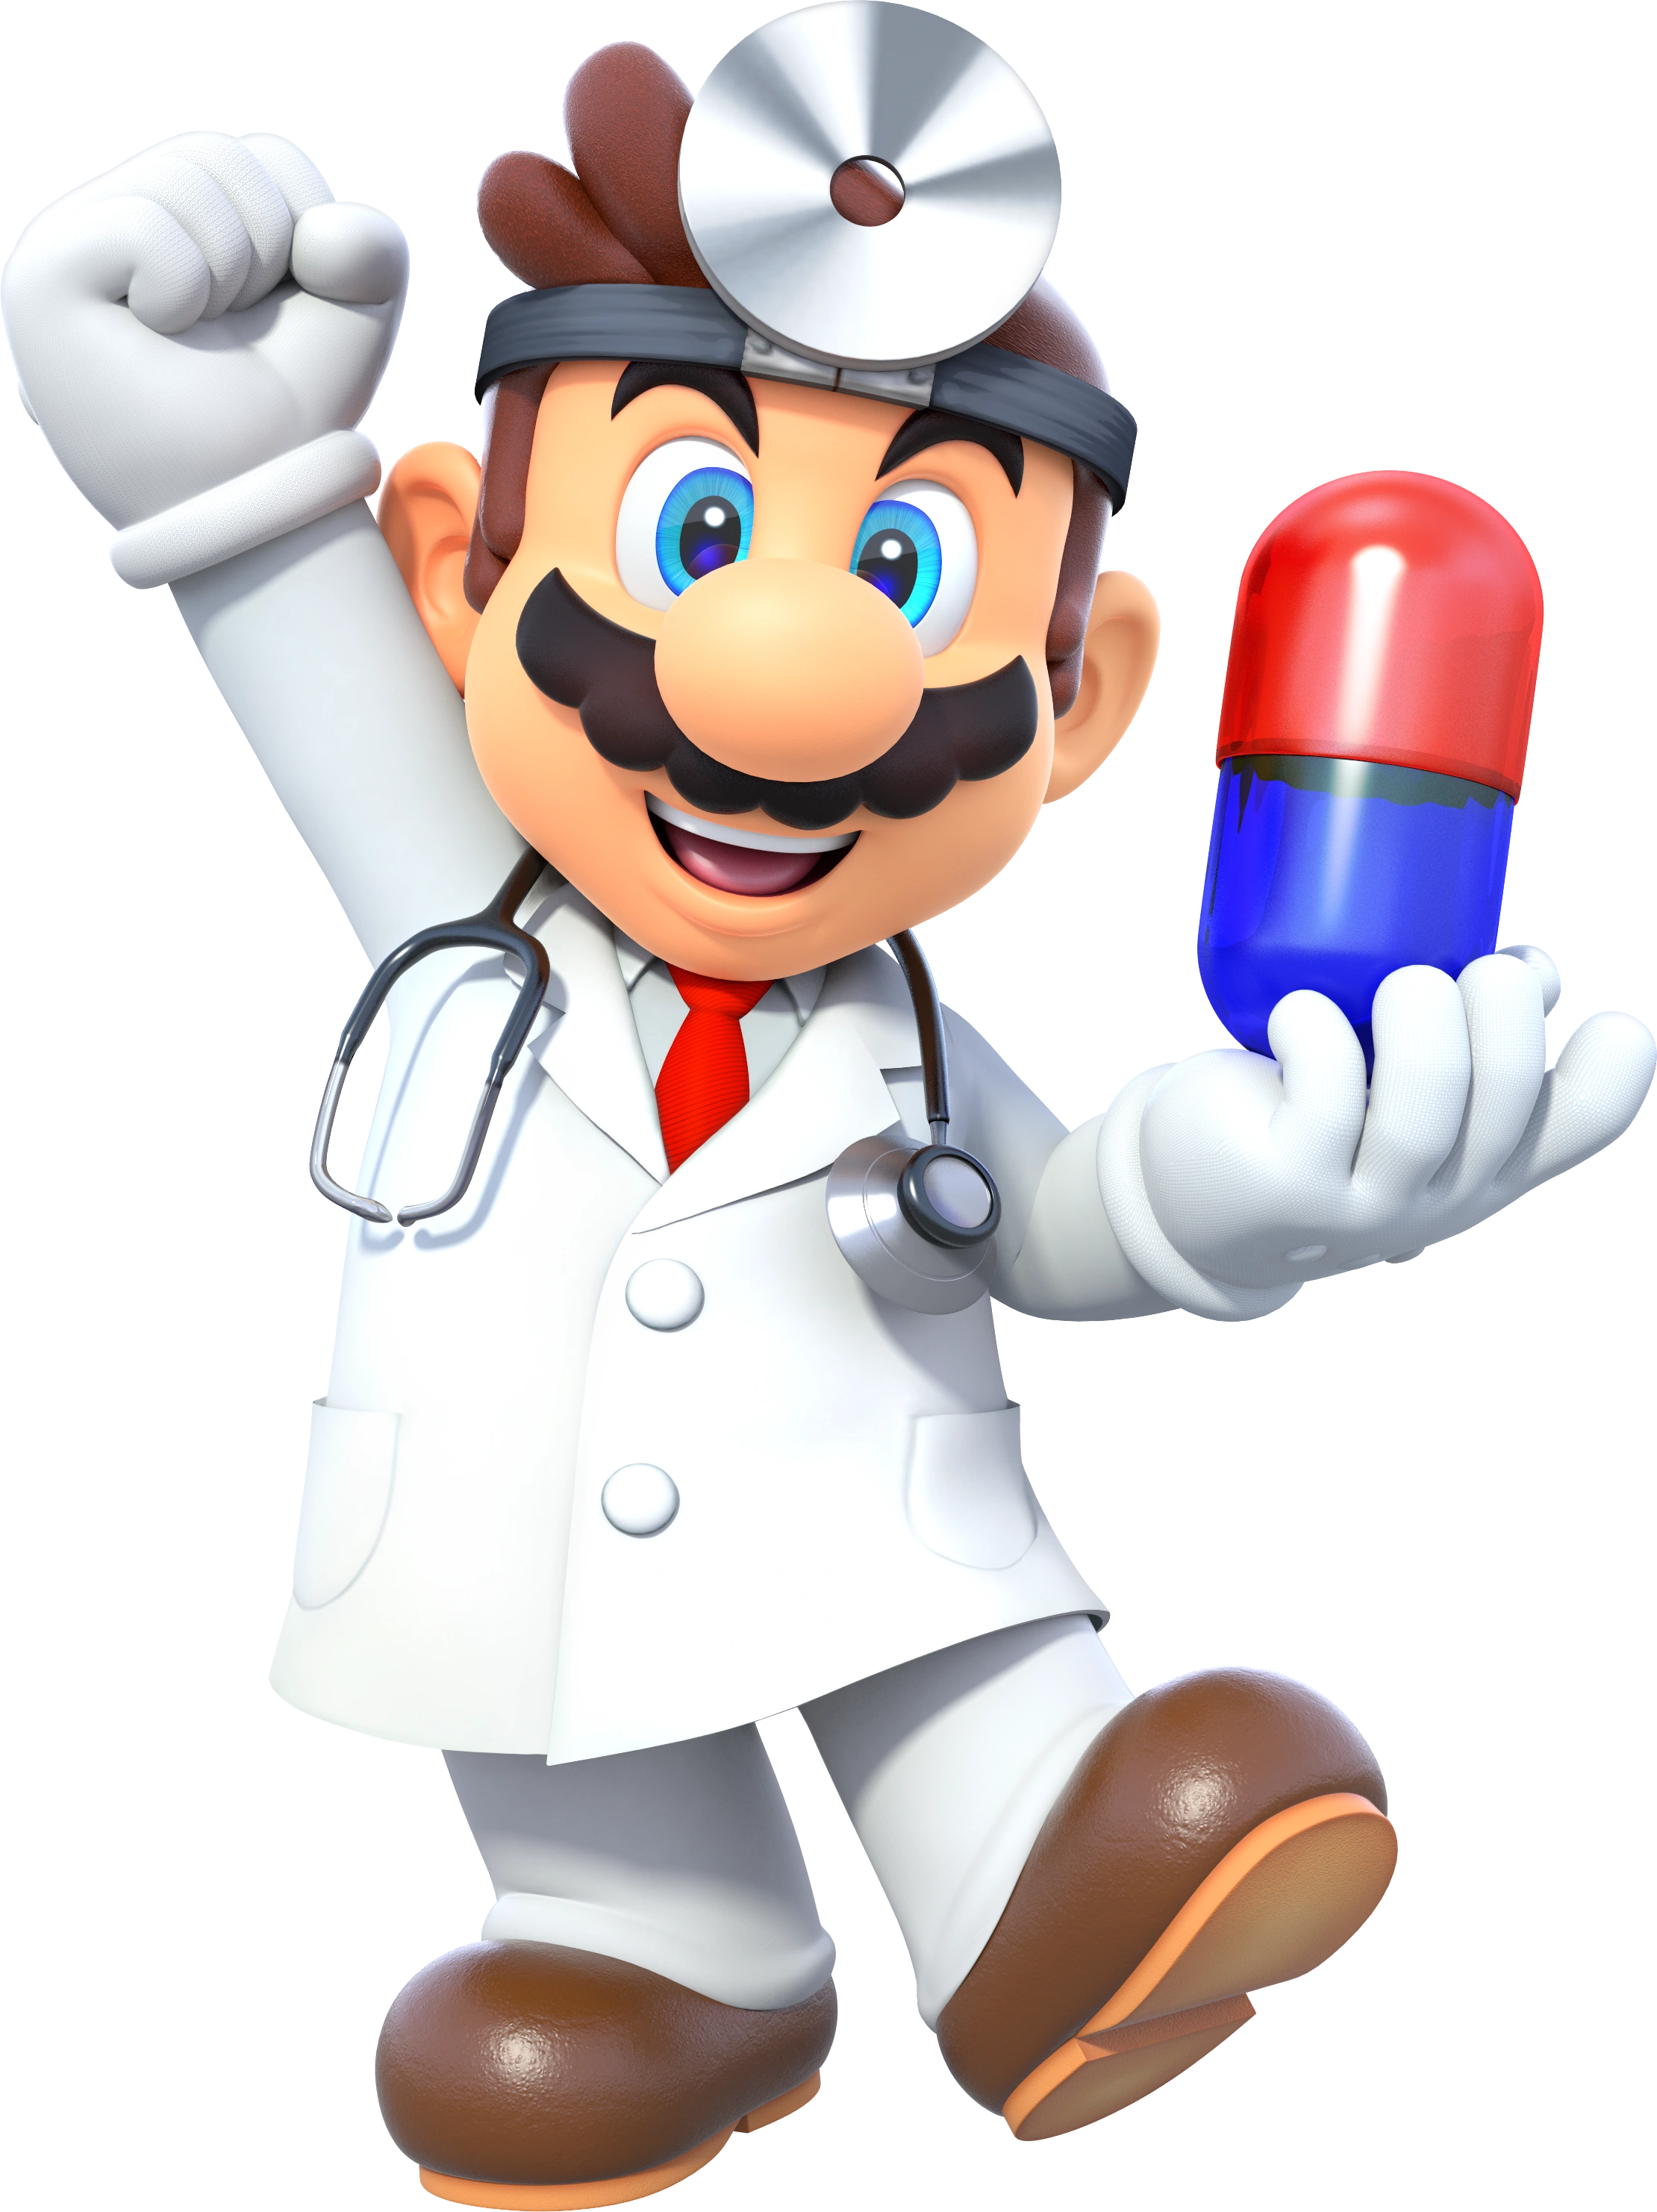
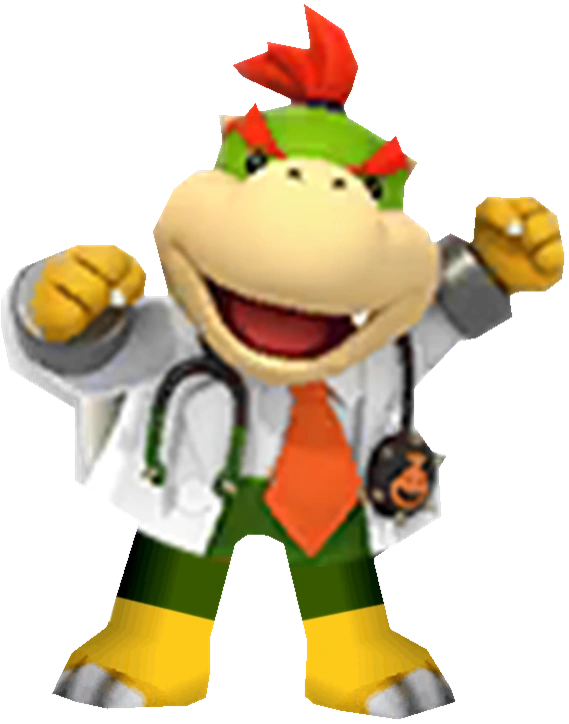
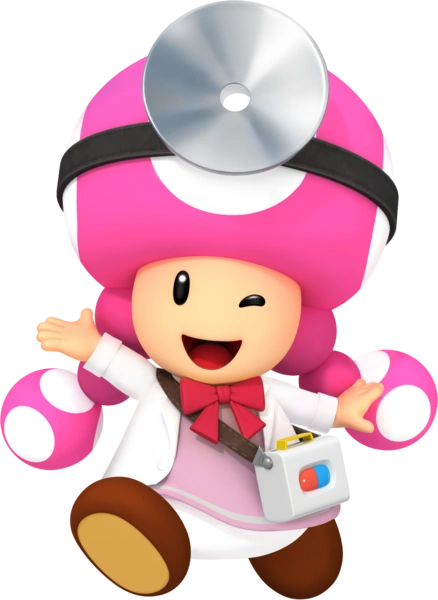
Dr. Mario is the doctor persona of Mario that he appears in the Dr. Mario puzzle series. In those games, he works alongside Dr. Luigi and Nurse Peach at the Mushroom Kingdom Hospital, working to destroy Viruses using colorful pills called Megavitamins. To do this, the player must match multi-colored Megavitamins with viruses of the same color, in order to eliminate them. Do to him being a separate character from Mario, many have speculated whether Dr. Mario and Mario are even the same person, with some even claiming that the doctor is the third long lost Mario Brother.
In past Super Smash Bros. games, Dr. Mario was simply a slower but more powerful version of Mario, who had a couple of different moves but was mostly the same. This time, however, due to Mario's changed moveset, Dr. Mario mostly serves as a way of retaining Mario's classic moves. Many of them focus on delivering heavy damage and knockback, though he has a few moves available for combos.
Jab: Dr. Mario throws a one-two punch combo followed by a kick.
Forward Tilt: Dr. Mario throws a side kick.
Forward Smash: Dr. Mario thrusts a defibrillator pad forward as electricity bursts from it. At full charge, the move can deal paralysis on opponents, leaving them vulnerable for attack.
Up Tilt: Dr. Mario throws a spinning uppercut.
Up Smash: Dr. Mario throws an upwards headbutt.
Down Tilt: Dr. Mario throws a sweep kick that sends opponents behind him.
Down Smash: Dr. Mario throws a breakdance kick, with the first hit knocking opponents into the second.
Dash Attack: Dr. Mario throws a sliding kick.
Counter: Dr. Mario throws a punch.
Neutral Aerial: Dr. Mario throws a sex kick. Unlike other sex kicks, the attack grows stronger throughout the duration rather than weaker.
Forward Aerial: Dr. Mario swings a clipboard forward.
Forward Bash: Dr. Mario throws a haymaker punch.
Back Aerial: Dr. Mario throws a kick behind him.
Back Bash: Dr. Mario throws a dropkick.
Up Aerial: Dr. Mario throws a bicycle kick.
Up Bash: Dr. Mario throws an uppercut.
Down Aerial: Dr. Mario throws a spinning drill kick, damaging opponents multiple times before launching them.
Down Bash: Dr. Mario stomps downward with both feet, which can spike opponents.
Grab: Dr. Mario reaches out to grab the opponent with both hands.
Pummel: Dr. Mario headbutts the opponent.
Forward Throw: Dr. Mario holds the opponent by the legs and spins around three times before throwing them forward. While spinning, Dr. Mario can move left and right, and the spinning can also damage nearby opponents if the victim collides with them.
Back Throw: Dr. Mario lifts the opponent over his head and tosses them behind him.
Up Throw: Dr. Mario heaves the opponent directly overhead with both hands.
Down Throw: Dr. Mario performs a body slam with the opponent.
Neutral Special - Megavitamin: Dr. Mario throws a Megavitamin forward, which bounces along the ground in an arc, dealing light damage to opponents that it hits. The Megavitamin comes in a random pair of red, blue, and yellow colors, which deal varying effects if they hit opponents; red can burn opponents, blue can freeze opponents, and yellow can deal electric damage.
Custom 1 - Mega-Vitamin: Megavitamins are much larger, but slower. They damage opponents multiple times before launching them.
Custom 2 - Megavitamin PM: Megavitamins deal less damage and don't even make opponents flinch, though they have a chance of putting them to sleep, leaving them vulnerable for attack.
Side Special - Super Sheet: Dr. Mario takes out a large sheet of paper and waves it in front of himself. The attack can reflect projectiles and reverse the opponent's direction.
Custom 1 - Shocking Sheet: The sheet cannot reflect projectiles or turn opponents around, but it deals much more damage and knockback.
Custom 2 - Sheet Spin: Dr. Mario spins with the sheet three times. This makes it easier to reflect projectiles, as well as allowing him to reflect ones coming from behind, though it cannot flip opponents.
Up Special - Super Jump Punch: Dr. Mario performs a jumping uppercut, damaging opponents he hits on the way up and falling into a helpless state afterwards. The attack deals much more damage and knockback at the start of the move, and by using directional inputs, the jump can be angled.
Custom 1 - Ol' One-Two: Dr. Mario travels less distance. The attack only damages opponents at the start and end of the uppercut; the first combos into the second, which causes an explosion that deals heavy damage and knockback.
Custom 2 - Jump Punch: Instead of dealing heavy damage at the start of the move, Dr. Mario instead damages opponents multiple times before launching them at the peak of his jump. Deals more damage but less knockback.
Down Special - Dr. Tornado: Dr. Mario rapidly spins around, trapping opponents and damaging them with a series of discus clotheslines and spinning backfists before assuming a spread-eagle position to launch them. While spinning, Dr. Mario can move left and right, and repeatedly tapping the special button allows him to rise upward.
Custom 1 - Clothesline Tornado: Instead of damaging opponents multiple times, Dr. Mario damages opponents once while spinning, dealing heavy damage and knockback. Has decreased mobility.
Custom 2 - Frosty Tornado: Dr. Mario cannot rise as high while using the move, however, the move has an ice effect with the final hit being able to freeze opponents.
Final Form - Miracle Cure: Dr. Mario chugs down a jar of Megavitamins, causing him to start glowing gold. In this state, his speed, jump height, aerial mobility, and attack power are all increased. He also has three midair jumps and uses stronger variants of Megavitamins, which are larger and deal more damage.
Final Smash - Dr. Finale: Dr. Mario rushes forward to deliver an uppercut. If he hits an opponent, they are trapped within the confines of a giant pill bottle. They are still able to move around, but they cannot leave the area. Dr. Mario then appears on the side of the screen and begins to throw Megavitamins into the bottle. The player is able to control the Megavitamin's movement, as well as flipping them around. The player has 8 seconds to try and crush the opponents with the Megavitamins. At the end of the Final Smash, all of the Megavitamins will explode, shattering the bottle and launching the opponents.
Entrance: A stack of Megavitamins appears on-stage. Another Megavitamin then lands on the top, causing a chain reaction which disintegrates the entire stack, revealing Dr. Mario behind them.
Up Taunt: Dr. Mario pulls out a randomly colored Megavitamin, rolls it down his arm, uses his shoulder to toss it into the air, then catches it.
Side Taunt: Dr. Mario lightly pounds himself on the shoulder.
Down Taunt: Dr. Mario goes into a thinking pose, and looks around while staring off into space, before thrusting his hand in the air in a "I've got it!" kind of pose.
Victory Animation 1: Dr. Mario waves his stethoscope in front of him, off to his side, then to the other, and then back in front of him.
Victory Animation 2: Dr. Mario throws two Megavitamins in different directions, dusts off his gloves, and pulls out two more Megavitamins and holds them up.
Victory Animation 3: Dr. Mario taps his shoe on the ground, puts his right hand on his chin in a thinking manner, and then glares at the screen while rubbing his chin.
Geno Super Mario RPG: Legend of the Seven Stars (1996)
Geno is a major character in Super Mario RPG: Legend of the Seven Stars, being one of Mario's party members. He is a star that comes to the Mushroom Kingdom after the Star Road is destroyed by the Smithy Gang, and takes the form of a doll in order to fight alongside the other characters. As a party member, he has the highest speed out of all characters, but has low defense.
Geno is a glass canon character, with strong attack power at the cost of being lightweight and easy to launch. He has a unique mechanic based on Timed Hits from Super Mario RPG: Legend of the Seven Stars where, after landing an attack, the attack button can be pressed again for it to deal more damage and knockback. Geno's moves make reference to his various attacks and special moves from the game, utilizing his arm cannon and various types of magic.
Jab: Geno throws a hook, followed by a sidekick, before ending with a blast from his arm cannon. Alternatively, the kick can be followed up with a rapid jab where Geno fires star-shaped shots into the enemy before launching them with a final blast.
Forward Tilt: Geno takes off his left arm and does an outwards swing with it.
Forward Smash: Geno rears his arm back before shooting his hand forward like a rocket, with its power and range increasing the longer it is charged. This move will deal more damage if the attack button is pressed just before Geno's hand connects with an opponent.
Up Tilt: Geno does a single shot from his arm cannon above his head.
Up Smash: Geno raises his two arms above his head as he shoots three powerful blasts from each one. This move will deal more damage if the attack button is pressed just before it connects with an opponent.
Down Tilt: Geno leaves his puppet body, revealing his true form as a star before swinging his body downward and reentering his body.
Down Smash: The bottom half of Geno's body spins around, hitting opponents with his legs multiple times before launching them. This move will deal more damage if the attack button is pressed just before it connects with an opponent.
Dash Attack: Geno does a lunging elbow tackle, as his elbow opens up to fire a small explosion from it.
Counter: Geno fires a powerful explosion from his arm.
Neutral Aerial: Geno's body spins in circles, the edges of his cape damaging opponents multiple times before launching them.
Forward Aerial: Geno takes off his right leg and does an overhead swing with it, which can spike opponents.
Forward Bash: Geno fires his fist forward like a rocket, exploding on impact.
Back Aerial: Geno shoots behind him twice.
Back Bash: Geno turns around and fires a blast behind him.
Up Aerial: Geno sprays bullets above himself in an overarching motion, damaging opponents multiple times before launching them.
Up Bash: Geno fires a blast from his cannon upwards.
Down Aerial: Geno sprays bullets below himself, damaging opponents multiple times before launching them.
Down Bash: Geno blasts below him with his arm cannon, spiking opponents if the attack button is pressed again just before it hits them.
Grab: Geno reaches out to grab the opponent with one hand.
Pummel: Geno hits the opponent with his arm cannon.
Forward Throw: Geno launches the opponent forward with a blast to the face.
Back Throw: Geno transforms into a canon and shoots the opponent behind him.
Up Throw: Geno throws the opponent above him as he shoots star-shaped projectiles at them.
Down Throw: Geno pins the opponent down and launches them forward with a blast from his arm cannon.
Neutral Special - Geno Beam: Geno fires a large blue beam out of his arm cannon. This move can be charged by holding the special button, as well as cancelled and stored by shielding. Charging the move until three stars appear above Geno's head will increase its distance and power.
Custom 1 - Draining Beam: The beam deals significantly less damage and knockback, but Geno will be healed by the damage opponents receive.
Custom 2 - Breaker Beam: The beam is much larger and deals more damage and knockback, but it takes longer to charge, and it cannot be cancelled or stored.
Side Special - Geno Whirl: Geno throws a bright yellow disk forward that explodes on contact. The move can be angled up and down, and if the special button is pressed again just before it hits an opponent, it will deal much more damage and knockback, as well as instantly KOing opponents who have over 160% of damage, however, the window to do this is extremely small.
Custom 1 - Vortex Whirl: The projectile is larger and travels slower. It has windboxes that draw opponents into it, damaging them multiple times before launching them.
Custom 2 - Aggressive Whirl: The Timed Hit variant deals more damage and knockback to opponents below 100%, but less to opponents above 100%.
Up Special - Geno Boost: Geno rises into the air as red arrows circle around him. This will increase his attack power for ten seconds, and also has a ten second cooldown before the effect will work again. If the special button is pressed again just before the move ends, Geno's defense will also be increased, as the cost of a fifteen second long cooldown.
Custom 1 - Berserk Boost: Geno's power and defense capabilities are increased much more, but it is only active for six seconds and the cooldown period is 15 seconds regardless if the Timed Hit variant is used or not.
Custom 2 - Super Geno Boost: Geno can last in this form for five seconds. However, every time he hits an opponent or the opponent hits him, the timer will reset, meaning he can keep the form by stringing combos. The cooldown, however, is 15 seconds, and 20 seconds if the Timed Hit variant is used.
Down Special - Geno Blast: Geno raises his arms into the air as he begins to channel energy. When the special button is released, Geno will summon beams of light down on the ground around him that briefly stuns opponents. Charging the move until three stars appear above Geno's head will increase the range, power, and stun time of the attack.
Custom 1 - Power Blast: The beams of light will deal more damage and stun longer, however they don't cover as much ground as the normal version.
Custom 2 - Ranged Blast: The beams of light will cover more distance, but don't deal as much damage and stun for a shorter amount of time
Final Form - Power of the Seven Stars: Geno surrounds himself with the seven Star Pieces. Geno is then empowered by them, glowing yellow. In this state, he is much faster and stronger, and his projectiles travel further. His Timed Hits are also more powerful, with them dealing more damage and knockback.
Final Smash - Geno Flash: Geno transforms into a canon and shoots a ball of light towards the center of the stage, dragging any caught opponents along with it.
Entrance: The Geno doll lies on the floor as a star descends from the sky and goes into the doll, bringing it to life as it grows to its normal size.
Up Taunt: Geno faces towards the camera, crosses his arms, and nods.
Side Taunt: Geno raises his arm into the air as a coin appears and he collects it.
Down Taunt: Geno exits his doll body and circles around it before reentering.
Victory Animation 1: Geno shoots a blast from his arm cannon before crossing his arms and nodding.
Victory Animation 2: Geno exits his doll body and slowly rises off screen as the doll lies on the ground motionless.
Victory Animation 3: Geno poses as one of the Star Pieces rotates around him.
Waluigi is a recurring character in the Super Mario series, first appearing in Mario Tennis on the N64. He is considered Luigi's equivalent to Wario, and as such the two have a fierce rivalry, with hints that Waluigi is jealous of Luigi's close relationship with Daisy. Wario and Waluigi have always been seen as partners in crime, although their exact relationship is unknown. Waluigi is portrayed as mischievous, and a very sore loser, often claiming that other characters are cheating, despite him himself cheating quite a fair bit. Since his first appearance, he has showcased various odd and sometimes reality breaking abilities, such as defying the laws of gravity.
Much like how Wario has exaggerated versions of Mario's traits, Waluigi is a more extreme version of Luigi. He has the single highest jump in the game, and has little to no traction on the ground. In terms of his moveset, Waluigi will do whatever he can to win, including ripping off the moves of other characters or his attacks having strange properties that they shouldn't. He is also able to glide by swimming through the air. Additionally, Waluigi also has a unique mechanic where he will become more aggressive as he takes damage, angered at the thought of losing. Once he reaches over 120% damage, he will become faster and stronger, at the cost of his attacks taking longer to come out.
Jab: Waluigi throws a hook, followed by a sidekick, and ending with a swing from his tennis racket.
Forward Tilt: Waluigi throws a front kick.
Forward Smash: Waluigi performs his own version of Captain Falcon's Falcon Punch, called the Waluigi Punch, albeit not nearly as powerful as the attack it takes after. This move sends opponents at a slightly different angle each time it is used.
Up Tilt: Waluigi throws a jumping uppercut.
Up Smash: Waluigi performs his own version of Ryu and Ken's Shoryuken, called the Wah-ryuken. This move sends opponents at slightly different angles each time it is used.
Down Tilt: Waluigi sticks his leg out, which can trip opponents.
Down Smash: Waluigi stomps the ground three times, with the third hit burying opponents.
Dash Attack: Waluigi trips and falls on his face.
Counter: Waluigi pokes the opponent in the eye.
Neutral Aerial: Waluigi poses in his signature "Γ" shape and spins around, generating a cyclone around him that damages opponents multiple times before launching them.
Forward Aerial: Waluigi throws a kick from low to high.
Forward Bash: Waluigi performs his own version of Captain Falcon's Forward Bash, however, this move will actually send opponents behind him rather than forward.
Back Aerial: Waluigi positions himself sideways and does a ballerina-like spin, damaging opponents multiple times before launching them.
Back Bash: Waluigi throws a dropkick.
Up Aerial: Waluigi turns upside down and throws a scissor kick, which can spike opponents.
Up Bash: Waluigi throws an upside down corkscrew kick, damaging opponents multiple times before launching them.
Down Aerial: Waluigi rapidly kicks below him, damaging opponents multiple times before launching them.
Down Bash: Waluigi performs a stall-then-fall stomp, which can spike opponents.
Grab: Waluigi reaches out and grabs the opponent with one hand.
Pummel: Waluigi hits the opponent with his knee.
Forward Throw: Waluigi places the opponent on a tee and hits them with a golf club.
Back Throw: Waluigi trips the opponent over his foot.
Up Throw: Waluigi kicks the opponent into the air.
Down Throw: Waluigi pins the opponent on the ground before pulling out a Bob-omb and slamming it into their face, resulting in an explosion that launches both of them.
Neutral Special - Serve: If the Special Button is tapped, Waluigi will pull out his tennis racket and swing it forward, which can reflect projectiles. If the button is held, however, he will pull out a tennis ball and serve it. The ball will bounce off of opponents and the stage, and can even be reflected by Waluigi if he uses the move again to simply swing the racket forward, with the ball becoming more powerful the more times he successfully hits it. If Waluigi is holding a throwable item and uses this move, he will actually serve the item instead of a tennis ball. It won't bounce, but the item will still retain its original properties, such as the Beastball teleporting behind the opponent, Bob-ombs exploding on contact, or Capsules breaking to reveal another item.
Custom 1 - Power Serve: The tennis ball is stronger and will pass through opponents, allowing it to hit multiple targets.
Custom 2 - Reflecting Serve: Waluigi can only use the tapped version of the move, however, projectiles reflected by him will be twice as strong.
Side Special - Purple Missile: Waluigi charges up before blasting forward like a rocket while spinning. This move automatically hones in on the nearest opponent, and can be charged to increase the distance and power of the move. There is a 30% chance that the move will travel significantly farther and deal a ton of damage, even more so than a fully charged version of the move. This version of the move is called a Misfire.
Custom 1 - Purple Rocket: Waluigi deals less damage, but he travels much farther and faster. He also travels through opponents, allowing him to damage more than one.
Custom 2 - Purple Torpedo: Waluigi must charge the move fully before he flies forward, though he deals more damage and travels faster. He also has a higher chance of Misfire.
Up Special - Whirl-Luigi: Waluigi rises into the air while spinning before striking a random pose and going into a helpless state. The spinning deals light damage to opponents, however, the pose at the end will deal 1% damage and huge knockback if the opponent is touching Waluigi when it happens.
Custom 1 - Rising Whirl-Luigi: Waluigi travels much higher and can even travel diagonally, though he cannot damage opponents at any point aside from the ending pose, which is also weaker.
Custom 2 - Wild Whirl-Luigi: There is no hitbox at the end of the move, but Waluigi damages opponents multiple times before launching them as he rises.
Down Special - Dice Block: A Dice Block from Mario Party appears in Waluigi's hands as he rolls it forward, landing on a random number from 1 to 6, with each number having a different effect.
1: A weak attack that deals a single point of damage.
2: The opponent is pushed away with a windbox.
3: The opponent is poisoned.
4: The opponent is frozen.
5: The opponent is buried. If used in the air the opponent will be spiked.
6: The opponent takes heavy damage and knockback..
Custom 1 - Chain Block: Waluigi damages the opponent multiple times before launching them, with the number the dice lands on dictating how many times he hits the opponent.
Custom 2 - Cheater Block: The effects of each number are much weaker, though after using the move, a small number will appear by Waluigi's icon, displaying what number the dice will land on next.
Final Form - Super Waluigi: Waluigi looks around before pulling out a bunch of smuggled in powerups and scarfing them down, causing him to glow purple. In this state his speed is increased, as well as his attacks dealing more damage and knockback. His air mobility is also significantly increased.
Final Smash - Waluigi Time!: A purple puff of smoke emerges around Waluigi, with any opponents caught in it being trapped in a cinematic where they appear on the Waluigi Pinball track from Mario Kart DS, bounced around the track by Waluigi who is playing the game from the outside. The opponent then falls into the drain between the two flippers, which causes Waluigi to rage quit and flip the pinball table, launching the opponents.
Entrance: Waluigi appears in a burst of rose petals.
Up Taunt: Waluigi makes an "L" shape with his hand and puts it to his forehead while laughing.
Side Taunt: Waluigi spins and strikes a random dance pose.
Down Taunt: Waluigi puts a rose in his mouth and claps.
Victory Animation 1: Waluigi laughs hysterically while pointing at the screen. If he and Wario are on a team they will always do their respective laughing victory animations.
Victory Animation 2: Waluigi spins around the screen before posing with a rose in his mouth and facing the camera.
Victory Animation 3: Waluigi performs his famous crotch chop animation from Mario Strikers: Charged.
King Boo is the main antagonist of the Luigi's Mansion series, and is also a recurring character in various Super Mario spinoff games. He once kidnapped Mario and trapped him inside of a painting, but was eventually defeated by Luigi and sealed away, only to be freed in later games. King Boo has a deep hatred for the Mario Bros., and controls an army of Boos and various other ghosts that will attempt to hunt down Luigi.
King Boo, despite being a heavyweight character, is floaty in the air with three additional jumps, the ability to float by holding up on the control stick after jumping, and air mobility that rivals Jigglypuff's. In battle, he will float slightly above the ground, meaning that some attacks could pass right under him. He uses various attacks from his boss fights in his moveset, as well as having a unique gimmick utilizing the Boos. For every 30% he deals, one of the many varieties of Boo will appear in the background of the stage to watch him fight, which will increase his mobility and attack power. Up to five Boos can be onstage at once, and if he takes 40% damage, one of the Boos will disappear, decreasing his stats. If King Boo is KOd, all of the Boos will disappear.
Jab: King Boo throws two slaps followed by a headbutt.
Forward Tilt: King Boo reels in his tongue before launching it forward.
Forward Smash: King Boo does a front flip and slams his tongue on the ground.
Up Tilt: King Boo does an upwards swipe with his tongue.
Up Smash: King Boo's crown begins to glow before creating a fiery explosion.
Down Tilt: King Boo charges forward.
Down Smash: King Boo jumps up and slams down on the ground.
Dash Attack: King Boo does a somersault.
Counter: King Boo bashfully covers his face before screaming forward.
Neutral Aerial: King Boo does a horizontal spin, damaging opponents multiple times before launching them.
Forward Aerial: King Boo rushes forward while throwing a battering ram.
Forward Bash: King Boo does a frontflip while swinging his tongue downwards, which can spike opponents.
Back Aerial: King Boo turns around and does an outward swing with his tongue.
Back Bash: King Boo turns around and screams, launching opponents.
Up Aerial: King Boo does a backflip, hitting opponents with his tongue and tail.
Up Bash: King Boo creates an explosion of electricity from his crown.
Down Aerial: King Boo does a frontflip and swings his tongue below himself.
Down Bash: King Boo performs a stall-then-fall body slam, which can spike opponents.
Grab: King Boo sucks in the opponent like a vacuum.
Pummel: King Boo laughs, damaging the opponent inside of him.
Forward Throw: King Boo blows the opponent out of his mouth.
Back Throw: King Boo spins around and spits the opponent behind him.
Up Throw: King Boo pops like a balloon, with an explosion of flashing sparks that launch the opponent upward before King Boo reappears.
Down Throw: King Boo flies upward with the opponent in tow before performing a piledriver, which buries them.
Neutral Special - Spike Bomb: King Boo spits out a spike covered bomb that explodes after a set time. The bomb cannot be picked up by anyone, as the spikes will damage them.
Custom 1 - Spike Ball: King Boo throws a spiked ball forwards, rolling a fair distance before slowing down and eventually coming to a stop, where it will then disappear. If the spiked ball collides with an opponent, it will be bounced in the opposite direction. If the move is used in midair from a high enough distance, the spiked ball will break open upon hitting the ground, causing two small bombs to come out of it, which can be picked up and thrown by fighters.
Custom 2 - Spook: King Boo hides his face before lunging forward while screaming, inflicting paralysis on opponents. If the special button is held, he will continue to hide his face. While hiding, King Boo has super armor. The longer the move is charged, the more damage and range the attack will have.
Side Special - Dark Lightning: King Boo's crown lights up before lightning strikes right in front of him. This move can be charged, causing glowing panels to appear on the ground one at a time, up to five spaces away from him. When the move is released, lightning will strike on the last glowing panel that appeared.
Custom 1 - Wisps: King Boo shoots a blue fireball out of his mouth that travels forward until it goes off-screen or connects with something. The fireballs are slow, and rather weak. If the special button is held down after King Boo shoots the fireball, he will begin to inhale. Any fireballs in front of King Boo will be pulled back towards him while inhaling, however, opponents cannot be sucked up while doing this.
Custom 2 - Portrait: King Boo pulls out a portrait and holds it in front of him. It will create vacuumboxes that drag opponents into it, trapping them in the portrait. While in the portrait, they are vulnerable to attack, though they can escape faster by button mashing. It becomes harder to escape if King Boo has more Boos with him.
Up Special - Boo Buddies: King Boo splits into three, as they rise into the air in a triangle formation, before the left and right King Boos disappear. During the duration of the move, the player can use directional inputs to choose which of the three King Boos is the real one, with the fake ones simply vanishing if they are hit. This move does not put King Boo into a helpless state once it is finished.
Custom 1 - Phase Out: King Boo vanishes before reappearing in a new spot determined by directional inputs, and falling into a helpless state. If the special button is held down briefly and then released, King Boo will leave a duplicate of himself in the spot that he teleported from, remaining there for five seconds before disappearing. If this duplicate is attacked, it will explode, which can hurt opponents including King Boo himself. If the special button is held down and never released, King Boo will simply hover in place while laughing. cancelling the teleport like this will not put King Boo into a helpless state.
Custom 2 - Outta Sight: King Boo hides his face and becomes invisible, reappearing a short distance away in whatever direction the control stick is held. Right when he reappears, the attack button can be pressed for him to strike with his tongue and damage opponents.
Down Special - Disappear: King Boo shrinks slightly and turns completely transparent. In this state, everything will pass through him as if he weren't there. This only lasts a short time, and has a bit of endlag. When used in midair, the move will slow King Boo's descent.
Custom 1 - Poltergeist: King Boo takes a quick stance, causing any projectiles that hit him to be caught with his psychokinesis and sent back at 1.5x the amount of damage. If the special button is held down, King Boo will hold on to any caught projectiles, only throwing them when the special button is released. He cannot move during this, but can turn around. While in this state, King Boo is completely immune to projectiles, as he can keep catching as many projectiles as he wants. Up to five can be held at once, the number increasing by one for ever Boo that appears.
Custom 2 - Paranormal Strike: King Boo casts a bolt of lightning on a close enough opponent with his crown. If King Boo has more Boos with him, the range he can strike opponents will increase. With all five Boos, he can strike an opponent from anywhere on the stage.
Final Form - Boo Army: Eight Boos appear, increasing King Boo's stats accordingly. Additionally, the effects on his moves will be enhanced, such as his Up Special going higher.
Final Smash - Goodnight: King Boo opens up a paranormal portal, which will suck opponents in if they get too close. Opponents caught will be transported to the Paranormal Dimension, where King Boo appears in front of them before growing in size and pulling out a blank portrait. The portrait sucks the opponents in as King Boo laughs, ending the attack. If opponents are over 100% damage when the attack ends, they will be KOd.
Entrance: King Boo fades into view while laughing.
Up Taunt: King Boo laughs maniacally.
Side Taunt: King Boo bounces up and down on the ground.
Down Taunt: King Boo growls as his crown lights up.
Victory Animation 1: The screen appears empty, before King Boo suddenly appears and screams at the camera before laughing.
Victory Animation 2: A group of Boos rotate around King Boo as he adjusts his crown and poses.
Victory Animation 3: King Boo pulls out a portrait of one of his opponents as he laughs.
Petey Piranha is a boss that appears in Super Mario Sunshine, during the Bianco Hills level. He first appears on top of the giant windmill, which Mario must climb to face him. During the fight, Petey will spit up brown goop that can damage Mario as well as summon enemies. He was defeated by Mario spraying water into his mouth and then ground pounding his belly button.
He returned in a later mission, now with the ability to fly and throw tornadoes towards Mario, but he was defeated once again. Petey Piranha has not appeared in another mainline Super Mario game after his debut, although he frequently shows up in spinoffs such as Mario Kart: Double Dash, and Mario Tennis: Aces. He even appeared in Super Smash Bros. Brawl as a boss during the Subspace Emissary mode, where he trapped Peach and Zelda in cages and had to be defeated by Kirby. He then returned as Piranha Plant's Final Smash in Super Smash Bros. Ultimate where he once again used the cages to trap opponents.
Petey Piranha is tied with Ridley for being the largest character in the same, and is also the second heaviest fighter behind Bowser. Despite his size and weight, Petey Piranha has four midair jumps and the ability to float in midair by holding up on the control stick after jumping. His moveset consists of attacks using his large head and leaves, as well as abilities he has been seen using in various Super Mario games.
Jab: Petey Piranha throws two alternating slaps with his leaves before spinning around while throwing knifehand slashes, damaging opponents multiple times before launching them with another slap.
Forward Tilt: Petey Piranha throws a flying dual kick, then struggles to regain his balance by flapping his leaves.
Forward Smash: Petey Piranha spins while holding a cage, swinging it in front of himself. At full charge, this move can cause an opponent to be trapped inside of the cage, where they then must repeatedly press buttons in order to escape. During this, all of Petey Piranha's Smash Attacks will deal more damage as well as launching the opponent out of the cage.
Up Tilt: Petey Piranha lunges upwards and bites.
Up Smash: Petey Piranha does an overhead swing with a cage. At full charge, this move can cause an opponent to be trapped inside of the cage, where they then must repeatedly press buttons in order to escape. During this, all of Petey Piranha's Smash Attacks will deal more damage as well as launching the opponent out of the cage.
Down Tilt: Petey Piranha swipes one of his leaves across the ground, knocking opponents into the air.
Down Smash: Petey Piranha spins around while holding two cages, scraping them across the ground. At full charge, this move can cause up to two opponents to be trapped inside of the cages, where they then must repeatedly press buttons in order to escape. During this, all of Petey Piranha's Smash Attacks will deal more damage as well as launching the opponents out of the cages.
Dash Attack: Petey Piranha's body disappears as his head rolls along the ground like a boulder, launching opponents should they touch it.
Counter: Petey Piranha throws a headbutt.
Neutral Aerial: Petey Piranha spins rapidly with his leaves extended, damaging opponents multiple times before launching them.
Forward Aerial: Petey Piranha throws a flying kick.
Forward Bash: Petey Piranha throws a downwards headbutt, which can spike opponents.
Back Aerial: Petey Piranha leans backward and spins, damaging opponents multiple times before launching them.
Back Bash: Petey Piranha throws a dropkick.
Up Aerial: Petey Piranha bites upward, gaining a bit of vertical momentum.
Up Bash: Petey Piranha throws an upwards headbutt.
Down Aerial: Petey Piranha turns upside-down and bites, which can spike opponents.
Down Bash: Petey Piranha performs a stall-then-fall slam where he falls down head-first, which can spike opponents.
Grab: Petey Piranha lunges forward to bite the opponent.
Pummel: Petey Piranha bites down on the opponent.
Forward Throw: Petey Piranha spits the opponent out in front of him.
Back Throw: Petey Piranha turns around and spits the opponent behind him.
Up Throw: Petey Piranha spits the opponent upwards and bites them.
Down Throw: Petey Piranha spits the opponent towards the ground and bites them twice.
Neutral Special - Goop Puddle: Petey Piranha spits a large blob of brown goop onto the stage, where it will remain for up to three seconds. Opponents that step into the goop will take continuous damage and will also have their movement speed decreased.
Custom 1 - Ptooie: Petey Piranha spits a spiked ball upward and blows on it to keep it afloat. While blowing, it will periodically move up and down, damaging opponents it hits. Directional inputs can be used to launch the spiked ball left or right, with its arc changing how high it is; the lower the ball is, the farther it will travel.
Custom 2 - Nipper Spore: Petey Piranha spits a Nipper Spore. It will fall slowly to the ground and transform into a Nipper Plant upon landing, which will hop around the stage and bite opponents nearby. The Nipper Plant will be defeated if it takes enough damage, and the Nipper Spore will disappear after any damage to it is dealt. Up to two Nipper Plants can be at play.
Side Special - Tweester: Petey Piranha creates a large tornado that travels forward a short distance before returning back to him. The tornado has vacuumboxes that drag opponents into it, trapping them, allowing Petey Piranha to follow up with an attack when the tornado returns to him.
Custom 1 - Poison Breath: Petey Piranha charges up poisonous breath. Pressing the special button again will have him release a cloud of poisonous breath in front of himself, with it remaining longer depending on how long the move is charged. Opponents in the cloud will take gradual damage, and at full charge, they will grow a flower on their heads.
Custom 2 - Glorpedo: Petey Piranha spits a Glorpedo, which will bounce and roll along the ground and explode into goop on contact with an opponent. The Glorpedo can be defeated by opponents' attacks.
Up Special - Piranhacopter: Petey Piranha spins his leaves to propel himself upward, damaging opponents multiple times before launching them and falling into a helpless state afterwards. While rising, directional inputs can be used to change his direction.
Custom 1 - Jumping Plant: Petey Piranha leaps upward while biting. The move deals more damage, but covers less distance.
Custom 2 - Flying Plant: Petey Piranha rapidly flaps his leaves, causing him to rise into the air while biting. It travels less distance but it is more easily controllable.
Down Special - Piranha Pest: Petey Piranha spits out a Piranha Pest, which will float around and loosely home in on nearby opponents. If it is near enough, it will stick out its tongue. If it grabs an opponent, it will begin chewing on them, dealing continuous damage before spitting them back out. Opponents can escape quicker with button mashing, and the Piranha Pest can also be defeated by opponents' attacks. Once it attacks or it misses twice, it will disappear. Only one Piranha Pest can be at play at once.
Custom 1 - Piranha Sprout: Petey Piranha spits out a Piranha Sprout instead of a Piranha Pest. It will walk around instead of float towards opponents.
Custom 2 - Long-Neck Strike: Petey Piranha crouches down before extending his neck forward and biting. The longer the move is charged, the longer his stalk will extend. While charging, Petey Piranha's body can be tilted with directional inputs to change his direction.
Final Form - Goop Piranha: Petey Piranha spits a glob of goop upward, which falls on himself and covers him in it. In this state, he will leave temporary goop wherever he travels, damaging opponents who step in it. His attacks will also deal more damage and knockback.
Final Smash - Down with Petey Piranha!: Petey Piranha roars before charging forward with a headbutt. If he hits an opponent, they will be launched before landing on top of the windmill in Bianco Hills. Petey Piranha then appears above on a cloud and leaps off of it, striking several poses before slamming headfirst into the opponent and crashing through the windmill, which launches them back to the stage.
Entrance: Petey Piranha falls from the sky and lands on the stage, before roaring.
Up Taunt: Petey Piranha crosses his leaves and snarls at the opponent.
Side Taunt: Petey Piranha chomps at the air several times.
Down Taunt: Petey Piranha spins before striking a joyous pose.
Victory Animation 1: Petey Piranha growls before chomping at the air several times.
Victory Animation 2: The screen is empty for a moment, before Petey Piranha drops in from off screen and roars.
Victory Animation 3: Mario runs on screen and attempts to jump on Petey Piranha's head before he jumps up and bites Mario, launching him off screen.
Can Crawl: No.
Can Wall Jump: No.
Can Wall Cling: No.
Footstool: If Petey Piranha is footstooled while crouching, they will counter by jumping up and biting, which deals 10% damage.
Bowser Jr. is a recurring villain in the Super Mario series. He is the son of Bowser and first appeared in Super Mario Sunshine, where he was disguised as Mario and tried to frame him for vandalizing Isle Delfino. He later appeared in the Super Mario Galaxy games as well as the New Super Mario Bros. series. Bowser Jr. has similar abilities to his dad, such as shooting fireballs, however, he tends to use machinery such as the Jr. Clown Car. In Super Mario Sunshine he had access to a Magic Paintbrush that allowed him to create enemies and spread harmful goop across the area.
Bowser Jr. is a small, heavyweight fighter who mostly fights using said Magic Paintbrush. He can create various enemies from Super Mario Sunshine to attack, as well as transforming into Shadow Mario in order to replicate Mario's moves. Bowser Jr. can also breath fire, spin in his shell, and attack with his claws.
Jab: Bowser Jr. transforms into Shadow Mario and throws a one-two punch combo followed by a kick before reverting back to his normal self.
Forward Tilt: Bowser Jr. thrusts the Magic Paintbrush forwards.
Forward Smash: Bowser Jr. does an overhead swing with the Magic Paintbrush.
Up Tilt: Bowser Jr. thrusts the Magic Paintbrush upwards.
Up Smash: Bowser Jr. does a backflip to kick upwards.
Down Tilt: Bowser Jr. blows a small stream of flames that damage opponents multiple times before launching them.
Down Smash: Bowser Jr. jumps up and stomps the ground, creating a shockwave upon landing that can spike opponents.
Dash Attack: Bowser Jr. enters his shell and spins, damaging opponents multiple times before launching them.
Counter: Bowser Jr. transforms into Shadow Mario and throws a punch.
Neutral Aerial: Bowser Jr. enters his shell and spins, damaging opponents multiple times before launching them.
Forward Aerial: Bowser Jr. swings the Magic Paintbrush in front of him.
Forward Bash: Bowser Jr. transforms into Shadow Mario and throws a haymaker punch, which can spike opponents.
Back Aerial: Bowser Jr. turns around and swings the Magic Paintbrush behind him.
Back Bash: Bowser Jr. transforms into Shadow Mario and throws a dropkick.
Up Aerial: Bowser Jr. throws an upwards headbutt.
Up Bash: Bowser Jr. transforms into Shadow Mario and throws an uppercut.
Down Aerial: Bowser Jr. swings a small hammer below him, which can spike opponents.
Down Bash: Bowser Jr. transforms into Shadow Mario and throws a stomp with both feet, which can spike opponents.
Grab: Bowser Jr. transforms into Shadow Mario and uses the Magic Paintbrush to create a Swipin' Stu, which then flies forward and attempts to grab an opponent.
Pummel: Shadow Mario punches the opponent.
Forward Throw: Shadow Mario kicks the opponent forward.
Back Throw: Shadow Mario lifts the opponent overhead before throwing them backward.
Up Throw: Shadow Mario kicks the opponent upward.
Down Throw: Shadow Mario jumps up and stomps on the opponent's head, burying them.
Neutral Special - Paint Splash: Bowser Jr. transforms into Shadow Mario and swings the Magic Paintbrush, causing a splatter of paint to shoot out. If it lands on the stage, it will stay there for a short time, damaging opponents who touch it. It will also stick to opponents that are directly hit by it, damaging them over time.
Custom 1 - Sticky Paint Splash: Bowser Jr. transforms into Shadow Mario and swings the Magic Paintbrush, causing a splatter of paint to shoot out. If it lands on the stage, it will stay there for a short time, causing opponents who touch it to become stuck in place. It will also stick to opponents that are directly hit by it, slowing them down for a moment..
Custom 2 - Swoopin' Stu: Bowser Jr. transforms into Shadow Mario and uses the Magic Paintbrush to create a Swoopin' Stu, who leaps forward and bursts into a puddle of paint upon landing. The Swoopin' Stu and the paint it leaves behind can both damage opponents.
Side Special - Red Electrokoopa: Bowser Jr. transforms into Shadow Mario and uses the Magic Paintbrush to create a Red Electrokoopa, before kicking it forward. The Red Electrokoopa will travel forward until it hits an opponent, where it will paralyze them.
Custom 1 - Blue Electrokoopa: Bowser Jr. transforms into Shadow Mario and uses the Magic Paintbrush to create a Blue Electrokoopa, who grabs its shell and tosses it forward. The shell will fly forward a short distance before returning to the Blue Electrokoopa, who will then disappear. The shell will paralyze opponents on impact.
Custom 2 - Huge Red Electrokoopa: Bowser Jr. transforms into Shadow Mario and uses the Magic Paintbrush to create a Huge Red Electrokoopa, who slowly walks forward while discharging electricity that can paralyze opponents. The Huge Red Electrokoopa will disappear after a short time.
Up Special - Paint Jet: Bowser Jr. transforms into Shadow Mario and sprays a jet of paint from the Magic Paintbrush downward, which propels him upward. The paint can also cover opponents and the ground below him, with the paint itself dealing no damage and merely pushing opponents away.
Custom 1 - Jumping Blooper: Bowser Jr. transforms into Shadow Mario and uses the Magic Paintbrush to create a Jumping Blooper, grabbing onto its tentacles as it rises into the air before disappearing, leaving Bowser Jr. in a helpless state.
Custom 2 - Pondskater: Bowser Jr. transforms into Shadow Mario and uses the Magic Paintbrush to create a Pondskater, which he bounces off of high into the air. This move does not put Bowser Jr. into a helpless state.
Down Special - Strollin' Stu: Bowser Jr. transforms into Shadow Mario and uses the Magic Paintbrush to create a Strollin' Stu, who will slowly walk forward and attempt to charge into any nearby opponents. The Strollin' Stu can be defeated by attacking or jumping on it.
Custom 1 - Smolderin' Stu: Bowser Jr. transforms into Shadow Mario and uses the Magic Paintbrush to create a Smolderin' Stu before kicking it forward. Upon landing, the Smolderin' Stu will remain in its spot for a while before disappearing, with the flames on its head being able to damage opponents. The Smolderin' Stu can be defeated by attacking it.
Custom 2 - Cataquack: Bowser Jr. transforms into Shadow Mario and uses the Magic Paintbrush to create a randomly colored Cataquack, who will charge forward and attempt to launch opponents high into the air with its beak. The Cataquack can be defeated by attacking it.
Final Smash - Shadow Bowser Jr.: Bowser Jr. uses the Magic Paintbrush to make himself a translucent blue color. In this state, his attacks deal more damage and knockback, and he is faster.
Final Smash - Shadow Mario Paint: Bowser Jr. transforms into Shadow Mario, who then uses the Magic Paintbrush to cover the screen with paint in an "M" shape. Opponents caught in this paint will suffer damage. Eventually, the paint explodes, launching opponents caught in it.
Entrance: Shadow Mario lands down onto the stage, before transforming into Bowser Jr.
Up Taunt: Bowser Jr. lifts his brush into the air and laughs, a small breath of fire coming out.
Side Taunt: Bowser Jr. transforms into Shadow Mario and does his signature laugh.
Down Taunt: Bowser Jr. hops up and down while laughing.
Victory Animation 1: Bowser Jr. paints an "M" on the screen and laughs.
Victory Animation 2: Shadow Mario falls from the sky, before transforming into Bowser Jr.
Victory Animation 3: Bowser Jr. dances around happily before posing with his brush.
Toadette is a recurring member of the Toad species that appears in the Super Mario series. First introduced in Mario Kart: Double Dash as Toad's racing partner, she has since appeared in other games as a playable character and has played supporting roles in several titles, such as Super Mario Odyssey, Super Mario Maker 2, and Captain Toad: Treasure Tracker. While she has very similar traits to other characters, she is the most commonly recurring female Toad in the series. Toadette's defining traits include her bouncing pigtails, cheerful and energetic personality, and occasional bursts of creativity.
Toadette serves as an Echo Fighter of Toad, and mostly plays the same as him with the exception of a few different attacks. Specifically, she does not create mushrooms or use a pickaxe. Toadette's biggest difference from Toad is that she is not able to run and jump while carrying heavy objects like he can, however, her jump height is slightly better than his.
Jab: Toadette throws two punches followed by a headbutt.
Forward Tilt: Toadette throws a lunging headbutt.
Forward Smash: Toadette throws a headbutt.
Up Tilt: Toadette throws a spinning uppercut.
Up Smash: Toadette throws a headbutt from front to back.
Down Tilt: Toadette performs a somersault.
Down Smash: Toadette hops on her head and spins, damaging opponents multiple times before launching them.
Dash Attack: Toadette hops on her head and spins across the stage before throwing a kick. If the button is held, she will spin for a bit longer, and she can change directions while spinning.
Counter: Toadette throws a kick.
Neutral Aerial: Toadette performs a spin in the air, giving her a small boost of upward momentum.
Forward Aerial: Toadette throws a flying kick.
Forward Bash: Toadette swings her head downward, which can spike opponents.
Back Aerial: Toadette does a backflip to hit opponents with her head.
Back Bash: Toadette turns around and throws a kick behind her.
Up Aerial: Toadette throws a bicycle kick.
Up Bash: Toadette throws an upwards headbutt.
Down Aerial: Toadette turns upside down and falls downward, which can spike opponents and bounce her upward.
Down Bash: Toadette stomps downwards, which can spike opponents.
Grab: Toadette reaches out to grab the opponent with both hands.
Pummel: Toadette headbutts the opponent.
Forward Throw: Toadette charges into the opponent head-first, launching them forward.
Back Throw: Toadette lifts the opponent over her head before throwing them backwards.
Up Throw: Toadette throws the opponent into the air and then hits them with an upwards headbutt.
Down Throw: Toadette throws the opponent on the ground and then jumps on them head-first.
Neutral Special - Spore Shot: Toadette puffs up her cheeks before releasing spores on both sides of her that don't deal damage, but will push opponents away. If fully charged, the spores will make opponents dizzy.
Custom 1 - Toxic Shot: Toadette's spores will put a poison effect on opponents, but it loses the windbox.
Custom 2 - Fungus Shot: Toadette's spores will put a mushroom on the heads of opponents, but it will not make them dizzy.
Side Special - Golden Mushroom: Toadette's head transforms into a Golden Mushroom from the Mario Kart series as she dashes forward at high speeds launching opponents in her way. Toadette cannot turn around during the dash, and has access to a single jump, but if the special button is pressed again just as the dash ends she will gain another burst of speed. This can be continued as long as the special button is continuously pressed at the right time.
Custom 1 - Dash Mushroom: Toadette's head will turn into a regular Mushroom instead. This version can only be used once, but the dash lasts longer and Toadette can turn around during it.
Custom 2 - Rotten Mushroom: Toadette's head turns into a Rotten Mushroom. This version will damage opponents multiple times before launching them at the end of the dash, but the move is overall slower.
Up Special - Propeller Mushroom: Toadette uses a Propeller Mushroom, and spins into the air, damaging opponents multiple times before slowly falling back down. If the button is pressed again during this, Toadette will fall to the stage like a drill, which can also damage opponents.
Custom 1 - Chopper Mushroom: The move goes higher, but Toadette cannot fall like a drill.
Custom 2 - Spinning Mushroom: Toadette has more control over where she goes, but the move does not deal any damage.
Down Special - Turnip Toss: Toadette pulls out a large turnip to throw, however, unlike Peach, Toadette can only jump once while holding one, and the damage is always the same. If Toadette falls off a platform or ledge she will drop the turnip, which can still damage opponents if it falls on top of them. If this move is used in midair and Toadette is right above the opponent, she will grab whoever is underneath her and automatically throw them forward.
Custom 1 - Mushroom Block: Toadette pulls out a Mushroom Block instead. These deal more damage than the turnips, but can't be thrown as far.
Custom 2 - POW Block: Toadette pulls out a POW Block instead. These don't deal as much damage as the turnips, but will create a shockwave that can damage nearby opponents.
Final Form - 1-Up Mushroom: Toadette pulls out a 1-Up Mushroom and eats it, causing her to glow green. In this state her jump height and air mobility are increased, as well as her attacks dealing more damage and knockback
Final Smash - Peachette Dance: Toadette puts on the Super Crown and transforms into Peachette. She then begins to dance, putting all nearby opponents to sleep as large peaches spawn across the stage, which can be eaten to recover health.
Entrance: A Toad House appears on screen as Toadette exists before it disappears into a puff of smoke.
Up Taunt: Toadette jumps up and pumps her fist in the air.
Side Taunt: Toadette pulls out a Power Moon and examines it, before placing it back in her pocket.
Down Taunt: Toadette hops up and down before posing.
Victory Animation 1: Toadette spins and poses while holding a Power Moon.
Victory Animation 2: Toadette rides forward in a minecart before jumping out and posing.
Victory Animation 3: Toadette sits on top of Toad Brigade ship and waves at the camera.
Dry Bowser is the skeletal form of Bowser that first appeared in New Super Mario Bros. after he was dunked in lava by Mario, causing his skin to melt off. After being resurrected by Bowser Jr, Dry Bowser retained the strength of his regular counterpart, on top of having the abilities of a Dry Bones, such as being immune to fireballs, and being able to put himself back together after being dismantled by Mario's stomps. Since then, Dry Bowser has appeared in several Super Mario spinoff games, usually as a separate entity from Bowser.
Dry Bowser shares some moves with Bowser, but also has plenty of his own attacks. Due to him only being a skeleton, he is lighter than his flesh counterpart, on top of lacking the "Tough Guy" attribute and the invincibility that some of his attacks grant him. To make up for this, Dry Bowser is more mobile, and his attacks have more range than Bowser's, due to his bones being able to disconnect and reconnect, allowing Dry Bowser's moves to reach opponents than Bowser's could not.
Jab: Dry Bowser throws a palm strike followed by a punch, with his arm disconnecting at the elbow joint for added reach.
Forward Tilt: Dry Bowser throws a backhand punch, with his arm disconnecting at the elbow joint for added reach. This move can be angled up and down
Forward Smash: Dry Bowser rears his head back before throwing a powerful headbutt, with his head disconnecting at the neck for added reach. This move causes an explosion upon impact
Up Tilt: Dry Bowser swipes his claws in an overarching motion, with his arm disconnecting at the elbow joint while he swipes, giving it an added amount of reach.
Up Smash: Dry Bowser gets on all-fours and disconnects the spikes on his shell to fire them outwards.
Down Tilt: Dry Bowser slashes along the ground with both his claws. The second attack is optional by pressing the attack button again, and the first hit is capable of tripping opponents. No limbs disconnect for this move.
Down Smash: Dry Bowser rakes the ground with his claws as his hands disconnect at the wrist for added reach. This move can hit opponents on both sides of Dry Bowser.
Dash Attack: Dry Bowser tackles the opponent, with his head disconnecting at the neck for added reach.
Counter: Dry Bowser throws a dropkick.
Neutral Aerial: Dry Bowser performs an aerial cartwheel, his arm bones disconnected at the elbow and leg bones disconnected at the knee for added reach, damaging opponents multiple times before launching them.
Forward Aerial: Dry Bowser slashes forward, disconnecting his arm at the elbow for better reach.
Forward Bash: Dry Bowser slashes downward, disconnecting his arm at the elbow for better reach.
Back Aerial: Dry Bowser thrusts his shell backward as spikes shoot out from it.
Back Bash: Dry Bowser throws a dropkick behind himself, his leg bones disconnecting at the knee for added reach.
Up Aerial: Dry Bowser throws an upwards slash, his arm disconnecting at the elbow for better reach.
Up Bash: Dry Bowser throws an upwards headbutt, disconnecting it at the neck for added reach.
Down Aerial: Dry Bowser enters his shell and spins downwards, damaging opponents multiple times before launching them
Down Bash: Dry Bowser turns upside down and comes crashing downwards, spiking opponents if it connects.
Grab: Dry Bowser reaches out with one hand as it disconnects at the elbow for added reach.
Pummel: Dry Bowser headbutts the opponent.
Forward Throw: Dry Bowser bucks his opponent upwards, briefly disconnecting his head from his body.
Back Throw: Dry Bowser's arm disconnects before it spins around himself four times and tosses the opponent behind him as Dry Bowser's head spins to follow the arm's movements.
Up Throw: Dry Bowser tosses the foe upwards, retreats into his shell, and spins, damaging the foe with his spikes.
Down Throw: Dry Bowser places the opponent on the floor and body slams them.
Neutral Special - Bone Toss: Dry Bowser pulls out a bone and throws it. The bone is not affected by gravity, and will travel straight forwards. Up to two bones can be thrown in succession.
Custom 1 - Power Bones: The bones are larger and deal more damage, however they are slower and are affected by gravity once thrown.
Custom 2 - Flaming Bones: Dry Bowser breathes blue fire onto the bones before throwing them, causing them to damage opponents multiple times, however only one can be thrown in succession.
Side Special - Royal Rampage/Galactic Crusher: Dry Bowser performs a running bear grab. Dry Bowser will walk forward until he either grabs an opponent or after 3 stomps. If used in the air, Dry Bowser will instead use Galactic Crusher, where he spins around in the air and gains armor. If a foe is in range, they will be grabbed and piledriven into the ground, resulting in a powerful explosion and massive knockback. Grabbing the opponent on the ground allows Dry Bowser to perform four different throws:
Forward Throw: Dry Bowser spins around and then throws the opponent forward.
Back Throw: Dry Bowser grinds the opponent on the ground with his shell.
Up Throw: Dry Bowser jumps into the air and performs a piledriver.
Down Throw: Dry Bowser slams the opponent on the ground.
Custom 1 - Chaotic Rampage: Dry Bowser can only use Royal Rampage, with it functioning the same in the air as on the ground, however, his throws become more powerful and he will run longer when attempting to grab an opponent.
Custom 2 - Ballistic Crusher: Dry Bowser can only use Galactic Crusher, with him grabbing the opponent and throwing them into the air to perform the piledriver if used on the ground. However, the move is more powerful.
Up Special - Spiraling Stronghold: Dry Bowser tucks into his shell and rapidly spins to gain height. During this, Dry Bowser will shed four bones from his body that can hit opponents below him. On the ground, each bone bounces twice, two going left and two going right, allowing Dry Bowser to cover more space on the ground. If the special button is repeatedly tapped, Dry Bowser will rise higher into the air.
Custom 1 - Burning Stronghold: Dry Bowser doesn't travel as fast or shed bones, but he leaves a trail of flames behind himself, which gradually damage opponents that stand in them. In midair, Dry Bowser deals more damage in exchange for lack of horizontal movement.
Custom 2 - Shocking Stronghold: Dry Bowser doesn't travel as high and doesn't shed bones, but he discharges electricity that can damage opponents multiple times before launching them.
Down Special - Blue Fire Orb: Dry Bowser shoots a large blue fireball towards the ground that explodes on contact, leaving a patch of flames that damage opponents who step in it until it disappears.
Custom 1 - Blue Fireball: Dry Bowser shoots the fireball forwards instead of at the ground, acting as a more traditional projectile.
Custom 2 - Blue Fire Breath: Dry Bowser expels blue flames out of his mouth that can damage opponents multiple times. The stream can be aimed using directional inputs, however it will grow smaller the longer the move is used for, and must recharge over time to return to its normal size.
Final Form - Flaming Bowser: Dry Bowser becomes engulfed in blue flames. In this state, his attacks deal more damage, with many of his attacks being enhanced with fire. He can also run faster and jump higher.
Final Smash - Giga Dry Bowser: Dry Bowser runs forward while slashing. Any opponents hit will then appear in the middle of the courtyard to Bowser's Castle, from which the towering Giga Dry Bowser crashes out of and unleashes a massive blue fireball the size of his body at the caught opponents, causing a massive explosion that launches them, and instantly KOing if they are over 100% damage.
Entrance: Dry Bowser falls from the sky and shatters into several pieces, before they reattach themselves as Dry Bowser stands up and roars.
Up Taunt: Dry Bowser takes off his forward-facing arm, spins it on his opposite finger, and places it back on.
Side Taunt: Dry Bowser roars as his shell and eyes glow a bright orange color.
Down Taunt: Dry Bowser's jaw literally drops to the ground, which he quickly reattaches.
Victory Animation 1: Dry Bowser dribbles his head on the ground like a basketball before tossing it up, only for it to land on his body upside down, leaving him dazed.
Victory Animation 2: Dry Bowser shoots several fireballs at the background, creating firework-like explosions as he turns around and points at himself with his thumbs in a prideful manner.
Victory Animation 3: Dry Bowser is seen spinning on the ground, missing his arms and legs. When they reattach, his arms appear where his legs should be and vice-versa, causing him to get up and stumble around awkwardly.
Can Crawl: Yes.
Can Wall Jump: No.
Can Wall Cling: No.
Footstool: If Dry Bowser is footstooled while crouching the opponent will take 10% damage, due to the spikes on his shell damaging them.
Rosalina & Luma are recurring characters in the Super Mario series, first appearing in Super Mario Galaxy. She is the mother of the Lumas, a race of small star creatures, and lives in the Comet Observatory, traveling throughout the galaxy. Upon meeting Mario, she requested that he retrieve the various Power Stars and Grand Stars that fueled the Comet Observatory. After her encounter with him, she has made frequent appearances in spinoffs such as Mario Kart, as well as main series games like in Super Mario 3D World.
Rosalina is a lightweight and floaty character who fights alongside one of her Lumas. The Luma will float in front of Rosalina and attack at the same time as her, as well as following her around wherever she goes. The Luma has its own percentage, which is displayed near Rosalina's percentage, and can be knocked around by opponents' attacks. If the Luma takes too much damage it will be KOd, and Rosalina must wait five seconds before another will appear to take its place.
Jab: Rosalina swings with her wand twice followed by emitting a third wand strike. The second hit can be followed by a rapid series of wand strikes that culminates with a final wand strike. Luma will punch followed by a kick followed by a bicycle kick. Alternatively, the punch and kick can be followed by a series of spins that culminate with a corkscrew headbutt.
Forward Tilt: Rosalina does a floating, double-footed roundhouse kick while Luma also does a roundhouse kick.
Forward Smash: Rosalina does a double palm thrust that emits a spiral galaxy-shaped energy blast while Luma simply punches.
Up Tilt: Rosalina emits a planetary ring that rises up from her head while Luma does an uppercut.
Up Smash: Rosalina does a backward arching headbutt while Luma throws a bicycle kick.
Down Tilt: Rosalina does a low-angle dropkick while Luma does a low-angle headbutt.
Down Smash: Rosalina performs a spinning shin kick that emits spiral galaxy-shaped energy blasts on both sides while Luma does a spinning kick.
Dash Attack: Rosalina performs a lunging, upward battering ram that emits stardust from her head while Luma does the same and concludes with a backflip.
Counter: Rosalina creates a blue force field around herself that can reflect projectiles. If she is attacked during this she will counter with a spin.
Neutral Aerial: Rosalina performs a spin that emits stardust from her wand while Luma also spins.
Forward Aerial: Rosalina performs a delayed bicycle kick that emits a spiral galaxy-shaped energy blast, hitting opponents multiple times while Luma does an upward headbutt.
Forward Bash: Rosalina throws a double palm thrust that emits a spiral galaxy-shaped energy blast while Luma throws a punch.
Back Aerial: Rosalina throws a dropkick that emits a spiral galaxy-shaped energy blast while Luma also does a dropkick.
Back Bash: Rosalina turns around and throws a double palm thrust that emits a spiral galaxy-shaped energy blast while Luma throws a punch.
Up Aerial: Rosalina emits a planetary ring above her head while Luma does an uppercut.
Up Bash: Rosalina does a backward arching headbutt while Luma throws a bicycle kick.
Down Aerial: Rosalina emits a planetary ring below herself while Luma stomps, both of which can spike opponents.
Down Bash: Rosalina and Luma both stomp downwards, which can spike opponents.
Grab: Rosalina reaches out to grab the opponent.
Pummel: Rosalina hits the opponent with her wand.
Forward Throw: Rosalina makes the opponent float in front of herself with anti-gravity, and then flings them in front of herself.
Back Throw: Rosalina spins the opponent around herself once with anti-gravity, and then tosses them behind herself.
Up Throw: Rosalina flings the opponent into the air with anti-gravity.
Down Throw: Rosalina slams the opponent onto the ground with anti-gravity.
Neutral Special - Luma Shot: Rosalina uses anti-gravity to launch Luma forward as they perform a corkscrew battering ram. The move can be charged, with a fully charged Luma being invincible whilst traveling. Luma stops after either hitting something, or reaching the end of its path. Luma will remain at the place it stopped until it is called back to Rosalina by tapping the special button again. Luma will eventually float back to Rosalina's position if it is not recalled after a long enough time and as long as it is above ground. While Luma is out it is susceptible to falling off of the stage and dying.
Custom 1 - Luma Rocket: Luma flies slower and doesn't travel as far, but they damage opponents multiple times before launching them.
Custom 2 - Luma-rang: The move cannot be charged, but Luma is stronger and will automatically return to Rosalina in a boomerang-like motion, with them being able to hit opponents both while being launched and while coming back.
Side Special - Star Bits: Luma shoots three Star Bits forward, which pierce opponents.
Custom 1 - Star Chunks: Luma sends out a single Star Bit that is larger and deals much more damage and knockback.
Custom 2 - Star Blast: Luma sends out a single larger Star Bit that explodes into smaller ones on impact, damaging opponents multiple times before launching them.
Up Special - Launch Star: Rosalina uses a multicolored Launch Star to launch herself upward. It can be angled, making it capable of launching her at a purely vertical angle, a nearly horizontal angle, or a diagonal angle. This move also puts Rosalina into a helpless state.
Custom 1 - Launch Comet: The move doesn't travel as far, but Rosalina will damage opponents multiple times before launching them if they come into contact with her.
Custom 2 - Launch Meteor: Rosalina has less control over the angle she is launched in, but an explosion occurs at the beginning and end of the move.
Down Special - Gravitational Pull: Rosalina waves her wand around herself, using the Star Cursor to make nearby items or projectiles gravitate toward her. Gravitating items and projectiles come under Rosalina's ownership, which can result in projectiles damaging opponents who get too close.
Custom 1 - Gravitational Force: The move will cause opponents to gravitate towards Rosalina rather than items and projectiles.
Custom 2 - Gravitational Repel: The move will repel items instead of pulling them in.
Final Form - Big Luma: Rosalina feeds Luma several Star Bits, causing him to grow larger. In this state, he is slower and heavier, but his attacks deal more damage and knockback. It also takes less time for Luma to respawn when he is KOd.
Final Smash - Black Hole: Rosalina summons a large black hole, as several Lumas fly into it, the black hole slowly growing bigger, before exploding. The black hole sucks opponents in, and the Lumas can damage them while flying into it.
Entrance: Rosalina and Luma fly onto the stage while accompanied by a trail of stardust.
Up Taunt: Rosalina & Luma lean forward and twirl like a planet on its axis while Luma chirps cheerfully.
Side Taunt: Rosalina puts her hand on her hip, leans back, waves her wand and says "Mmm hmm!" while Luma nods its head in agreement.
Down Taunt: Rosalina crouches and then slowly rises up while waving her wand and while Luma dances around.
Victory Animation 1: Rosalina poses gracefully and says "All right!" while Luma flies in from off-screen and twirls next to her.
Victory Animation 2: Rosalina giggles while motioning forward similarly to when performing Luma Shot, as Luma flies forward while twirling and chirping cheerfully before dancing around her.
Victory Animation 3: Luma jumps around before jumping into Rosalina's arms while she giggles.
The Maker is not an actual character, but rather a representation of someone playing Super Mario Maker. Ingame, the player looks like they're controlling a sprite of Mario, but in reality they are controlling the hand that places down objects. The Maker controls differently compared to other fighters, as Mario has a momentum based mechanic to him. The longer Mario runs for, the more speed he builds up, and he keeps this momentum when he jumps.
Additionally, when The Maker reaches over 150% damage, Mario will shrink down to around half his size, making him faster, as well as causing attacks to come out quicker, at the cost of him being much lighter and easier to KO. All of The Maker's attacks involve placing down objects or giving Mario various items from Super Mario Maker and Super Mario Maker 2. Additionally, The Maker is unique for being the only fighter in the game to not have any Custom Moves, due to all of his Special Moves having different variants by default.
Jab: The Maker taps on the screen, causing an image of a hand holding a stylus to strike the area in front of Mario.
Forward Tilt: The Maker places down a Koopa Shell, which Mario kicks forward.
Forward Smash: The Maker places down a Chain Chomp, who lunges forward to bite opponents. When the move is fully charged, The Maker will add a Super Mushroom to the Chain Chomp, causing it to be larger than normal and deal more damage.
Up Tilt: The Maker places down a Lava Bubble, which jumps upwards to hit opponents before disappearing.
Up Smash: The Maker places a Buzzy Shell on Mario as he jumps into the air, damaging any opponents he hits with his head, which also has super armor. When the move is fully charged, The Maker will give Mario a Spiny Shell instead, which deals more damage.
Down Tilt: The Maker creates a vertical stack of random blocks in front of Mario.
Down Smash: The Maker places down a Sledge Bro., who jumps up and stomps on the ground, creating a shockwave that damages opponents. When the move is fully charged, The Maker will instead place down a Thwomp that acts the same way, but deals more damage.
Dash Attack: The Maker places Mario in a Koopa Troopa Car as he drives forward, ramming into opponents.
Counter: Mario jumps on the opponent's head.
Neutral Aerial: The Maker places down a Fire Bar that spins in place, damaging opponents multiple times before launching them.
Forward Aerial: The Maker places a Bullet Bill Mask on Mario's head, causing him to propel forward and ram into opponents. Mario can continue to fly forward for as long as the attack button is held down for.
Forward Bash: The Maker places down a Burner, which shoots out a stream of flames that damage opponents multiple times before launching them.
Back Aerial: The Maker places a Canon in midair, which proceeds to shoot a cannonball backwards, launching opponents it hits. The cannonball can be "killed" though, should the opponent jump on it at the right time.
Bash Bash: The Maker places a Bill Blaster behind Mario, which proceeds to shoot a Bullet Bill backwards, exploding on impact.
Up Aerial: The Maker places a Brick Block above Mario's head as he breaks it, with the explosion of bricks launching opponents.
Up Bash: The Maker places a Red POW Box on Mario's head, with it creating a shockwave on impact with an opponent that can damage others nearby.
Down Aerial: The Maker places a Crate below Mario, which will fall down until it hits the stage or an opponent.
Down Bash: The Maker creates a horizontal line of random blocks underneath Mario, which not only protects him from opponents trying to attack from below, but it can also spike if the opponent is hit with the blocks when they are placed down.
Grab: The Maker grabs the opponent and holds them in place.
Pummel: The Maker rapidly shakes the opponent.
Forward Throw: The Maker places the opponent in a Question Block and Mario jumps up to hit it, knocking the opponent out and launching them forward.
Back Throw: The Maker puts the opponent in a Bill Blaster, which then fires the opponent behind Mario.
Up Throw: The Maker places the opponent in a Clear Warp Pipe, which sends them flying upward into the air.
Down Throw: The Maker places Mario in a Goomba's Shoe as he jumps up and stomps on the opponent's head, burying them
Neutral Special - Powerups: The Maker gives Mario one of five different powerups that can be selected from a menu, which transform him into a new form and replace the Neutral Special with a new move. Mario will keep the powerup until he takes 50%, where he will then lose it and return to normal. The five different powerups include:
Superball Flower: Mario takes on his appearance from Super Mario Land and gains the ability to throw Superballs. These Superballs will bounce off of platforms, opponents, and even the edges of the screen before disappearing. Only one can be thrown at a time.
SMB2 Mushroom: Mario takes on his appearance from Super Mario Bros. 2 and gains the ability to pull turnips from the ground and throw them at opponents. Additionally, Mario is able to stand on the heads of opponents and ride them like a platform, where he can then pick them up and throw them.
Super Bell: Mario transforms into Cat Mario form from Super Mario 3D World and gains the ability to climb up walls. He also gains a claw attack on the ground, and an attack in midair where he dives diagonally downwards.
Super Hammer: Mario transforms into Builder Mario and gains the ability to swing his hammer as well as create Builder Boxes. These boxes are treated just like normal Crates are, meaning that anyone can pick them up and throw them. Builder Mario can have up to three boxes on the stage at a time, and they can stack on top of each other, forming a wall in front of Builder Mario.
Cannon Box: Mario has a Cannon Box placed on his head, allowing him to fire cannonballs forward. The move can be charged to increase its speed and the distance it travels.
Side Special - Enemies: The Maker places down one of five different enemies that can be selected from a menu in front of Mario, all with their own properties and abilities. Only one enemy can be onstage at a time. The five different types include:
Blooper: The Blooper will move erratically towards the closest opponent, damaging them on contact. They can be defeated fairly easily, with attacks or by jumping on their head.
Cheep Cheep: The Cheep Cheep will bounce along the ground, following opponents and jumping up to attack them. They cannot be jumped on and must be defeated by attacks.
Spike: The Spike will stand still and throw Spike Balls at the opponents, which fly forward in a straight line. The Spike can be attacked or jumped on to defeat it.
Pokey: The Pokey will slowly walk forward and damage opponents on contact. Their height is random, with them consisting of between two and six segments not including the head. Opponents must attack the Pokey's head in order to defeat it.
Bully: The Bully will charge forward and ram into opponents, not dealing damage but pushing them back and stunning them. The Bully cannot be defeated, but they can also be pushed back by attacks, eventually falling off of the stage.
Up Special - Recovery: The Maker places down one of five different items that can be selected from a menu, all of which cause Mario to rise upward in some way. The five different items include:
Power Balloon: Mario inflates like a balloon, and by pressing the special button, he will gain a burst of momentum forwards into whatever direction he is facing. This can be done up to three times before Mario returns to normal.
Super Acorn: Mario transforms into Flying Squirrel Mario and gains a burst of upwards momentum. If the special button is held down, Mario will enter a gliding state at the apex of his jump.
Propeller Box: Mario has a Propeller Box placed on his head as he rapidly spins, causing him to rise high into the air before falling down slowly.
Lakitu's Cloud: The Maker places Mario into a Lakitu's Cloud, where he then has free movement and can fly anywhere for three seconds before the cloud disappears.
Fast Lava Lift: The Maker places down a Lava Lift, which travels upwards in an arc with Mario on top of it.
Down Special - Gizmos: The Maker places down one of five different gizmos that can be selected from a menu, all of them having different functions and properties. Only one gizmo can be onstage at time. The five different gizmos include:
Bull's-Eye Blaster: The Bull's-Eye Blaster will fire Bull's-Eye Bills that home in on opponents and explode on impact. It will disappear after five seconds.
Twister: The Twister will propel opponents, including Mario, upward through the use of tornadoes, before disappearing after three seconds.
POW Block: The POW Block appears above Mario and will cause a stage-wide tremor when hit that causes all grounded opponents to be damaged. The POW Block can then be hit or attacked up to three times before it disappears. Opponents can also use the POW Block for themselves. Only one POW Block can be at play at a time.
Grinder: The Grinder will remain stationary for five seconds before disappearing, dealing a lot of damage to opponents who touch it.
Bumper: The Bumper will bounce opponents away should they touch it. It can also be used as a trampoline if jumped on top of. The Bumper will disappear after five seconds.
Final Form - Big Mario: The Maker gives Mario a Big Mushroom, transforming him into Big Mario. In this state, his attacks cover more range and deal more damage. He can also bury opponents by jumping on them, and he creates small shockwaves upon landing that cause nearby opponents to trip.
Final Smash - Kaizo Madness: The Maker taps on the screen in an attempt to grab an opponent. If they succeed, the opponent will be pulled into a cutscene where the screen goes black, before transporting The Maker, Mario, and the opponent into one of the many "Don't Move" levels that have been created in Super Mario Maker. Mario will be standing on top of a moving platform, following along at the bottom of the screen while the opponent is bombarded with various enemies, hazards, and other things that some evil creator has placed in this level. The Final Smash ends with several images of cat paws striking the opponent rapidly while the rave music from Super Mario Maker plays in the background, before they are held in place as The Maker erases the opponent using Mr. Eraser, which will instantly KO them if they are over 100% damage.
Entrance: Mario walks on screen before receiving a Super Mushroom from The Maker, turning him into Super Mario.
Up Taunt: The Maker quickly switches to the Super Mario 3D World theme and makes Mario spin in place before reverting back to Mario's normal appearance.
Side Taunt: The Maker gives Mario a Weird Mushroom, which transforms him into Skinny Mario, before The Maker regrets this decision and shakes Mario, turning him back to normal.
Down Taunt: Mario hops in the air, causing a random sound effect from Super Mario Maker to play.
Victory Animation 1: Mario slides down a flag pole as various sounds and effects from Super Mario Maker play in the background.
Victory Animation 2: Mario jumps through the goal from Super Mario Bros. 3, receiving a Star to go with the two that he already has, which gives him a 1-Up.
Victory Animation 3: Mario jumps through the goal post from Super Mario World, then poses with a peace sign.
Can Crawl: No.
Can Wall Jump: Yes.
Can Wall Cling: No.
Footstool: The Maker's footstool does 10% damage, as well as spiking opponents.
Gooigi is a clone of Luigi who appears in the Nintendo 3DS remake of Luigi's Mansion and again in Luigi's Mansion 3, with him serving as the second player character in both instances. He appears in Luigi's image but is entirely composed of green goo, hence his name, and wields a gooey version of the Poltergust G-00. He was created by Professor E. Gadd during the events of Luigi's Mansion: Dark Moon, after accidentally spilling his coffee onto a strange liquid he was experimenting on, which caused it to take a green goop-like form. After this, Gooigi was sent back in time to the events of the original Luigi's Mansion, outsourcing E. Gadd's testing to his and Luigi's past selves. Gooigi then went on to reappear in Luigi's Mansion 3, where the player can use him to reach certain areas that Luigi cannot, such as behind bars, past spikes, or through grates.
In this game, Gooigi appears as Luigi's Echo Fighter, using mostly the same moveset as him, but with a few different attacks. Gooigi is lighter and faster than Luigi, however, this comes at the cost of him being easier to KO. Gooigi also has weaker attacks overall, but they deal more knockback than Luigi's.
Jab: Gooigi swings the head of the Poltergust G-00 in front of him before performing an uppercut-like swing. If the attack button is repeatedly pressed, Gooigi will spin the vacuum in front of him like a propeller, damaging opponents multiple times before launching them with a final swing.
Forward Tilt: Gooigi throws a wheel kick.
Forward Smash: Gooigi attaches the Strobulb to the Poltergust G-00 and unleashes a large flash of light that stuns opponents the longer the move is charged for.
Up Tilt: Gooigi throws an overhand swipe.
Up Smash: Gooigi throws an upward headbutt.
Down Tilt: Gooigi shines an ultraviolet ray from his flashlight at the ground in front of him, causing a Spirit Ball to rise up and burst.
Down Smash: Gooigi performs a breakdance sweep.
Dash Attack: Gooigi throws a series of childish punches while running forward, damaging opponents multiple times before launching them.
Counter: Gooigi throws a knifehand thrust.
Neutral Aerial: Gooigi throws a sex kick that sends opponents straight up.
Forward Aerial: Gooigi swings the Poltergust G-00 downwards as it creates a stream of flames.
Forward Bash: Gooigi throws a downwards knifehand strike.
Back Aerial: Gooigi swings the Poltergust G-00 behind him as it creates a stream of ice that can freeze opponents.
Back Bash: Gooigi throws a dropkick.
Up Aerial: Gooigi swings the Poltergust G-00 overhead as it sprays out a stream of water that pushes opponents upwards.
Up Bash: Gooigi throws a bicycle kick.
Down Aerial: Gooigi aims the Poltergust G-00 below him as an explosion bursts from it, which can spike opponents.
Down Bash: Gooigi throws a corkscrew stomp, which can spike opponents.
Grab: Gooigi fires a plunger from the Poltergust G-00, pulling opponents towards him. This can also be used in midair as a tether recovery.
Pummel: Gooigi lifts the opponent overhead and slams them on the ground. He will alternate between the left and right sides of himself each time the move is used.
Forward Throw: Gooigi lifts the opponent up before launching them away with a blast of fire.
Back Throw: Gooigi swings the opponent around and launches them behind him with a blast of ice.
Up Throw: Gooigi swings the opponent overhead before launching them upward with a blast of water.
Down Throw: Gooigi launches the opponent at the ground.
Neutral Special - Goo: Gooigi fires an orb of green goo from his palm that flies forward, briefly slowing down opponents on contact.
Custom 1 - Fireball: Gooigi fires a green fireball from his finger that travels forward in a circular motion, dealing more damage but moving slower.
Custom 2 - Boo Shot: Gooigi launches a Boo out of the Poltergust G-00, which bounces along the ground and puts a mushroom on opponent's heads.
Side Special - Suction Surge: Gooigi activates the vacuum attachment of the Poltergust G-00 to pull in opponents with a very far and wide-ranged tornado-like effect. While Gooigi cannot move, he can aim the vacuum forward or diagonally upwards. If an opponent is too close to Gooigi, a bright green surge of electricity pulls them into the vacuum, before he launches the opponent outwards, upwards, or backwards.
Custom 1 - Suck Up: The move doesn't have as much range and is overall smaller, on top of not being able to suck in opponents. However, the move will suck in any projectiles and fire them back out, with them dealing more damage than normal.
Custom 2 - Green Bullet: Gooigi climbs atop the Poltergust G-00 as it blasts forward like a rocket, causing opponents to be hit by Gooigi's head. The move can be charged to cover more distance and deal more damage. There is a 1/4 chance that the move will fly faster, farther, and deal more damage than its fully charged form, known as a Misfire. Compared to Luigi's version, Gooigi deals less damage, but he travels much farther and faster, and he also travels through opponents, allowing him to damage more than one.
Up Special - Burst: Gooigi releases air pressure from the Poltergust G-00, causing him to be launching upward. Gooigi does not fall into a helpless state after this, and the move also creates windboxes that can push opponents away.
Custom 1 - Balloon Berry: Gooigi attaches a Balloon Berry from Luigi's Mansion: Dark Moon to the Poltergust G-00 and inflates it, causing him to be lifted into the air. Gooigi will rise higher if the special button is repeatedly pressed, before the balloon deflates and he falls into a helpless state. The balloon can also be popped by opponents.
Custom 2 - Rising Jump Punch: Gooigi throws a jumping uppercut, damaging opponents multiple times before launching them and falling into a helpless state.
Down Special - Elemental Medals: Gooigi releases a stream of flames from the Poltergust G-00 that deals multiple hits of light damage to opponents standing in it. The stream can be angled up and down, but will gradually decrease in size as time goes on, and will need time to recharge before returning to full size. By using his Guard Special, Gooigi can switch out the fire for water that pushes opponents away, or ice that has a chance to freeze opponents, with the one he has currently selected being displayed near his portrait.
Custom 1 - Blown Away: Gooigi begins blowing air out of the Poltergust G-00, creating a windbox that will push opponents away, as well as nullify any physical projectiles.
Custom 2 - Gooigi Whirlwind: Gooigi spins rapidly with his arms outstretched, damaging opponents multiple times before launching them. Gooigi can move left and right during this. Compared to Luigi's version, Gooigi spins for longer and deals more damage as a result, but he cannot rise into the air.
Final Form - Sticky Gooigi: Gooigi begins to melt, causing him to become sticky. In this state, Gooigi's movement is more slippery, and he is faster. Additionally, all of his attacks will send out green goo that can stick to opponents and slow them down temporarily.
Final Smash - Boolossus: Gooigi readies the Poltergust G-00 as the vacuum attachment on it goes haywire and starts sucking in anything nearby. If any opponents are caught, the scene will transition to show them on atop the roof of the mansion from the original Luigi's Mansion. Suddenly, a swarm of Boos begin circling and surrounding the opponents before combining together and forming Boolossus, who jumps up and slams down on the opponents, sending them back to the stage and launching them.
Entrance: Gooigi emerges from a puddle of green goo lying on the ground.
Up Taunt: Gooigi does five quick poses, one after the other. These include him flashing a peace sign, him pointing both his fingers in the direction he is facing while looking frightened, him holding his finger under his nose and looking at the player, him crouching down to the floor with his back turned to the player, and assuming a fearful position with his hands on his cheeks, mimicking Luigi's pose on the boxart of Luigi's Mansion.
Side Taunt: Gooigi pulls out a random gem and observes it before putting it back where it got it.
Down Taunt: Gooigi melts into a puddle of goo before reforming himself.
Victory Animation 1: Gooigi turns around and makes gun motions with his fingers, saying "Bang, bang." Afterwards, he alternates between pointing his fingers and nose to the right and left.
Victory Animation 2: Gooigi twirls around before he flashes a peace sign at the camera with his right hand and a wide grin while nodding, a reference to when Luigi finds a key in a chest during the events of Luigi's Mansion.
Victory Animation 3: Gooigi is seen in the middle of trying to catch a Boo, being dragged around the screen before he finally catches the ghost and wipes the sweat off his forehead.
Yoshi is a dinosaur-like creature that has appeared several times in the Super Mario series, and has gone on to star in his own series of games as well. Yoshi first appeared in Super Mario World, where the Mario Bros. could ride on top of him and use his abilities to their advantage. Yoshi's first solo adventure was in Super Mario World 2: Yoshi's Island, where he had to go on a quest to reunite the baby Mario Bros. This was also where he gained the ability to eat enemies and turn them into eggs, a move that would reappear in several games.
Yoshi is a fast heavyweight fighter who primarily uses his large head and tail to attack. He has a unique double jump where he uses his Flutter Jump; this is higher than most double jumps and provides super armor. Yoshi also has a unique shield where he hides inside of a Yoshi Egg. By holding either direction on the control stick while shielding, he will parry instead of roll, allowing him to move along the stage while holding his shield.
Forward Tilt: Yoshi spins to hit opponents with his tail.
Forward Smash: Yoshi throws a headbutt.
Up Tilt: Yoshi swings his tail upward.
Up Smash: Yoshi throws an upwards headbutt.
Down Tilt: Yoshi does a sweep with his tail.
Down Smash: Yoshi swings his tail in front, and then behind him.
Dash Attack: Yoshi throws a flying kick.
Counter: Yoshi spits a fireball at the opponent.
Neutral Aerial: Yoshi throws a sex kick.
Forward Aerial: Yoshi throws two alternating kicks.
Forward Bash: Yoshi throws a downward headbutt while performing a front flip, which can spike opponents.
Back Aerial: Yoshi wags his tail behind him, damaging opponents multiple times before launching them.
Back Bash: Yoshi throws a kick behind him.
Up Aerial: Yoshi swings his tail above him.
Up Bash: Yoshi throws a bicycle kick.
Down Aerial: Yoshi flutters his legs below himself, damaging opponents multiple times before launching them. If the attack button is held, he will continue fluttering his legs indefinitely.
Down Bash: Yoshi stomps downward, which can spike opponents.
Grab: Yoshi sticks out his tongue to grab the opponent and draw them into his mouth. This move can be used to swallow projectiles and items, and can be used in midair as a tether recovery. If Yoshi grabs a food item with this move it will heal 1.7x more than usual.
Pummel: Yoshi chews on the opponent.
Forward Throw: Yoshi spits the opponent forward.
Back Throw: Yoshi lays the opponent as a Yoshi Egg. In this state they are left vulnerable for a short time. However, by button-mashing, opponents can escape the egg sooner. When the opponent is laid, they can also damage other opponents if they hit them.
Up Throw: Yoshi spits the opponent upward.
Down Throw: Yoshi spits the opponent down onto the ground.
Neutral Special - Egg Lay: Yoshi lays a small Yoshi Egg, which will follow him throughout the battle. Up to six Yoshi Eggs can be laid, and Yoshi will lose them if he is KOd. These can be used for Yoshi's Side Special, Egg Throw, acting as ammo. When a Yoshi Egg is laid, they can also hit opponents. If Yoshi uses his grab to eat a physical projectile, it will automatically be turned into an egg.
Custom 1 - Eggdozer: Yoshi lays larger Yoshi Eggs. He can only have three at a time, but they deal more damage.
Custom 2 - Bouncing Eggs: The Yoshi Eggs deal less damage, but they can rebound off of surfaces and blast zones more times.
Side Special - Egg Throw: Yoshi grabs one of the Yoshi Eggs following him and throws it. This move can only be used if there is at least one Yoshi Egg following him. By holding the special button, a cursor will appear that gradually aims up and down; releasing the button allows Yoshi to throw the Yoshi Egg in that direction. While aiming, he can move and jump. Thrown Yoshi Eggs will travel at quick speeds across the stage, ricocheting off of surfaces and blast zones several times before breaking.
Custom 1 - Auto Egg Throw: Instead of having to hold the special button to aim, the special button can be pressed a second time to throw the Yoshi Egg in the specified direction. The cursor moves somewhat slower.
Custom 2 - Lock-On Egg Throw: The cursor automatically locks onto the nearest opponent instead of aiming up and down gradually.
Up Special - Mellow Mode: Yoshi sprouts wings and floats upward. It doesn't go too far, considering Yoshi's very good double jump.
Custom 1 - Baby Yoshi: Yoshi brings out a Baby Yoshi as it inflates like a balloon, causing him to rise into the air before falling into a helpless state.
Custom 2 - Helicopter Yoshi: Yoshi transforms into a helicopter and flies upward, damaging opponents with his propellers multiple times before launching them.
Down Special - Ground Pound: Yoshi leaps into the air and slams downward. If he is in midair, he will simply fall downward. Yoshi will damage opponents he lands on, and upon landing will cause stars to appear that deal even more damage.
Custom 1 - Koopa Stomp: Yoshi doesn't go as high when jumping, but he stomps the ground instead of doing a ground pound, which is more powerful and is capable of burying opponents.
Custom 2 - Jackhammer: Yoshi transforms into a jackhammer before slamming down. This move does not create stars on impact, however, it will damage opponents multiple times before launching them.
Final Form - Super Dragon Yoshi: Yoshi sprouts large wings. In this state, Yoshi's air mobility is increased, as well as having access to the ability to glide. Yoshi's attacks also become stronger.
Final Smash - Stampede!: Yoshi charges forward and swings his head. If an opponent is hit they will be trapped in a cinematic where a horde of different colored Yoshi run by and trample them.
Entrance: Yoshi bursts out of a Yoshi Egg.
Up Taunt: Yoshi hops up and down excitedly.
Side Taunt: Yoshi dances around.
Down Taunt: Yoshi sits down and plucks the petals from a flower. He will continue doing this until the taunt is cancelled or he has plucked all the petals.
Victory Animation 1: Yoshi flutters in the air briefly before giving a peace sign to the camera.
Victory Animation 2: Yoshi jumps up and down, pumping his fists in the air.
Victory Animation 3: Yoshi poses before Baby Mario falls from the sky and lands on his back, followed by Baby Luigi, Peach, Wario, Donkey Kong, and Bowser. Yoshi then collapses on the ground, the weight of the six babies wearing him out.
Can Crawl: Yes.
Can Wall Jump: No.
Can Wall Cling: No.
Footstool: Yoshi's footstool does 10% damage, as well as spiking opponents.
Wario is a recurring character in the Super Mario series, as well as the star of his own two series, Wario Land and WarioWare. He is a money obsessed treasure hunter, as well as a game developer, and serves as a rival to Mario, being his opposite in almost every way. Wario first appeared as the main antagonist in Super Mario Land 2: 6 Golden Coins, and has since been a mainstay in various Super Mario spinoffs such as Mario Kart and Mario Party. In the Wario Land series, he got his own set of unique abilities, as well as a variety of transformations that alter his body and skills. In the WarioWare series, Wario resides in Diamond City, and runs a microgame business with some of his "friends" to make quick cash.
Wario is a heavyweight but also very mobile fighter, with incredible movement in the air. His moveset leans more towards the Wario Land series rather than WarioWare, with a lot of his attacks utilizing his various forms and transformations, including a third jump where he transforms into Bat Wario. When crouching and crawling, Wario transforms into Flat Wario, and when in water he transforms into Bubble Wario.
Up Tilt: Wario transforms into Bouncy Wario and does a jumping headbutt.
Up Smash: Wario transforms into Bull Wario and throws an upwards headbutt, damaging opponents with his horns.
Down Tilt: Wario transforms into Ball ni naru and rolls forward. If the attack button is pressed again Wario will transform into Ball o' String Wario and do a second roll.
Down Smash: Wario punches the ground, creating a shockwave that can trip opponents nearby.
Dash Attack: Wario transforms into Crazy Wario, stumbling around to damage opponents multiple times before burping, which launches them.
Counter: Wario throws a backhanded punch.
Neutral Aerial: Wario transforms into Flaming Wario and bursts into flames, damaging opponents multiple before launching them.
Forward Aerial: Wario transforms into Jet Wario and dashes forward, launching opponents.
Forward Bash: Wario throws a kick.
Back Aerial: Wario leans back to hit opponents with his head.
Back Bash: Wario transforms into King Dragon Wario and claps his wings behind himself.
Up Aerial: Wario transforms into Puffy Wario, damaging opponents with his swollen head while also gaining slight upward momentum.
Up Bash: Wario claps above himself.
Down Aerial: Wario turns upside down and spins, damaging opponents multiple times before launching them.
Down Bash: Wario performs a stall-then-fall ground pound, spiking any opponents he hits while falling down, and burying grounded ones.
Grab: Wario reaches out and grabs the opponent with one hand.
Pummel: Wario transforms into Electric Wario, shocking the opponent.
Forward Throw: Wario transforms into Frozen Wario and falls on top of the opponent, launching the forward.
Back Throw: Wario transforms into Snowman Wario and rolls over the opponent, sending them backward.
Up Throw: Wario transforms into Eagle Wario and flies into the air with the opponent in tow before slamming them back down on the ground.
Down Throw: Wario transforms into Fat Wario and violently sits on the opponent.
Neutral Special - Mad Moves: Wario uses the Hyper Suction move from Wario World, opening his mouth to suck an opponent towards him with a large vortex. If the opponent gets close enough to Wario, he will reach out and grab them. After this he can either pummel by shaking the opponent, causing coins to pop out of them, or throw them in three different directions:
Forward Throw: Wario reels the enemy back and then throws them forward. This throw can be charged to increase damage and knockback.
Back Throw: Wario spins around three times and throws the opponent backwards. Wario can move in either direction before throwing them backward, and will spin them faster the lighter they are. The spun opponent can hurt other foes they come into contact with.
Down Throw: Wario will jump in the air and spin before performing a piledriver, pounding the enemy headfirst into the ground and burying them. In addition, the piledriver sends out a shock wave that can damage nearby opponents.
Custom 1 - Crazy Moves: Wario's throws are more powerful, but the vortex isn't as long.
Custom 2 - Wacky Moves: Wario's vortex has more range, but the throws aren't as powerful.
Side Special - Shoulder Bash: Wario's signature move from the Wario Land series, Wario will charge forward with his shoulder out, gaining armor and launching any opponents that come into contact with him. Wario can also jump while using this move and will continue to charge forward.
Custom 1 - Wario Bike: Wario takes out his Wario Bike and begins riding it forward, damaging opponents he runs into. He can turn around while driving, perform a wheelie by holding up on the control stick, burying opponents when he comes back down, as well as jump off of the bike by pressing the attack button. If the bike is attacked enough, it will explode into several pieces, which can be picked up and thrown as items. When the bike is destroyed or goes off-screen, Wario must wait three seconds before using it again.
Custom 2 - Wario Car: Wario enters the Wario Car and dashes forward, damaging opponents he hits. The opposite direction can be held for Wario to drift, dealing more damage. If the drift is done in midair, he will gain significant horizontal distance, and as such aids his recovery. The dash can be cancelled into a jump, as well as any attack.
Up Special - Wario Waft: Wario farts, sending him upwards before falling into a semi-helpless state. He damages opponents he farts on, as well as on the way up. The move charges overtime, and eating food will cause it to charge faster. Wario has a garlic icon next to his character portrait that shows how much charge he has.
Custom 1 - Jet Wario: Wario transforms into Jet Wario and boosts upward. He travels farther, but he doesn't fart, and as such doesn't have a high-damaging initial hitbox.
Custom 2 - Max Fastosity Dasherator: Wario enters a Max Fastosity Dasherator instead of farting. He launches out of it, travelling upward at high speeds and damaging opponents he hits. The move can be cancelled into any attack.
Down Special - Wario Bomb: Wario takes out a Wario Bomb, the icon for WarioWare, Inc. He can then throw it as an item in any direction, and it will explode on impact and damage any opponents in the blast radius.
Custom 1 - Timed Wario Bomb: The bomb explodes on a counter as opposed to on impact. The explosion deals slightly more damage.
Custom 2 - Dragon Breath: Wario transforms into Dragon Wario and shoots a stream of fire that damages opponents multiple times before launching them. This move can be charged, causing Wario to turn into Sea Dragon Wario instead, with the fire being stronger.
Final Form - Wario-Man: Wario eats a head of garlic and transforms into Wario-Man. In this state, Wario can run much faster and jump much higher. His attacks are also more powerful, and come out quicker.
Final Smash - Wario Deluxe: Wario puts the Pot of Luxeville on his head and runs forward while performing a shoulder tackle. If he hits an opponent, they are sent in the air where Wario, as Wario Deluxe, then appears on a hot air balloon, and zaps the opponents with electricity, damaging them and sending them back to the stage.
Entrance: Wario crashes onstage in a plane while laughing. Wario then jumps out and the plane explodes as he dusts himself off.
Up Taunt: Wario belly-laughs so hard that his jaw unhinges, and has to manually close his mouth with his hands.
Side Taunt: Wario pumps his fist in the air while saying "I'm-a-gonna win!".
Down Taunt: Wario transforms into Tiny Wario and looks shocked before returning to normal size.
Victory Animation 1: Wario stretches his arm before going into a strongman pose.
Victory Animation 2: Wario does donuts on the Wario Bike, stops while facing the screen and saying "Yes", plucks the end of his mustache, and holds up three fingers in the shape of a W.
Victory Animation 3: Wario laughs uncontrollably, falling on the ground and laughing still.
Donkey Kong is the main protagonist of the Donkey Kong series, as well as a recurring character in various Super Mario spinoffs such as Mario Kart and Mario Party. Donkey Kong is a laid back gorilla with a red tie who lives on Donkey Kong Island with the rest of the Kong family. His adventures often feature him trying to reclaim his precious stash of bananas after it is stolen by one of the many personas of King K. Rool.
Donkey Kong is a powerful heavyweight fighter who uses various punches, swipes, and slaps in his moveset. However, he is pretty slow and doesn't have the best recovery. Donkey Kong can also throw barrels like in his original game, as well as use moves like the Barrel Roll and the Hand Slap.
Jab: Donkey Kong throws two slaps followed by a punch.
Forward Tilt: Donkey Kong throws a drop kick, pushing his hands against the ground to propel himself forwards.
Forward Smash: Donkey Kong winds up before throwing a powerful punch. At full charge, this move has super armor.
Up Tilt: Donkey Kong swipes his hand above his head in an arcing motion.
Up Smash: Donkey Kong claps above himself.
Down Tilt: Donkey Kong swipes his hand in front of himself, which can trip opponents.
Down Smash: Donkey Kong jumps up and slams his fists on the ground.
Dash Attack: Donkey Kong performs the Barrel Roll. If used near an edge, he will roll off of it, and can cancel the attack into a jump.
Counter: Donkey Kong claps in front of himself.
Neutral Aerial: Donkey Kong spins around and performs discus clotheslines.
Forward Aerial: Donkey Kong throws a double-hand axle. The attack can bury grounded opponents and spike aerial ones. When this happens, Donkey Kong gains slight upward momentum.
Forward Bash: Donkey Kong claps in front of himself.
Back Aerial: Donkey Kong kicks behind himself.
Back Bash: Donkey Kong turns around and throws a punch.
Up Aerial: Donkey Kong does an upwards headbutt.
Up Bash: Donkey Kong claps above himself.
Down Aerial: Donkey Kong stomps below him with one foot, spiking opponents.
Down Bash: Donkey Kong pulls out his Coconut Gun and swings it below him, which can spike opponents.
Grab: Donkey Kong reaches out to grab the opponent.
Pummel: Donkey Kong slaps the opponent.
Forward Throw: Donkey Kong throws the opponent forward.
Back Throw: Donkey Kong spins around and throws the opponent backward.
Up Throw: Donkey Kong heaves the opponent upward with both hands.
Down Throw: Donkey Kong holds the opponent and performs a bear hug, launching them forward.
Neutral Special - Barrel Toss: Donkey Kong pulls out an empty barrel and its lid before slamming them together. After this he can throw the barrel, where it will roll across the stage and break on impact with an opponent or wall. If an opponent is in front of Donkey Kong when he assembles the barrel, they will be trapped inside of it, where he can then walk around and jump while carrying it over his shoulder. While carrying the opponent in the barrel, he can throw them in four different directions:
Forward Throw: Donkey Kong rolls the barrel forward, breaking on impact.
Back Throw: Donkey Kong turns around and throws the barrel behind him.
Up Throw: Donkey Kong tosses the barrel upwards.
Down Throw: Donkey Kong smashes the barrel on the ground.
Custom 1 - Steel Barrel: The barrel is made of steel, and deals more damage on contact with an opponent. However, the move takes longer to come out.
Custom 2 - TNT Barrel: The barrel will explode on contact with an opponent, however, Donkey Kong cannot control where he throws it as he will always roll it forward.
Side Special - Hand Slap: Donkey Kong slaps the ground twice, creating shockwaves that launch nearby grounded opponents. He can act out of the move or cancel it into a jump after the first slap. If the special button is pressed rapidly, he will continue slapping. If used in midair, the second slap can spike opponents.
Custom 1 - Hand Slam: The move cannot be used repeatedly, however, it will bury opponents on contact.
Custom 2 - Hand Smash: Donkey Kong only slaps the ground once, however, the shockwave will cause opponents to trip.
Up Special - Barrel Cannon: Donkey Kong enters a Barrel Cannon as it begins to spin in circles, before launching Donkey Kong in the direction it is currently facing, with him being able to damage opponents. The cannon can shoot Donkey Kong out earlier if the player presses the normal or special buttons while inside.
Custom 1 - Barrel Blast: The Barrel Cannon doesn't send Donkey Kong as high, however, it causes an explosion when he is fired out of it.
Custom 2 - Barrel Rocket: The player can directly control where the Barrel Cannon launches Donkey Kong, however, the move does not deal any damage to opponents.
Down Special - Snack Break: Donkey Kong sits down and begins to eat a banana. The animation for this move is very long and cannot be cancelled, however, it will heal him by 15% by the time it is finished. If Donkey Kong is attacked at all during this, he will drop his banana and become extremely angry. In this state, he gains super armor on all of his attacks as well as more aggressive animations for 20 seconds, before he returns to normal.
Custom 1 - Quick Snack: The move doesn't take as long to use, however, it only heals Donkey Kong for 8% and the super armor he gains when hit only lasts 10 seconds.
Custom 2 - Moody Snake: Donkey Kong will only be healed by 10% when the move is finished, however, he will gain a temporary strength boost instead of super armor.
Final Form - Super Kong: Donkey Kong pounds his chest as his fur turns white and his tie becomes blue. In this state, his attacks are more powerful and have more knockback, as well as his speed being increased.
Final Smash - Banana Slamma!: Donkey Kong leaps high into the air, so high that he leaves the planet's orbit and appears above the Moon. He then winds up before punching it, causing the Moon to fall down and crash into the stage, where it will explode and damage opponents multiple times before launching them.
Entrance: Donkey Kong bursts out of a DK Barrel and poses.
Up Taunt: Donkey Kong pounds his chest.
Side Taunt: Donkey Kong turns to the camera and shrugs.
Down Taunt: Donkey Kong sits down and plays on a Nintendo Switch. He will continue doing this for as long as the taunt button is held down for. Sound effects from Donkey Kong Country: Tropical Freeze can be heard during this.
Victory Animation 1: Donkey Kong does a flip in the air before landing and posing.
Victory Animation 2: Donkey Kong pounds his chest several times before posing.
Victory Animation 3: Donkey Kong puts his hands together and shakes them above his head.
Diddy Kong is one of the main protagonists of the Donkey Kong series, and often serves as Donkey Kong's equivalent to Luigi from the Super Mario series. He is a small chimpanzee, with a red shirt and hat with the Nintendo logo on it. He often accompanies Donkey Kong on his adventures to take back their stolen hoard of bananas. He also starred in his own games in the form of Diddy Kong Racing and Donkey Kong Country 2: Diddy's Kong Quest. Diddy Kong is very quick and agile, but also lightweight. He comes equipped with his Rocketbarrel Pack, allowing him to fly through the air, as well as his Peanut Popguns.
Diddy Kong doesn’t fight alone, however, as throughout the match he will be followed around by Dixie Kong. She is Diddy Kong's partner who was first introduced in Donkey Kong Country 2: Diddy's Kong Quest. In that game her and Diddy Kong traveled to defeat Kaptain K. Rool and rescue Donkey Kong. Eventually, she even starred in her own game, Donkey Kong Country 3: Dixie's Double Trouble. Dixie Kong's signature ability is her hair, which she can use to glide in the air, or pick up objects.
Unlike similar characters like Ice Climbers or Rosalina & Luma, Dixie Kong cannot be damaged while she is following behind Diddy Kong. By using his Down Special or Guard Special, Diddy can switch places with Dixie, with the player now controlling her and Diddy following behind. Because of this, neither of their Down Specials have Custom Move variants. Each Kong has their own percentages and separate stocks, with them being split between the two. Dixie Kong shares a lot of moves with Diddy Kong, but also has her own distinct attacks that set her apart, utilizing her long hair to give her a lot of range. By holding up on the control stick while in midair, Dixie will begin to spin, using her ponytail to slow her descent.
Jab: Diddy Kong throws two slaps followed by a kick. If the attack button is pressed repeatedly, he will shake his tail in front of himself, damaging opponents multiple times before launching them with a kick.
Forward Tilt: Diddy Kong throws a double punch.
Forward Smash: Diddy Kong spins while throwing two punches.
Up Tilt: Diddy Kong swipes his hand above his head in an arcing motion.
Up Smash: Diddy Kong slaps upward, followed by a kick and then a punch.
Down Tilt: Diddy Kong claps in front of himself, which can trip opponents.
Down Smash: Diddy Kong throws a sweeping kick.
Dash Attack: Diddy Kong throws a flying kick.
Counter: Diddy Kong throws a spinning kick.
Neutral Aerial: Diddy Kong performs a cartwheel.
Forward Aerial: Diddy Kong throws a punch.
Forward Bash: Diddy Kong throws a dropkick.
Back Aerial: Diddy Kong throws a kick behind him.
Back Bash: Diddy Kong turns around and punches behind him.
Up Aerial: Diddy Kong throws an upwards kick.
Up Bash: Diddy Kong throws an upwards dropkick.
Down Aerial: Diddy Kong kicks below himself.
Down Bash: Diddy Kong punches below himself, spiking opponents.
Grab: Diddy Kong reaches out to grab the opponent.
Pummel: Diddy Kong headbutts the opponent.
Forward Throw: Diddy Kong tosses the opponent forward.
Back Throw: Diddy Kong flings the opponent backward.
Up Throw: Diddy Kong throws the opponent upward and hits them with a handstand kick.
Down Throw: Diddy Kong throws the opponent onto the ground.
Neutral Special - Peanut Popguns: Diddy Kong pulls out his Peanut Popguns and begins rapidly firing them in front of himself, and will continue to for as long as the special button is held down for. The move deals more damage the closer an opponent is to him. Diddy Kong can use this move on the ground, in midair, or while using his Up Special.
Custom 1 - Angled Popguns: Diddy Kong can aim his Peanut Popguns up or down, but it doesn't have as much range.
Custom 2 - Running Popguns: Diddy Kong can move back and forth while shooting, but the peanuts deal less damage.
Side Special - Cartwheel: Diddy Kong performs a cartwheel, damaging opponents he hits and keeping his momentum during it. If used near an edge, he will roll off of it, and can cancel the attack into a jump.
Custom 1 - Rapid Cartwheel: The move damages opponents multiple times before launching them, but it doesn't go as far.
Custom 2 - Heavy Cartwheel: The move cannot be jumped out of, but it will bury opponents hit by it.
Up Special - Rocketbarrel Boost: Diddy Kong puts on his Rocketbarrel Pack and flies upward. He can continue flying if the special button is held for a limited amount of time before he falls into a semi-helpless state. If attacked while flying, the Rocketbarrel Pack will begin flying around aimlessly with Diddy Kong still attached, exploding on impact. The player has some control over where the Rocketbarrel Pack goes during this, however, if Diddy Kong was attacked while using his Peanut Popguns, you cannot control where it goes.
Custom 1 - Flying Rocketbarrel: Diddy Kong can travel much farther and has better maneuverability, but he cannot use his Peanut Popguns during the move.
Custom 2 - Explosive Rocketbarrel: The Rocketbarrel Pack explodes at the end of the move, heavily damaging any opponents in the blast radius as Diddy Kong falls into a helpless state.
Down Special - Kong Tag: Diddy Kong grabs Dixie Kong and throws her forward while she does a flying kick. By using his Guard Special, he will instead simply tag out with Dixie Kong without throwing her forward.
Final Form - Super Kong: Diddy Kong pounds his chest as his fur turns white and his clothes become blue. In this state, his attacks are more powerful and have more knockback, as well as his speed being increased.
Final Smash - Hyper Rocketbarrel: Diddy Kong puts on his Rocketbarrel Pack and begins flying around the stage, damaging opponents he runs into. After a while, he will target a random opponent and fly into them, exploding on impact and dealing heavy damage and knockback.
Entrance: Diddy Kong bursts out of a DD Barrel and poses.
Up Taunt: Diddy Kong tosses his cap in the air and winks at the camera before it lands back on his head.
Side Taunt: Diddy Kong starts juggling three balls before putting them away.
Down Taunt: Diddy Kong covers his mouth while laughing.
Victory Animation 1: Diddy Kong fires his Peanut Popguns, rolls towards the camera and shoots at it.
Victory Animation 2: Diddy Kong spins with his Rocket Barrels then faces the screen, dancing with his hands on his head and chin.
Victory Animation 3: Diddy Kong pulls out a boombox and sunglasses and starts dancing to the music coming from the boombox (His victory theme).
Jab: Dixie Kong throws two slaps followed by a kick.
Forward Tilt: Dixie Kong does a spin while swinging her ponytail in front of her.
Forward Smash: Dixie Kong turns her ponytail into a makeshift fist and throws a hook.
Up Tilt: Dixie Kong swipes her hand above her head in an arcing motion.
Up Smash: Dixie Kong slaps upward, followed by a kick and then a punch.
Down Tilt: Dixie Kong sweeps her ponytail across the ground, which can trip opponents.
Down Smash: Dixie Kong throws a sweeping kick.
Dash Attack: Dixie Kong throws a flying kick.
Counter: Dixie Kong throws a spinning kick.
Neutral Aerial: Dixie Kong throws a sex kick.
Forward Aerial: Dixie Kong throws a dropkick.
Forward Bash: Dixie Kong throws a spinning kick.
Back Aerial: Dixie Kong kicks behind her.
Back Bash: Dixie Kong spins and throws a punch.
Up Aerial: Dixie Kong kicks above her.
Up Bash: Dixie Kong throws an uppercut.
Down Aerial: Dixie Kong does a stall-then-fall stomp, spiking opponents.
Down Bash: Dixie Kong punches below herself, spiking opponents.
Grab: Dixie Kong swings her hair forward to grab the opponent. This can also be used in midair as a tether recovery.
Pummel: Dixie Kong headbutts the opponent.
Forward Throw: Dixie Kong throws the opponent forwards.
Back Throw: Dixie Kong turns around and slams the opponent on the ground.
Up Throw: Dixie Kong throws the opponent upward and hits them with a handstand kick.
Down Throw: Dixie Kong throws the opponent onto the ground.
Neutral Special - Bubblegum Popgun: Dixie Kong pulls out her Bubblegum Popgun and fires a piece of bubblegum out of it. This move can be charged, increasing the distance and power of the gum, but if charged for too long it will blow up. The explosion does damage opponents but it stuns Dixie Kong for a while. The gum will stick to opponents on contact, although this is only cosmetic.
Custom 1 - Jumbo Gum: The bubblegum is larger and deals more damage, but the move takes longer to charge and the bubblegum doesn't travel as far.
Custom 2 - Bubblegum Bomb: The bubblegum travels slower and the move has more endlag, but they explode on impact, dealing heavy damage to opponents in the blast radius.
Side Special - Twirl: Dixie Kong performs a twirls forward, damaging opponents she hits and keeping her momentum during it. If used near an edge, she will roll off of it, and can cancel the attack into a jump.
Custom 1 - Rapid Twirl: The move damages opponents multiple times before launching them, but it doesn't go as far.
Custom 2 - Heavy Twirl: The move cannot be jumped out of, but it will bury opponents hit by it.
Up Special - Kong Copter: Dixie Kong rapidly spins her hair in a propeller-like motion, damaging opponents multiple times before launching them. While spinning, Dixie Kong can move forward and backward. If used in midair, she will rise upward before falling into a helpless state. Pressing the special button rapidly will allow her to rise higher.
Custom 1 - Kong Cyclone: While spinning, Dixie Kong creates vacuumboxes that pull in opponents nearby into the attack. She cannot move at all if the grounded version is used, and she gains less distance if the aerial version is used.
Custom 2 - Kong Chopper: Dixie Kong quickly rises high while spinning. She cannot damage opponents.
Down Special - Kong Tag: Dixie Kong grabs Diddy Kong and throws him forward while he does a flying kick. By using her Guard Special, she will instead simply tag out with Diddy Kong without throwing him forward.
Final Form - Super Kong: Dixie Kong pounds her chest as her fur turns white and her clothes become blue. In this state, her attacks are more powerful and have more knockback, as well as her speed being increased.
Final Smash - Double Trouble: Dixie Kong charges forward. If the move connects, the opponent will be locked in a cinematic where Dixie and Kiddy Kong repeatedly attack the opponent from all angles, ending with Dixie throwing a TNT Barrel at the opponents, launching them.
Entrance: Dixie Kong bursts out of a DX Barrel and poses.
Up Taunt: Dixie Kong plays a short song on her guitar.
Side Taunt: Kiddy Kong appears and gives Dixie Kong a high five.
Down Taunt: Dixie Kong hovers above the ground with her hair while giggling.
Victory Animation 1: Dixie Kong pulls out an electric guitar and plays her victory theme on it.
Victory Animation 2: Dixie Kong does a backflip and poses while Tiny Kong, Lanky Kong, and Chunky Kong pose behind her.
Victory Animation 3: Dixie Kong strums her guitar before lifting it over her head and repeatedly slamming it on the ground, breaking it into pieces.
Funky Kong is a recurring character in the Donkey Kong series. He is often seen selling items and goods to the Kongs in his shops such as Funky's Flights or Funky's Fly 'n' Buy. Funky Kong made his grand playable debut in the Nintendo Switch version of Donkey Kong Country: Tropical Freeze, where he served as the games Easy Mode. He can typically be found surfing or tinkering with machinery, although he isn't a huge fan of adventuring himself.
Funky Kong is a heavyweight fighter who rides on his surfboard throughout the battle, giving him a total of three jumps as well as the ability to glide in midair. His attacks consist of punches, kicks, and swinging his surfboard, and his Special Moves include various items that he has sold in various Donkey Kong Country games. Funky Kong is designed to be easy to pick up and play, just like his appearance in Donkey Kong Country: Tropical Freeze.
Forward Tilt: Funky Kong thrusts his surfboard forward.
Forward Smash: Funky Kong does a stationary front flip and slams his surfboard on the ground in front of himself.
Up Tilt: Funky Kong swipes his arm above himself in an overarching motion.
Up Smash: Funky Kong throws his surfboard upward and catches it in his other hand. While spinning, the surfboard will damage opponents multiple times before launching them.
Down Tilt: Funky Kong swipes his arm along the ground.
Down Smash: Funky Kong jumps up and lands with his surfboard.
Dash Attack: Funky Kong performs a somersault. If used near an edge, he will roll off of it, and can cancel the attack into a jump.
Counter: Funky Kong throws a backhand slap.
Neutral Aerial: Funky Kong's surfboard spins underneath him, damaging opponents multiple times before launching them.
Forward Aerial: Funky Kong throws a kick.
Forward Bash: Funky Kong swings his surfboard outward.
Back Aerial: Funky Kong throws a back kick.
Back Bash: Funky Kong turns around and swings his surfboard behind him.
Up Aerial: Funky Kong performs a handstand on his surfboard.
Up Bash: Funky Kong spins his surfboard above himself, damaging opponents multiple times before launching them.
Down Aerial: Funky Kong turns upside down and throws a punch.
Down Bash: Funky Kong stomps below him with his surfboard, which can bury and spike opponents.
Grab: Funky Kong reaches out to grab the opponent.
Pummel: Funky Kong slaps the opponent.
Forward Throw: Funky Kong throws the opponent forward.
Back Throw: Funky Kong swings the opponent behind him.
Up Throw: Funky Kong flings the opponent into the air.
Down Throw: Funky Kong slams the opponent on the ground before stomping on them with his surfboard.
Neutral Special - FK Barrel: Funky Kong pulls out a FK Barrel and throws it forward in an arc, breaking on impact and damaging opponents. The special button can be held for Funky to hold the FK Barrel, and he can move around and jump while holding one, but he can't use any other attacks until it's thrown. Directional inputs can be used for him to throw the FK Barrel in a high arc or roll it across the ground instead.
Custom 1 - DK Barrel: Funky Kong uses an FK Barrel instead of a DK Barrel. It travels farther, but can only be thrown forward.
Custom 2 - DX Barrel: Funky Kong uses a DX Barrel instead of a DK Barrel. It will bounce along the ground when thrown instead of breaking on impact, though it overall deals less damage.
Side Special - Tidal Breaker: Funky Kong throws a downwards headbutt, which can bury grounded opponents and spike aerial ones. The attack also has super armor while in use.
Custom 1 - Jumping Headbutt: Funky Kong rises upward before falling downward with a headbutt. Deals more damage, but cannot meteor smash aerial opponents and buried opponents can escape easier.
Custom 2 - Wave Tremor: The attack has no super armor and cannot bury or spike opponents, but creates a tremor that causes all nearby grounded opponents to trip. Has much less startup and endlag.
Up Special - Hang Ten: Funky Kong spins around on his surfboard while rising, damaging opponents multiple times before launching them as he strikes a pose. Once he reaches his maximum height, he will continue spinning the surfboard as he floats downward. If he's damaged or if down is held on the control stick, he falls into a helpless state instead.
Custom 1 - Surfer Leap: Funky Kong rises higher and faster, but he won't keep spinning his surfboard to float down.
Custom 2 - Surfer Chopper: Funky Kong only damages opponents once, but he will create windboxes on either side of him while spinning the surfboard, which pushes opponents backward.
Down Special - Crash Guard: Funky Kong takes out a Crash Guard item that floats in front of him. It will block any and all attacks from that direction as well as reflect projectiles. However, it will be destroyed if it takes 25% damage, and it will disappear after being deployed for 9 seconds. Another Crash Guard can't be used for 40 seconds.
Custom 1 - Spike Guard: The Crash Guard has spikes on it, which will damage opponents on contact. However, it can't reflect projectiles.
Custom 2 - Reflector Guard: Instead of keeping the Crash Guard in front of himself, it just appears and disappears in front of him, and stays there if the special button is held.
Final Form - Banana Juice: Funky Kong drinks a jar of Banana Juice, causing him to become golden. In this state, he is faster and deals more damage. Many of his attacks also have super armor, and he can jump higher.
Final Smash - Funky Mode: Funky Kong summons his Barrel Plane, which flies across the stage. If it hits an opponent, they are locked in an animation where Funky Kong is flying in his Barrel Plane, and slams right into the opponent. This sends them back to the stage and launches them.
Entrance: Funky Kong's Barrel Plane flies overhead as he jumps out and poses before landing on the stage.
Up Taunt: Funky Kong gives a thumbs up to the camera.
Side Taunt: Funky Kong spins his surfboard around him before tossing it in the air and catching it.
Down Taunt: Funky Kong does a backflip and lands while posing.
Victory Animation 1: Funky Kong is seen surfing around the victory screen before flashing a peace sign at the camera.
Victory Animation 2: Funky Kong does a flip and lands in a handstand while holding his surfboard.
Victory Animation 3: Funky Kong rides in on the Flame Runner bike from Mario Kart Wii and performs doughnuts while shouting.
King K. Rool is the main antagonist of the Donkey Kong Country series. He is a large crocodile and the leader of the Kremling Krew, a group of reptiles who repeatedly go head to head with the Kongs, and have attempted to steal their horde of bananas on several occasions. King K. Rool has taken on many different identities throughout his various appearances, such as Kaptain K. Rool, Baron K. Roolenstein, and King Krusha K. Rool, however his royal persona as a king has been the most prominent.
King K. Rool is a heavyweight fighter who attacks with his claws as well as various tools he has used throughout his different boss fights. He also has several moves that involve his stomach, which gives him a special armor that allows him to take half the damage of an attack and no knockback. After taking some damage, his stomach will crack, and after taking a total of 50% damage it will shatter, stunning K. Rool for a short time.
Jab: King K. Rool throws a palm strike, followed by a claw swipe, and then a kick.
Forward Tilt: King K. Rool claps in front of himself.
Forward Smash: King K. Rool puts on a boxing glove and throws a punch. This move has super armor.
Up Tilt: King K. Rool throws an uppercut.
Up Smash: King K. Rool throws an upwards headbutt followed by a plank, which can spike opponents.
Down Tilt: King K. Rool stomps forward, which can bury grounded opponents and spike aerial ones.
Down Smash: King K. Rool pulls out a remote and presses a button on it, causing the area around him to become covered in electricity, damaging opponents multiple times before launching them.
Dash Attack: King K. Rool leaps while thrusting his stomach forward. This move grants him super armor.
Counter: King K Rool's stomach turns green as it puffs out, which is capable of reflecting projectiles.
Neutral Aerial: King K. Rool expands his stomach. This move grants him super armor.
Forward Aerial: King K. Rool throws a dropkick.
Forward Bash: King K. Rool puts on a boxing glove and throws a punch.
Back Aerial: King K. Rool turns around and throws an overhead punch, which can spike opponents.
Back Bash: King K. Rool puts on a boxing glove, turns around, and throws a punch.
Up Aerial: King K. Rool thrusts his head upward. The attack deals more damage and has more range if he has his crown on his head.
Up Bash: King K. Rool throws an upwards headbutt.
Down Aerial: King K. Rool performs a stall-then-fall ground pound, bouncing off of opponents if he lands on one. If he lands on the ground he will create a green shockwave that travels outward.
Down Bash: King K. Rool does a downwards stomp with both feet, which can spike opponents.
Grab: King K. Rool reaches out to grab the opponent with one hand.
Pummel: King K. Rool headbutts the opponent.
Forward Throw: King K. Rool spins around before throwing the opponent forward.
Back Throw: King K. Rool drags the opponent across the ground before throwing them backwards.
Up Throw: King K. Rool leaps into the air past the upper blast zone with the opponent, landing on the ground and performing an Argentine-style backbreaker.
Down Throw: King K. Rool heaves the opponent overhead and slams them into the ground, burying them.
Neutral Special - Blunderbuss: King K. Rool puts on a pirate hat and takes out the Blunderbuss. If the special button is tapped, he will fire a cannonball that travels forward and damages opponents. If the special button is held, he will instead suck opponents into the Blunderbuss, and can then launch them at different angles depending on directional inputs. This can also be done by holding the special button after a cannonball is launched. The cannonball can be reflected back at King K. Rool, and if he's still sucking with the Blunderbuss, the cannonball will be sucked back in, causing it to explode, damaging both King K. Rool and any opponents too close.
Custom 1 - Spikeball Blunderbuss: King K. Rool fires out a spiked cannonball that deals more damage, and will fall to the stage after it reaches a certain distance, where it will remain onstage for a few seconds. However, you cannot suck the cannonball back in, and it doesn't travel as far as the normal cannonball.
Custom 2 - Blusterbuss: The Blunderbuss does not fire cannonballs, but instead fires a strong gust of wind forward that pushes opponents back. If the special button is held, King K. Rool will continue to expel wind.
Side Special - Crownerang: King K. Rool tosses his crown forward, which acts as a boomerang. However, if King K. Rool is too far away from the crown when it comes back, it will simply land on the stage, where an opponent can pick it up and use it as an item. If King K. Rool touches the crown while it's on the ground he will put it back on his head.
Custom 1 - Trick Crown: King K. Rool's crown appears more jagged and pointy. It doesn't travel as far when thrown, but will hang in midair and spin in place for a few seconds before returning back to King K. Rool.
Custom 2 - Spiral Crown: Rather than traveling like a boomerang, the crown flies in a circular motion above King K. Rool.
Up Special - Propellerpack: King K. Rool puts on his helicopter pack and flies upward. While flying, he can move forward and backward, damaging opponents that touch the propeller. When he reaches the peak of his flight, the pack begins to malfunction and explode, sending King K. Rool into a helpless state and damaging all opponents in the blast radius.
Custom 1 - KAOS Kopter: The move has a larger propeller and causes King K. Rool to rise faster, but doesn't carry him as far.
Custom 2 - Free Roam Kopter: King K. Rool can be controlled with directional inputs after he puts on the Propellerpack, and can move in any direction for a short time before it explodes and puts him into a helpless state.
Down Special - Spiked Cannonball: A cannonball is launched from the foreground, landing in front of King K. Rool and dealing damage to any opponents it lands on. The cannonball will remain onstage for five seconds, and if an opponent gets too close to it, spikes will extend out of it, dealing big damage.
Custom 1 - Exploding Cannonball: The cannonball explodes after three seconds, dealing heavy damage and knockback to opponents in the blast radius.
Custom 2 - Targeting Cannonball: The cannonball falls from directly above a random opponent as opposed to in front of King K. Rool. It disappears once it hits the ground.
Final Form - King Krusha K. Rool: King K. Rool puts on a tracksuit, shoes, and boxing gloves as an announcer introduces him as "King Krusha K. Rool" In this state, King K. Rool is much faster and his attacks deal more damage, on top of being able to jump higher.
Final Smash - Blast-o-Matic: King K. Rool flies forward headfirst. If he hits an opponent, they are locked in a cinematic where they land on Donkey Kong Island. King K. Rool then appears on Krem Isle inside of his Blast-o-Matic, laughing as it fires a large laser at the island, causing it to explode and send the opponents back to the stage, launching them.
Entrance: King K. Rool lands down on the stage with his arms crossed, laughing.
Up Taunt: King K. Rool rubs his hands together and looks at the camera menacingly.
Side Taunt: King K. Rool slaps his belly. Uniquely, this taunt has super armor on it during the animation.
Down Taunt: King K. Rool goes into a sumo wrestler pose.
Victory Animation 1: King K. Rool shifts his eyes left and right before ending with a triumphant pose.
Victory Animation 2: King K. Rool flips his cape around before ending in a pose similar to his official artwork from Super Smash Bros. Ultimate.
Victory Animation 3: King K. Rool belly flops on screen and rebounds with a backflip, before landing on his feet and slapping his belly with his tongue sticking out.
Link is the name given to the protagonists of The Legend of Zelda series. While there have been many different incarnations of Link throughout the series, all of them wielding the Master Sword and Triforce of Courage, the version that appears in Super Smash Bros. X Universe is based on his appearance in The Legend of Zelda: Breath of The Wild and its sequel. This Link, referred to as the Hero of the Wild, served as Princess Zelda's personal bodyguard, but was heavily wounded during a battle against the powerful Calamity Ganon, and had to be put to sleep for a century in order to recover. When he woke up, he had no memory, and had to journey across the ruined kingdom of Hyrule in order to defeat Calamity Ganon as well as reclaim his lost memories.
Link is a middleweight fighter who mostly fights using the Master Sword, although he also makes use of other weapons such as spears, clubs, and axes. Uniquely, moves that use the Master Sword are capable of firing out a small energy beam projectile, though this will only work if Link is at 0% damage, as he will lose the ability if he takes damage. On top of his weapons, Link also wields a bow, which can fire a variety of different arrows, the various Rune and Champion Abilities from The Legend of Zelda: Breath of The Wild, as well as being able to glide using his Paraglider.
Additionally, Link's Hylian Shield is capable of blocking projectiles, no matter their strength, as long as Link is standing still or crouching when they hit. Also, Link has the unique ability to climb up walls; if Link touches a wall/the side of the stage, he can climb up it by holding up on the control stick, though he can only do this for a few seconds before getting tired and falling. He is able to jump out of the wall climb as well.
Jab: Link does an outwards slash, followed by a downward stab, and ending with a forward stab. The final stab can send a sword beam forward if Link is at 0%.
Forward Tilt: Link thrusts a spear forward. The stab can be repeated twice for a total of three hits in the move.
Forward Smash: Link throws a lunging downward slash. If the attack button is pressed again, Link will follow with an outward slash. The downward slash can send a sword beam forward if Link is at 0%.
Up Tilt: Link throws an overarching slash. The move can send a sword beam upward if Link is at 0%.
Up Smash: Link throws three overarching slashes in rapid succession. The last slash can send a sword beam upward if Link is at 0%.
Down Tilt: Link throws a kneeling inward swing with a club.
Down Smash: Link throws a kneeling inward slash in front of himself before turning around and throwing a kneeling outward slash behind himself. The first stab can send a sword beam forward if Link is at 0%.
Dash Attack: Link leaps forward while doing a downwards swing with an axe.
Counter: Link pushes opponents away as he glows a brown aura for a short time. In this state, he uses Daruk's Protection, being heavier and taking less knockback from opponents. Repeated uses of the move will decrease the time these effects are active. It also cannot be used again if Link is already in this state.
Neutral Aerial: Link throws two alternating spinning outward slashes. The second slash can send a sword beam forward if Link is at 0%.
Forward Aerial: Link does two alternating spinning outward swings with a boomerang.
Forward Bash: Link throws an outward slash. The move can send a sword beam forward if Link is at 0%.
Back Aerial: Link turns around and does an inward swing with a club.
Back Bash: Link turns around and throws an outward slash. The move can send a sword beam backward if Link is at 0%.
Up Aerial: Link thrusts his sword upward. The move can send a sword beam upward if Link is at 0%.
Up Bash: Link thrusts a spear upwards.
Down Aerial: Link positions his sword underneath him pointing downwards, and lands on enemies sword-first to stab them from above, which can spike them if hit correctly. The move can send a sword beam downward if Link is at 0%.
Down Bash: Link swings an axe downwards, which can spike opponents.
Grab: Link uses the Magnesis Rune to grab the opponent and pull them towards him. This can also be used as a tether recovery
Pummel: Link hits the opponent with the Master Sword's pommel.
Forward Throw: Link spins around before throwing the opponent forward.
Back Throw: Link swings the opponent overhead and slams them on the ground behind him.
Up Throw: Link raises the opponent overhead and slashes them upward.
Down Throw: Link pins the opponent to the ground and jumps on top of them while stabbing downward.
Neutral Special - Traveller's Bow: Link wields the Traveler's Bow and fires an arrow forward. Charging the move increases the arrow's speed, distance and damage. Upon hitting the ground or a wall, the arrows also linger for a while before disappearing, during which they can be picked up and thrown as items. If Link uses this move with an arrow picked up, he will fire the two arrows at once, greatly increasing the damage dealt to opponents. By using his Guard Special, a menu will appear where he can change the type of arrow that is fired, meaning that this move does not have any Custom Move variants. Each type of arrow other than the normal ones can only be shot 5 times and will be restored once Link dies. The types of arrows that can be shot along with the standard arrow include:
Fire Arrows: Deals more damage but is slower.
Ice Arrows: Doesn't travel as far but has a chance to freeze opponents.
Bomb Arrows: Can't be shot as frequently but will explode on impact.
Shock Arrows: Deal less damage but will stun opponents on impact.
Side Special - Crynosis: Link creates a large pillar of ice in front of him, which will linger for 10 seconds before disappearing. If an opponent is below it when it is formed, they will be launched upward. The pillar can be used as a platform, as well as a barricade to block attacks. Attacking the pillar enough times will destroy it, however, Link can also destroy it himself by using the Side Special again, causing it to explode into chunks of ice which damage nearby opponents.
Custom 1 - Multi-Cryonis: Link can create two pillars, with him destroying the closest one to him if the move is used again. However, the pillars are smaller and break more easily.
Custom 2 - Sturdy Cryonis: The pillar is larger and takes more hits to destroy, however, Link cannot detonate it himself and it will only last for 7 seconds.
Up Special - Revali's Gale: Link uses the Revali's Gale ability to create a gust of wind, launching him into the air while he spins around with his sword, damaging opponents multiple times before launching them. While in the air, Link can pull out his Paraglider to float down towards the stage.
Custom 1 - Spin Attack: Link doesn't use Revali's Gale to propel himself upward, resulting in the move having less vertical distance. However, Link can now use the move on the ground, with him being able to charge it for more damage.
Custom 2 - Spin Slash: Link launches opponents he hits instead of damaging them multiple times, but he cannot open his Paraglider to float down.
Down Special - Remote Bomb: Link pulls out a Remote Bomb, which can be thrown as an item. After throwing it, using the move again has Link detonate the Remote Bomb with his Sheikah Slate, creating a large blue explosion. The Remote Bomb has a maximum duration of about 30 seconds before detonating automatically, and can be knocked around by attacks, which also causes it to damage opponents in range.
Custom 1 - Cubed Bomb: Link pulls out a cube-shaped Remote Bomb. It will not roll around when thrown or attacked, but the blast radius is slightly smaller.
Custom 2 - Classic Bomb: Link pulls out a regular Bomb. When thrown, it explodes on impact. It will also explode on its own after 10 seconds.
Final Form - Triforce of Courage: Link empowers himself with the Triforce of Courage, causing him to glow yellow. In this state, he becomes much faster and can jump higher. Link is also capable of fire sword beams regardless of how much damage he has, though these are weaker and travel less distance than normal.
Final Smash - Champion's Finisher: Link does a backflip into the air before pulling out the Ancient Bow and firing an Ancient Arrow, with directional inputs being used to determine where he shoots it. If an opponent is hit by the arrow, Link will dash towards them and use the Stasis Rune to freeze them in time as he repeatedly slashes at them before empowering his sword with Urbosa's Fury and delivering a final stab that launches them.
Entrance: Link glides in on his Paraglider, and unsheathes his sword.
Up Taunt: Link swings the Master Sword twice and twirls it behind him before sheathing it.
Side Taunt: Link holds the Master Sword in front of him with both hands as it glows blue, then puts it aside.
Down Taunt: Link sheaths his sword and shield, and lets out a chuckle while brushing back his hair.
Victory Animation 1: Link swings his sword three times and looks to the right.
Victory Animation 2: Link stabs his sword forward, then thrusts it up as he lets out a battle cry.
Victory Animation 3: Link swings his sword, then turns his back to the camera and sheaths it.
Zelda is the name given to all the princesses of Hyrule from the The Legend of Zelda series. The first incarnation of Zelda, who appeared in The Legend of Zelda: Skyward Sword, served as the physical embodiment of the goddess Hylia, who unified the races of Hyrule to defeat her nemesis Demise. Ever since then, all Zeldas have wielded the Triforce of Wisdom, and have had some form of magic prowess. This version of Zelda is based on her appearance in The Legend of Zelda: A Link to the Past, however some of her moves are based on abilities used by other incarnations of the character.
Zelda is a slow middleweight with poor mobility on the ground and air, but strong attacks to compensate. She uses various magic abilities as well as a rapier in battle. Several of her attacks feature a magic ball that appears a fair distance away from her as she attacks, this ball also being able to damage opponents. If the attacks button is held as an opponent connects with the ball, Zelda will instantly teleport to that location.
Jab: Zelda emits a magic burst from her palm, followed by a series of several magical bursts by waving her hand, before finishing with a final blast. A magic ball appears in front of Zelda as the attack is performed, which can also damage opponents.
Forward Tilt: Zelda does an outward strike with her rapier. A magic ball appears in front of Zelda as the attack is performed, which can also damage opponents.
Forward Smash: Zelda thrusts her palms forward while emitting magic, damaging opponents multiple times before launching them. A magic ball appears in front of Zelda as the attack is performed, which can also damage opponents.
Up Tilt: Zelda strikes above her with her rapier. A magic ball appears above Zelda as the attack is performed, which can also damage opponents.
Up Smash: Zelda waves her arm twice in an overhead fanning motion while her hand is infused with magical energy, which hits opponents multiple times before launching them. A magic ball appears above Zelda as the attack is performed, which can also damage opponents.
Down Tilt: Zelda does a kneeling slash with her rapier. A magic ball appears in front of Zelda as the attack is performed, which can spike opponents.
Down Smash: Zelda throws a magic-infused spinning shin kick. A magic ball appears in front of Zelda as the attack is performed, which can spike opponents
Dash Attack: Zelda throws a double palm thrust that emits a blast of magical energy from her hands. A magic ball appears in front of Zelda as the attack is performed, which can also damage opponents.
Counter: Zelda spins as magic emits from her. This move can absorb projectiles in order to heal her.
Neutral Aerial: Zelda spins with her arms outstretched and infused with magical energy, damaging opponents multiple times before launching them. A magic ball appears in front of Zelda as the attack is performed, which can also damage opponents.
Forward Aerial: Zelda does an inward strike with her rapier. A magic ball appears in front of Zelda as the attack is performed, which can also damage opponents.
Forward Bash: Zelda throws a magic-enhanced flying kick. A magic ball appears in front of Zelda as the move is performed, which can also damage opponents.
Back Aerial: Zelda strikes behind her with her rapier. A magic ball appears behind Zelda as the attack is performed, which can also damage opponents.
Back Bash: Zelda throws a magic-enhanced back kick. A magic ball appears behind Zelda as the move is performed, which can also damage opponents.
Up Aerial: Zelda strikes above her with her rapier. A magic ball appears above Zelda as the move is performed, which can also damage opponents.
Up Bash: Zelda raises her arm upward and emits a magical explosion from her hand. A magic ball appears above Zelda as the attack is performed, which can spike opponents.
Down Aerial: Zelda swings her rapier below her. A magic ball appears below Zelda as the move is performed, which can also damage opponents.
Down Bash: Zelda throws a magic-infused stomp, which can spike opponents. A magic ball appears below Zelda as the attack is performed, which can also spike opponents.
Grab: Zelda restrains the opponent with magic.
Pummel: Zelda slashes at the opponent with her rapier.
Forward Throw: Zelda magically spins the opponent in front of herself and then throws them away.
Back Throw: Zelda magically spins the opponent and turns around with them in tow before throwing them away.
Up Throw: Zelda magically spins the opponent overhead and then throws them upward.
Down Throw: Zelda slams the opponent into the ground and then blasts them with fiery, magical energy from her hands.
Neutral Special - Light Arrow: Zelda creates an arrow of light and fires it forward. The Special Button can be held to charge the move, where it will deal more damage, but travel slower.
Custom 1 - Rapid Arrow: The arrows can be fired three times in rapid succession, but the move cannot be charged.
Custom 2 - Purity Arrow: The arrows travel slower, but will explode into a flash of light on impact, damaging all opponents in the blast radius. The size of the explosion will increase the longer the move is charged for.
Side Special - Din's Fire: Zelda launches a magic fireball forward, which can be angled up and down. When the special button is released, the fireball will stay in place, dealing damage to opponents who touch it, and exploding after three seconds before returning back to Zelda, where it can once again damage opponents. The fireball can be automatically detonated if the Special Button is pressed again while it is floating in place.
Custom 1 - Din's Blast: Zelda launches two magical fireballs forward, with one travelling twice as slow as the other, that simply explode upon releasing the Special Button. They deal more damage and have a larger blast radius depending on how far they travel.
Custom 2 - Din's Inferno: The fireball moves slower, but will damage opponents multiple times before launching them upon exploding.
Up Special - Farore's Wind: Zelda warps in any given direction. It deals damage upon contact while disappearing and reappearing, as well as creating vacuumboxes that draw opponents in.
Custom 1 - Farore's Bellow: Zelda can travel much farther, but will not damage opponents. She creates windboxes rather than vacuumboxes while disappearing.
Custom 2 - Farore's Storm: Zelda can only travel directly upward, but she can spike opponents while reappearing.
Down Special - Nayru's Love: Zelda encases herself in a blue, crystalline barrier, damaging opponents multiple times before launching them. While in the barrier, she can move around freely with directional inputs. The barrier will damage opponents multiple times before launching them, as well as reflect projectiles.
Custom 1 - Nayru's Repulsion: The barrier turns opponents around and has windboxes that pushes them away. However, reflected projectiles are weaker and the move deals less damage.
Custom 2 - Nayru's Desire: The barrier has vacuumboxes that pull opponents into the move. There is also a magical explosion that deals more knockback. However, the move cannot reflect projectiles and Zelda cannot move while inside the barrier. It additionally has more endlag.
Final Form - Power of Hylia: Zelda empowers herself with magic energy. In this state, she is a lot faster and falls slower, as well as having a higher jump height. Her physical attacks are also stronger, with the magic balls being bigger and somewhat farther away from her.
Final Smash - Triforce of Wisdom: Zelda summons the Triforce of Wisdom, which appears in front of her and sucks in opponents using massive periodic shockwaves. Upon catching an opponent, they will be damaged multiple times before being launched or instantly KOd if they are above 100% damage.
Entrance: Zelda teleports onto the stage with magic glowing between her hands and emanating from the ground around her.
Up Taunt: Zelda moves her right hand in a similar fashion to an infinity symbol while emitting magic from it.
Side Taunt: Zelda puts her hands together and creates a small flame.
Down Taunt: Zelda waves while leaning forward and laughing.
Victory Animation 1: Zelda creates magic with her fingertips and waves it around.
Victory Animation 2: Zelda creates fire from her fingertips and waves it around while giggling.
Victory Animation 3: Zelda poses with her hands on her chest, as the Triforce symbol on her hand glows bright.
Young Link The Legend of Zelda: Ocarina of Time (1998)
Young Link is the child version of Link, who appears in The Legend of Zelda: Ocarina of Time, and The Legend of Zelda: Majora's Mask. He is a small child from Kokiri Forest, who is accompanied by his fairy friend Navi. One day, Young Link learns that he is the Hero of Time, and must travel across Hyrule to defeat the demon king Ganondorf. After traveling seven years into the future in order to defeat the warlock, he was sent back to his time. One day, Young Link went out to find Navi, and ended up in a strange world called Termina, where he had to battle against the clock to stop the Skull Kid, who was being controlled by the evil Majora's Mask. Throughout this adventure, Young Link obtained several masks that could be worn to give him special abilities, or completely change his appearance.
Young Link is a fast lightweight fighter who wields the Kokiri Sword and the Deku Shield in battle. The Deku Shield, much like the other Links, gives him the ability to block incoming attacks and projectiles. The majority of Young Link's moves consist of sword swings, as well as his various transformations such as Deku Link and Goron Link.
Jab: Young Link throws two forward slashes, followed by a forward thrust. If the attack button is pressed repeatedly, Young Link will follow with a flurry of quick stabs, damaging opponents multiple times before launching them with a forward slash.
Forward Tilt: Young Link throws a lunging downward slash.
Forward Smash: Young Link transforms into Goron Link and throws a punch.
Up Tilt: Young Link transforms into Deku Link and stands on one foot while twirling, damaging opponents multiple times before launching them.
Up Smash: Young Link throws three upward arching slashes.
Down Tilt: Young Link throws a kneeling inward slash.
Down Smash: Young Link transforms into Zora Link and creates an electric barrier around his feet, stunning opponents that come near.
Dash Attack: Young Link rolls across the ground. If the move is performed at a ledge, Young Link will jump off of it, which can lead into any other attack.
Counter: Young Link throws an upwards slash.
Neutral Aerial: Young Link transforms into Deku Link and spins in the air, damaging opponents multiple times before launching them.
Forward Aerial: Young Link throws two alternating, spinning outward slashes.
Forward Bash: Young Link throws an outward slash.
Back Aerial: Young Link throws a double backward kick.
Back Bash: Young Link transforms into Zora Link and throws a kick behind himself.
Up Aerial: Young Link thrusts his sword straight up.
Up Bash: Young Link transforms into Deku Link and throws an upwards headbutt.
Down Aerial: Young Link thrusts his sword downward, which can spike opponents.
Down Bash: Young Link transforms into Goron Link and stomps downward, which can spike opponents.
Grab: Young Link uses the Hook Shot to grab the opponent and pull them towards him. This can also be used in midair as a tether recovery.
Pummel: Young Link hits the opponent with the Kokiri Sword's pommel.
Forward Throw: Young Link kicks the opponents forward.
Back Throw: Young Link turns around and kicks the opponent away.
Up Throw: Young Link transforms into Goron Link and uppercuts the opponent.
Down Throw: Young Link pins the opponent on the ground and performs an elbow drop.
Neutral Special - Bubble Blast: Young Link transforms into Deku Link and shoots a bubble from his snout. If the Special Button is held down the move will charge, causing the bubble to become larger and travel farther.
Custom 1 - Fairy Slingshot: Young Link instead pulls out the Fairy Slingshot and fires a pellet forward. Charging the move allows the pellet to fly faster, fly farther, and deal more damage.
Custom 2 - Fairy Bow: Young Link instead pulls out the Fairy Bow and fires a Fire Arrow forward. The arrow travels slower, but deals more damage.
Side Special - Double Cutters: Young Link transforms into Zora Link and puts his hands together to release his two arm-fins as a projectile attack that acts as a boomerang. The angle can be adjusted with directional inputs.
Custom 1 - Boomerang: Young Link instead throws out a regular boomerang, which travels farther but doesn't deal as much damage.
Custom 2 - Split Cutter: Young Link throws a single boomerang, but if it hits an opponent, it will split into two smaller boomerangs that deal further damage and cover more range.
Up Special - Deku Flower Flight: Young Link transforms into Deku Link and pulls out a Deku Flower to begin floating upward. He can drift forward or backward with directional inputs, and at the peak of his height, he will let go and fall into a semi-helpless state.
Custom 1 - Poison Flower: Young Link isn't able to drift as far forward or backward, but he can damage opponents with the Deku Flower, causing them to grow a flower on their heads.
Custom 2 - Soaring Flower: Young Link flies much faster and higher, but cannot drift left or right.
Down Special - Goron Roll: Young Link transforms into Goron Link and begins rolling forward, damaging opponents he hits. While rolling, he can change directions and even jump; he creates a shockwave when he lands on the ground, damaging opponents nearby. He has super armor while rolling and can keep rolling if the special button is held, but will eventually stop after a few seconds.
Custom 1 - Goron Smash: Young Link will not roll forward, but instead jump in an arc and damage any opponents he lands on. The move can bury and spike opponents, as well as create a shockwave that deals damage to opponents around him.
Custom 2 - Goron Blaze: Young Link is covered in fire while rolling, and creates a trail of flames behind himself that gradually damage opponents that step in it. However, the attack itself deals less damage and he cannot roll for as long.
Final Form - Fierce Deity Link: Young Link transforms into Fierce Deity Link. In this state, Young Link is much faster and can jump higher, as well as having more range on his attacks due to his sword increasing in size.
Final Smash - Final Hour: Link transforms into Fierce Deity Link as his sword grows to an enormous size before rushing forward. If he hits an opponent, they are locked in a cinematic where he slashes at them several times, before the Moon from The Legend of Zelda: Majora's Mask begins to fall down towards the stage, and Fierce Deity Link slashes through it, causing it to split in half and explode, launching the opponents.
Entrance: Young Link rides onto the stage atop Epona, before hopping off and equipping the Kokiri Sword and Deku Shield.
Up Taunt: Young Link holds the Kokiri Sword up in the air.
Side Taunt: Young Link places the Deku Shield on his back and watches Navi fly around.
Down Taunt: Young Link sheaths the Kokiri Sword and Deku Shield before taking a drink of Lon Lon Milk. This taunt will actually heal Young Link by 3%.
Victory Animation 1: Young Link adjusts his belt and flicks his nose.
Victory Animation 2: Young Link does a horizontal swipe with his sword, then holds it up, giving off a battle cry.
Victory Animation 3: Young Link sheaths his sword, dusts his hands off, and puts them on his hips while grinning.
Ganondorf is the main antagonist of The Legend of Zelda series, who has served as the villain of almost every game in the series. This version is based on his appearance in The Legend of Zelda: Ocarina of Time, where Ganondorf was born to the Gerudo tribe of people. Ganondorf was the first male Gerudo born in a hundred years, resulting in him becoming the king, where he began plotting a scheme to take over the neighboring kingdom of Hyrule. Ganondorf used his intelligence and power to gain access to the Sacred Realm, where he found the Triforce. Upon attempting to take it, the Triforce was split into three pieces, with the Triforce of Power going to Ganondorf, the Triforce of Wisdom going to Zelda, and the Triforce of Courage going to Link.
Ganondorf is a heavyweight fighter who boasts incredible strength in his attacks, having some of the strongest moves of the entire roster. He wields a large trident, which is capable of getting stuck in opponents and pulling them towards him, as well as a variety of magic attacks from his different boss fights. Ganondorf is also capable of temporarily floating in midair by holding up on the control stick after jumping.
Jab: Ganondorf swings his trident downwards, then stabs it forward. If the second hit connects, he will automatically pull the opponent towards him before punching them off the trident.
Forward Tilt: Ganondorf throws a front kick.
Forward Smash: Ganondorf thrusts his trident forward, which pierces through opponents and pulls them towards him before he throws a powerful kick that launches them away.
Up Tilt: Ganondorf throws a delayed downward swing with his trident, causing an explosion when it hits the ground. It has a lot of startup lag, but he has super armor while using it and creates vacuumboxes in front of himself that pull opponents towards the move.
Up Smash: Ganondorf plants the hilt of his trident on the ground as an explosion of dark magic erupts from the points.
Down Tilt: Ganondorf swipes his trident along the ground, creating a wave of dark magic that travels along the ground.
Down Smash: Ganondorf stabs his trident into the ground, creating an explosion of dark magic around him.
Dash Attack: Ganondorf swings his trident upward, creating a trail of electricity that damages opponents.
Counter: Ganondorf throws a backhand punch.
Neutral Aerial: Ganondorf does a semi-circular slash in front of himself with his trident.
Forward Aerial: Ganondorf throws an outwards slash with his trident.
Forward Bash: Ganondorf thrusts his trident forward and creates an explosion of dark magic.
Back Aerial: Ganondorf turns around and swings his trident downward.
Back Bash: Ganondorf throws an inward slash with his trident while turning around, followed by an outward slash.
Up Aerial: Ganondorf swings his trident above him from front to back.
Up Bash: Ganondorf thrusts his trident into the air, with electricity discharging from it.
Down Aerial: Ganondorf does a stall-then-fall downward thrust with his trident, which will drag opponents down with him before being launched upon hitting the ground.
Down Bash: Ganondorf stomps downward, which can bury grounded opponents and spike aerial ones.
Grab: Ganondorf stabs his trident forward to hook the opponent and bring them back to him.
Pummel: Ganondorf knee strikes the opponent.
Forward Throw: Ganondorf lifts the opponent and hits them with an uppercut.
Back Throw: Ganondorf swings his trident overhead, with the opponent still stuck to it, before slamming them on the ground behind him.
Up Throw: Ganondorf lifts the opponent overhead and hits them with an upward palm strike.
Down Throw: Ganondorf holds the opponent overhead before slamming them into the ground.
Neutral Special - Shadows of Calamity: Ganondorf begins gathering energy as dark magic swirls around him. After a long startup, the magic will take shape as the shadowy form of Ganon, who will throw a powerful punch in front of Ganondorf. This move will damage him when used, and if the move is performed when he is over 150% damage, he will become consumed by rage and rocket forward until he hits the blast zone, passing through anything in his way, and almost guaranteed to KO any opponents he comes into contact with, at the cost of a stock.
Custom 1 - Warlock Punch: The move isn't as powerful, but Ganondorf does not take damage when using it and will not kill himself when over 150%.
Custom 2 - Wizard Smash: Instead of punching, Ganondorf pulls out his trident and thrusts it forward. It covers more range and takes less time to charge, but deals less damage.
Side Special - Dead Man's Volley: Ganondorf begins to float slightly above the ground and raises his arm into the air. He starts charging electrical energy into his hand before throwing it forward as a large sphere, its size increasing the longer it was charged for. The sphere will damage opponents, but if timed correctly they could hit the sphere back at Ganondorf, to which Ganondorf can reflect it right back at them, with the sphere becoming faster and more powerful the more it is reflected until it finally hits someone.
Custom 1 - Warlock's Volley: The move will stun opponents, but will not increase in size as it is charged.
Custom 2 - Wizard's Volley: The move will explode on impact and cannot be reflected, but takes longer to charge.
Up Special - Trident Throw: Ganondorf throws his trident before teleporting to wherever it ends up. The trident can be controlled by directional inputs and deals small damage to opponents hit by it.
Custom 1 - Trident Spin: The trident will damage opponents multiple times, but doesn't travel as far/
Custom 2 - Trident Grapple: The trident will not damage opponents, but if there is an opponent next to Ganondorf when he reappears, he will grab onto them and damage them multiple times before causing an explosion, which spikes them.
Down Special - Fire Bats: Ganondorf spins his trident above his head, creating a group of flaming bats that will rotate around him before charging towards the closet opponents. More bats will be created the longer the move is charged for, with a maximum of five being made at full charge.
Custom 1 - Exploding Bats: The bats will explode on contact with an opponent, but only a maximum of three can be summoned.
Custom 2 - Inferno Bats: The bats do not charge at opponents, but instead will create a large wave of flames that surround Ganondorf, damaging opponents nearby.
Final Form - Triforce of Power: Ganondorf empowers himself with the Triforce of Power, and begins to glow a red aura. In this state, many more of his attacks are darkness-enhanced, and he also deals more damage. He can also jump higher and has slower falling speed.
Final Smash - Ganon, The Demon King: Ganondorf summons all three pieces of the Triforce, transforms into his mighty Demon King form, and slashes his swords downward before charging forward.
Entrance: Ganondorf emerges from a liquid-like vortex of darkness.
Up Taunt: Ganondorf floats in the air and then curls into a ball while spinning before opening up from his curled position and striking a pose while laughing.
Side Taunt: Ganondorf punches his right hand into his open palm in a threatening pose and scoffs, with electricity emitting from his hands afterward. When the electricity is emitted, his cape will flow as if being blown by wind.
Down Taunt: Ganondorf crosses his arms and begins to laugh evilly. He will continue laughing until the player lets go of the taunt button.
Victory Animation 1: Facing away, Ganondorf turns to face the screen while flipping his cape, and pumps his fist.
Victory Animation 2: Ganondorf briefly levitates in the air before landing on the ground while punching his palm, then reels back and thrusts his hand towards the screen.
Victory Animation 3: Ganondorf flips his cape, crosses his arms, and laughs.
Toon Link is the small, cartoon incarnation of Link that appears in games such as The Legend of Zelda: The Wind Waker, The Legend of Zelda: Spirit Tracks, and The Legend of Zelda: The Minish Cap. This version of the hero grew up on Outset Island, living in a flooded version of Hyrule, when one day his sister Aryll is kidnapped by the Hemrock King and taken to Ganondorf. Toon Link goes out to rescue her, and ends up teaming with a gang of pirates, led by Tetra. Throughout his journey, Toon Link gains the ability to control the winds with the Wind Waker, as well as obtaining several items to help him on his quest.
Toon Link is a fast lightweight character who wields the Four Sword and Hero's Shield, which can be used to block projectiles if he is standing still or crouching. He also uses a variety of items from his game, and can glide using the Deku Leaf as well. Additionally, Toon Link is capable of using the Wind Waker to create tailwinds that follow him, which will give his attacks more range. Because of the move's function, it does not have any Custom Move variants.
Jab: Toon Link does an inward slash with the Four Sword, followed by a spinning outward slash, before ending with a jumping upward slash.
Forward Tilt: Toon Link throws an outward swing with the Four Sword.
Forward Smash: Toon Link jumps forward and slams the Four Sword on the ground.
Up Tilt: Ezlo appears from Toon Link's hat, who pecks upward six times in quick succession.
Up Smash: Toon Link pulls out the Skull Hammer and swings it overhead.
Down Tilt: Toon Link swings the Four Sword across the ground.
Down Smash: Toon Link equips the Iron Boots and stomps the ground, which can trip nearby opponents.
Dash Attack: Toon Link rolls forward and throws an upward slash with the Four Sword.
Counter: Toon Link throws an upwards slash.
Neutral Aerial: Toon Link spins around while swinging the Four Sword, damaging opponents multiple times before launching them.
Forward Aerial: Toon Link uses the Whirlwind item to blow a stream of air forward that pushes opponents away and propels him backward.
Forward Bash: Toon Link pulls out the Skull Hammer and swings it downward, which can spike opponents.
Back Aerial: Toon Link opens the Gust Jar behind him, creating a burst of wind that pushes opponents back and propels him forward.
Back Bash: Toon Link turns around and does a downward slash with the Mole Mitts.
Up Aerial: Ezlo appears from Toon Link's hat, who pecks upward.
Up Bash: Toon Link thrusts the Four Sword upward.
Down Aerial: Toon Link swings the Cane of Pacci below him, which will bounce him upwards on contact.
Down Bash: Toon Link performs a stall-then-fall downward thrust with the Four Sword, which can spike opponents.
Grab: Toon Link launches his Clawshot forward. The move can also be used in midair, and functions as a tether grab.
Pummel: Ezlo appears from Toon Link's hat and pecks the opponent.
Forward Throw: Toon Link launches the opponent with a shoulder tackle.
Back Throw: Toon Link kicks the opponent backward and slashes them with the Mole Mitts.
Up Throw: Toon Link uses the Sand Rod to create a pillar of sand beneath the opponent, launching them into the air.
Down Throw: Toon Link uses the Magnetic Gloves to lift the opponent upward before slamming them into the ground.
Neutral Special - Wind Waker: Toon Link uses the Wind Waker to create a tailwind in front, behind, below, or above himself. This wind will follow Toon Link around, and will disappear after 15 seconds. This wind will cause any of Toon Link's attacks that go in its direction to have a further range than normal.
Side Special - King of Red Lions: The King of Red Lions appears beneath Toon Link as it rushes forward along a trail of water, pushing opponents along with it and repeatedly dealing damage. The King of Red Lions acts as a platform, with Toon Link and his opponents being able to stand on it and attack. It cannot change direction while moving and will disappear as soon as it touches the edge of a stage.
Custom 1 - Sturdy Ship: The King of Red Lions travels slower, but buries opponents he runs into.
Custom 2 - Shipwreck: The King of Red Lions explodes on impact with an opponent, dealing heavy damage and knockback.
Up Special - Deku Leaf: Toon Link pulls out the Deku Leaf. If used on the ground, he will swing it forward and create a gust of wind that pushes opponents away. When used in midair, he will lift it over his head and rise into the air. When floating, he can drift left and right.
Custom 1 - Floaty Leaf: Toon Link will rise higher, but automatically falls into a helpless state afterward.
Custom 2 - Pointy Leaf: The Deku Leaf will damage opponents multiple times before launching them, but he will not rise as high.
Down Special - Copycat: Toon Link summons a clone of himself that appears in front of him. Only one clone can be active at a time. The clone will either chase opponents or run from them. The player can change this behavior by using the move again. This clone will attack every 3 seconds and chooses his attacks based on his relative position from the opponent. He will never use Special Moves or Smash Attacks except the Up Special for recovering. The clone can be defeated in one hit.
Custom 1 - Durable Clone: The clone can take more hits, but will only attack every 5 seconds.
Custom 2 - Power Clone: The clone can use Smash Attacks, but they will automatically disappear after 20 seconds.
Final Form - Triforce of Courage: Toon Link empowers himself with the Triforce of Courage, causing him to glow yellow. In this state, Toon Link is much faster and can jump higher. His attacks also deal more damage.
Final Smash - Four Swords Slash: Toon Link emits a beam of light from the Triforce of Courage symbol on the back of his hand to stun an opponent in front of himself. If the beam comes in contact with an opponent, Toon Link will hold his sword upward as he summons three clones of himself. The four Toon Links will then dash forward and perform a barrage of slashes while the opponent is trapped in a Triforce-shaped energy field, before the clones disappear and Toon Link jumps into the air to stab the opponent from above.
Entrance: An explosion appears on-screen and as the smoke fades, Toon Link appears and unsheathes the Four Sword and equips the Hero's Shield.
Up Taunt: Toon Link sheathes the Four Sword and places the Hero's Shield on his back as he conducts with the Wind Waker, then strikes a pose and smiles while facing.
Side Taunt: Toon Link sheathes the Four Sword and places the Hero's Shield on his back as he watches a fairy fly around him.
Down Taunt: Toon Link wildly swings the Four Sword in front of himself while yelling in a panicked tone, then runs out of breath while sporting an exhausted expression.
Victory Animation 1: Toon Link conducts with the Wind Waker before concluding by striking a pose while smiling.
Victory Animation 2: Toon Link chases a pig, catches it and raises it in the air triumphantly.
Victory Animation 3: Toon Link chases a pig, but fails to catch it, which results in him comically tripping and landing on his bottom, then rubbing it in discomfort.
Samus is the main protagonist of the Metroid series. As a child, she was orphaned when her home planet was attacked by a group of Space Pirates led by Ridley. However, Samus was able to survive, having been found and taken in by the Chozo, a race of bird-like aliens. Samus was infused with Chozo DNA, and trained to become a powerful bounty hunter for the Galactic Federation.
Samus, despite being a heavyweight, is fast and mobile with a high jump. Her moveset revolves around her arm cannon, with the ability to switch between energy or explosive based attacks using her Guard Special. The energy moves are quick and good for combos, while the explosive moves are slower but serve as powerful finishers. Samus also uses various abilities from the Metroid series, such as the Morph Ball and Screw Attack.
Jab: Samus fires a short ranged energy beam out of her arm cannon that deals light damage. The explosive version of the move has her fire small missiles that are slower but deal more damage.
Forward Tilt: Samus fires a short ranged beam out of her arm cannon that deals light damage. The explosive version of the move has her fire small missiles that are slower but deal more damage. Uniquely, Samus can use this move even while walking.
Forward Smash: Samus thrusts her arm cannon forward to fire a large energy beam forward, which will increase in size and power the longer the move is charged for. The explosive version of the move has her fire a large missile that is slower, but deals more damage.
Up Tilt: Samus throws an electrified axe kick, which can spike opponents.
Up Smash: Samus aims her arm cannon upward and fires six small energy blasts above herself in an arc, damaging opponents multiple times before launching them. In explosive mode she creates a single explosion above herself that deals more damage but only hits once.
Down Tilt: Samus kneels and quickly thrusts her arm cannon downward to fire a small energy blast. In explosive mode she creates a small explosion that deals more damage but is slower.
Down Smash: Samus throws an electrified legsweep.
Dash Attack: Samus performs an electrified shoulder tackle.
Counter: Samus swings her arm cannon upward in a wide arc.
Neutral Aerial: Samus throws a spinning electrified roundhouse kick.
Forward Aerial: Samus fires five energy blasts in a downward arching motion, damaging opponents multiple times before launching them. In explosive mode she fires five fiery blasts that deal more damage but take longer to come out.
Forward Bash: Samus fires a large energy beam forward, damaging opponents multiple times before launching them. In explosive mode, she fires a large missile that is slower and only hits once but deals more damage.
Back Aerial: Samus throws an electrified back kick.
Back Bash: Samus throws an electrified roundhouse kick.
Up Aerial: Samus aims her arm cannon upward and fires an energy blast above herself. In explosive mode she creates an explosion above herself that deals more damage but takes longer to come out.
Up Bash: Samus fires a large energy beam above herself, damaging opponents multiple times before launching them. In explosive mode, she fires a large missile that is slower but deals more damage.
Down Aerial: Samus swings her arm cannon in a downward arching motion, which can spike opponents.
Down Bash: Samus fires a large energy beam below herself, damaging opponents multiple times before launching them. In explosive mode she fires a large missile that is slower but deals more damage and can spike opponents.
Grab: Samus sends out her Grapple Beam to catch the enemy. This move can also be in midair as a tether grab.
Pummel: Samus hits the enemy with her arm cannon.
Forward Throw: Samus twirls the opponent overhead before throwing them downward.
Back Throw: Samus flings the opponent behind herself.
Up Throw: Samus holds the enemy from above with her Grapple Beam, then launches them upward with an energy blast/explosion.
Down Throw: Samus pins the opponent to the ground and uses her Grapple Voltage, healing herself as she damages the opponent.
Neutral Special - Ice Missile: Samus fires a Ice Missile from her arm cannon, which can freeze opponents they hit. If the Special Button is tapped, the missile will home in on opponents before exploding on impact. If the Special Button is held, the missile will fly forward at high speeds before exploding on impact. The held versions also deal more damage.
Custom 1 - Diffusion Missile: The version of the move can be charged. When fully charged, the missile will diffuse its freezing effect across a large area, affecting anything in the blast radius. The missile will function the same regardless of if the Special Button is tapped or held.
Custom 2 - Seeker Missile: This version of the move will lock on to up to 3 different targets then simultaneously fire a missile at each of them. The missile will function the same regardless of if the Special Button is tapped or held.
Side Special - Speed Booster: Samus activates the thrusters on the back of her suit to fire and propel herself forward while running, launching any opponents she comes into contact with. If Samus jumps while running, she will continue her momentum into the air.
Custom 1 - Ball Spark: Samus rolls into her Morph Ball form before dashing forward. This version travels farther, but deals less damage.
Custom 2 - Spin Jump Attack: Samus performs a somersault while running, damaging opponents multiple times before launching them. This version of the move cannot be jumped out of.
Up Special - Screw Attack: Samus leaps upward, somersaulting while discharging energy and damaging opponents multiple times before launching them. She falls into a helpless state afterwards.
Custom 1 - Shinespark: Samus simply dashes upward while discharging electricity. The move travels higher, and Samus can also go diagonally upward while using it, but does not deal as much damage.
Custom 2 - Space Jump: Samus activates her thrusters to propel herself upward. She will not fall into a helpless state afterward, but the move does not deal any damage.
Down Special - Morph Ball: Samus rolls into her Morph Ball form, and can exit by pressing the Special Button again. In this state she can move left and right, and by pressing the Attack Button she will drop a Bomb which explodes after a short time and damages opponents in the blast radius. If the Special Button is held down and then released, Samus can release three Bombs at once, which scatter around her and explode shortly after.
Custom 1 - Power Bomb: Samus drops a Power Bomb instead of a Bomb. It takes longer to explode, but it has a much larger blast radius that damages opponents multiple times before launching them.
Custom 2 - Flash Bomb: Bombs take longer to explode and don't damage opponents, but explode in a flash of light, which can stun opponents to leave them vulnerable.
Final Form - Hypermode: Samus begins glowing blue, entering Hypermode. In this state, all of her attacks become Phazon-enhanced, and she can also jump much higher. Notably, some of her attacks can cover the ground in Phazon, which can both heal Samus and damage opponents when they step in it. Additionally, using her Down Special will have her enter the Hyper Ball instead of the Morph Ball, although this is only an aesthetic change.
Final Smash - Zero Laser: Samus fires a massive laser from her arm cannon forward that can be angled up and down. The laser will damage opponents multiple times before launching them.
Entrance: Samus arrives from a Save Station.
Up Taunt: Samus holds her arm cannon upright while posing and saying "Is that all?"
Side Taunt: Samus kneels and aims her arm cannon in front and behind her while saying "Try me."
Down Taunt: Samus removes her helmet and clenches her fist while saying "You're mine."
Victory Animation 1: Samus lands on the ground and readies her arm cannon.
Victory Animation 2: Samus fires multiple shots from her arm cannon while kneeling, then strikes a pose.
Victory Animation 3: Samus removes her helmet and fires a Super Missile towards the screen before striking a pose.
Ridley is a large pterodactyl-like creature, and a major antagonist from the Metroid series. Ridley is the leader of the Space Pirates, and was responsible for the death of Samus' parents, causing the two to have a fierce rivalry. Despite his feral appearance, Ridley is a very intelligent creature, so much so that he has earned the nickname "Cunning God of Death". Throughout his battles with Samus, he has been killed several times, but always finds a way to come back.
Ridley is a heavyweight fighter, and one of the largest in the game, being tied with Petey Piranha. Thanks to his wings, he is capable of five midair jumps and is able to glide. Ridley's moveset consists of claw slashes, wing attacks, tail slashes, and bursts of fire from his mouth. A number of his attacks take reference from several of his boss battles in the Metroid series.
Jab: Ridley throws two alternating claw swipes followed by a bite. If the attack button is pressed repeatedly, he will stab his tail forward repeatedly, damaging opponents multiple times before launching them with a stronger stab.
Forward Tilt: Ridley grabs his tail and thrusts it forward. This move can be angled upward or downward.
Forward Smash: Ridley rears back before causing an explosion out of his mouth.
Up Tilt: Ridley swipes one wing above himself in an overarching motion.
Up Smash: Ridley claps his wings together above his head, damaging opponents caught in between them.
Down Tilt: Ridley swipes his tail along the ground, which can spike opponents.
Down Smash: Ridley leaps and slams the ground with his wings, which creates a shockwave around him.
Dash Attack: Ridley leans forward and bites.
Counter: Ridley stabs his tail forward.
Neutral Aerial: Ridley performs backflip and swings his tail around himself.
Forward Aerial: Ridley stabs forward with his tail three times in rapid succession.
Forward Bash: Ridley rears back before causing an explosion out of his mouth.
Back Aerial: Ridley swings his tail behind him.
Back Bash: Ridley turns around and slashes with his claws.
Up Aerial: Ridley thrusts both of his wings upwards while closed, then opens them. The opening of his wings can spike opponents.
Up Bash: Ridley performs a frontflip to kick upward.
Down Aerial: Ridley performs a stall-then-fall stomp, which can spike opponents
Down Bash: Ridley stabs his tail diagonally downward in front of himself, which can spike opponents.
Grab: Ridley reaches out to grab the opponent.
Pummel: Ridley stabs the opponent with his tail.
Forward Throw: Ridley tosses the opponent forward.
Back Throw: Ridley turns around and tosses the opponent backward.
Up Throw: Ridley throws the opponent upward before stabbing them with his tail.
Down Throw: Ridley slams the opponent into the ground and violently slashes at them several times.
Neutral Special - Plasma Breath: Ridley spits a fireball from his mouth that bounces along the floor. The move can be charged to have Ridley spit up to 10 fireballs. If Ridley is hit in the mouth while charging the move, he will take recoil damage.
Custom 1 - Plasma Balls: The move cannot be charged, but if the special button is tapped repeatedly Ridley can spit up to 10 fireballs in rapid succession. If seven fireballs or more are launched, Ridley will cough up smoke when he finishes, having some endlag.
Custom 2 - Plasma Ray: The move has more startup and endlag, but instead of firing a fireball, he fires a laser that covers a wide range, damaging opponents multiple times before launching them.
Side Special - Space Pirate Rush: Ridley rushes forward to grab the opponent. If successful, he slams them into the ground and flies forward while dragging them across it, dealing continuous damage before throwing them at an edge or if the Special Button is pressed again. However, opponents can button mash to escape Ridley's grasp. If he grabs an opponent in midair, he can fly freely in the air for a short time and throw them in any direction. Pressing the Special Button again during this will cause Ridley to leap off of the opponent, spiking them.
Custom 1 - Space Pirate Smash: Instead of dragging the opponent across the ground, Ridley slams them downward, burying grounded opponents and meteor smashing aerial ones.
Custom 2 - Space Pirate Blitz: Ridley drags opponents faster and it is more difficult for them to button mash out of the move, but Ridley has less range when grabbing and he deals less damage.
Up Special - Wing Blitz: Ridley folds his wings and dashes in the direction the control stick is held, damaging opponents he hits and falling into a helpless state afterwards. If he is traveling downward, he will spike opponents.
Custom 1 - Wing Drill: Ridley damages opponents multiple times before launching them. However, he is more limited in what directions he can move.
Custom 2 - Wing Shock: Ridley deals less damage, but the move is electrically-charged and inflicts paralysis on opponents.
Down Special - Skewer: Ridley stabs his tail forward. It normally deals little damage and knockback, but if an opponent is hit by the tip of the tail, they take massive damage and are left vulnerable for a follow-up. If the sweetspot does not land, he has endlag.
Custom 1 - Shish-Kebab: Ridley stabs his tail forward, piercing through any opponents he hits. He will take any opponents and swing his tail forward or backward to launch them.
Custom 2 - Explosive Tail: Ridley has noticeable startup lag, but after stabbing his tail, he creates an explosion that deals heavy damage and knockback.
Final Form - Omega Ridley: Ridley lets out a roar and dashes forward. Upon hitting an opponent, they are locked in a cinematic where Ridley knocks them onto Samus' gunship. As the gunship flies off, he shoots it down with a laser that engulfs both the ship and the target in an explosion. After the cutscene ends, the opponent is launched and the gunship can be seen crashing in the background of the stage. This move is an instant KO on opponents at 100% damage or higher before the cutscene ends.
Final Smash - Plasma Scream: Ridley becomes swarmed with Phazon, transforming into Omega Ridley. In this state, he is much faster and a number of his attacks deal phazon-based damage. He can also jump higher.
Entrance: Ridley swoops down at an angle, before landing and letting out a roar.
Up Taunt: Ridley roars and strikes a menacing pose, while flapping his wings rapidly.
Side Taunt: Ridley stands upright with an audible cracking sound and remains in that position for a moment before going back into his idle stance.
Down Taunt: Ridley begins to hover above the ground while laughing, before going back down to the ground.
Victory Animation 1: Ridley flies in from off-screen, lands, and drifts to a stop.
Victory Animation 2: Ridley performs a somersault and screeches, then lands with a slash.
Victory Animation 3: Ridley claws at the ground repeatedly and bites once afterwards, then turns toward the camera as he grins.
Dark Samus is a major antagonist in the Metroid series, specifically the Metroid Prime series. They were created when the titular Metroid Prime absorbed Samus' Phazon Suit, gaining all of their counterparts abilities as well as several Phazon abilities. Dark Samus has all of their normal counterpart's abilities, as well as Phazon-based abilities. In Metroid Prime 3: Corruption, they served as the main antagonist, where she spread Phazon across the galaxy.
Fittingly, Dark Samus is similar to Samus with them mostly using their arm cannon. Dark Samus can utilize Phazon during battle, causing it to cover the ground if they hit opponents with any move that uses it. Dark Samus can stand in the Phazon to heal themselves, whereas opponents will take damage from standing in it.
Jab: Dark Samus throws a jab followed by a forearm club with their arm cannon.
Forward Tilt: Dark Samus throws a roundhouse kick.
Forward Smash: Dark Samus thrusts their arm cannon forward to fire a small Phazon blast.
Up Tilt: Dark Samus throws an axe kick, which can spike opponents.
Up Smash: Dark Samus fires five Phazon blasts above themselves in an overarching motion, damaging opponents multiple times before launching them.
Down Tilt: Dark Samus kneels and quickly thrusts their arm cannon downward to fire a small Phazon blast.
Down Smash: Dark Samus throws a legsweep.
Dash Attack: Dark Samus performs a shoulder tackle.
Counter: Dark Samus fires a small Phazon blast from her arm cannon.
Neutral Aerial: Dark Samus throws a spinning roundhouse kick.
Forward Aerial: Dark Samus fires five Phazon blasts in a downward arching motion, damaging opponents multiple times before launching them.
Forward Bash: Dark Samus fires a large Phazon blast forward, damaging opponents multiple times before launching them.
Back Aerial: Dark Samus throws a back kick.
Back Bash: Dark Samus throws a roundhouse kick.
Up Aerial: Dark Samus aims their arm cannon upward and fires an energy blast above themselves.
Up Bash: Dark Samus fires a large energy beam above themselves, damaging opponents multiple times before launching them.
Down Aerial: Dark Samus swings their arm cannon in a downward arching motion, which can spike opponents.
Down Bash: Dark Samus fires a large Phazon blast below themselves, damaging opponents multiple times before launching them.
Grab: Dark Samus sends out their Grapple Beam to catch the enemy. This move can also be in midair as a tether grab.
Pummel: Dark Samus hits the enemy with their arm cannon.
Forward Throw: Dark Samus twirls the opponent overhead before throwing them downward.
Back Throw: Dark Samus flings the opponent behind themselves.
Up Throw: Dark Samus fires a Phazon blast from their arm cannon, launching the opponent upward.
Down Throw: Dark Samus pins the opponent to the ground and uses their Grapple Voltage, healing themselves as they damage the opponent.
Neutral Special - Echoes: Dark Samus creates a stationary clone of themselves that performs the last move they did after three seconds of waiting. Dark Samus is free to move around and do other things while the clone is on stage, such as throwing the opponent into the clone when it performs its attack.
Custom 1 - Persisting Clone: The clone will remain for ten seconds, and perform the last three moves that Dark Samus did. However, the clone can be defeated by the opponent's attacks.
Custom 2 - Phazon Clone: The clone will explode after three seconds instead of attacking.
Side Special - Phazon Orb: Dark Samus creates a large orb of Phazon that hovers above their head shortly before homing in on the nearest target. The move can be charged, with a total of three orbs being created at max charge.
Custom 1 - Exploding Orb: The orb will explode on contact, damaging opponents multiple times before launching them. However, the move cannot be charged.
Custom 2 - Rushdown Orb: Dark Samus will create three orbs regardless of the level of charge, but they are smaller and deal less damage.
Up Special - Screw Attack: Dark Samus leaps upward, somersaulting while discharging energy and damaging opponents multiple times before launching them. They fall into a helpless state afterwards.
Custom 1 - Screw Rush: Dark Samus travels more horizontal distance in exchange for less vertical distance.
Custom 2 - Gravity Screw Attack: Dark Samus deals less damage, but while somersaulting, they create vacuumboxes around themselves that draw nearby opponents into the attack. They also travel slightly higher.
Down Special - Phazon Smash: Dark Samus strikes the ground below them, causing large tentacle-like objects to protrude out of the ground in a circle around them that knocks opponents into the air. Not only can this move destroy most projectiles that come into contact with it, but it can also protect Dark Samus from enemy attacks.
Custom 1 - Grapple Smash: Dark Samus creates a single tentacle that appears in front of her and grabs a nearby opponent. They can then attack the opponent as they are being held in place. The opponent can escape by repeatedly pressing the attack button.
Custom 2 - Targeting Smash: Dark Samus will create three tentacles that appear from underneath grounded opponents, regardless of how far away they are from them.
Final Form - Phazon Overload: Dark Samus begins glowing blue, enhancing themselves with Phazon. In this state, all of their Phazon-based attacks become stronger, and they can move faster and jump higher.
Final Smash - Phazon Corruption: Dark Samus punches the ground, causing a large tentacle-like object to sprout out of the ground in front of them. Any opponents hit by it are trapped in a cinematic where Dark Samus creates a clone of themselves that teleports to the opposite side of the opponent, and the two of them begin to strike the opponent several times in unison, before the clone disappears and Dark Samus launches the opponent with a final blast from their arm cannon.
Entrance: Dark Samus emerges from a puddle of Phazon.
Up Taunt: Dark Samus spins around while glowing with Phazon.
Side Taunt: Dark Samus crouches down while holding their arm cannon upright.
Down Taunt: Dark Samus hovers into the air slightly while glowing with Phazon.
Victory Animation 1: Dark Samus raises their arm and lowers it while clenching their fist.
Victory Animation 2: Dark Samus splits into two and performs a cartwheel, then levitates in a circle before recombining with their clone.
Victory Animation 3: Dark Samus turns toward the camera while glowing with Phazon, then the camera dramatically zooms in, showing their eyes glowing through their visor.
Kirby is a small, pink, round creature and the main protagonist of the Kirby series. Although he is very friendly and innocent, Kirby will not hesitate to defend his home from any dangers. He has the ability to inflate his body and fly through the air, as well as being able to inhale his enemies and gain their abilities for himself.
Kirby is a lightweight fighter, with his five midair jumps and moderate air speed that make for a good recovery. With his Neutral Special, Inhale, Kirby has the ability to take an opponent's Neutral Special and use it against them. After this, if Kirby is attacked enough, he will lose the ability. However, using his Guard Special will allow him to discard the move himself. Kirby's moveset takes inspiration from his various Copy Abilities in the Kirby series.
Jab: Kirby throws two alternating jabs followed by a flurry of punches, damaging opponents multiple times before finishing with an uppercut.
Forward Tilt: Kirby spits out a puddle of poisonous liquid that travels along the ground.
Forward Smash: Kirby cracks a whip in front of him. Uniquely, this move can pull items towards Kirby if it connects with one.
Up Tilt: Kirby twirls as leaves circle around him, damaging opponents multiple times before launching them. If the special button is held down, Kirby will continue to spin until it is released.
Up Smash: Kirby pulls out two bells and slams them together above his head, creating soundwaves that damage opponents.
Down Tilt: Kirby slides forward, bouncing back if he hits an opponent.
Down Smash: Kirby punches the ground, creating a splash of water around him.
Dash Attack: Kirby transforms into a wheel and dashes forward, damaging opponents multiple times before launching them.
Counter: Kirby disappears in a puff of smoke, leaving a log in his place, before reappearing behind the opponent and kicking them forward.
Neutral Aerial: Kirby generates an orb of electricity around himself, damaging opponents multiple times before launching them.
Forward Aerial: Kirby flies forward while engulfed in flames.
Forward Bash: Kirby throws a bomb forward in an arc that explodes on impact.
Back Aerial: Kirby turns around and sends out a yo-yo.
Back Bash: Kirby turns around and throws an outwards swing with a paintbrush.
Up Aerial: Kirby thrusts a staff directly upward.
Up Bash: Kirby attaches the horn of a beetle to his head and spins around while rising upward, damaging opponents multiple times before launching them.
Down Aerial: Kirby attaches wings to himself and performs a stall-then-fall dive, creating a small shockwave upon landing.
Down Bash: Kirby pulls out a megaphone and screams into it, creating a soundwave below him that can spike opponents. When halfway charged, the megaphone becomes a desk mike, and at full charge it becomes a stand mike, with the size of the soundwave increasing each time.
Grab: Kirby reaches out to grab the opponent.
Pummel: Kirby punches the opponent.
Forward Throw: Kirby flings the opponent forward.
Back Throw: Kirby performs a suplex, throwing opponents backward.
Up Throw: Kirby jumps upward above the upper blast zone with the opponent in tow before slamming onto the ground with them.
Down Throw: Kirby pins the opponent on the ground and stomps on them multiple times.
Neutral Special - Inhale: Kirby begins inhaling, and can continue inhaling if the special button is held. He can inhale items and projectiles, healing himself by a bit. If he inhales an opponent, the special button can be pressed again for him to spit the opponent out as a star, damaging them and any opponents hit by it. If the control stick is held down, Kirby will copy the opponent, gaining a hat based on the opponent. In this state, Kirby can use the opponent's Neutral Special.
Custom 1 - Exhale: Instead of inhaling, Kirby produces windboxes that push opponents backward.
Custom 2 - Frost Breath: Kirby blows icy breath instead of inhaling, damaging opponents multiple times and sometimes freezing them.
Side Special - Hammer: Kirby pulls out a hammer and swings it, heavily damaging opponents he hits. If the special button is held, the move can charge, and Kirby can move, jump, and short hop while charging. At full charge, the hammer will catch on fire, and he will gradually damage himself as he continues charging. If used in midair, Kirby will instead swing the hammer twice while spinning.
Custom 1 - Cutter Blade: Kirby throws out a cutter blade, which functions like a boomerang. The move can be charged to increase the size and distance the blade travels. The blade can also be angled up or down after being thrown, and will bounce off of walls when fully charged.
Custom 2 - Fighter Wave: Kirby releases a blue fireball from his hands that travels forward and damages opponents on impact. The move can be charged, increasing the speed and power of the fireball. When fully charged, the fireball becomes red.
Up Special - Final Cutter: Kirby pulls out a cutter blade and leaps upward, damaging opponents. Afterwards, he will fall down with the blade, spiking opponents and creating a shockwave projectile upon landing. If the special button is held and the control stick is held forward while preparing the move, Kirby will instead perform a single horizontal slice that propels him forward.
Custom 1 - Uppercut: Kirby throws a jumping uppercut, damaging opponents multiple times before launching them and falling into a helpless state.
Custom 2 - High Jump: Kirby crouches down before leaping high into the air, damaging opponents he hits on the way up.
Down Special - Stone: Kirby transforms into a stone, and can hold this state if the special button is held, but will eventually be forced to return to his normal state. If used in midair, Kirby will fall to the ground, burying and spiking opponents he lands on. While a stone, Kirby is invincible.
Custom 1 - Freeze: Kirby creates an icy aura around himself that can freeze opponents on contact. He can keep it up for as long as the special button is held down for.
Custom 2 - Mirror: Kirby waves a wand in front of himself, creating a wave of mirror-like images that can reflect projectiles.
Final Form - Hypernova: Kirby eats a Miracle Fruit, becoming rainbow-colored. In this state, Kirby is faster and can jump higher. His Neutral Special has much more range and has a stronger pull, and his attacks also deal more damage and knockback.
Final Smash - Robobot Armor: Kirby hops on a Warp Star and flies forward. If he hits an opponent, they are locked in a cinematic where Kirby flies upward while carrying them. He then jumps off of the Warp Star and enters his Robobot Armor before rapidly punching the opponent. Kirby then morphs one of the Robobot's arms into a drill and throws a final punch that damages the opponent multiple times before launching them.
Entrance: Kirby flies in on a Warp Star and crashes into the ground.
Up Taunt: Kirby smiles and poses, producing a star.
Side Taunt: Kirby spins in place before posing on one foot.
Down Taunt: Kirby faces the screen and waves his arms while saying "Hi!"
Victory Animation 1: Kirby, accompanied by two copies of himself, moonwalks to the left, twists, slides to the right, and jumps into a pose where he stands on one foot.
Victory Animation 2: Kirby, accompanied by two copies of himself, cartwheels to the left twice, wiggles, and does a front flip before posing.
Victory Animation 3: Kirby, accompanied by two copies of himself, jumps twice, shuffles backwards, does a breakdance, and poses while facing away from the camera.
King Dedede is one of the main characters of the Kirby series. Originally appearing as the main antagonist in Kirby's Dream Land, he has gone on to be an anti-hero of sorts, often serving as a rival to Kirby. King Dedede is the self proclaimed king of Dream Land, and leads an army of Waddle Dees that serve him.
King Dedede is one of the heaviest characters in the game, on top of having five midair jumps. His moveset revolves around his large hammer, with powerful but slow attacks. Several of King Dedede's moves are taken directly from his various boss fights.
Jab: King Dedede swings his hammer downwards in front of himself. This move can be repeated three times in succession.
Forward Tilt: King Dedede thrusts his hammer forward as the head spins around, damaging opponents multiple times before launching them.
Forward Smash: King Dedede lifts his hammer overhead and slams it on the ground in front of him.
Up Tilt: King Dedede throws an upwards headbutt.
Up Smash: King Dedede pulls back his hammer as the head bursts into flame, then throws a powerful uppercut.
Down Tilt: King Dedede slides across the ground, bouncing back if he hits an opponent.
Down Smash: King Dedede holds his hammer underneath himself and twirls it, damaging opponents multiple times before launching them.
Dash Attack: King Dedede trips and face-plants onto the ground, sliding a short distance.
Counter: King Dedede puffs up his chest and spits his inhaled air as a bullet.
Neutral Aerial: King Dedede rapidly somersaults with his hammer in midair, swinging it around himself.
Forward Aerial: King Dedede swings his hammer forward.
Forward Bash: King Dedede swings his hammer downward.
Back Aerial: King Dedede swings his hammer backward.
Back Bash: King Dedede turns around and swings his hammer upward.
Up Aerial: King Dedede thrusts his hammer upward as the head spins around, damaging opponents multiple times before launching them.
Up Bash: King Dedede thrusts his hammer upward.
Down Aerial: King Dedede thrusts his hammer downward as the head spins around, damaging opponents multiple times before launching them.
Down Bash: King Dedede swings his hammer downwards, which can spike opponents.
Grab: King Dedede reaches out to grab the opponent.
Pummel: King Dedede headbutts the opponent.
Forward Throw: King Dedede smacks the opponent with his hammer, sending them forward.
Back Throw: King Dedede turns around and smacks the opponent with his hammer, sending them backward.
Up Throw: King Dedede hoists the opponent above himself and pushes them upward with both hands.
Down Throw: King Dedede slams the opponent into the ground.
Neutral Special - Inhale: King Dedede begins inhaling, and can continue inhaling if the special button is held. He can inhale projectiles and his own Gordos, and spit them back out for extra damage. If he inhales an opponent, he can spit them back out as a star, damaging them and other opponents hit by it.
Custom 1 - Dedede Storm: Instead of inhaling opponents, King Dedede creates violent vortexes that damage opponents multiple times before launching them.
Custom 2 - Bait 'N' Switch: King Dedede will not inhale opponents in the vacuumbox. Instead, the move can be cancelled into any other attack. Notably, it has a much longer horizontal reach.
Side Special - Gordo Throw: King Dedede takes out a Gordo and smacks it with his hammer, sending it bouncing across the ground. With directional inputs, the trajectory and arc the Gordo bounces in can be altered. Any attack that deals 5% damage or more can reflect the Gordo back at King Dedede, but he can attack it to send it back at the opponent. If a Gordo hits a wall or ledge, it will stick to it for some time, damaging any opponents that touch it. The Gordos can also be inhaled and spat out with Inhale. Up to three Gordos can be at play at once.
Custom 1 - Waddle Dee Throw: Instead of Gordos, King Dedede will smack Waddle Dees forward. They will walk around the stage, and will attack nearby opponents with a kick. If hit enough, they will be defeated.
Custom 2 - Shotzo Throw: Instead of Gordos, King Dedede will smack Shotzos forward. They will stay in place and aim at opponents, firing cannonballs before disappearing after a short time. Only one Shotzo can be at play at a time.
Up Special - Super Dedede Jump: King Dedede leaps upward before crashing down. While falling, he will bury and spike opponents he lands on. Upon landing, he creates stars that deal further damage. The move can be cancelled by holding up on the control stick, sending him in a semi-helpless state. He has super armor throughout the entire duration of the move.
Custom 1 - Rising Dedede Jump: King Dedede damages opponents while rising upward. He falls into a helpless state at the peak of his jump.
Custom 2 - Dedede Tremor: King Dedede doesn't deal as much damage, but upon landing he will create a stage-wide tremor that causes all grounded opponents to trip.
Down Special - Missiles: King Dedede sets his hammer on the ground in front of him as the head opens up like a hatch to fire a large missile forward. The missile flies forward and can be steered into any direction using the control stick, exploding on contact with the stage, an opponent, or after six seconds where it will automatically fall to the ground.
Custom 1 - Homing Missile: The missile cannot be controlled, and instead automatically homes in on the nearest opponent.
Custom 2 - Blasting Missile: The missile has a larger blast radius and deals more damage, but the move cannot be cancelled.
Final Form - Masked Dedede: King Dedede takes out a mechanized hammer and puts on a mask, becoming Masked Dedede. In this state, he is much faster and his attacks are much stronger. Notably, many of his attacks have an electric effect on them.
Final Smash - Revenge of the King: King Dedede becomes engulfed with a purple aura as his robe rips to reveal a toned chest, and his arms grow to become extremely muscular. In this more powerful form, King Dedede leaps into the air before slamming his fists on the ground, sending out a powerful shockwave that launches opponents.
Entrance: King Dedede is carried onto the stage by a group of Waddle Dees, while he sits atop his throne. He then hops off and equips his hammer.
Up Taunt: King Dedede thrusts his hammer upwards several times.
Side Taunt: King Dedede twirls his hammer and laughs.
Down Taunt: King Dedede dances around in a circle while chanting.
Victory Animation 1: King Dedede swings his hammer twice before turning to the camera and posing.
Victory Animation 2: King Dedede laughs and slaps his belly while a Waddle Doo walks into the scene.
Victory Animation 3: King Dedede twirls his hammer with a grimace then poses with it.
Meta Knight is a major character in the Kirby series. Originally appearing as a servant of King Dedede who was tasked with protecting a piece of the Star Rod, he is a mysterious, masked swordsman who pilots his own battleship, the Halberd. He has both helped and battled Kirby, always providing a sword for him in order to make the battle fair.
Meta Knight is a fast and lightweight fighter, with five midair jumps and the ability to glide. He has a variety of fast and powerful moves using his sword, the Galaxia. Meta Knight's attacks take after various moves he has used throughout his boss fights in the Kirby series, as well as the Sword Copy Ability.
Jab: Meta Knight slashes the Galaxia sword around himself, damaging opponents multiple times before finishing with an upward slash. He can continue slashing if the attack button is held.
Forward Tilt: Meta Knight slashes twice in front of him before doing an downwards slash. Pressing the attack button once will cause Meta Knight to perform only the first hit. If Meta Knight is at 0%, the first slash will create a blade of energy that travels forward.
Forward Smash: Meta Knight pulls the Galaxia back, then slashes in front of him in a clearing outward strike.
Up Tilt: Meta Knight thrusts the Galaxia upwards.
Up Smash: Meta Knight jumps up while spinning around, damaging opponents with his sword multiple times before launching them.
Down Tilt: Meta Knight slides across the ground, bouncing back if he connects with an opponent.
Down Smash: Meta Knight throws a spinning, low-angle outward slash.
Dash Attack: Meta Knight thrusts the Galaxia forward.
Counter: Meta Knight dashes backward before slashing through the opponent.
Neutral Aerial: Meta Knight performs a somersault while swinging the Galaxia around him.
Forward Aerial: Meta Knight throws a downwards slash, holding the Galaxia out in front of him and bouncing off of opponents he hits.
Forward Bash: Meta Knight throws an outward slash.
Back Aerial: Meta Knight throws an upwards slash behind him.
Back Bash: Meta Knight throws a spinning inward slash followed by an outward slash.
Up Aerial: Meta Knight throws an upwards arching slash.
Up Bash: Meta Knight thrusts the Galaxia upward.
Down Aerial: Meta Knight performs a stall-then-fall downward thrust, which can spike opponents.
Down Bash: Meta Knight throws a downward fanning slash.
Grab: Meta Knight reaches out to grab the opponent.
Pummel: Meta Knight jabs with one of the talons on his wings.
Forward Throw: Meta Knight boots the opponent away with a back-somersaulting kick.
Back Throw: Meta Knight lays the opponent down, warps, then slashes behind their back.
Up Throw: Meta Knight jumps upward above the upper blast zone with the opponent in tow before slamming onto the ground with them.
Down Throw: Meta Knight pins the opponent on the ground and stomps on them multiple times.
Neutral Special - Mach Tornado: Meta Knight spins around while slashing the Galaxia sword, creating a tornado that damages opponents multiple times before launching them. While spinning, he can move around with directional inputs, and repeatedly tapping the special button allows him to rise upward. If he is in midair, he falls into a helpless state afterwards.
Custom 1 - Entangling Tornado: The move only hits opponents once before launching them. However, the move creates vacuumboxes that pull opponents into the attack.
Custom 2 - Knightmare Tornado: Meta Knight deals more damage while spinning, but cannot move as much, and cannot rise at all.
Side Special - Sword Beam: Meta Knight raises the Galaxia into the air before slashing it forward, sending out a weak crescent-shaped projectile. This move can be repeated up to three times in succession, however, it will have more endlag.
Custom 1 - Piercing Beam: The projectile deals less damage, but travels through opponents.
Custom 2 - Pursuing Beam: The projectile homes in on opponents, but it travels slower.
Up Special - Shuttle Loop: Meta Knight leaps upward while slashing the Galaxia sword, damaging opponents. He then performs a shuttle loop and begins gliding. Tapping the special button repeatedly allows Meta Knight to perform multiple shuttle loops before gliding, adding damage.
Custom 1 - Blade Coaster: Meta Knight dashes forward before travelling upward, falling into a helpless state afterwards.
Custom 2 - Cutter Rush: Meta Knight deals more damage, but travels slower and isn't able to perform multiple shuttle loops.
Down Special - Dimensional Cape: Meta Knight warps in the direction the control stick is held. If no directional inputs are used, he simply reappears where he was. If the special button is pressed as Meta Knight appears, he will perform a powerful slash. If he reappears in midair, he falls into a helpless state afterwards.
Custom 1 - Shield Piercer: The slash ignores shields and deals more damage, but Meta Knight doesn't warp as far.
Custom 2 - Targeting Slash: Meta Knight will warp next to any opponent in range and slash them. However, he delays a bit before the slash.
Final Form - Star Warrior: Meta Knight hoists the Galaxia sword upwards as it exerts electric energy, causing Meta Knight to become electrified. In this state, Meta Knight is faster, can jump higher, and deals much more damage and knockback. His sword attacks also deal electrical damage.
Final Smash - Meta Knightmares: Meta Knight waves his cape forward. If an opponent is caught in it, it will initiate a cinematic where Meta Knight raises his sword and calls upon the members of the Meta Knight Corps. All together, Trident Knight, Mace Knight, Axe Knight, and Javelin Knight attack the opponent from all angles with their respective weapons, before Meta Knight finishes them off with a powerful slash.
Entrance: Meta Knight appears with his back facing the camera, his cape flowing in the wind, before turning around and drawing the Galaxia.
Up Taunt: Meta Knight wraps himself in his cape and spins repeatedly while scoffing.
Side Taunt: Meta Knight slashes the Galaxia twice then points it in front of himself while saying "Fight me!"
Down Taunt: Meta Knight turns his cape into wings and spreads them out while shouting "Come!"
Victory Animation 1: Meta Knight performs three slashes with the Galaxia, and warps away while saying "Come back when you can put up a fight."
Victory Animation 2: Meta Knight flies into the scene and spreads his cape, saying "You've much yet to learn."
Victory Animation 3: Meta Knight performs two slashes and twirls the Galaxia, saying "Victory is my destiny."
The Animal Friends are a trio of characters that appear in the Kirby series. The group consists of Rick the Hamster, Kine the Sunfish, and Coo the Owl. They debuted in Kirby's Dream Land 2, helping Kirby on his adventure, and would later team up as a singular character in Kirby Star Allies. They each have their own abilities, such as Rick being able to withstand treacherous terrain, Kine being a strong swimmer but rather useless on land, and Coo being able to carry Kirby through the air with his talons.
Rick, Kine, and Coo work together throughout their moveset, often changing into one another for their attacks. The player mainly controls Rick or Kine on the ground, while they transform into Coo when jumping. Because of Coo's wings, they have five midair jumps and the ability to glide. Kine and Coo are middleweight fighters while Rick is a heavyweight. They are also unique in that, since Rick is controlled when walking or running, they cannot slip on ice. When swimming, the player will control Kine, who can move really fast in the water and will never drown.
Their moveset is derived from their appearance as a Dream Friend in Kirby Star Allies, swapping between each other for the entirety of their moveset. Rick attacks with kicks and body slams, Coo with his wings and talons, and Kine by flopping around. Some of their moves also utilize the Animal Friends that appeared in Kirby's Dream Land 3, those being Pitch the Bird, Nago the Cat, and ChuChu the Squid.
Jab: Rick breathes a burst of flames. He can continue doing this for as long as the attack button is held down for.
Forward Tilt: Kine falls over and creates a splash. of water
Forward Smash: Pitch appears in Rick's hands before morphing into a bucket as Rick thrusts him forward, releasing a water projectile that travels forward in an arc. Charging the move will increase the projectile's size, as well as the distance it travels.
Up Tilt: Rick throws an upward headbutt.
Up Smash: Kine leaps upward while spinning, damaging opponents multiple times before launching them.
Down Tilt: Kine flops on the ground, creating a splash of water.
Down Smash: Rick throws a belly flop.
Dash Attack: Nago appears behind Rick as he transforms into a curling stone. Nago then pushes Rick forward, leaving behind a trail of water and damaging opponents multiple times before launching them.
Counter: Rick jumps and stomps on the opponent, burying or spiking them. If they counter a projectile, he simply dodges.
Neutral Aerial: Coo puts a parasol over his head and spins around, damaging opponents multiple times before launching them.
Forward Aerial: Coo throws a headbutt.
Forward Bash: Pitch appears in Coo's talons before morphing into a bucket as Coo swings him forward, releasing a water projectile that travels forward in an arc. Charging the move will increase the projectile's size, as well as the distance it travels.
Back Aerial: Coo throws a corkscrew kick backward, damaging opponents multiple times before launching them.
Back Bash: Pitch appears in Coo's talons before morphing into a bucket as Coo turns around and swings him forward, releasing a water projectile that travels forward in an arc. Charging the move will increase the projectile's size, as well as the distance it travels.
Up Aerial: Coo performs a backflip to swing his talons upward.
Up Bash: Coo puts a parasol above himself, which floats upward before exploding on impact.
Down Aerial: Coo throws five consecutive strikes with his talons downward.
Down Bash: Nago appears above Coo and grabs him before performing a front flip and swinging him downwards, which can spike opponents.
Grab: Rick reaches out to grab the opponent.
Pummel: Rick headbutts the opponent.
Forward Throw: Rick kicks the opponent forward.
Back Throw: Nago appears and spins around with the opponent in tow before throwing them backward.
Up Throw: Coo carries the opponent upward with his talons before throwing them upward.
Down Throw: Kine flops on the opponent four times while splashing water.
Neutral Special - Cutter Coo: Coo swings his wing outward, causing three sharp feathers to fly forward in varying directions. Each of the feathers can damage opponents, as well the initial wing attack.
Custom 1 - Boomerang Coo: The feathers travel less distance forward, but will boomerang backward.
Custom 2 - Slicing Coo: The feathers travel slower, but damage opponents multiple times.
Side Special - Stone Rick: Rick transforms into a boulder, and can remain in this state for up to 10 seconds by holding the special button. He is invincible while in this state, but he can be grabbed. Rick can roll around forward and backward to damage opponents, and rolls faster if he is on a slope. If used in midair or he falls off a platform, he will plummet, and bury and spike opponents he lands on.
Custom 1 - Heavy Stone: Rick can't remain a boulder for as long, but he will bury opponents he rolls over.
Custom 2 - Rick Roll: Instead of being able to roll around freely, Rick turns into a boulder and rolls forward at a quick speed, turning back to normal afterwards. It deals more damage and knockback.
Up Special - Clean ChuChu: Rick or Kine hop on top of a broom as ChuChu appears and lands on their head. While riding the broom, they can move freely in any direction before falling into a helpless state afterwards. The move damages opponents multiple times before launching them, but also has windboxes that push opponents away.
Custom 1 - Dirty ChuChu: Instead of windboxes, the move has vacuumboxes that pull opponents into it.
Custom 2 - Soapy ChuChu: The move loses the windbox, but it leaves behind a trail of water that can also damage opponents.
Down Special - Kine Freeze: Kine surrounds himself in frost, damaging opponents around him multiple times before freezing them. He can continue attacking if the special button is held, but if he uses the move for too long, Kine will freeze himself.
Custom 1 - Ice Kine: The attack only hits once and can't be held, but it deals more damage.
Custom 2 - Cold Kine: It takes longer for Kine to freeze himself, though opponents can't be frozen.
Final Form - Friend Vacuum: Rick pulls out a large vacuum cleaner and begins to suck in anything around him. The rest of the Animal Friends, as well as nearby items, get stuck to the hose of the vacuum before Rick launches them forward. They will rapidly bounce around the stage, ricocheting off of the ground, platforms, and even the edges of the screen, all while damaging opponents they come into contact with. Eventually, they slow down and the move ends.
Final Smash - Fire Rick, Blizzard Kine, & Bluster Coo: Rick, Kine, and Coo power themselves up with fire, ice, and wind respectively. In this state, all of their attacks are enhanced with their respective elements, dealing more damage and covering more range. Coo has more aerial mobility, Rick Stone leaves a trail of fire as Rick moves, and Kine cannot freeze himself when using Kine Ice.
Entrance: A large sack appears on stage as it opens up to reveal Rick.
Up Taunt: Rick stretches and lies down before falling asleep. He will continue to sleep for as long as the taunt button is held down for.
Side Taunt: Kine backflips into the air and poses.
Down Taunt: Coo spreads his wings and caws.
Victory Animation 1: Rick, Kine, and Coo appear out of a large sack and pose.
Victory Animation 2: Rick appears on the ground sleeping, before Coo flies overhead while holding Kine in his talons and drops him onto Rick, waking him up.
Victory Animation 3: All six Animal Friends run towards a large pile of leaves and jump into it, scattering them everywhere.
Can Crawl: No.
Can Wall Jump: No.
Can Wall Cling: No.
Footstool: Rick's footstool does 10% damage, as well as spiking opponents.
Gooey is a recurring character in the Kirby series, debuting in Kirby's Dream Land 2 as a minor character before becoming playable in Kirby's Dream Land 3, and a Dream Friend in Kirby Star Allies. Despite being made from the same material as Dark Matter, Gooey is silly and absent-minded. Gooey has a long tongue that he uses to attack enemies, and like Kirby, can absorb enemies to gain their abilities.
Gooey is a quick lightweight fighter with a lot of range in his attacks thanks to his tongue. Using his Down Special, Gooey can copy an opponent's ability and use it against them, however, unlike Kirby, he copies the opponent's Down Special rather than their Neutral Special. He also doesn't gain a hat after copying an opponent, but instead morphs his head into the shape of them, while still keeping his eyes and mouth. Gooey's moveset mostly consists of tongue whips and body slams, as well as many of his attacks from Kirby Star Allies, which has him use Copy Abilities from the Kirby series. Additionally, all of Gooey's tongue attacks have the unique feature of being able to latch onto items and pull them towards him,
Jab: Gooey throws three tongue flicks. If the attack button is held, he begins rapidly flicking his tongue, damaging opponents multiple times before launching them.
Forward Tilt: Gooey throws a heavy tongue flick.
Forward Smash: Gooey plants his tongue on the ground and uses it to thrust his body forward.
Up Tilt: Gooey takes out a parasol and spins it above himself, damaging opponents multiple times before launching them. If the attack button is held, Gooey can continue spinning the parasol.
Up Smash: Gooey morphs the top of his head into a spike and thrusts it upward.
Down Tilt: Gooey flicks his tongue across the ground, which can trip opponents.
Down Smash: Gooey leaps into the air, transforms into his Stone form, and slams onto the ground. Gooey is invincible while transformed into stone, and the move can spike opponents.
Dash Attack: Gooey flies forward while engulfed in flames.
Counter: Gooey thrusts his body forward.
Neutral Aerial: Gooey performs a somersault.
Forward Aerial: Gooey throws three tongue flicks forward in rapid succession.
Forward Bash: Gooey thrusts his body forward.
Back Aerial: Gooey performs a backflip to strike opponents with a tongue flick behind himself.
Back Bash: Gooey thrusts his body behind him.
Up Aerial: Gooey thrusts his body upward.
Up Bash: Gooey takes out a parasol and spins it above himself.
Down Aerial: Gooey transforms into his Stone form and falls down, spiking and burying opponents he lands on.
Down Bash: Gooey thrusts his body downward, which can spike opponents.
Grab: Gooey grabs an opponent with his tongue, coiling it around them.
Pummel: Gooey slams the opponent into the ground with his tongue.
Forward Throw: Gooey flings the opponent forward.
Back Throw: Gooey flings the opponent backward.
Up Throw: Gooey flings the opponent upward.
Down Throw: Gooey slams the opponent into the ground before jumping on them.
Neutral Special - Mock Matter: Gooey transforms into a form similar to that of Dark Matter. In this state, he can float around freely, though the control stick must be held upward for him to not lose altitude. If the attack button is pressed, he swings his tongue around himself, damaging opponents hit by it. If the special button is pressed, he will fire four lasers around himself in an "X" formation, damaging opponents heavily. Finally, if the special button is held, he will charge up for a massive laser that he shoots forward, damaging opponents multiple times before launching them. After using either of the latter two attacks, after five seconds, or after being hit with an attack, Gooey will turn back into his normal form and fall into a semi-helpless state. The move has a 10 second cooldown after being used.
Custom 1 - Auto-Lasers: Gooey simply uses the "X" lasers attack instead of transforming into a Dark Matter-like form. The lasers cover a longer range.
Custom 2 - Fast Flying: Gooey can travel noticeably faster while floating, though he is heavier and loses altitude easier.
Side Special - Burning Gooey: Gooey engulfs himself in flames and rushes forward, damaging opponents he hits. If he hits a wall, he will recoil backward, gaining a boost of upward momentum and allowing him to use the move again. If he doesn't hit a wall or an opponent, then he falls into a semi-helpless state after dashing.
Custom 1 - Freezing Gooey: The move deals less damage, but it deals ice damage instead of fire damage, which can freeze opponents.
Custom 2 - Washing Gooey: The move doesn't travel as far, but Gooey will damage opponents multiple times before launching them.
Up Special - Tongue Slingshot: Gooey swings his tongue in the direction the control stick is held in. If he hits an opponent, he can grab them and throw them in any direction. If he touches a ledge, he can latch onto it like a tether grab.
Custom 1 - Zap Slingshot: Instead of grabbing opponents, Gooey's tongue simply launches them. The move has a sweetspot at the tip of his tongue that causes paralysis.
Custom 2 - Gobbling Slingshot: Gooey's tongue covers less range, but it also allows him to eat projectiles to replenish his health.
Down Special - Absorb: Gooey sticks his tongue out. If he hits an opponent, he absorbs them and spits them out. After this, he can use the Down Special of the opponent he just copied, with his head morphing to match the character. If he is damaged enough, he will lose the ability, but using his Guard Special can discard it as well.
Custom 1 - Lick: Instead of copying the opponent's Down Special, Gooey will gradually damage the opponent he absorbs, while also replenishing his own health. Opponents can escape him quicker by button mashing.
Custom 2 - Slurp: Gooey's copied Down Special deals 1.5x the damage and knockback and has faster startup and endlag, but Gooey will automatically discard it 10 seconds after getting it.
Final Form - Sugar Rush: Gooey eats a giant strawberry shortcake, causing him to start glowing pink and his pupils to shrink. In this state, he is significantly faster, can jump higher, and deals more damage. Mock Matter also doesn't lose altitude whatsoever, and has no cooldown after being used.
Final Smash - Dark Laser Flare: Gooey transforms into his Dark Matter-like form and fires a massive laser, damaging opponents multiple times before launching them. Directional inputs can be used to angle the laser up or down.
Entrance: A large sack falls onto the stage and Gooey pops out.
Up Taunt: Gooey scratches the top of his head with his tongue.
Side Taunt: Gooey morphs his head to resemble that of Zero, complete with a single eye, before returning to normal.
Down Taunt: Gooey stretches and flattens his body.
Victory Animation 1: Gooey transforms into his Dark Matter-like form and flies around before posing.
Victory Animation 2: Gooey does a flip before posing with his tongue out.
Victory Animation 3: Gooey rolls around before jumping up and posing.
Bandanna Dee (fully known as Bandanna Waddle Dee) is a recurring character in the Kirby series, being King Dedede's right-hand-man. As his name suggests, he is a Waddle Dee who wears a blue bandanna, and wields a spear as his main weapon. Originally a background character, Bandanna Dee made his playable debut in Kirby's Return to Dream Land, and has since become one of Kirby's closest allies.
Bandanna Dee is a slow and lightweight fighter with three midair jumps, who utilizes his spear for the majority of his attacks. These attacks are taken from the Spear Copy Ability, as well as some moves that only Bandanna Dee can use in games such as Kirby Star Allies. These moves are fast with a long range, dealing the most damage if opponents are hit with the tip of the spear. Bandanna Dee also uses other weapons such as a parasol and a beam wand, allowing him to mimic the abilities of the Waddle Doo enemies.
Jab: Bandanna Dee thrusts his spear forward, and follows with a flurry of stabs that damage opponents multiple times before launching them with another thrust.
Forward Tilt: Bandanna Dee thrusts his spear forward. If the control stick is held backwards and the attack button is pressed again after the first thrust, Bandanna Dee will then thrust the spear behind him.
Forward Smash: Bandanna Dee swings his parasol in front of him as water splashes from it.
Up Tilt: Bandanna Dee thrusts his spear directly above him.
Up Smash: Bandanna Dee thrusts his parasol upwards, spinning it and damaging opponents multiple times before launching them.
Down Tilt: Bandanna Dee slides forward, bouncing off of opponents he comes into contact with.
Down Smash: Bandanna Dee spins his parasol underneath him, damaging opponents multiple times before launching them.
Dash Attack: Bandanna Dee drags his spear forward along the ground, then flicks it upward. Pressing the attack button again before the flick will cause him to pole-vault instead.
Counter: Bandanna Dee throws a kick.
Neutral Aerial: Bandanna Dee spins his spear like a helicopter blade underneath himself, damaging opponents multiple times before launching them.
Forward Aerial: Bandanna Dee thrusts his spear forward, sending himself forwards slightly.
Forward Bash: Bandanna Dee swings his beam wand forward, creating a wave of energy that damages opponents multiple times before launching them.
Back Aerial: Bandanna Dee thrusts his spear backward.
Back Bash: Bandanna Dee turns around and swings his beam wand forward, creating a wave of energy that damages opponents multiple times before launching them.
Up Aerial: Bandanna Dee thrusts his spear upwards.
Up Bash: Bandanna Dee swings his beam wand upward, creating a wave of energy that damages opponents multiple times before launching them.
Down Aerial: Bandanna Dee performs a stall-then-fall thrust with his spear while spinning, which can spike opponents.
Down Bash: Bandanna Dee swings his beam wand downward, creating a wave of energy that damages opponents multiple times before launching them.
Grab: Bandanna Dee reaches out with one hand.
Pummel: Bandanna Dee headbutts the opponent.
Forward Throw: Bandanna Dee launches the opponent away with a wave of energy from his beam wand.
Back Throw: Bandanna Dee turns around and launches the opponent away with a wave of energy from his beam wand.
Up Throw: Bandanna Dee bounces the opponent on top of his parasol before thrusting it upward and launching them.
Down Throw: Bandanna Dee pins the opponent to the ground and punches them.
Neutral Special - Beam Whip/Wave Beam: Bandanna Dee pulls out his beam wand and waves it forward, creating a short-range beam that moves downward, damaging opponents multiple times before launching them. If charged, Bandanna Dee will store up energy before firing a massive blast of energy forward, dealing heavy damage and knockback.
Custom 1 - Shocking Beam: The beams have more startup and deal less damage, but they can inflict paralysis on opponents.
Custom 2 - Nova Beam: The initial beam is weaker, but the charged beam is much stronger, damaging opponents multiple times. It also has vacuumboxes that draw opponents into the projectile before it explodes.
Side Special - Spear Throw: Bandanna Dee throws his spear in an arc before pulling out a new one. The arc can be altered with directional inputs during the start of the move. The spear will briefly pin opponents to the ground if they are hit with the tip, and it can also be picked up and thrown as an item after it lands. If the move is charged, Bandanna Dee will throw three spears instead of one.
Custom 1 - Bluster Spear: The spears will swoop upwards after being thrown, knocking opponents into the air.
Custom 2 - Blizzard Spear: The spears will freeze opponents rather than pinning them to the ground. However, they cannot be picked up and thrown afterward.
Up Special - Waddle Copter: Bandanna Dee jumps up while spinning his spear like a helicopter blade, then glides down. The spear can damage opponents multiple times before launching them. The descent can be cancelled by pressing down, causing him to fall faster and enter a helpless state.
Custom 1 - Sizzle Copter: Bandanna Dee doesn't travel as high, but the spinning spear will create large fireballs that fly out on both sides of him and explode on impact.
Custom 2 - Zap Copter: Bandanna Dee has less control over where he goes, but lightning will repeatedly strike his spear from all angles, dealing more damage and paralyzing opponents.
Down Special - Parasol Drill/Parasol Dive: If done on the ground, Bandanna Dee rushes forwards with his parasol, dealing strong knockback. In the air, he will dive downwards while spinning his parasol for a multi-hit spike.
Custom 1 - Chumbrella: The parasol is much larger and deals more damage, but Bandanna Dee doesn't travel as far.
Custom 2 - Funbrella: The parasol will damage opponents multiple times before launching them, but the moves have more endlag.
Final Form - Puppet Dee: Bandanna Dee whistles, summoning a Puppet Dee with a bandanna on it that he enters. In this state, while he is slightly slower, he is much heavier, and his attacks deal more damage.
Final Smash - Megaton Punch: Bandanna Dee rushes forward while stabbing his spear. If he hits an opponent, they are locked in an animation where Bandanna Dee stands in front of a cheering crowd, tosses his spear aside, and leaps upward to land on the opponent, punching them. Planet Popstar is then shown breaking in two before the opponent is taken back to the stage and launched.
Entrance: Bandanna Dee flies in from the foreground accompanied by a trail of smoke, as if he had been hit and launched into the battlefield.
Up Taunt: Bandanna Dee stands on one foot and waves at the camera.
Side Taunt: Bandanna Dee plants his spear in the ground, flips on it, then poses with a wink.
Down Taunt: Bandanna Dee bounces on his spear like a pogo stick.
Victory Animation 1: Bandanna Dee repeatedly waves back and forth to a nonexistent crowd.
Victory Animation 2: Bandanna Dee spins his spear above his head before holding it up triumphantly.
Victory Animation 3: Bandanna Dee does a side flip before rolling forward and posing.
Marx is the main antagonist of Kirby Super Star and its remake, Kirby Super Star Ultra. He appeared in the Milky Way Wishes subgame, where he caused the Sun and Moon to fight, and tricked Kirby into awakening the wish granting Galactic Nova to stop it. He then tried to use it's power to take over the universe, but was defeated by Kirby. He later appeared in Kirby Star Allies as a Dream Friend, having seemingly changed his villainous ways and coming to Kirby's aid, despite their past history, in order to stop the threat looming over the galaxy.
Marx is a floaty lightweight character with a total of six jumps, utilizing his wings to gain extra height. These wings also allow him to glide through the air. Marx's moveset consists of attacks from his appearance as a Dream Friend in Kirby Star Allies as well as his boss fights in Kirby Super Star, Kirby Super Star Ultra, and Super Smash Bros. Ultimate. They cover a lot of range and are quite strong, but are laggy as a result.
Jab: Marx throws a kick, followed by a sidekick, and ends with an inward swing with one of his wings. If the attack button is repeatedly pressed, Marx will grow vein-like tentacles from his body and wiggle them in front of himself, damaging opponents multiple times before launching them.
Forward Tilt: Marx's eyes turn pitch black and fall out of his head, bouncing along the ground in front of him a short distance before disappearing as Marx's regular eyes return.
Forward Smash: Marx's eyes enlarge and bulge out of his head as multiple pupils appear on them that shoot out a series of short ranged lasers, which can be angled up or down and damage opponents multiple times before launching them.
Up Tilt: Marx grows a thorny vine in front of himself that stabs upwards.
Up Smash: Marx disappears into the ground, before flying straight up with his wings out. While charging this move, Marx is underground and cannot be damaged, on top of being able to slowly move left or right.
Down Tilt: Marx grows a tentacle from his body and sweeps the ground with it.
Down Smash: Marx jumps up and slams the ground with his wings, sending small, hexagonal panels outward on both sides of him.
Dash Attack: Marx flies forward with his wings out for a flying tackle.
Counter: Marx opens his mouth and belches out a small explosion of energy.
Neutral Aerial: Marx encases himself within his wings before spreading them out and releasing four crescent-shaped blades that travel outward in a boomerang-like motion, damaging opponents multiple times before launching them.
Forward Aerial: Marx throws a kick.
Forward Bash: Marx rushes forward while engulfed in blue flames.
Back Aerial: Marx thrusts his wings backward.
Back Bash: Marx turns around rushes forward while engulfed in pink flames.
Up Aerial: Marx spits a small seed upwards, which will fall down to the stage and cause a tall thorny vine to grow in its place, damaging opponents who touch it.
Up Bash: Marx rushes upward with his wings outstretched.
Down Aerial: Marx dives straight down, spiking opponents he comes into contact with. Normally, Marx will stop at the ground while using this move, but if the player is able to input an Up Smash right before Marx touches the ground, he will cancel this move directly into his Up Smash, however, it cannot be charged.
Down Bash: Marx performs a front flip to swing his wings downward, which can spike opponents.
Grab: Marx forces the opponent underneath him as he runs on top of them.
Pummel: Marx spins the opponent fast.
Forward Throw: Marx kicks the opponent forwards.
Back Throw: Marx roundhouse kicks the opponent backwards.
Up Throw: Marx dives down with the opponent into the ground, then quickly rises with the opponent above him, launching them into the air.
Down Throw: Marx stomps the opponent into the ground, burying them.
Neutral Special - Jester Ball: If the special button is tapped, Marx spawns a ball underneath himself that he balances on. While on top of the ball, Marx can move left and right as well as jump a single time, but he cannot change directions. Tapping the special button again will have Marx kick the ball forward, where it will ricochet off of the ground or walls, before exploding shortly after. If the special button is held while Marx is on top of the ball, the ball's trajectory can be angled. If Marx is moving forward and the special button is tapped, he will kick the ball farther and faster than normal. Finally, if the control stick is held up or down and the special button is pressed, Marx will jump off of his ball, where it will explode after three seconds. The ball will automatically explode if anything besides Marx himself touches it. Only one ball can be out at a time.
Custom 1 - Blizzard Ball: The balls deal less damage, but will freeze opponents upon exploding.
Custom 2 - Zap Ball: The balls take longer to explode, but lightning will strike them when they do, paralyzing opponents.
Side Special - Arrows of Light: Marx launches a flurry of arrows forward, damaging opponents multiple times before launching them. If the special button is held, the move will charge, allowing him to fire more arrows.
Custom 1 - Cosmic Laser: Marx launches a massive laser instead of a flurry of arrows. The laser is larger and covers more range, and deals heavy knockback However, it takes longer to fully charge.
Custom 2 - Ball Barrage: Marx kicks four balls instead of a flurry of arrows. The balls travel in different arcs and distances depending on how long the move is charged, and they will all explode on impact.
Up Special - Radiant Flight: Marx teleports in the direction the control stick is held, falling into a semi-helpless state afterwards if he ends up in midair. The move can be used up to three times in succession, and it can be cancelled into any attack after he reappears.
Custom 1 - Wing Smash: Marx launches himself in the direction the control stick is held, damaging opponents he hits and falling into a helpless state afterwards.
Custom 2 - Crescent Storm: Marx encases himself inside his wings. In this state, he can float freely in midair with directional inputs, but is left vulnerable. After a while, he will begin glowing white. If the special button is released, Marx will spread out his wings and release four crescent-shaped blades that travel outward in a boomerang-like motion, damaging opponents they hit. Marx is left vulnerable until the blades return to him.
Down Special - Black Hole: Marx encases himself inside his wings. In this state, he can float freely in midair with directional inputs, but is left vulnerable. After a while, he will begin glowing purple. If the special button is released, his body will split open, revealing a black hole. It will suck in all opponents in range, damaging them multiple times before either launching them a fixed distance upwards, or spiking them downwards depending on directional inputs. The black hole will also suck in items and projectiles in range, which will heal Marx.
Custom 1' - 'Supernova: The black hole is larger and has stronger vacuumboxes, but the move takes much longer to charge.
Custom 2 - White Hole: Instead of sucking in opponents, the black hole creates windboxes that violently push opponents backward.
Final Form - Marx Soul: Marx transforms into his Soul form. In this state, he is much larger and his attacks are faster. They also cover more range and deal more damage and knockback.
Final Smash - Galactic Nova: Marx's body splits in half, revealing a black hole that sucks in any close enough opponents. The captured opponents will then appear floating in space, with the Galactic Nova looming behind them, as Marx appears and transforms into his Soul form. He then fires a massive laser beam that pushes the opponents into the Galactic Nova, causing it to explode and launch them. This move will instantly KO opponents if they have over 100% damage.
Miscellaneous=
Entrance: Marx teleports on stage while laughing.
Up Taunt: A ball appears underneath Marx as he bounces on top of it.
Side Taunt: Marx floats into the air while laughing.
Down Taunt: Marx splits himself in half while chuckling.
Victory Animation 1: Marx rolls in atop his ball and does a flip.
Victory Animation 2: Marx flies around while laughing before posing in front of the camera.
Victory Animation 3: Marx is initially nowhere to be seen, until the camera turns around to show him staring at it with his soulless eyes.
Adeleine & Ribbon Kirby's Dream Land 3 (1997) / Kirby 64: The Crystal Shards (2000)
Adeleine & Ribbon are two recurring characters from the Kirby series. Adeleine is a human that came to Dream Land in order to practice her art, and first appeared as a boss in Kirby's Dream Land 3, where she was being possessed by Dark Matter. In her fight, she would paint enemies on her canvas, which would then come to life and attack Kirby. She then reappeared in Kirby 64: The Crystal Shards, where she would appear in the background of certain stages and paint Kirby a healing item. Also introduced in that game was Ribbon, a small fairy from Ripple Star, that has recently been paired with Adeleine in Kirby Star Allies to form a duo.
Adeleine & Ribbon are middleweight fighters, with players taking control of Adeleine while Ribbon follows behind her at all times, floating above the ground. They have three midair jumps and the ability to glide using Ribbon's wings, as well as being able to summon various enemies from the Kirby series to attack. These enemies can vary in function, and provide more utility to their moveset and are usually their strongest moves. These enemies also act on their own startup and endlag, allowing Adeleine & Ribbon to move almost instantly after they are summoned. However, most of them can be attacked by opponents as well, defeating them early before the attack ends. Their attacks also cover the stage, as well as opponents, in paint, although this is only cosmetic.
Jab: Adeleine does an inward swing with her paintbrush, followed by an outwards swing, before ending with a headbutt.
Forward Tilt: Adeleine steps into the background as Ribbon charges forward and throws a headbutt.
Forward Smash: Adeleine brings out her canvas and creates a painting of a Ghost Knight, who thrusts their lance forward.
Up Tilt: Adeleine ducks as Ribbon charges diagonally upwards, hitting opponents with her head.
Up Smash: Adeleine brings out her canvas and creates a painting of an Octagon, who floats upward and enlarges itself to damage opponents.
Down Tilt: Adeleine crouches down as Ribbon throws a lunging headbutt.
Down Smash: Adeleine brings out her canvas and creates a painting of an I³, who falls to the ground like an anvil, which can spike opponents.
Dash Attack: Adeleine charges forward while rapidly swinging her brush from side to side. If she hits an opponent, she will be bounced back.
Counter: Adeleine brings out her canvas and creates a painting of a Scarfy, who transforms into a Mutant Scarfy before exploding.
Neutral Aerial: Adeleine twirls around with Ribbon while rising into the air, damaging opponents multiple times before launching them. This attack can also be used to pull in nearby items.
Forward Aerial: Adeleine does an outwards swing with her paintbrush.
Forward Bash: Adeleine brings out her canvas and creates a painting of a Burnin' Leo, who breathes flames forward that damages opponents multiple times before launching them.
Back Aerial: Adeleine throws a kick behind her.
Back Bash: Adeleine brings out her canvas and creates a painting of a Chilly, who breathes ice backward that damages opponents multiple times before launching them, and has a chance to freeze them.
Up Aerial: Adeleine does an overhead swing with her brush.
Up Bash: Adeleine brings out her canvas and creates a painting of a Poppy Bros. Jr., who tosses a bomb straight upward before it falls down, exploding on impact.
Down Aerial: Adeleine throws a flurry of kicks below her, damaging opponents multiple times before launching them.
Down Bash: Adeleine brings out her canvas and creates a painting of a Rocky, who turns into stone and falls downward, which can bury and spike opponents.
Grab: Ribbon flies forward and grabs the opponent.
Pummel: Ribbon headbutts the opponent.
Forward Throw: Adeleine brings out her canvas and creates a painting of Sweet Stuff, who fires arrow-shaped lasers from its lure, launching the opponent forward.
Back Throw: Adeleine brings out her canvas and creates a painting of either Mr. Shine or Mr. Bright, who flies behind the opponent before charging into them, sending them backward.
Up Throw: Adeleine brings out her canvas and creates a painting of either Pon or Con, who grabs the opponent and heaves them upwards.
Down Throw: Adeleine brings out her canvas and creates a painting of Acro, who jumps up and body slams the opponent.
Neutral Special - Ribbon's Crystal: Adeleine uses Ribbon's Crystal Gun to shoot Crystal Shards forward. She shoots two Crystal Shards at a time, and it can be used in quick succession.
Custom 1 - Ribbon's Diamonds: Adeleine fires five Crystal Shards instead of two, but the move is slower.
Custom 2 - Ribbon's Emeralds: The Crystal Shards are bigger and more powerful, but don't travel as far.
Side Special - Wheelie: Adeleine brings out her canvas and creates a painting of a Wheelie, which will roll forward and damage opponents it runs over. If the special button is held, Adeleine can ride the Wheelie, allowing her to cancel it into any move on impact.
Custom 1 - Explosive Wheelie: The Wheelie explodes after hitting an opponent, dealing more damage. However, it moves slower and cannot be cancelled if Adeleine is riding it.
Custom 2 - Monster Wheelie: The Wheelie will bury opponents instead of launching them, but it deals less damage.
Up Special - Bronto Burt: Adeleine brings out her canvas and creates a painting of a Bronto Burt. She grabs onto its legs as it flies upward. She can drift left and right while flying, and falls into a helpless state when she reaches peak height. If the Bronto Burt is defeated, she will fall into a helpless state earlier, but if the control stick is held down, she will let go of the Bronto Burt early.
Custom 1 - Soaring Bronto Burt: The Bronto Burt flies much higher, though it will only carry Adeleine straight upward.
Custom 2 - Pushy Bronto Burt: The Bronto Hurt cannot fly for as long, but it will damage opponents that it flies into.
Down Special - Ado's Painter: Adeleine pulls out her canvas and paints one of three different bosses from the Kirby series: Kracko, Ice Dragon, and Waiu. Adeleine then hops on top of the boss and can ride around on them. This move cannot be used in the air and the transformations only last for a short amount of time.
Kracko: If the special button is tapped, Kracko will create two beams of electricity that rotate around itself, damaging opponents multiple times before launching them. If the special button is held, Kracko will shoot a lightning bolt below itself, which can spike opponents.
Ice Dragon: If the special button is tapped, Ice Dragon will blow out a stream of icy wind that can freeze opponents. If the special button is held, Ice Dragon will create a block of ice and push it forward. If the special button is held while in midair, Ice Dragon will slam down, causing four icicles to fall, two on each side.
Waiu: If the special button is tapped, Waiu will throw out a purple crescent-shaped projectile. If the special button is held, Waiu will vanish before reappearing a short distance away. If the special button is held while in midair, Waiu will stomp down on the ground, creating a purple star that bounces along the ground three times before traveling upwards.
Custom 1 - Ado's Artist: The transformations last longer, but the moves deal less damage.
Custom 2 - Ado's Sculptor: The transformations are stronger, but don't last as long.
Final Form - Invincibility Candy: Adeleine pulls out her canvas and paints an Invincibility Candy before eating it, causing her and Ribbon to become rainbow-colored. In this state, Adeleine is faster and stronger. The summoned enemies are also much more difficult to defeat.
Final Smash - 0²: Adeleine pulls out her canvas and begins to draw on it while Ribbon watches, worryingly. Adeleine creates a picture of 0², who comes to life and flies into the background before shooting a large beam of red energy that can be aimed left or right, while Adeleine and Ribbon hide behind the canvas. The beam damages opponents multiple times before launching them as the move ends.
Entrance: Ribbon flies Adeleine down onto the stage before gently placing her down.
Up Taunt: Adeleine and Ribbon high five.
Side Taunt: Adeleine lies down, drawing on a piece of paper.
Down Taunt: Ribbon spins around Adeleine while holding a Crystal Shard.
Victory Animation 1: Adeleine paints a "#1" on her canvas before turning around and posing.
Victory Animation 2: Ribbon carries Adeleine into the air, spins, and poses.
Victory Animation 3: Adeleine and Ribbon are seen sitting on a picnic blanket surrounded by food, with them talking and laughing.
Dark Meta Knight Kirby & the Amazing Mirror (2004)
Dark Meta Knight is the Mirror World version of Meta Knight, appearing as a boss in Kirby & the Amazing Mirror and Kirby: Triple Deluxe, as well as a playable character in Kirby Star Allies. Despite looking nearly identical to Meta Knight, he has a much more vicious and darker personality, lacking the honor his lighter counterpart has. He has a much more aggressive fighting style, and has abilities not even the normal Meta Knight can achieve.
Obviously, Dark Meta Knight is very similar to Meta Knight, with five midair jumps and the ability to glide. However, his moveset is entirely different, taking inspiration from his attacks in Kirby Star Allies. A lot of his moves create large mirrors that allow Dark Meta Knight to summon giant versions of his sword. Uniquely, several of his moves are capable of reflecting projectiles.
Jab: Dark Meta Knight throws an inward slash, followed by an outward slash, before ending with a spinning outward slash. If the attack button is repeatedly pressed, Dark Meta Knight will slash his sword around himself before throwing an upwards slash.
Forward Tilt: Dark Meta Knight throws an overhead slash. If he is at 0% damage, this move will send out a blade of energy that travels forward.
Forward Smash: Dark Meta Knight summons a massive sword that lunges outward from a mirror that appears in front of him. This move can reflect projectiles.
Up Tilt: Dark Meta Knight thrusts his sword upward as several small mirrors emerge from the ground around him.
Up Smash: Dark Meta Knight summons two massive swords that lunge upward from mirrors that appear on the ground on either side of him. This move can reflect projectiles.
Down Tilt: Dark Meta Knight splits into two as they both fly outward before recombining.
Down Smash: Dark Meta Knight summons two massive swords that lunge outwards from mirrors that appear on either side of him. This move can reflect projectiles.
Dash Attack: Dark Meta Knight thrusts his sword forward before swinging it upward, summoning three large swords that lunge outwards from mirrors that appear in front of him. This move can reflect projectiles.
Counter: Dark Meta Knight summons a massive sword that lunges outwards from a mirror that appears in front of him. This move can reflect projectiles.
Neutral Aerial: Dark Meta Knight creates six copies of himself that appear around him in a circle.
Forward Aerial: Dark Meta Knight throws two slashes in front of himself.
Forward Bash: Dark Meta Knight summons three large swords that lunge outwards from mirrors that appear in front of him. This move can reflect projectiles.
Back Aerial: Dark Meta Knight turns around and throws a downwards slash.
Back Bash: Dark Meta Knight turns around and summons a massive sword that lunges outwards from a mirror that appears in front of him. This move can reflect projectiles.
Up Aerial: Dark Meta Knight thrusts his sword upward as several small mirrors emerge from the ground around him.
Up Bash: Dark Meta Knight throws a spinning upwards slash, damaging opponents multiple times before launching them.
Down Aerial: Dark Meta Knight slashes his sword downwards.
Down Bash: Dark Meta Knight summons a massive sword that lunges downward from a mirror that appears beneath him. This move can spike opponents and reflect projectiles.
Grab: Dark Meta Knight reaches out to grab the opponent.
Pummel: Dark Meta Knight stabs the opponent with the spikes on his wings.
Forward Throw: Dark Meta Knight flings the opponent forward.
Back Throw: Dark Meta Knight flings the opponent backward.
Up Throw: Dark Meta Knight flies above the upper blast zone with the opponent in tow, then divebombs onto the ground with them.
Down Throw: Dark Meta Knight throws the opponent on the ground, stomps on them several times, and stabs them.
Neutral Special - Triple Crescent Shot: Dark Meta Knight slashes his sword in front of himself three times, with each swing sending out a large purple crescent-shaped projectile. He has super armor during the move, but is forced to do all three swings before he can act again.
Custom 1 - Piercing Shot: The projectiles deal less damage, but travel through opponents.
Custom 2 - Pursuing Shot: The projectiles home in on opponents, but they travel slower.
Side Special - Wall of Mirrors: Dark Meta Knight creates a wall of mirrors in front of himself before making them disappear shortly after. This wall will reflect projectiles and serves as a wall that prevents opponents from walking past it. If the special button is held, the wall can remain held up, though he is left vulnerable. The wall can also be destroyed if it has taken 15% damage; when this happens, it cannot be used again for 15 seconds.
Custom 1 - Mirror Sword: Dark Meta Knight summons a massive sword that lunges out of a mirror that appears in front of him. Using directional inputs, the sword can be aimed up or down. It deals heavy damage, but cannot reflect projectiles.
Custom 2 - Moving Mirror: After creating the wall, Dark Meta Knight pushes it forward, damaging opponents it hits. Another one cannot be created until the first one travels off-screen or hits a wall, causing it to shatter.
Up Special - Shuttle Loop: Dark Meta Knight leaps upward while slashing his sword, travels in a loop before flying upward again, and falls into a helpless state afterwards. Using directional inputs, the angle he travels in after the loop can be altered.
Custom 1 - Blade Coaster: Dark Meta Knight travels in a wider loop, damaging opponents multiple times before launching them. He gains less vertical distance.
Custom 2 - Shuttle Glide: Dark Meta Knight travels less vertical distance and doesn't deal damage, but he will begin gliding after the loop.
Down Special - Mirror Swords:: Dark Meta Knight creates three small mirrors in front of himself. Small, red swords appear out of them and home in on opponents, damaging them. They travel slowly however, and the move cannot be used again until all the swords disappear.
Custom 1 - Targeting Swords: The swords travel in straight lines, but stop in midair before boosting at high speed in the direction of the nearest opponent. They deal less damage.
Custom 2 - Sword Rain: The mirrors appear above Dark Meta Knight, and the swords travel in a diagonally downwards angle, hitting the ground.
Final Form - Dark Meta Knight's Revenge: Dark Meta Knight enters a mirror. The mirror begins glowing red aura before he breaks out of it, glowing red himself. In this state, he moves much faster and can jump higher. His attacks also deal slightly more damage, while moves that involve summoning swords from mirrors cover more range and are a lot stronger.
Final Smash - Dimension Mirror: Dark Meta Knight summons the Dimension Mirror, which sucks in nearby opponents. If one is caught, he swings his sword to slash the mirror, breaking it and launching the opponents.
Entrance: Dark Meta Knight emerges from a mirror and slashes it in half.
Up Taunt: Dark Meta Knight thrusts his sword upward.
Side Taunt: Dark Meta Knight splits into three and laughs.
Down Taunt: Dark Meta Knight points his sword forward.
Victory Animation 1: Dark Meta Knight summons two massive swords that lunge upward from mirrors that appear on the ground on either side of him, then thrusts his sword towards the camera.
Victory Animation 2: Dark Meta Knight throws a spinning slash, then thrusts his sword upward.
Victory Animation 3: Dark Meta Knight summons several clones of himself that circle around him as he laughs.
Daroach is a recurring character in the Kirby series, first appearing as the main antagonist of Kirby: Squeak Squad. He is the leader of the Squeak Squad, a gang of mouse-like thieves that steal treasure. He steals a chest thinking it contains ultimate power, but Kirby chases him, thinking it has his missing Strawberry Shortcake. It turns out to be Dark Nebula that hides within the chest, and it possesses Daroach. After being saved, he would later appear in Kirby Mass Attack and Kirby Star Allies, as an ally to Kirby.
Daroach is a fast and nimble middleweight, possessing great ground and air speed. He also has three midair jumps, and is in general a great aerial fighter. Daroach's moveset is directly lifted from his attacks in Kirby Star Allies and Kirby: Squeak Squad. His normal moves revolve around claw slashes and kicks, while his special moves either use weapons or summon members of the Squeak Squad.
Jab: Daroach throws two alternating claw slashes followed by an upwards claw slash.
Forward Tilt: Daroach throws an outward claw slash.
Forward Smash: Daroach throws a corkscrew spin with his claws, damaging opponents multiple times before launching them.
Up Tilt: Daroach throws a dual claw slash above himself.
Up Smash: Daroach pulls out a treasure chest as it opens to reveal a jack-in-the-box-styled toy of Dark Nebula that bounces back and forth, damaging opponents.
Down Tilt: Daroach throws a sliding kick.
Down Smash: Daroach slashes his claws at the ground in front of himself, then behind himself.
Dash Attack: Daroach throws a corkscrew spin with his claws, damaging the opponent multiple times. If the attack button is pressed again, he will throw a dual claw slash afterward.
Counter: Daroach teleports behind the opponent and throws a claw slash. If he counters a projectile, he simply dodges.
Neutral Aerial: Daroach spins around with his claws, damaging opponents multiple times before launching them.
Forward Aerial: Daroach throws a flying kick.
Forward Bash: Daroach throws a dual claw slash.
Back Aerial: Daroach throws a dropkick.
Back Bash: Daroach takes out his scepter and emits an icy blast behind himself. The move can freeze opponents.
Up Aerial: Daroach throws a bicycle kick.
Up Bash: Daroach throws a dual claw slash above himself.
Down Aerial: Daroach slashes his claws downward, which can spike opponents.
Down Bash: Daroach takes out the Triple Star and swings it downward, sending three star projectiles that travel at different angles, which ricochet off of surfaces and the edges of the screen.
Grab: Daroach reaches out to grab the opponent.
Pummel: Daroach slashes his claws at the opponent.
Forward Throw: Daroach spins around with the opponent in tow before throwing them backward.
Back Throw: Daroach throws the opponent backward.
Up Throw: Daroach heaves the opponent upward before slashing at them with his claws.
Down Throw: Daroach slams the opponent on the ground and repeatedly slashes at them with his claws.
Neutral Special - Ice Laser: Daroach pulls out his scepter and fires a small ice shard forward. It deals little damage and doesn't travel far, but it can freeze opponents. If the special button is held, the move will charge, increasing the shard's distance. At full charge, Daroach instead fires a giant beam of ice that travels across the entire stage, damaging opponents multiple times before launching them, as well as always freezing them.
Custom 1 - Ice Spear: The move cannot be charged, but the ice shards travel further and deal more damage.
Custom 2 - Zap Shot: Daroach uses his scepter to fire electric sparks instead of ice shards. They travel slower, but inflict paralysis on opponents instead of freezing. The beam also deals more damage, but doesn't cover as much distance.
Side Special - Daroach Bomb: Daroach tosses a bomb in an arc, which can be altered with directional inputs, that explodes on impact. Holding the special button will charge the move, and when fully charged, Daroach throws a much larger, fiery bomb. This bomb doesn't explode immediately, but creates a giant pillar of flames on detonation, damaging opponents multiple times before launching them.
Custom 1 - Ice Bomb: The fully-charged version of the move lets Daroach throw an icy bomb instead of a fiery one. It creates a pillar of ice instead of fire when it explodes, which is smaller but wider. Deals less damage, but it can freeze opponents.
Custom 2 - Daroach TNT: It takes longer to charge the move, and the bomb is larger and takes longer to explode. However, instead of a fire pillar, it creates a giant explosion, heavily damaging any opponents in the blast radius.
Up Special - Hunter Claw: Daroach Daroach throws an uppercut with his claws, damaging opponents multiple times before falling into a helpless state at the peak of his jump.
Custom 1 - Hunter Slash: Daroach only damages opponents once and travels much faster.
Custom 2 - Hunter Meteor: Daroach doesn't travel as high, but at the peak of his jump, he slashes his claws downward, which can meteor smash opponents.
Down Special - Squeak Squad: Daroach summons a member of the Squeak Squad, which changes upon use. When used for the first time, he summons Spinni, who runs around the stage and slashes any opponents nearby with his claws. When used for the second time, he summons Doc, who flies around Daroach in his UFO for a short time, which damages any opponents that touch him. When used for the third time, he summons Storo, who will perform three consecutive body slams, which heavily damage opponents, the last of which being able to spike and bury them. If the move is used again when a member of the Squeak Squad has already been summoned, Daroach instead summons a Squeaker, who hops around and deals little damage and knockback to opponents. Up to three Squeakers can be at play at once, and all Squeak Squad members can be defeated by opponents' attacks.
Custom 1 - Burly Squeaks: Spinni, Doc, and Storo can take more damage before being defeated, but they are slower and deal less damage.
Custom 2 - Sneaky Squeaks: Spinni's claw slashes will always launch opponents toward Daroach, Doc flies his UFO in an orbit around Daroach instead of around him horizontally, and Storo doesn't move forward, but his body slams can create shockwaves.
Final Form - Dark Daroach: Dark Nebula possesses Daroach, causing him to take on a much darker, fiery appearance. In this state, Daroach is much faster and his attacks deal more damage. Ice Laser and Daroach Bomb also don't need to be charged, as he will immediately use their fully-charged variants. He can also summon the Squeak Squad more quickly.
Final Smash - Squeak Squad Assemble!: Daroach summons Spinni, Doc, and Storo, as well as a hoard of Squeakers as they run across the screen, trampling anyone in their way.
Entrance: Daroach teleports onto the stage and tips his hat.
Up Taunt: Daroach observes a Squeaker circling around him.
Side Taunt: Daroach takes off his hat and pulls a Squeaker out of it.
Down Taunt: Daroach pulls out a random valuable item from the Kirby series, such as a Maxim Tomato, a 1-Up, or an Invincibility Candy, tosses it up and down, then places it back in his pocket.
Victory Animation 1: Daroach pulls out a slice of Strawberry Shortcake and tosses it into his mouth.
Victory Animation 2: Daroach poses with the rest of the Squeak Squad behind him.
Victory Animation 3: Kirby appears and poses before the Squeak Squad run by, accidentally flattening him in the process.
Magolor is a recurring character in the Kirby series, first appearing in Kirby's Return to Dream Land. Hailing from Halcandra and commanding the Lor Starcutter, Magolor crash lands on Popstar, causing his ship to lose many pieces. Kirby, King Dedede, Meta Knight, and Bandanna Dee agree to help him find the missing parts. After the ship is reassembled, Magolor takes the quartet to his home world, where they are then attacked by a four-headed dragon named Landia. Upon the dragon's defeat, Magolor reveals that he had tricked the heroes into helping him obtain the Master Crown, a powerful object being guarded by Landia. With the crown's power, Magolor attempts to conquer the universe, but is eventually defeated by Kirby and company.
Magolor is a fast and lightweight fighter with five midair jumps. He is generally a better fighter in the air than on the ground. Magolor's moveset consists of punches, body slams, and various moves from his boss fights as well as his appearance as a Dream Friend in Kirby Star Allies.
Jab: Magolor throws two punches followed by a body slam.
Forward Tilt: Magolor throws a clap, creating a burst of magic from his hands.
Forward Smash: Magolor summons the Ultra Sword and swings it downward in front of him.
Up Tilt: Magolor performs a backflip to hit opponents above him.
Up Smash: Magolor summons the Ultra Sword and swings it overhead from front to back.
Down Tilt: Magolor sweeps his hand along the ground, leaving behind a trail of magic that damages opponents.
Down Smash: Magolor summons the Ultra Sword as it spins around him in a circular motion.
Dash Attack: Magolor throws a flying tackle.
Counter: Magolor thrusts his palm forward as magic bursts from it.
Neutral Aerial: Magolor performs a somersault, damaging opponents multiple times before launching them.
Forward Aerial: Magolor throws a downwards headbutt.
Forward Bash: Magolor summons the Ultra Sword and does an inward swing with it.
Back Aerial: Magolor turns around and claps behind him, creating a burst of magic from his hands.
Back Bash: Magolor summons the Ultra Sword and thrusts it behind him.
Up Aerial: Magolor throws a bicycle kick despite not having legs.
Up Bash: Magolor summons the Ultra Sword and thrusts it above him.
Down Aerial: Magolor rapidly spins with his arms outstretched, damaging opponents multiple times before launching them.
Down Bash: Magolor summons the Ultra Sword and stabs it downwards, which can spike opponents.
Grab: Magolor reaches out to grab the opponent.
Pummel: Magolor headbutts the opponent.
Forward Throw: Magolor spins around and throws the opponent forward.
Back Throw: Magolor tosses the opponent behind him.
Up Throw: Magolor flings the opponent upward.
Down Throw: Magolor slams the opponent into the ground.
Neutral Special - Revolution Orbs: Magolor releases an orb of energy from his hands that travels forward and explodes on impact. The move can be charged, with Magolor sending out three orbs that spiral around each other when halfway charged, and launching three fireballs at full charge.
Custom 1 - Trickster Orbs: The orbs will home in on opponents, but they cannot be charged.
Custom 2 - Deceit Orbs: The orbs will bounce along the ground, and pass through opponents on contact.
Side Special - Gem Apple Bombs: Magolor tosses out three Gem Apple Bombs that fly forward in an arc. Upon hitting the ground, they will remain in that spot until the move is used again, where Magolor will detonate the bombs while laughing. The bombs will slowly increase in size the longer they sit on the stage for, with it taking 8 seconds for them to reach their full size.
Custom 1 - Green Apple Bombs: The bombs have vacuumboxes that pull opponents towards them, but they don't deal as much damage.
Custom 2 - Caramel Apple Bomb: Magolor only throws out one bomb, but the explosion is larger and damages opponents multiple times before launching them.
Up Special - Landia: Magolor hops on top of Landia as they fly in the direction the control stick is held in, damaging opponents multiple times before launching them. Magolor falls into a helpless state afterwards.
Custom 1 - Landia EX: Landia is covered in flames while flying, meaning that the move deals more damage, but they don't fly as far.
Custom 2 - Magolor Surge: Magolor flies himself, performing a corkscrew headbutt. This version travels farther, but deals less damage.
Down Special - Deadly Needles: Magolor will cause 2 purple needles to rise on both sides of himself, putting a poison effect on opponents. The move can be charged to increase the number of needles to 4, and eventually 8.
Custom 1 - Destructive Needles: The needles are larger and simply damage opponents rather than poisoning them. However, Magolor can only have a maximum of 6 instead of 8
Custom 2 - Terrible Needles: Opponents hit by the needles will become stuck to them, where they then must button mash in order to escape. The move cannot be charged.
Final Form - Magolor Soul: Magolor transforms into his Soul form. In this state, he is much larger and his attacks are faster. They also cover more range and deal more damage and knockback.
Final Smash - C.R.O.W.N.E.D.: Magolor puts on the Master Crown and rises into the air as he summons a black hole behind himself that sucks nearby opponents in. The caught opponents will then appear in Another Dimension as Magolor, in his Soul form, fires a massive laser beam at them, damaging the opponents multiple times before launching them.
Entrance: The Lor Starcutter crashes onto the stage as Magolor tumbles out.
Up Taunt: Magolor tosses a Gem Apple up and down.
Side Taunt: Magolor laughs while covering his mouth.
Down Taunt: Magolor pulls out an Energy Sphere and observes it.
Victory Animation 1: Magolor pops up from behind a stand, advertising his services for a payment of Gem Apples.
Victory Animation 2: The Lor Starcutter is seen flying through the sky, as Magolor pops out of one of the windows and waves to the camera.
Victory Animation 3: Magolor steals the Master Crown from on top of Landia's head and stares at it with a menacing look in his eyes.
Taranza is a recurring character in the Kirby series, first appearing in Kirby: Triple Deluxe. He is a young wizard with arachnid-like characteristics who, on orders from Queen Sectonia, kidnapped King Dedede in order to prevent him from foiling their plans to conquer Floralia. In the end, however, Taranza realized he had captured the wrong target, as Kirby would pursue him all the way to the queen's chambers and defeat them in combat. Taranza would later be betrayed by his queen, and eventually come to Kirby and King Dedede's aid in dispatching her after she had merged with the Dreamstalk. From then on, he would be an ally to Kirby and King Dedede.
Taranza is a fast, lightweight fighter with five midair jumps, who uses a variety of spider-like abilities in his moveset. His attacks are mostly taken from his appearance as a Dream Friend in Kirby Star Allies. Uniquely, several of Taranza's moves will create webs that will slow down opponents standing in them. Additionally, these webs can be used to bounce Taranza high into the air, aiding his recovery.
Jab: Taranza throws two slaps followed by an uppercut. If the attack button is repeatedly pressed, Taranza will spin with all six of his arms out, damaging opponents multiple times before launching them.
Forward Tilt: Taranza creates a web ball in front of himself that explodes
Forward Smash: Taranza launches a web forward that will remain onstage for four seconds. Directional inputs can be used to change the trajectory of the web. The web will slow down opponents that are in it, and if the player jumps while in front of the web they will bounce off of it high into the air.
Up Tilt: Taranza shoots out a tall needle made of web
Up Smash: Taranza launches a web upward that will remain onstage for four seconds. Directional inputs can be used to change the trajectory of the web. The web will slow down opponents that are in it, and if the player jumps while in front of the web they will bounce off of it high into the air.
Down Tilt: Taranza spins, hitting opponents with his arms multiple times before launching them.
Down Smash: Taranza creates a web behind himself that will remain onstage for four seconds. The web will slow down opponents that are in it, and if the player jumps while in front of the web they will bounce off of it high into the air.
Dash Attack: Taranza throws a lunging headbutt.
Counter: Taranza creates a burst of magic around himself.
Neutral Aerial: Taranza creates a burst of magic around himself.
Forward Aerial: Taranza throws two alternating punches.
Forward Bash: Taranza launches three small webs forward that will remain onstage for four seconds. Directional inputs can be used to change the trajectory of the webs. The webs will slow down opponents that are in it, and if the player jumps while in front of the webs they will bounce off of it high into the air, though not as high as the larger versions.
Back Aerial: Taranza turns around and throws a backhanded punch.
Back Bash: Taranza turns around and launches three small webs backward that will remain onstage for four seconds. Directional inputs can be used to change the trajectory of the webs. The webs will slow down opponents that are in it, and if the player jumps while in front of the webs they will bounce off of it high into the air, though not as high as the larger versions.
Up Aerial: Taranza creates a web ball above himself that explodes.
Up Bash: Taranza launches three small webs upward that will remain onstage for four seconds. Directional inputs can be used to change the trajectory of the webs. The webs will slow down opponents that are in it, and if the player jumps while in front of the webs they will bounce off of it high into the air, though not as high as the larger versions.
Down Aerial: Taranza stomps downward, which can spike opponents.
Down Bash: Taranza launches a web downward that will remain onstage for four seconds. Directional inputs can be used to change the trajectory of the web. The web will slow down opponents that are in it, and if the player jumps while in front of the web they will bounce off of it high into the air.
Grab: Taranza creates a web ball in front of himself that traps opponents inside of it.
Pummel: Taranza squeezes the web ball, crushing the opponent inside.
Forward Throw: Taranza lifts the web ball overhead and slams it on the ground, launching the opponent out of it.
Back Throw: Taranza swings the web ball overhead and slams it on the ground behind him, launching the opponent.
Up Throw: Taranza tosses the web ball upward as it explodes, launching the opponent.
Down Throw: Taranza slams the web ball on the ground, launching the opponent.
Neutral Special - Magic String Shot: Taranza shoots a string of web forward that will trap opponents in a pod on contact. While in a pod, the opponent can be knocked around by the attacks of other fighters, damaging whomever they come into contact with. They must button mash in order to escape.
Custom 1 - Magic String Blast: Instead of trapping opponents in a pod, the move will spawn a web that opponents can get stuck in.
Custom 2 - Magic String Wave: Taranza creates a web and sends it forward, which will bounce opponents backward on contact.
Side Special - Taranza Ball: Taranza tosses a magic ball that bounces off walls and platforms before exploding. The move can be charged, with the ball becoming much larger, dealing more damage, and lasting longer. Taranza can also very slowly move around while charging.
Custom 1 - Taranza Sphere: Taranza can throw up to three balls in rapid succession, but they are smaller and deal less damage.
Custom 2 - Taranza Orb: The move cannot be charged, however, the explosion damages opponents multiple times before launching them
Up Special - Bouncy Web: Taranza creates a heart-shaped trampoline made of web above his head. He can bounce off of the trampoline, launching him upward and damaging opponents he hits. The angle Taranza is launched in can be altered, and the web will remain onstage for four seconds.
Custom 1 - Spring Web: Taranza will damage opponents he flies into multiple times before launching them, but he doesn't go as high.
Custom 2 - Rocket Web: The move sends Taranza a lot higher, but he falls into a helpless state afterwards.
Down Special - Darling Dreamstalk: Taranza summons a replica of the Dreamstalk, which emerges from the ground in front of him. It doesn't deal damage, but it will slowly heal Taranza by 2% every three seconds whenever he is close enough to it. The Dreamstalk will remain onstage until either Taranza creates another one, or it is destroyed by an opponent.
Custom 1 - Thorny Dreamstalk: The Dreamstalk simply damages opponents who touch it instead of healing Taranza.
Custom 2 - Toxic Dreamstalk: The Dreamstalk will put a poison effect on nearby opponents instead of healing Taranza.
Final Form - Dark Taranza: Taranza summons the Black Mirror, with its power corrupting him and transforming him into Dark Taranza. In this state, Taranza is faster and can jump higher, and his attacks deal more damage and knockback. Additionally, Taranza's webs last longer and completely immobilize opponents who touch them.
Final Smash - Queen's Phantom: Taranza summons the illusion of Queen Sectonia, who raises her scepter into the air before creating lightning that strikes all around the stage, dealing heavy damage to opponents.
Entrance: Taranza flies on-screen while laughing.
Up Taunt: Taranza takes out a flower and stares at it lonesomely.
Side Taunt: Taranza spins in midair before posing with his arms outstretched.
Down Taunt: Taranza pulls out a pod and bumps it into the air before it lands on the ground and breaks.
Victory Animation 1: Taranza appears above the unconscious body of one of his opponents and begins to play with them like a puppet.
Victory Animation 2: Taranza spins while rising into the air before posing and laughing.
Victory Animation 3: Taranza slides down the Dreamstalk before jumping off and posing.
Susie, full name Susanna Patrya Haltmann, is a recurring character in the Kirby series, first appearing in Kirby: Planet Robobot. She is the executive assistant of the Haltmann Works Company, who comes to Popstar in order to exploit their natural resources. After Kirby defeats the owner of the company, President Haltmann, Susie takes the opportunity to attempt to steal the Mother Computer, Star Dream from him. This fails, however, as Star Dream itself zaps her away, and then declares its intentions to erase history. She helps Kirby defeat the machine, and as of Kirby Star Allies she is aiming to rebuild the company.
Susie has two very different movesets that she can switch between using her Guard Special. She can fight on foot where she is fast and lightweight, using various weapons and machines to attack such as the H.W.C Blaster and Transporter. Additionally, Susie has an extra midair jump while in this form. She can also fight while piloting her Business Suit (a large pink mech with a drill in place of legs). This turns her into a slow but powerful heavyweight fighter, losing the extra jump but gaining a mechanic where attacks that hit the mech will deal 0.5x the damage, as well as universal super armor; attacks that deal 20 units or less of knockback that hit the mech will not make the Susie flinch. Susie's attacks in both forms are mostly taken from her appearance as a Dream Friend in Kirby Star Allies.
Jab: Susie swings her H.W.C Blaster forward twice before throwing a hip thrust.
Forward Tilt: Susie does a spin, hitting opponents with her ponytail.
Forward Smash: Susie fires a blast from her H.W.C Blaster, damaging opponents multiple times before launching them.
Up Tilt: Susie lifts her Transporter overhead, damaging opponents with the propellers multiple times before launching them.
Up Smash: Susie fires a blast from her H.W.C Blaster upward, damaging opponents multiple times before launching them.
Down Tilt: Susie slides forward along the ground.
Down Smash: Susie pulls out two H.W.C Blasters and fires them toward the ground on both sides of herself.
Dash Attack: Susie uses her Transporter to propel herself forward.
Counter: Susie throws a slap.
Neutral Aerial: Susie performs a midair cartwheel.
Forward Aerial: Susie swings her H.W.C Blaster downward.
Forward Bash: Susie fires a blast from her H.W.C Blaster, damaging opponents multiple times before launching them.
Back Aerial: Susie turns around and swings her H.W.C Blaster downward.
Back Bash: Susie turns around and fires a blast from her H.W.C Blaster, damaging opponents multiple times before launching them.
Up Aerial: Susie swings her H.W.C Blaster overhead.
Up Bash: Susie fires a blast from her H.W.C Blaster upward, damaging opponents multiple times before launching them.
Down Aerial: Susie throws a stomp, which can spike opponents.
Down Bash: Susie fires a downward blast from her H.W.C Blaster, damaging opponents multiple times before launching them.
Grab: Susie reaches out to grab the opponent.
Pummel: Susie wacks the opponent with her H.W.C Blaster.
Forward Throw: Susie launches the opponent forward with a blast from her H.W.C Blaster.
Back Throw: Susie spins around before throwing the opponent backward.
Up Throw: Susie uses her Transporter to fly upward with the opponent in tow before slamming them into the ground.
Down Throw: Susie pins the opponent to the ground and fires a blast from her H.W.C Blaster.
Neutral Special - H.W.C Blaster: Susie pulls out her H.W.C Blaster and fires a laser from it, which can pass through opponents and hit multiple targets.
Custom 1 - Sizzle Blaster: Susie fires out a stream of flames instead of a laser. The flames damage opponents multiple times and can be angled up and down.
Custom 2 - Splash Blaster: Susie fires a water projectile instead of a laser. The move can be charged to increase the size and power of the projectile.
Side Special - Transporter Burst: Susie puts on her Transporter and dashes forward. The move can be charged, increasing the damage and the distance it travels. Susie can also move up or down while dashing. If the special button is pressed again when the move is at full charge, Susie will release her stored energy as a large wave that travels forward, dealing heavy damage to opponents.
Custom 1 - Terra Burst: The move damages opponents multiple times before launching them, but Susie will only fly straight forwards.
Custom 2 - Aero Cracker: Susie will automatically release a wave of energy at the end of the move, but it doesn't travel as far and cannot be charged.
Up Special - Transporter: Susie grabs onto her Transporter as it lifts her into the air, damaging opponents with the propellers multiple times before launching them. She will fall into a helpless state afterwards. Susie is able to use her Neutral Special while traveling upward.
Custom 1 - Transporter Jump: Susie wears the Transporter like a backpack and dashes upward. This move only hits once, but doesn't put Susie into a helpless state afterwards.
Custom 2 - Diving Heart: Susie will fly upward with the Transporter before performing a shuttle loop and falling into a helpless state. The move travels higher, but deals less damage.
Down Special - Drillbit: Susie summons two small drones that fly forward at a downward angle and explode on impact.
Custom 1 - Blizzard Drillbit: The drones will fly straight forward and deal less damage, but they will drop icicles that can freeze opponents.
Custom 2 - Zap Drillbit: The drones don't travel as far, but will cause lightning to strike wherever they land, paralyzing opponents.
Final Form - Max Profit: Susie enters a golden version of her Business Suit, the same one piloted by President Haltmann. In this state she is unable to exit the Business Suit, however, it is much faster and deals more damage. Additionally, attacks that hit the mech will deal even less damage than in its regular form.
Final Smash - Star Dream: Susie puts on a helmet and summons Star Dream, who descends from the background of the stage and begins firing several large heart-shaped projectiles towards the opponents. After a while, Star Dream will launch a missile that crashes into a random opponent, creating a massive explosion that damages opponents multiple items before launching them as the move ends.
Entrance: Susie descends onto the stage using her Transporter.
Up Taunt: Susie pulls out a clipboard and looks it over before putting it away.
Side Taunt: Susie crosses her arms and thinks to herself before looking like she just got a brilliant idea.
Down Taunt: Susie waves while looking back and forth.
Victory Animation 1: Susie fires off several Drillbits while inside her Business Suit before posing.
Victory Animation 2: Susie twirls before posing while waving.
Victory Animation 3: Susie Susie enters her Business Suit and spins around before leaping off-screen.
Jab: Susie swings one of the Business Suit's arms downward, followed by an outward swing.
Forward Tilt: Susie swings one of the Business Suit's arms upward.
Forward Smash: Susie throws a dropkick, stabbing opponents with the drill on the bottom of the Business Suit and damaging opponents multiple times before launching them.
Up Tilt: Susie swings both arms of the Business Suit upward.
Up Smash: Susie thrusts one of the Business Suit's arms upward.
Down Tilt: Susie sweeps the ground with one of the Business Suit's arms.
Down Smash: Susie jumps up and slams the ground with the Business Suit.
Dash Attack: Susie spins the arms of the Business Suit while dashing forward, damaging opponents multiple times before launching them.
Counter: Susie throws a punch with the Business Suit's arm.
Neutral Aerial: Susie spins the arms of the Business Suit, damaging opponents multiple times before launching them.
Forward Aerial: Susie swings one of the arms of the Business Suit downward.
Forward Bash: Susie thrusts the drill on the bottom of the Business Suit forward, damaging opponents multiple times before launching them.
Back Aerial: Susie turns around and swings one of the arms of the Business Suit outward.
Back Bash: Susie thrusts the drill on the bottom of the Business Suit behind her, damaging opponents multiple times before launching them.
Up Aerial: Susie does an overhead swing with one of the Business Suit's arms.
Up Bash: Susie throws an uppercut with one of the Business Suit's arms.
Down Aerial: Susie stomps downward with the Business Suit, spiking opponents.
Down Bash: Susie thrusts the drill on the bottom of the Business Suit downward, damaging opponents multiple times before launching them.
Grab: Susie reaches out to grab the opponent with one of the Business Suit's arms.
Pummel: Susie hits the opponent with one of the Business Suit's arms.
Forward Throw: Susie lifts the opponent overhead before throwing them forward.
Back Throw: Susie spins around before throwing the opponent behind her.
Up Throw: Susie punches the opponent upward.
Down Throw: Susie jumps up and stomps on the opponent with the Business Suit, burying them.
Neutral Special - Spin Cycle: The arms of the Business Suit begin to rapidly spin, damaging opponents multiple times before launching them. They can continue to spin for up to five seconds if the special button is held down. Susie can move left and right as well as jump while spinning.
Custom 1 - Sizzle Cycle: The spinning will generate a tornado of flames that surround it, giving the move more range. However, the move only hits once.
Custom 2 - Bluster Cycle: The spinning will generate a whirlwind around it, causing the Business Suit to rise into the air. The move deals less damage, but has vacuumboxes that pull opponents into it.
Side Special - Driver Slam: Susie flies forward drill-first, launching opponents. The angle that she flies in can be slightly angled using directional inputs.
Custom 1 - Splash Slam: The move has a water effect on it, causing it to damage opponents multiple times before launching them. However, Susie's angle cannot be adjusted.
Custom 2 - Sizzle Slam: The move creates an explosion on impact with an opponent, dealing much more damage. However, Susie will take recoil damage from it.
Up Special - Mech Tornado: The arms of the Business Suit begin to spin as it rises into the air, damaging opponents multiple times before launching them and falling into a helpless state.
Custom 1 - Bluster Tornado: The move has vacuumboxes that pull opponents into the move, but it doesn't go as high.
Custom 2 - Splash Tornado: The move has a water effect, pushing opponents away. However, the player has less control over the move.
Down Special - Drillbit: Susie summons two small drones that fly forward at a downward angle and explode on impact.
Custom 1 - Blizzard Drillbit: The drones will fly straight forward and deal less damage, but they will drop icicles that can freeze opponents.
Custom 2 - Zap Drillbit: The drones don't travel as far, but will cause lightning to strike wherever they land, paralyzing opponents.
Final Form - Max Profit: Susie enters a golden version of her Business Suit, the same one piloted by President Haltmann. In this state she is unable to exit the Business Suit, however, it is much faster and deals more damage. Additionally, attacks that hit the mech will deal even less damage than in its regular form.
Final Smash - Star Dream: Susie puts on a helmet and summons Star Dream, who descends from the background of the stage and begins firing several large heart-shaped projectiles towards the opponents. After a while, Star Dream will launch a missile that crashes into a random opponent, creating a massive explosion that damages opponents multiple items before launching them as the move ends.
Entrance: Susie descends onto the stage using her Transporter.
Up Taunt: Susie pulls out a clipboard and looks it over before putting it away.
Side Taunt: Susie crosses her arms and thinks to herself before looking like she just got a brilliant idea.
Down Taunt: Susie waves while looking back and forth.
Victory Animation 1: Susie fires off several Drillbits while inside her Business Suit before posing.
Victory Animation 2: Susie twirls before posing while waving.
Victory Animation 3: Susie enters her Business Suit and spins around before leaping off-screen.
Mewtwo is a Physic-type Legendary Pokémon introduced in Generation I. It was created by scientists to be the world's most powerful Pokémon, using DNA from Mew. It is said to have the most savage heart among all Pokémon, lacking compassion and striking fear into its enemy with cold, glowing eyes. Because it was engineered to be the ultimate Pokémon, in battle it can only think of defeating its foes.
Mewtwo can be seen as a glass canon character, with powerful attacks combined with being lightweight and having good mobility. It has high jump height and low fall speed, on top of being able to temporarily float in midair by holding up on the control stick, where it can drift left and right and use their aerial attacks without falling. Mewtwo's attacks are mostly comprised of physic blasts, although he also attacks with his tail for some moves.
Jab: Mewtwo extends its arm to emit a pulse of psychic energy, then sways its arm up and down to emit multiple pulses of psychic energy before finishing with an upward swipe.
Forward Tilt: Mewtwo spins while swinging its tail forward.
Forward Smash: Mewtwo thrusts its hands forward to perform a double palm thrust while emitting a blast of psychic energy.
Up Tilt: Mewtwo does a backflip while swinging its tail overhead.
Up Smash: Mewtwo thrusts its arm upward to emit a swirling blast of psychic energy that hits opponents multiple times before launching them.
Down Tilt: Mewtwo spins around while swinging its tail forward, which can trip opponents.
Down Smash: Mewtwo extends its arm towards the ground to emit a blast of psychic energy.
Dash Attack: Mewtwo throws a lunging palm thrust while emitting a blast of psychic energy.
Counter: Mewtwo throws a palm thrust that emits psychic energy.
Neutral Aerial: Mewtwo discharges psychic energy around itself, damaging opponents multiple times before launching them.
Forward Aerial: Mewtwo swipes its arm forward while emitting psychic energy.
Forward Bash: Mewtwo closes its eyes and emits a giant blast of psychic energy in front of itself.
Back Aerial: Mewtwo swings its tail behind itself in an upward arc.
Back Bash: Mewtwo closes its eyes and emits a giant blast of psychic energy behind itself.
Up Aerial: Mewtwo backflips and swings its tail upward.
Up Bash: Mewtwo closes its eyes and emits a giant blast of psychic energy above itself.
Down Aerial: Mewtwo backflips and performs a stomp, which can spike opponents.
Down Bash: Mewtwo closes its eyes and emits a giant blast of psychic energy below itself, which can spike opponents.
Grab: Mewtwo telekinetically grabs the opponent.
Pummel: Mewtwo releases a pulse of psychic energy into the opponent.
Forward Throw: Mewtwo telekinetically throws the opponent forward before firing several spheres of psychic energy at them.
Back Throw: Mewtwo telekinetically throws the opponent backwards.
Up Throw: Mewtwo telekinetically whirls the opponent around itself before launching them upward above its head.
Down Throw: Mewtwo telekinetically slams the opponent to the ground, and then somersaults in order to strike them with its tail.
Neutral Special - Shadow Ball: Mewtwo cups its hands to its side and creates a large, blackish violet sphere of psychic energy between its hands, then thrusts its hands forward to launch the sphere. The sphere grows larger and covers more distance the longer the move is charged.
Custom 1 - Shadow Swarm: The move cannot be charged, and instead of throwing one sphere, Mewtwo throws four spheres in rapid succession, each being thrown at different heights.
Custom 2 - Psysphere: The sphere takes longer to charge and travels slower, but opponents hit by it will become stunned for a short time before being launched away with a psychic blast. The sphere can travel through opponents.
Side Special - Barrier: Mewtwo swipes its arm forward. If an opponent is nearby, it will encase them in a sphere of psychic energy and launch them in the direction the control stick is held. If Mewtwo manages to land the move, then its psychic-based attacks will gain a 1.5x damage and knockback buff for a short time. However, these buffs cannot stack if the move is used multiple times. If there isn't an opponent nearby, Mewtwo creates a mirror-like wall in front of itself. This wall can reflect any projectiles that come into contact with it.
Custom 1 - Confusion: Mewtwo creates a ripple of psychic energy in front of itself. This will flip opponents around and leave them vulnerable.
Custom 2 - Absorb: Instead of reflecting projectiles, Mewtwo will absorb them, replenishing its health.
Up Special - Teleport: Mewtwo teleports into any given direction, before falling into a helpless state. It is completely invincible during the move.
Custom 1 - Warp: Mewtwo's teleport path is telegraphed, but it creates an explosion when it disappears and reappears, damaging opponents caught in the blast radius.
Custom 2 - Vanish: Mewtwo will automatically teleport to the stage, but it doesn't travel as far.
Down Special - Disable: Mewtwo emits a spark of psychic energy from its eyes. If an opponent is close enough, they will be stunned for a short time, leaving them vulnerable. The attack will only connect with opponents facing Mewtwo. Aerial opponents will suffer light knockback.
Custom 1 - Mind Scramble: The move has less range, but it can affect opponents regardless if they are facing Mewtwo or not.
Custom 2 - Explosion: About two seconds after using the move, an explosion appears in front of Mewtwo's original position, damaging opponents in the blast radius heavily.
Final Form - Mega Mewtwo X: Mewtwo Mega Evolves into Mega Mewtwo X. In this state, it is significantly stronger, has a higher jump height, and its psychic attacks cover a lot more range.
Final Smash - Psystrike: Mewtwo Mega Evolves into Mega Mewtwo Y before throwing a massive sphere of dark energy forward. Opponents hit by it will be stunned for a short time before suffering a blast of psychic energy, launching them. Mewtwo will then return to its original form.
Entrance: Mewtwo emerges from a large mass of psychic energy and then descends onto the ground.
Up Taunt: Mewtwo closes its eyes and folds its arms as it telekinetically spins around on the spot while laughing ominously.
Side Taunt: Mewtwo surrounds itself in a flame-like aura of psychic energy.
Down Taunt: Mewtwo turns to face the screen, before waving his hand in a circular motion in front of itself. It then proceeds to thrust its opposite arm forward while emitting a small spark of psychic energy from its palm.
Victory Animation 1: While radiating a psychic aura, Mewtwo raises its left hand in front of itself while pulling back its right hand. It then thrusts its right hand forward, emitting psychic energy sparks from its palm while saying "I cannot afford to lose!"
Victory Animation 2: Mewtwo crosses its arms as it turns its back to the screen, and looks over its shoulder while saying "Why am I here?"
Victory Animation 3: Mewtwo does a spin while levitating, then poses with a psychic aura bursting from its body as it laughs and says "Foolish!"
Pichu is an Electric-type Tiny Mouse Pokémon introduced in Generation II. It evolves into Pikachu, which evolves into Raichu. It is a social Pokémon known for its playfulness and mischievous behavior. It has the ability to store electricity, and may discharge it when amused, startled, or shocked. However, because this skill is underdeveloped, it will damage itself when it happens.
Pichu is a very light and fast fighter, with a unique gimmick where all of his electric-based attacks will cause him to take recoil damage. Once Pichu has accumulated 50%, he will begin discharging electricity around his body. In this state, known as Discharge, all of Pichu's electric attacks will deal more damage, and his special moves will gain new properties.
Jab: Pichu throws a kick, followed by a tail whip, followed by a headbutt.
Forward Tilt: Pichu throws a spinning kick.
Forward Smash: Pichu rears his head back before leaning forward and releasing a large orb of electricity in front of him, damaging opponents multiple times before launching them.
Up Tilt: Pichu swings his tail in an overarching motion.
Up Smash: Pichu throws an upward headbutt.
Down Tilt: Pichu swipes his tail along the ground.
Down Smash: Pichu charges his tail with electricity before spinning around, damaging opponents multiple times before launching them.
Dash Attack: Pichu performs a leaping headbutt.
Counter: Pichu shocks the opponent, inflicting paralysis on them.
Neutral Aerial: Pichu performs a somersault.
Forward Aerial: Pichu performs an electrically-charged horizontal corkscrew spin, damaging opponents multiple times before launching them.
Forward Bash: Pichu throws a downward headbutt while performing a somersault, which can spike opponents.
Back Aerial: Pichu does a horizontal spin, damaging opponents multiple times before launching them.
Back Bash: Pichu throws an electrically-charged back kick.
Up Aerial: Pichu performs a forward flip to swing his tail upward.
Up Bash: Pichu performs a back flip to swing his tail upward, discharging electricity with it.
Down Aerial: Pichu performs a front flip to swing his tail downward, which can spike opponents.
Down Bash: Pichu performs an electrically-charged downward corkscrew spin, damaging opponents multiple times before launching them.
Grab: Pichu reaches out to grab the opponent.
Pummel: Pichu headbutts the opponent, shocking them.
Forward Throw: Pichu places the opponent on his back and shocks them, sending them forward.
Back Throw: Pichu performs a backwards somersault with the opponent, then throws them backward.
Up Throw: Pichu flings the opponent upward.
Down Throw: Pichu pins the opponent on the ground and body slams them.
Neutral Special - Electro Ball: Pichu discharges electricity from his cheeks in the form of an orb of electricity that slowly travels forward, paralyzing opponents for a short time. In his Discharge state, the orb is larger, travels diagonally upwards, and stuns for a much longer time.
Custom 1 - Electroweb: The orb of electricity travels much faster in a straight line. If it hits an opponent, it expands into a web of electricity that damages opponents multiple times before launching them.
Custom 2 - Zap: The orb of electricity is larger and travels slower. It launches opponents rather than paralyzing, and it explodes on contact.
Side Special - Fling: Pichu leaps forward, damaging opponents he hits. If used in midair, he enters a semi-helpless state afterwards. If the special button is pressed again, he discharges electricity around himself, dealing more damage. In his Discharge state, he flies much farther.
Custom 1 - Wild Charge: Pichu travels less distance, but the electric discharge covers more range and deals more damage.
Custom 2 - Volt Tackle: Pichu grabs an opponent if he hits one as he leaps. He then shocks them with electricity before leaping off of them.
Up Special - Agility: Pichu dashes in the direction the control stick is held in at warp speed. The move can be performed up to three times in rapid succession before he falls into a helpless state afterward. In its Discharge state, Pichu will only dash once, but will discharge a massive amount of electricity around himself that deals heavy damage to opponents.
Custom 1 - Quick Attack: Pichu can only dash twice, but he deals electric damage to opponents as it moves.
Custom 2 - Volt Switch: Pichu discharges small bursts of electricity at the end of each dash.
Down Special - Thunder: A bolt of lightning crashes on Pichu from above. It damages opponents multiple times before launching them, and if the bolt touches Pichu, he discharges electricity that deals heavy damage and knockback. In his Discharge state, the bolt will launch Pichu upwards if it touches him.
Custom 1 - Thunder Shock: There is no lightning bolt. Instead, Pichu simply discharges electricity in a massive blast.
Custom 2 - Fusion Bolt: The lightning bolt crashes on a random opponent instead of Pichu.
Final Form - Ion Deluge: Pichu enters a state where his electric attacks are even stronger than when he enters its Discharge state. These attacks deal more damage and knockback, and don't even deal recoil damage. Pichu will also lightly shock opponents with electricity when they touch him.
Final Smash - Volt Tackle: Pichu surrounds himself in electricity as he dashes around the stage, damaging opponents multiple times before launching them with a stage-wide burst of electricity.
Entrance: Pichu jumps out from a Pokéball and waves both of his hands in the air.
Up Taunt: Pichu charges up with electricity, but falls back dazed.
Side Taunt: Pichu squirms around on the ground.
Down Taunt: Pichu pulls out a ukulele and begins to play it. He will continue to play the ukulele for as long as the taunt button is held down for.
Victory Animation 1: Pichu cheers twice, jumps three times while spinning, and poses with his left hand raised.
Victory Animation 2: Pichu jumps three times, while waving both of his arms. After landing, Pichu raises both of his arms.
Victory Animation 3: Pichu charges electricity, making himself dizzy, then stands up and winks.
Lucario is a Fighting / Steel dual-type Aura Pokémon introduced in Generation IV. It evolves from Riolu. It is a prideful Pokémon and is extremely loyal to its trainer. Lucario has the ability to manipulate a special energy called aura. Using aura, it can predict opponents' movements and counterattack accordingly, or manipulate it in offensive attacks such as explosive projectiles.
Lucario is a middleweight fighter who utilizes aura in his moveset. When Lucario lands an attack on his opponents, he will gain an amount of aura that is equal to the amount of damage that the move dealt. The amount of aura he has is displayed above his damage icon. Once he has accumulated 50 Aura, he will begin to emit aura from his hands. Lucario can have up to 150 aura, with the intensity of the aura on his hands growing every 50 he gets. He retains his aura even after being KOd, and can use this aura to power up his Special Moves by pressing the special and attacks buttons at the same time, costing 50 aura each time he does it.
Jab: Lucario throws a downwards swipe, followed by a forward punch, and ending with a high kick.
Forward Tilt: Lucario throws a palm thrust while emitting aura from his hand, hitting twice.
Forward Smash: Lucario throws a double palm thrust as aura bursts from his hands.
Up Tilt: Lucario throws an overhead kick.
Up Smash: Lucario thrusts his arm up as aura bursts from his hand, hitting twice.
Down Tilt: Lucario throws a low kick to the ground while emitting aura from his foot.
Down Smash: Lucario thrusts his arms down on both sides as aura bursts form his hands.
Dash Attack: Lucario throws a flying kick, which can go off the edge of platforms.
Counter: Lucario disappears, then reappears behind the opponent to counter with a flying kick.
Neutral Aerial: Lucario spins while emitting aura from his hands.
Forward Aerial: Lucario throws a kick from low to high.
Forward Bash: Lucario throws a flying kick while emitting aura.
Back Aerial: Lucario thrusts his arm behind him as aura bursts from his hand.
Back Bash: Lucario throws a back kick while emitting aura.
Up Aerial: Lucario throws a kick above himself.
Up Bash: Lucario throws a scissor kick upward while emitting aura.
Down Aerial: Lucario throws two stomps downward, with the second being able to spike opponents.
Down Bash: Lucario throws a stall-then-fall stomp downward, which can spike opponents.
Grab: Lucario reaches out to grab the opponent.
Pummel: Lucario surges the opponent with aura.
Forward Throw: Lucario punches the opponent forward.
Back Throw: Lucario turns around and slams the opponent onto the ground.
Up Throw: Lucario punches the opponent upwards.
Down Throw: Lucario lifts the opponent overhead and slams them onto the ground.
Neutral Special - Aura Sphere / Aura Bomb: Lucario cups his hands to his side and begins charging a ball of aura, which can damage opponents while it is charging. If the special button is pressed again Lucario will throw the ball forward. The size of the ball will increase as Lucario gains more aura. The charge can also be cancelled and stored. 50 aura can be spent for Lucario to upgrade the move to Aura Bomb, which launches a much larger projectile that travels slower but explodes on impact, dealing heavy damage and knockback to opponents in the blast radius.
Custom 1 - Aura Vortex: The ball of aura creates windboxes that drag the opponent into it, damaging them multiple times before launching them. It travels much slower.
Custom 2 - Piercing Aura Sphere: The ball travels faster and can hit multiple opponents, but it is weaker.
Side Special - Force Palm / Force Blast: Lucario thrusts his palm forward as aura bursts from it, dealing light damage and knockback, with the blast increasing in length the more aura Lucario has. If Lucario is right next to an opponent, he will instead grab them before punching them forwards, which will spike if used in midair. 50 aura can be spent for Lucario to upgrade the move to Force Blast, which covers a much wider range and damages opponents multiple times before launching them.
Custom 1 - Force Smash: Lucario cannot grab opponents, though opponents closer to him that are hit with the aura will take much more damage and knockback.
Custom 2 - Force Dash: Lucario rushes forward while using the move. This makes it easier to grab opponents, but the aura covers less range and it has noticeably more endlag.
Up Special - Extreme Speed: Lucario uses aura to dash upwards, damaging opponents before falling into a helpless state. Directional inputs can be used to control where Lucario flies. If Lucario is traveling straight downwards, the move can spike opponents. The distance Lucario flies will increase as he gains more aura. 50 aura can be spent to allow Lucario to cancel the attack into any move, as well as not fall into a helpless state and be able to use the move again.
Custom 1 - Extreme Speed Attack: Lucario doesn't travel as far, but it surrounds itself in aura while using the move, damaging opponents multiple times before launching them.
Custom 2 - Extreme Speed Burst: Lucario cannot change direction while flying, and instead simply rushes in the direction the control stick is held. However, it deals much more damage.
Down Special - Feint: Lucario dodges into the background briefly before throwing a punch that paralyzes opponents. During the dodge, Lucario can dash forwards or backwards using directional inputs. 50 aura points can be spent to allow Lucario to cancel the attack into any move.
Custom 1 - Feint Attack: The move will launch opponents rather than paralyzing them, but it deals less damage.
Custom 2 - Feint Force: The move is enhanced by aura, dealing more damage. However, Lucario cannot dash during it.
Final Form - Mega Lucario: Lucario Mega Evolves into Mega Lucario. In this state, its aura-based attacks are faster, and deal more damage and knockback. Its aura is also permanently charged up, allowing it to use its stronger special move variants at any point.
Final Smash - Aura Storm: Lucario Mega Evolves into Mega Lucario, and flies to the top of the stage. He will then release a massive beam of aura downward that can be angled left and right. The beam will damage opponents multiple times before launching them. After the move, Lucario reverts to his normal state.
Entrance: Lucario teleports on-stage, floats while gathering aura in his hands, and then lands.
Up Taunt: Lucario floats in mid-air and growls, emitting aura from his body.
Side Taunt: Lucario moves one hand forward and one behind his back, growling.
Down Taunt: Lucario stands on one foot and holds one hand in mid-air.
Victory Animation 1: Aura pulsates out of Lucario's hands as he does a crane-like stance, saying "Behold the power of aura."
Victory Animation 2: Lucario moves his hands in front of himself , then clasps them together, saying "The aura is with me!"
Victory Animation 3: Lucario moves his hand to his left side and groans while aura radiates off his body.
Ness is the main protagonist of EarthBound, the second game in the MOTHER series. He is a young boy hailing from Onett, with the ability to utilize PSI moves, granting him strong psychic powers. One night, he wakes up from a meteor crash and investigates it. Here, he finds an alien named Buzz Buzz, who says Ness is the one destined to save the world from being known as Giygas. To accomplish this, he must travel the world to find other heroes and collect the Eight Melodies before it's too late.
Ness is a middleweight fighter who boasts powerful attacks using his baseball bat and PSI abilities, and can take quite a bit of damage before being KOd. He has a high jump and slow fall speed, and his throws are some of the strongest on the roster. He also has a unique mechanic where, upon being hit, his damage percentage will scroll up rather than automatically change to a new amount like other fighters. This replicates the battle system of EarthBound, where the character's HP would scroll down upon taking damage, meaning that even if you suffered a fatal blow you could still attack and potentially win the battle before your HP reaches 0.
Jab: Ness throws a downwards swing with his bat, followed by an outwards swing, and ending with an upwards swing.
Forward Tilt: Ness thrusts the side of his bat forward while holding it with both hands.
Forward Smash: Ness performs the "forward pass" trick with his yo-yo, sending it forward as it spins in place before returning to him, damaging opponents multiple times before launching them.
Up Tilt: Ness throws an overhead swing with his bat.
Up Smash: Ness performs the "around-the-world" trick with his yo-yo, swinging it above himself in an arc. This move has a hitbox while charging.
Down Tilt: Ness performs the "walk the dog" trick with his yo-yo, sending it along the ground in front of him before it returns back, damaging opponents multiple times before launching them.
Down Smash: Ness performs the "sleeper" trick with his yo-yo, hitting behind and then in front of him. This move has a hitbox while charging.
Dash Attack: Ness throws an inward swing with his bat.
Counter: Ness reels his bat back before throwing a powerful swing.
Neutral Aerial: Ness swings his bat in a circular motion.
Forward Aerial: Ness throws a downward swing with his bat.
Forward Bash: Ness performs a front flip while swinging his yo-yo downward, damaging opponents multiple times before launching them.
Back Aerial: Ness turns around and throws an outward swing with his bat.
Back Bash: Ness turns around and swings his yo-yo behind him.
Up Aerial: Ness swings his bat overhead.
Up Bash: Ness sends his yo-yo straight upward before reeling it back in.
Down Aerial: Ness swings his bat downward, which can spike opponents.
Down Bash: Ness sends his yo-yo straight downward before reeling it back in.
Grab: Ness grabs the opponent with one hand.
Pummel: Ness hits the opponent with the end of his bat.
Forward Throw: Ness reels back before swinging his bat forward, sending the opponent flying.
Back Throw: Ness turns around with the opponent before knocking them away with his bat.
Up Throw: Ness throws an upwards swing with his bat, knocking the opponent upwards.
Down Throw: Ness sends his yo-yo forward as it wraps around the opponent, before he pulls them in and slams them on the ground.
Neutral Special - PK Rockin: Ness summons a ball of psychedelic lights and sounds above his head. As the special button is held, the sphere moves downwards until it explodes after being fully charged, or if the special button is released, with the explosion dealing big damage. Ness is left vulnerable while charging.
Custom 1 - PK Rockin' Finder: The projectile targets the nearest opponent as it is charging, but deals less damage.
Custom 2 - Safe PK Rockin': Ness glows red while charging, gaining super armor. The projectile has less range and deals less damage.
Side Special - Bash: Ness reels his bat back before swinging it forward. This move deals a lot of damage and can reflect projectiles, but has some startup. There is also a 30% chance that the move will deal 2x the damage, with the word "SMAAAASH!" appearing above the opponents head when this happens.
Custom 1 - Crash: The move is stronger, but cannot reflect projectiles.
Custom 2 - Thrash: Ness' bat becomes enhanced with PSI, causing the move to damage opponents multiple times before launching them. However, the move has more startup.
Up Special - PSI Teleport: Ness runs in place before dashing into any direction. Once he reaches his destination, he will explode, launching opponents before going into a helpless state while pitch black and covered in soot.
Custom 1 - Dual Teleport: Ness can teleport a second time if the control stick is held in another direction, but he won't create an explosion at the end of the move.
Custom 2 - Damaging Teleport: The move will damage opponents multiple times before launching them with the explosion, however, it doesn go as far.
Down Special - Paralysis / Hypnosis: If the special button is tapped, Ness places his fingers on his forehead before pointing forward, creating a green burst of PSI that will temporarily stun opponents. If the special button is held, Ness will instead create a pink burst of PSI that takes longer to execute, but puts opponents to sleep.
Custom 1 - Mega Paralysis: Ness can only use Paralysis, but the area of effect is larger and the opponents are stunned longer.
Custom 2 - Mega Hypnosis: Ness can only use Hypnosis, but the area of effect is larger and the opponents sleep longer.
Final Form - Lifeup: Ness begins channeling PSI energy within himself, causing him to glow green aura. In this state, he attacks much faster and can launch opponents farther. He can jump higher, and his falling speed is also slightly slower.
Final Smash - Bein' Friends: Ness dashes forward with PSI Teleport, and any opponents he hits get taken to a classic EarthBound battle scene. There, Ness, accompanied by Paula, Jeff, and Poo, use their strongest attack on the enemy. Ness using PK Rockin' Omega, Jeff using a Big Bottle Rocket, Paula using PK Freeze Omega, and Poo using PK Starstorm Omega, finishing off the opponent and instantly KOing them if they are at over 100% damage. If Paula is one of the opponents in the match, her appearance in the cinematic will be replaced by a stuffed bear that does absolutely nothing, referencing the purchasable teddy bear item in EarthBound that acts as a temporary party member. The attack will deal the same amount of damage regardless, however.
Entrance: Ness rides in on his bike before hopping off and equipping his bat.
Up Taunt: Ness faces the screen and nods while saying "Okay!"
Side Taunt: Ness pulls a receiver phone out of his backpack as it begins to ring and answers it, causing a text box to appear above his head which reads "Hello, it's your dad." before hanging up and putting the phone away.
Down Taunt: Ness takes out the Sound Stone and places it to his forehead as the first bit of the Eight Melodies from EarthBound plays. If the taunt is used again, the next melody will play, before eventually cycling back to the first.
Victory Animation 1: Accompanied by Paula, Jeff, and Poo, Ness flashes a peace sign at the camera as a shutter effect occurs.
Victory Animation 2: Ness readies PSI Teleport and dashes off screen, leaving behind a trail of flames.
Victory Animation 3: Ness holds his Franklin Badge towards the screen triumphantly.
Paula is a girl from Twoson, and is one of the main playable characters in EarthBound, being the first to join Ness, and the only female member of the team. She has advanced psychic powers, mainly wielding elemental PSI, and is shown to use telepathy as well. Ness is made aware of her existence when she contacts him through her telepathy in a dream, after being kidnapped by Pokey Minch, and brought to Peaceful Rest Valley to become the high priestess for the Happy Happyism cult. She gifts the Franklin Badge to Ness so that he may challenge and defeat the cult's leader, get the key to where she is imprisoned, and free her. Paula is one of the heroes destined to defeat Giygas, and is heavily implied to be Ness' love interest by the end of the game.
Paula is a floaty middleweight character who is fast, but easy to launch, and uses various PSI moves along with a frying pan to attack. She has a high jump height and slow falling speed, and possesses several projectiles that can deal heavy damage to opponents. However, she suffers from poor mobility. Additionally, Paula is unique in that her percentage will scroll up when hit rather than automatically changing to a new value.
Jab: Paula throws a downwards swing with her frying pan, followed by an outwards swing, and ending with an upwards swing.
Forward Tilt: Paula thrusts the side of her frying pan forward while holding it with both hands.
Forward Smash: Paula swings her frying pan forward, which can reflect projectiles.
Up Tilt: Paula swings her frying pan overhead.
Up Smash: Paula throws a jumping overhead swing with her frying pan.
Down Tilt: Paula slams her frying pan on the ground in front of her.
Down Smash: Paula does a spinning swing with her frying pan.
Dash Attack: Paula does an inwards swing with her frying pan.
Counter: Paula does an overhead swing with her frying pan.
Neutral Aerial: Paula swings her frying pan in a circular motion.
Forward Aerial: Paula swings her frying pan forwards.
Forward Bash: Paula throws a PSI-enhanced flying kick.
Back Aerial: Paula turns around and swings her frying pan behind her.
Back Bash: Paula turns around and throws a PSI-enhanced kick.
Up Aerial: Paula does an overhead swing with her frying pan.
Up Bash: Paula throws an upwards headbutt.
Down Aerial: Paula swings her frying pan downward, which can spike opponents.
Down Bash: Paula stomps downward, which can spike opponents.
Grab: Paula reaches out with both hands to grab the opponent.
Pummel: Paula attacks the opponent with PSI.
Forward Throw: Paula psychokinetically spins the opponent in a circle in front of herself before flinging them forward.
Back Throw: Paula psychokinetically swings the opponent over her head before flinging them backward.
Up Throw: Paula psychokinetically spins the opponent around herself before flinging them upward.
Down Throw: Paula throws the opponent on the ground and scorches them with PK Fire.
Neutral Special - Pray: Paula puts her hands together as a light shines down from the sky on top of her. Any opponents that come into contact with the light will have a random effect put on them. These effects include: Taking small damage, getting dizzy, falling asleep, having your controls reversed, randomly tripping for eight seconds, taking increased knockback from attacks for eight seconds (also affects Paula herself), and healing Paula by 15%.
Custom 1 - Telegraphed Prayer: The effects aren't as strong, but Paula will have an icon next to her percentage that shows what the next effect will be.
Custom 2 - Safety Prayer: Paula has super armor while praying, and can cancel the move into any attack.
Side Special - PK Fire: Paula fires a yellow, lightning-bolt shaped projectile that travels in a straight line until it hits an opponent or surface, at which point it explodes into a gradually fading pillar of fire, damaging opponents multiple times. If used in midair, Paula fires the bolt diagonally downward.
Custom 1 - PK Fire Burst: The bolt explodes on impact, launching opponents instead of damaging them multiple times.
Custom 2 - PK Wildfire: The bolt creates pillars of flames along the ground as it travels, which gradually damage opponents that stand in it. If used in midair, the bolt will explode on impact, launching opponents in the blast radius.
Up Special - PK Thunder: Paula creates an orb of electricity that can be controlled with directional inputs, and will pass through surfaces. The orb damages opponents it hits, making them paralyzed. Hitting Paula with the orb allows her to use PK Thunder 2, where she launches in the opposite direction she was hit in, damaging opponents she hits. If she hits an opponent, she can use the move again. Otherwise, she enters a helpless state.
Custom 1 - Lasting PK Thunder: The orb lasts longer and can pass through opponents. It is harder to control, however.
Custom 2 - Automatic PK Thunder: The orb travels in a set path around Paula and hits her from behind, having her use PK Thunder 2 in a diagonally upwards angle. She travels less distance, deals less damage, and it cannot use it a second time regardless if she hits an opponent or not.
Down Special - PSI Magnet: Paula creates a blue PSI field around herself. She can keep the field up if the special button is held. In this state, projectiles that touch the field will be absorbed, healing Paula slightly. If the control stick is held forward during this move, Paula will thrust her arm forward to emit a glowing orb of PSI energy around her outstretched hand instead, which can damage opponents on top of absorbing projectiles, but leaves her vulnerable to being attacked with projectiles from behind.
Custom 1 - Damaging PSI Magnet: Instead of healing herself from projectiles, Paula damages opponents from inside the field.
Custom 2 - Reflecting PSI Magnet: The field reflects projectiles instead of absorbing them.
Final Form - Lifeup: Paula begins channeling PSI energy within herself, causing her to glow green aura. In this state, her attacks much faster and can launch opponents farther. Her projectiles also travel more distance and she can jump higher. Her falling speed is also slightly slower.
Final Smash - Heavenly Light: Paula puts her hands together and rises into the air as large beams of light rain down on the stage, dealing heavy damage to opponents and launching them.
Entrance: Paula teleports in using PSI Teleport, then shakes off the soot she gathered upon impact.
Up Taunt: Paula waves her hand in an S motion while emitting a stream of PSI from her finger.
Side Taunt: A Mr. Saturn appears next to Paula as she kneels down to pet it.
Down Taunt: Paula pulls out a teddy bear and hugs it before putting it away.
Victory Animation 1: Paula skips on screen before pointing her frying pan forward.
Victory Animation 2: Paula twirls in place before striking a pose.
Victory Animation 3: Paula emits a stream of PSI from her finger before pointing it forward.
Lucas is the main protagonist of the Japan-exclusive MOTHER 3. Lucas once lived happily with his parents and twin brother, Claus, in Tazmily Village, only for his mother to be killed by a chimera known as a Mecha-Drago, with Claus going missing shortly after. After a struggle with the Pigmask Army, he learns the ability to use PSI powers, and goes on an adventure with his newfound allies to pull the Seven Needles to awaken the Dark Dragon under Nowhere Islands.
Lucas is a very floaty middleweight with unique gravity and falling speed that give him a strong aerial presence. He isn't very mobile on the ground, but his grab game is excellent and his attacks are quick. Lucas' moveset is mostly comprised of punches and kicks, enhanced with his PSI powers to deal more damage and knockback. He is also armed with his Rope Snake and a stick to use as weapons. Additionally, Lucas is unique in that his percentage will scroll up when hit rather than automatically changing to a new value.
Jab: Lucas throws a roundhouse kick, followed by a hook kick, followed by a spinning kick.
Forward Tilt: Lucas thrusts a palm thrust while emitting PSI, which can be angled up or down.
Forward Smash: Lucas pulls out a stick and swings it forward, which can reflect projectiles and be angled up or down.
Up Tilt: Lucas telekinetically lifts himself upward to throw a kick while emitting a burst of PSI.
Up Smash: Lucas crouches down before unleashing a powerful PSI blast above his head.
Down Tilt: Lucas throws a spinning kick.
Down Smash: Lucas points at the ground and emits a PSI blast from his finger. If the attack button is tapped again, he can repeat this up to three times.
Dash Attack: Lucas slides forward, shooting out a burst of PSI energy from his hand.
Counter: Lucas pulls out a stick and swings it downward.
Neutral Aerial: Lucas spins while PSI energy circles around him, damaging opponents multiple times before launching them.
Forward Aerial: Lucas kicks one foot forward, launching a burst of PSI energy.
Forward Bash: Lucas pulls out a stick and swings it forward.
Back Aerial: Lucas does a backflip and kicks one foot downwards with a stream of PSI energy, which can spike opponents.
Back Bash: Lucas throws a dropkick while emitting a burst of PSI.
Up Aerial: Lucas throws an upward headbutt.
Up Bash: Lucas waves his hand above himself in an overarching motion while emitting bursts of PSI, damaging opponents multiple times before launching them.
Down Aerial: Lucas thrusts his feet downwards and creates several quick flashes of PSI energy, with the final hit being able to spike opponents.
Down Bash: Lucas performs a stall-then-fall stomp, which can spike opponents.
Grab: Lucas pulls out Duster's Rope Snake and sends it forward to grab opponents. This move can also be used in midair and acts as a tether recovery.
Pummel: Lucas headbutts the opponent white emitting PSI energy.
Forward Throw: Lucas telekinetically throws the opponent in front of himself.
Back Throw: Lucas telekinetically throws the opponent behind himself.
Up Throw: Lucas telekinetically whirls the opponent around himself before throwing them upward.
Down Throw: Lucas telekinetically slams the opponent into the ground, burying them.
Neutral Special - Offense Up: Lucas begins channeling PSI through his body, and can continue doing so by holding the special button. While doing so, he produces weak windboxes that push nearby opponents away. After five seconds, Lucas' hands will begin glowing red, significantly strengthening his Smash or Bash Attacks. If the move is used again in this state, Lucas emits a blast of PSI around himself, damaging opponents in the radius. Lucas can stay in this state indefinitely, but when he misses a Smash Attack, Crash Attack, or the spark, the charge will go away.
Custom 1 - Defense Up: Instead of powering up his attacks, Lucas increases his launch resistance, as well as increasing the size of his shield. He remains in this state for 12 seconds before he reverts to normal. Subsequent uses of the move increase the charge time.
Custom 2 - PK Spark: Lucas can only perform the spark attack, though it deals more damage and knockback.
Side Special - PK Flash: Lucas creates a green PSI projectile from his eyes that travels a short distance forwards, which can be charged. With no charge, the move simply makes opponents flinch, with some charge, it launches them, and at full charge, it will temporarily stun them.
Custom 1 - PK Beam: The projectile doesn't travel as far, but it paralyzes opponents instead of stunning them.
Custom 2 - PK Blast: The projectile simply damages opponents, and can travel farther.
Up Special - PK Thunder: Lucas creates an orb of electricity that can be controlled with directional inputs, and will pass through surfaces. The orb damages opponents it hits, making them paralyzed. Hitting Lucas with the orb allows him to use PK Thunder 2, where he launches in the opposite direction he was hit in, damaging opponents he hits. If he hits an opponent, he can use the move again. Otherwise, he enters a helpless state.
Custom 1 - Lasting PK Thunder: The orb lasts longer and can pass through opponents. It is harder to control, however.
Custom 2 - Automatic PK Thunder: The orb travels in a set path around Lucas and hits him from behind, having him use PK Thunder 2 in a diagonally upwards angle. He travels less distance, deals less damage, and it cannot use it a second time regardless if he hits an opponent or not.
Down Special - Counter: Lucas takes a defensive stance. If hit during this, Lucas will negate all damage and knockback from the attack and begin to glow yellow. In this state, the next three attacks that hit Lucas will deal half the damage they normally do. After Lucas is hit a third time, he will release a burst of PSI that deals damage equal to the combined total of the last three attacks that hit him. After this, Lucas returns to normal.
Custom 1 - Deflect: Lucas will use the PSI attack immediately after being hit, but it deals less damage.
Custom 2 - Rebound: Lucas will use the PSI attack after being hit five times, but he will still take the normal damage and knockback from them.
Final Form - Lifeup: Lucas begins channeling PSI energy within himself, causing him to glow green aura. In this state, he attacks much faster and can launch opponents farther. His projectiles also travel more distance and he can jump higher. His falling speed is also slightly slower.
Final Smash - PK Love: Lucas raises his arm into the air as blue bursts of PSI surround him. Any opponents hit will be trapped in a cutscene where Lucas approaches one of the Seven Needles embedded in the ground, and pulls it out, causing the Dark Dragon to awaken and roar before it shoots a powerful PSI beam down towards the opponents, dealing massive damage and instantly KOing them if they are over 100% damage.
Entrance: Lucas rides in on a Mr. Saturn-styled coffee table, then hops off.
Up Taunt: Lucas trips, falls on his rear, and shakes his head before getting back up. Holding the taunt button will actually make Lucas trip, giving him the option to roll or do a floor attack.
Side Taunt: Duster's Rope Snake comes out of Lucas's pocket and has a brief conversation with him, as Lucas shrugs at it.
Down Taunt: Lucas Performs the Osohe Dance done by Wess in MOTHER 3. This taunt lasts for an incredibly long time (around sixteen seconds to be exact), but whenever the dance is successfully performed without any interruption, the ending pose produces a shockwave that deals a ton of damage, shocking opponents with paralysis before launching them, being capable on landing a one-hit KO on any character, regardless of damage.
Victory Animation 1: Lucas forcefully pulls one of the Seven Needles out of the ground, sending it flying off-screen while looking toward the screen in a battle-ready pose.
Victory Animation 2: With his back toward the screen, Lucas crouches while poking at something on the ground with a large stick. After the camera zooms in, he then turns his head around to face the screen and says "Huh?" while briefly sporting a surprised expression.
Victory Animation 3: Lucas bends down on one knee and waves his right arm in from himself while releasing blasts of PSI energy from his index and middle fingers.
Min Min is one of the playable fighters in the fighting game ARMS. Like the other fighters, she competes in the ARMS Grand Prix and uses her long, extendable arms to battle opponents. She works at the Mintendo Noodle House, her family's ramen restaurant, and fights in the ARMS Grand Prix to promote it.
Min Min is a fast middleweight fighter with a massive reach thanks to her ARMS. She has a unique attribute where some of her attacks shoot her ARMS forward: Jab, Forward Tilt, Forward Aerial, Forward Bash, Back Aerial, and Back Bash have her shoot her left ARM, while Neutral Special and Side Special have her shoot her right ARM. Pressing both the attack and special button will have her extend both of her ARMS at once. These punches travel a long distance and can be curved up and down, as well as bounce off of surfaces. She is also able to change which type of ARMS her right arm uses with her Down Special. Despite her range, a lot of her moves leave her wide open to be attacked. In addition to her ARMS, Min Min can also use kicks if the attack button is tapped rather than held down for certain moves.
Jab (Tapped): Min Min throws a hook kick, followed by a legsweep, followed by a flurry of kicks that damage opponents multiple times before launching them with a side kick.
Jab (Held): Min Min extends her left ARM.
Forward Tilt: Min Min extends her left ARM.
Forward Smash: Min Min extends her left ARM.
Up Tilt: Min Min throws a wheel kick.
Up Smash: Min Min throws a somersault kick, which can reflect projectiles.
Down Tilt: Min Min throws a sliding kick.
Down Smash: Min Min throws a split kick.
Dash Attack: Min Min throws a flying kick.
Counter: Min Min throws a punch with her right ARM.
Neutral Aerial: Min Min swings her right ARM around herself.
Forward Aerial: Min Min extends her left ARM.
Forward Bash: Min Min extends her left ARM.
Back Aerial: Min Min extends her left ARM behind herself.
Back Bash: Min Min extends her left ARM behind herself.
Up Aerial: Min Min throws a bicycle kick.
Up Bash: Min Min throws an upward corkscrew kick, damaging opponents multiple times before launching them.
Down Aerial: Min Min throws a stall-then-fall kick, which can spike opponents.
Down Bash: Min Min swings her right ARM downward. Megawatt can spike opponents.
Grab: Min Min extends her arms forward to grab the opponent. When she throws an opponent, her left ARM will be temporarily powered up.
Pummel: Min Min knee strikes the opponent.
Forward Throw: Min Min kicks the opponent forward.
Back Throw: Min Min suplexes the opponent backward.
Up Throw: Min Min kicks the opponent overhead.
Down Throw: Min Min does a front flip and hits the opponent with an axe kick.
Neutral Special / Side Special - ARM Punch: Min Min extends her right ARM, with its attributes changing depending on what ARM she is currently using. Due to the nature of the move, it has no Custom Move variants.
Up Special - ARMS Jump / ARM Hook: If used on the ground, Min Min boosts herself into the air with her ARMS, damaging opponents she hits. Holding the special button increases her height. If used in midair, Min Min instead shoots her left ARM upward, which can function as a tether recovery.
Custom 1 - ARMS Spring: Min Min can only use the grounded version. She travels higher, but deals less damage.
Custom 2 - ARMS Whip: Min Min can only use the aerial version. It travels higher and can attack opponents above her, but doesn't have as much horizontal range when grabbing ledges.
Down Special - ARMS Change: Min Min changes the type of ARM her right ARM uses, affecting the moves that use it. Due to the nature of the move, it has no Custom Move variants. The kinds of ARMS she can use include:
Dragon: The attack or special button can be held for it to fire a short-ranged laser beam, which can be aimed in any direction. This is on her left ARM at all times.
Ramram: The weakest of the three ARMS, but fires a curving projectile that covers more range and is overall faster. Its trajectory changes depending on what direction the ARM is extended in.
Megawatt: The strongest of the three ARMS, but is also the slowest and covers the least amount of range. Effects opponents with electric damage.
Final Form - Ramen Bomber: Min Min quickly eats a bowl of ramen, causing her to glow yellow. In this state, she is faster and her ARMS can extend faster, as well as cover more range. She is also stronger overall.
Final Smash - ARMS Rush: Min Min throws a punch forward with her left ARM, followed by her right ARM. If the move connects she, accompanied by other characters from ARMS, will throw a flurry of punches, damaging the opponent multiple times before launching them with a combined laser from two Dragon ARMS.
Entrance: Min Min jumps in from the background while spinning before posing on one leg.
Up Taunt: Min Min throws two spinning kicks.
Side Taunt: Min Min holds her ARMS forward then raises them upward.
Down Taunt: Min Min swings her ARMS around then spreads them outward.
Victory Animation 1: Min Min throws several spinning kicks.
Victory Animation 2: Min Min throws a kick before waving her ARMS around and posing.
Victory Animation 3: Min Min thrusts her ARM upward before waving them around and posing.
All of the different modes from Ultimate return, along with new additions.
Smash[]
Smash: The "Smash" sub-menu contains all the regular battle modes, such as:
Smash: Battle with up to eight players. In addition to Time, Stock, and Stamina, Coin Battles make a return, along with two new battle types: King of the Hill and Death Match. In King of the Hill the goal is to stay within the highlighted area for a certain amount of time, and in Death Match, you must compete to be the first to get a certain amount of points.
Squad Strike: A 3-on-3 or 5-on-5 tag-team showdown.
Tourney: A Tourney to see who truly is the best! Up to 32 players can participate, and four different formats are available.
Special Smash: Smash with a twist!
Rotation Smash: Players fight with each stock being a different character.
Super Sudden Death: Prepare to launch! Everyone starts with 300% damage!
Smashdown: Smash your way down the roster! Once you play as a fighter, they'll become unavailable for the next rounds.
Smashketball: Two players must attempt to knock a ball into their respective hoop through any means necessary. The amount of points required to win can be customized and this mode can be played on any stage.
Custom Smash: Adjust your size and status for a quirky battle. A new feature is the ability to change the traits of individual characters. The different options for this mode include:
Mega: All fighters are supersized!
Mini: All fighters are itty bitty!
Flower: Fight with a life-draining flower on your head!
Bunny: Start the battle wearing a Bunny Hood.
Metal: All fighters are metallic, taking less damage.
Clear: Everyone's invisible!
Tail: Grow a tail and float around!
Rocket Belt: Everyone gets a Rocket Belt!
Screw Attack: Perform a Screw Attack with every jump!
Back Shield: Start the battle with a Back Shield equipped.
Curry: Fight with nonstop fiery curry breath!
Reflect: Reflect all projectiles.
Light: You'll be much lighter descending in the air.
Slow: Play at 1/2 normal speed.
Fast: Play 1.5x normal speed.
Fixed: Stop the camera from zooming or scrolling.
Angled: Fight with the camera tilted slightly over you.
Solo[]
Games & More has been renamed to simply Solo.
Classic Mode: Classic Mode returns and once again sees each character going through a unique route, now with 10 rounds instead of 8, including the round of Race to the Finish, which replaces Ultimate's bonus game, and a boss battle at the very end. All the bosses from Ultimate make their return, along with all new ones.
All-Star Mode: All-Star Mode is now a separate mode once again, where you take on each member of the cast. Characters are fought in order of when they first debuted, and characters from the same series are all fought within the same match.
Boss Rush: Players must go against all of the bosses that can be found in the game, featuring three healing items between each fight much like All-Star Mode.
Stadium Mode: Stadium Mode makes its grand return after being scrapped from Ultimate, where you can play Home Run Contest, and Multi-Man Smash, as well as character specific rounds of Break the Targets, and Board the Platforms.
Multi-Man Smash: Multi-Man Smash includes 100 Man Smash, 10 Minute Smash, Endless Smash, and Cruel Smash. In addition, the opponents you face in Multi-Man Smash will alternate between the Fighting Polygon Team from the original Super Smash Bros., the Fighting Wire Frame Team from Super Smash Bros. Melee, the Fighting Alloy Team from Super Smash Bros. Brawl, and the Fighting Mii Team from Super Smash Bros. Ultimate.
Smash Run: Smash Run returns from Super Smash Bros. for Nintendo 3DS, and now you're able to interact with the other players on the map, as well as choose what kind of match is played at the end, and how long the game lasts. Defeating another player gives you half the stat boosts that the other player lost. The different matches that can be played at the end of Smash Run include:
Free-For-All: A basic four stock match between all the players.
Race to the Finish: A race to see who can reach the end of an obstacle course first.
Climb to the Top: A vertical race where you must climb up to the finish line.
Enemy Rush: A group of 30 enemies appear and you must defeat them as quickly as possible.
Boss Battle: A random boss will appear and you must defeat them as quickly as possible.
Stage Builder: Stage Builder also returns and it is identical to the form it took in Ultimate, and includes new parts and set pieces. In addition, the background of the stage can be set to that of any official stage in the game, along with some extras.
Trophies[]
Trophies return as the replacement to Spirits, although they have the same function as Spirits. The Spirit Board returns, now named the Trophy Board. Each trophy has a unique description, detailing information about the character or item featured in the trophy. The only thing to not return is World of Light, which has been replaced with a new story campaign.
Vault[]
The Vault returns from Ultimate, including all the features from the original such as Sounds, Replays, Tips, Challenges, Records, Movies, and the Shop. Players now have the ability to record footage of the game just like other Switch titles, which can be viewed in the Vault and edited just like in Ultimate. Additionally, the Masterpieces from past games return, allowing you to play demos of the games that the various fighters originated from.
The Paint Studio is also located in the vault, and allows you to recolor certain parts of characters, to create your own palette swaps. A character’s default appearance, as well as their alternate costumes, can be recolored. Players can create as many custom colors as they please, and they can even be used online. Each fighter has 12 palette swaps/alternate costumes by default.
Stages[]
Every stage from Super Smash Bros. Ultimate returns, along with all of the past stages that didn't make it into that game. The only stages to not return in this game are Flat Zone 1 and 2, as well as Pictochat 1 and 2. This is because they were replaced with Flat Zone X and Pictochat X respectively.
All stages that appeared in the original Super Smash Bros. have the option to be played using either the original look from the N64 or a new, "Modern" version of the stage, by using the L and R buttons to cycle between them.
Battlefield
Super Smash Bros. (1999)
Battlefield is a classic stage that has appeared in every single Smash game, although it could not be played on in the original Super Smash Bros. through normal means. The stage is a simple strip of land with three floating platforms.
Final Destination
Super Smash Bros. (1999)
Final Destination is another classic stage that has appeared in every single Smash game, although it could not be played on in the original Super Smash Bros. through normal means. The stage is a simple flat piece of land floating in space.
Big Battlefield
Super Smash Bros. for Wii U (2014)
Big Battlefield is simply a larger version of the regular Battlefield stage, that features six platforms instead of three. Just like Battlefield, you are able to play on all previous incarnations of the stage by using the L and R buttons to cycle through them..
Bowser's Castle
Super Mario Bros. (1985)
Bowser's Castle is a location that has appeared in almost every single game in the Super Mario series, and is usually where the final boss fight against Bowser takes place. This version of Bowser's Castle takes inspiration from both Super Mario Bros. and Super Mario World, and includes several elements from the series in the background such as Thwomps, Lava Bubbles, and the chain walls from Super Mario World with a Koopa hanging on.
The stage features a flat ground with three floating platforms above, the middle one being slightly higher than the other two. On the ground there is an axe that, when attacked, will fall down and cause the bridge to fall apart, forcing the fighters to battle on the top platforms until Kamek arrives to fix the bridge.
Wart's Throne Room
Yume Kōjō: Doki Doki Panic (1987) / Super Mario Bros. 2 (1988)
Wart's Throne Room is the setting of the final boss fight against Wart in Super Mario Bros. 2/Yume Kōjō: Doki Doki Panic. The floor is made of multi-colored blocks, and the Dream Machine sits in the middle of it. There are two floating purple platforms that the players can stand on, and occasionally the Dream Machine will shoot out vegetables that can be grabbed by players and thrown.
Doctor's Office
Dr. Mario (1990)
Doctor's Office is a simple flat stage, with graphics from Dr. Mario on the NES in the background. Megavitamins will fall onto the stage, being either red, blue, yellow, or a mix of two. The Megavitamins can land flat down, or standing upright, and they will deal damage to opponent's that are standing beneath them when they land.
Occasionally, the Viruses will appear on the stage, dealing damage to any players who come into contact with them. The players cannot defeat the viruses, however they will be destroyed if a matching colored Megavitamin lands right next to them, or on top of them.
Meta Crystal
Super Mario 64 (1996)
Meta Crystal is a stage from the original Super Smash Bros. that is finally making it's first official playable appearance in this game. The stage was originally exclusive to the Metal Mario boss fight in Classic Mode, but it can now be played in Multiplayer, just like any other stage.
The stage is based on Super Mario 64's Cavern of the Metal Cap, a cave that, once completed, allows you to unlock access to the Metal Cap powerup. The entrance is located in Hazy Maze Cave, behind a set of double doors in the underground lake area. The cave is decorated with large glittering crystals and has a stream of water running through the middle.
The stage's layout consists of a platform that is slightly raised to the right and lower to the left. Above the middle of the bottom platform is a flat floating platform.
Hyrule Castle
The Legend of Zelda: Ocarina of Time (1998)
Hyrule Castle is a recurring location in The Legend of Zelda series, however this stage is specifically based on the Hyrule Castle from The Legend of Zelda: Ocarina of Time. Death Mountain, another recurring area in the series, appears in the background. In the Modern version of the stage, Kaepora Gaebora will be perched on the left tower where he will occasionally fly away, and can be seen in the background, before returning to the tower.
The stage has a large main platform in the center. Three platforms float about midway across the main platform, with the middle to the right of the top and bottom ones. Connected to the left of the main platform is a slightly lower, slanted platform. To the right of the main platform is a lower, connected platform with a dark green gazebo-like structure in the middle of it. Players can stand on top of it, but can not fall through it.
Sometimes, a tornado will randomly spawn in one of four different locations on the stage: The middle platform, near the gazebo, on the left platform, and on the center platform. They last around 10-20 seconds, and move randomly in a direction, although they may suddenly speed up and home in on a character. If caught, a fighter is held for about two seconds before being dealt 14% and thrown upward.
Bridge of Eldin
The Legend of Zelda: Twilight Princess (2006)
The Bridge of Eldin is a location that appears in The Legend of Zelda: Twilight Princess. It is situated over a large canyon with Zora's River running through it, and it connects the northern part of the Eldin Province to the large field in the southern part. After Link traverses the bridge for the first time, a large section of it is teleported away by Twilit Messengers. Later in the game, Link and Midna find the missing piece in the Gerudo Mesa and teleport it back via a Twilight Portal.
The stage itself is completely flat, reaching both of the side blastzones. Occasionally, a horn can be heard, where King Bulbin will then ride across the stage (sometimes followed by a Bulbin, which can be KOed by the fighters) and deal damage to any fighters in the way. He can be attacked, and if he takes enough damage he will simply ride by without doing anything, otherwise he will drop a bomb in the middle of the stage.
Shortly after, the bomb will explode, dealing damage and massive knockback to nearby fighters, as well as destroying the middle part of the bridge, creating a bottomless pit with grabbable ledges. Eventually, a Twilight Portal appears in the sky and fixes the stage, returning it to it's normal state.
The Great Fox
Star Fox (1993)/Star Fox 64 (1997)
The Great Fox is a fusion between the Sector Z stage from Super Smash Bros, and the Corneria stage from Super Smash Bros. Melee. This was done because the two stages are nearly identical except for Sector Z being much larger than Corneria.
The stage's size is comparable to Sector Z. Arwings and Wolfens will fly in from the right hand side or from up above to fire lasers at players. The lasers can damage players, but they will only make characters flinch and do no knockback. They may come in and lock on from the background, flying past the Great Fox. They also serve as moving platforms when they come, though they can carry characters past the blast zones.
The Great Fox also has two laser cannons in the front. Players can stand on these laser cannons, but they will charge and fire on occasion. Characters caught in the crossfire can very easily be KOed. The laser cannons can also be destroyed, which stops them from being used as platforms.
Lylat Cruise
Star Fox series.
Lylat Cruise is a stage that is based on different events in Star Fox games, most of which are from Star Fox: Assault. The stage takes place on an original spacecraft called the Pleiades as it flies around various areas of the Lylat System. The layout features a flat ground that slightly points downward at the ledges, as well as three platforms. The Pleiades tilts side-to-side as it makes turns and avoids shots from other ships.
During the battle, various different scenarios will occur in the background, including a space battle between the Cornerian army and Andross' army, a hazardous Star Fox flight through Meteo the asteroid belt, a dogfight between Star Fox and Star Wolf, a peaceful flight through the atmosphere of Corneria, and a cruise through space where the dogfight happens.
Yggdrasil's Altar
Dragon Quest XI: Echoes of an Elusive Age (2017)
Yggdrasil, the world tree of Norse legend, is a recurring location in the Dragon Quest series, first introduced in Dragon Quest II.
At the start of a match, the stage is rooted to the ground, before rising into the air. The stage then travels over the world of Erdrea, showcasing many locations from Dragon Quest XI. The stage features many cameos from the Dragon Quest series, including Slimes, Spirits of Lost Time, and Cetacea.
Very rarely, a Metal Slime will appear in the background of the stage. The stage also features additional platforms that fly onto the playing field periodically. Treasure Chests may occupy one of these platforms, yielding an item to the player who attacks it. However, these chests may also be Mimics in disguise. Defeating the Mimic will also yield an item.
Mementos
Persona 5 (2016)
Mementos is one of the palaces featured in Persona 5. The layout of Mementos resembles Final Destination, but with a small slope in the middle of it, as well as two floating platforms on the left and center of the stage.
Sometimes a train will speed by underneath the stage, launching any opponents that touch it upward. A wall can also appear from the ceiling and sides of the stage that opponents will bounce off of. Occasionally a third platform will also appear on the right side of the stage.
In the background, the Morgana Car will appear and drop off a random member of the Phantom Thieves, who will observe the battle and cheer.
The color of the stage and background will change depending on which Persona game the background music comes from. Persona 5 songs make the stage red, Persona 4 songs make the stage yellow, and Persona 3 songs make the stage blue.
Items[]
Capsule
Super Smash Bros. (1999)
The Capsule is an item that can be picked up and thrown as a projectile. More often than not the Capsule will contain another item, however there is a small chance that it will explode instead.
Crate
Super Smash Bros. (1999)
The Crate is an item that can be picked up and thrown as a projectile. The player's movement speed will be decreased while holding a Crate, and they cannot jump while holding it. Donkey Kong and Toad are the only characters whose movement is not altered when holding a Crate. When the Crate is thrown or attacked, it will break and release several other items from within it. However there is also a chance that the Crate will explode. Sometimes the Crate will take on a different appearance based on the stage.
Barrel
Super Smash Bros. (1999)
The Barrel is an item that can be picked up and thrown as a projectile. The player's movement speed will be decreased while holding a Barrel, and they cannot jump while holding it. Donkey Kong and Toad are the only characters whose movement is not altered when holding a Barrel. When the Barrel is thrown or attacked, it will roll across the stage, and will break and release several other items from within it when it hits a wall or an opponent. However there is also a chance that the Barrel will explode. Sometimes the Barrel will take on a different appearance based on the stage.
Music Tracks[]
Super Smash Bros. X Universe has a wide variety of music tracks, including some from series that may not have a playable character in the roster. All menu themes from past Super Smash Bros. games are available, however, they are not listed here. Some songs have both the original rendition along with a remix available.
The "Other" category, represented by a generic music note, includes songs that either come from a series with no playable character, or a series that doesn't have enough music to warrant its own category.
Click on one of the franchise logos to be taken to that series' tracklist.
The name X Universe was inspired by Super Smash Bros. Universe, the rumored name for Super Smash Bros. for 3DS and Wii U before the game was officially revealed in 2013.