"We were once just X's Super Smash Bros.. Those days are long gone."
![]()
Super Smash Bros. Swansong is a large-scale crossover fighting game consisting of various IPs owned by Nintendo and other third-party developers, such as Bandai Namco, who had a hand in developing the game. Rather than being directed by Masahiro Sakurai, the role of director was given to DoodleFox, who wanted to keep Sakurai's attention to detail and creativity while also adding in himself. Super Smash Bros. Swansong was began early development during the final stages of production on Super Smash Bros. Ultimate, with the game taking a lot of gameplay and assets and either retooling them or keeping them the same as before. The game also marks the return of a proper story mode, the concept returning from Super Smash Bros. Brawl and the aforementioned Ultimate.
The game was released on November 19th, 2021 on the Nintendo Switch, featuring 4th party content and representation from fellow fanon Smash game, Super Smash Bros. Discord.
Gameplay[]
Super Smash Bros. Swansong uses elements from every past Smash Bros. game, ranging from the original on the Nintendo 64 all the way up to the jam-packed Ultimate on the Nintendo Switch. The game keeps the same gameplay style of the past entries: a 2.5D fighting game that mixes elements of competitive gaming and party games to make one extravagant package. You're able to duke it out in a multitude of ways: items or no items, chaotic stages or flat stages, live players or computer players, local matches or online matches, and so much more. Super Smash Bros. Swansong keeps Sakurai's ever-present philosophy of Kirbyism; a term used to describe games that are accessible to people who have never played before and people who have been playing video games their whole life. Essentially, the game is easy to learn, but extremely rewarding if you go the extra mile and develop your skills as a player.
Super Smash Bros. Swansong offers a wide variety of modes and play style options, enhancing the overall experience for the player while also providing multiple different ways to play.
Multiplayer Modes[]
- Versus, You simply can't have Smash without Versus Mode. Up to eight different players are able to duke it out on any stage that they want to. The opponents can either be controlled by real-life players or computers, with the latter having adjustable levels of fighting styles and difficulties. Stages all have unique Omega forms, making them flat like Final Destination, have additional platforms like Battlefield, or be much larger like Big Battlefield.
- Special Smash: If you wanted even more zaniness than you get with items on, then Special Smash is for you. You're able to set different options on or off, all of them affecting how fighters duke it out in matches. If you truly want to adjust your character's weight while also giving them the effects of the Bunny Hood, Spicy Curry, and Metal Box, then the possibility is open to you.
- Spirit Matches: Spirit Matches are the replacement for Event Matches, having 100 different events with the reward for each being a new Spirit. Each Spirit is exclusive to that event, meaning there's no way to obtain on the Spirit Board unless you unlock the one from the event.
- Squad Strike: Players choose from three to five different fighters to choose between during a match, each one of them acting as a single stock. Once one fighter is K.O.'d, the next fighter in line will come and take it's place. Whoever has at least one fighter standing by the end of the match wins.
- Smashdown: This mode uses all available fighters on the roster to duke it out. Once a match is done, the selected fighters are eliminated and cannot be chosen again until the game is complete. Whoever defeats the other player first wins the match, resetting each character back to their playable status.
An entirely new mode has been introduced into the game in the form of Smash Zone.
![]()
Smash Zone has a unique concept: whenever you attack an opponent, no damage is taken by them and vice versa. The way a fighter loses the match is by the ever-approaching "Smash Zone" a cloud of purple and orange smog that chips away at the stamina of the fighters. While damage from physical attacks don't exist in this mode, knockback does; and it's crucial to winning. You must knock your opponent into the fog and stay out of it. As stated, the fog comes closer and closer to the stage, forcing both opponents to get creative and ask two questions: "how do I avoid dying?" and "how do I want to defeat the other fighter?".
Yet another new mode has been introduced for two or more players to play together, that being Spirit Hunters.
![]()
Spirit Hunters is essentially a reboot of the Smash Run mode from Super Smash Bros. for Nintendo 3DS, albeit with substantial improvements to the core structure. Spirit Hunters sees you and up to three CPU or player-controlled fighters dropped into a large maze-like map under a five minute time limit. During that time limit, you're able to boost your stats by defeating the various enemies found within the maze while also beating up the other fighters that you can encounter in the maze. Exploring the map reveals treasure chests that hold a Spirit within them.
After the time limit is up, the four fighters duke it out in a free-for-all battle where, before the match begins, you bet on one of the Spirits you've found. If you win the fight, you keep all Spirits and even get a few extra rewards. If you lose, however, you keep all of the Spirits and rewards except for the one you bet on for the match, gaining no extra rewards along with the loss. Again, the mode is able to be played with up to three other players, the maze being expanded and modified from it's 3DS incarnation.
Single Player[]
- Classic Mode: A 12-match series of challenges and fights between NPCs, target-smashing escapades, and a final fight between you and Master Hand. Classic Mode, like Ultimate's, returns to the standard form seen in the first three entries and keeps the addition of set challenges for each playable fighter from Ultimate as well.
- All-Star Mode: Unlocked after unlocking every fighter, All-Star Mode has you fighting every single character in the roster in order of their first appearance outside of Smash Bros., complete with a health-regaining area with four Heart Containers. The difficulty is able to be scaled to one's liking before starting the gauntlet.
- Training: A mode that allows anyone to train against a static NPC fighter. The graph-like background from Ultimate returns, allowing for players to see the trajectory and angle of the outcome of their attacks along with accurate measurements and gridmarks on the stage.
- Boss Tourney: Every single boss from The Challenger Approaches is able to be fought here once the mode is beaten for the first time. This also includes other bosses such as Master and Crazy Hand. You can fully customize the amount of bosses and the kinds you'd like in one sitting, allowing for as little as three bosses to be fought in a run.
- Minigames: Minigames like Home Run, Break the Targets, Multi-Man Melee, and Board the Platforms have returned once again, giving the players endless hours of replayability. All of these can be played in multiplayer equivalents, allowing for double the fun.
- Spirit Board: The Spirit Board from Super Smash Bros. Ultimate returns here, acting as one of the two main ways to earning Spirits. Unlike it's previous incarnation, the sections after a battle where you must shoot the Spirit to win is completely removed, meaning that once you beat the Spirit, the Spirit is yours for good until you decide to dismiss it or take it's core.
In addition to all of the modes listed above, another single player mode is introduced in this game, that being Tower of Smash.
![]()
Tower of Smash sees players go through a gauntlet of 100 different challenges, pummeling your way through different fighters and bosses. The bosses are carried over from The Challenger Approaches, Classic Mode, and even have a few original bosses sprinkled in there. The goal is to make it to the 100th floor and take on the challenge at the top, gaining rewards and exclusive perks for doing so. Like other single player modes, it can be played with up to two players at once. The difficulty, like 3DS & Wii U's Classic Mode, can be scaled to a player's liking in terms of how difficult the gauntlet is overall, but still gets more challenging the higher you go no matter the difficulty.
In addition to all new and returning modes, one other mode returns with a good amount of enhancements.

Stage Builder Deluxe, as the name implies, is a massively expanded version of Ultimate's Stage Builder mode. It's seen a massive overhaul since the last game, including more of everything present in past versions. Players are still able to create their own stages using assets from the game in different sizes; in addition to the previously included Small, Medium, and Large settings are two new settings, those being Extra Small and Extra Large. Every single music track is still selectable, but now allows for up to three tracks to be played one after the other before looping back to the start. The small pool of assets have been greatly expanded, going from simple platforms and springs to hazards and items found on other playable stages.
The way stages are made is functionally similar to Super Mario Maker while also utilizing the unique controls of the Nintendo Switch. In docked mode, the Joy-Con's IR pointer is used in a similar way to a Wii Remote to select items and assets. This isn't the only way to play docked, however, as you're completely able to use the control sticks and buttons on the Joy-Cons and even the Pro Controller to perform the same actions. Stages can be made by selecting an asset and dragging it along the screen within the limits of the blast zones and the size a player has chosen.
As mentioned earlier, multiple assets from actual stages can be used when making a custom stage. These can range from simple falling platforms, hazards like the food-dropping Shy Guys, or even one boss enemy per stage, such as the Dark Lord, Metal Face, and Yellow Devil. There's an upper limit to how many hazards you can have in one stage; for example, if you have a boss enemy, the choices for other hazards are cut down significantly as to not make the battles lag.
Assets extended beyond just hazards, however. "Skins" from each series can be used to decorate the stages you make, including both original and reference-based skins. These change the background and main platform you fight on, along with certain elements you build your stages with. For example, a Mario theme switches the main platform to look like brick blocks and the background like World 1-1 from Super Mario Bros.. Every single past skin for a custom stage returns from Brawl, Wii U, and Ultimate to go alongside them.
You're able to share your custom stages online seamlessly. However, like Mario Maker, verification is required to prove that a fight can reasonably occur on each stage before being uploaded.
Mii Fighters[]
Mii Fighters have been completely revamped from their previous incarnations. One of the biggest changes is the removal of Mii types, allowing for Miis to use multiple specials based on the previous types. For example, your Mii Fighter can have the neutral special of the Brawler, the side special of the Athlete, the up special of the Gunner, and the down special of the Swordfighter all in one moveset. This allows for more customization of the moveset overall and gives players to give their Miis a full set of specials that goes with their preferred play style.
In addition to the previous sets of the Mii Brawler, Swordfighter, and Gunner, a new set of moves has been introduced: the Mii Athlete, who uses fitness and sports-based specials that cover distance easily at the cost of leaving themselves open to other attacks.
Like past games, a Mii's height, weight, speed, and features are all dependant on how a Mii is created in the Switch's Mii Maker application. However, Super Smash Bros. Swansong gives players the ability to create Miis within the game itself rather than having to switch to a separate menu on the home screen. The Mii Maker within the game carries all of the features available in the regular one, including all face, hair, eye, mouth, weight, height, and other features.
Mii costumes make a return with a rather sizable change; they're universal. This means that every Mii you make, no matter the moveset, is able to wear any costume. Some costumes return from 3DS, Wii U and Ultimate, but a good chunk of them are original to the game, spanning various titles and even third party series with no playable representation, such as Kingdom Hearts. In addition, Miis are also able to choose specific types of weapons for their individual attacks, providing cosmetic differences to their weapons.
Miscellaneous Information[]
Stage Morph from Super Smash Bros. Ultimate returns, allowing stages to switch between each other mid-battle. Up to two stages can be selected for this option, staying at the total available in the past game. Stage Morph has been heavily refined and fine-tuned in order to accomodate for the sheer variety of stages and certain ones like Jungle Hijinx and Rhythm Route for their multiple backgrounds, If a fighter is in the back part of those stages, they're immediately transported to the front portion during the transformation phase as to not get unfairly K.O.'ed. This system has also helped for adding in more scrolling stages like Poké Floats and stages with more unpredictable layouts such as Dr. Mario to the list of playable stages.
This comes back alongside Final Smash Meters, allowing for weaker yet still powerful Final Smashes to be executed without the use of a Smash Ball. Features also present in Ultimate such as direction air-dodging and ladder attacks also return alongside an improved and official wavedashing mechanic, allowing for even faster competitive play.
Online play has been drastically improved from the past games that offered it, with Doodle aiming to fix what problems the community had with the online itself. Dependent on the Nintendo Switch Online Service, online play allows most of the modes to be played online with both friends and random people all over the world. Tournaments return from Super Smash Bros. for Wii U, albeit with an approach more akin to Mario Tennis Aces. Participating in Nintendo-made online tournaments also results in players gaining extra content, such as stages, costumes, music, and more.
Roster[]


Continuing the idea set up by Super Smash Bros. Ultimate, every single veteran from the past six games returns. Multiple newcomers join the fray, ranging from Nintendo's distant past, their current present, and even some new third party characters.
As of right now, the base roster contains 159 different characters out of 160 if you count Pokémon Trainer's three fighters as individuals.
Characters[]

|
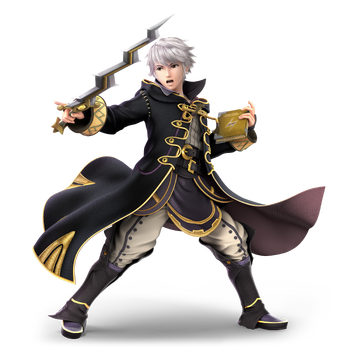
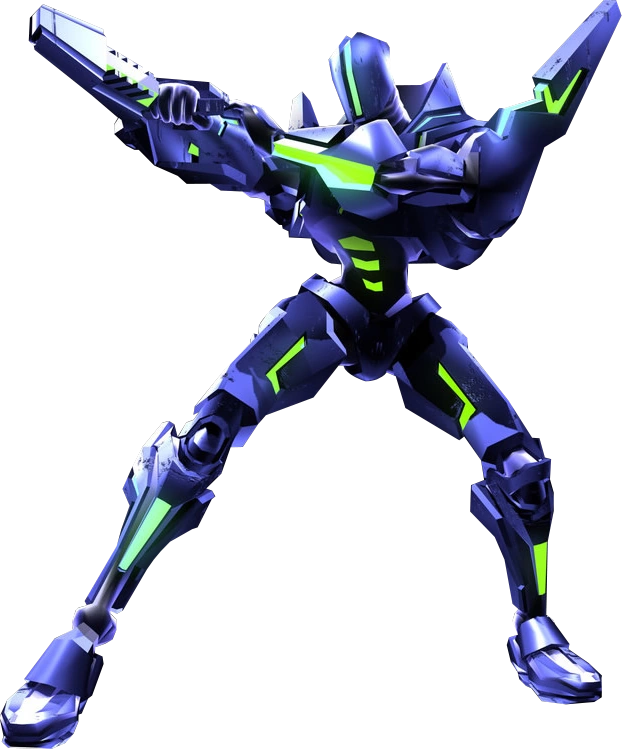
Name: Dragon Queen Debut: Super Smash Bros. Discord (20XX) Current wielder of the Dragon Queen title, the Dragon Queen hails from another Smash universe beyond Swansong's, one where she’s taken Mario’s place as the balanced fighter. The Dragon Queen’s moveset borrows heavily for her custom movepool back from her homeworld, showcasing its wide array of options while putting new spins on each move presented. |
Neutral Special: Burning Knuckle. The Dragon Queen shoots a comically small fireball out of her mouth and at her hand, setting it aflame. The flame, if not used for too long, fizzles out eventually. Delivering a punch straight to a foe’s chest with the fire multiplies the damage by two times, but without it leaves it at a modest 7%. Side Special: Dragon Glacier. The Dragon Queen blows a puff of cold air, creating a small glacier that slides along the floor. If an opponent is hit at the beginning of the move, they take much more damage, while they take less damage as the glacier melts. If they’re at over 100% in damage, the glacier temporarily freezes them. Up Special: Tail Tornado. The Dragon Queen lunges forwards and shoots a small tornado out via rapid tail movements. The tornado is only on screen for two seconds, but any opponent caught in it takes 1% of damage each time the attack hits them. If they’re stuck in the tornado for the entire time, they’re shot upwards, but not high enough to instantly K.O. them unleash they’re at high percentages. Down Special: Dragon’s Fence. The Dragon Queen stomps her foot and creates a large green crystal a few inches away from her, acting as a sort of barrier than can reflect projectiles. The barrier can be broken after three projectiles hit it or after enough physical damage has been done it to it by hand. Final Smash: Loyalty to the Scales. The Dragon Queen calls upon four dragons from a large wheel behind her, unleashing two large pillars of flames on her left and right sides. The pillars not only directly attack opponents above them, but also shoot out fireballs that target other fighters on the stage. The pillars eventually die down, the four dragons disappearing in a flash of light. | |
| |
|
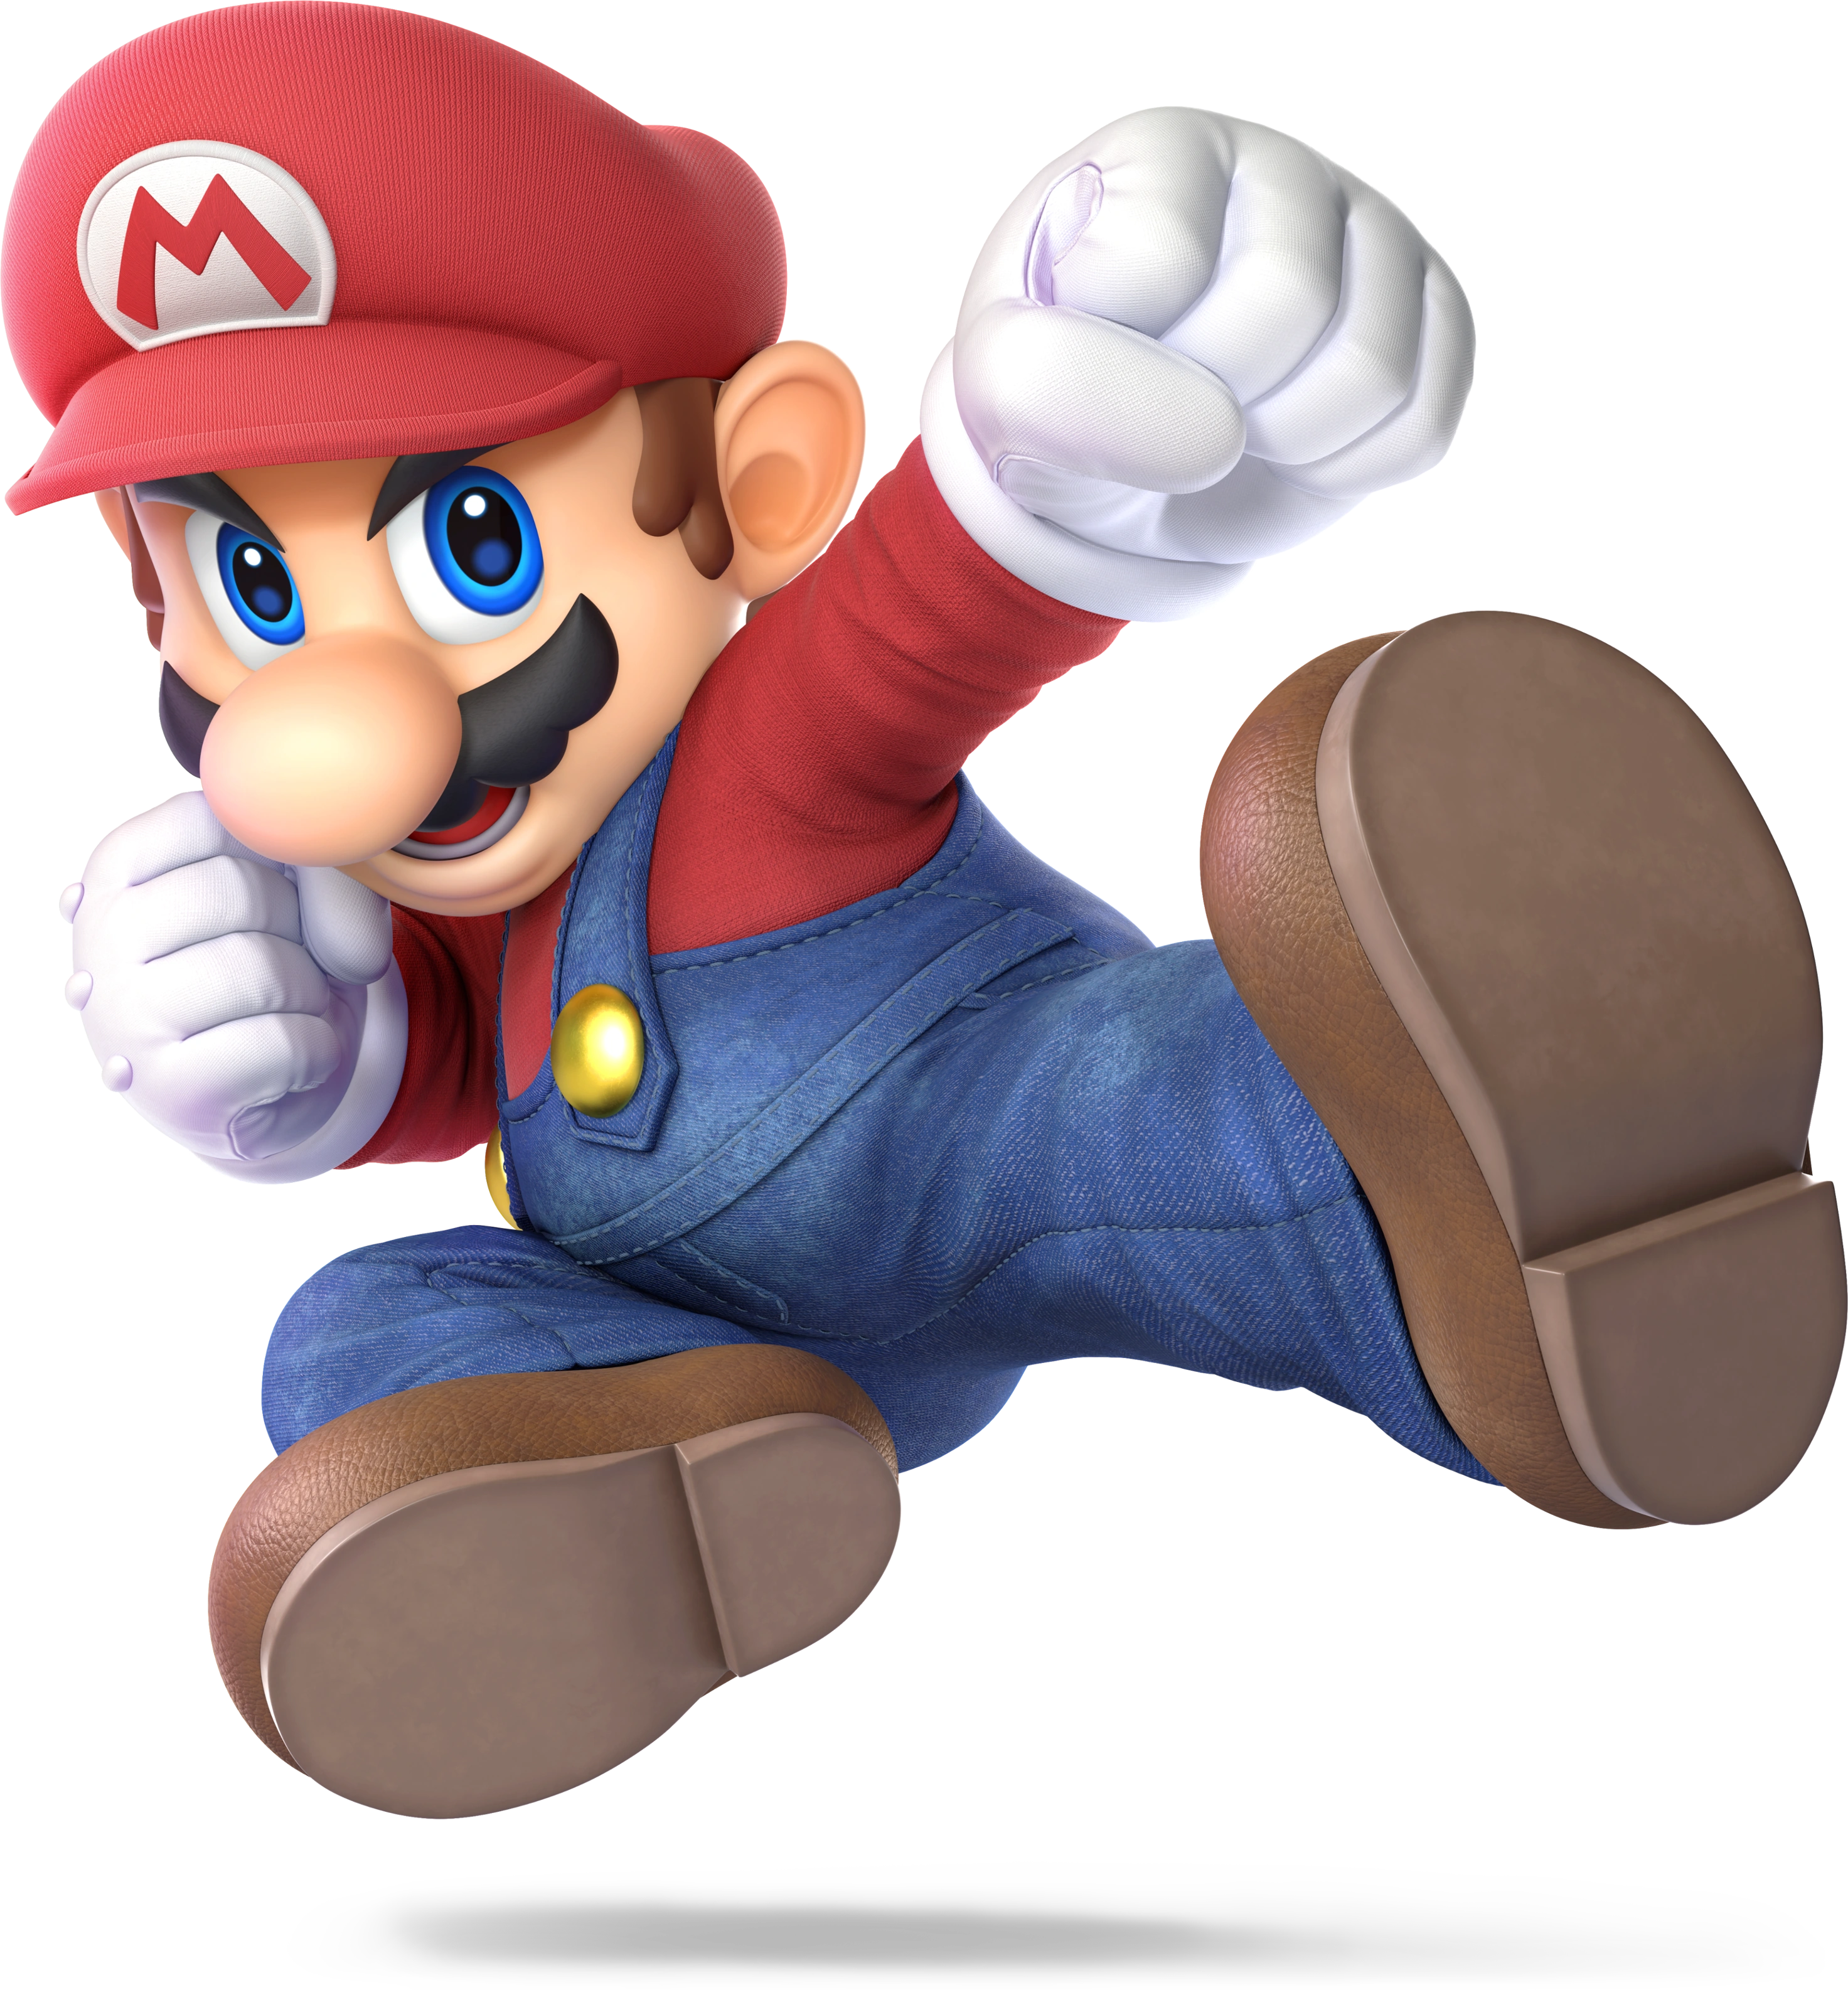
Name: Mario Debut: Super Mario Bros. (1985) Mario is back and better than ever! A blue collar guy to the core, Mario is a versatile balanced character that serves as both a powerful tool and a guide for newcomers to the series. Aspects of his moveset have been modified and changed to reflect more of his appearances, such as his side special, down special, and even his Final Smash. While still familar to new players. Mario has plenty of new tricks up his sleeves to surprise older fans. |
Neutral Special: Fireball. Mario launches a single fireball at an enemy, traveling across the stage. The fireball spins around in the air for a few frames before disappearing and does minimal damage by itself, but does well in slightly stunning foes and leaving them open to Mario's future attacks. Side Special: Hat's Off To You. Mario throws Cappy at an enemy, knocking them back a bit. Cappy himself is a decent projectile, but can be jumped on if the B button is held down. This gives Mario an extra vertical boost and can be used in the air to trick foes before getting back up to the stage. Up Special: Super Jump Punch. Mario does his iconic jump, complete with coins and Cappy's eyes appearing. If you hit an opponent upon starting up the move, Mario's fist does multiple hits and pushes both him and the foe higher. The coins change from gold, purple, and red randomly, but only for aesthetic purposes. Down Special: F.L.U.D.D.. Mario pulls out his trusty F.L.U.D.D. and now has a multitude of attack options. If Mario uses his neutral special, he shoots out of a burst of water that can go on until the water runs out, leaving Mario stationary. The side special is now the Turbo Nozzle, ramming into foes at the cost of worse handling until the button is let go of. The up special becomes the Rocket Nozzle, shooting Mario vertically upwards before having him dive straight down into the ground. Using the down special again allows Mario to unequip F.L.U.D.D.. Final Smash: Super Mario Maker. Mario slips on his builders uniform and begins to add in multiple hazards onto the stage, trapping opponents in a box of hard blocks as Bob-Ombs, Thwomps, Hammer Bros., and Bullet Bills assault their target. As a final send-off, a Banzai Bill appears from the background and rams into all foes caught in the box, dealing massive damage. | |
| |
|
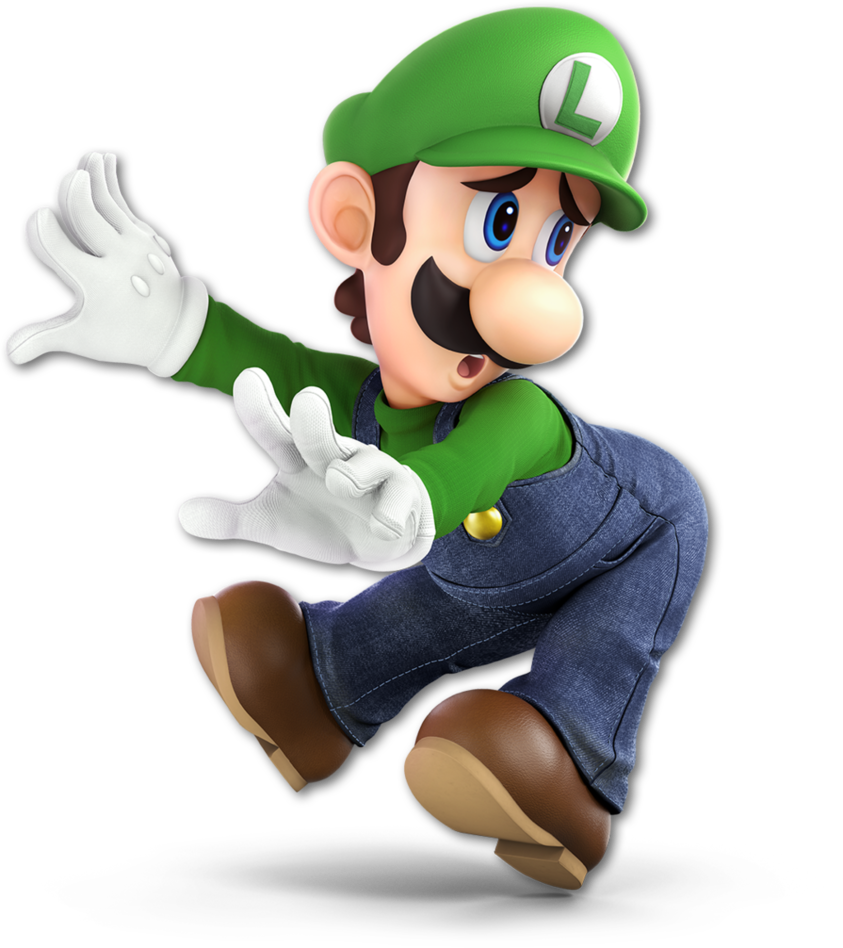
Name: Luigi Debut: Super Mario Bros. (1985) The cowardly and endearing Luigi makes his way back to the world of Super Smash Bros., complete with new additions to his moveset. Compared to previous outings, Luigi now functions like a completely different beast overall, using moves exclusive to him and only him. Luigi still keeps his side and down special, but has entirely new moves that make references to past games he's been in. |
Neutral Special: Thunderhand. Luigi charges up a ball of electricity between his hands, the ball getting bigger the longer B is held. Luigi can then store it for later and get close to an opponent, stunning them once he unleashes the attack. The attack itself doesn't stun enemies unlike other electric attacks, focusing on hitting them with more and more force depending on the projectile's size. Side Special: Green Missile. Luigi charges up and launches himself in the direction he's facing like a rocket. This move can be handy in off-stage situations, propelling you closer to the stage but leaving you stuck in walls or the sides of the stage if pulled off correctly. Up Special: Balloon Ride. Luigi slips on his balloon pack from Luigi's Balloon World, floating upwards as the balloon's deflate one by one. Like Villager's up B, the balloons can be destroyed, but take Luigi higher automatically. Unlike Villager, however, Luigi is able to drop the backpack onto the ground and use it like a regular item, doing more damage depending on the amount of balloons left in it. Down Special: Luigi Cyclone. Luigi spins around, whirling into a tornado-like form before shoving his arms out and hitting any foe in his path. If he hits an opponent, they spin around with him before the arms launch them outwards and away from Luigi, the green plumber sighing as the attack ends. Final Smash: Poltergust G00. Luigi sucks in one or more opponents into his new Poltergust G00. Upon catching a figher in the gust, Luigi slams them upon the ground like he does in Luigi's Mansion 3, going back and forth before sucking them into the Poltergust. The vacuum rattles around and expands as the fighter tumbles around inside before Luigi shoots them out and deals plenty of damage. | |
| |
|
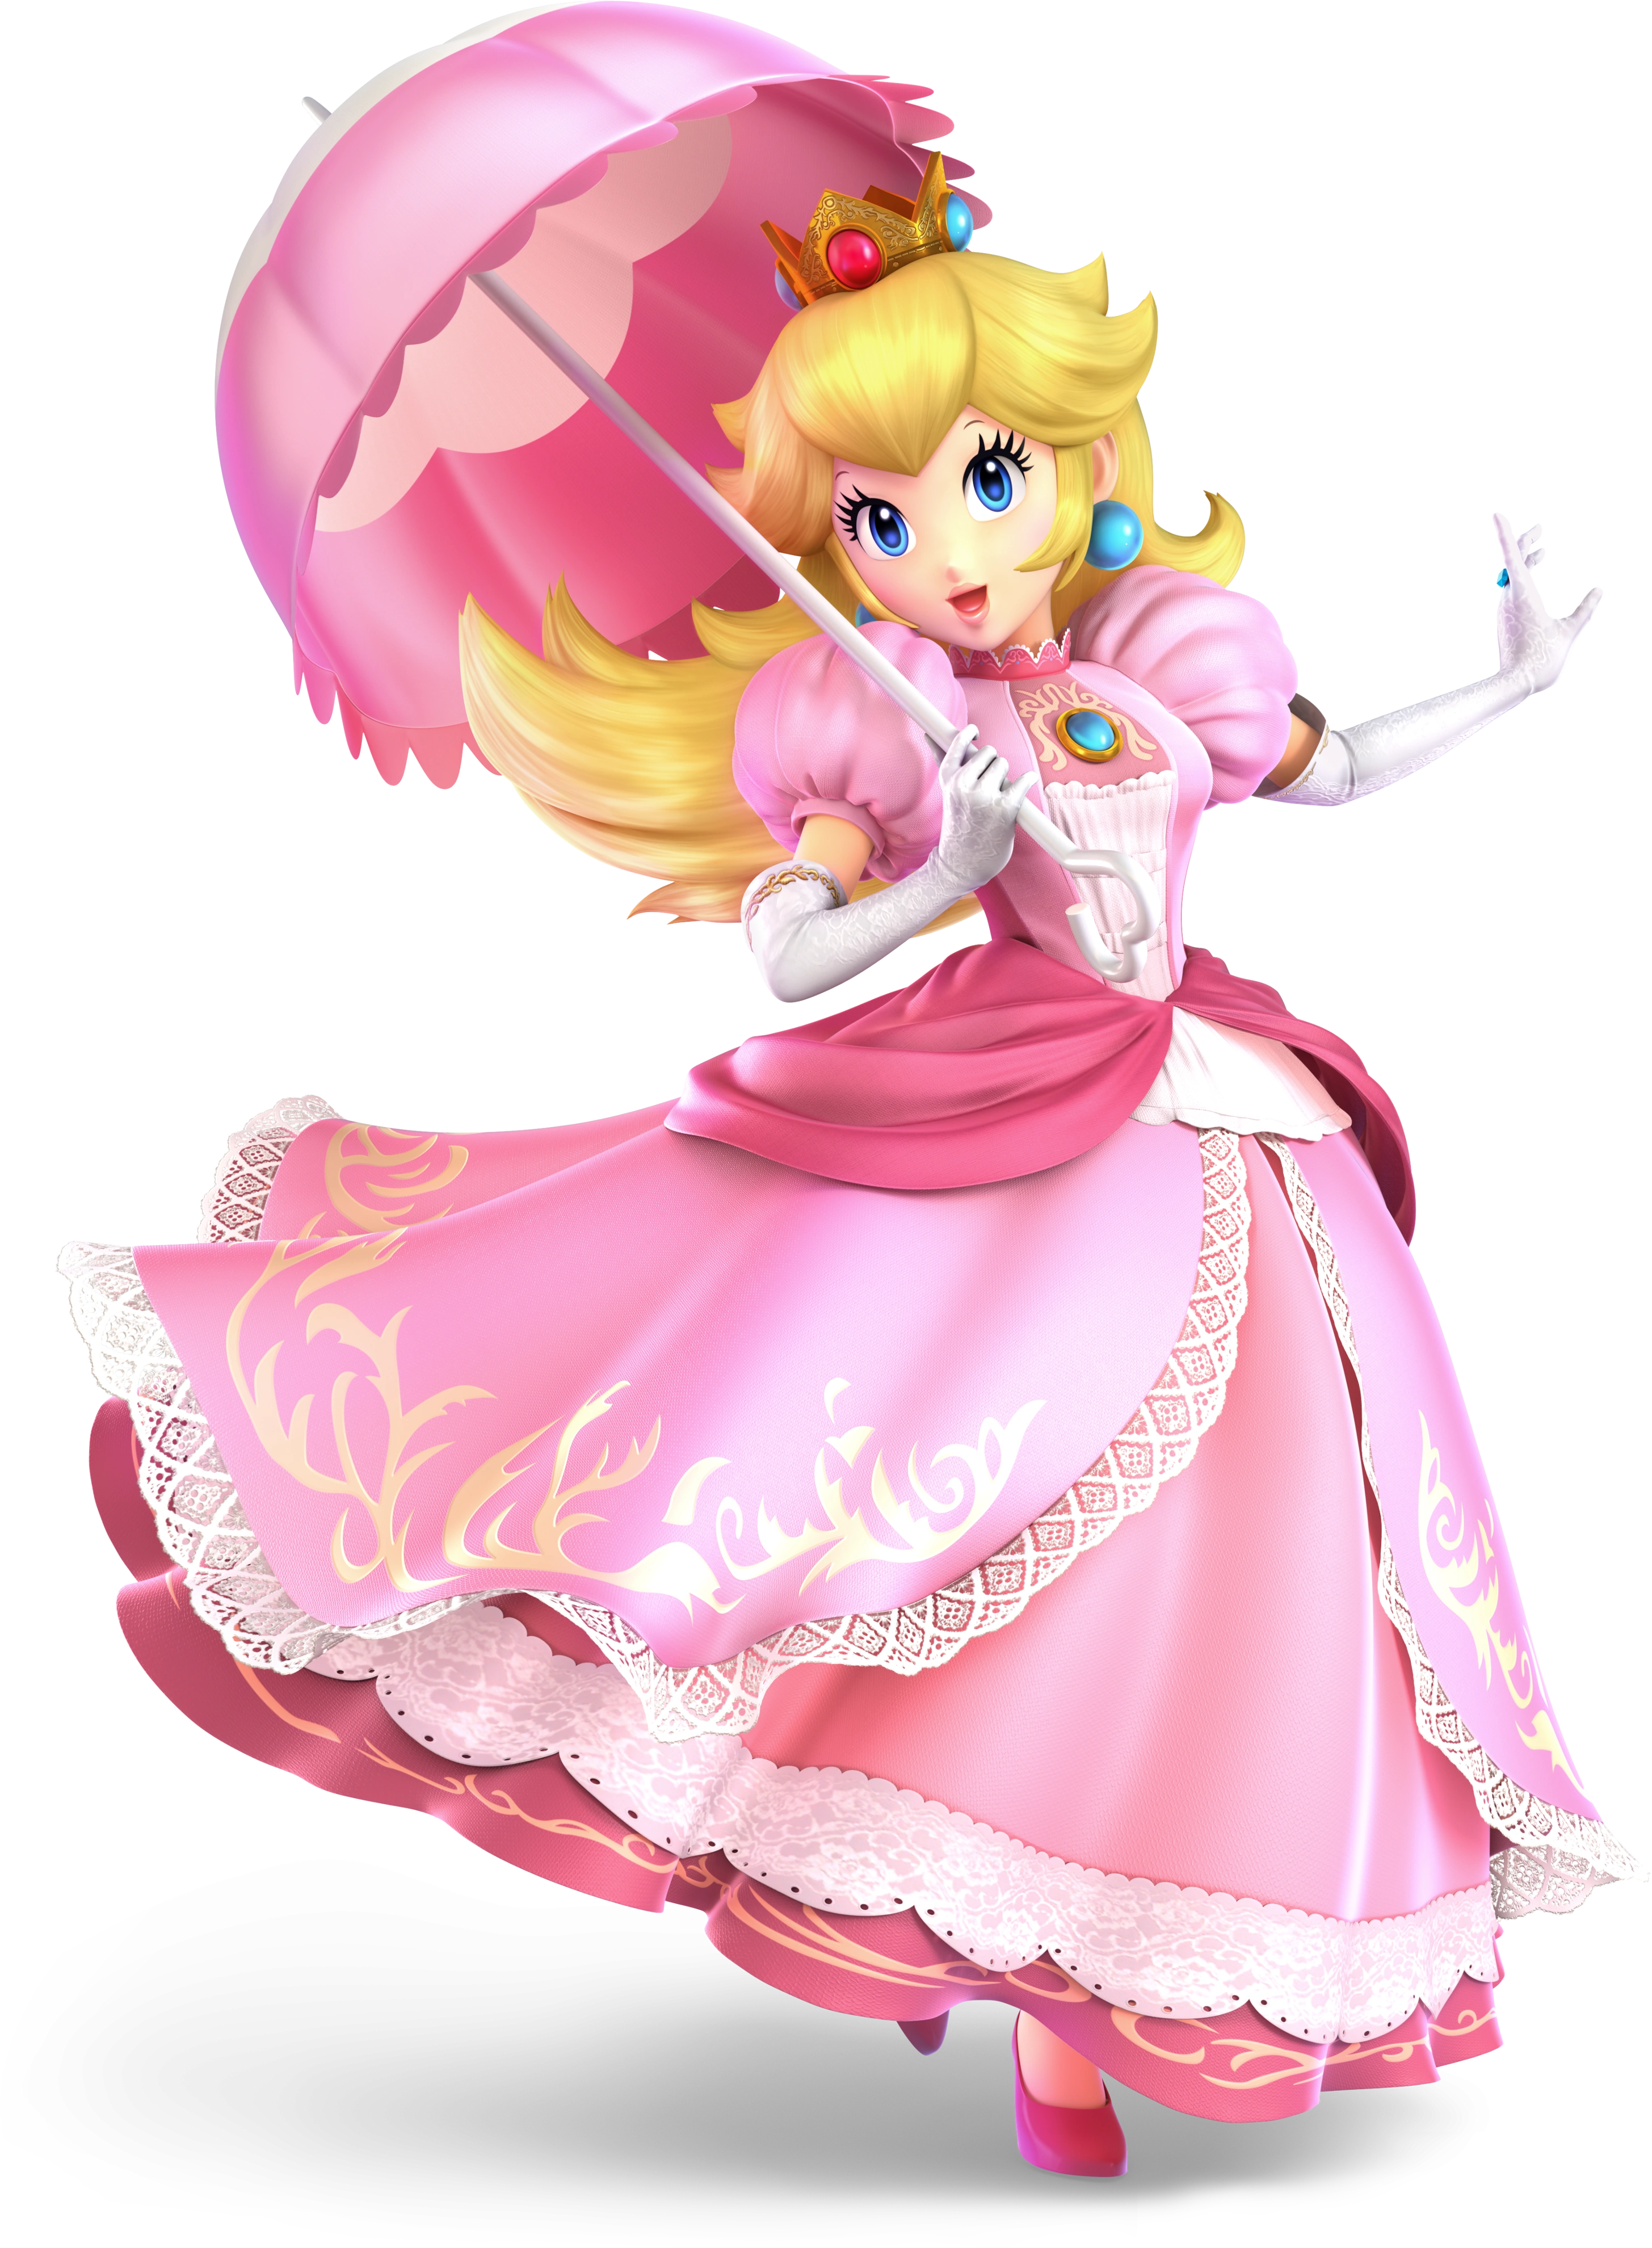
Name: Princess Peach Debut: Super Mario Bros. (1985) The princess of the Mushroom Kingdom returns for yet another outing with her trusted friends...and foes. Peach has been somewhat retooled from her past appearances, ranging from cosmetic differences to full-on new attacks, plenty of them coming from Super Princess Peach, including the addition of a brand new Final Smash. She still functions as the floaty and graceful fighter we all know her as, however. |
Neutral Special: Toad Protector. A Toad pops out of nowhere, jabbing and punching outwardsto protect Peach from any attack for a short while before disappearing. A few frames are left open where an opponent can run in and grab Toad, using him as a one-use projectile while not doing damage to Peach if he's taken. Side Special: Perry Strike. Peach grabs Perry from Super Princess Peach and holds him by the handle. When closed, Peach can strike, swing, and stab with Perry, while when open, Peach can ram into a foe with the living umbrella, twirling it around in her hands at the cost of range. Peach can put Perry back whenever she wants, but the closed and open playstyles allow for multiple ways to use the move. Up Special: Perry-sol Power. Peach once again pulls out Perry from thin air and juts it upwards, slowly floating back down onto the stage with ease. This move functions the same as her previous up special, only carryin aesthetic changes with it. Down Special: Turnip Toss. Peach plucks a turnip out of the ground and chucks it at an enemy like a projectile. The turnip can sometimes be a helpful item, nothing, or even a Bob-Omb, but usually leans more towards the chances of plucking a turnip. Final Smash: Vibe Specter. Peach pulls out the Vibe Scepter, which gives her one of four powers depending on her damage total when the Final Smash is used. 0-30% brings in Joy, allowing Peach to fly around freely and spin foes around like a tornado. 31-60% brings about Gloom, causing Peach to cry waterfalls that drag opponents away from the stage and do chip damage. 61-90% causes Anger, which causes Peach to erupt into flames and set a large around her ablaze. 91-999% uses Joy, bringing Peach's damage total down to 30%. | |
| |
|
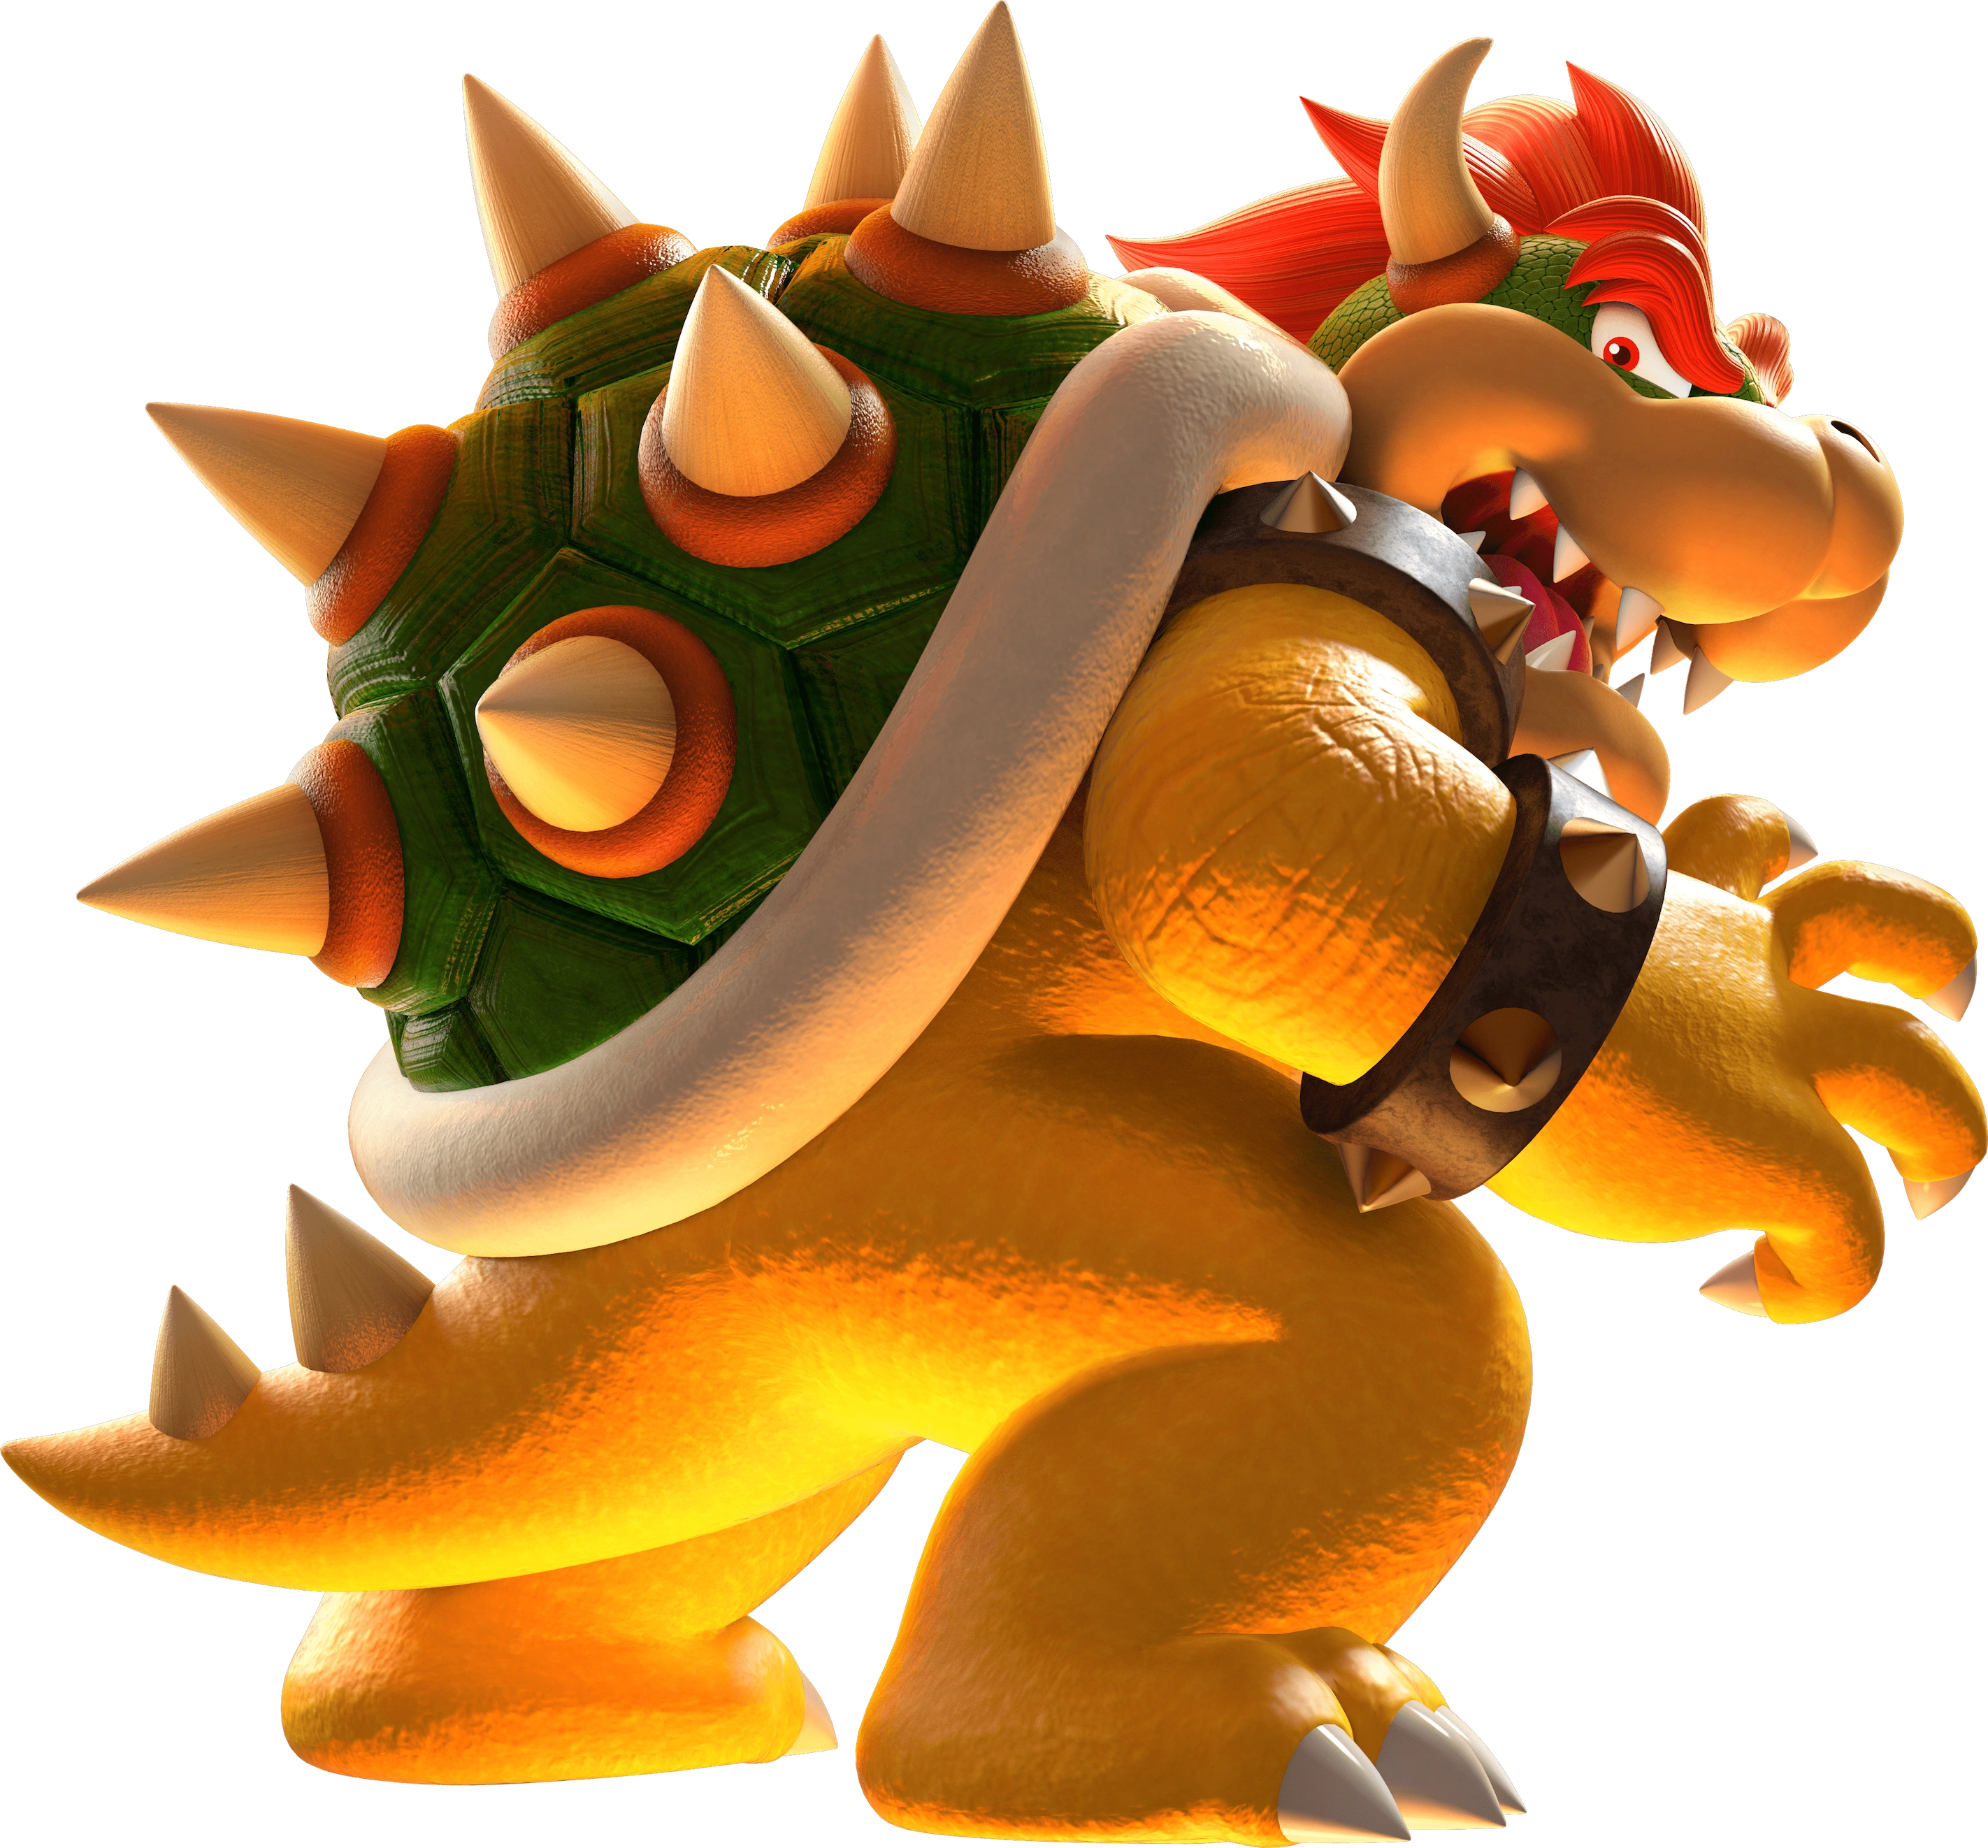
Name: Bowser Debut: Super Mario Bros. (1985) There is no Koopa more feared, sinister, and joked about than Bowser, the king of them all. Bowser is a heavy and brutal fighter with a focus on fire breath, scratches, and attacks with his spiky shell. Like other veterans, the Koopa King comes with new tricks for him to use and now resembles his regular canon appearance much more. He may be a big target, but Bowser is no slouch when it comes to combat. |
Neutral Special: Fire Breath. Bowser breathes out a stream of fire that gets shorter and weaker the longer it's active. The stream is now able to be angled when the B button is held down and the control stick is moved up, although Bowser is still stationary throughout the attack. Side Special: Flying Slam. Bowser grabs an opponent and jumps in the air, slamming them onto the ground. This move is identical to past versions in past games and, unlike other attacks, doesn't gain any form of super armor when used. Up Special: Whirling Fortress. Bowser gets in his shell and whirls around, gaining air before falling back down. The shell does multiple hits like it always has, but now has more super armor on the top of the shell whereas the bottom has no armor, making quick reactions necessary if you're right under the Koopa King. Down Special: Bowser Bomb. Bowser jumps up and does a ground pound, crushing whoever was under him. Unlike past games, this move has an increased amount of super armor, making Bowser almost unstoppable in the air but disappearing once he lands and leaving him open. Final Smash: Giga Bowser. Bowser transforms into his monstorous Smash-exclusive form known as Giga Bowser and leaps in the background, ready to deliver a finishing blow to anyone he sees fit. An aiming reticle appears on the screen and can be aimed anywhere within a five second time limit. Upon the B button being pressed or the timer running out, Giga Bowser delivers a fist full of fury onto the stage, K.O.ing anyone he hits. | |
| |

|
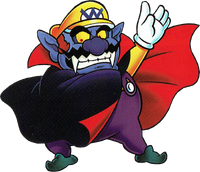
Name: Wart Debut: Super Mario Bros. 2 (1988) The evil ruler of Subcon has finally shown his face in the world of gaming after years of absence! Wart is a psuedo-echo of Bowser, using bubbles instead of fire while bringing his own sinister flair to the fray. His up special is similar to King Dedede's, acting as a competitor to the other evil kings on the roster. Wart's clearly been training for years in his absence and isn't afraid to declare himself the only real king in Smash. |
Neutral Special: Bubble Breath. Wart breathes out a stream of bubbles that get less effective the longer it's active. Unlike Bowser's attack, Wart's version cannot be angled, only shooting straight ahead while giving Wart the advantage of jumping while using the attack. Side Special: Subcon Slam. Wart grabs an opponent and jumps in the air, slamming them onto the ground. Unlike Bowser's version, Wart lands on his back rather than his stomach. While this change may seem small, this opens up the opportunity for Wart to follow the move up with smaller hits and strikes due to the missing amount of frames. Up Special: Super Wart Hop. Wart performs Dedede's up special, jumping upwards and slamming down on the stage. Unlike Dedede's up special where Wart got the move, Subcon's ruler can perform a second bounce with an extra button input if he lands on the stage or platform, although the vertical distance isn't too great. Down Special: Wart Bomb. Wart jumps up and does a ground pound, crushing whoever was under him. Unlike Bowser, Wart lacks the super armor while gaining faster ascension and descension speeds along with more damage done to those close to where he lands. Final Smash: Subcon Strike. Wart calls upon some of his allies, including Mouser, Clawgrip, and Tryclyde to rain havoc upon foes, all of them attacking them in various harmful ways. Everyone except for Wart attacks first, trapping their targets in a large dust cloud before they all scatter away, only for their king to fall from the sky and crush them under his weight, ending the attack. | |
| |

|
Name: Dr. Mario Debut: Dr. Mario (1990) Mario's medicine-practicing alter ego, Dr. Mario, has brought with him a new set of attacks. He's been completely de-cloned and now stands as a separate fighter with little-to-no moves borrowed from Mario himself. He can switch the direction of his pills to either horizontal or vertical, both providing unique attributes with each attack. |
Neutral Special: Miracle Attack. Dr. Mario chucks a bottle of Megavitamins along the ground, the bottle bouncing along up to three times. There's always a chance the bottle could shatter, sending damaging pills flying in all directions. Side Special: Virus Buster. Dr. Mario charges up an attack before unleashing a sort of punch-shove hybrid, knocking opponents down and leaving them open to attacks. The good doctor's fist has the image of a Megavitamin in it whenever the attack is unleashed. Up Special: Doctor's Orders. Dr. Mario performs a move similar to the Super Jump, launching upwards and putting his fist out. The fist hits a giant Megavitamin, sending it flying up to the stage. The Megavitamin does more damage than Dr. Mario himself, but hitting it provides Dr. Mario with better vertical distance. Down Special: Pill Swap. Dr. Mario swaps out the direction of his pills before launching a single one in a straight line. Horizontal pills are slower but deal more damage while vertical pills have the opposite effect. These new effects change the way a player uses Dr. Mario, giving him two unique playstyles in a way. Final Smash: Flu Season. Dr. Mario sends any opponents caught within range to a large medical table, staring up at the ceiling. All of the sudden, large versions of the Viruses appear from above and crush the fighters underneath them. | |
| |

|
Name: Dr. Luigi Debut: Dr. Luigi (2013) Not even Mario's younger brother could stay away from the practice of medicine. Dr. Luigi is Dr. Mario's Echo Fighter, utilizing his pill-swapping mechanic while bringing some new things to the table. His most notable change is that his pills are L-shaped, making their individual effects even more prominent. The Viruses in his Final Smash come from Dr. Luigi rather than Dr. Mario. |
Neutral Special: Miracle Attack. Dr. Luigi chucks a bottle of Megavitamins along the ground, the bottle bouncing along up to three times. There's always a chance the bottle could shatter, sending damaging pills flying in all directions. Side Special: Virus Buster. Dr. Luigi charges up an attack before unleashing a sort of punch-shove hybrid, knocking opponents down and leaving them open to attacks. The good doctor's fist has the image of a Megavitamin in it whenever the attack is unleashed. Up Special: Doctor's Orders. Dr. Luigi performs a move similar to the Super Jump, launching upwards and putting his fist out. The fist hits a giant L-shaped Megavitamin, sending it flying up to the stage. The Megavitamin does more damage than Dr. Luigi himself, but hitting it provides Dr. Luigi with better vertical distance. Down Special: Pill Swap. Dr. Luigi swaps out the direction of his pills before launching a single one in a straight line. Unlike Dr. Mario, Dr. Luigi's pills are L-shaped, which enhances the power of each when flipped. Even when the orientation is the same as his brother, the new shape allows for even more tricks to catch your foes off-guard. Final Smash: Flu Season. Dr. Luigi sends any opponents caught within range to a large medical table, staring up at the ceiling. All of the sudden, large versions of his Viruses appear from above and crush the fighters underneath them. | |
| |
|
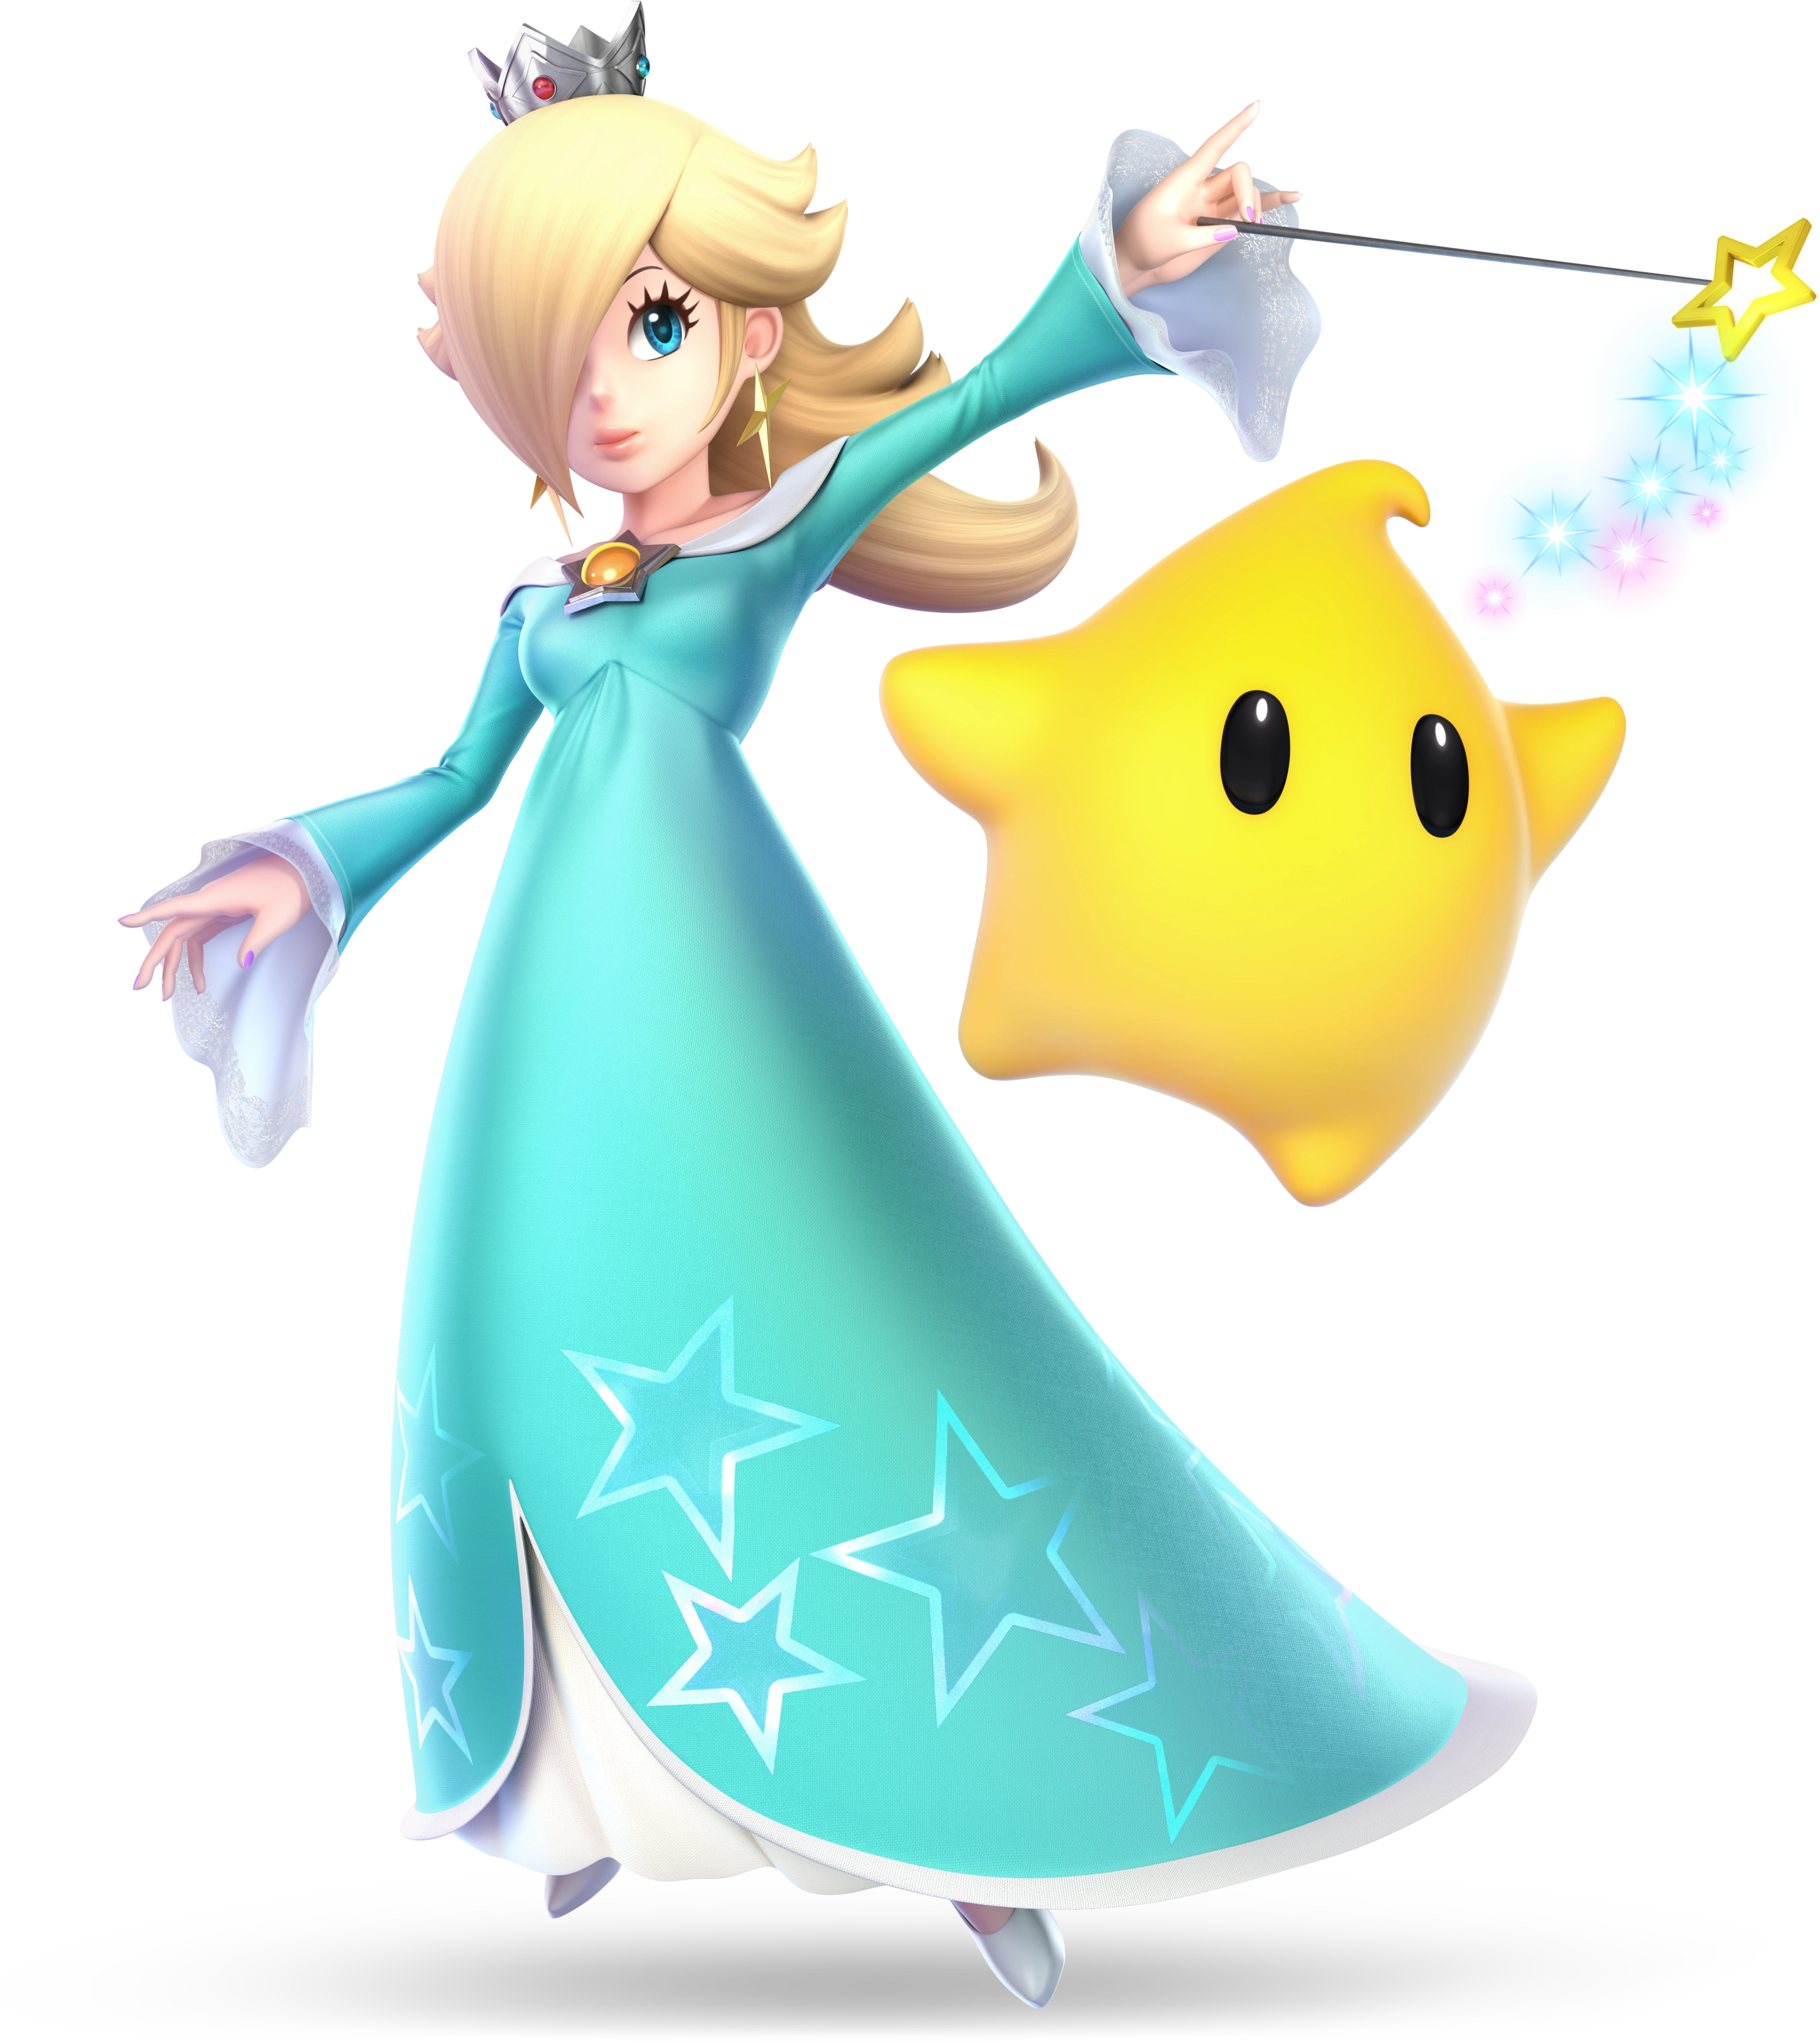
Name: Rosalina & Luma Debut: Super Mario Galaxy (2007) The cosmic duo has returned for yet another brawl. Rosaline & Luma work together, with Rosalina being able to shoot off the Luma. Said Luma can also attack others, but is extremely easy to launch off stage, although it does regenerate shortly after it's previous demise. Coming with slight alterations and new tricks, Rosalina is floaty, fun, and frightenly powerful when placed in the right hands. |
Neutral Special: Luma Shot. Rosalina charges the Luma and fires it off at an opponent, hitting them. The Luma, as a projectile, gets stronger the longer the B button is held, but is still easy to defeat even when it's fully charged. The next Luma spawns ten seconds after the last one, leaving Rosalina to fend for herself. Side Special: Star Bits. Rosalina fires off three differently colored Star Bits at enemies, each one of them firing off at different angles. These Star Bits are now projectiles, unlike past games, meaning they can now be absorbed by others. In exchange, the Star Bits now fire even faster and do a bit more damage than before. Up Special: Launch Star. Rosalina creates a Launch Star out of thin air and hopes in, the star launching her straight into the air like a cannon. Unlike past games, Rosalina's head is now a hitbox upon being launched, dealing damage to anyone above her before she begins to fall. Down Special: Gravitational Pull. Rosalina whirls her wand around, creating a gravitational pull that pulls in nearby objects and foes closer with sheer gravity alone. This can be useful in getting not only items sooner, but also dragging enemies towards you when they least expect it. Final Smash: End of the Universe. Rosalina traps nearby foes in a black hole, sucking them in and triggering a cutscene. In it, planets, meteors, and other space debris are sucked in as the universe explodes in on itself, dealing massive damage to the fighter as Rosalina's clear outline looms over them. Once the universe ends, the fighter is shot back to the stage, ending the attack. | |
| |

|
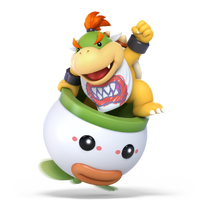
Name: Bowser Jr. Debut: Super Mario Sunshine (2002) The prince of the Koopa clan, Bowser Jr. plays 100% differently from his old man. He's bound to his Koopa Clown Car for all of his attacks and uses it's various traps and tricks for all of his attacks, using Mechakoopas, cannons,boxing gloves, a giant fork, and even...a real tongue? His Final Smash sees him transform into Shadow Mario and summon Mecha-Bowser in order to cause some chaos. |
Neutral Special: Clown Cannon. Bowser Jr. launches a cannonball out of the Clown Car's mouth, firing in a straight line before descending if it doesn't hit a target. Side Special: Clown Kart Dash. The Clown Car gains a set of wheels and charges forward, able to turn around for a time when it crashes into opponents. Up Special: Abandon Ship. Bowser Jr. rockets out of his Clown Car, leaving him without one until he reaches the stage where it regenerates. Down Special: Mechakoopa. The Koopa Clown Car spits out a Mechakoopa from the bottom, which walks along and detonates shortly thereafter. Final Smash: Shadow Mario Strike. Bowser Jr. transforms into Shadow Mario and jumps on Mecha-Bowser, rising from the background before shooting out a barrage of Bullet Bills and fire, all of which can brutally damage whoever they come into contact with. | |
| |
|
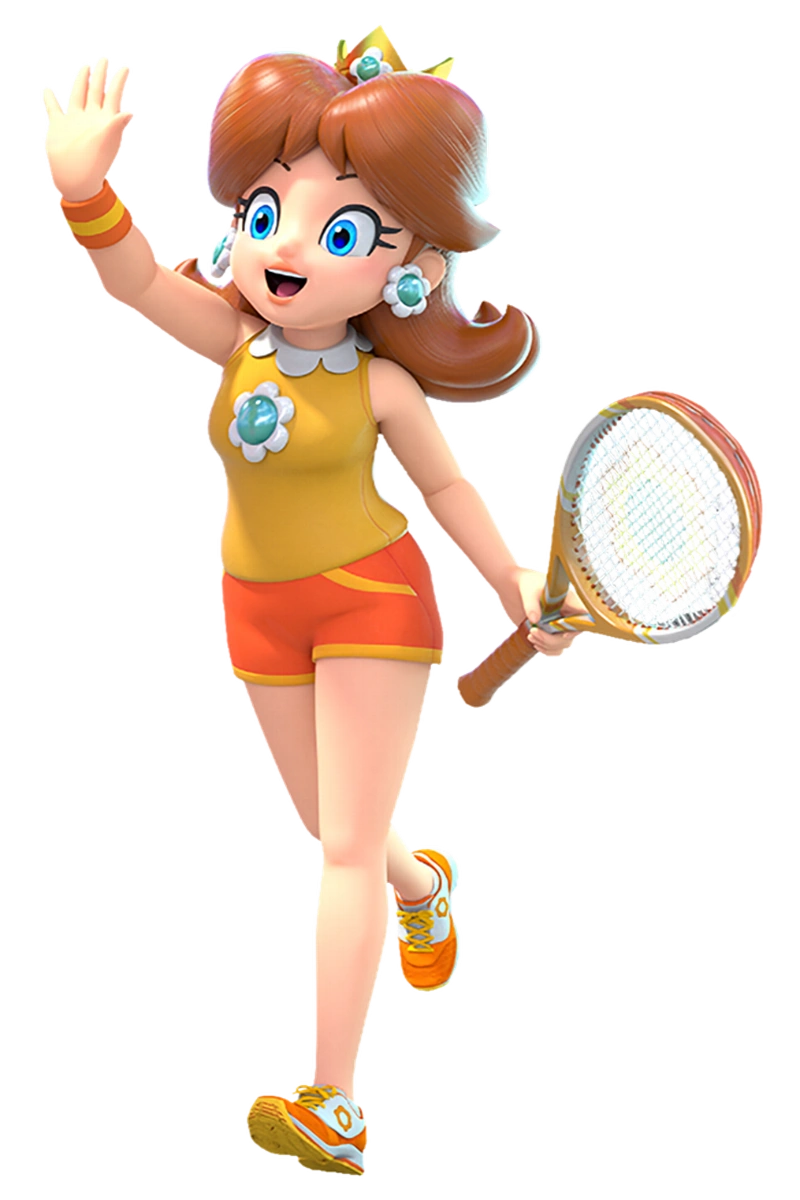
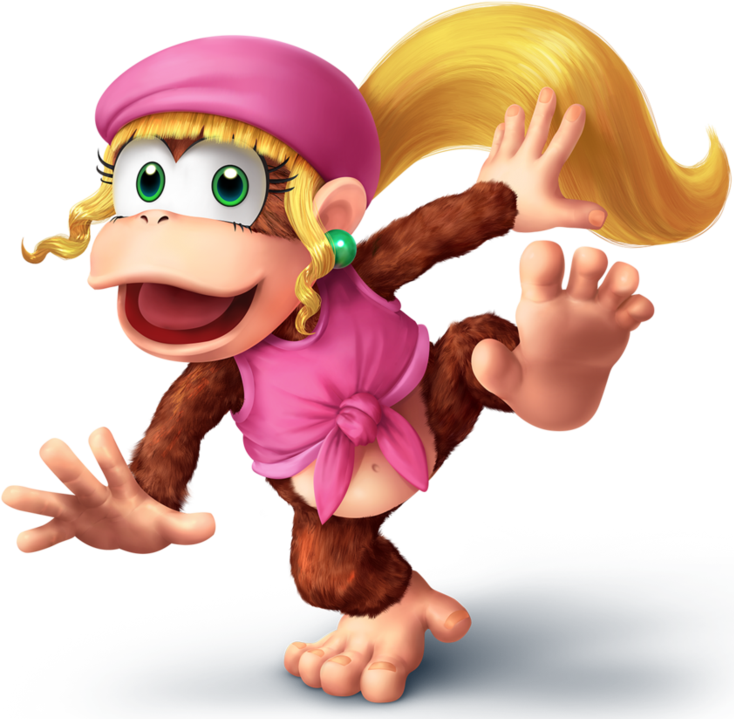
Name: Daisy Debut: Super Mario Land (1989) While nowhere near as iconic as her pink counterpart, the princess of Sarasaland, Daisy, has her own style, personality, and flair! Formerly an Echo fighter, she's been completely revamped in order to showcase her competitive, hard-hitting, and stylish nature. She uses elements from various Super Mario spin-offs, most notably including her sports appearances and references to Super Mario Land. |
Neutral Special: Tokotoko Protector. Instead of a Toad, a Tokotoko from Super Mario Land appears to protect Daisy, blocking all attacks and delivering a single punch at her attack. Side Special: Superball. Daisy is able to launch a Superball, which bounces around a few times before disappearing from the battlefield. It disappears immediately after it hits an opponent. Up Special: Mega Strike. Daisy jumps upwards in somewhat of an arc, punching a soccer ball in whatever direction she's facing. Her movements reference Mario Strikers Charged from the Wii era. Down Special: Petal Power. Daisy spins around, creating a small whirlwind made of daisies to appear around her as a protective shield of sorts. The attack decreases the damage taken by projectiles. Final Smash: Final Lap. Daisy hops on a motorcycle and throws opponents onto DK Mountain, placing them between an infamous shortcut and her. Daisy leaps over the shortcut and lands on them with the motorcycle as eleven more racers follow, sending the opponent soaring. | |
| |
|
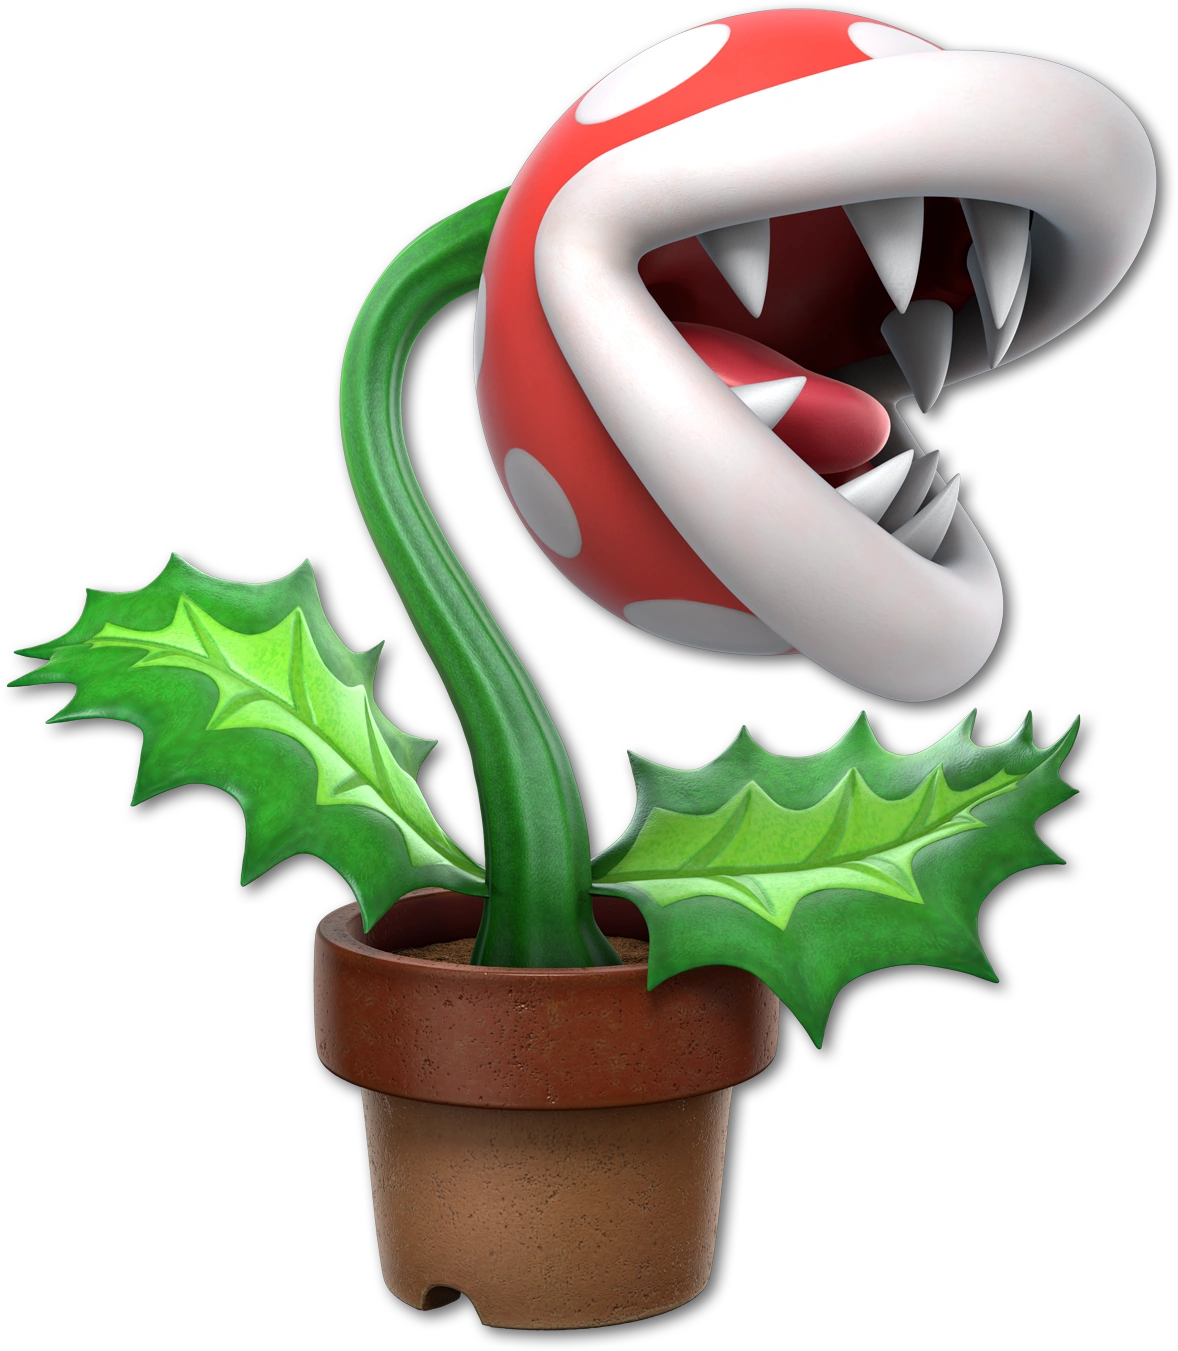
Name: Piranha Plant Debut: Super Mario Bros. (1985) All of the time the Piranha Plant spent off-screen was spent on training for Smash, preparing to take on Mario for over 30 years. Piranha Plant is surprisingly agile, maneuvering around in it's flower pot extremely well while using it's large head and leaves to dish out some damage. It even turns into the sinister Naval Piranha for it's devastating Final Smash. |
Neutral Special: Ptooie. Piranha Plant blows a spiked ball into the air, keeping it propelled with it's breath. It can launch the ball left or right if the left stick is hit, clobbering anyone who touches it. Side Special: Poison Breath. Piranha Plant briefly turns into a Putrid Piranha Plant and breathes poison on any nearby foes, the poisonous cloud staying on the stage depending on how long it's been charged. If a fighter is in the cloud, they take chip damage until they escape. Up Special: Piranhacopter. Piranha Plant spins it's leaves around rapidly, being able to fly high up into the sky with good horizontal and vertical distance. The character can be tilted to either side before eventually stopping. Down Special: Long-Stem Strike. Piranha Plant sinks into it's pot before launching outwards, covering great distance. The pot itself can be hit, turning it in a different direction. Final Smash: Naval Piranha. Piranha Plant smiles as Kamek flies in and turns into the Naval Piranha, spreading vines all over the stage before various Naval Buds lash and bite at the opponents caught in the attack, finishing off with a head-slam from the main head before the plant reverts back to it's original form. | |
| |

|
Name: Geno Debut: Super Mario RPG: Legend of the Seven Stars (1996) A warrior from the land of Star Road, Geno's true form is possessing the wooden doll he walks around in. This specific form is the one that's arrived to the battlefield. He functions like a long-ranged fighter that doubles as a glass cannon, utilizing strong projectiles to compensate for his weak defense. Some of his wooden limbs, such as his hands, becoming different shapes depending on the attack used. |
Neutral Special: Geno Power. Geno fires out a small blast of energy in a straight line across the stage, three red stars appearing above his head. In order to fill these stars, Geno must hold down the B button while not taking damage, forcing the player to take a more strategic approach to fighting. Upon these stars filling, Geno can either fire a power stage-wide laser beam or channel this same energy into his down special. Side Special: Geno Whirl. Geno spins around in a circle, damaging opponents as discs of light shoot out from underneat his cape. Like other projectiles, the discs shoot out at a certain distance before returning to their user, stunning whoever they hit. Geno is able to move away from his starting point, allowing the discs to fly out all the way to the blast zone before disappearing. Up Special: Geno Boost. Geno thrusts himself upwards, with the thrust being able to be angled in four regular and four diagonal directions. Geno, in this state, is completely helpless and can't do damage while gaining some of the best aerial height in the game. By holding down the B button, Geno is able to charge how fast he shoots, giving players a new level of strategy. Down Special: Geno Pillar. Geno's arm turns into a small cannon as the star warrior launches energy blasts downwards. The blast itself can be charged by holding down the B button not unlike his neutral special, ending up as a large pillar of energy that does massive damage if it hits a foe. When the B button is pressed, Geno fires out three smaller pillars that cover more range, while holding it down slighty releases two mid-size pillars. Final Smash: Geno Flash. Geno turns into a large wooden cannon and launches a ball of energy that explodes when it lands, trapping anyone in it's radius in a fiery blast. The blast itself extends outwards not unlike a Smart Bomb, a small "cutesy" face appearing as it grows. When opponents within the blast take damage, a series of numbers above their head will count appear ala Super Mario RPG, the foes being K.O.'d if they're over 100% before the attack. | |
| |
|
Name: Chain Chomp Debut: Super Mario Bros. 3 (1988) Once a common mook in the Super Mario franchise, Chain Chomp has evolved into an all-star after years on the sidelines! Chain Chomp is a heavyweight fighter with some amazing range, able to strike opponents from afar using his chain and his own body as tools of mass destruction. He's very set-up heavy |
Neutral Special: One-Two Chomp. Chain Chomp bites two times depending on button presses, moving forward slightly with each chomp. The most basic attack a Chomp knows, this one specializes in getting large amounts knockback out of it's foes. Side Special: Silver Roller. Chain Chomp, it's coat become a shining silver, rolls along the ground, targeting any player in his path. While somewhat slow, being caught under the attack buries you and leaves you wide open. Up Special: Flame Chomp. Chain Chomp's chains become balls of fire as he thrusts himself high up into the air. As he rises, the fire is left behind as projectiles that hone in on enemies, lightly damaging them before Chomp comes back. Down Special: Stake In. Chain Chomp tethers itself to the ground and charges up an attack that causes it to rush forward with immense power, crushing opponents with it's body rather than it's maw. It takes a lot of time to charge, but it's worth it for the sheer amount of damage. Final Smash: Chomp Stampede. Chain Chomp lets out a loud bark as rumbling can be heard behind him. Chain Chomplets and even larger Chomps rampage across the stage, trampling over any and all fighters in their path. The Chomps gradually get bigger as the attack progresses, ending with a large golden Chomp rolling along the stage. | |
| |

|
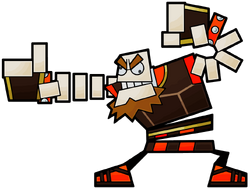
Name: O'Chunks Debut: Super Paper Mario (2007) One of Count Bleck's five main minions, O'Chunks is the strongest of the group and specializes in brute force. This translates over to Smash, where he's a juggernaut of sorts. His side special is extremely powerful when used right, ramming into opponents and only stopping at certain points. He was even given a better version of Wario's up special, fusing it with K.Rool's for a gas-tonishingly good recovery. |
Neutral Special: Square Up. O'Chunks unleashes a single punch forwards that does nothing if it doesn't collide with other foes. If it does, he's able to unleash a few more before ending with an uppercut. Side Special: Chunks Charge. O'Chunks runs across the stage and rams into any opponent in his path, stopping when he's hit or if he's at the edge of the stage. Up Special: Chunks Away. O'Chunks proceeds to fart, lifting himself high up into the air. The putrid gas can chip away foes and the attack can be angled much like K.Rool's up special. Down Special: Groundbreaker. O'Chunks lifts a large green block out of the ground and proceeds to throw it in the direction he's facing. If the block doesn't hit you, the small debris it creates upon impact will. Final Smash: Raise the Roof! O'Chunks punches a nearby opponent into the halls of Castle Bleck. When they land, the roof begins to cave in on itself and fall, crushing them and immensely damaging them. O'Chunks then lifts up the roof, finishing the attack. | |
| |

|
Name: Popple Debut: Mario & Luigi: Superstar Saga (2003) The Shadow Thief himself, Popple has entered the fray in order to become the most legendary brawler in the land. Popple’s moveset revolves around his bag, with one item or projectile from other fighters able to be stored in it at a time. The item completely changes how all four of his specials work, an “Empty” and “Full” variation being there for each one. He’s a versatile foe, using his thievery to his advantage. |
Neutral Special (Empty): Hammer Toss. Popple throws a single metal hammer in the air, a move taken from Rookie, with the hammer doing good damage if it hit foes square on the head. If the B button is held down for longer, the arc which the hammer travels in is higher, allowing for more overall options. Neutral Special (Full): Item Toss. Popple reaches into his bag and throws the previously stored item out at a blazing fast speed, doing massive damage if it ends up hitting a foe. The throw, however, once again leaves the bag empty and even items like the one Popple gets from his side special are gone. Side Special (Empty): Thief’s Trick. Popple deliberately rams right into opponents, damaging them in the process. If the B button is pressed at the peak of the attack when Popple first rams into his target, Popple stores a rather weak healing in his bag that he can use later with his full down special. Side Special (Full): Bags Away. Popple spins around with his full bag now outstretched in front of him. If the bag hits a foe, it causes damage at the cost of the item inside of the bag, shattering due to it not being used for its intended purpose. If used repeatedly without hitting a fighter, the item eventually disappears from the bag. Up Special (Empty): Onwards! Popple, his bag completely empty, lifts it over his head. The open bag acts as a glider of sorts, pushing him up into the air before he begins to glide back to safety. Eventually, the bag must return to its normal state, causing the Shadow Thief to fall to his potential demise. Up Special (Full): Designbomb. Popple reaches into his bag and pulls out a Designbomb, throwing it under himself as it explodes. The explosion not only damages nearby foes, but propels Popple higher than he would without it. As a downside, the bag is now empty after this, the item now missing from it. Down Special (Empty): Snatch. Popple is able to grab things on the ground and stuff them into his bag. With his bag now full, Popple has four options; use the down special again to take the item out, , use the side special to hit foes with the full bag, use the up special to use a Designbomb, or press the B button to aggressively throw the item in a one-use attack. Down Special (Full): Item Reserve. Popple stops and opens his bag, pulling out the item that was inside and beginning to use it. This is directly affected by his side special, allowing him to use the healing item he had earned before. If Popple grabbed another item, he can use it until its use runs out. Final Smash: Wiggler’s Revenge. Popple hops atop an enraged Wiggler, cheering as the player is able to aim a reticle at a specific point on the stage. Once said point is chosen, the Wiggler runs from in the background, ramming into anyone or anything in its path as Popple jumps off at the last second. | |
| |

|
Name: Petey Piranha Debut: Super Mario Sunshine (2002) The morbidly large Piranha Plant himself, Petey fills the role of the now-absent Piranha Plant! Petey is a heavy fighter, utilizing tricks, traps, and set-ups in order to lure his targets into his hard-hitting attacks. He mainly focuses on doing minimal amounts of damage at a time before delivering said attacks, evident in his use of Nipper Plants and burrowing into the stage. |
Neutral Special: Toxic Goop. Petey stands still and launches out a ball of goop, landing on the floor and ending up in a puddle on the stage. The goop slows opponents down and does chip damage if they’re in it for too long, but fades away after ten seconds of activity and can’t be continuously launched until the current puddle disappears.. Side Special: Nipper Sentry. Petey spews a small Nipper Plant from his mouth, the little guy hopping around and latching onto opponents. While somewhat similar to Bowser Jr.’s Mechakoopa, the Nipper inflicts flower damage if it bites enough times, chipping away at foes even when it dies. Up Special: Flutter. Petey starts flapping his leaves, covering great horizontal distance while only covering a little vertical distance, going in a low diagonal line. While not exactly good for recovery, Petey is able to perform a ground pound mid-air if the B button is pressed before the attack ends. Down Special: Piranha Sneak. Petey burrows himself into the ground and dashes across the ground, his petals visible as he travels. At the player’s command, Petey can leap up out of the ground and attack anything directly above him. Attacks that hit the ground can damage him and force him out of the ground, however. Final Smash: Cage Crush. Petey rushes at opponents, only able to hit two before the scene cuts to him flying above the stadium from Super Smash Bros. Brawl, holding cages with his foes inside. Petey drops of the ground, smashing the cages into pieces and dealing devastating damage before the battle continues. | |
| |
|
Name: Donkey Kong Debut: Donkey Kong (1985) King of Swing? Leader of the bunch? Whatever you call him, you know him well, and he's finally back to kick some tail! DK is a physical heavyweight fighter that's all about physical attacks. Strong punches, claps, swings...you name it, this Kong's got it! |
Neutral Special: Giant Punch. Donkey Kong winds up a punch and can unleash it at any time on anyone. Side Special: Headbutt. Donkey Kong slams his head into an opponent with a chance of burying them in the ground. Up Special: Spinning Kong. Donkey Kong puts his arms out and starts spinning upwards like a helicopter. Down Special: Hand Slap. It sells itself: Donkey Kong slaps his hands together and damages the enemy. Final Smash: Power Punch Flurry. Donkey Kong launches a flurry of punches, trapping an opponent in the flood of fists. He ends it off with a single punch that almost KO's an opponent. | |
| |
|
Name: Diddy Kong Debut: Donkey Kong Country (1994) More style than Lanky Kong! More grace than Tiny Kong! And he STILL has a funny face! Diddy Kong is a fast and frantic fighter, known for his ability to set up traps with his banana peels, shoot out peanuts with his pop gun, and use his rocketbarrel to get him back to the stage safely. |
Neutral Special: Peanut Popgun. Diddy Kong charges up his peanut popgun and fires a single peanut. Side Special: Kong Family Flip. Diddy flips over and latches onto an opponent, hitting them all over. Up Special: Rocketbarrel Hop. Diddy gets a small boost of air time from his rocketbarrel, propelling him upwards. Down Special: Banana Peel. Diddy whips out a banana peel and tosses it on the ground, creating a hazard. Final Smash: Rocketbarrel Barrage. Diddy slips on the Rocketbarrel and sets of a barrage of peanuts, all of them shooting in different directions as he zips around. | |
| |
|
Name: King K.Rool Debut: Donkey Kong Country (1994) The egotistical, wacky, and borderline insane roleplaying leader of the Kremlings has return to the fray once more. King K.Rool uses a variety of tools and fighting styles, such as his blunderbuss, boxing gloves, and even his own gut. He masters in using the tools he has to lead into devastating combos. Don't forget the super armor he has embedded onto his golden belly! |
Neutral Special: Blunderbuss. K.Rool fires a cannonball out of his blunderbuss that, if hit back at him, can be sucked back in and launched out at a 45 degree angle upwards. He can also suck in opponents and shoot them back out. Side Special: Crownerang. K.Rool tosses his icon crown at an opponent which comes back like a boomerang-like motion. If it doesn't return, K.Rool will be without a crown for a time until he picks it back up. Up Special: Propellerpack. K.Rool whips out his helicopter backpack and flies upwards with, moving at a decent speed. The move can be angled and even hits foes above it with it's propeller. Down Special: Gut Check. K.Rool blocks attacks with his large golden gut, acting as a sort of counter move. The counter thrusts the foe backwards and keeps K.Rool completely safe. Final Smash: Blast-o-matic. K.Rool sits inside of the Blast-o-matic as a lazer completely annihilates Donkey Kong Island, along with any players caught in the attack. | |
| |
|
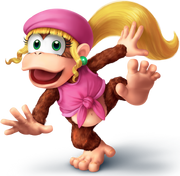
Name: Dixie Kong Debut: Donkey Kong Country: Diddy's Kong Quest (1995) Dixie Kong is one of most well-known members of the Kong Family, being Diddy's "partner in crime". She's a mixture of aspects of quick long-ranged and short-ranged characters, using her ponytail, barrels, and gumballs to attack her opponents. While built off of Diddy, she's slightly slower and more hardhitting than he is, giving this Kong a whole meta of her own. |
Neutral Special: Barrel Throw. Dixie picks up a barrel out of thin air and is now holding onto it like an item; any attack that uses her ponytail now automatically tosses the barrel. This includes the up special blowing it above her, the grabs throwing it in the direction they're facing, and her Smash attacks sending it forwards like a rocket. Side Special: Rambi Rampage. Dixie immediately charges forwards on Rambi's back, the rhino doing substantial shield damage along with physical damage. In this state, Dixie cannot hop off of Rambi, but she's able to steer in on the ground once just in case she wants to hit something she may have missed. The properties, speed, and more make this different from something like Wario's side special. Up Special: Ponytail Spin. Dixie Kong imitates DK's up special, only flying higher with her ponytail. The ponytail itself doesn't do much damage and can be easily punished, but can do more damage from the sides when used on the ground. Down Special: Bubblegum Toss. Dixie Kong throws bubblegum onto the ground, setting up a trap for fighters. The bubblegum is rather sticky and causes a slowdown effect when stepped in, but can also affect Dixie if she herself steps in it. After a few seconds, the trap disappears into thin air. Final Smash: Gyrocopter Joyride. Dixie Kong hops into Funky's gyrocopter alongside her partner in crime Kiddy Kong, raining down bombs all over the stage and hitting any opponent in their path. The gyrocopter flies in from the background before giving the player the manual ability to drop bombs, doing immense damage if an opponent is struck multiple times with them. | |
| |

|
Name: Link Debut: The Legend of Zelda (1986) Link is back and is still rocking his iconic Breath of the Wild design. He's less focused on one specific motif and instead uses multiple different methods of attack: bombs, bows, boomerangs, swords...Link is a master of trades and pretty good at most of them, albeit not without his own set of disadvantages. |
Neutral Special: Traveler's Bow. Link charges up two arrows that he can fire and even pick back up for future use. Side Special: Giant Boomerang. Link throws the Giant Boomerang, which is slow but deals real damage if it hits someone. Up Special: Spin Attack. Link spins his sword and body around at the same time, lifting himself upwards. Down Special: Remote Bombs. Link places down a bomb that he can remotely detonate at any point on the stage. Final Smash: Urbosa's Fury. Link charges up an attack from his sword and slashes, releasing lightning from Urbosa's Fury that strikes all nearby opponents. | |
| |

|
Name: Sheik Debut: The Legend of Zelda: Ocarina of Time (1998) Sheik may be returning from past Smash Bros. games, but her appearance and demeanor couldn't be any more distinct. Based off of the villainous Yiga Clan, Sheik still plays fast and stealthy, rushing into attacks and using her mobility to her advantage. Due to her affiliation with the clan, she seems a lot more sinister than before. |
Neutral Special: Needle Storm. Sheik charges up an attack that can unleash up to six needles from her hands. Side Special: Sheik lobs a grenade attached to a chain at nearby foes, which detonates near them upon impact. Up Special: Vanish. Sheik uses a Deku Nut to disappear into thin air, reappearing near someone/somewhere else. Down Special: Bouncing Fish. Sheik bounces in the air, landing a kick on anyone nearby. Final Smash: Kohga's Guidance. Sheik jumps up into the air, summoning large metallic spiked orbs to her side. She moves her hands, allowing them to descend upon fighters and roll them over and/or crush them. | |
| |

|
Name: Zelda Debut: The Legend of Zelda (1986) Zelda in Super Smash Bros. Swansong has received a complete overhaul that retools her moveset. Based around technology more than magic, Zelda uses the Sheikah Slate and it's runes to cause major havoc on the battlefield. These are the exact same ones Link used during his journey in The Legend of Zelda: Breath of the Wild. Who says she's stuck to researching? |
Neutral Special: Seal of the Triforce. Zelda attacks an opponent with magic from her hand, "sealing" them away and damaging them. Side Special: Stasis Hand. Zelda paralyzes an opoonent for a single second with the Stasis rune. Up Special: Cryonis Boost. A block of ice appears under Zelda, allowing her to hop up on it. Down Special: Magnesis. Zelda pulls an opponent towards her, being able to attack directly. Final Smash: Divine Beasts. Zelda stops as the four Divine Beasts focus their laser blasts on a selected opponent, firing off a furious blast of energy. | |
| |
|
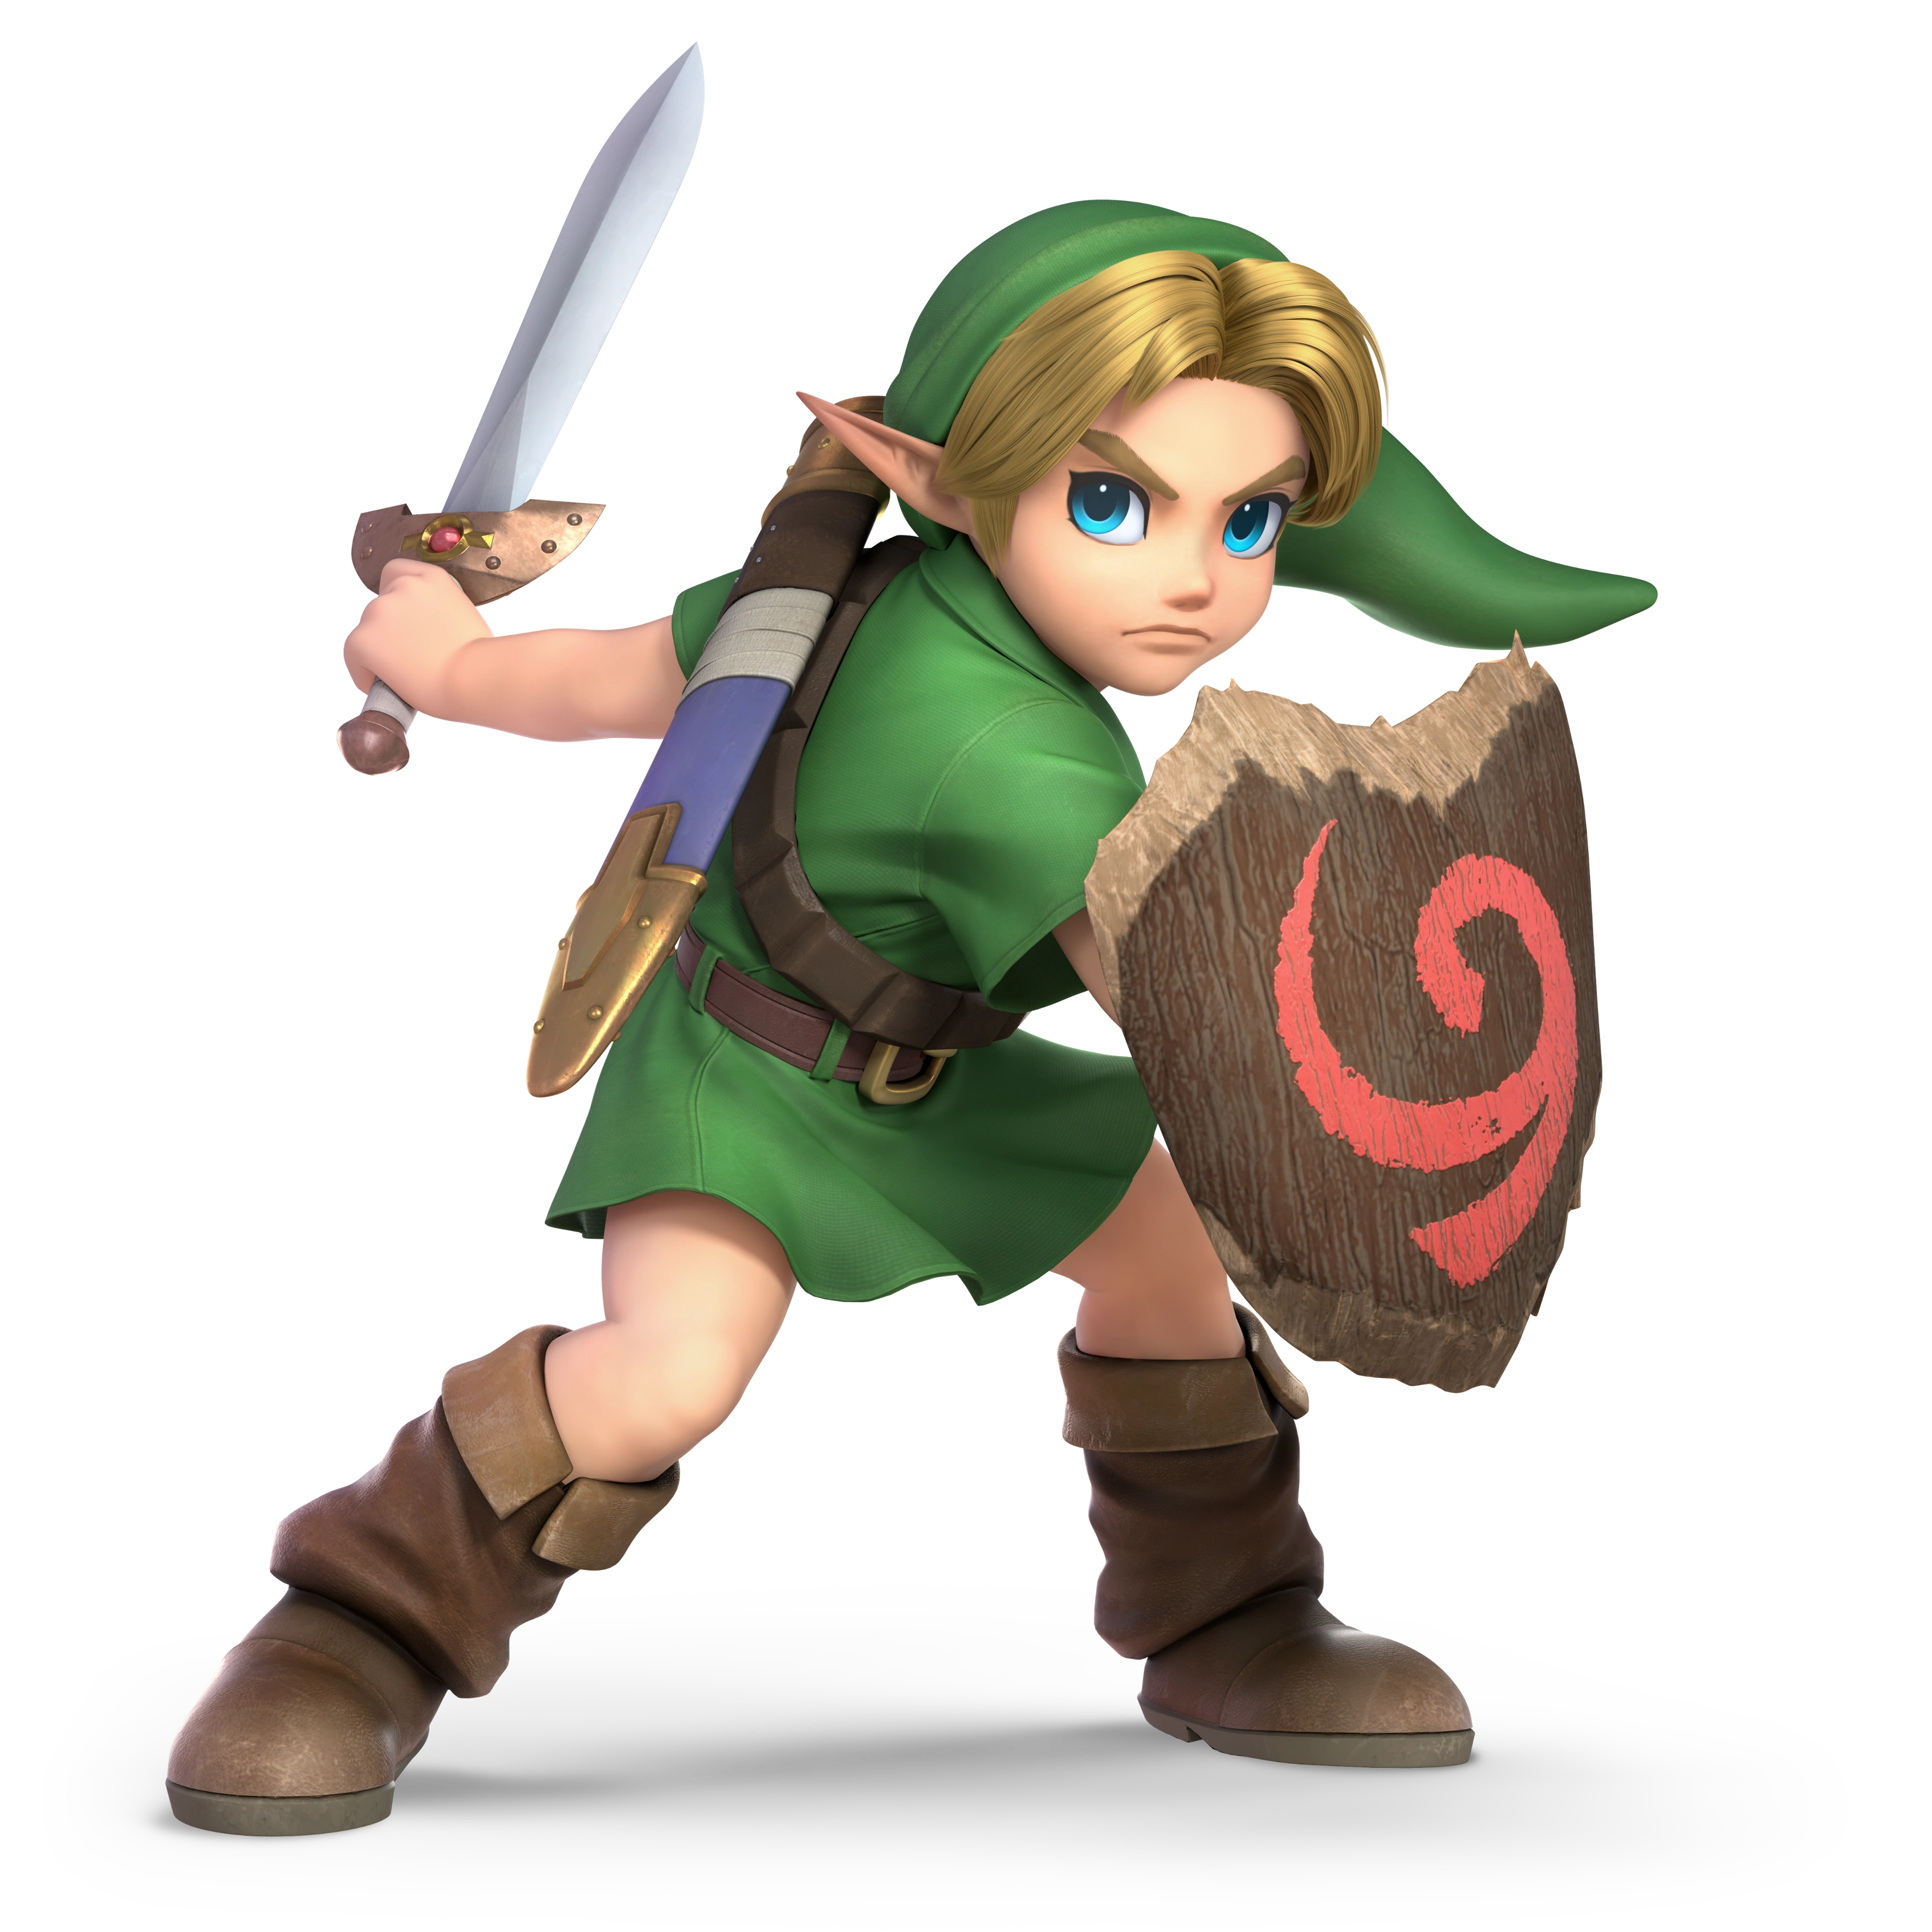
Name: Young Link Debut: The Legend of Zelda: Ocarina of Time (1998) This younger version of the Hero of Time is still as brave and bold as his older self, seeming to keep his strong will through the years. He plays somewhat similarly to Link, but use unique elements from games like Majora's Mask to attack. |
Neutral Special: Hero's Bow. Young Link fires off a single arrow at an opponent. The arrows can be toggled between fire, ice, and light elements. Side Special: Deku Stick. Young Link pulls out a Deku stick and juts it forwards and backwards, striking anyone in his way. Up Special: Spin Attack. Young Link spins around in the air, jutting his Kokiri Sword upwards before landing. Down Special: Bombchu. Young Link lays down a Bombchu on the ground, which then rushes towards an opponent and explodes. Final Smash: Fierce Deity. Young Link puts on the Fierce Deity Mask and traps an opponent in the final boss room from Majora's Mask, rapidly slashing at them before stabbing through them with the Fierce Deity's sword. | |
| |

|
Name: Ganondorf Debut: The Legend of Zelda: Ocarina of Time (1998) Like Sheik before him, Ganondorf uses a completely new design based on elements from Breath of the Wild. Covered in ancient Sheikah tech and the corruptive force of Malice, Ganondorf's corpse has been brought back to life with a vengeance. He has a completely unique moveset, keeping absolutely nothing from his old incarnation. These moves are based off of the Calamity Ganon boss fight from the previously-mentioned game. |
Neutral Special: Critical Strike. Ganondorf repeatedly slashes around his sword-arm, going from the left to the right while pushing himself slightly forwards after the final swing. Side Special: Guardian's Fury. Ganondorf charges up an attack from his sword before slashing it in front of him. The sword unleashes a fast-moving fireball across the stage, taking opponents with it as it travels. Up Special: Flight of the Malice. Ganondorf turns into a smaller form of Calamity Ganon and darts into the air, moving in a zig-zag pattern upwards. If he touches an opponent, they're sent flying back as he returns to his normal state. Down Special: Guardian Javelin. Ganondorf blocks an attack from a fighter and switches out his sword for a spear, stabbing their opponent right through the chest. This sends them into a state of defenselessness, leaving them open to Ganondorf's powerful attacks. Final Smash: The Great Calamity. Ganondorf traps nearby foes in an attack and becomes Calamity Ganon, swirling around before darting towards the other fighters from a distance, covering them in Malice and corrupting them as he swirls around them. | |
| |
|
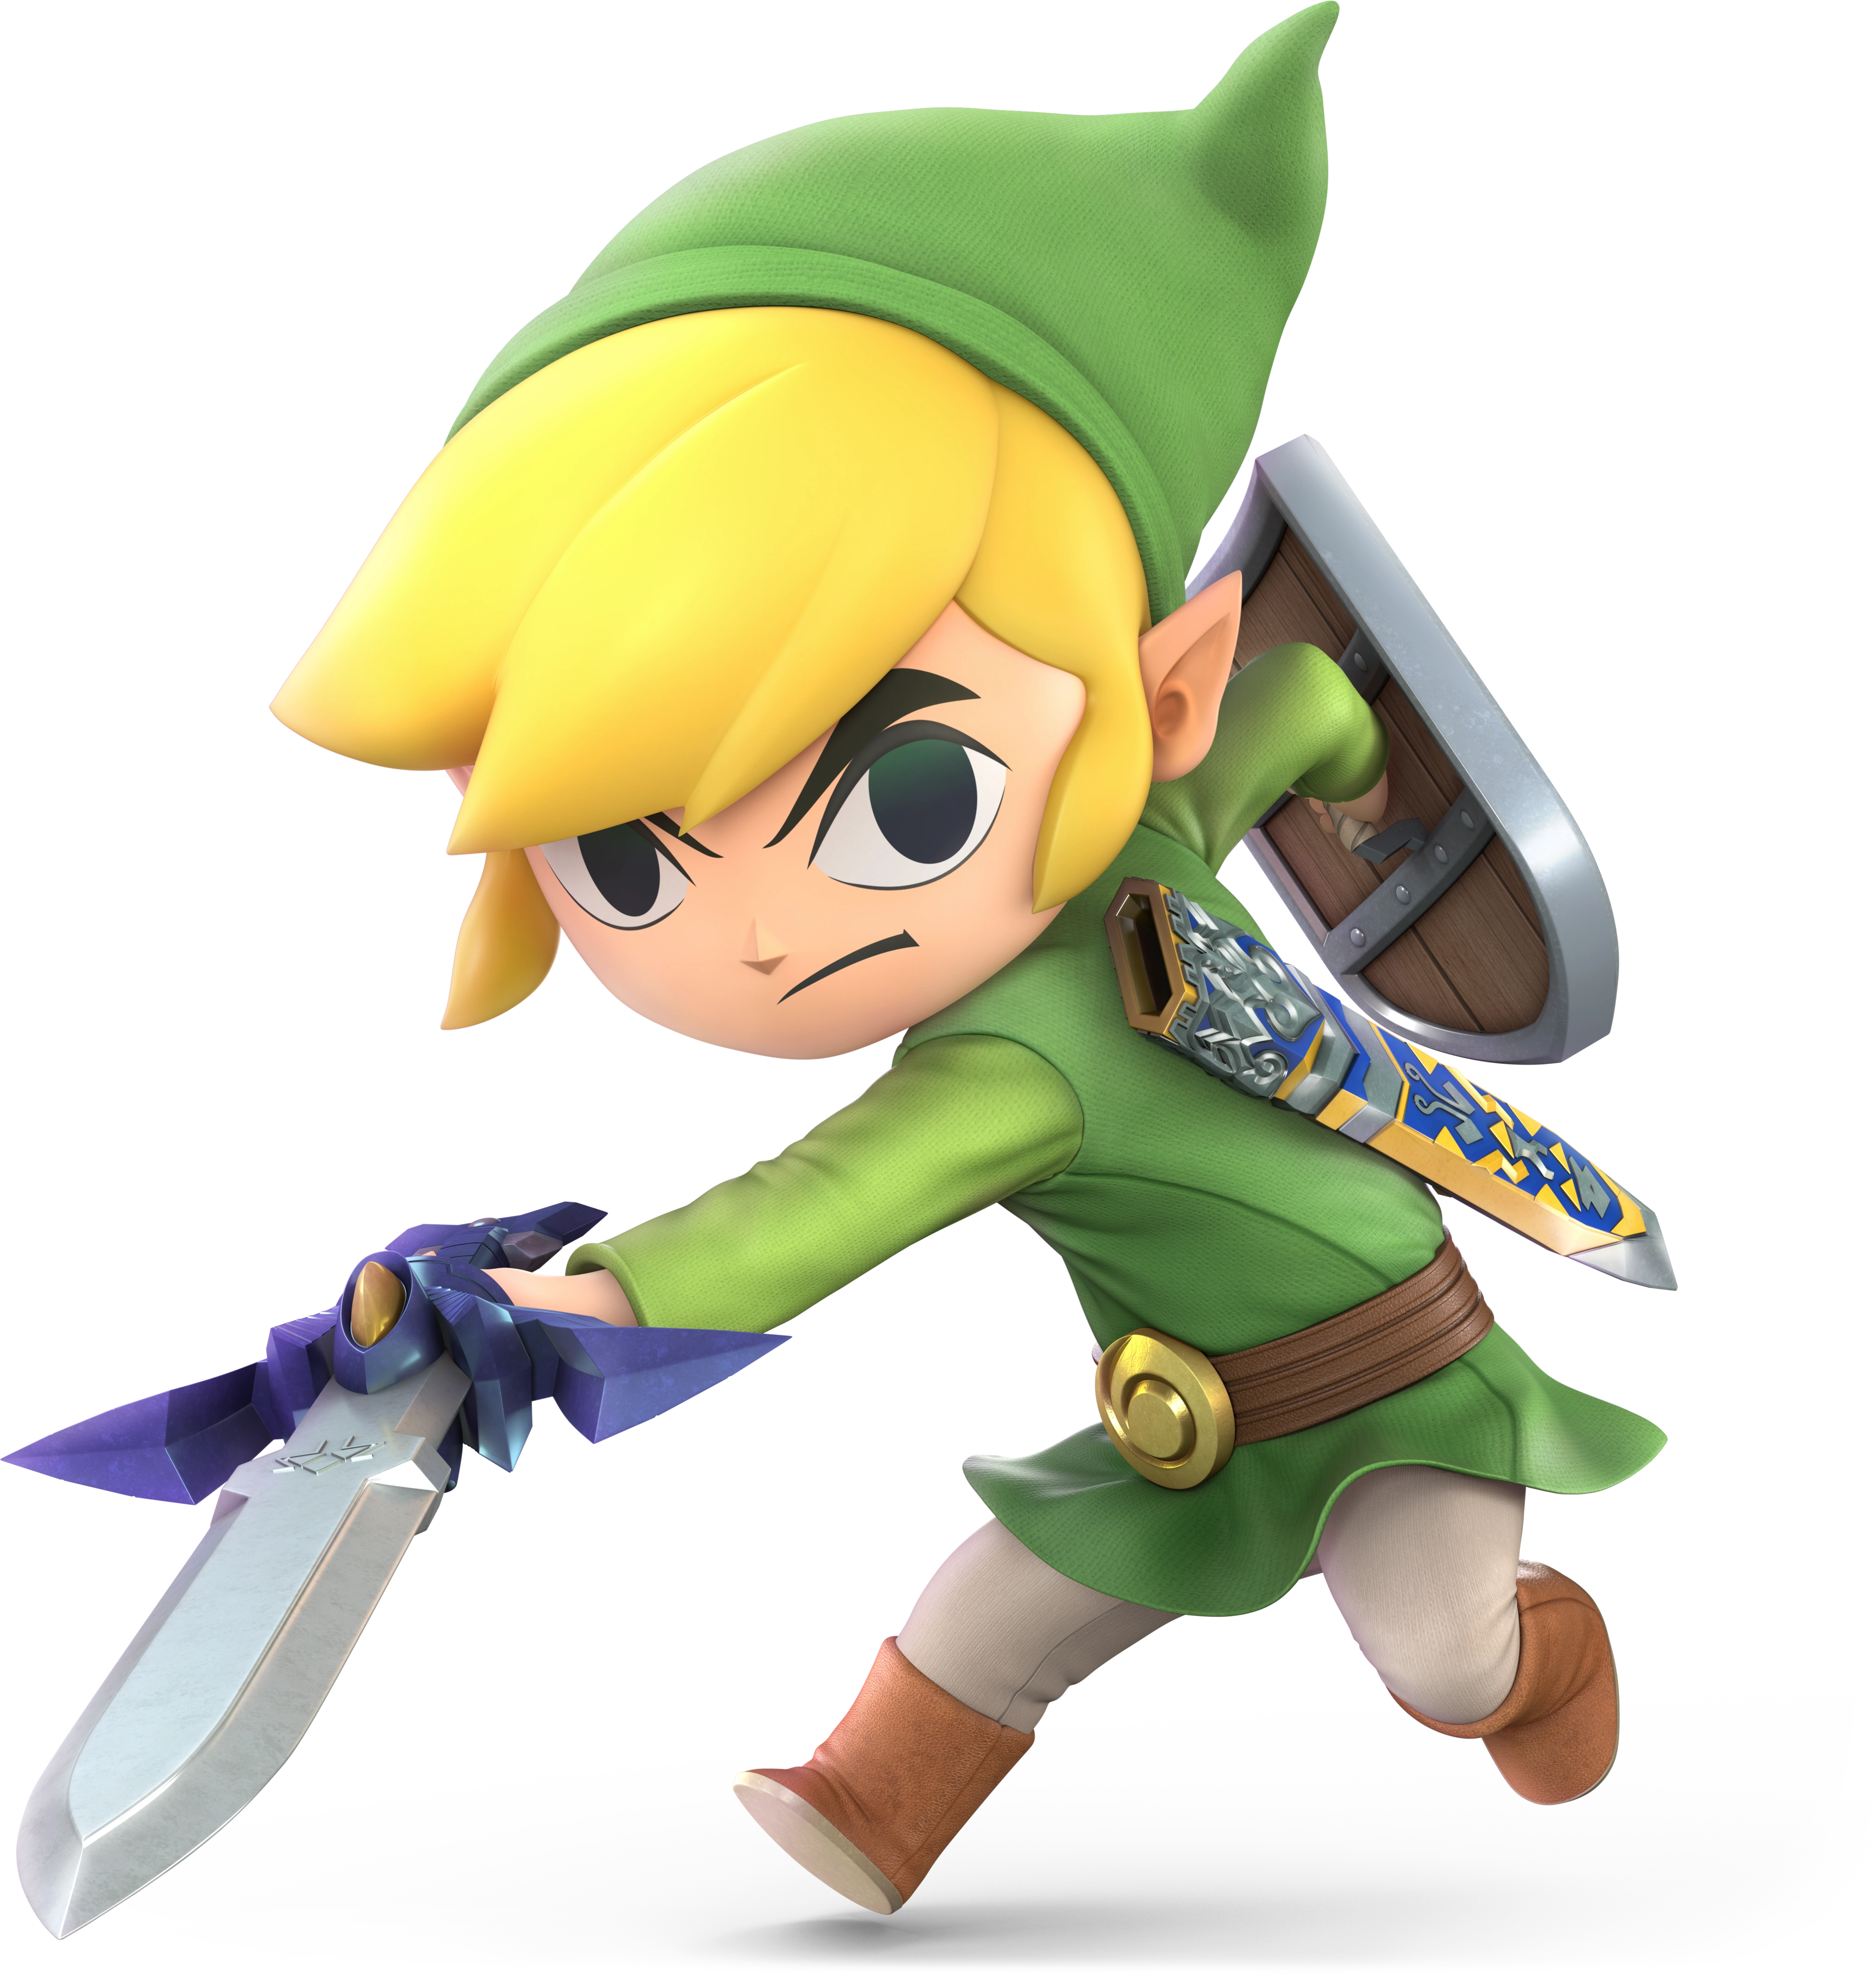
Name: Toon Link Debut: The Legend of Zelda: The Wind Waker (2003) The Hero of Winds is an incarnation of Link with a rather distinct appearance, notable for his stature and cat-like eyes. Toon Link is the last of the Links that still plays somewhat similarly to the original incarnation, utilizing items from The Wind Waker in his moveset. His Final Smash is completely different, however. |
Neutral Special: Hero's Bow. Toon Link pulls out his bow and fires a single arrow, traveling at a fast pace until it collides with something. Side Special: Boomerang. Toon Link throws a classic boomerang across the stage. The weapon travels upwards upon it's return. Up Special: Spin Attack. Toon Link, holding the Master Sword outwards, spins around in the air, ending with a sword thrust upwards before descending. Down Special: Bomb. Toon Link plucks a bomb out of thin air and chucks it in front of him, exploding once it hits the ground into a cloud of smoke. Final Smash: The Great Sea. Toon Link hops aboard the King of Red Lions on stormy waters and is dragged towards a whirlpool along with the other fighters caught in the attack. Just then, a Big Octo sprouts out from it and delivers a strike with it's tentacle, pulverizing all who it touches. | |
| |
|
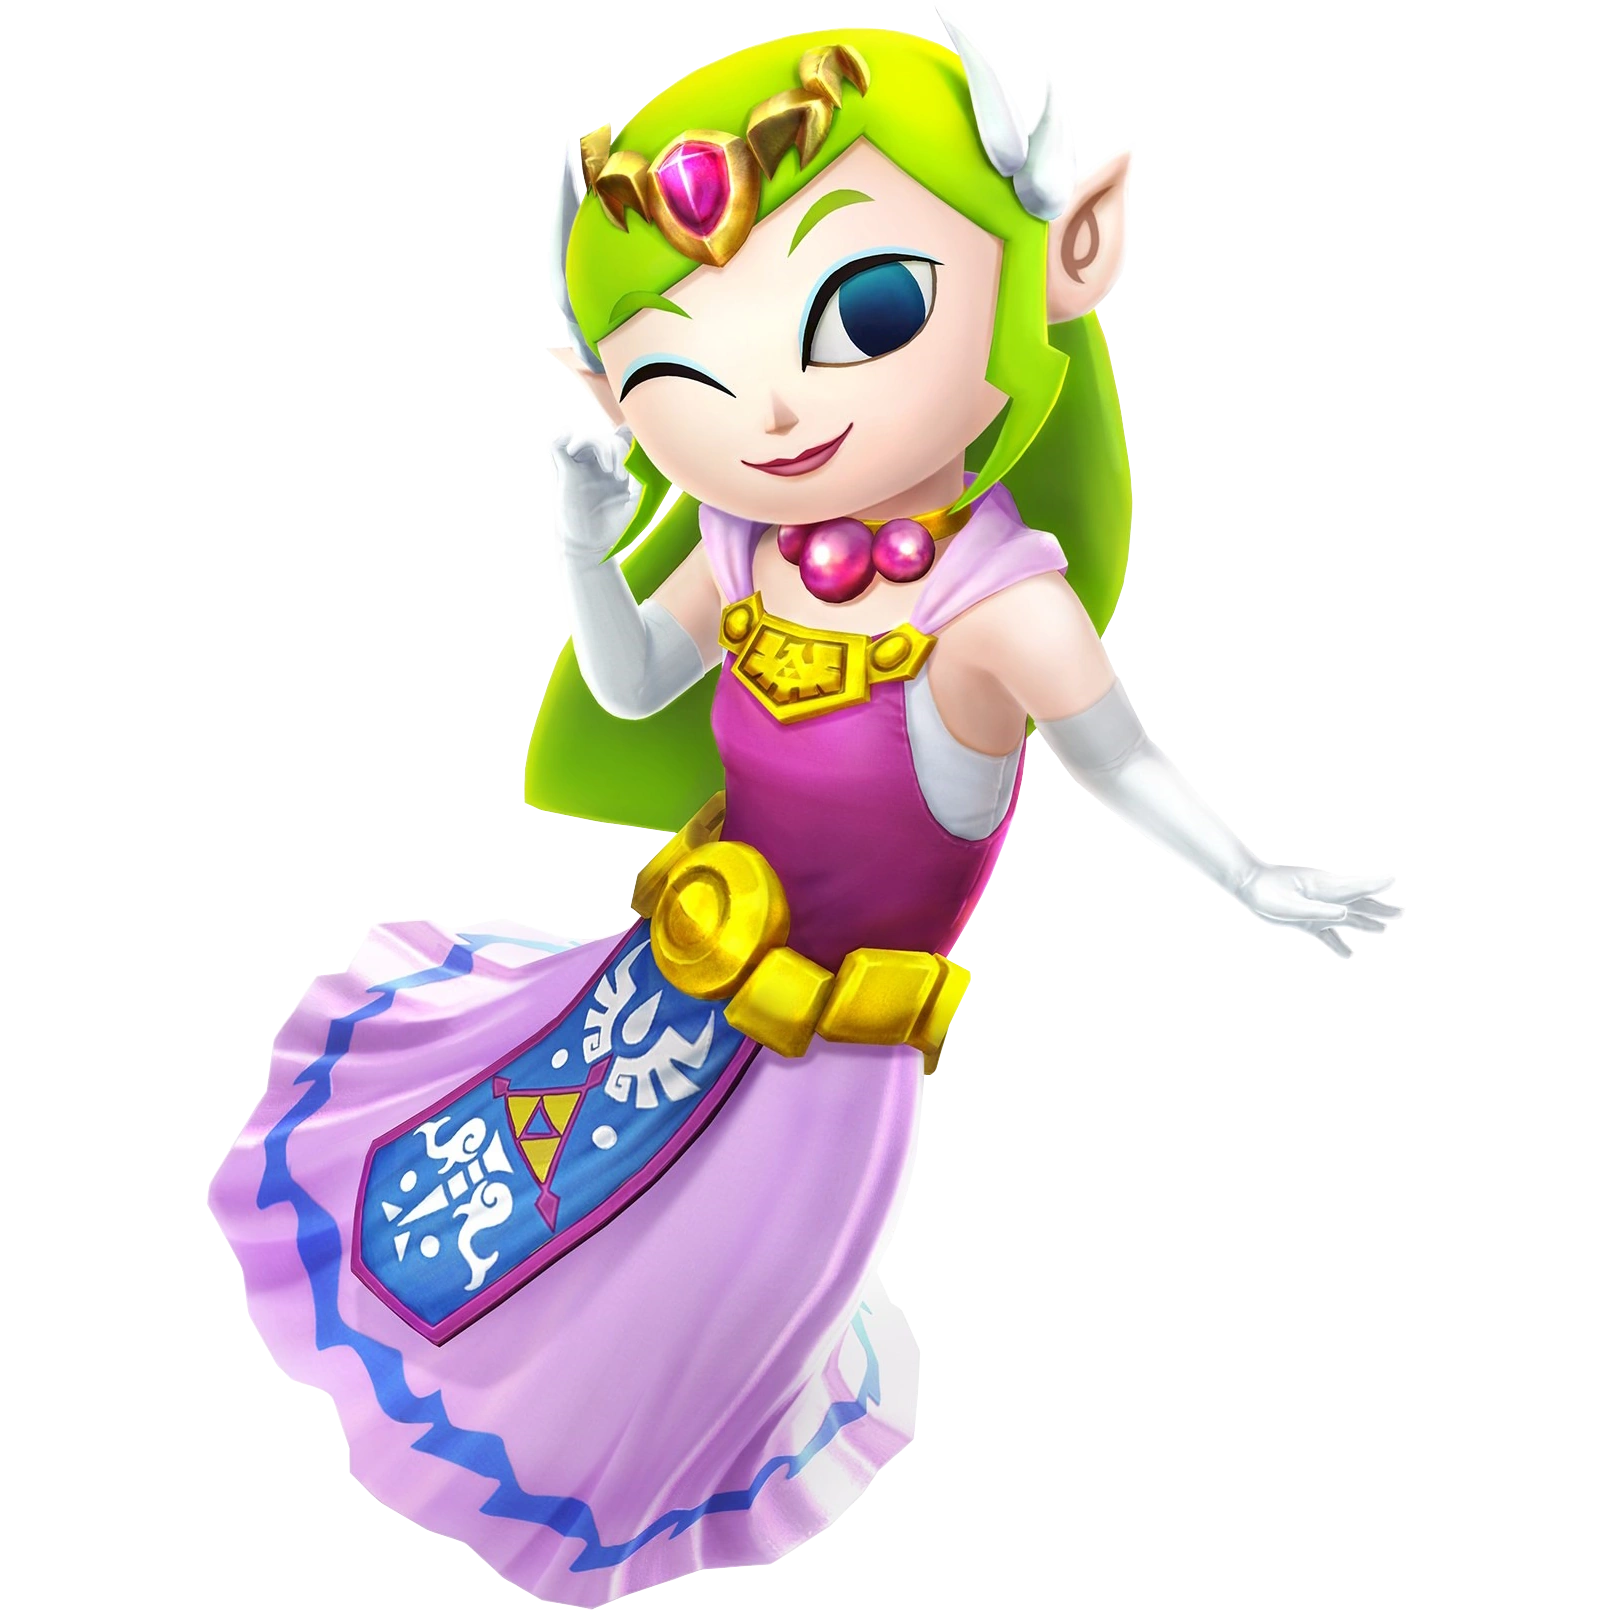
Name: Toon Zelda Debut: The Legend of Zelda: Wind Waker (2003) Toon Zelda is the cartoonish version of Hyrule's beloved princess. Since the regular Zelda uses an entirely different moveset from her past self, Toon Zelda takes the old moveset and uses it, using Din's Fire, Nayru's Love, and Farore's Wind just like the old Zelda. Some of these moves are swapped around; for example, Phantom Slash is now her side special. |
Neutral Special: Din’s Fire. Toon Zelda launches a ball of fire that goes off in the direction she was facing, detonating near fighters. Side Special: Phantom Slash. Toon Zelda charges up an attack that summons a phantom to do one quick swipe across the stage, damaging foes. Up Special: Farore’s Wind. Toon Zelda warps to another point on the stage not far from where she once was, trying to land on the stage. Down Special: Nayru’s Love. Toon Zelda spins around, a crystal-like shield surrounding her and knocking opponents backwards. Final Smash: Triforce of Wisdom. Toon Zelda performs a move where opponents get trapped in a large Triforce symbol that shrinks with the fighters in it, the attack ending with all fighters being launched high-up into the air. | |
| |

|
Name: Tetra Debut: The Legend of Zelda: Wind Waker (2003) Tetra is Toon Zelda's pirate alter ego, complete with a different flair, personality, and fighting style. Tetra is more up-close than her princess form, utilizing weapons and motifs from The Wind Waker to get the job done while pummeling opponents with items like the Swift Sail, the Iron Boots, and even her very own Final Smash. |
Neutral Special: Pistol Fire. Tetra fires an attack out of her flintlock pistol, hitting anyone in her general vicinity. Side Special: Cutlass Clash. Tetra charges up a slash with her cutlass and unleashes a series of slashes and strikes on a foe within close range. Up Special: Swift Sail. Tetra pulls out the Swift Sail and floats upward before gently floating down or falling fast depending on if she let go. Down Special: Iron Boot Stop. Tetra slips on the Iron Boot and spikes downwards, landing with a thud on the ground or massively damaging a fighter. Final Smash: Cannonball Barrage. Tetra's pirate ship appears in the background and launches cannonballs at all other fighters on the stage, damaging any fighter massively and acting as hazards if they just hit the stage. | |
| |

|
Name: Phantom Ganon Debut: The Legend of Zelda: Ocarina of Time (1998) An illusion created by the Great King of Evil to duel with the Hero of Time, Phantom Ganon is a pure manifestation of evil. Since Ganondorf got himself a new moveset, Phantom Ganon keeps most of it intact barring his up special and Final Smash, both utilizing elements from Ocarina of Time. If you aren't careful, Phantom Ganon is a slow yet hard-hitting threat. |
Neutral Special: Phantom Punch. Phantom Ganon charges up a devastatingly powerful punch using dark magic, sending his target flying if the attack lands. Side Special: Flame Choke. Phantom Ganon rushes towards their target and picks them up by the neck, dropping them once he's done with them. Up Special: Dead Man's Volley. Phantom Ganon launches a ball of energy under him, propelling him higher than Ganondorf's old up special. Down Special: Phantom's Foot. Phantom Ganon, in the air, delivers a brutal kick aiming straight for the ground below him, dealing damage if it touches a foe. Final Smash: Painting Panic. Phantom Ganon hops on his stead and runs into multiple paintings, ramming straight into the fighters caught in the attack before leaping off of the horse and delivering a single punch to them, finishing the attack in style. | |
| |
|
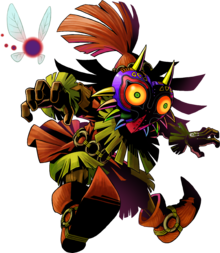
Name: Skull Kid Debut: The Legend of Zelda: Majora’s Mask (2001) A normal Skull Kid overtaken by the influence of Majora’s Mask, it seems that the mask does most of the fighting by using the child as his puppet. Skull Kid excels at movement, being able to zip around the stage and in the air with relative ease. This, along with his overall moveset, makes him quite the tricky character to utilize, with all of his specials depending on timing to get the best results. |
Neutral Special: Tag Team Fairy Frenzy. Skull Kid calls upon Tatl and Tael, his two fairy friends from Majora’s Mask. Upon being summoned, the fairies move forwards in a straight line and latch onto any foes in their path. If no one is there, they simply disappear, but if they catch someone, they catch them in place and allow Skull Kid to move in and dish out free attacks. This attack is easy to wiggle out of at lower percents. Side Special: Majora’s Curse. Skull Kid points at the ground as a bolt of dark energy seeps into the ground. Skull Kid is now able to move this bolt, now a “puddle” of sorts, along the ground in one direction. He’s able to leave the puddle there and keep fighting, acting similarly to Snake’s C4’s. Upon activation, a burst of dark magic explodes from underneath a foe, doing no status effects but doing considerable damage. Up Special: Playtime. Skull Kid lets out a maniacal laugh as he spins around, disappearing into thin air as purple smoke appears where he once was. Upon disappearing, Skull Kid is able to be rotated by 360 degrees around in a circle, jetting off like a rocket towards his selected destination. The attack does damage, but only on the first few frames where Skull Kid launches himself forwards. Down Special: Puppet. Skull Kid whips out a horn and blows into it, summoning two large wooden puppets in front of him. While looking similar to Toon Zelda’s Phantom, the puppets function like a homing missile and actively seek out the closest opponent. The puppets only appears for a few three seconds, but if it reaches its target, both ram into the foe and shatter upon impact. Final Smash: Reincarnation of Wrath. Skull Kid falls to the ground lifeless as Majora’s Mask tries to aim for a target. If the mask collides with a fighter, they’re then taken to a mysterious realm within the moon where Majora goes through all three phases of its boss fight, sprouting tentacles and lashing at his target before becoming Majora’s Incarnation and physically assaulting them while spinning. Finally, a series of whip strikes from Majora’s Wrath ends the attack, sending the puppet flying. | |
| |

|
Name: Maz Koshia Debut: The Legend of Zelda: Breath of the Wild (2017) One of the many monks whose corpse was mummified in a state of prayer, Maz Koshia has leapt back to life and entered the world of Smash. Maz Koshia fights with ancient Sheikah tactics, summoning clones of himself, electric arrows, and spiked balls that can lead to unique combo setups and let Koshia do plenty of damage with weaker smash attacks. Koshia is agile, fast, and if used right, extremely hard-hitting. |
Neutral Special: Clone’s Strike. Maz Koshia summons an identical copy of himself that dies in one hit, but essentially acts as the Nana to Koshia’s Popo. The twin is weaker, but can open up plenty of unique setups with the use of the clone. The clone, if B is pressed once more, can run across the stage and try to hit a target once with a Guardian Sword+, but at the cost of immediately disappearing even if it misses. Side Special: Spike Ball. Maz Koshia puts his hands together and summons a large Sheikah-branded spiked ball that lingers behind him the air. By using side B again, Maz Koshia launches the ball in whatever direction and angle he happens to be facing. The ball moves slower the longer its activate, but can easily lead into devastating K.O.’s if the ball makes contact with anyone at high percentages. Up Special: Electric Leap. Maz Koshia does a backflip and leaps into the air, spinning around if the B button isn’t pressed. If the button is pressed, Maz Koshia stops in midair and pulls out a bow, firing an electric arrow straight in front of him that damages and stuns whoever it fits. Without the button press, Koshia lands safely and completes the arc, but with the button press, he falls from the air after he fires the arrow. Down Special: Sheikah’s Warp. Maz Koshia prepares to defend himself from an attack, pulling out the Guardian Sword+ as a symbol made from red energy appears from behind him. Upon being struck, Maz Koshia disappears and reappears above an opponent in a few frames, diving the sword into their head and launching away as he lands safely, putting the sword away. Final Smash: Goddesses’ Blessing. Maz Koshia floats in the air as he grows in size, flying to the far ends of the background as he stares into the screen. A reticle in the shape of a Sheikah symbol appears in the middle of the screen that the player can move around and aim at anywhere. After the B button is pressed, Maz Koshia fires a large laser beam out of his eye and covers a portion of the stage in it, damaging anyone who touches the attack. | |
| |

|
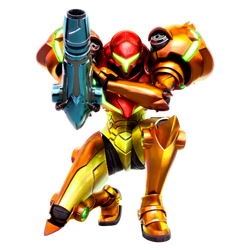
Name: Samus Debut: Metroid (1986) Even the most primal of Metroids are no match for the intergalactic bounty hunter, Samus Aran. Based on her bulkier Samus Returns design, Samus is a long-ranged fighter, using projectiles and other explosives to get the job done. Combine this with her mobility and new neutral special, and you have yourself a deadly fighter that can tackle foes in the air and ground level. |
Neutral Special: Beam Burst. Samus uses the Beam Burst from Metroid: Samus Returns, replacing the Charge Shot from previous Smash games. Samus fires a series of energy beams from her cannon, able to hit an opponent multiple times until the attack ends. Side Special: Super Missile. Samus fires a slow yet hard-hitting missile out of her cannon arm, the missile moving in the opposite direction. The missile doesn't stop until it malfunctions or it hits an opponent. Up Special: Screw Attack. Samus curls up into a ball and jumps with the effects of the Screw Attack surrounding her. The attack is somewhat multi-hit if Samus touches an enemy, slightly stunning them in the air. Down Special: Morph Ball. Samus curls up into her Morph Ball form and drop bombs when doing so. These bombs, if not hit by an enemy, can be remotely detonated, allowing for Samus to jump around in the air in her Morph Ball form. Final Smash: Zero Laser. Samus positions herself and fires her Zero Laser, taking over most of the stage with a powerful damage dealing blast of energy. The power of the attack can be so strong that it shatters Samus's helmet, revealing her real face for a time before the helmet regenerates. | |
| |
|
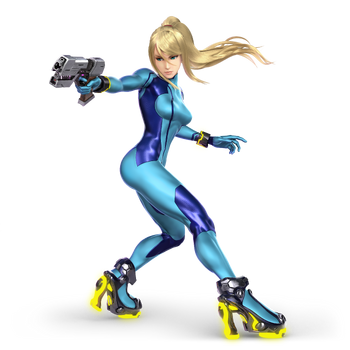
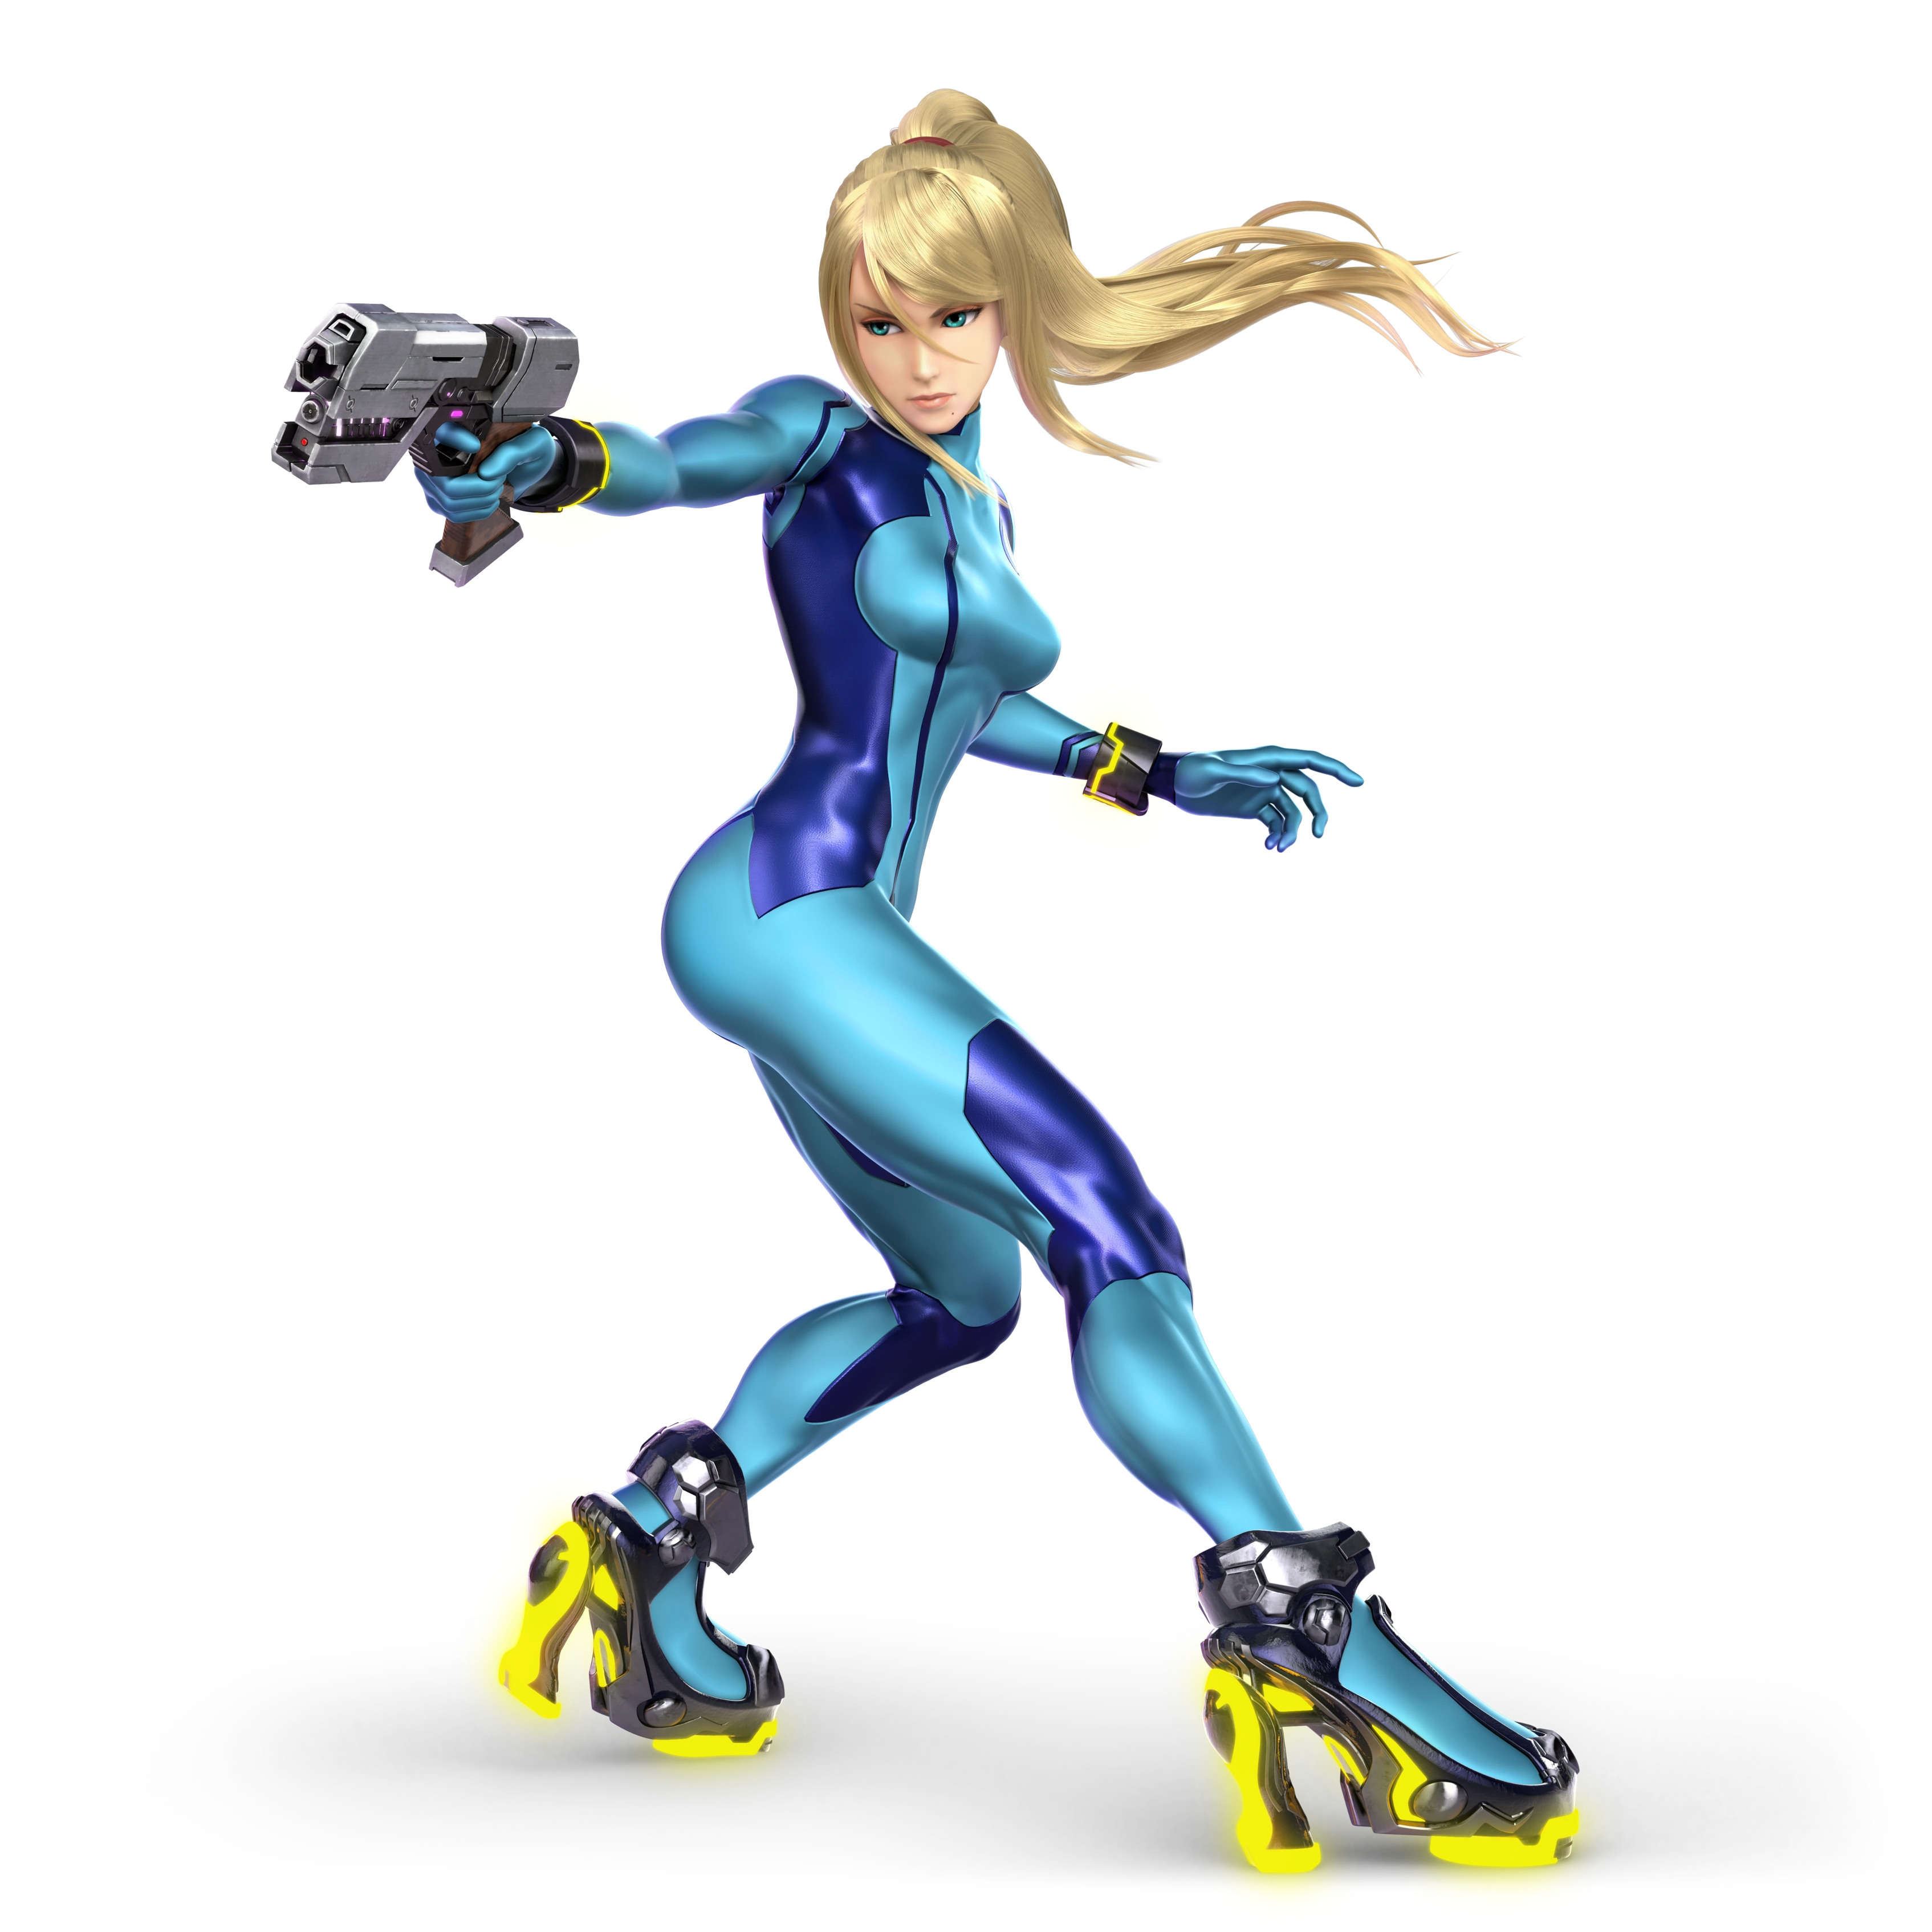
Name: Zero Suit Samus Debut: Metroid: Zero Mission (2004) Zero Suit Samus is Samus Aran without her powerful armor suit to protect her, forcing her to get more physical and acrobatic. She's extremely athletic and fast, jumping between opponents and using both close and long ranged attacks to get the job done. These come from her high heels, physical attacks, and a laser whip/pistol hybrid. |
Neutral Special: Paralyzer. Zero Suit Samus can use her laser pistol to fire off paralyzing beams of electricity at other fighters. Each blast lightly stuns anyone they touch, sending them backwards slightly. Side Special: Plasma Whip. Zero Suit Samus, wielding her pistol, brings out a whip-like formation made of plasma, lashing it at opponents from a distance. If the attack lands, it's able to be following up by a few extra lashes. Up Special: Boost Kick. Zero Suit Samus kicks up in the air. If she touches her foes, they're locked into a second attack from her jet heels, sending them and Zero Suit Samus higher into the air than they usually would go. Down Special: Flip Jump. Zero Suit Samus jumps in an arc formation, leaping back and forth off of any wall that she touches. On the ground, she just leaps forward simply before landing on her feet again if she doesn't hit an opponent. Final Smash: Gunship. Zero Suit Samus hops onto her powerful gunship, now adorned in her Power Suit, and flies towards the stage from the background, firing a barrage of lasers at the stage before crashing the ship into it with full force. | |
| |
|
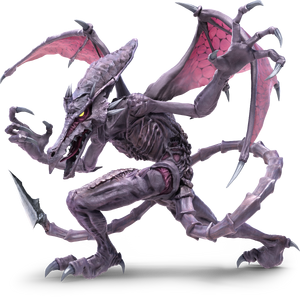
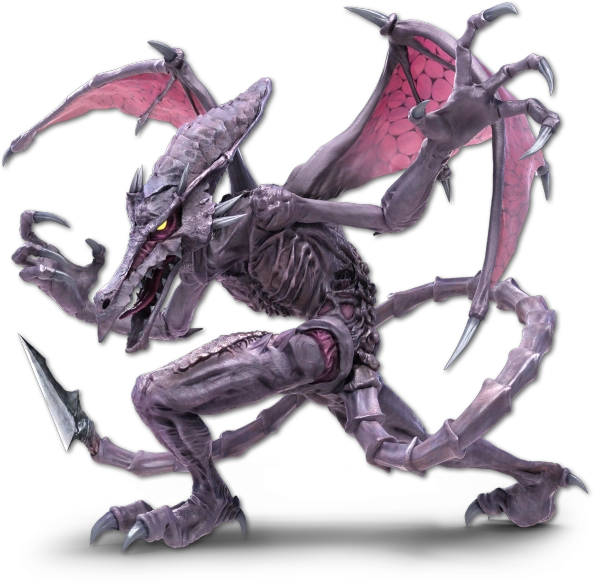
Name: Ridley Debut: Metroid (1986) The murderous, ferocious, and cunning space pirate himself, Ridley isn't leaving the fray any time soon. Ridley is a middleweight fighter that has good control the ground, utilizing his large frame to scare opponents. His size makes him a big target, but his brutal nature and fierce attacks from his tail and wings especially make up for any drawbacks he has. He gains a new up special in the transition from Ultimate to Swansong as well. |
Neutral Special: Plasma Breath. Ridley breaths out a singular ball of plasma out at an opponent. If charged, the ball turns into a stream of plasma, shooting out onto the stage. Side Special: Space Pirate Rush. Ridley grabs and opponent and drags them to the opposite side of the stage. Tilting the control stick will result in Ridley throwing the opponent at the end of the attack. Up Special: Pirate's Flight. Ridley darts diagonally in the air, jetting forwards. If he makes contact with an opponent, he immediately slams down on the ground, taking them with him. Down Special: Skewer. Ridley crouches down and charges up an attack from his tail. If timed right, the tail can do 50% damage on a foe and put them in a dangerous position. Final Smash: Plasma Scream. Ridley throws an opponent onto a spaceship, flying through the depths of space before blowing it up in a furious rage via a blast of plasma from his mouth. blowing it and it's target to smithereens. The ship changes depending on the character, ranging from Samus's ship to Thanos's Sanctuary 2. | |
| |
|
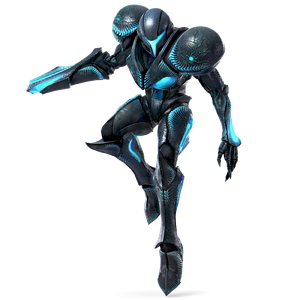
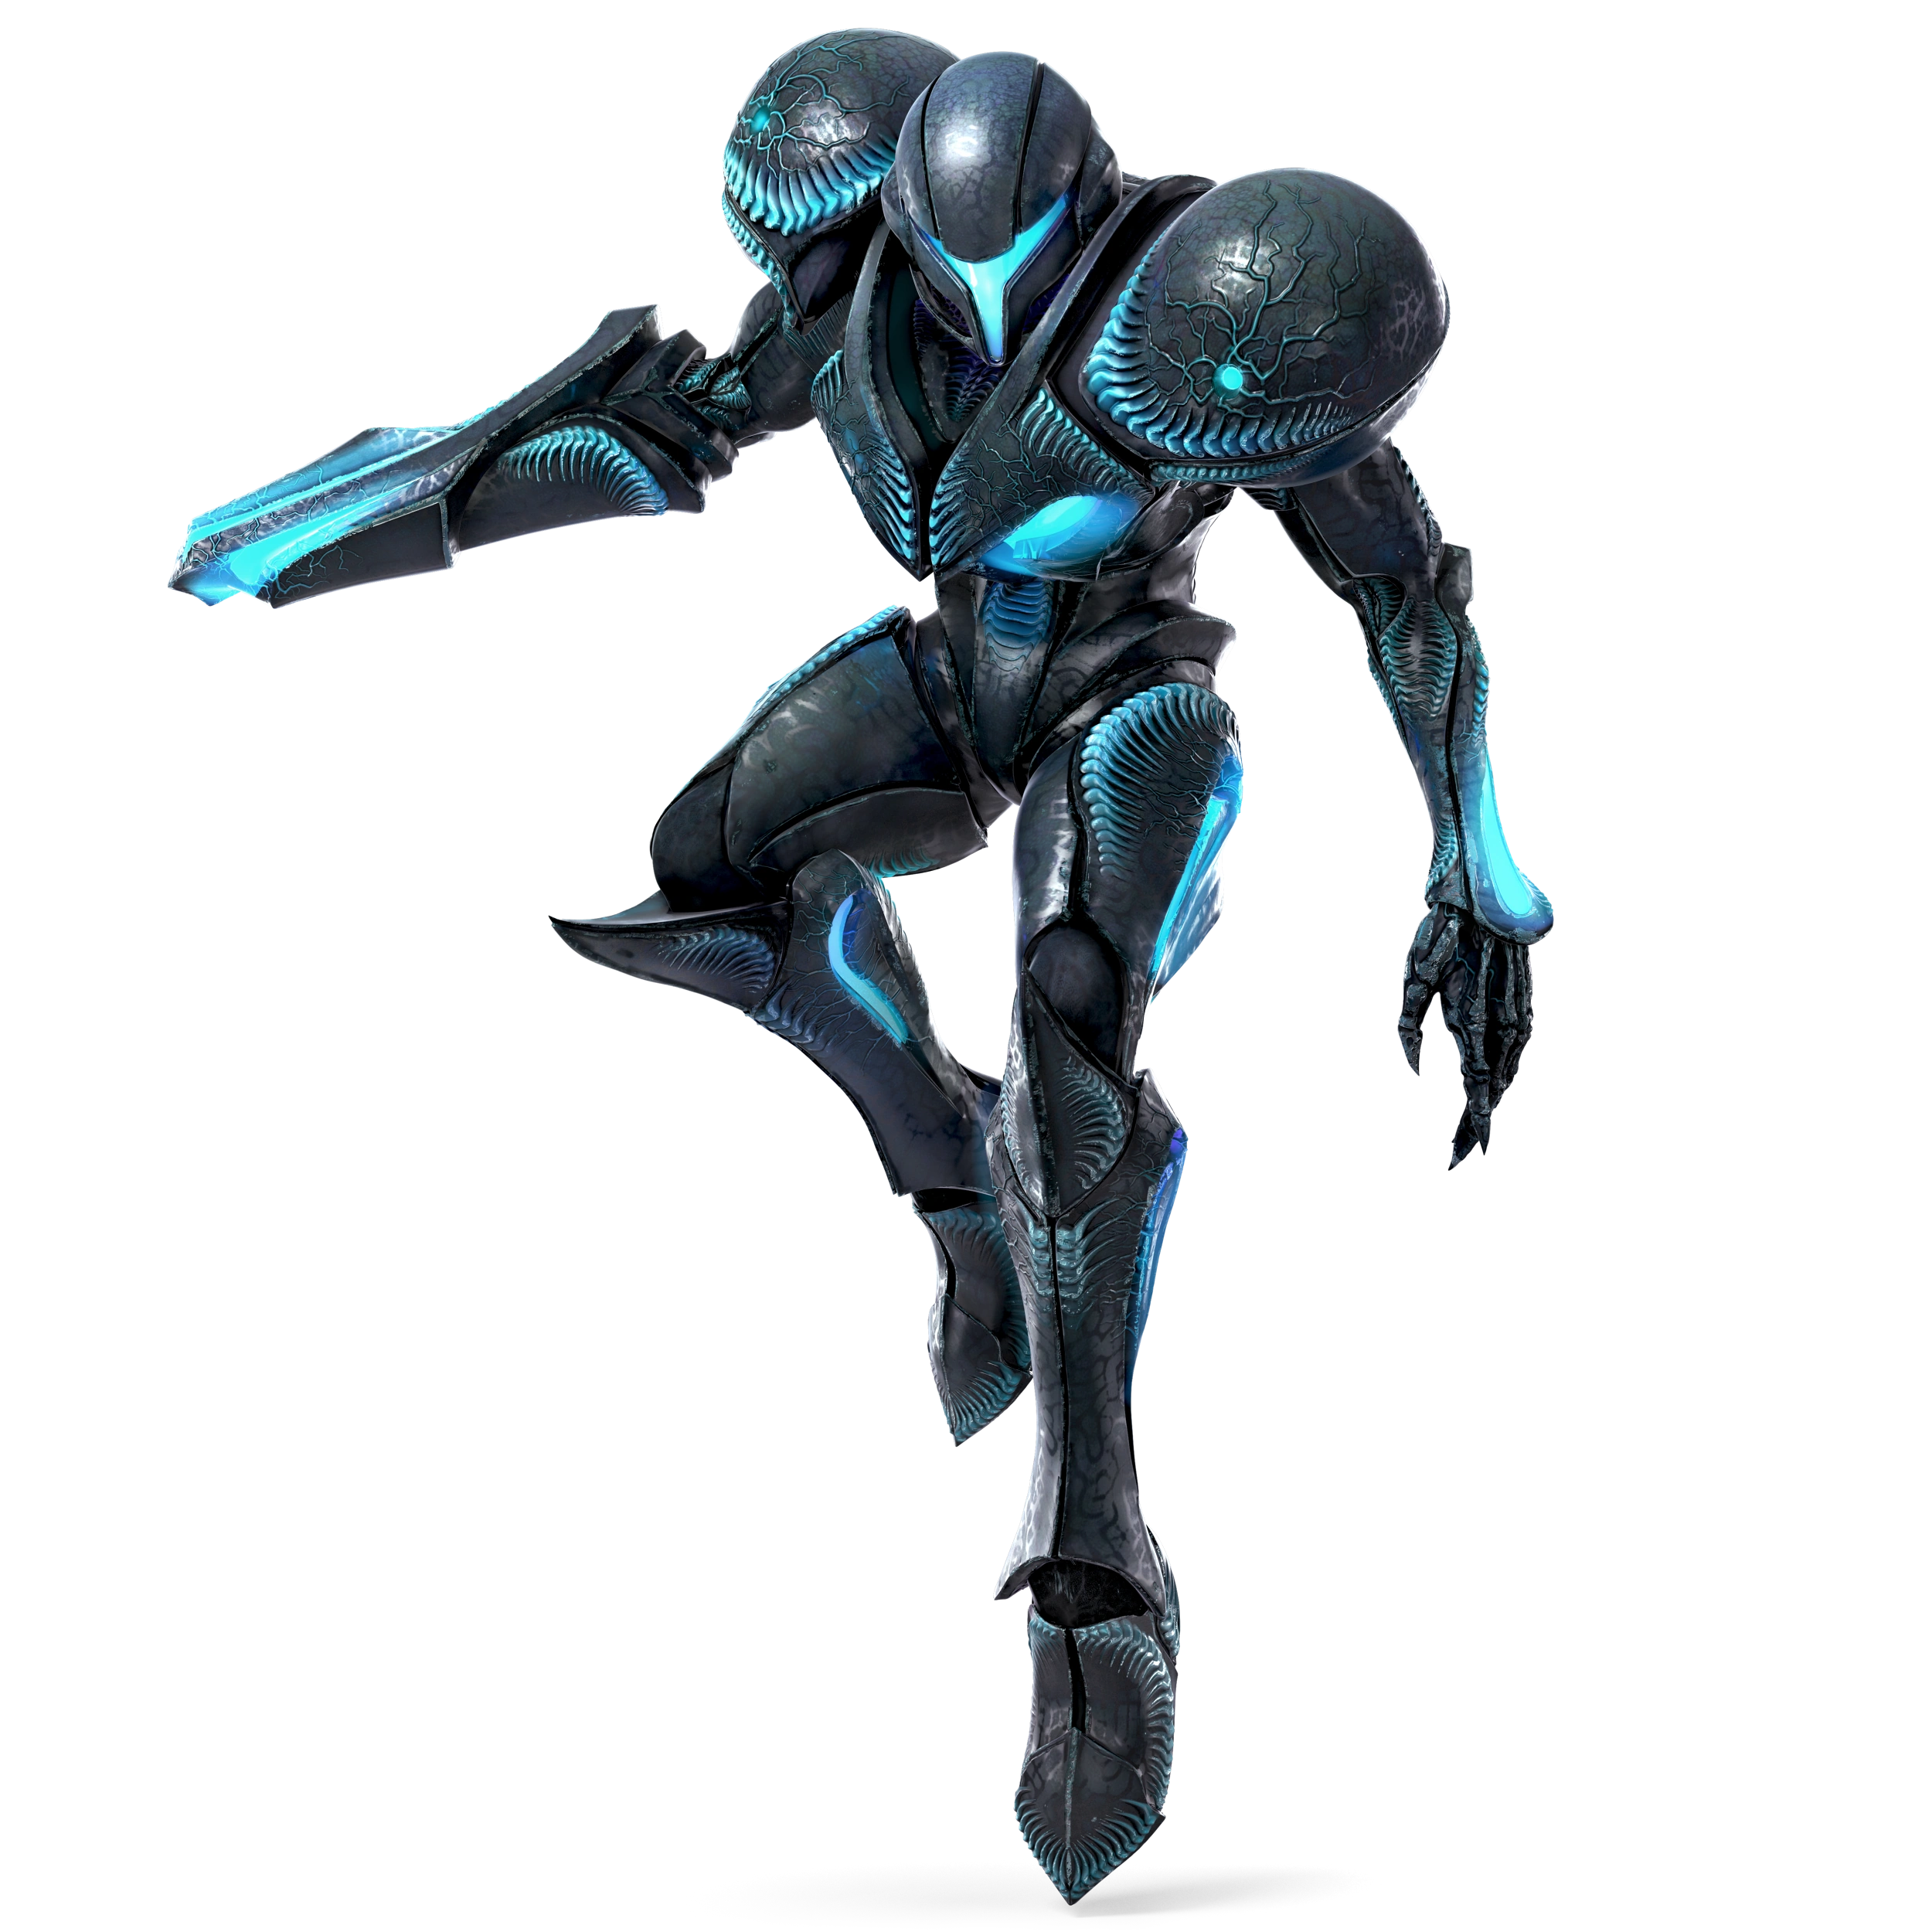
Name: Dark Samus Debut: Metroid Prime 2: Echoes (2004) Formerly an Echo Fighter of Samus, Dark Samus has evolved into her own character. Utilizing the sinister substance known as Phazon, she still floats and stares down her potential opponents, but her overall moveset couldn't be any more different compared to her light counterpart. She even turns into Metroid Prime for her Final Smash. |
Neutral Special: Phazon Blast. Dark Samus shoots a single blast of Phazon energy that travels like a shot from Samus's arm cannon. Side Special: Corrupted Echo. Dark Samus splits herself in two, delivering two powerful Phazon blasts in a single direction, one coming from each copy. Up Special: Phazon Lift. Phazon blasts out of Dark Samus's feet, jetting her upwards at a blazing fast speed with a crazy fast descent. Down Special: Phazon Spires. Dark Samus slams her fist on the ground, causing multiple spires of Phazon to rise up around her like a shield. Final Smash: Metroid Prime. Dark Samus turns into her original Metroid Prime form and proceeds to wreck havoc across the stage, firing out blasts of Phazon energy at other fighters while swaying back and forth, making her shots erratic and hard to predict. | |
| |
|
Name: Sylux Debut: Metroid Prime Hunters (2004) The enigmatic bounty hunter and undying enemy to the Federation, Sylux, has once again followed Samus, this time to the world of Smash. Sylux is a Fusion Fighter of characters like Samus, Zero Suit Samus, and even Captain Falcon, Robin and the Mii Gunner, using it’s Shock Coil and other tricks as it’s way of fighting. It has the bulk of Samus but the speed of her Zero Suit form, making it a deadly opponent. |
Neutral Special: Charge Shot. Sylux charges up a burst of energy that shoots out it’s arm cannon. While it is the same move as Samus’s neutral special, it comes out with more power behind it at the cost of some speed. Side Special: Shock Coil. Sylux fires out a short beam of energy that, once it touches an opponent, drains their health for a short time. This move is a mix between Robin’s down special and Zero Suit Samus’s side special. Up Special: Battlehammer. Sylux shoots out a burst of energy from underneath them, launching them upwards and damaging anyone beneath them in a manner similar to the Mii Gunner’s Lunar Launch move. Down Special: Lockjaw. Sylux goes into it’s Lockjaw form and zips across the stage, stunning anyone it touches before getting back up. The move is functionally the same as Captain Falcon’s Falcon Kick with stun properties. Final Smash: Delano Strike. Sylux hops on top of it’s ship, the Delano 7, and fires out blasts of energy before reenacting it’s intro from Metroid Prime Hunters, jumping from the ship and down to stage. The impact creates a small shockwave and can do good damage to any nearby foes. | |
| |
|
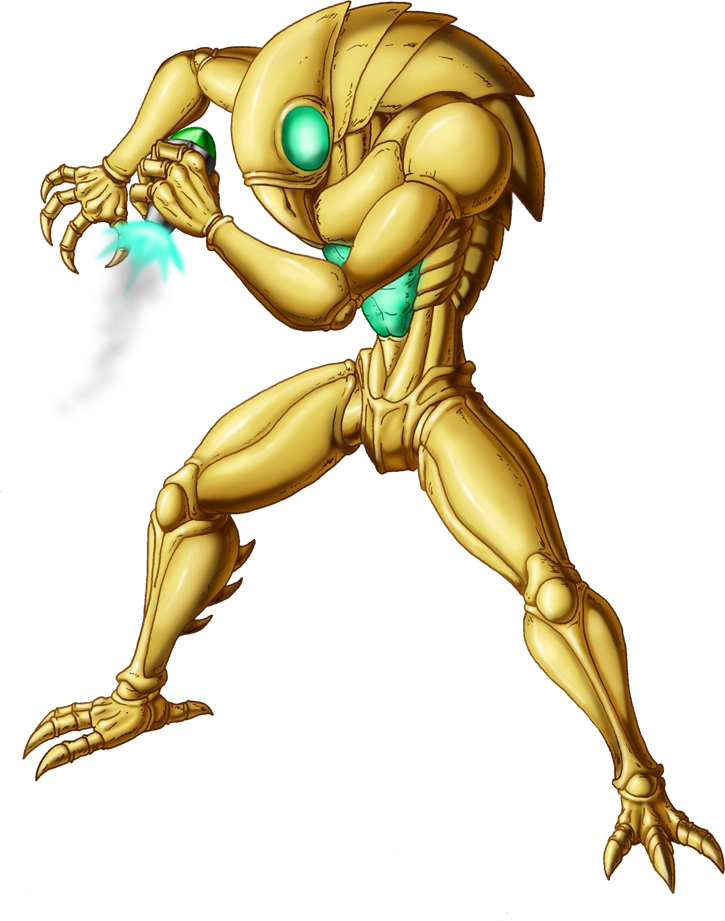
Name: Torizo Debut: Super Metroid (1994) The Torizo is a hostile Chozo Statue that has fought against Samus on multiple occasions, always holding an item before attacking. In Smash, the Torizo is a slow yet powerful adversary that specializes in slowly racking up damage on opponents for sending them flying with physical strength. The character itself uses aspects from various Chozo incarnations from across plenty of different games. |
Neutral Special: Plasma Launch. The Torizo launches three small projectiles from its mouth in the shape of bombs, the weapons landing on the ground. After that, they create small explosions that have similar properties to that of Arcfire or PK Fire, doing chip damage to foes while keeping them in place. Side Special: Ghost Orb. The Torizo imitates a Chozo Ghost, summoning a white ball of energy that it throws at whatever’s in front of it. The ball, if it hits opponents, damages them with little knockback before immediately disappearing. If it hits a wall, however, the orb ricochets off of it and goes flying, disappear if it hits another wall. Up Special: Elephant Bird. The Torizo, controlled by the X-Parasite, transforms into the strange form known as the Elephant Bird. The Elephant Bird is able to float a short distance in an arc shape, inflicting chip damage on anyone who touches it in that time. The Torizo eventually reforms back to its normal state. Down Special: Warrior’s Mirror. The Torizo pulls out a large circular piece of glass and holds it up to about chest height. The mirror is able to reflect projectiles by itself, but by pressing the B button, it instead calls upon a bolt of lightning to drop down from the sky and land in front of the Torizo, allowing you trade a defensive option for an offensive one. Final Smash: Nettori. The Torizo lets out a screech as vines wrap around any nearby opponents, tying them up and turning them into the dreaded Nettori. A cutscene now plays in which Samus runs into the beast and repeatedly fires at it and the opponent, damaging them as the vines explode into a fiery blaze and the cutscene ends. | |
| |
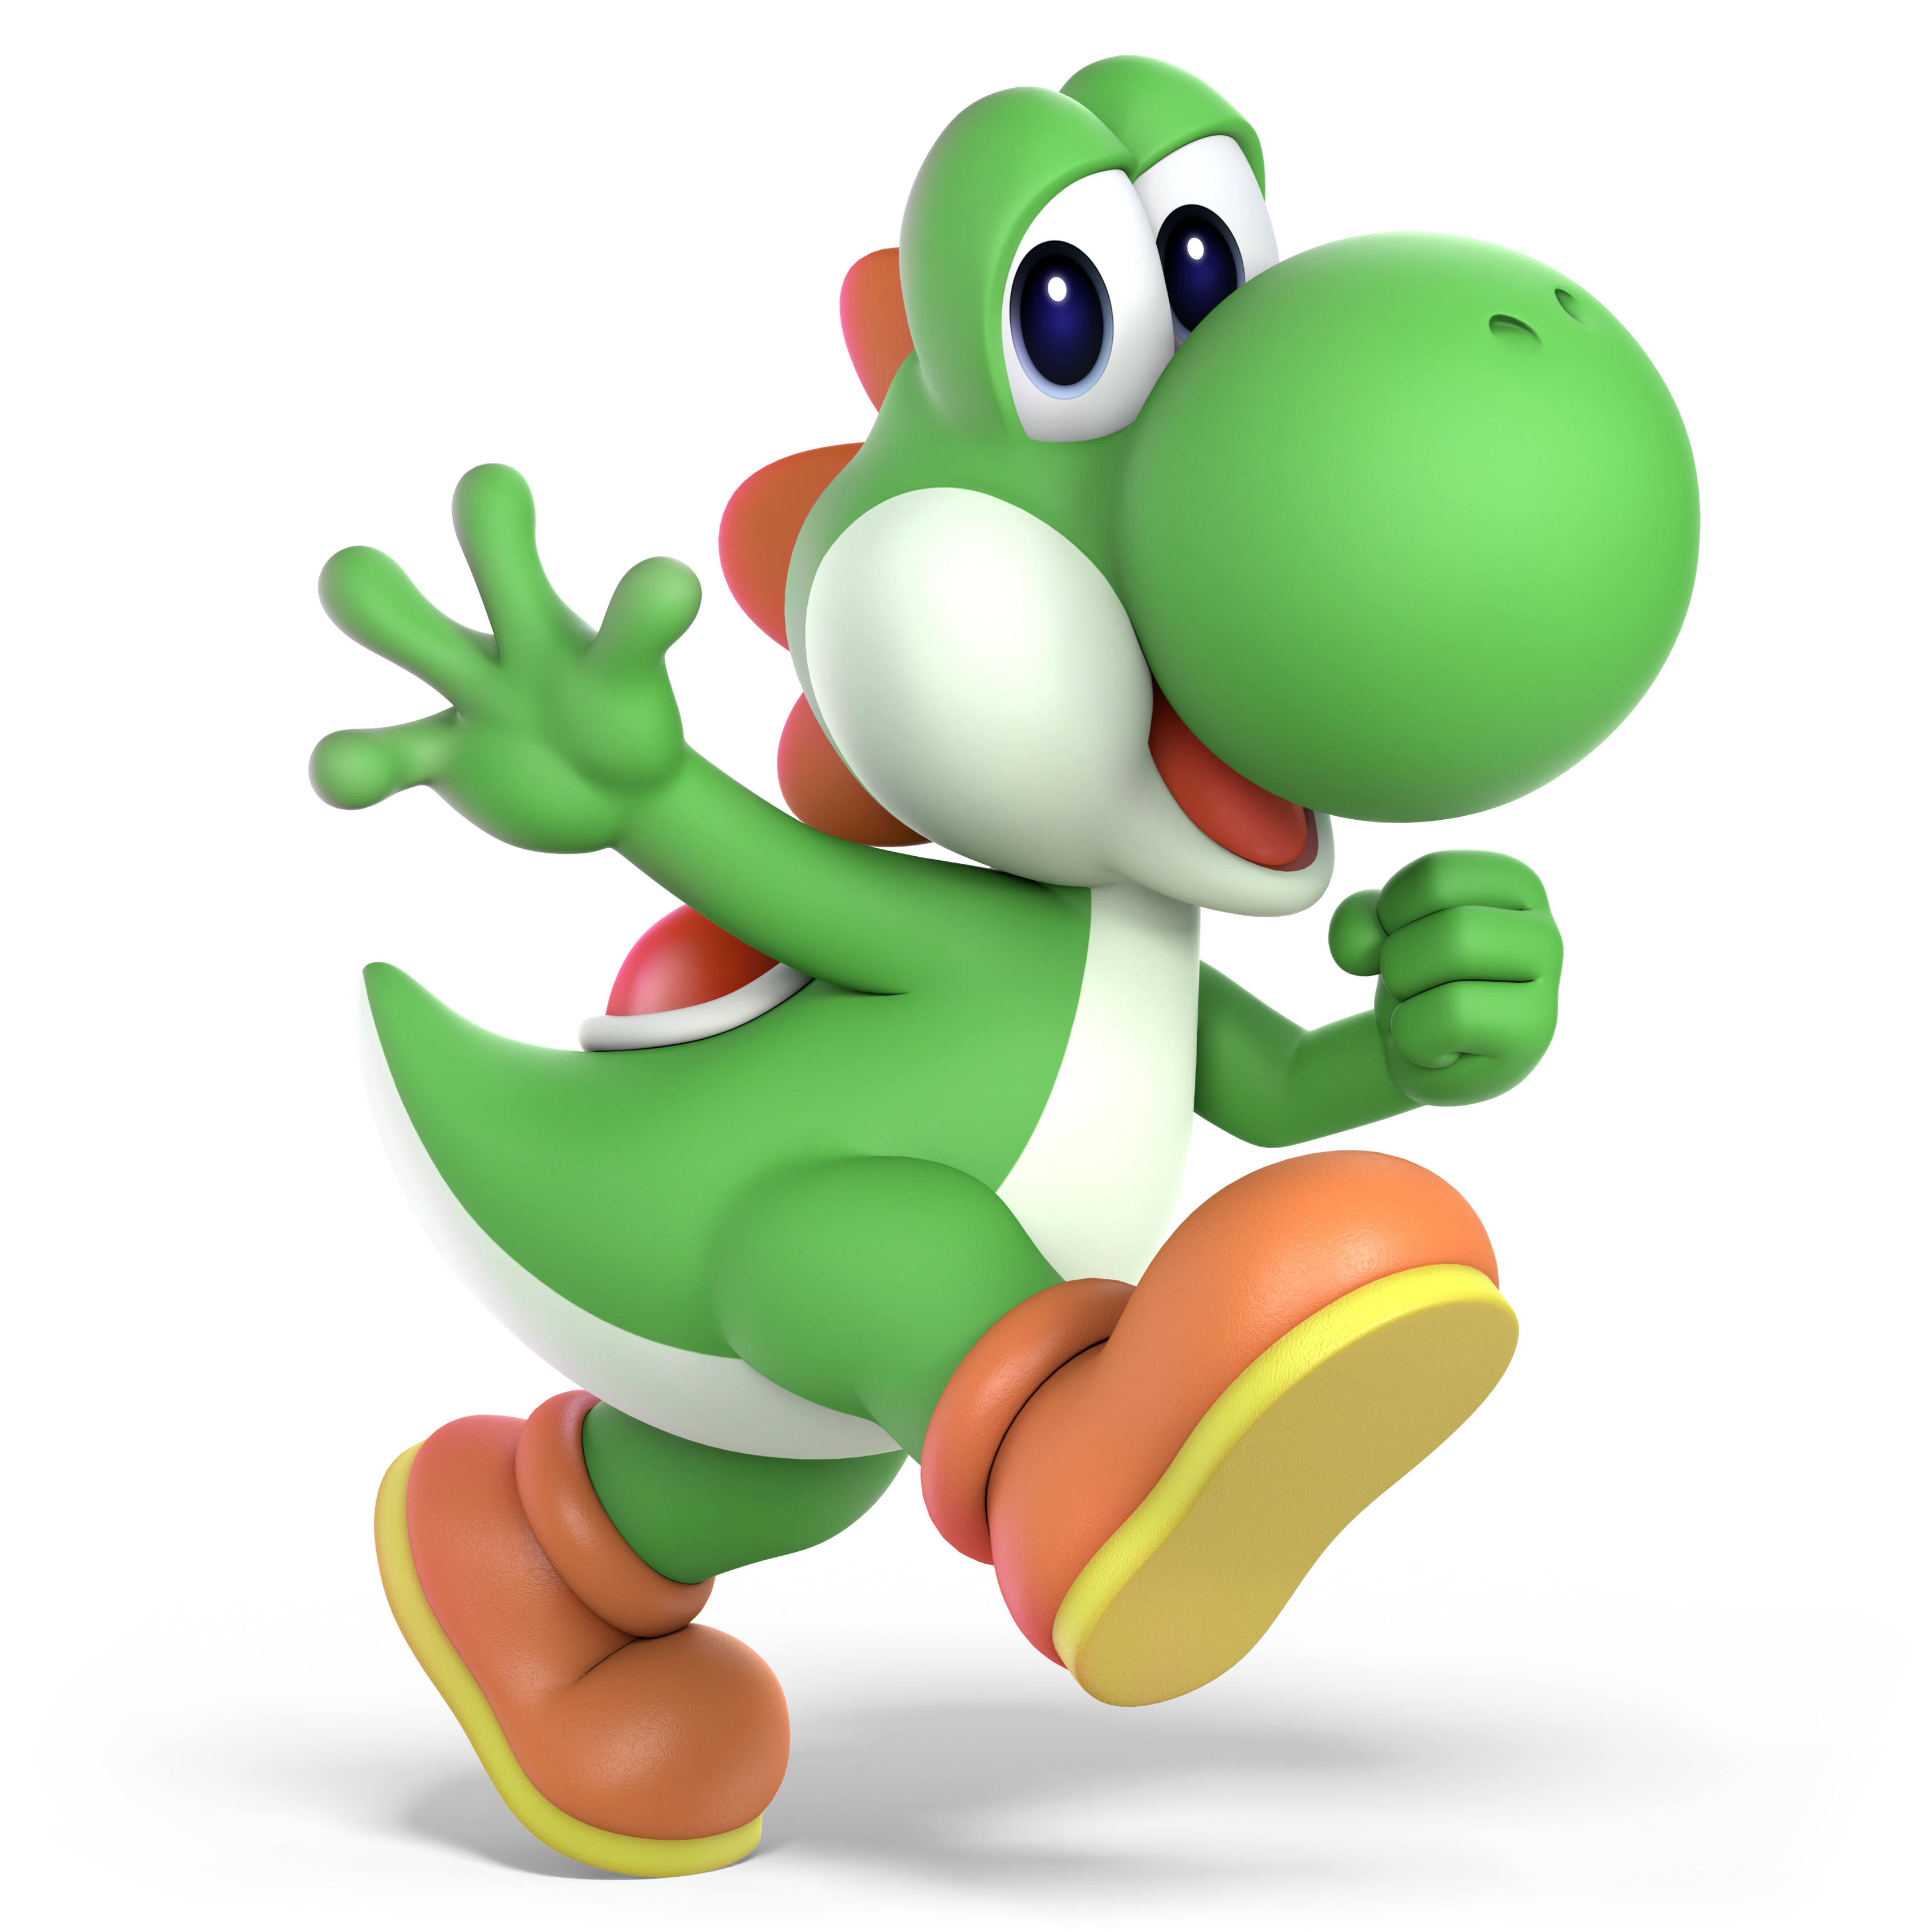
|
Name: Yoshi Debut: Super Mario World (1991) The classic green dinosaur has returned to duke it out with his friends and foes! Yoshi is a fighter that specializes in mobility in the air, notable in his flutter jump. Yoshi is also known for laying eggs, being able to them with 360 degrees of motion backing them up. |
Neutral Special: Egg Lay. Yoshi creates an egg and is able to throw it at enemies, able to do so in a straight line or an arc. Side Special: Egg Roll. Yoshi himself gets inside of an egg and rolls around, eventually stopping after a second or two. Up Special: Egg Toss. Yoshi chucks an egg upwards, moving in a small vertical arc as a way to get back to the stage easier. Down Special: Yoshi Slam. Yoshi jumps up and slams down bottom-first on the battlefield, imitating something like Mario's groundpound. Final Smash: Egg Dozer. Yoshi pulls out a giant egg and traps opponents in its path, with the egg rolling over enemies and eventually shattering once the deed is done. | |
| |
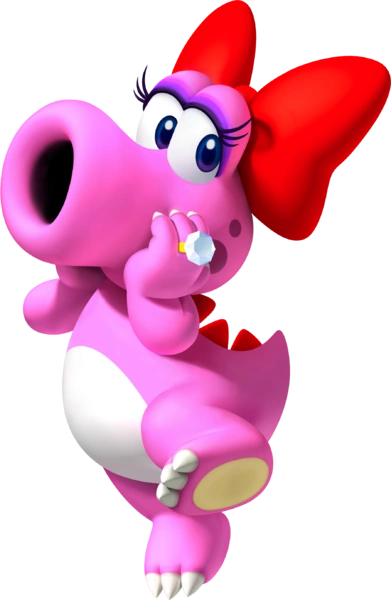
|
 Name: Birdo Debut: Super Mario Bros. 2 (1988) Introduced as an ally to Wart, Birdo has become her own separate entity and frequently teams up with Yoshi. She's his echo fighter, utilizing most of the same moves he has, with the exception of now shooting and spitting things out of her mouth akin to K.Rool's blunderbuss. |
Neutral Special: Spit Out. Like K.Rool's blunderbuss, Birdo can shoot out eggs from her nose and suck any projectile in before shooting it back out as well. Side Special: Egg Roll. Birdo herself gets inside of an egg and rolls around, eventually stopping after a second or two. Up Special: Egg Toss. Birdo chucks an egg upwards, moving in a small vertical arc as a way to get back to the stage easier. Down Special: Birdo Slam. Birdo jumps up and slams down on the battlefield. Unlike Yoshi, she's able to angle it sideways, allowing her to move vertically. Final Smash: Robirdo. Birdo calls upon Robirdo, who stands behind her and fires a barrage of massive eggs at foes before detonating, prompting Birdo to jump back into the fray. | |
| |
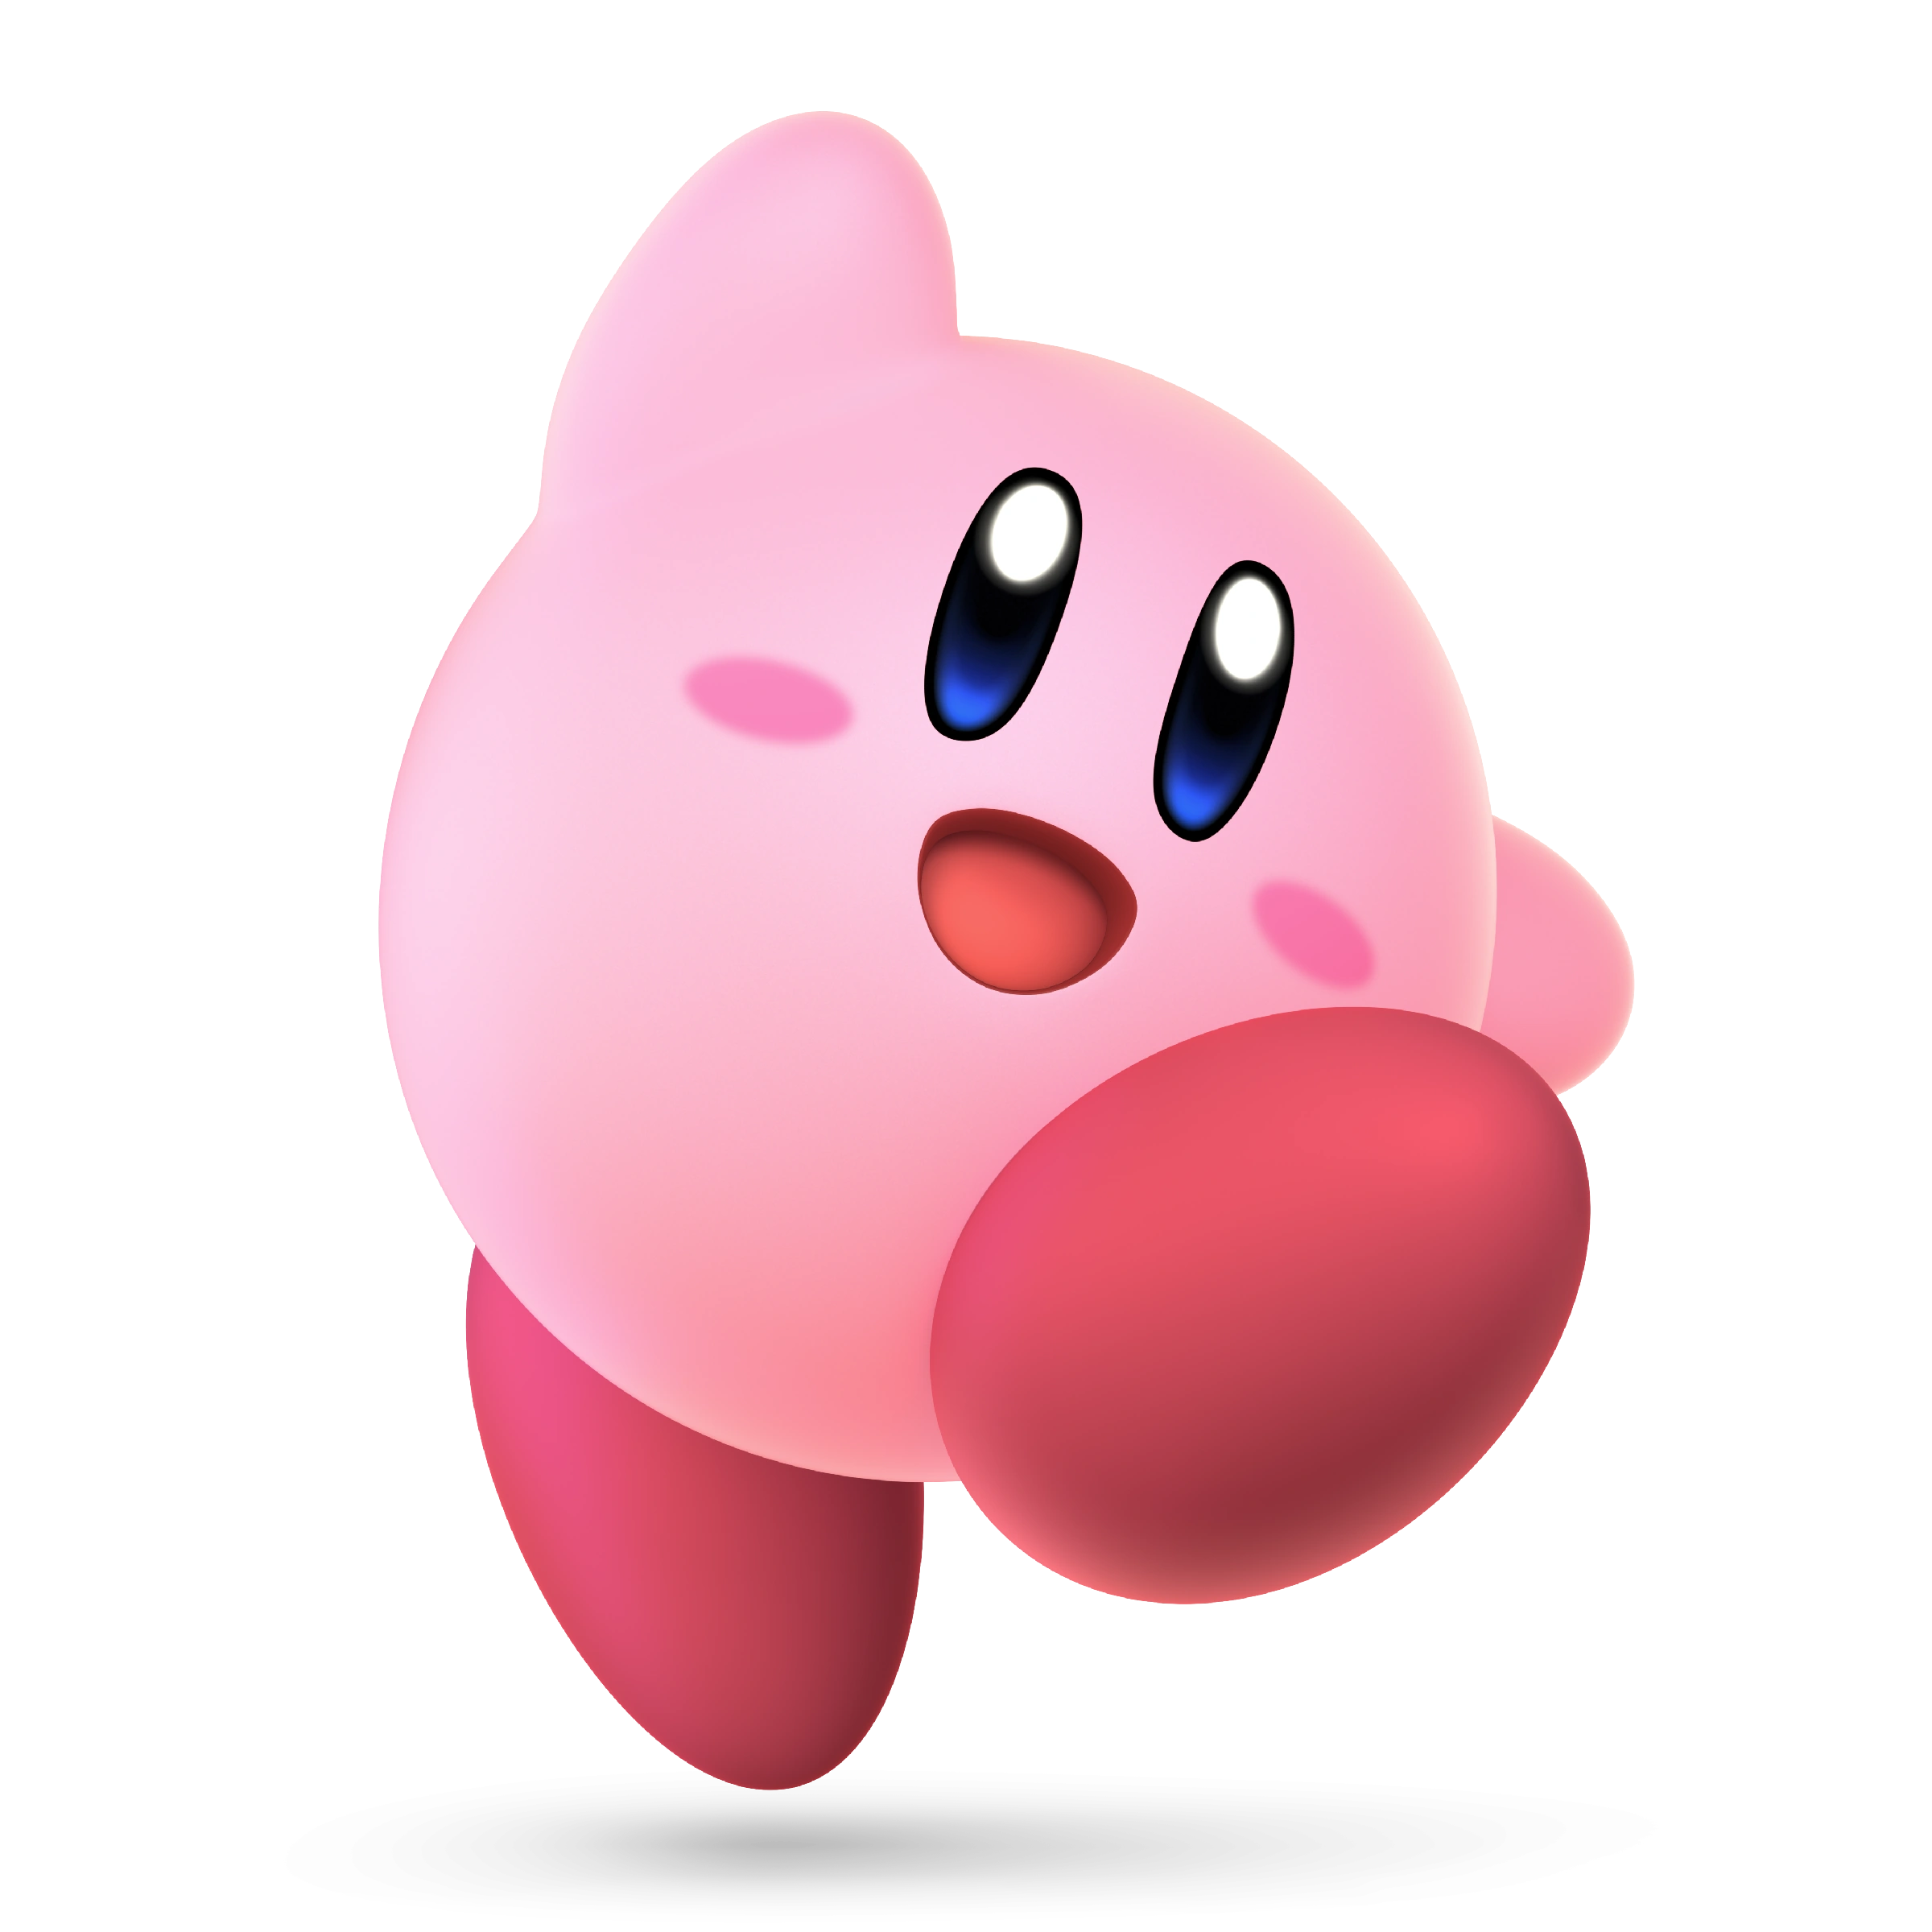
|
Name: Kirby Debut: Kirby's Dream Land (1992) Kirby is a heroic pink puffball that aims to protect his home land of Dream Land from all evil threats. Kirby, like Mario, is an easy to learn beginners characters with a focus on his many copy abilities, such as Stone, Cutter, Fighter, Hammer, and more. |
Neutral Special: Inhale. Kirby's most iconic move: sucking up opponents and taking their powers. Side Special: Hammer Flip. Kirby can charge up the power of his hammer and use it at any point, flaming or not. Up Special: Final Cutter. Kirby jumps up with the help of Sir Kibble's blade, spinning around and slamming back down. Down Special: Stone Slam. Kirby uses the Stone transformation in a variety of forms, crashing down on the ground. Final Smash: Megaton Punch. Kirby puts on his Fighter headband and jumps up into the air with his arm hitting the ground, damaging all opponents in an earthquake. | |
| |
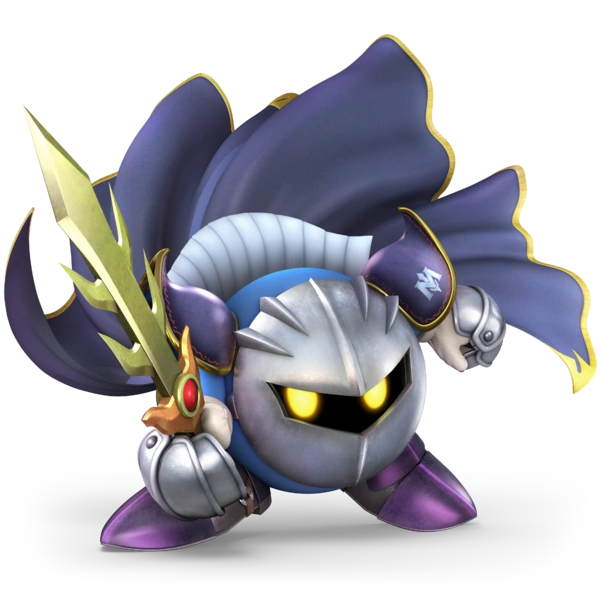
|
Name: Meta Knight Debut: Kirby's Adventure (1993) Out of all of Kirby's friends and foes, there is not one more enigmatic and mysterious than the masked warrior, Meta Knight. He's an extremely mobile fighter, able to dart around the stage and deal multiple hits before darting away to safety. He gains a new Final Smash, calling upon the Halberd to rain down fire at foes from above. |
Neutral Special: Mach Tornado. Meta Knight spins around, creating a small whirlwind around him. He's able to move around slightly in this state. Side Special: Drill Rush. Meta Knight dashes across the stage in a drill-like formation, rapidly striking any opponent in his path. Up Special: Shuttle Loop. Meta Knight flies in a loop, thrusting his sword outwards as he finishes the loop and flies higher towards the stage. Down Special: Dimensional Cape. Meta Knight flings his cape forward, disappearing into thin air before reappearing in the opposite direction. Final Smash: Dream Land's Destruction. Meta Knight calls upon his trusty airship, the Halberd, and flies over an island with other fighters on it, shooting down laser blasts and using the ship's weapons to bombard opponents and sending them flying. | |
| |
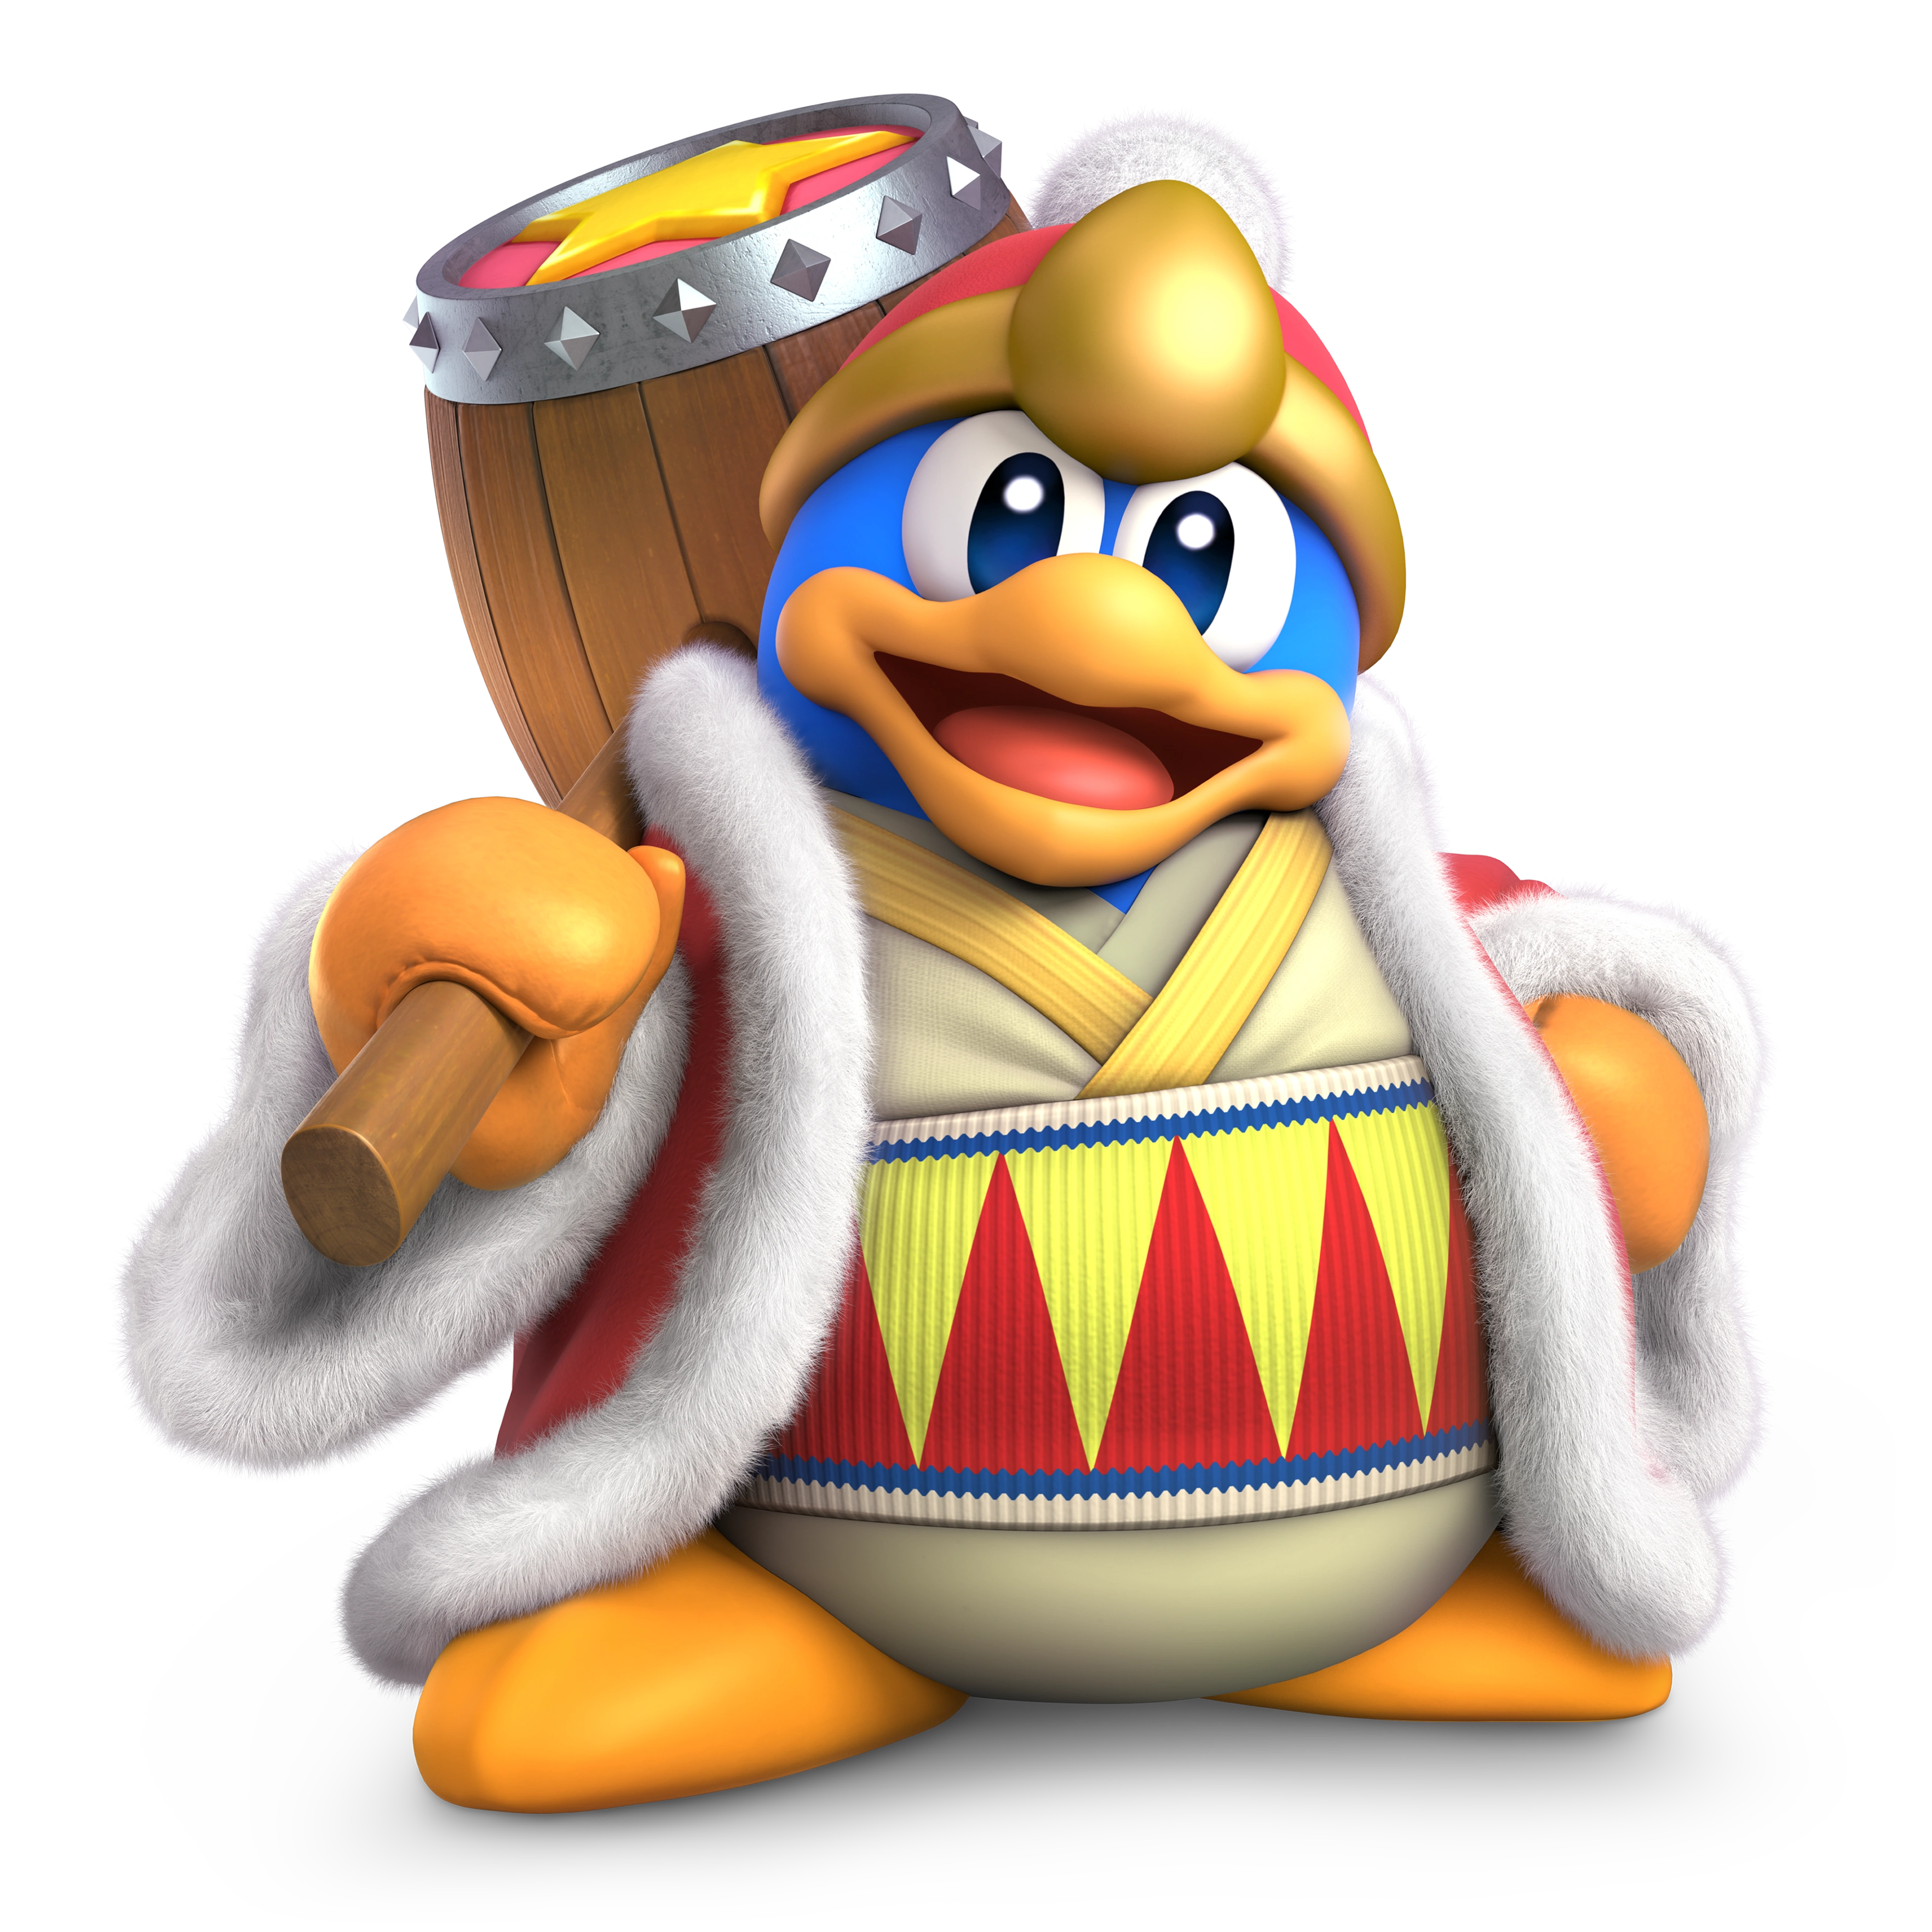
|
Name: King Dedede Debut: Kirby's Dream Land (1992) The greedy king of Dream Land and Kirby's eternal rival...or ally, King Dedede stops at nothing to one-up the pink puffball, even in the world of Smash. His neutral and down specials are imitations of Kirby's with extra flair only Dedede can provide. He retains all of his moves from Ultimate, with Bandana Dee now being present in his Final Smash. |
Neutral Special: Inhale. Dedede starts sucking opponents into his mouth like Kirby, but can't swallow them, forcing him to spit them back out. Side Special: Gordo Toss. King Dedede throws a Gordo in the air and hits it with his hammer, causing it to bounce across the stage. Up Special: Super Dedede Jump. King Dedede forces himself downwards for a time before shooting himself back up at a tremendous speed. Down Special: Jet Hammer. King Dedede charges up an attack from his hammer, revealing mechanical insides similar to a rocket engine, which he then unleashes on foes. Final Smash: Masked Dedede. King Dedede equips his mask and a new more powerful hammer, trapping his opponent in a cage fight before launching a barrage of missiles at them, finishing it off with a powerful hammer swing. | |
| |
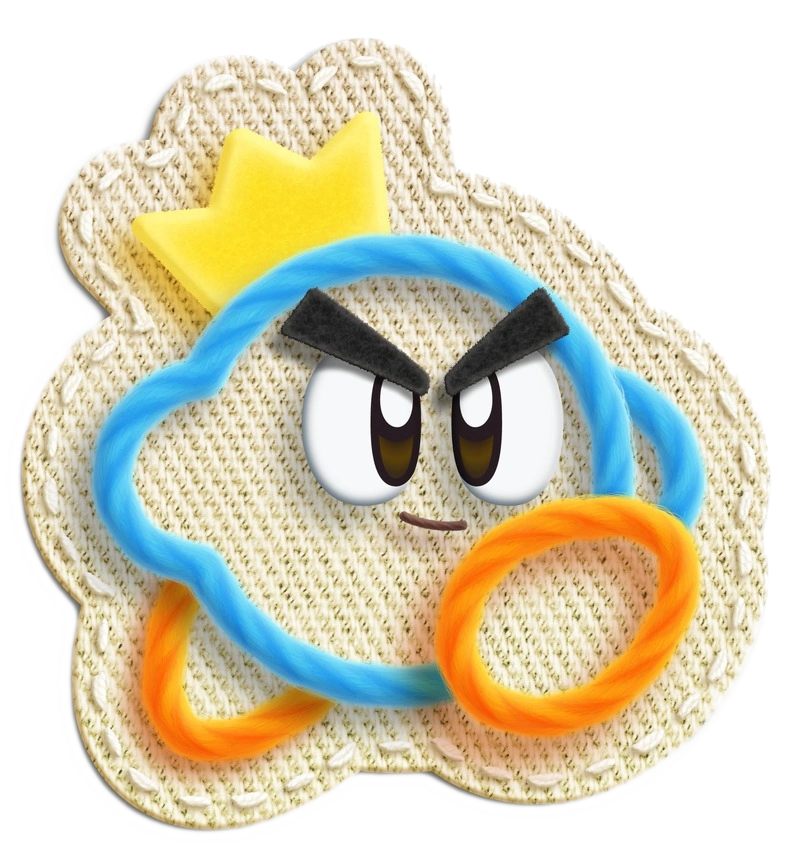
|
Name: Prince Fluff Debut: Kirby’s Epic Yarn (2010) The prince of Patch Land, Prince Fluff has finally stepped out of his kingdom to fight with Nintendo’s all-stars. Prince Fluff is a Fusion Fighter, using elements from Kirby, Jigglypuff, Ivysaur, and even the Belmont’s Smash attacks. He doesn’t have Kirby’s Inhale or his amazing jumps, but he makes up for it in range and combo potential while keeping Kirby’s light weight. |
Neutral Special: Car. Prince Fluff transforms into a car and can charge up before dashing forwards, able to control the direction he goes in for a short time. Functionally, it’s the same as Jigglypuff’s neutral special. Side Special: Yarn Strike. Prince Fluff charges up a strike from his whip in the direction he’s facing. While he’s unable to move it around like Simon and Richter do, the speed of the attack is much quicker, coming out faster. Up Special: Yarn Whip. Prince Fluff unleashes a string of yarn that can hit an enemy while on the ground and act as a tether recovery in the air. This move is a slightly more hard-hitting version of Ivysaur’s up special. Down Special: Weight. Prince Fluff transforms into a yarn weight, acting as a damaging weapon if someone is right below him. This attack is the same as Kirby’s but falls just an extra bit faster. Final Smash: Tankbot. Prince Fluff proceeds to transform into a Tankbot with Yarn Kirby at the helm. A barrage of yarn missiles are launched at helpless foes before Prince Fluff finishes them off with repeated strikes from yarn boxing gloves. | |
| |
|
Name: Galacta Knight Debut: Kirby Super Star Ultra (2008) Galacta Knight is commonly referred to as one of, if not the most powerful being in the galaxy, going toe to toe with characters like Kirby. In Smash, he’s a mix of two fighters in particular; Meta Knight and Corrin, using his primary weapon, his lance, to fight while employing many of the mechanics present in Meta Knight and Corrin’s fighting style, making him an agile foe. |
Neutral Special: Galactornado. Galacta Knight thrusts his lance up in the air before spinning around, creating a narrow yet powerful tornado around himself. While slimmer than Meta Knight’s neutral special, it does more all-around damage. Side Special: Nova Lunge. Galacta Knight shoots up into the air and slams his lance into the ground before launching himself forwards in a kicking motion. While it’s the same as Corrin’s side special, his small size makes him much deadlier. Up Special: Galactic Ascent. Galacta Knight forces himself up into the air, the two angel wings on his back spreading out as he does so. This move is faster but weaker than Corrin’s same up special. Down Special: Dimensional Wing. Galacta Knight’s wings curl around him before he disappears into thin air, reappearing farther away from where he was before. He travels less distance than Meta Knight but appears much faster. Final Smash: Reborn Butterfly. Galacta Knight transforms into Morpho Knight and unleashes a series of attacks on any foes caught in the Final Smash. He uses two enlarged swords to slice and dice at foes before rushing at them with both swords facing outwards, finishing them off. | |
| |
|
Name: Marx Debut: Kirby Super Star (1996 The original crazed jester with a penchant for body horror, Marx makes his grand entrance! Marx’s main gimmick is his ability to fly freely, an up special that no other fighter shares...although it comes a limit that, once broken, has serious consequences. Other than that, Marx is a technical character, using crescent-shaped projectiles and black holes to get the fight done his way and his way only. |
Neutral Special: Crescent Cutter. Marx stays in place and fires four crescent-shaped projectiles from his wings, two on his left and right respectively. Holding down the B button allows the projectiles to launch farther but do the same damage overall, all the while giving Marx somewhat of a safe area to function in. Side Special: Mirror, Fear. Marx splits into two copies of himself, referencing the Mirror copy ability present in the "Kirby" series. These two halves go to the left and the right, doing one hit of damage before melding back together into Marx’s base form. If you’re between the two Marx’s when they come back together, you’re knocked into the air slightly. Up Special: Wishmaker’s Float. Marx starts to freely fly around in the air, able to dart all around the air. While a broken concept on paper, the scales on Marx’s wings begin to disappear for the few seconds he’s able to fly freely. If all of the scales disappear, Marx erupts into flames and has to recharge the scales, taking a ton of damage while doing so. Down Special: Black Hole. Marx dives into the floor, a shadow now moving across the ground slightly. Marx then pops back up from the hole in the new position, damaging anyone he touches. The hole is able to be damaged from above, causing Marx to pop back out without launching upwards. In addition, the attack can’t be performed in the air. Final Smash: Milky Way Wishes. Marx tosses an opponent up into the air before slapping them with his wing, sending them flying away from him into the stars. The opponent hurtles straight into Nova, causing the Clockwork Star to explode into pieces and massively damage the foe. All of this occurs as Marx laughs maniacally, taking glee in the suffering of his foe. | |
| |
|
Name: Adeleine & Ribbon Debut:Kirby 64: The Crystal Shards (2000) The plucky painter, Adeleine, and the friendly fairy, Ribbon, have teamed up in order to take down whatever foe tries to take "them" down! Adeline uses her ability to bring her paintings to life, whereas Ribbon fills more of a “support” role, carrying Adeleine upwards or giving her Ribbon’s Crystal for a long-ranged attack. The two make one unstoppable duo...although Adeleine is a rather light and fragile target. |
Neutral Special: Ribbon’s Crystal. Adeleine pulls out the Crystal Gun used by Kirby before her, firing out up to three small crystal shards from across the stage if the B button is repeatedly pressed. While a seemingly weak projectile attack, the crystals themselves do good damage if all three hit one opponent. Side Special: Canvas Curse. Adeleine sends out a rainbow line straight out in front of her, the player able to twist the line with the use of the control stick before it stops a second or two later. After that, a small ball with Kirby’s face dashes along the line at a breakneck pace, hitting whoever it touches as the line disappears behind it. Up Special: Fairy Carry. Ribbon grabs the back of Adeleine's shirt, carrying her upwards for a long time at the cost of decent air speed. Adeline herself can cancel the move at any point and have Ribbon let her go, the move itself not doing any damage. Down Special: Paint-A-Picture. Adeleine pulls out a large canvas and begins to draw on it, a monster being sent out depending on how long the B button is held. If its held for a short amount of time, an N-Z pops out. If she holds for a bit longer, it’s now a Gordo. If she holds it for the longest amount of time she can, an Ice Dragon pops out instead. Final Smash: Dark Matter Daze. Ribbon runs off as Adeleine is once again possessed by Dark Matter, creating a drawing of its ball form to attack the stage. The Dark Matter flies around in the background, firing off destructive projectiles before exploding into black paint, causing Adeleine to revert back to normal and Ribbon to come back. | |
| |

|
Name: Fox Debut: Star Fox (1993) Fox McCloud is the confident leader of the space team known as Star Fox, taking the role of his deceased father. Fox is infamous for his speedy fighting style and his quick attacks, being able to dash through opponents and reflect their projectiles back at them. |
Neutral Special: Blaster Gun. Fox whips out his blaster and shoots lazer blasts at any fighter in range. Side Special: Fox Illusion. Fox dashes through opponents as afterimages of him are left behind him, disappearing shortly after they appear.. Up Special: Fire Fox. Fox charges up a ball of fire surrounding him before shooting back up into the sky. Down Special: Reflector. Fox pulls out his reflector and can block most attacks and projectiles. Final Smash: Star Fox Assault. Fox hops in his Arwing, followed by his teammates, Falco, Slippy, and Peppy. All four unleash a full-scale assault on fighters who are caught in the Final Smash, firing lasers and other attacks. | |
| |

|
Name: Falco Debut: Star Fox (1993) Falco Lombardi is Fox McCloud's wingman and the second most notable member of Star Fox, known for his cocky and snarky personality. Falco plays a lot like Fox in the world of Smash, but does enough to stand out from the competition. He's slightly faster than Fox, keeping his reckless yet rewarding nature intact from his source material. |
Neutral Special: Blaster. Falco pulls out his blaster and fires a shot out of it, knocking it's target back slightly as Falco puts it away. Side Special: Falco Phantasm. Falco dashes across the stage, leaving a trail of afterimages of himself behind him. Up Special: Fire Bird. Falco surrounds himself in fire and launches himself upwards, going slightly higher than Fox does. Down Special: Reflector. Falco kicks his reflector in front of him, launching it outwards as it reflects projectiles back at the sender. Final Smash: Star Fox Assault. Falco, now recklessly leading the rest of the Star Fox crew, heads straight for any opponents caught in the attack. They all begin to fire their lasers as Falco delivers the final blow, blowing up the area the fighter is standing on. | |
| |

|
Name: Wolf Debut: Star Fox 2 (1996) Wolf O'Donnell is Star Fox's eternal nemesis, always seeking the chance to take down the heroes once and for all, especially Fox himself. Wolf plays a bit differently to how he did before, gaining some entirely new moves in addition to upgrades to his existing ones. His Final Smash, Neutral special, and down special are all the same with some tweaking thrown in. |
Neutral Special: Blaster Rifle. Wolf pulls out his blaster rifle and fires a single purple energy shot. The shot stuns opponents for less than a second. Side Special: Rapid Swipe. Wolf charges up an attack, crossing his arms somewhat before unleashing a flurry of claw swipes that rush him forwards, damaging whoever they touch. Up Special: Wolf Jet. Wolf, surrounded by a plasma-like substance, shoots upwards as a trail of electricity follows behind him, going in a straight line. Down Special: Reflector. Wolf thrusts his reflector forward, causing a shield to form that reflects projectiles back in the direction they came from. Final Smash: Star Wolf Barrage. Wolf hops into his Wolfen and jets into space along with Leon, Panther, and Pigma as they all target the foes caught in the attack, using all available weaponry to take them out and send them packing. | |
| |
|
Name: Krystal Debut: Star Fox Adventures (2002) Krystal is the former member of Star Fox, once being their fourth additional pilot and only telepathic member on the crew...although she's now a member of Star Wolf depending on who you ask. Krystal utilizes her staff to attack, using its elemental powers such as fire and ice and overall strength to fight her way to victory. |
Neutral Special: Staff Strike. Krystal jabs in the direction she's facing with her staff. Side Special: Fire/Ice Blast. Krystal can alternate between shooting out fire or ice with her staff. Up Special: Rocket Boost. Krystal thrusts herself upwards, using her staff to gain extra air time. Down Special: Ground Quake. Krystal grabs her staff tightly and slams down on the ground, making a shockwave. Final Smash: Rage of the Krazoa. Krystal summons the Krazoa Spirits who all fly at nearby opponents and pummel them with individual attacks, with Krystal shooting out energy from her staff. | |
| |
|
Name: Pikachu Debut: Pokémon Red & Blue (1996) The cuddly mascot of Pokémon series, Pikachu's electrifying play style returns once again! Pikachu is quick and nimble with an emphasis on hard-hitting attacks like Quick Attack and Skull Bash, along with electricity-based attacks. This, backed up by his impressive speed, makes Pikachu a fighter that sholdn't be treated lightly. |
Neutral Special: Thunder Jolt. Pikachu unleashes a ball of electricity that bounces in arc formations. The speed in which the ball moves fully depends on how long the ball has been charged, going slower the larger it is. Side Special: Skull Bash. Pikachu charges up an attack before launching himself across the stage, hitting opponents with his head. The longer the attack is charged, the farther Pikachu ends up flying. Up Special: Quick Attack. Pikachu zips around two times, ramming into enemies who are in his way. If a different direction is pressed while he's up in the air, Pikachu moves in that direction upon his second zip. Down Special: Thunder. Pikachu summons a lightning bolt to hit the stage, damaging whoever is touched by it. The cloud takes some time to appear and, unlike, past games, the move cannot be spammed as easily as it once could. Final Smash: Catastropika. Pikachu activates it's signature Z-Move, surrounding itself in electricity, jumping into the air, and hitting a single opponent with brute electric force. The attack ends when Pikachu lands safely on the ground, his opponent flying off into the distance before they both return to the stage. | |

|
Name: Jigglypuff Debut: Pokémon Red & Blue (1996) The Balloon Pokémon hasn't missed a single brawl yet, and she isn't stopping now. Jigglypuff's air mobility is top notch, being able to move up to six times in the air. She's extremely light, however, making her easy to K.O. if the player isn't careful. |
Neutral Special: Rollout. Jigglypuff curls up and rolls in the specific direction, barreling through others before the attack concludes. Side Special: Pound. Jigglypuff delivers a simple jab towards an opponent, striking them. This move is easily able to break shields. Up Special: Sing. Jigglypuff starts to sing a song, putting anyone near to her to sleep for a good while, leaving them open to other attacks. Down Special: Rest. Jigglypuff goes to sleep herself, able to slightly heal herself by a few points while also being able to K.O. nearby foes if the attack is timed right. Final Smash: Moonblast. Jigglypuff calls upon the power of the moon and the Fairy type itself and watches as it shoots down a beam of fairy energy, annihilating whoever is caught within the range of the attack. | |
|
Name: Pichu Debut: Pokémon Gold & Silver (1999) Pikachu's younger evolution, Pichu, is the last face you'd expect to see in a fighting game like this...but he's here anyway. Pichu is a clone of his older brother, using all of the same moves he does with a twist: every electric move he uses damages himself. Yeah...really. |
Neutral Special: Thunder Jolt. Pichu sends out a ball of electricity at anyone in front of him in a straight line, damaging Pichu and the opponent. Side Special: Skull Bash. Pichu launches itself forwards, crashing into opponents with it's noggin akin to a missile of sorts. Up Special: Agility. Pichu zips back and forth in the air, leaving a small trail of electricity behind him before landing back down on the stage. Down Special: Thunder. Pichu calls upon a bolt of lightning to strike him, electrifying the area around him and himself. Final Smash: Future Generations. Pichu calls upon Pikachu and Raichu to help him unleash a brilliant bolt of lightning down upon a foe, electrifying them to kingdom come. | |

|
Name: Mewtwo Debut: Pokémon Red & Blue (1996) Mewtwo is a artificial clone of the Mythical Pokémon, Mew, and extremely powerful Psychic type to boot. Mewtwo uses psychic attacks to duke it out, utilizing the power of his mind rather than his fists. He can even confuse an opponent, stunning them for a split second and leaving them open. |
Neutral Special: Shadow Ball. Mewtwo charges up a ball made of shadow energy and launches it right at an opponent. The ball is able to be charged. Side Special: Confusion. Mewtwo swipes it's hand upwards, spinning nearby foes into an aura of darkness and psychic energy. Up Special: Teleport. Mewtwo vanishes into thin air before reappearing, twirling around before landing back on the ground. Down Special: Disable. Mewtwo uses his psychic abilities to paralyze whoever he's facing, stunning them for a moment. Final Smash: Psystrike. Mewtwo undergoes Mega Evolution, becoming Mega Mewtwo Y before launching a mental attack at fighters. The sheer power of it breaks their brains, sending them flying. | |
|
Name: Pokémon Trainer Debut: Pokémon Red & Blue (1996) The Pokémon Trainer isn't actually who you fight as: rather, it's his three Pokémon, aka Squirtle, Ivysaur, and Charizard. All of them vary in weight, attack, and fighting styles, being able to be swapped out with one another by the trainer. |
Neutral Special (Squirtle): Water Gun. Squirtle shoots out a jet of water at an opponent. Neutral Special (Ivysaur): Bullet Seed. Ivysaur shoots out streams of seeds into the air, hitting those in their path. Neutral Special (Charizard): Flamethrower. Charizard shoots out a jet of fire from his mouth. Side Special (Squirtle): Withdraw. Squirtle hides in his shell and jets forwards, spinning around until he pops out. Side Special (Ivysaur): Razor Leaf. Ivysaur tosses a leaf in whatever direction he's facing, striking foes. Side Special (Charizard): Rock Smash. Charizard pulls out a rock and smashes it with his head. Up Special (Squirtle): Waterfall. Squirtle has a waterfall appear underneath him, shooting him back up. Up Special (Ivysaur): Vine Whip. Ivysaur's vines jut out from it's back and propel him upwards, whacking enemies. Up Special (Charizard): Fly. Charizard spins around in the air, his wings encasing his body. Down Special: Pokémon Change. The Pokémon Trainer swaps out one of the three Pokémon with another. Final Smash: Triple Finish. All three Pokémon evolve into their final forms and unleash a concentrated beam of elemental power at foes, consisting of Grass, Fire, and Water. | |
|
Name: Lucario Debut: Pokémon Diamond & Pearl (2007) The Aura Pokémon, Lucario, comes back to join the fight and duke it out with Nintendo's best. Lucario, when taking damage, gets more and more powerful at high percentages. If you're still alive by then, Lucario becomes a deadly force to deal with. He does cap out at around 150%, reaching his maximum amount of power at that point while also being easier to knock out due to how much damage he's potentially taken. |
Neutral Special: Aura Sphere. Lucario charges up a ball of aura energy, unleashing it on his foes. The ball is able to stored for later and unleashed at a later time. Side Special: Force Palm. Lucario pummels opponents in his way using both of his palms. Up Special: Extreme Speed. Lucario jets upward in a straight line via the power of aura. Down Special: Double Team. Lucario can evade enemy attacks by rapidly splitting into two forms of himself. Final Smash: Aura Blast. Lucario jumps up high in the air and shoots out a large laser, decimating whoever is in it's path of destruction, transforming into Mega Lucario while doing so. Unlike the Fianl Smash's previous incarnation, the laser is easier to tilt, making it easier to get opponents stuck in the attack. | |
|
Name: Greninja Debut: Pokémon X & Y (2013) The Ninja Pokémon, Greninja, makes another splash in the Smash Bros. scene! Greninja is fast and agile, hopping around with great speed and sneaking up on his foes. Many of his moves are about evading an opponent before coming back and striking them down. |
Neutral Special: Water Shuriken. Greninja is able to toss a large water shuriken at foes while also being able to charge its size and power. Side Special: Shadow Sneak. Greninja's shadow moves a short distance, prompting Greninja to teleport to it himself. Up Special: Hydro Pump. Greninja launches himself upwards with two blasts of water from its hands, hitting whatever's below them. Down Special: Substitute. Greninja vanishes into thin air, leaving a single Substitute Doll behind before striking the opponent from behind. Final Smash: Secret Ninja Attack. Greninja launches an opponent into the air in front of the moon and rapidly attacks them from multiple angles, sending them crashing back to the stage below. | |

|
Name: Incineroar Debut: Pokémon Sun & Moon (2016) The final evolution in the Litten line, Incineroar is back and is prepared to bring the heat once more. Incineroar is a heel wrestler, using devious tactics and trickery to get his point across; the point that HE'S the boss. Incineroar is the slowest fighter in the game, but makes up for it in the power of his attacks and unique fighting style. |
Neutral Special: Darkest Lariat. Incineroar spins around rapidly, propelling himself forward and leaning slightly sideways before hitting an opponent multiple times. Side Special: Alolan Whip. Incineroar grabs an opponent and throws them away, having them bounce off of a wrestling ring rope. The attack performed after depends completely on timing, allowing Incineroar to hit hard with the button is pressed at the right time. Up Special: Cross Chop. Incineroar leaps upwards into the air before rocketing back down below. If he lands on an opponent or the stage, the impact of the attack creates a small explosion. Down Special: Revenge. Incineroar blocks an attack and sends out a weaker one, slightly damaging them. This move boosts the strength of Incineroar's next attack, making him stronger for a turn. Final Smash: Max Malicious Moonslaught. Incineroar runs forward and grabs an opponent before throwing them into a ring rope and punching them up into the sky. Incineroar finishes the attack by leaping on top of his foes and sending them crashing into the ring, creating an explosion. | |

|
Name: Sceptile Debut: Pokémon Ruby & Sapphire (2002) After years of waiting, the Forest Pokémon has finally left the Hoenn region and joined his fellow starter members in Smash! Sceptile is much more physical than he is projectile heavy, although his down special can lead to crafty plays and attacks. His other attacks are all physical, depending on him getting close to his foes to get the job done. |
Neutral Special: Leaf Blade. Sceptile slashes with the blades on its arms, ending with him using both arms to slash in an X formation. The X formation in particular is great at breaking shields depending on the circumstances. Side Special: Leaf Storm. Sceptile charges up an attack and launches a series of grass blades in front of him. The blades do multiple hits on an opponent if they’re in front from Sceptile, acting as a sort of jab combo. Up Special: Aerial Ace. Sceptile launches up into the air at a quick speed, covering great horizontal distance. If he hits an opponent from below, he gains a bit of additional air time as the foe flies upwards from the attack. Down Special: Absorb. Sceptile fires a seed at a foe. If the seed hits them, a series of thorns poke out from under them and helps Sceptile recover health while the opponent takes damage. If it misses, the seed has no effect. Final Smash: Solar Beam. Sceptile begins to absorb sunlight as he Mega Evolves into Mega Sceptile. Upon the transformation’s completion, Sceptile fires out a beam of solar energy that does immense damage to foes, acting as a sideways version of Lucario’s Aura Storm. | |
|
Name: Zoroark Debut: Pokémon Black & White (2010) The Illusion Fox Pokémon has finally come out of its Pokéball once and for all and joins other monsters on the battlefield! Zoroark is a mix of various characters, utilizing moves from Wolf‘s new moveset, Greninja, and Zeraora along with a unique move, Payback, which boosts its strength based on its use of combos. A quick and agile creature, Zoroark is a ferocious foe with tricks up his sleeve to boot. |
Neutral Special: Payback. Zoroark unleashes a few slashes, pushing a foe back. If Zoroark follows the attack up with more combos, his strength is boosted until he’s locked in a combo himself. This is the only original attack Zoroark has in his kit. Side Special: Hone Claws. Zoroark charges up multiple swipes from his claws before unleashing the attack on any nearby foe, finishing with a slightly stronger one. The move functions the same as Wolf’s Rapid Slash attack. Up Special: Acrobatics. Zoroark leaps high up into the air and repeatedly slashes with his claws, ending with one swipe upwards before the attack ends. The properties of this attack are much different than Zeraora’s due to the lack of electric energy. Down Special: Substitute. Zoroark disappears as a green substitute doll sits where he once stood, reappearing like a bullet with his claws barred. This move, while similar to Greninja’s down special, leads into combos easier than his. Final Smash: Night Daze. Zoroark rushes at a nearby foe and launches them into a dark and spooky forest. As they lie there, Zoroark comes down from the sky claws-first and lands on the opponent, creating a shockwave of dark energy as the attack ends. | |

|
Name: Zeraora Debut: Pokémon Sun & Moon (2016) Zeraora is known as the Thunderclap Pokémon, debuting as the last Pokémon in 2016's Pokémon Sun & Moon. In Smash, Zeraora is a speedy fighter that prioritizes in getting up close to foes or trapping them, making it hard for them to fight and easier for him to dish out attacks. His special ability, Volt Absorb, has him heal from attacks if he repeatedly gets hits in, but stops when he's hit during a winning streak. |
Neutral Special: Thunder Punch. Zeraora delivers a strong series of punches, his paws covered in electric sparks. These punches can go on for as long as the fighter wants at the cost of wearing Zeraora down the longer the attack is used, making him slightly slower for a good bunch of frames. The final punch has his fist fully enveloped in electricity, stunning his prey. Side Special: Electroweb. Zeraora charges up an attack from his paws, shooting out a "web" of electric energy at foes. If another fighter is caught by the web, they're electrocuted before being launched back slightly. The delay on being launched back allows for Zeraora to rush in with the available frames to deal extra hits, making Electroweb a great overall combo starter. Up Special: Acrobatics. Zeraora leaps high up into the air, repeatedly slashing and striking at the same time before beginning to fall back down. The attack can be angled to the left or the right slightly depending on where the player moves the control stick. The beginning of the attack, the leap, does no damage and can leave Zeraora vulnerable, but the second half, the slashing allows him to fight back with fierce intent. Down Special: Plasma Fists. Zeraora lifts his arms up into the air before slamming them back down, creating an electric shockwave that travels across the stage until it either damages an opponent or disappears. The shockwave's damage peaks around Zeraora, getting progressively weaker as it travels outwards and making the attack a great tool for keeping up-close opponents off your back. Final Smash: Gigavolt Havoc. Zeraora leaps into the air, it's entire body surrounded in lightning. Between it's paws is a bolt of electricity that is unleashed on whoever is trapped in the attack, taking the form of an electric blast that completely annihilates the fighter and hits the stage with rapid force. Even those who aren't involved in the Final Smash can be damaged by walking up to the blast, although they take less damage then the initial targets. | |
|
Name: Pikachu Libre Debut: Pokémon Omega Ruby & Alpha Sapphire (2014) Pikachu Libre, formerly an alternate costume for Pikachu, has now become her own original fighter! Retaining the speed of Pikachu with the brutal strength of Incineroar, she acts as a crossroads between a fusion and a new fighter altogether, balancing Incineroar and Pikachu’s moves with a unique up special and Final Smash. |
Neutral Special: Thunder Jolt. Pikachu Libre unleashes a ball of electricity that bounces in arc formations. The speed in which the ball moves fully depends on how long the ball has been charged, going slower the larger it is. Side Special: Hoennian Whip. Pikachu Libre grabs an opponent and throws them away, having them bounce off of a wrestling ring rope. The attack performed after depends completely on timing, allowing Libre to hit hard with electricity the button is pressed at the right time. Up Special: Flying Press. Pikachu Libre leaps up into the air, going in a slight arc formation before reaching her peak. At this point, she slams down upon the ground, burying any opponent directly beneath her. Down Special: Revenge. Pikachu Libre blocks an attack and sends out a weak one. This move boosts the strength of Libre's next attack, making her stronger for a turn. Unlike Incineroar’s same attack, the move really benefits from the use of electric attacks. Final Smash: Thunderclap Press. Pikachu Libre rams into nearby opponents, throwing them into a wrestling ring as she lands on a wrestling rope. Pikachu Libre then jumps up into the air, slamming back down on her foes as she surrounds herself in electricity, lightning erupting from the sheer impact. | |

|
Name: Ness Debut: Earthbound (1994) Ness is an ordinary boy from the small town of Onett with a secret: he has surprisingly powerful psychic abilities. These abilities come in handy in the world of Smash, as the attacks of both him and his party members make up the bulk of his moveset. He's extremely versatile with a good range of close and long ranging fighting abilities to boot. |
Neutral Special: PK Fire. Ness fires a bolt of lightning out of his fingertips, exploding into a small flame upon landing. Side Special: PK Flash. Ness creates a ball of light that travels slightly above his head and can charge it up, the explosion being bigger depending on the charge. Up Special: PK Thunder. Ness shoots out a ball of electricity that can travel behind him and hit him, launching him across the stage or up into the air. Down Special: PSI Magnet. Ness creates a field of energy around him which can absorb any projectile thrown his way, healing him in the process. Final Smash: PK Starstorm. Ness calls upon Paula and Poo and summons a flurry of shooting stars to rain down upon the stage. The stars get slightly faster as the attack continues, going in multiple different directions before the barrage ends. | |
|
Name: Lucas Debut: Mother 3 (2006) Lucas is a young boy and twin brother of Claus who has the ability to pull out the Seven Needles from the Earth. He plays uniquely with moves like PK Freeze, but borrows elements from Ness, like variations on his specials and Final Smash. |
Neutral Special: PK Freeze. Lucas sends a large snowflake traveling through the air, freezing whoever touches it. Side Special: PK Fire. Lucas shoots out a bolt of fire that erupts into flames when it hits an opponent. Up Special: PK Thunder. Lucas summons a ball of electricity to push him upwards, jetting him back to the stage. Down Special: PSI Magnet. Lucas brings out a forcefield that drags items towards it, healing him. Final Smash: PK Starstorm. Lucas calls for the help of Kumatora and Boney to help bring down a flurry of shooting stars, all of which pelt the stage and opponents. | |
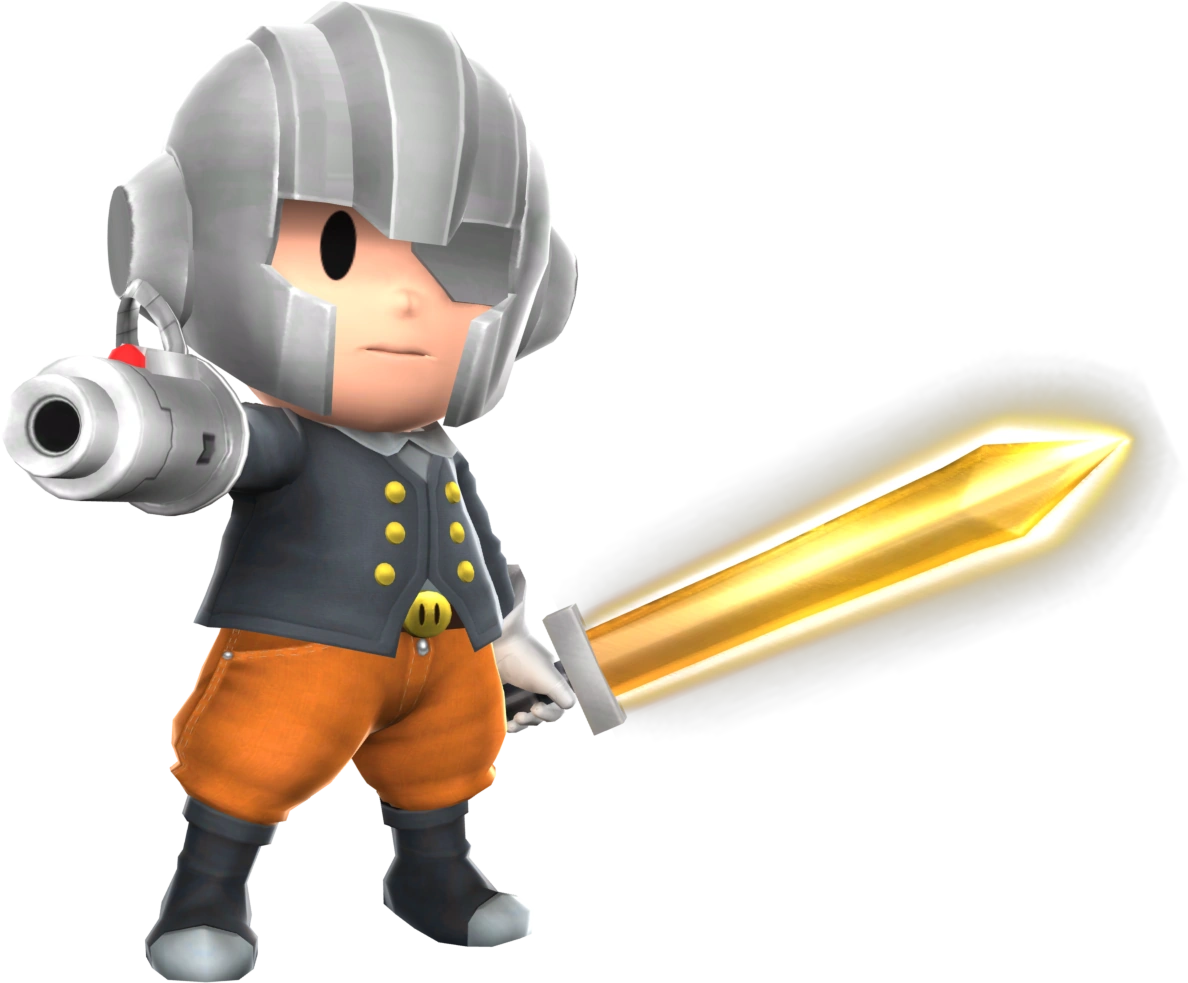
|
Name: Masked Man Debut: Mother 3 (2006) The mysterious leader of Porky’s horrifying Pigmask Army, the Masked Man has more to him than meets the eye. None of his moves are similar to each other; in one, he could be using his arm cannon, while in another, he could be using his mechanical cyborg wings. The Masked Man is a jack of all trades with powerful tools at his disposal to boot, making a small yet dangerous opponent. |
Neutral Special: Shot Fire. The Masked Man fires out a single burst of energy out of his arm cannon. The blast can be charged by holding down the B button, but cannot be held in and immediately releases once the button is released or another attack is used. Side Special: Strike Slash. The Masked Man jumps into the air, leaping forwards as he thrusts his blade forwards. If he hits an opponent at the attack’s height, they’re launched farther than they usually would be. Up Special:Scissor Wings. The Masked Man sprouts out mechanical wings from his back, propelling him upwards. The wings flap downwards, hitting anything in their path. The recovery goes into more an arc shape rather than a straight line. Down Special: Shield Killer. The Masked Man lets off a brilliant flash of yellow light around him, damaging anyone nearby. Its name comes from how it’s a rather powerful move against shields, shrinking them if not outright breaking them. Final Smash: Lightning Blade. The Masked Man dashes into opponents, sending them into a state of freefall in the air before he raises his blade, calling down lightning to strike his trapped foes. The amount of lightning depends on how many opponents you’ve caught in the attack, the attack failing if no opponents are dashed into. | |
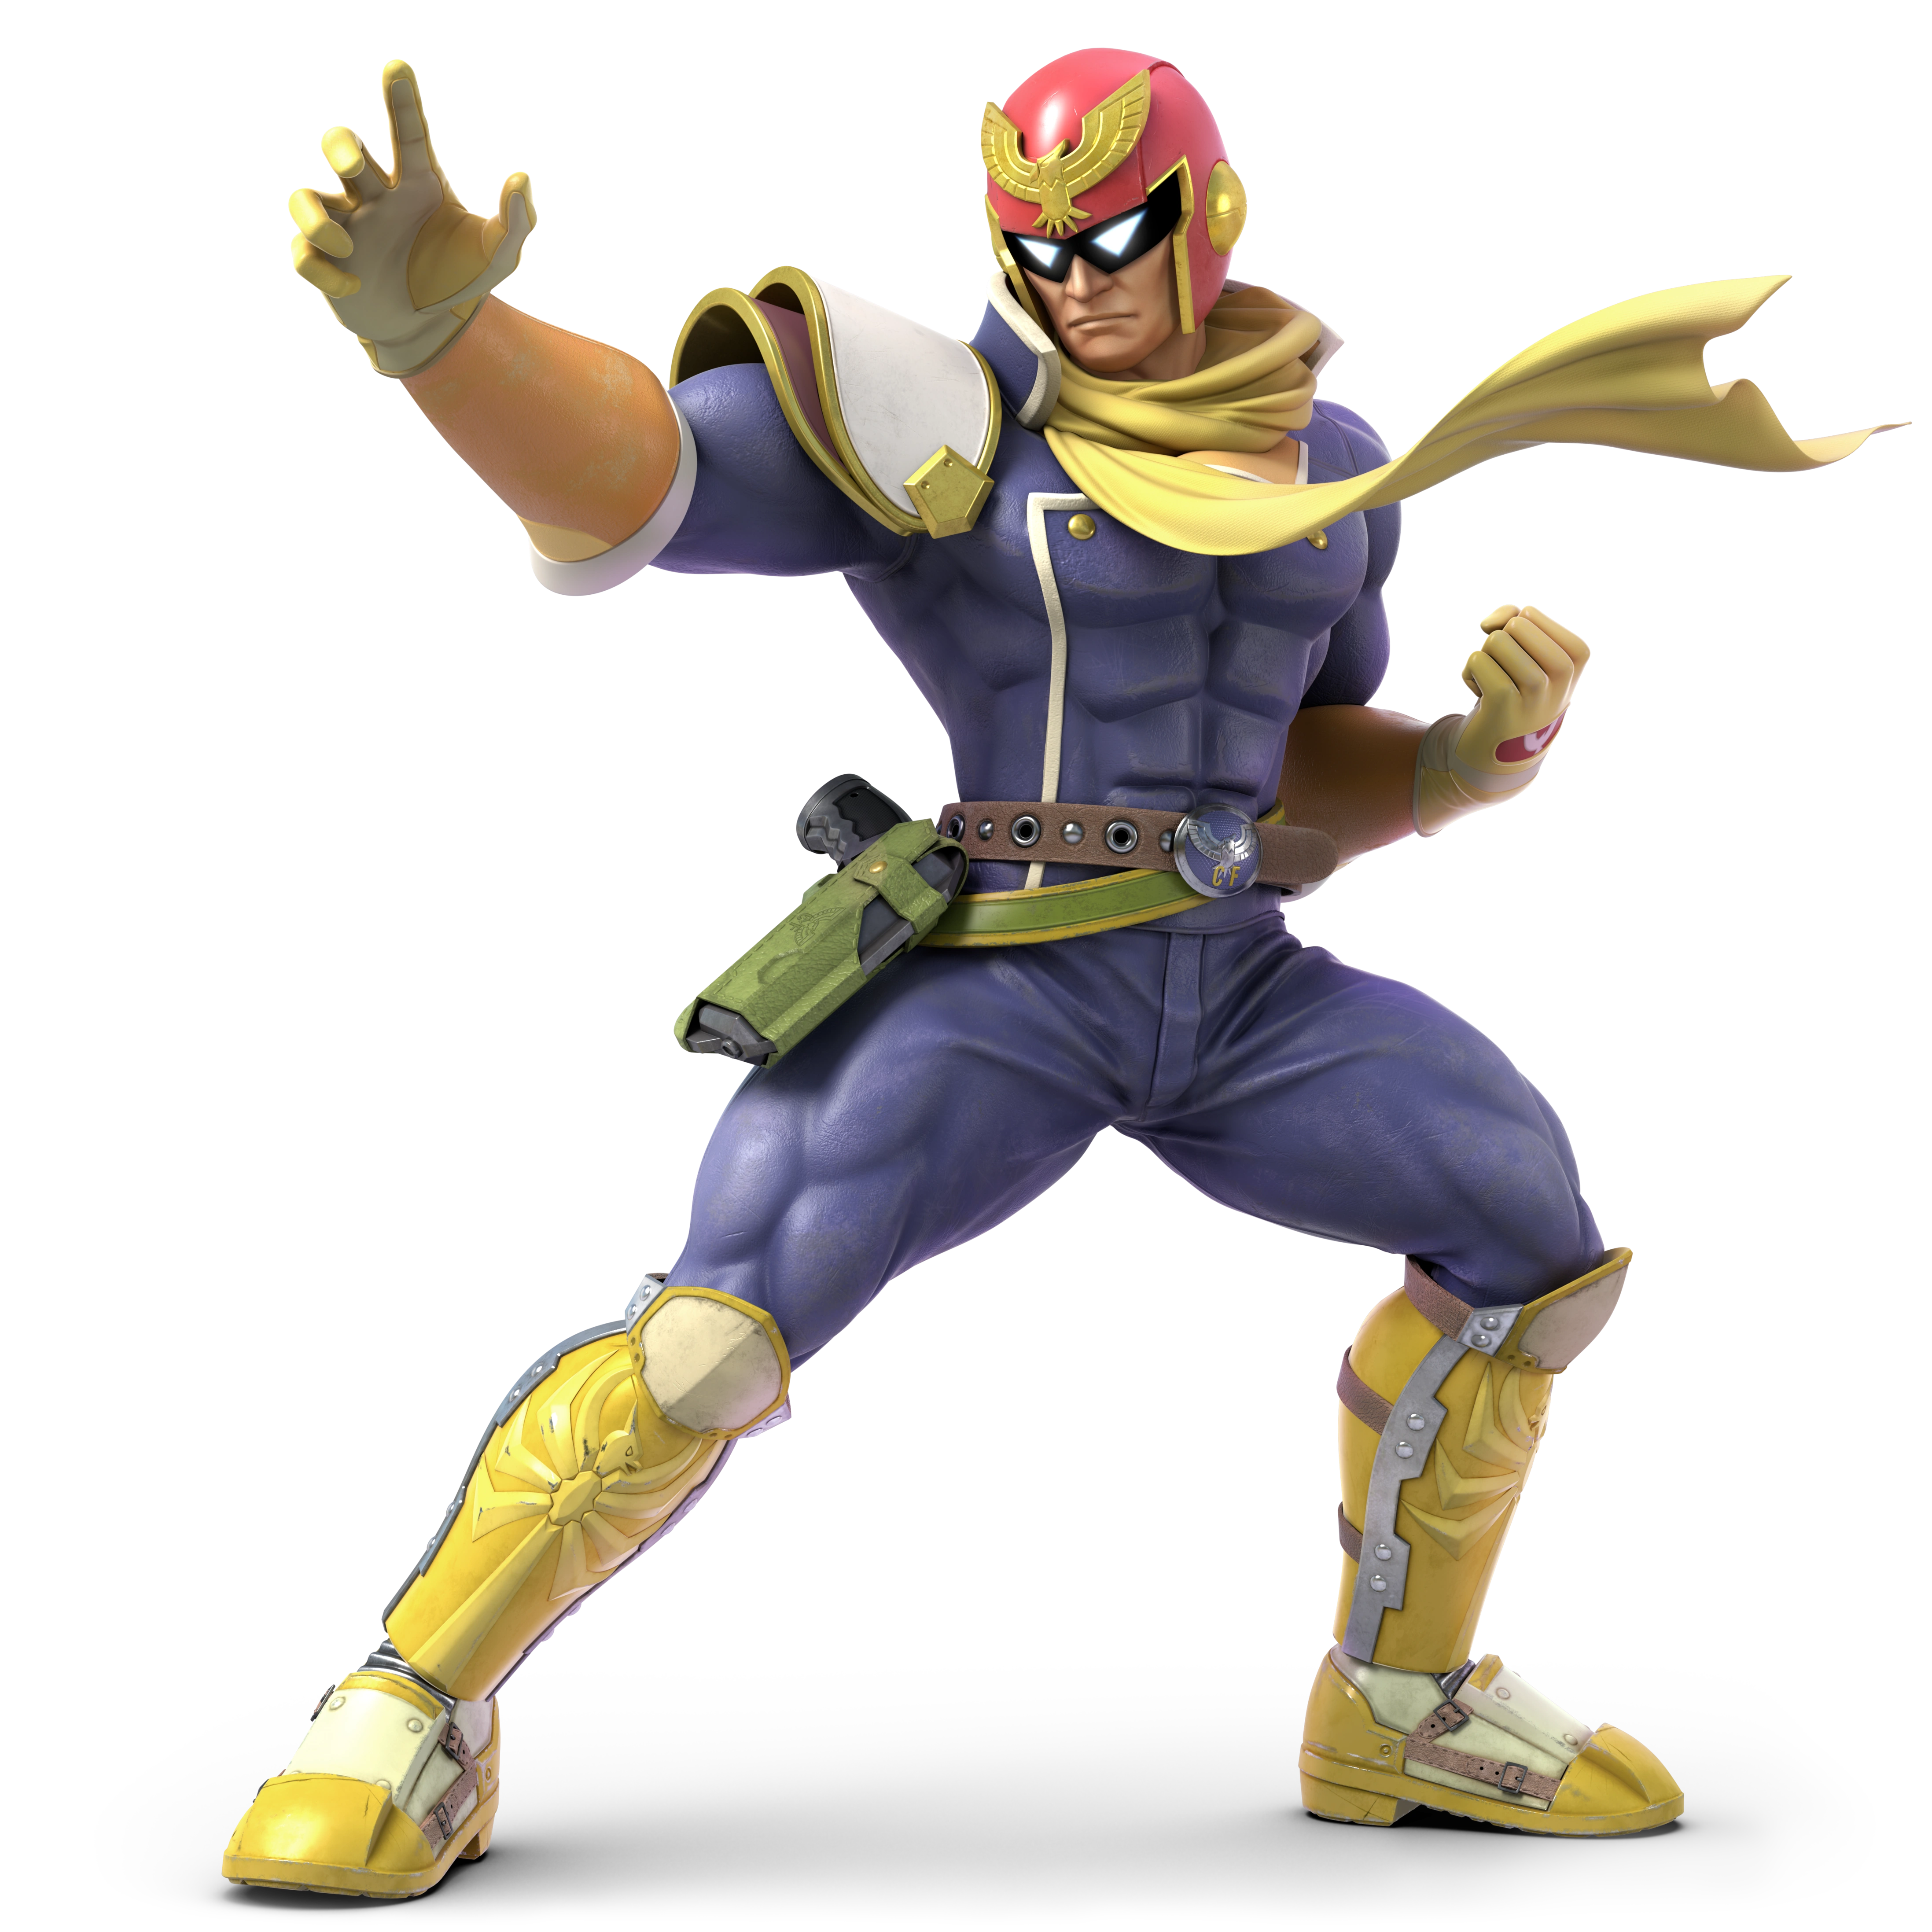
|
Name: Captain Falcon Debut: F-Zero (1990) Douglas Jay Falcon, known as the F-Zero racer/bounty hunter Captain Falcon, acts as a hard-hitting fighter that's fast on his feet. Falcon requires a lot of skill to truly master due to his immense speed and his wild physical attacks, preferring to launch himself into opponents and run back out before repeating the process. He's quick, just like his home games. |
Neutral Special: Falcon Punch. Captain Falcon pulls back his arm as it covers itself in flames before unleashing a deadly punch, all while screaming "Falcon...PAWNCH!!" Side Special: Raptor Boost. Captain Falcon dashes across the stage and unleashes a fiery uppercut at the end of the attack, stumbling if an opponent isn't hit. Up Special: Falcon Dive. Captain Falcon shoots up into the air and, if he touches a foe, grabs them before launching both of them backwards surrounded by flames. Down Special: Falcon Kick. Captain Falcon lunges across the stage as his boot catches fire, damaging any opponent it touches before Falcon comes to a stop. Final Smash: Blue Falcon. Captain Falcon calls upon the Blue Falcon to ram into nearby foes, forcing them onto a race track as Falcon speeds towards them. The impact of the vehicle sends the fighters flying once the attack is over. | |
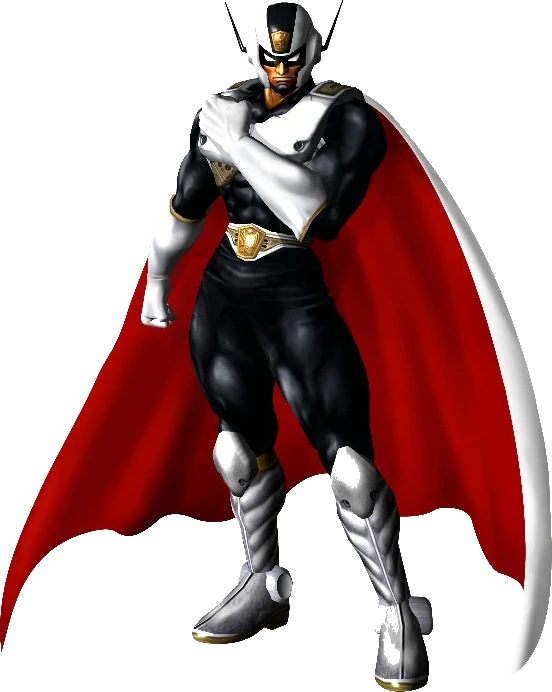
|
Name: Phoenix Debut: F-Zero AX (2003) Phoenix is a time-traveling police officer from the 29th century on a mission to take down any criminals he can find. In Smash, he acts as Captain Falcon's echo fighter, using the same moveset as the captain while being a slightly heavier fighter based on getting in and getting out as fast as he can. His partner, QQQ, can be seen in his Final Smash. |
Neutral Special: Phoenix Strike. Phoenix pulls back his arm as it covers itself in electriciy before unleashing a deadly punch, all while screaming "Phoenix...STRIKE!" Side Special: Eagle Boost. Phoenix dashes across the stage and unleashes an electric uppercut at the end of the attack, stumbling if an opponent isn't hit. Up Special: Phoenix Rise. Phoenix shoots higher up into the air than Falcon and, if he touches a foe, grabs them before launching both of them backwards surrounded by electricity. Down Special: Phoenix Kick. Phoenix lunges across the stage as his boot is enveloped in blue electric energy, damaging any opponent it touches before Phoenix comes to a stop. Final Smash: Rainbow Phoenix. Phoenix calls upon his vehicle, the Rainbow Phoenix, to ram into an opponent before sending them onto a race track. Both the Rainbow Phoenix and QQQ's Rolling Turtle crash into these foes, sending them flying off the stage. | |
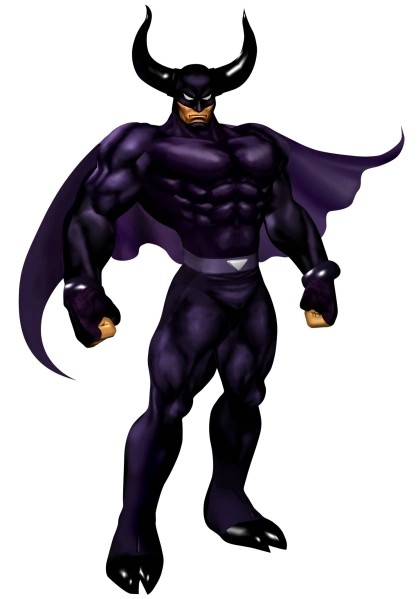
|
Name: Black Shadow Debut: F-Zero X (1998) The cold-hearted leader of the BS Group, Black Shadow, steps into Smash in order to take down those he considers weaker than him. His moveset is largely based off of F-Zero vehicles, using variations of the spin attack and boost mechanics from the games. He's a heavyweight that packs a powerful punch, preferring to get in on an opponent and force them to get out instead. |
Neutral Special: Bully Charged. Black Shadow charges up an attack from his horns, staying in one spot before lunging forwards and shoving opponents into the air. Side Special: Shadow Spin. Black Shadow holds back an attack before spinning around in place, clobbering any nearby opponents in a similar way to a spin attack from the F-Zero series. Up Special: Boost. Black Shadow performs a boost akin to an F-Zero vehicle, shooting upwards at a blistering speed as dark energy trails behind him. Down Special: Blood Bind. Black Shadow launches a ball of dark energy at opponents that completely ties them up, forcing them to take damage while immobile for a short time. Final Smash: Black Bull. Black Shadow laughs as the Black Bull speeds towards foes and knocks them onto Phantom Road. The Black Bull then rushes at them again before Black Shadow jumps out, the vehicle exploding upon colliding with an opponent. | |

|
Name: Jody Summer Debut: F-Zero X (1998) A spokesperson of the Galactic Space Federation and highly popular F-Zero racer, Jody Summer is no one to scoff at. In Smash, she’s a fusion of fighters such as Captain Falcon, Zero Suit Samus, Chun-Li, and even Bayonetta, being one of the fastest characters in the roster while utilizing acrobatic and fast fiery kicks to duke it out with her fellow F-Zero opponents. |
Neutral Special: Cat’s Pride. Jody Summer kicks multiple times via repeatedly use of the B button, purple flames erupting around the foot nearing the end of the attack. While taken from Chun-Li, the attack’s properties are different due to the fire. Side Special (Ground): Afterburner. Jody Summers slides along the ground, purple flames surrounding her. She launches into a vertical kick if the attack is timed just right, similar to Bayonetta’s attack. Side Special (Air): Take Off. Jody Summer launches into a vertical kick, launching any opponent caught in her way high up while she’s able to get back down just fine. This functionally works the same as Bayonetta’s move. Up Special: Cat Scratch. Jody Summer launches herself upwards and, if she makes contact with an opponent, punches them away from her as she gains additional air time. Her opponents are sent farther than the ones in Captain Falcon’s up special. Down Special: Flip Kick. Jody Summer leaps up in an arc shape, bouncing off any walls or fighters that stand between her. The attack does more damage to foes than Zero Suit Samus’s version while staying at the same speed. Final Smash: White Cat. Jody Summer calls upon her vehicle, the White Cat, as it rams into nearby opponents and forces them onto a race track. Jody, now in the vehicle, proceeds to run over the fighter and speed off as the fighter is sent soaring off into the distance. | |
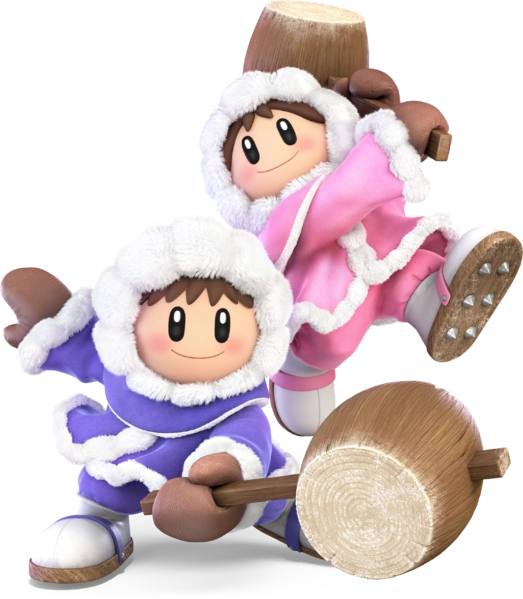
|
Name: Ice Climbers Debut: Ice Climber (1985) Popo (the one in blue) and Nana (the one in pink) are two parka-wearing kids who are known for their single NES outing in the 80's...and their ability to climb frozen peaks. The two fight together and down work well when separated from each other. If one is to unleash an attack, then the other will use the same attack right after them. |
Neutral Special: Ice Shot. The Ice Climbers shoot out small chunks of ice that slide across the stage and damage whoever they touch. Side Special: Squall Hammer. The Ice Climbers hold hands and spin around with their hammers out, acting like a small tornado that can even rise. Up Special: Belay. Popo throws Nana upwards with a rope with Nana pulling upwards, launching both of them even higher than usual. Down Special: Blizzard. The Ice Climbers blow frosty wind out from their hands, freezing and damaging anyone it contacts. Final Smash: Iceberg. A giant iceberg rises out of the ground and climbs high into the stratosphere, taking fighters caught in on a ride. It spins around with a polar bear on top, ready to deal some damage. | |
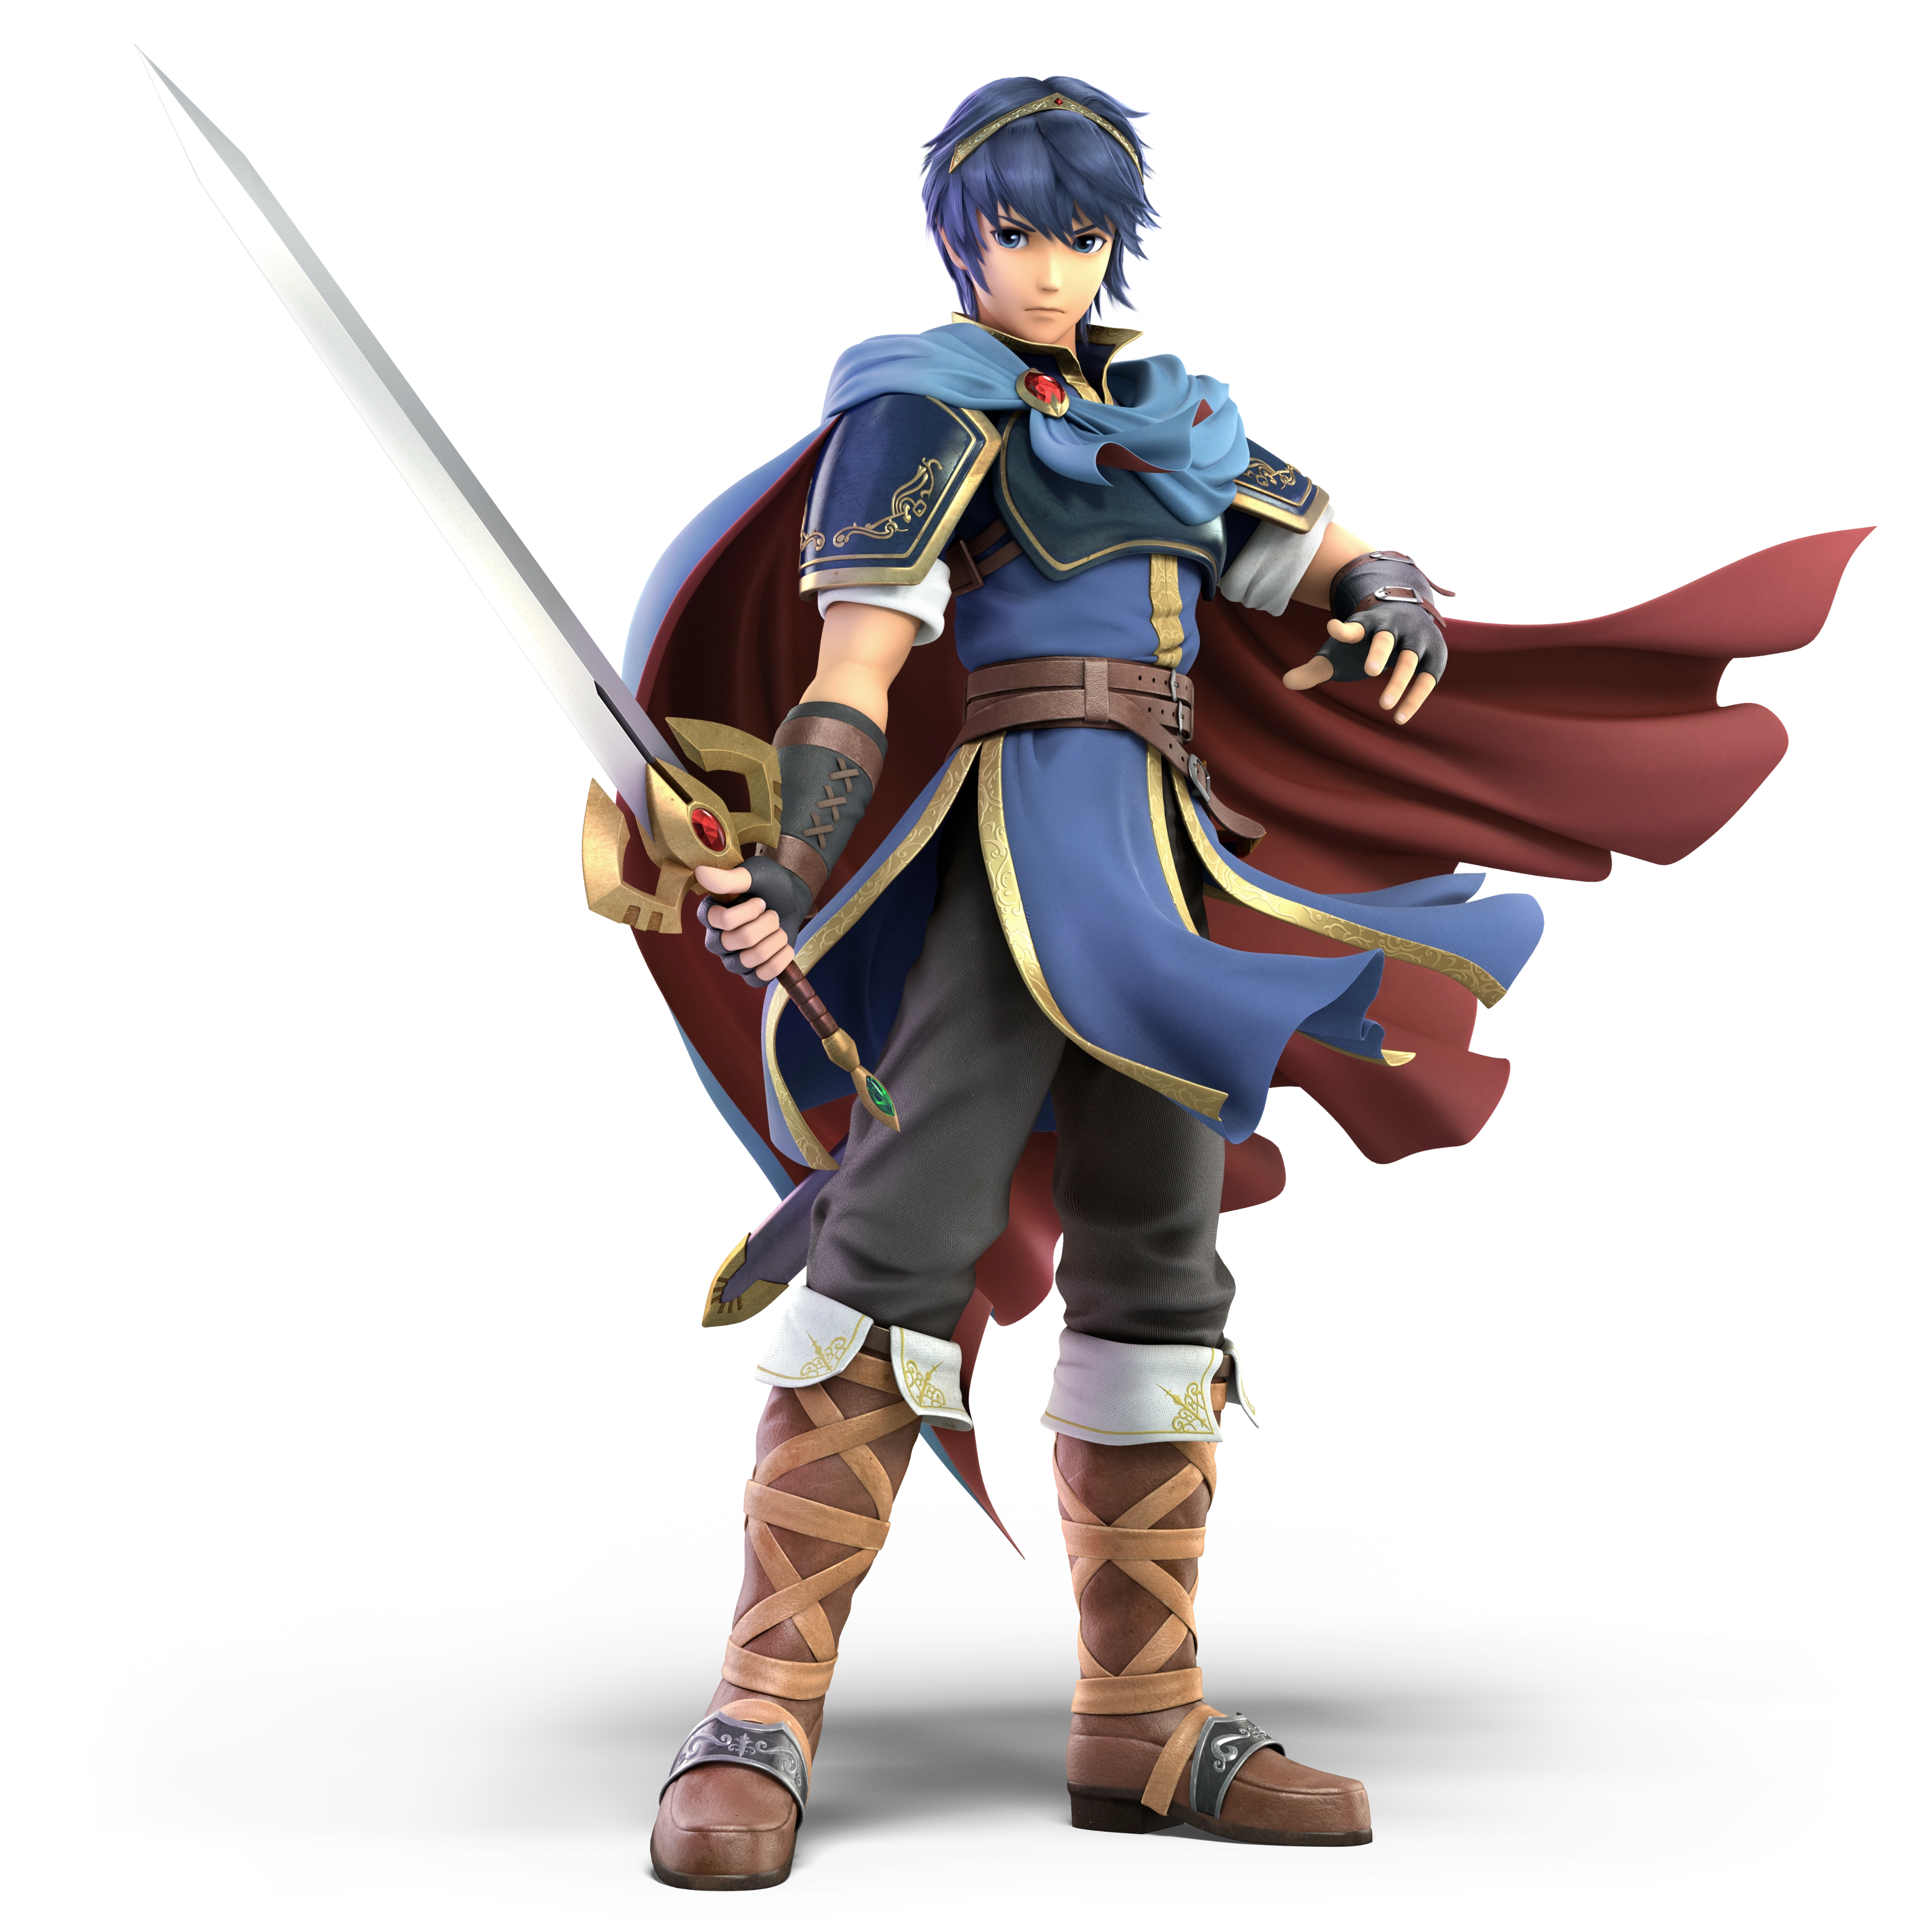
|
Name: Marth Debut: Fire Emblem: Shadow Dragon and the Blade of Light (1990) Marth is the prince of Altea and essentially the mascot of the Fire Emblem series. His moveset revolves entirely around his sword and the heavy-hitting tip, which can cause a lot of damage. Marth is also the pioneer of the Counter move many fighters now have. |
Neutral Special: Shield Breaker. Marth thrusts his sword out, the power of which is able to completely destroy shields. Side Special: Dancing Blade. Marth does a series of slashes with his sword, cutting through opponents. Up Special: Dolphin Slash. Marth does an uppercut with his sword, slashing upwards in the air. Down Special: Counter. A move that allows Marth to deflect any attack comes his way and return with a fast strike. Final Smash: Critical Hit. Marth rushes at an opponent with his sword straight out in front of him, impaling them and sending them flying off of the stage. | |
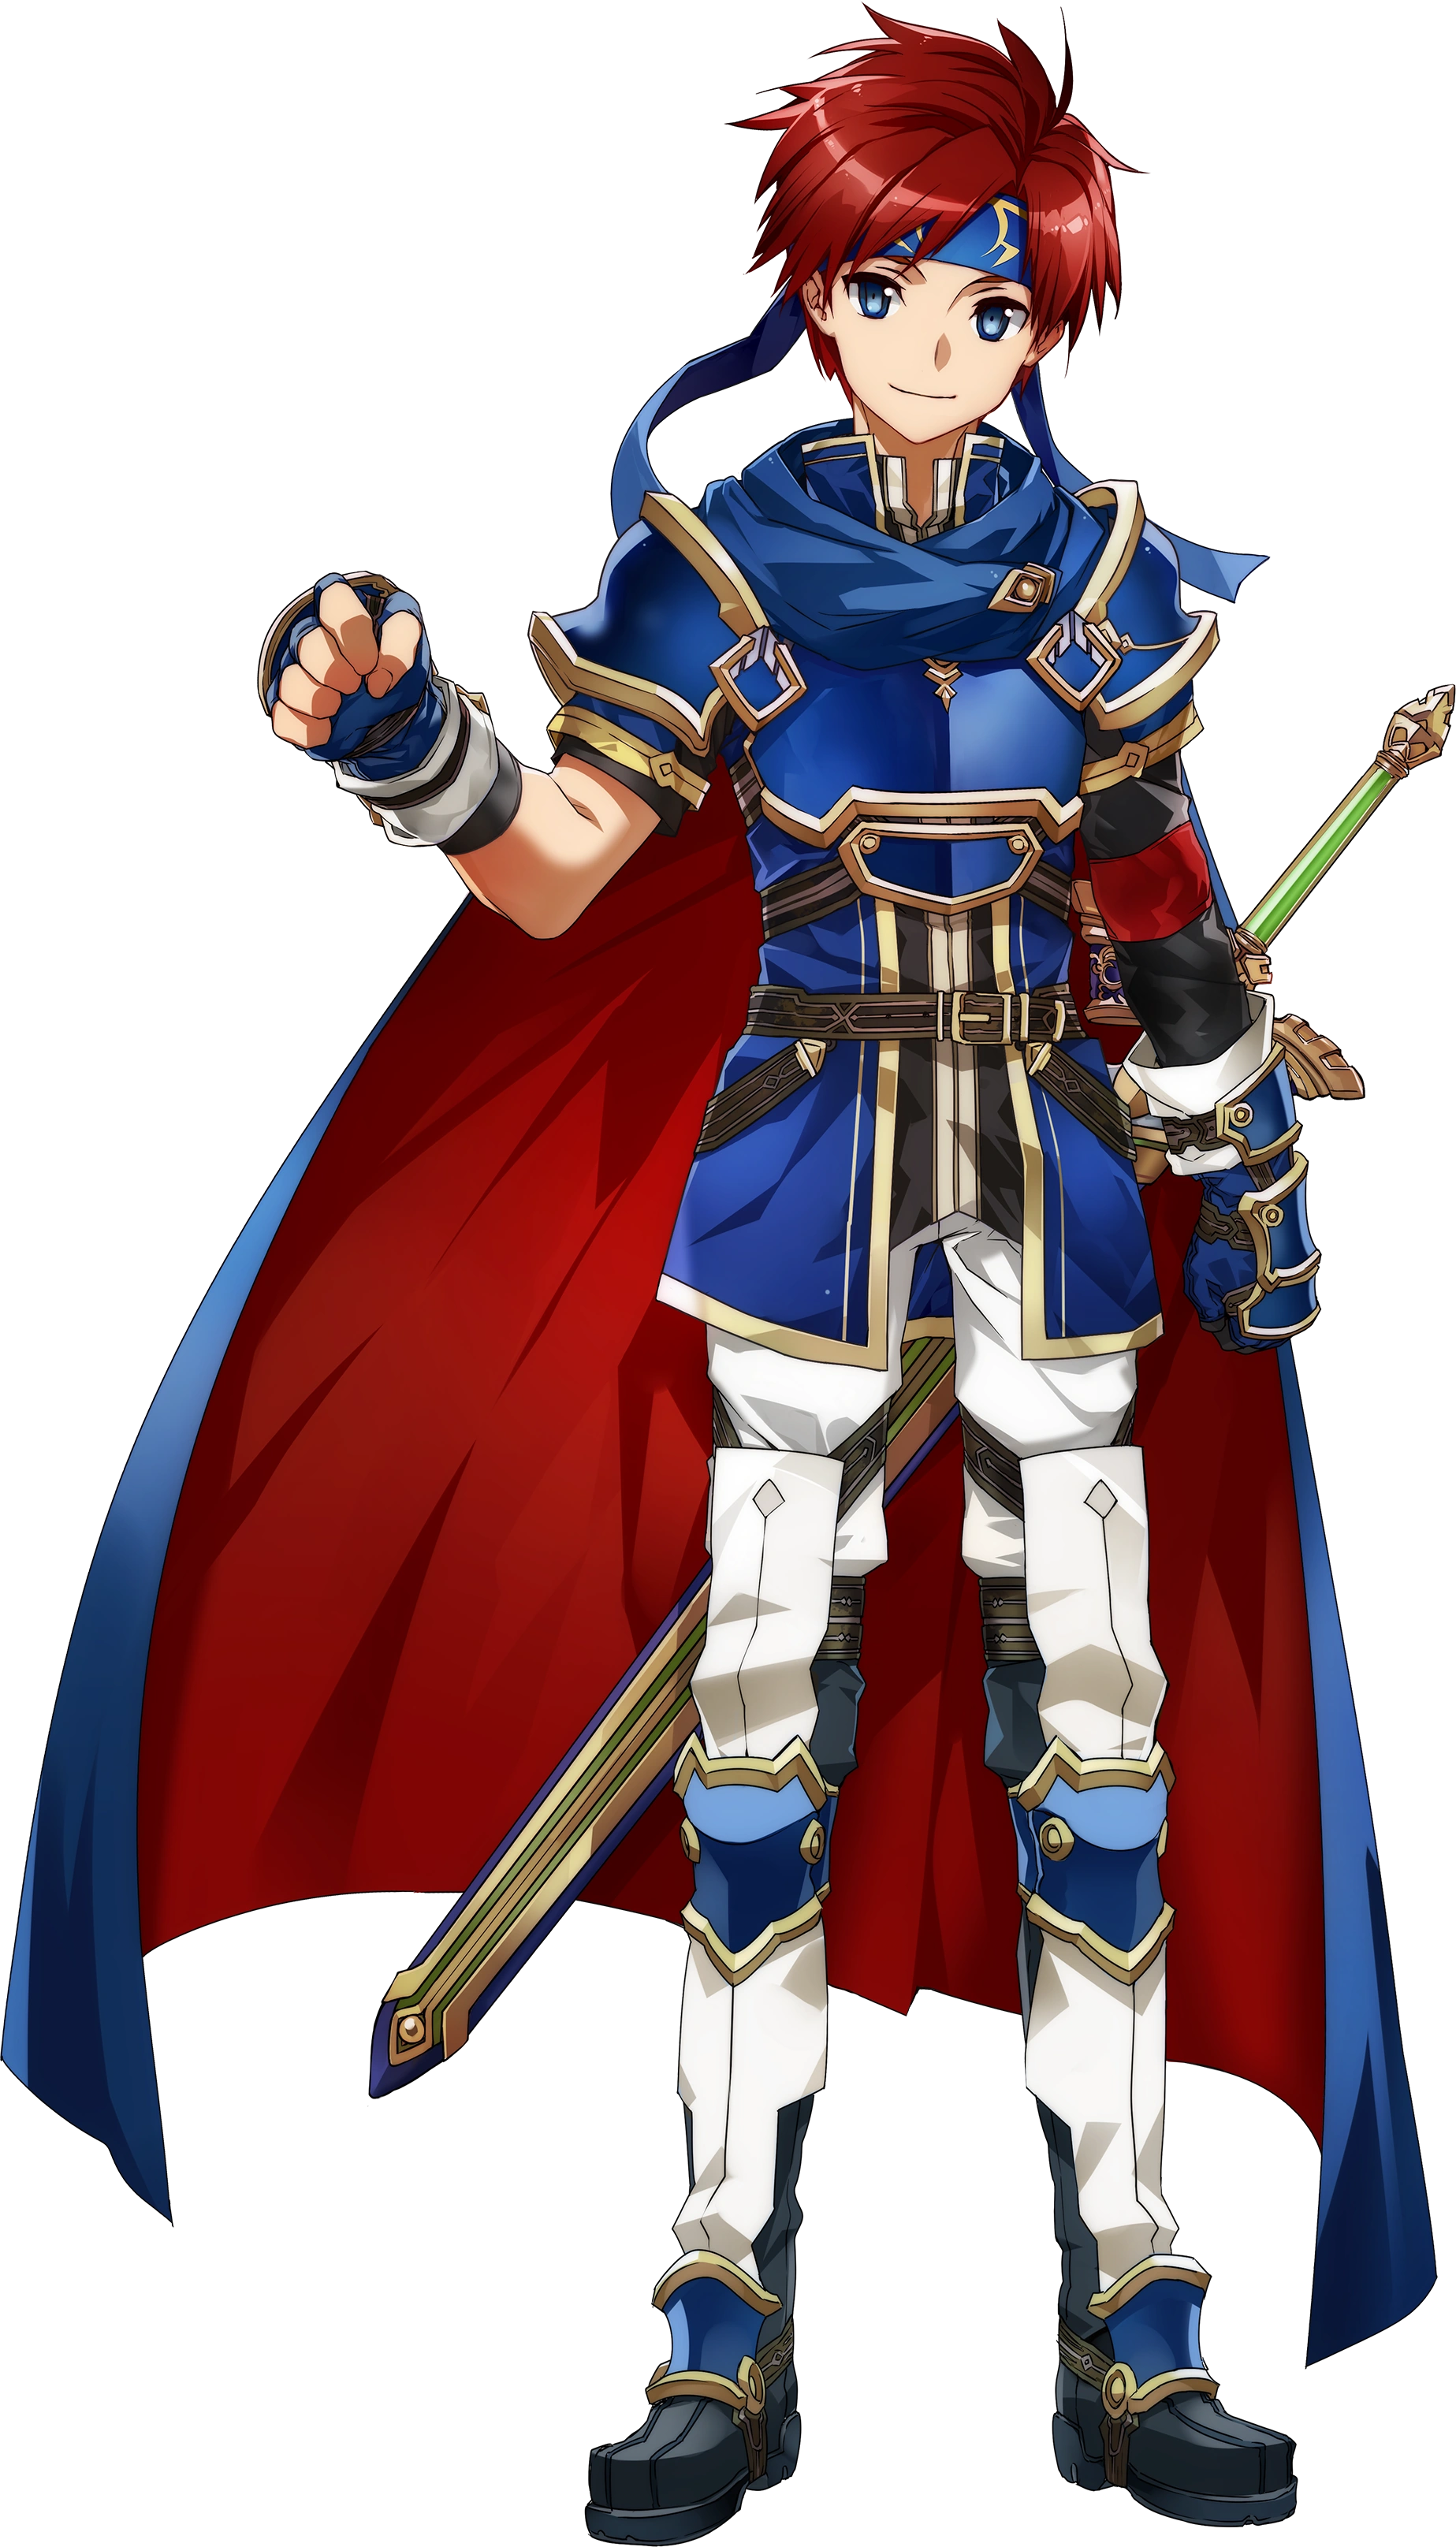
|
Name: Roy Debut: Fire Emblem (2003) Roy is the son of Eliwood, leading Pherae's own troops into glorious and victorious battles. Returning to his design from Melee, Roy is known for his short-range combat, rushing in and out of attacks. His sword, the Sword of Seals, deals physical damage with the addition of fire. In addition to his sword doing more damage at the hilt, his shorter height makes him much lighter and faster. |
Neutral Special: Flare Blade. Roy charges up a fiery strike with his sword, unleashing it at full power. If Roy charges it for too long, he'll be forced to unleash the attack and take damage while doing so. Side Special: Double-Edge Dance. Roy slashes at an opponent four times in rapid succession. The attack only works if the first attack lands, allow Up Special: Blazer. Roy thrusts his sword into the air, jumping upwards as fire trails behind him. If the attack hits a foe in the air, Roy soars higher than he usually would and ends up much closer to where he wants to be. Down Special: Counter. Roy blocks attacks with his sword raised, slashing at the opponent if they make contact with him. The fire on Roy's sword is able to knock back foes farther than Marth's. Final Smash: Critical Hit. Roy enacts a similar Final Smash to Marth's, but gives off more damage overall due to the fire that comes with Roy's unique properties. The meter above Roy replicates the style of his debut game on the Game Boy Advance. | |
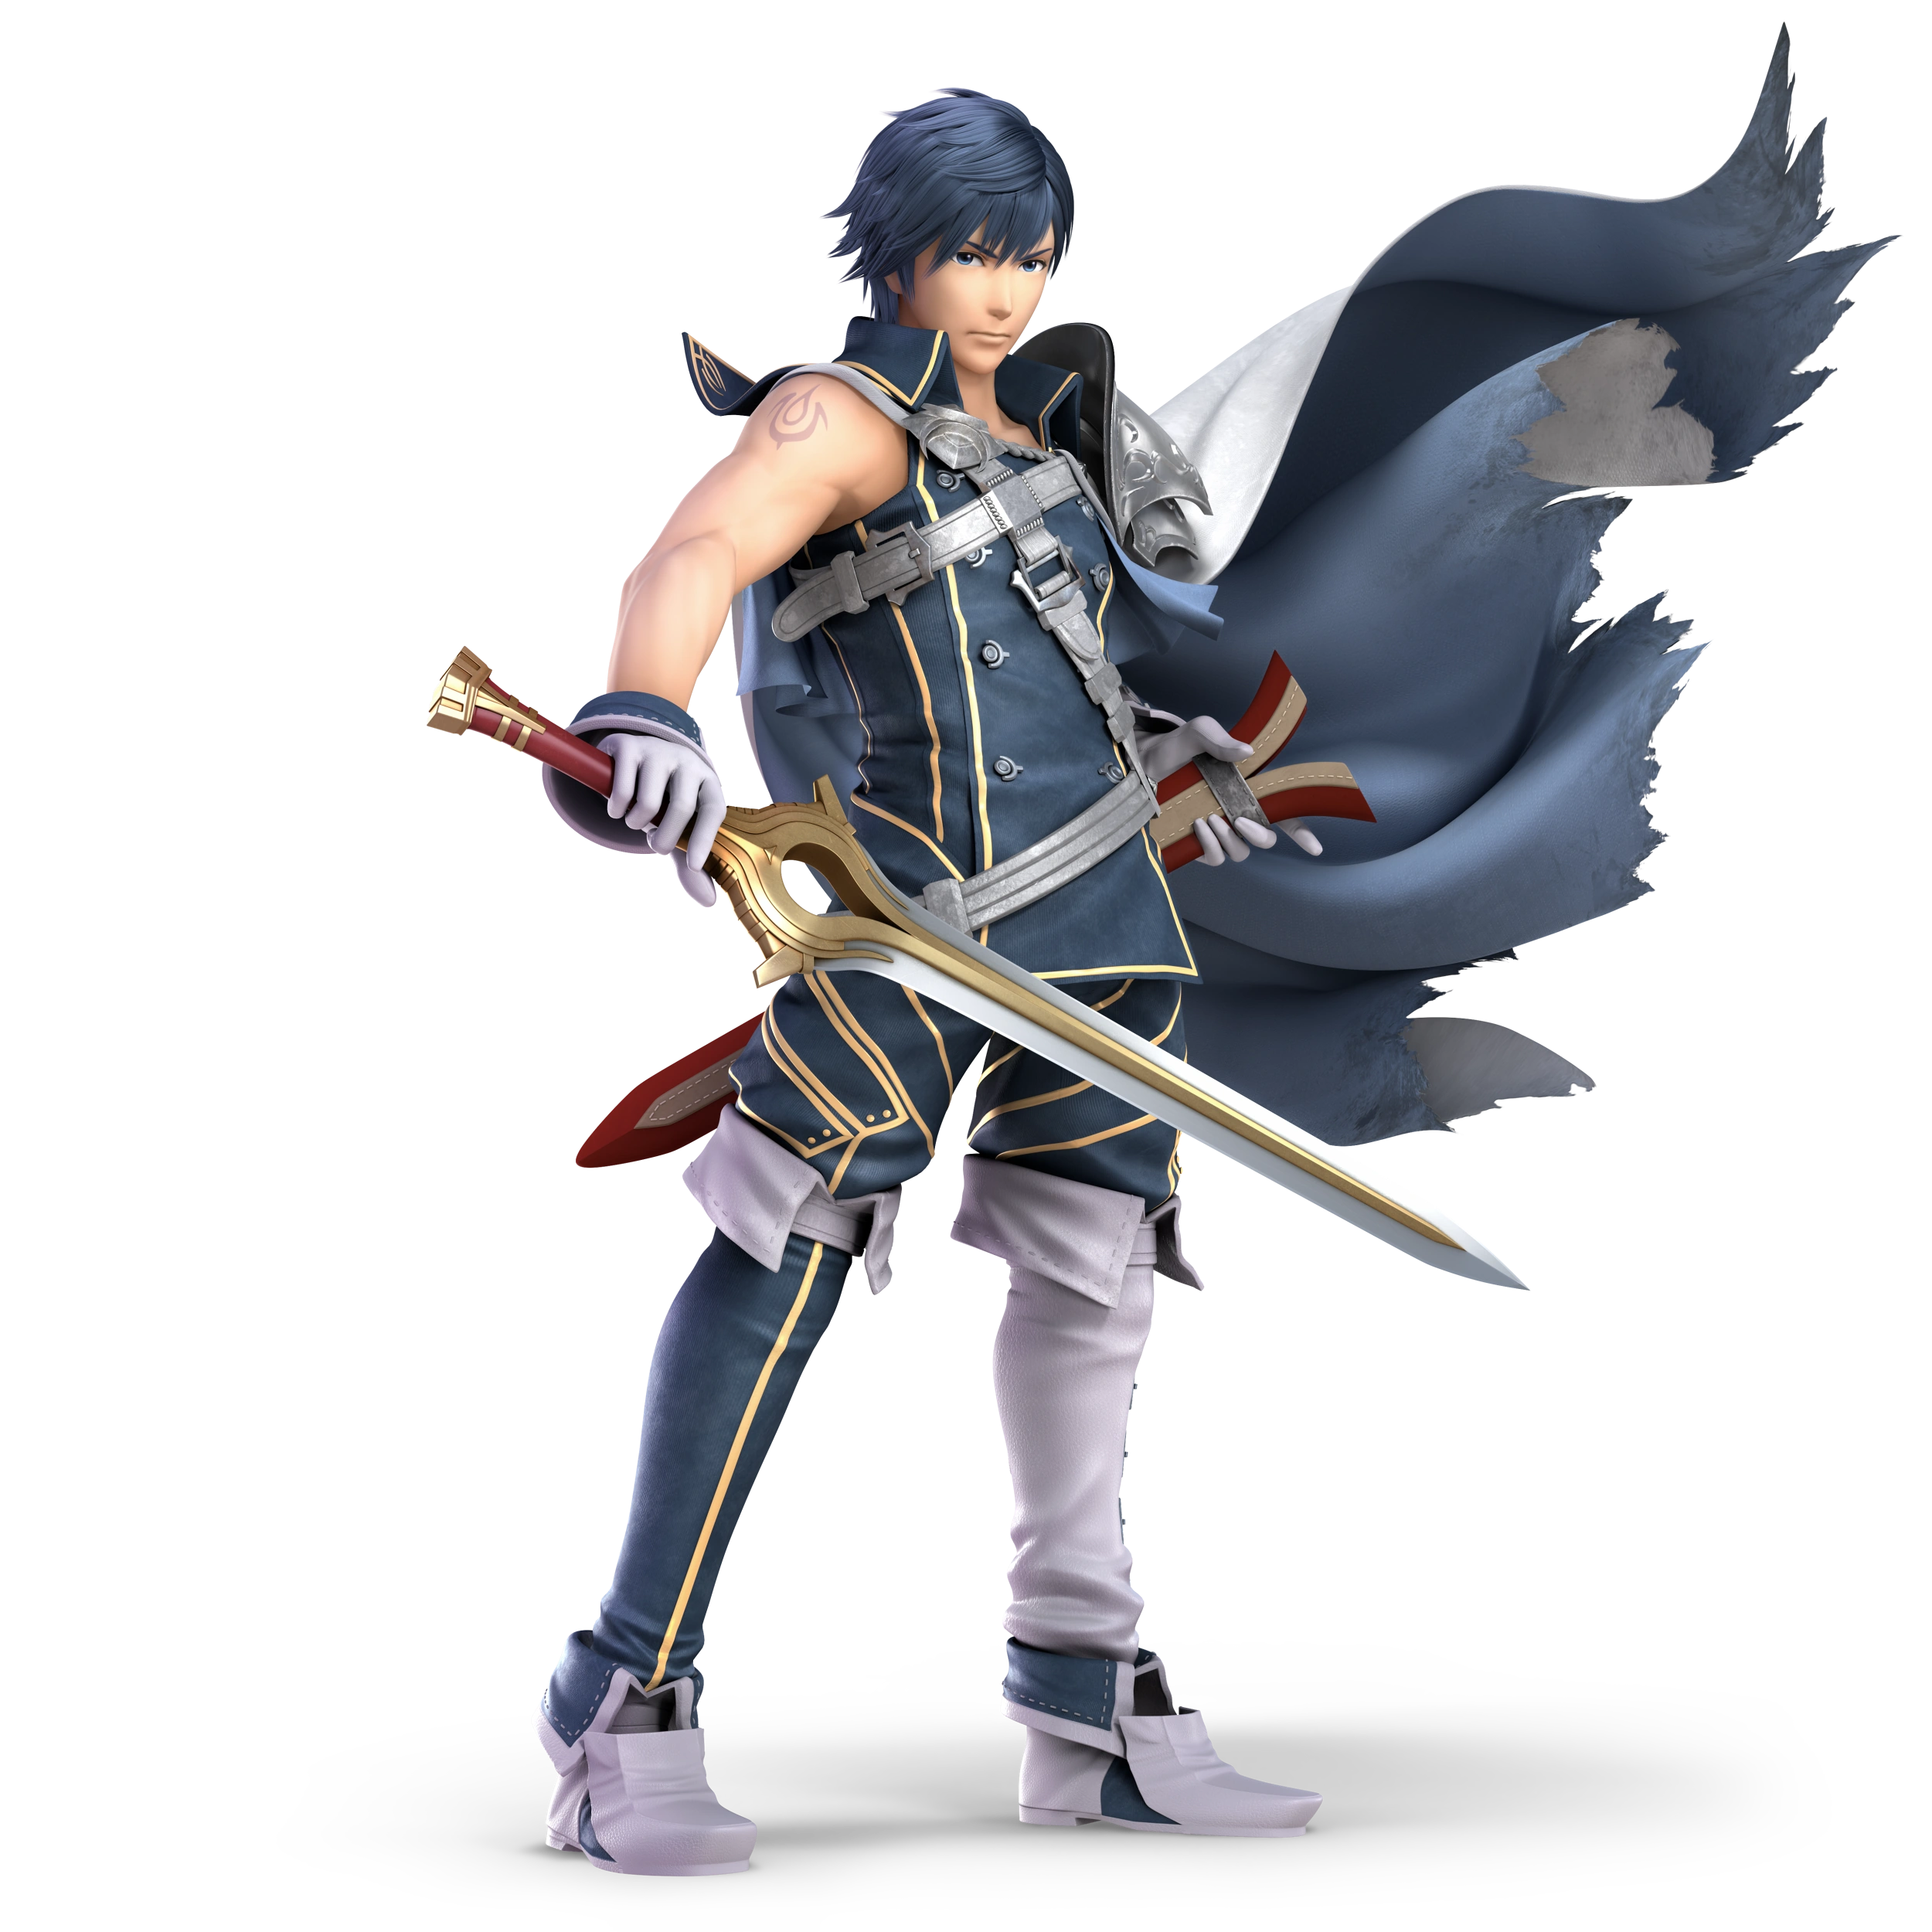
|
Name: Chrom Debut: Fire Emblem: Awakening (2012) The prince of Ylisse, Chrom returns from Super Smash Bros. Ultimate and remains an echo of Roy with elements of Ike. He's a mix between the two in more than just movement; he moves like a cross between the two, although he leans more towards Roy than Ike. |
Neutral Special: Aether Blade. Chrom charges the Falchion, surrounding it in Aether before unleashing it on a foe. Side Special: Quick Draw. Chrom lunges at an opponent and slashes at them with the Falchion. Up Special: Aether. Chrom throws the Falchion and spins in the air for a minute before grabbing anything nearby. Down Special: Counter. Chrom blocks any attack from an opponent, thrusting the Falchion outwards before finishing the attack. Final Smash: Aether of Awakening. Chrom traps opponents with a sword strike, rushing at them before striking them down with the Exalted Falchion, sending them all flying. | |
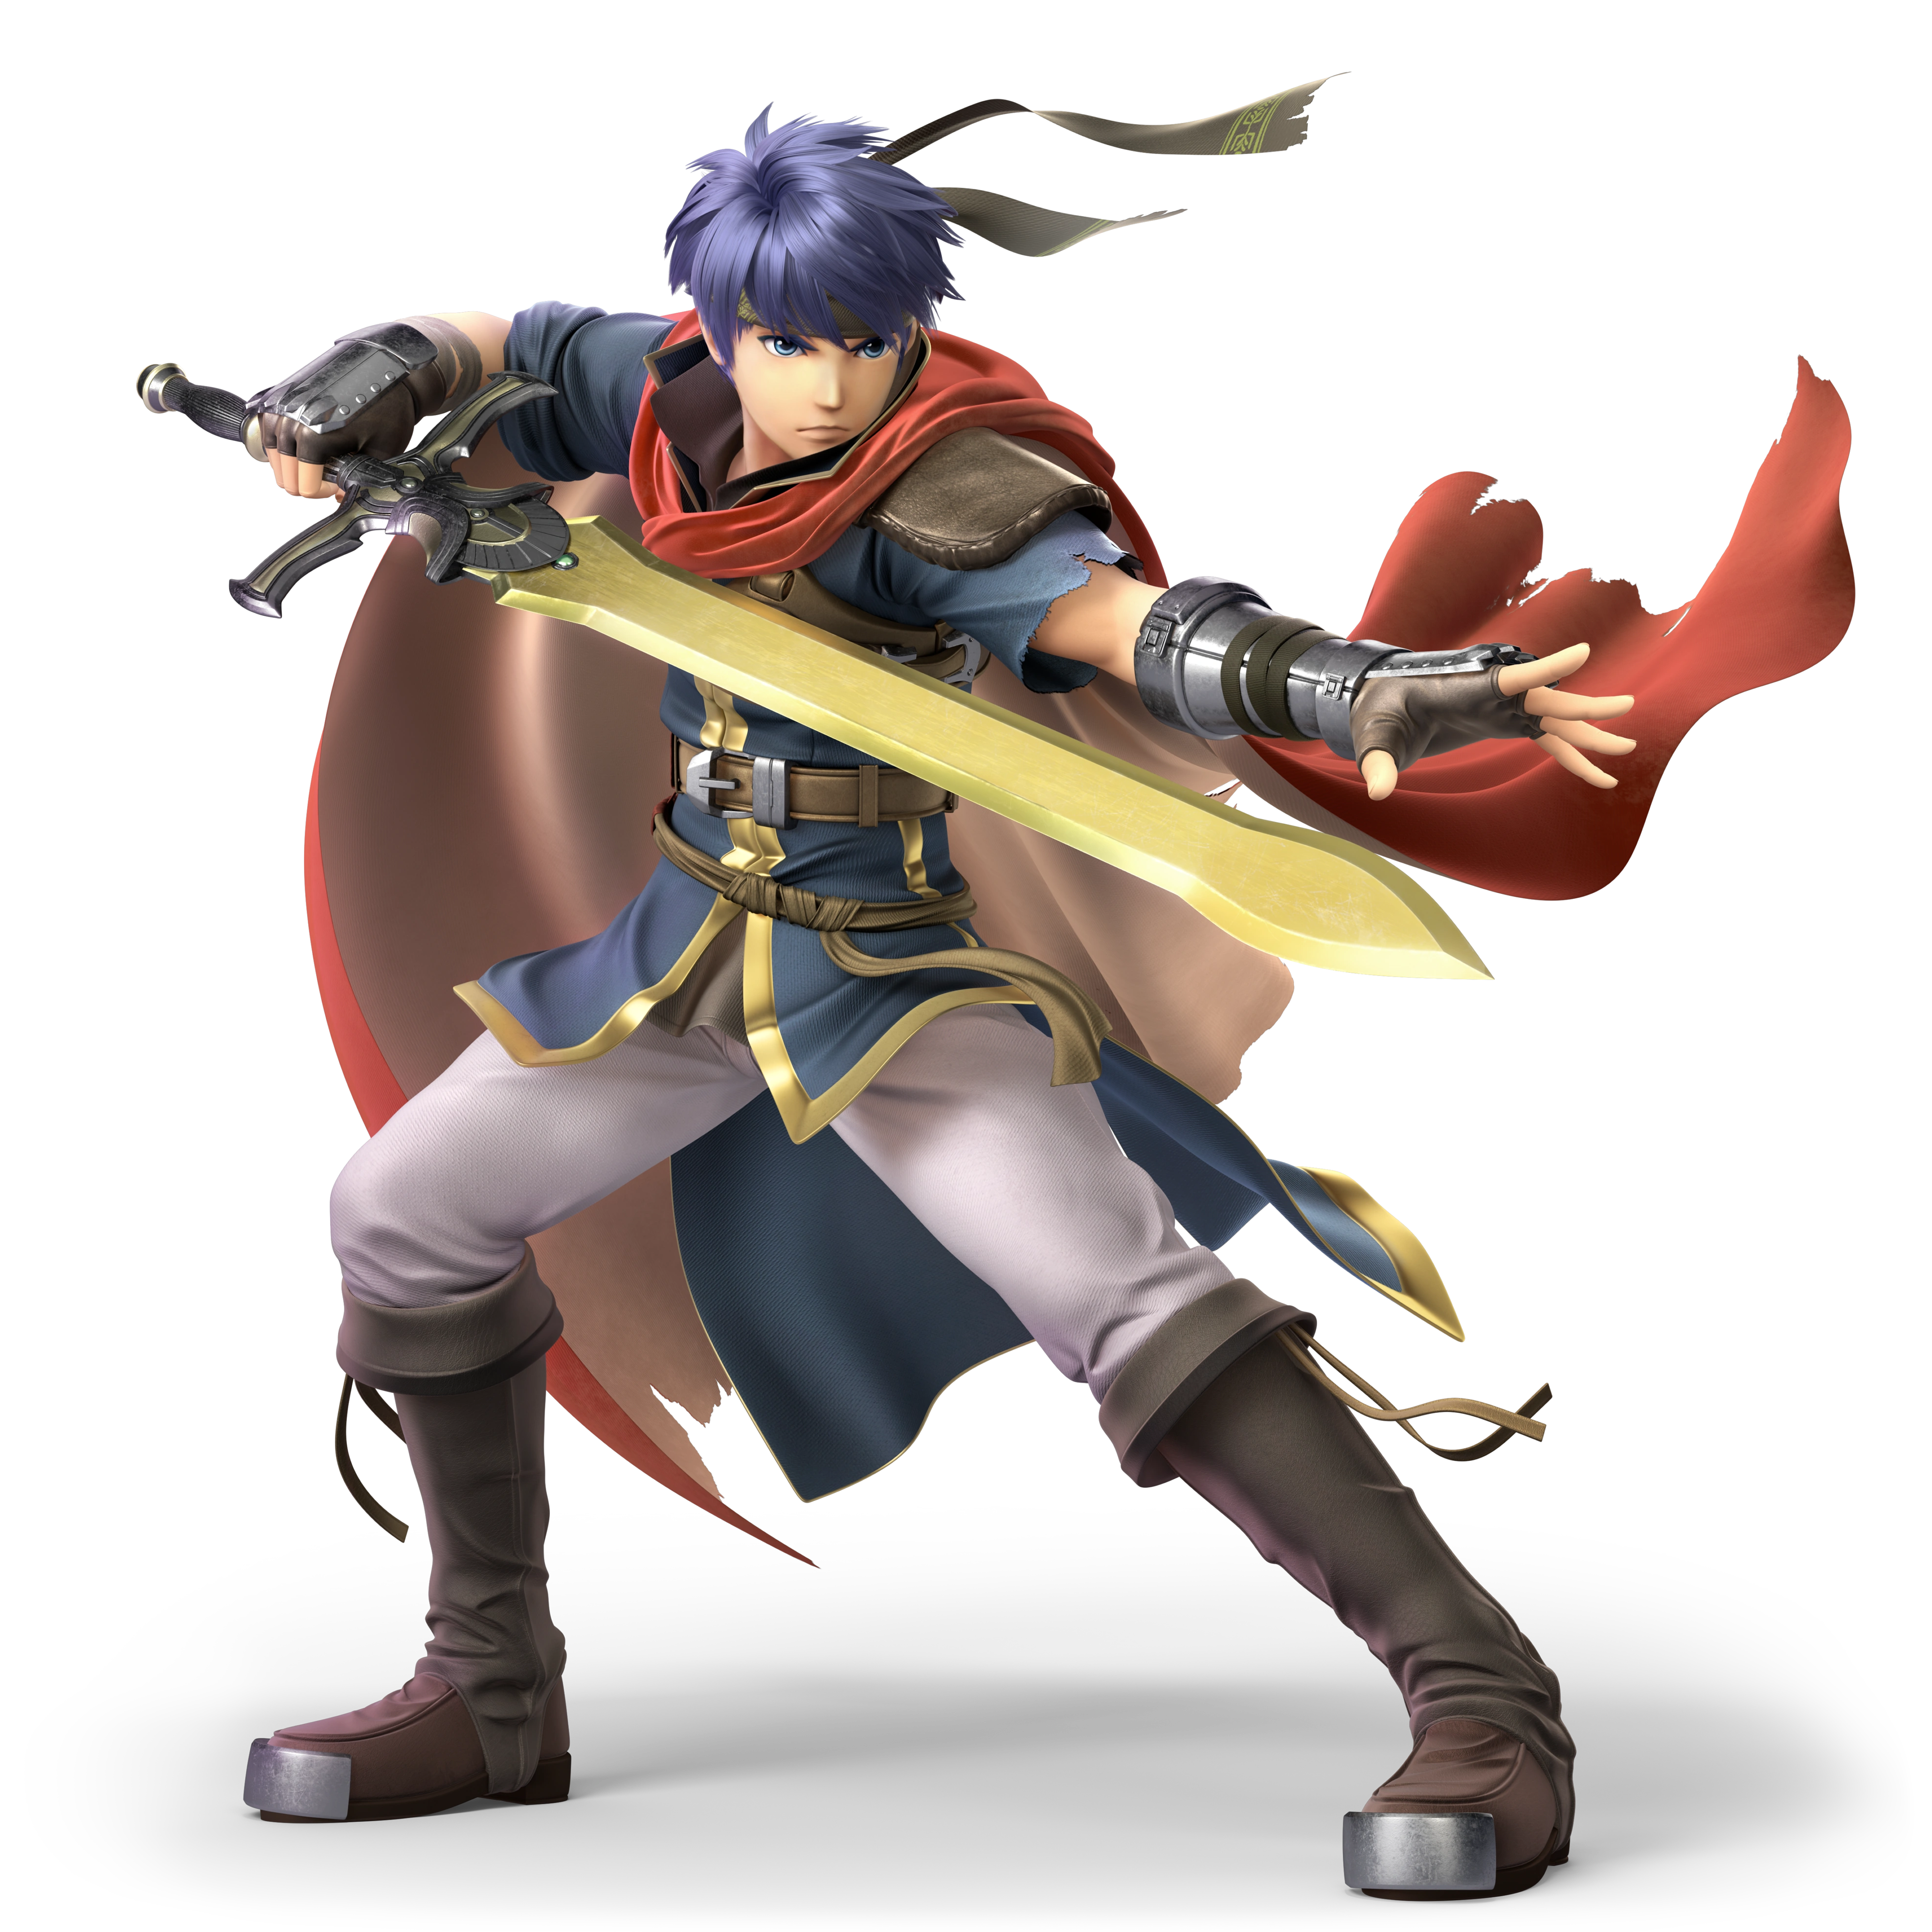
|
Debut: Fire Emblem: Path of Radiance (2005) The leader of the Greil Mercenaries, Ike has returned to Smash Bros. once again. Keeping his change to his neutral special from Ultimate, Ike is a heavy hitter, using strong attacks from his sword to fight. He's easily able to take on some of the most intimidating opponents there are. |
Neutral Special: Eruption Charge. Ike can charge up his sword and create a long-range eruption depending on how long he charges it when he strikes. Side Special: Quick Draw. Ike lunges at an opponent and slashes at them with his sword, slamming down on them and knocking them backwards.. Up Special: Aether. Ike throws his sword upwards and spins in the air for a minute before grabbing anything nearby, hitting anyone in his path. Down Special: Counter. This move is the same as Marth's, albeit much stronger and heavy-hitting when it does hit. Final Smash: Great Aether. Ike traps an opponent up in the air and proceeds to move around them slash at them with his sword, all while yelling "Great AETHER!!!" at the top of his lungs. | |

|
Name: Lucina Debut: Fire Emblem: Awakening (2012) Chrom's daughter from the future and taker of the Marth mantle, Lucina has been completely reworked to be in her Brave Princess form from Fire Emblem Heroes. Using multiple tactics from other spear-wielders in the Fire Emblem series, Lucina wields a mechanic known as Steady Breath, which rewards skilled play with a temporary boost to her specials. |
Neutral Special: Geirskögul Strike. Lucina thrusts Geirskögul outwards in a single direction, stabbing any nearby opponents and pushing them backwards. Side Special: Geirskögul's Descent. Lucina charges up an attack before throwing Geirskögul in an arc. The spear's landing can be devastating if a sweet spot is hit. Up Special: Luna. Lucina slashes Geirskögul upwards, creating a crescent-shaped arc and pushing her upwards a great deal. If used on a fighter just right, it weakens their defense slightly. Down Special: Spinning Spear. Lucina charges up an attack before twirling Geirskögul around in front of her, repeatedly stabbing and hitting trapped opponents. Final Smash: Pair Up. Lucina calls upon her younger brother, Morgan, and deal massive amounts of damage upon a fighter together. Lucina uses Geirskögul and stabs the opponent multiple time, while Morgan uses multiple different tomes. | |
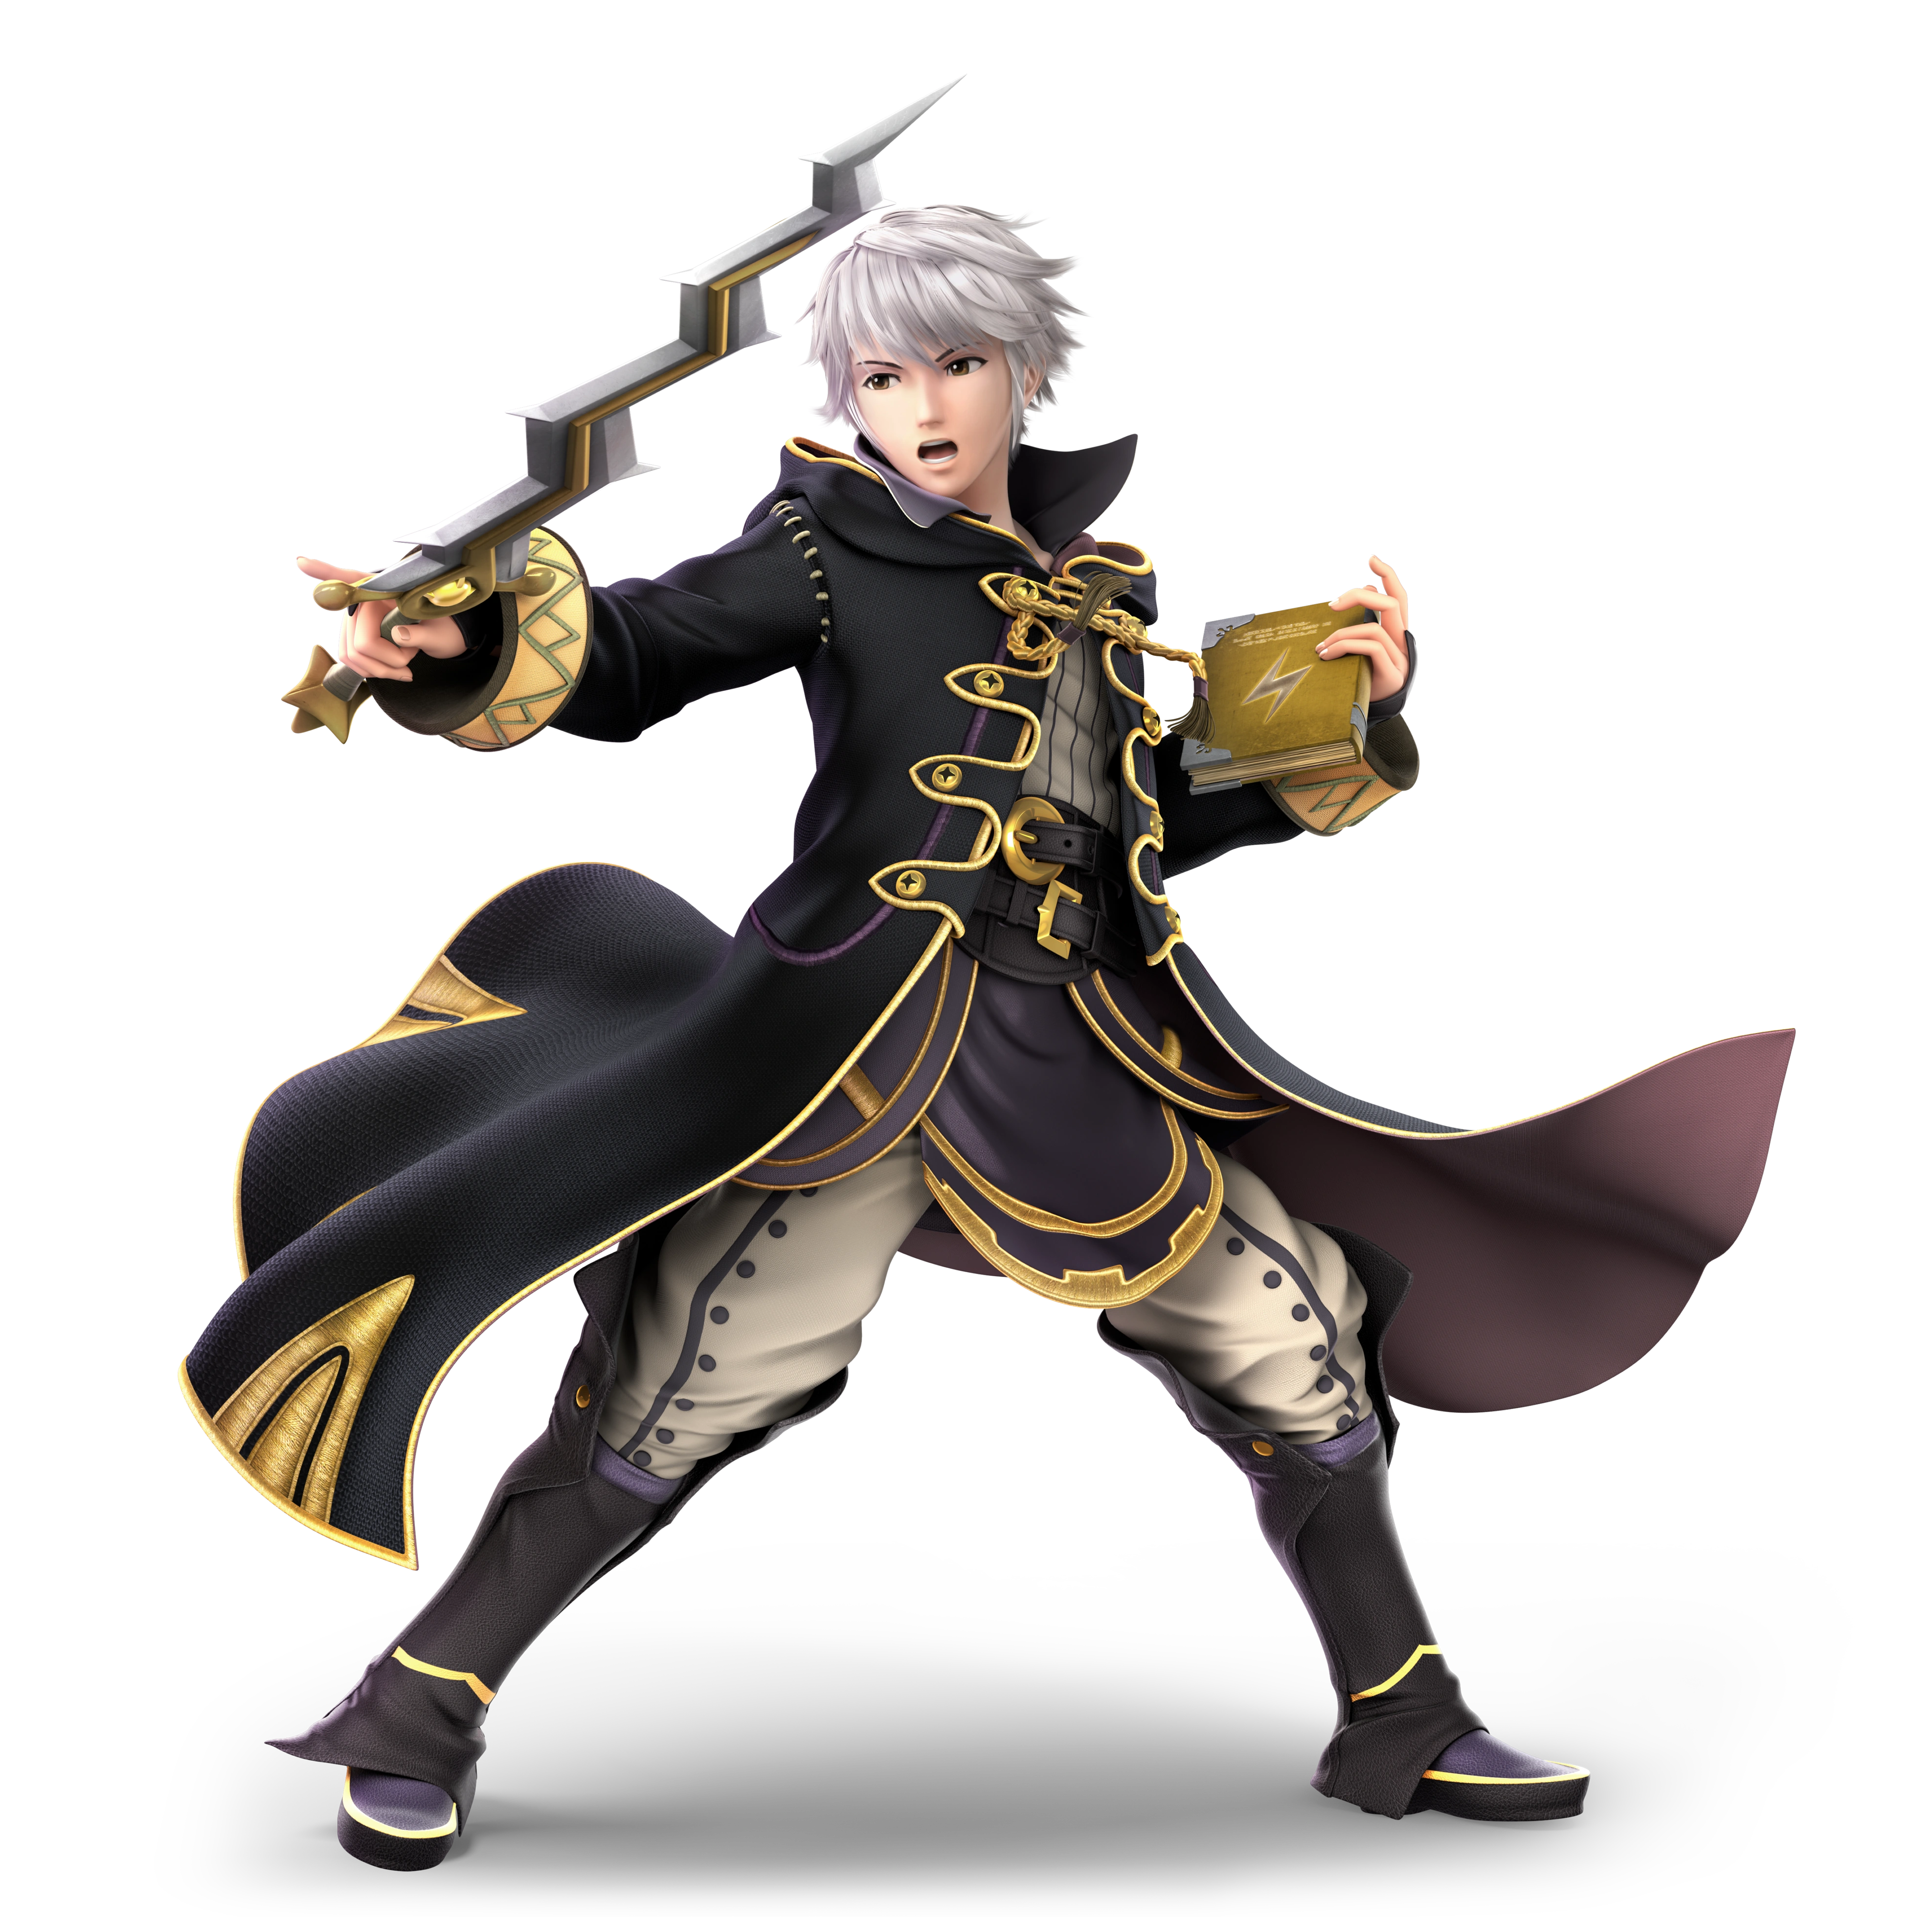
|
Name: Robin Debut: Fire Emblem: Awakening (2012) A member of the Fire Emblem: Awakening trio, Robin is the game's avatar character, being able to be customized to a player's liking. Robin is unique due to his use of tomes, having a limited use before they stop working and must "recharge". |
Neutral Special: Thunder. Robin charges up a bolt of electricity, shooting it out quickly in whatever direction he's facing. Side Special: Arcfire. Robin summons a ball of fire that he throws in the direction he's facing, burning whoever it touches. Up Special: Elwind. Robin shoots two blasts of wind out from under him, forcing him upwards. Down Special: Nosferatu. Robin traps an opponent in a cloud of dark energy, healing himself while damaging them. Final Smash: Fell Reincarnation. Robin, now overtaken by the Fell Dragon, Grima, starts to levitate and proceeds to unleash a blast of dark energy, brutally damaging anyone caught within the attack. | |
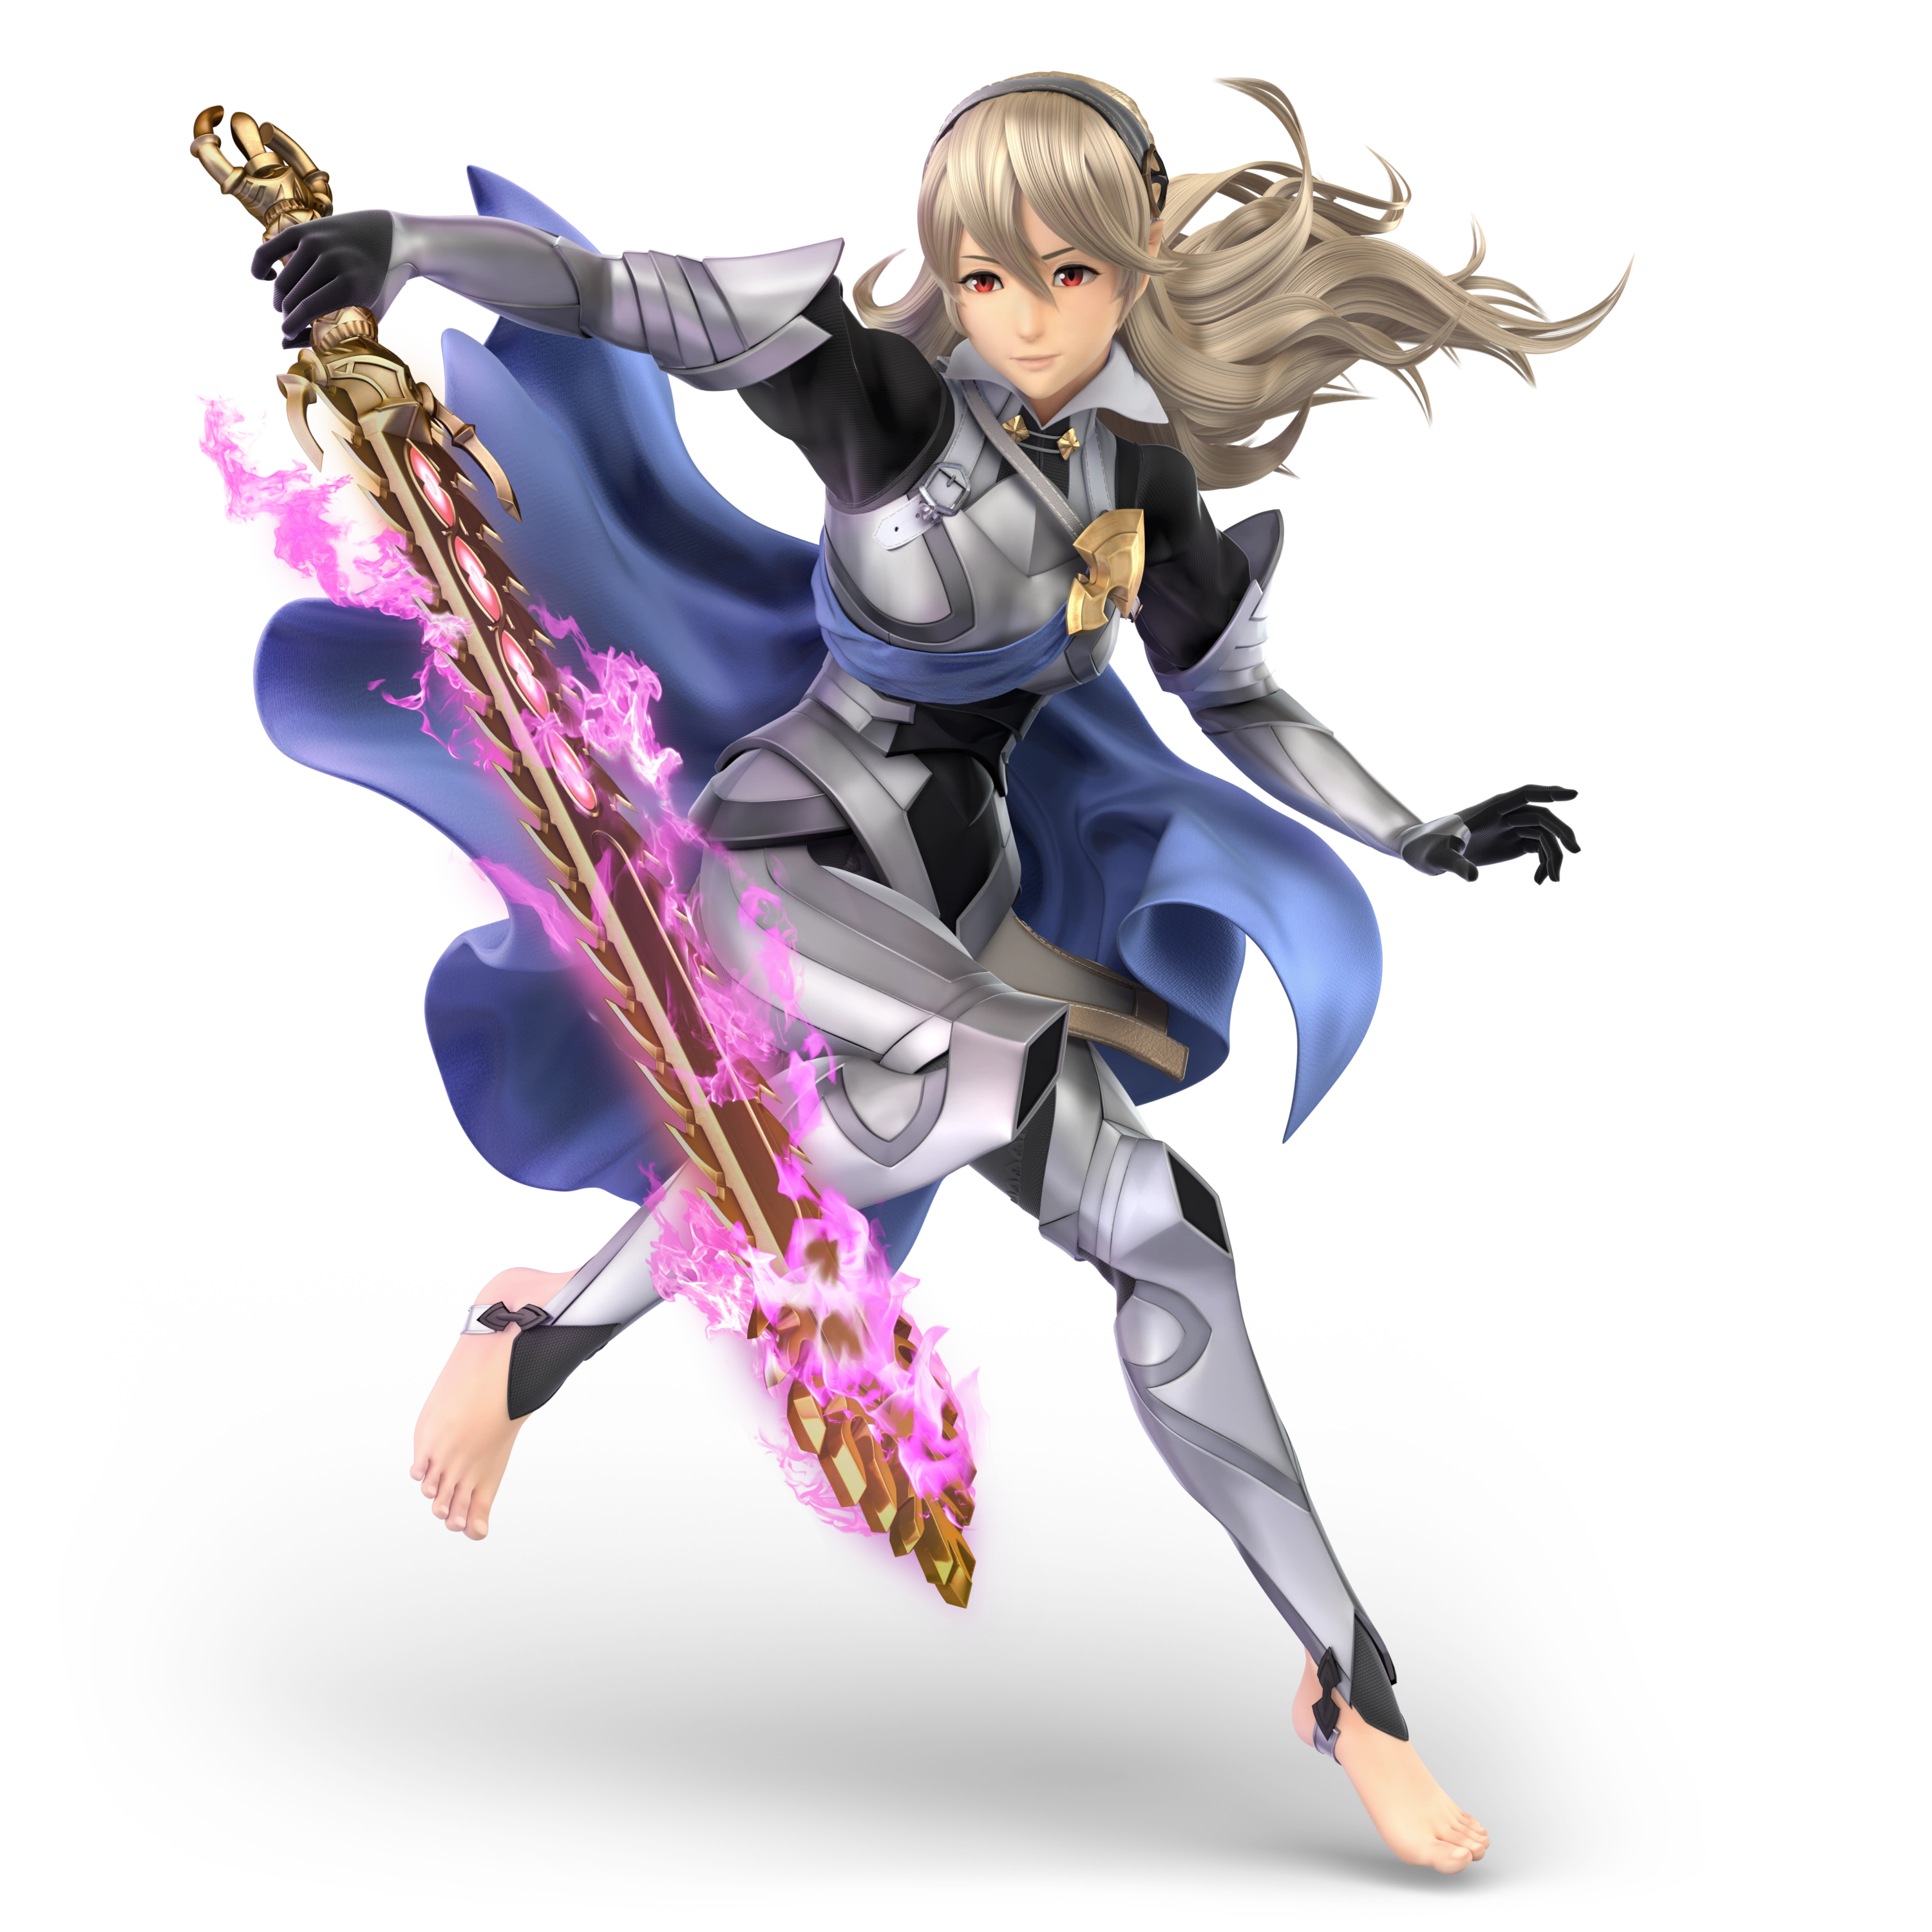
|
Name: Corrin Debut: Fire Emblem Fates (2015) Born a Hoshidan but raised as a Nohrian, Corrin is a descendant of the First Dragons and main protagonist of Fire Emblem Fates. Corrin's moveset reflects their draconic origins, having multiple parts of their body transform into dragon-like apendages, including their hands, arms, and even back. They can easily pin down foes and punish them shortly thereafter. |
Neutral Special: Dragon Fang Shot. Corrin's hand turns into the mouth of a dragon and charges a ball of water that can be launched in a straight line and can followed by chomping motions. Side Special: Dragon Lunge. Corrin jumps into the air and strikes their arm, now a sort of spear, into the ground and launches themselves forward in a kicking motion. Up Special: Draconic Ascent. Corrin launches themselves up into the air, sprouting dragon wings on their back when doing so and leaving a trail of water behind them. Down Special: Counter Surge. Corrin counters and turns into their dragon form, stomping and sending their opponent high up into the air. Final Smash: Torrential Roar. Corrin, transforming into their dragon form, creates beams of light that trap opponents in the attack. Corrin then roars, creating a large whirlpool that damages those caught within it. | |
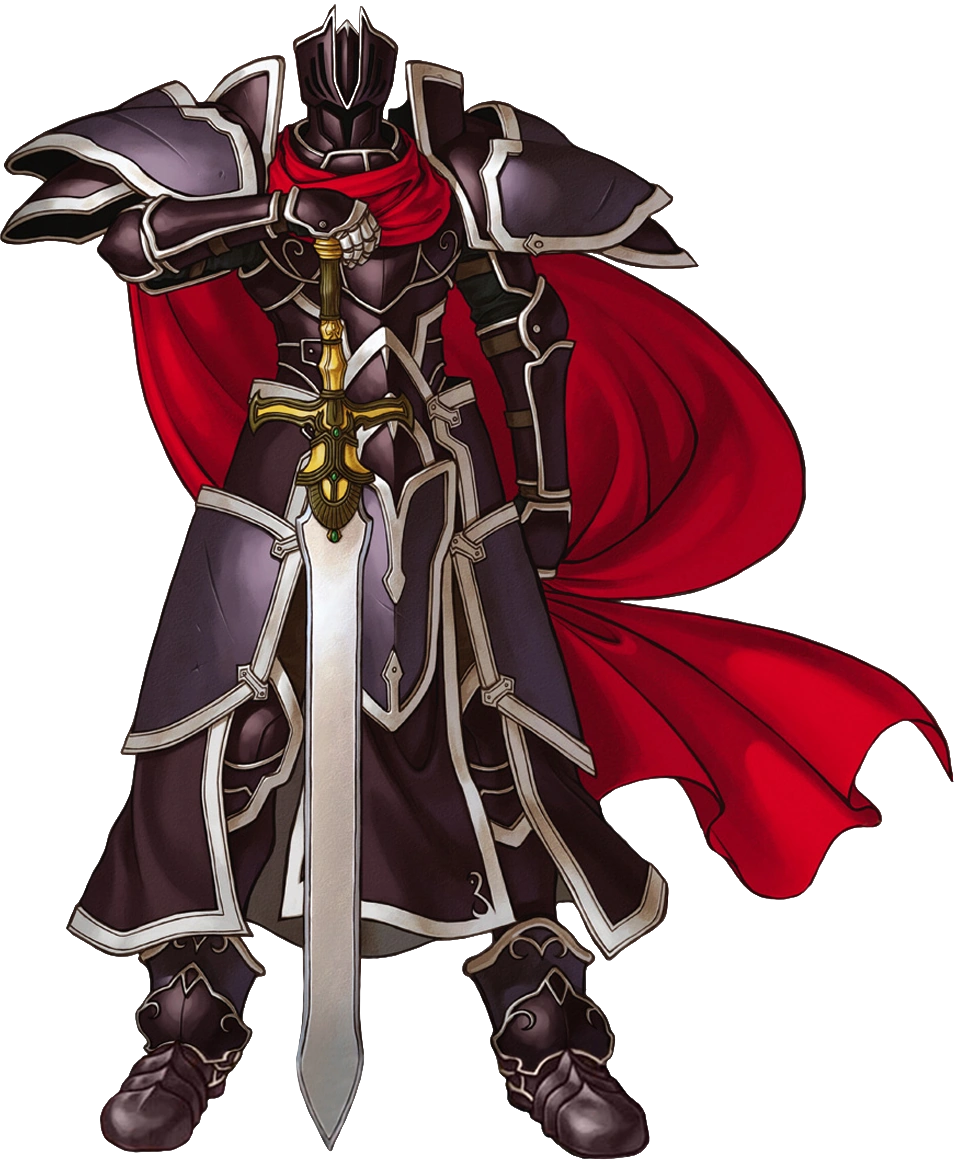
|
Name: Black Knight Debut: Fire Emblem: Path of Radiance (2005) Zelgius, also known as his alias, the Black Knight, is one of the Fire Emblem series most recognizable foes, wielding the blessed sword known as Adolnite. The Black Knight is one of the heaviest characters in all of Smash, using Adolnite as a brute weapon that deals immense damage. His down special, Radiance, is a counter that can even deflect far-off projectiles! |
Neutral Special: Alondite Thrust. The Black Knight steps back slightly before stepping forward, shoving Alondite out in front of him and stabbing any opponent in his path. Side Special: Black Luna. The Black Knight charges up an an attack from Alondite, darting forwards before swinging the weapon in a crescent-shape, slamming it down upon foes. Up Special: Radiant Rise. The Black Knight spins around in the air, thrusting Alondite outwards as he whirls like a tornado. Unlike Link's up special, if the Black Knight makes contact with a fighter, he goes even higher than his original trajectory. Down Special: Radiance. The Black Knight counters attacks with Adolnite, creating a shockwave around him if an attack lands. Adolnite can also reflect projectiles back at their sender. Final Smash: Eclipse. The Black Knight grips Alondite as it glows a bright white before he rushes towards a nearby opponent, delivering four powerful strikes with the sword before finishing the attack off with a final slash, massively damaging his target and sending them flying. | |

|
Name: Echidna Debut: Fire Emblem: The Binding Blade (2002) The leader of the resistance against the corrupt Etrurian rule in the Western Isles and “Goddess of the West”, Echidna is the first axe-user in Smash up to this point. The axe is what separates her from other fighters, combing a powerful hard-hitting weapon with decent speed. The specific axe she uses is the Killer Axe, allowing for her attacks to reach out farther. |
Neutral Special: Killing Dart. Echidna charges up an attack from her Killer Axe, pulling it and herself back before launching forwards. If the axe hits a foe, they’re knocked up straight into the air rather than going in the opposite direction. Side Special: Axe Rush. Echidna, the blades of her axe facing outwards, rushes in the direction she’s facing in the hopes of hitting a foe. If she does, the axe does a good chunk of damage to the opponent at the cost of leaving Echidna open to attacks. Up Special: Leaping Strike. Echidna throws the Killer Axe into the air in an arc formation before leaping back up to grab it. If she fails to hit anyone or reach a ledge, she descends rather quickly, an especially dangerous prospect in the air. Down Special: Counter Sweep. Echidna raises her axe to her chest, preparing for an upcoming attack. If the attack hits her, she’ll thrust her axe behind her before sweeping it at the opponent, knocking them back as she stays still. Final Smash: Critical Shockwave. Echidna throws her axe high up into the air, jumping up to grab it as the weapon moves directly above a foe. Echidna grabs it and slams back down on that same opponent, creating a shockwave that kills pixelated enemy forces from The Binding Blade before the attack ends. | |

|
Name: Legion Debut: Fire Emblem: New Mystery of the Emblem (2010) Eremiya’s masked Berserker ally, Legion is one of many versions of himself to the point where he refers to himself as “we”. In Smash, Legion is an Echo of Echidna, using the same moveset with a twist; Legion is a heavyweight fighter yet he retains the speed of a lighter character. While this would make him quite the threat, Legion is an overall glass tank and is relatively easy to take out compared to other heavyweights. |
Neutral Special: Immortal Dart. Legion charges up an attack from his Immortal Axe, pulling it and himself back before launching forwards. Unlike Echidna’s attack, Legion’s launches foes in the opposite direction rather than upwards, giving a good chunk of distance between him and his prey. Side Special: Axe Rush. Legion, the blades of his axe facing outwards, rushes in the direction he’s facing in the hopes of hitting a foe. If he does, the axe does a good chunk of damage to the opponent at the cost of leaving Legion open to attacks. This is even more devastating to Legion due to his relative frailness overall. Up Special: Leaping Strike. Legion throws the Immortal Axe into the air in an arc formation before leaping back up to grab it. If he fails to hit anyone or reach a ledge, he descends even faster than Echidna, plummeting with almost no chance of survival depending on where he’s located. Down Special: Counter Sweep. Legion raises his axe to his chest, preparing for an upcoming attack. If the attack hits him, he’ll thrust him axe behind him before sweeping it at the opponent, knocking them back as he stays still. The attack is slower to execute than the original, but does a ton more damage overall. Final Smash: Critical Shockwave. Legion throws his axe high up into the air, jumping up to grab it as the weapon moves directly above a foe. Legion grabs it and slams back down on that same opponent, creating a shockwave that kills pixelated enemy forces from New Mystery of the Emblem before the attack ends. | |
| |
|
Name: Mr. Game & Watch Debut: Ball (1980) This strange silhouette of a fighter is none other than Mr. Game & Watch, an amalgamation of all things Game & Watch! Mr. Game & Watch fights with various iconography from a vast library of the old LCD handhelds, turning into the characters as he fights. His Judge move has the chance to instantly K.O. a fighter if it hits 9, dealing a single devastating attack before sending them soaring. |
Neutral Special: Chef. Mr. Game & Watch becomes a chef and flings sausages in arcs in front of him. The sausages don’t do much damage, but keep a fighter at bay instead. Side Special: Judge. Mr. Game & Watch grabs a hammer and swings it downwards. The number above his head indicates what the attack will do or how much damage it will do. Up Special: Fire. Mr. Game & Watch is thrust up into the air via a duo of firemen with a trampoline. He descends down with a parachute, coming down rather slowly. Down Special: Oil Panic. Mr. Game & Watch pulls out a bucket that, while not doing any damage, can absorb up to three projectiles and launch them out in the form of an oil slick. Final Smash: Octopus. Mr. Game & Watch turns into the titular sea creature from the Game & Watch title, Octopus, and proceeds to move along the side of the screen he’s face, picking up any opponents he can and dragging them offscreen. | |

|
Name: Pit Debut: Kid Icarus (1986) The plucky young angel who can't fly...unless granted the ability by Lady Palutena. Pit is a close-range airborne fighter who works best in the air, as shown by his multiple jumps. Pit is able to use weapons from Kid Icarus: Uprising as well. |
Neutral Special: Palutena's Arrow. Pit can fire off arrows from his bow, allowing them to go straight or in an arc. Side Special: Upperdash Arm. Pit gains the Upperdash Arm and rams into an opponent, sending them upwards. Up Special: Gift of Flight. Pit jets off to the side as his wings glow, allowing him to fly back to safety. Down Special: Guardian Orbitars. Pit uses the Guardian Orbitars to protect himself for physical attacks. Final Smash: Lightning Chariot. Pit disappears and rams into whoever is in the path of the Lightning Chariot, dashing through the stage at lightning speed before disappearing offscreen. | |
|
Name: Dark Pit Debut: Kid Icarus: Uprising (2011) The angsty young angel who can't fly...didn't we already go over this guy? Whatever the case may be, Dark Pit has evolved from a simple Echo Fighter to the ranks of someone like Dr. Mario, using his staff for more than just his Final Smash. |
Neutral Special: Staff Blast. Dark Pit can charge up blasts from his staff, being able to be multiplied into four smaller blasts. Side Special: Electroshock Arm. Dark Pit rushes up to an opponents and uppercuts them, electrifying them. Up Special: Power of Flight. Dark Pit jets off to the side as his wings glow, allowing him to fly back to safety. Down Special: Guardian Orbitars. Dark Pit uses the Guardian Orbitars to protect himself from physical attacks. Final Smash: Dark Pit Staff. Dark Pit pulls out his staff and fires off a single hard-hitting blast of dark energy that impales foes upon impact, acting as a sort of extremely powerful ranged shot. | |
|
Name: Palutena Debut: Kid Icarus (1986) The ruler of Angel Land and Goddess of Light, Palutena, returns to duke it out with some of Nintendo's strongest. Palutena is all about long-ranged attacks, keeping herself away from her opponents and attacking from far away. Her Final Smash is a return of Pit's from Brawl with new additions from Kid Icarus: Uprising. |
Neutral Special: Autoreticle. Palutena pulls out her staff and fires three shots of light at another fighter, a green reticle landing on them for targeting. Side Special: Explosive Flame. Palutena launches a small explosive flame that travels a good distance away before erupting into a fiery blaze, roasting everything within it. Up Special: Warp. Palutena spins around and disappears from her current position before reappearing at a higher point horizontally away from her last point. Down Special: Counter Barrier. If hit from an attack up close, Palutena does a simple counter. If hit with a projectile from far away, Palutena creates a barrier to reflect it back at the sender. Final Smash: Palutena's Army. Palutena calls upon a flurry of Centurions as they rush across the stage and fire off multiple attacks, somehow utilizing vehicles like Cherubots and Exo Tanks to do heavier damage to opponents. | |
|
Name: Medusa Debut: Kid Icarus (1986) Formerly a ruler of Angel Land alongside Palutena, Medusa turned on Palutena and became the Leader of the Underworld Army. Medusa is an Echo Fighter of Palutena, utilizing dark energy as her main method of attacking. Her side special has completely different properties from her original fighter, along with a new Final Smash to boot. |
Neutral Special: Autoreticle. Medusa pulls out her staff and fires three shots of dark energy at another fighter, a red reticle landing on them for targeting. Side Special: Corrosive Flame. Medusa launches a small poisonous flame that travels a good distance away before erupting into a cloud of smog, poisoning everything within it. Up Special: Warp. Medusa spins around and disappears from her current position before reappearing at a higher point horizontally away from her last point. Down Special: Counter Barrier. If hit from an attack up close, Palutena does a simple counter. If hit with a projectile from far away, Palutena creates a barrier to reflect it back at the sender. Final Smash: Monstrous Form. Medusa's head detaches from her body and becomes more monster-like, firing laser blast, small floating skulls, and having the snakes in her hair lurch forward to try and devour opponents whole. | |
|
Name: Wario Debut: Super Mario Land 2: 6 Golden Coins (1992) While he does return from previous Smash entries, Wario's strange moveset has been completely redone. Elements of the Wario Land and WarioWare series of games are present in his new moveset with only his side special and Final Smash remaining from his previous incarnation. The rest of his moves come from Wario Land: Shake It and Wario World, highlighting his macho personality. |
Neutral Special: Shake It. Wario reaches out for any nearby opponents. If he grabs one, he proceeds to shake them up and down before tossing them away from him, laughing when the attack is over. Side Special: Wario Bike. Wario hops on his Wario Bike and speeds on in the direction he's facing, ramming into opponents. He can jump off of the bike while it's moving and can even destroy the bike, creating individual items to throw. Up Special: Corkscrew Conk. Wario jumps in an arc, spinning around rapidly while doing so. If he lands on a slope during the duration of the move, he begins to roll down incredibly fast. The power of the attack when he hits an enemy depends on his momentum. Down Special: Earthshake Punch. Wario stands still and throws his arm into the air before bringing it back down onto the ground, creating a small shockwave around him that tosses nearby foes up into the air. Final Smash: Wario-Man. Wario transforms into his superhero(?) alter-ego, Wario-Man, and traps a single opponent in a barrage of comic book-styled attacks. He finishes off the attack with a new edition; grabbing his foe and throwing them back down onto the stage below. | |
|
 Name: Vampire Wario Debut: Wario Land 3 (2000) Vampire Wario is one of Wario's many transformations in the Wario Land series, activating when he touches a Kobatto. In Smash, he's Wario's echo fighter; despite this, he retains only two of Wario's specials, replacing one with a variation on his dash attack. Everything else is original to Vampire Wario, acting as a more technical variation on the greedy goon. |
Neutral Special: Shake It. Vampire Wario reaches out for any nearby opponents. If he grabs one, he proceeds to shake them up and down before tossing them away from him, laughing when the attack is over. Side Special: Dracula Dash. Vampire Wario dashes forward, a move previously assigned to Wario's dash attack. This version is stronger but somewhat slower, meaning timing is key to getting the attack in one foes. Up Special: Vampire Bat. Vampire Wario turns into his bat form and flies up into the air, able to dodge a few attacks. Vampire Wario cannot fully attack in this state, reverting back into his regular form shortly after. Down Special: Moonquake Punch. Vampire Wario stands still and throws his arm into the air before bringing it back down onto the ground, creating a small shockwave around him that tosses nearby foes up into the air. Final Smash: Wario Darkness. Vampire Wario swings his cape near an enemy. If the cape touches them, the screen goes dark as Vampire Wario delivers multiple bites and kicks to his target in a rapid fashion, ending the attack by sending them flying as the screen becomes fully visible again. | |

|
Name: Captain Syrup Debut: Wario Land: Super Mario Land 3 (1994) The cunning leader of the Black Sugar Gang and Wario's true nemesis, Captain Syrup has finally made her way into the world of Smash Bros.! Syrup relies on trickery and traps to fight, utilizing bombs, a flying teacup, and even her own minions. She prefers for fight from a distance and have others do the dirty work just so she can reap in the rewards. |
Neutral Special: Bomb Blast. Captain Syrup throws a bomb across the stage. It blows up on it's own after time, but if repeatedly hit by another fighter, it erupts into a pillar of flames. Side Special: Anchors Away. Captain Syrup grabs an anchor attached to a chain and prepares to unleash it on foes. The attack concludes with the anchor being thrown outwards, acting as a heavy ranged attack. Up Special: Teacup Terror. Captain Syrup rises up inside of her mechanical teacup, going vertically upwards. She can jump out of the teacup and kick it in the opposite direction, now becoming a fast moving projectile. Down Special: Spear Men Toss. Captain Syrup throws out a Helmet Spear Man that waddles around the stage and stabs enemies with it's spear. It's very weak, however, and can be taken out in one hit. Final Smash: Genie of the Lamp. Captain Syrup rubs a golden lamp, prompting a large genie to pop out as Syrup rests upon it's shoulder. The genie hovers above the stage, shooting out fast-moving fireballs that travel along the stage, burning any fighter they touch. | |

|
Name: Ashley & Red Debut: WarioWare: Touched! (2004) A witch and demon duo, Ashley herself has finally been promoted to playable status with Red fully appearing for the first time. Ashley and Red both do equal attacks with Red transforming into items like a magic wand and a broom. Some attacks have Red use his trident, others have Ashley cast a spell, and even their Final Smash is a reference to Ashley's boss microgame from WarioWare: Smooth Moves. |
Neutral Special: Magic Spell. Ashley fires a bolt of magic out of her wand, the bolt having a different effect each time; the effect can be fire, ice, shrinking, or putting them to sleep. However, the wand can sometimes explode and damage Ashley. Side Special: Trident Jab. Ashley ducks slightly as Red pops out from behind her, repeatedly stabbing a fighter with his silver trident. The attack concludes with a single stronger jab. Up Special: Hocus Pocus. Red turns into a broom that Ashley rides upon, flying in a loop formation before she shoots upwards one more time. After this, Red transforms back into his demon form and begins to fall. Down Special: Pumpkin Panic. Ashley plants a pumpkin on the ground and can do one of two things. If she's far away from it, she shoots out a beam of magic from Red's wand form, the pumpkin flying a bit across the stage. If she's close to it, she instead kicks it with her foot. Final Smash: Fresh Off the Grill. Ashley and Red throw an opponent on top of a giant burger that's in the process of being made. Tens of different toppings (and even Wii Remotes) fall on top of the fighter before rats lunge at the burger, ending the Final Smash. | |

|
Name: 9-Volt Debut: WarioWare, Inc.: Mega Microgames! (2003) Once a simple Nintendo fanboy, 9-Volt has become an incredibly versatile fighter among Nintendo's all-stars. 9-Volt's moveset uses tons of different relics from Nintendo's real life past to duke it out, whether it be the Ultra Hand, the Ten-Billion Barrel, or even the NES Zapper. He's a jack-of-all-trades, and mastering his crafty play style is a reward within itself. |
Neutral Special: NES Zapper. 9-Volt fires an energy bullet out of an orange and white NES Zapper. He can shoot up to three if the B button is held down for long enough. Side Special: Ultra Hand. 9-Voly charges up an attack before unleashing the Ultra Hand. If it grabs anything, such as an item or fighter, it'll pull them towards 9-Volt for him to attack or use. Up Special: Hoverboard. 9-Volt jumps on his trusty rocket-powered skateboard and zooms in a diagonal line upwards. The skateboard eventually runs out of fuel, prompting him to get off. Down Special (Far Away): Chiritorie. 9-Volt pulls out a Chiritorie vacuum that doubles as a bomb and remote controls it, moving it across the stage. He can remotely detonate it if the machine doesn't do it without touching anything. Down Special (Close Up): Ten-Billion Barrel. 9-Volt grabs a Ten-Billion Barrel and shifts the rows around, creating a perfect line-up of balls. He throws the barrel before running off as the barrel explodes near an opponent. Final Smash: Game of the Year. 9-Volt attacks a fighter, trapping them inside a level of Super Mario Bros.. They're immediately attacked by multiple enemies, sending them crashing out of the TV as 9-Volt and 18-Volt high-five each other for a job well done. | |
|
Name: Olimar Debut: Pikmin (2001) Olimar and his trusty Pikmin aren't missing out on a Smash Bros. installment. This time, Olimar is equipped with six out of the seven Pikmin types. These Pikmin have different damage outputs, weight, and effects, so make sure you know how to deal with them. |
Neutral Special: Pikmin Pluck. Olimar does the easiest thing he knows: he plucks Pikmin out of the ground. Side Special: Pikmin Throw. The Pikmin can now be thrown, ranging from red, blue, yellow, purple, and white. Up Special: Winged Pikmin. Two Winged Pikmin grab Olimar and fly him back to safety. Down Special: Pikmin Order. Olimar whistles for his group of Pikmin to return to his side. Final Smash: End of Day. Olimar gets in his spaceship and jets off, leaving other players to be eaten alive by the Bulborbs that appear. The rocket eventually crashes back down, causing an explosion. | |

|
Name: Alph Debut: Pikmin 3 (2013) Alph was formerly a palette swap for Olimar, but now acts as the captain's Echo Fighter! His moveset is mostly the same as Olimar's with the exception of the heavy-hitting Rock Pikmin that appear alongside the other five Pikmin (besides Winged). |
Neutral Special: Pikmin Pluck. Alph does the easiest thing he knows: he plucks Pikmin out of the ground. Side Special: Pikmin Throw. Alph can throw all kinds of Pikmin, including the new Rock Pikmin. Up Special: Winged Pikmin. Two Winged Pikmin grab Alph and fly him back to safety. Down Special: Pikmin Order. Alph whistles for his group of Pikmin to return to his side, Final Smash: Plasm Wraith Flood. Alph looks behind him and runs out of fear, as a large mass of golden goo rushes down and hits fighters in it's path. The goo is actually the Plasm Wraith. | |

|
Name: R.O.B. Debut: Gyromite (1985) Nintendo's classic Robotic Operating Buddy, otherwise known as R.O.B., returns as the only character in Smash to be based on a physical toy. R.O.B. uses the tools he has have his disposal to deal out, including his arms, his jet-fueled rockets at the bottom of his body, and laser eyes. He has a meter on his chasis showing when his up special is about to run out. |
Neutral Special: Robo Beam. R.O.B. fires a laser blast from his eyes. If used frequently, the power of the attack weakens, while when used sparingly, the beam is extremely powerful. Side Special: Arm Rotor. R.O.B. glides forward on the ground while spinning his arms like helicopter blades, clobbering any and all opponents in his path. Up Special: Robo Burner. R.O.B. propels himself upwards with his jets, gaining vertical distance. The chasis on his sides show how much fuel he has left before having to stop. Down Special: Gyro. R.O.B. places a gyro on a stand and charges it up before launching it at an opponent. The gyro can be picked up and thrown by other fighters. Final Smash: Floating Island. R.O.B., now adorned in his Ancient Minister robes, is seen flying around from the floating island before it explodes via a Subspace Bomb, sucking in all fighters caught in the attack before the battle continues. | |

|
Name: Villager Debut: Animal Forest (2001) The Villager has returned, once again sporting their classic rotund design from previous games in the Animal Crossing series. They're all about setting up moves and traps, which is evident in moves like Pocket and Timber. They're a varied character, so make sure to take advantage of all of their unique aspects. |
Neutral Special: Pocket. Villager can grab any item or projectile and store for later use in their pocket. Side Special: Lloid Rocket. Villager hops on a Lloid and jets towards the opposite side of the stage. Up Special: Balloon Trip. Villager equips a helmet with two balloons attached to it and floats upward. Down Special: Timber. Villager plants, waters, and cuts down a tree that can do devastating damage to others. Final Smash: Dream Home. Tom Nook and his two sons, Timmy and Tommy, appear and trap a player as they build a house around them. The house eventually explodes with the opponent being sent flying. If there's no one to attack, the three just shrug and disappear with nothing being done. | |
| |
|
Name: Isabelle Debut: Animal Crossing: New Leaf (2012) The trust mayor's assistant, Isabelle, comes back to Smash Bros. after her surprise reveal for Ultimate! Isabelle is still a semi-clone of Villager, borrowing their iconic Pocket move, but now has more differing features to make her stand out against her mayor! This includes the addition of a new Final Smash, showcasing aspects from New Leaf rather than past games. |
Neutral Special: Pocket. Isabelle can grab any item or projectile and store for later use in their pocket. This is functionally and identically the same as Villager's neutral special. Side Special: Fishing Rod. Isabelle uses a fishing rod to drag items or opponents closer to her, damaging them in the process. Tilting the control stick results in her throwing the opponent. Up Special: Balloon Trip. Isabelle hops on a swing help up by two balloons and flies upwards, propelling herself upwards with each swing. The balloons, like Villager's can be popped. Down Special: Lloid Trap. Isabelle buries a Lloid in the ground, which acts a rocket-mine hybrid that shoots upwards if an opponent ends up walking on top of it. Final Smash: New Year's Celebration. Isabelle commences the New Year's countdown, launching fighters into the sky with fireworks as the countdown hits zero. The fireworks massively damage anyone caught in the blast. | |
| |

|
Name: K.K. Slider Debut: Animal Forest (2001) The Jack Russell terrier himself, K.K. Slider, has left the sidelines and has joined the fight! K.K. attacks with moves based on the various album covers from Animal Crossing: New Leaf, acting as a jack of all trades that’s good at keepaway. He also comes with the Sour Note mechanic, where enough hits on a fighter decreases their jumping ability for a short time. |
Neutral Special: K.K. Kasbah. K.K. Slider pulls out a small trumpet and blows into it, creating a small soundwave in front of the trumpet that damages whoever it touches. The last note could potentially be a Sour Note. Side Special: K.K. Rider. K.K. Slider hops on a small motorcycle and directly rams into opponents. Unlike Wario’s side special, he cannot hop off until the move is finished, but a trail of music notes is left behind him, one of them potentially being a Sour Note. Up Special: K.K. Aria. K.K. Slider spins around in the air as if he’s dancing with a ballerina, going higher and higher until the attack ends. If he touches an opponent in this state, he’ll grab them, dance with them, and throw them to the side as he falls. Down Special: K.K. Ballad. K.K. Slider claps his paws together before a group of fireflies fly in the direction he’s facing, dealing damage to whoever they touch. If enough fireflies hit a fighter, the Sour Note effect kicks in. Final Smash: Two Days Ago. K.K. Slider splits into three different versions of himself; a guitarist, a DJ, and a simple coffee-drinking pooch. The first two attack any nearby foes with a damaging rendition of Bubblegum K.K. as the one drinking coffee sits and watches from a table. | |
| |
|
Name: Wii Fit Trainer Debut: Wii Fit (2007) The Wii Fit Trainer has one goal in mind: to get everyone on the roster fit, healthy, and feeling great! She mostly does best up close to other fighters with a wide pool of physical attacks, utilizing ones based on yoga poses, fitness, and positive attributes to life. She can even heal herself with her down special, Deep Breathing. |
Neutral Special: Sun Salutation. Wii Fit Trainer "salutes the sun" and throws out a ball of energy at an enemy. Side Special: Header. Wii Fit Trainer hits a soccer ball with her head, arcing the ball at her targets. Up Special: Super Hoop. Wii Fit Trainer is surrounded by hula hoops and floats up as she shakes. Down Special: Deep Breathing. Wii Fit Trainer takes a deep breath and regains a bit of health. Final Smash: Balance Board. Wii Fit Trainers steps on the board and strikes a yoga pose which shoots out afterimages of herself, hitting opponents in it's path. | |
| |

|
Name: Little Mac Debut: Punch-Out(1984) A young boxer from New York, Little Mac was underestimated due to his small stature, but ended up making a big splash after beating Mr. Dream. Mac is renowned for his punches and jabs, but is also known for his abysmal abilities in the air. He has a meter that, once fully charged, allows him to perform a one-hit K.O. punch that takes the form of an uppercut. |
Neutral Special: Straight Lunge. Little Mac charges up a punch and then lunges forward, performing a punch that only increases in power the longer it charges. Side Special: Jolt Haymaker. Little Mac leaps forwards and punches downwards. If he leaps off of a stage, he can't recover from the attack. Up Special: Rising Uppercut. Little Mac tries to cover vertical distance by spinning around in the air with his fist out, but doesn't get much height. Down Special: Slip Counter. Little Mac braces himself for an oncoming attack and, if it lands, uppercuts the fighter who tried to attack him. Final Smash: Giga Mac Rush. Little Mac transforms into Giga Mac and repeatedly pummels an opponent with a flurry of strong punches, finishing with a strong uppercut that sends opponents flying. | |

|
Name: King Hippo Debut: Punch-Out!! (1987) One of the many opponents Little Mac has faced, King Hippo is possibly one of the heaviest fighters in all of Super Smash Bros. Swansong, acting as an amalgamation of characters like Little Mac, King K.Rool, and King Dedede. He’s as slow as Incineroar and lacks a KO Meter, but makes up for it with his brutal strength and better up special, lifted from King Dedede of all fighters. |
Neutral Special: Tropical Takedown. King Hippo, using K.Rool’s forward smash as a neutral special, charges up a single strong punch from his fist. The attack does massive damage if it hits a foe, but leaves him open if it misses. Side Special: Hippo Haymaker. King Hippo lurches forward slightly, his fist moving outwards as he tries to clobber a foe. If he misses and hits the stage, he flops on his belly and grunts before getting back up. Up Special: Hippo Jump. King Hippo leaps vertically into the air with little horizontal distance, creating a damaging shockwave if he lands on the stage. The shockwave alters this from King Dedede’s move, making Hippo much more dangerous. Down Special: Grate Gut. King Hippo counters any attack from the front with his large cut, adorned with a sewer grate. The grate disappears after the attack is finished, replicating K.Rool’s own down special, Gut Check. Final Smash: Dinner Time. King Hippo starts to eat as much food as he can to prepare for a title match; by that, it means that King Hippo will then jump into the ring and rapidly punch opponents, ending in the one fighter he trapped being immediately K.O.’d. | |

|
Name: Shulk Debut: Xenoblade Chronicles (2010) A young man who wields the Monado, Shulk's fight against the Mechon has led him back to the world of Smash Bros.! His ability to switch between the various Monado Arts makes him a kind of wild card, being able to switch his best attribute any time in the fight and boost one of his five main stats for a short time. Shulk can become defensive, speedy, powerful, and more depending on the selected art. |
Neutral Special: Monado Arts. Shulk can go through five different Monado forms, becoming better in one aspect for a short time. These aspects are Smash, Speed, Jump, Buster, and Shield, all boosting one of Shulk's stats. Side Special: Back Slash. Shulk lunges at an opponent and strikes down, sending them forwards as the energy within the Monado shoots forward before Shulk hits the ground. Up Special: Air Slash. Shulk swings the Monado upwards, jumping up to higher ground. The Monado moves in a large arc-like formation, hitting any foe it touches. Down Special: Vision. Shulks counters a move done by another fighter, hitting back harder as a flash of blue light appears around Shulk and slows down the area around him. Final Smash: Chain Attack. Shulks calls upon Dunban, Fiora in her Mecha-Fiora form, and Riki the Nopon to help him take down the opponent caught in the attack, all four attacking at one before Shulk delivers a final blow with the help of the Monado. | |

|
Name: Elma Debut: Xenoblade Chronicles X (2015) A BLADE colonel and the leader of the Reclaimers Division, Elma brings a unique playstyle to the world of Smash, utilizing dual swords and dual pistols. Her down special allows for her to switch out her weapon with the other, giving her a set of two specials each (minus said down special). This makes her options very versatile and allows for multiple ways to fight with her. |
Neutral Special (Guns): Violent Streak. Elma whips out her dual guns and fires at opponents rapidly. Repeatedly pressing the B button makes more bullets come out, although the attack isn’t infinite and bullets eventually do run out. Neutral Special (Swords): Electric Surge. Elma charges up her swords with electric energy via holding B down. The longer the attack is charged, the more power the attack has when it lands on a foe. Side Special (Guns): Sliding Slinger. Elma slides along the ground, her guns firing a few shots in front of her before he gets up and puts them away. The bullets fire in a 15 or 45 degree angle depending on if you press the B button during the slide. Side Special (Swords): Stream Edge. Elma swipes her blades once in front of her and performs various other attacks via the pressing of the B button. Each attack, if it hits an enemy, is gradually stronger than the last. Up Special (Guns): Sky High. Elma shoots downwards and launches herself up diagonally into the air. If these bullets hit a foe from above, they have a chance to stun them and launch them farther than they normally would. Up Special (Swords): Shadowstrike. Elma leaps up into the air in a straight line. If B is pressed during the height of the attack, Elma slashes both of her swords out in front of her, giving her a little vertical momentum. Down Special: Weapon Swap. Elma stops and changes her current weapon into the unused one, changing her first three specials to totally different ones. While it does no damage, the different playstyles that come with each swap vastly change how Elma plays. Final Smash: Aghasura Cannon. Elma calls upon one of the many Skells from Xenoblade Chronicles X, Ares, and begins to pilot it. The Skell is able to fire one single blast from it’s Aghasura Cannon and decimate a random point on the stage, damaging whoever the blast touches. | |

|
Name: Mòrag & Brighid Debut: Xenoblade Chronicles 2 (2017) The Special Inquisitor of the Ardainian Empire, Mòrag and her Blade, Brighid, have come to duke it out in the world of Smash. Brighid is a stationary background character akin to the Pokémon Trainer with a twist; the Affinity mechanic. If Mòrag is closer to Brighid during the fight, her smash attacks and specials go farther and increase in power. When far away, however, the opposite effect occurs. |
Neutral Special: Judgement. Mòrag stands still and lashes her whipsword forward, the furthest point of the weapon doing more damage than the rest. When close to Brighid, the attack gains more range. Side Special: Blaze. Mòrag charges up her whipswords before unleashing them in a one-two fashion, lashing at them twice. When closer to Brighid, the range on this attack goes farther and hits harder. Up Special: Radiance. Mòrag lashes upward with her right whipsword, then her left one, and finishes with a downwards strike of the weapon. When getting closer to Brighid, the reach of the whipswords expand. Down Special: War Pyre. Mòrag raises her weapons and, if a foe hits her, she dodges out of the way and gets a buff in her attack power. If the dodge fails, the buff doesn’t occur. The buff is more prominent when closer to Brighid. Final Smash: Soulfire. Mòrag and Brighid come close to each other and uses the Blade Special of the same name to engulf enemies in a series of bright blue flames. Both of them use flaming whipswords to deal out two final hits, ending the attack in a blazing fury. | |
|
Name: Duck Hunt Debut: Duck Hunt (1984) Unlike most fighters, Duck Hunt is made up of three fighters; the dog, the duck, and the NES Zapper. Duck Hunt likes to control the stage, using long-reaching projectiles to deal out damage instead of running straight into an opponent. Other games that used the NES Zapper are also present in the trio's moveset, such as Wild Gunman and Hogan's Alley. |
Neutral Special: Trick Shot. Duck Hunt kicks a can from Hogan's Alley out onto the stage. Repeatedly pressing the B button will cause it to move and eventually explode, but the direction can be reversed if another fighter hits it. Side Special: Clay Shooting. Duck Hunt throws out a clay pigeon that shatters via three shots fired from the NES Zapper. The pigeon travels downwards, shattering even if it doesn't touch a foe. Up Special: Duck Jump. Duck Hunt has the duck part of the trio lift up the dog, flapping it's wings furiously before beginning to fall if the dog doesn't touch the stage. Down Special: Wild Gunman. Duck Hunt calls upon one of five different characters from Wild Gunman, all firing one shot while facing the opposite direction. They can be hit by any fighter, resulting in their pants falling down. Final Smash: NES Zapper Posse. Duck Hunt calls up characters from Wild Gunman and Hogan's Alley to deal out damage to the fighters caught in the crossfire. The dog laughs as various shots are fired, sending their foe flying. | |

|
Name: Inkling Debut: Splatoon (2015) The squid-kid hybrid has returned for another brawl, this time rocking a design straight out of Splatoon 2. A fast and frantic fighter, the Inkling needs to fuel up on ink often and is able to coat fighters and the stage in said ink they can swim in. Like Link, their bombs are now remotely detonated instead of activating on their own, making their offensive attacks even more powerful. |
Neutral Special: Splattershot. The Inkling shoots ink out of their Splattershot, coating any and all fighters touched by it in ink that can make them even more apparent targets for the Inkling. Side Special: Splat Roller. The Inkling whips out a roller and runs across the stage with it, running over opponents while covering massive portions of it in harmful ink. Up Special: Super Jump. The Inkling goes into it's squid form and jets straight into the air, landing back down safely. They can do minimal damage if a fighter touches them during the start-up. Down Special: Auto Bomb. The Inkling deploys a bomb on the stage that sits idly, prompting the Inkling to blow it up remotely when near an opponent. Final Smash: Tenta-Missiles. The Inkling activates the Tenta-Missiles, targeting specific fighters before launching a barrage of missiles down at them. The missiles do good damage and cover whatever they touch in even more ink without wasting the Inkling's supply. | |
|
Name: Agent 8 Debut: Splatoon 2 (2017) The Deepsea Metro stopped in this strange new world...and Agent 8 just got off at her next stop. Like the Inkling, Agent 8 needs to swim in ink and can paint the stage, but has moves exclusive to them based off of the Octo Expansion, like 8-balls and the Inkjet. |
Neutral Special: Splattershot Blast. Agent 8 shares this move with the Inkling, but fires slower with stronger ink. Side Special: 8-Ball. Agent 8 spawns an 8-ball and hits it towards a side of the stage, barreling through opponents. Up Special: Inkjet. Agent 8 equips the Inkjet and flies up, being able to fire at opponents for a bit. Down Special: Splash Wall. Agent 8 puts down a Splash Wall that damages enemies upon contact with it. Final Smash: Killer Wail. Off the Hook appears as Pearl hops down with a large Killer Wail, screaming into it and delivering a sound so powerful that it physically damages anyone caught in the blast. | |
|
Name: Spring Man Debut: ARMS (2017) Spring Man is the poster child for the ARMS League, acting as the most "normal" of the long-armed fighters in the group. In Smash, Spring Man has a charge ability that increases the power of his attacks whenever he successfully evades an attack, boosting his punches for a second or two. |
Neutral Special: One-Two. Spring Man delivers two jabs in quick succession, hitting the foe's head and their stomach. Side Special: Chakram. Spring-Man charges up his arms before unleashing one after the other, both using the Chakram arms to rack up damage. Up Special: Spring-A-Ling. Spring Man pushes his arm downwards, pushing himself up before using his other hand to grab onto whatever's nearby. Down Special: Dodge-Charge. Spring Man moves to the side, charging the power of his arms at the cost of his vulnerability. Final Smash: Rush Attack. Spring Man grabs a random opponent, glowing a bright yellow before throwing them in the air and unleashing rapid fire punches onto them, sending them flying afterwards. | |
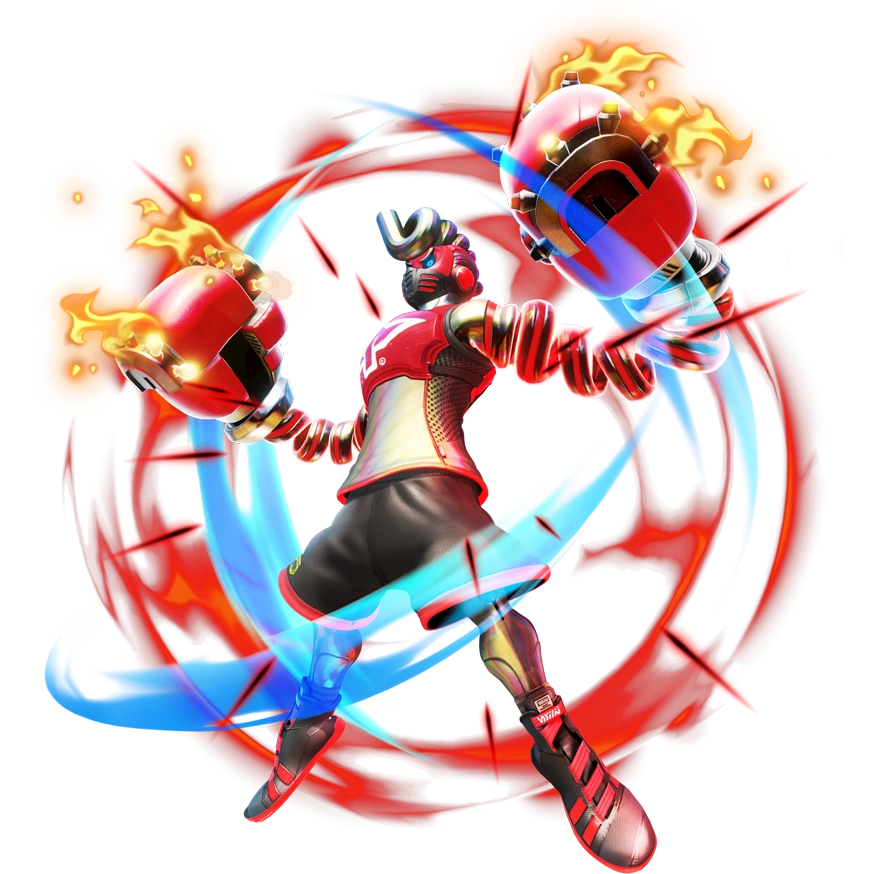
|
Name: Springtron Debut: ARMS (2017) Like Helix and Hedlok before him, Springtron is a creation by the ARMS League and is a robotic duplicate of Spring Man. He's a heavier and slower version of Spring Man, acting as his echo fighter, but packs a much stronger punch...ESPECIALLY when he lands a boosted attack. |
Neutral Special: One-Two. Springtron delivers two jabs in quick succession, hitting the foe's head and their stomach. Side Special: Chakram. Springtron charges up his arms before unleashing one after the other, both using the Chakram arms to rack up damage. Up Special: Spring-A-Ling. Springtron pushes his arm downwards, pushing himself up before using his other hand to grab onto whatever's nearby. Down Special: Dodge-Charge. Springtron moves to the side, charging the power of his arms at the cost of his vulnerability. Final Smash: Rush Attack. Springtron grabs a random opponent, glowing a bright yellow before throwing them in the air and unleashing rapid fire punches onto them, sending them flying afterwards. | |

|
Name: Isaac Debut: Golden Sun (2001) Isaac is the main protagonist for most of the Golden Sun series, being a Venus Adept and using his more youthful design from the first two games. Isaac uses a mixture of sword attacks with elemental attacks as well, being a decent long-ranged fighter. He even uses his old Assist Trophy attack, Move, as his neutral special, able to push opponents away briefly. |
Neutral Special: Move. Isaac summons a large glowing hand that damages opponents, pushing them backwards while damaging them at the same time. Side Special: Jupiter Dash. Isaac charges up a sword strike before dashing across the stage, striking anyone in his path with the use of elemental energy. Up Special: Planet Diver. Isaac slashes diagonally to the side before crashing back downwards in the air, doing massive damage to enemies underneath him. Down Special: Flame Pillar. Isaac shoves his sword into the ground and causes a pillar of fire to appear a good distance away from him, shooting foes upwards. Final Smash: Judgement. Isaac calls upon Judgement, who swoops down from the sky and fires a blast from his lion gun. The blast damages all opponents caught in it's range, enveloping an entire point on the stage. | |
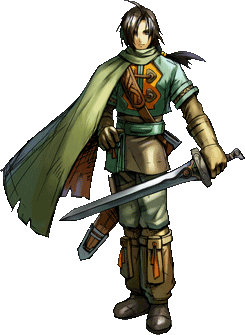
|
Name: Felix Debut: Golden Sun: The Lost Age (2002) A fellow Venus Adept and former foe to Isaac, Felix comes in as Isaac’s Echo Fighter. While sharing most of the hero’s moveset, Felix has attributes that make him stand out from Isaac, such as his sword being longer, his attacks being harder to land but doing more overall damage, and an entirely new up special: Retreat. |
Neutral Special: Move. Felix summons a large glowing hand that damages opponents, pushing them backwards while damaging them at the same time. While functioning similarly to Isaac’s same move, the hand is smaller at the cost of doing more damage to whoever it ends up touching. Side Special: Jupiter Dash. Felix charges up a sword strike before dashing across the stage, striking anyone in his path with the use of elemental energy. This version of the attack is more powerful than Isaacs due to Felix’s sword being an overall longer weapon, even dealing more damage at the middle of the blade. Up Special: Retreat. Felix casts the Psynergy spell, Retreat, causing him to disappear into thin air and end up higher up in the air or farther away from where he previously was. The move can be aimed in that way if you immediately follow up the initial teleport with a press on the left control stick, either to the left, right, or upwards. Down Special: Flame Pillar. Felix shoves his sword into the ground and causes a pillar of fire to appear a good distance away from him, shooting foes upwards. Felix’s version of the move is overall thinner, covering less distance while dealing more damage towards those he gets trapped in the attack. Final Smash: Judgement. Felix calls upon Judgement, who swoops down from the sky and fires a blast from his lion gun. The blast damages all opponents caught in it's range, enveloping an entire point on the stage. Unlike other moves in Felix’s kit, Judgement functions the exact same between him and Isaac. | |
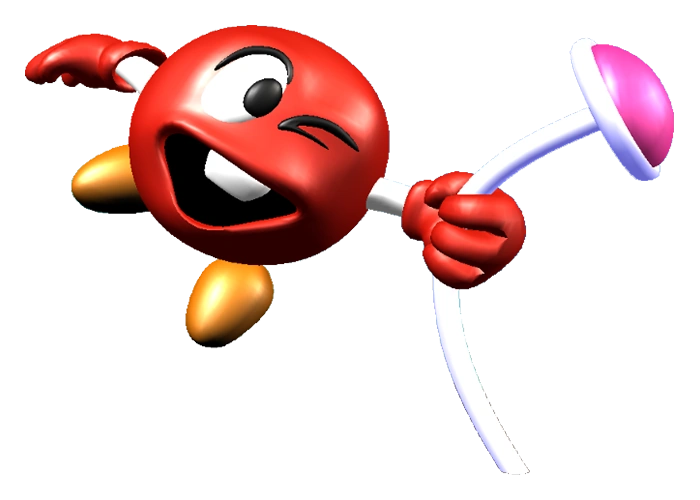
|
Name: Bubbles Debut: Clu-Clu Land (1984) Bubbles is the small red blowfish that resides in the underwater kingdom of Clu-Clu Land. She uses the poles from her home game to attack, being extremely acrobatic and nimble if they're used right. She can also attack with Unira's and charged soundwaves, being able to push back opponents with the pole and the attacks she can perform from it. |
Neutral Special: Ingot Toss. Bubbles chucks a golden ingot at a fighter, the ingot bouncing off of them and disappearing upon impact. Side Special: Sound Wave Splash. Bubbles charges up a yell, unleashing a powerful soundwave that damages any nearby foes while also pushing them back slightly. Up Special: Pole Jump. Bubbles flings off of a pole that sprouts in front of her, firing herself upwards into the air and closer to the stage like a rocket. Down Special: Turning Point. Bubbles slams a pole into the ground and begins to spin around, firing herself like a bullet when the button is released. Final Smash: Unirian Black Hole. Bubbles spawns a whirlpool that sucks nearby fighters in, sending them on a painful trip down the drain. Uniras litter the pool, hurting the fighters. | |
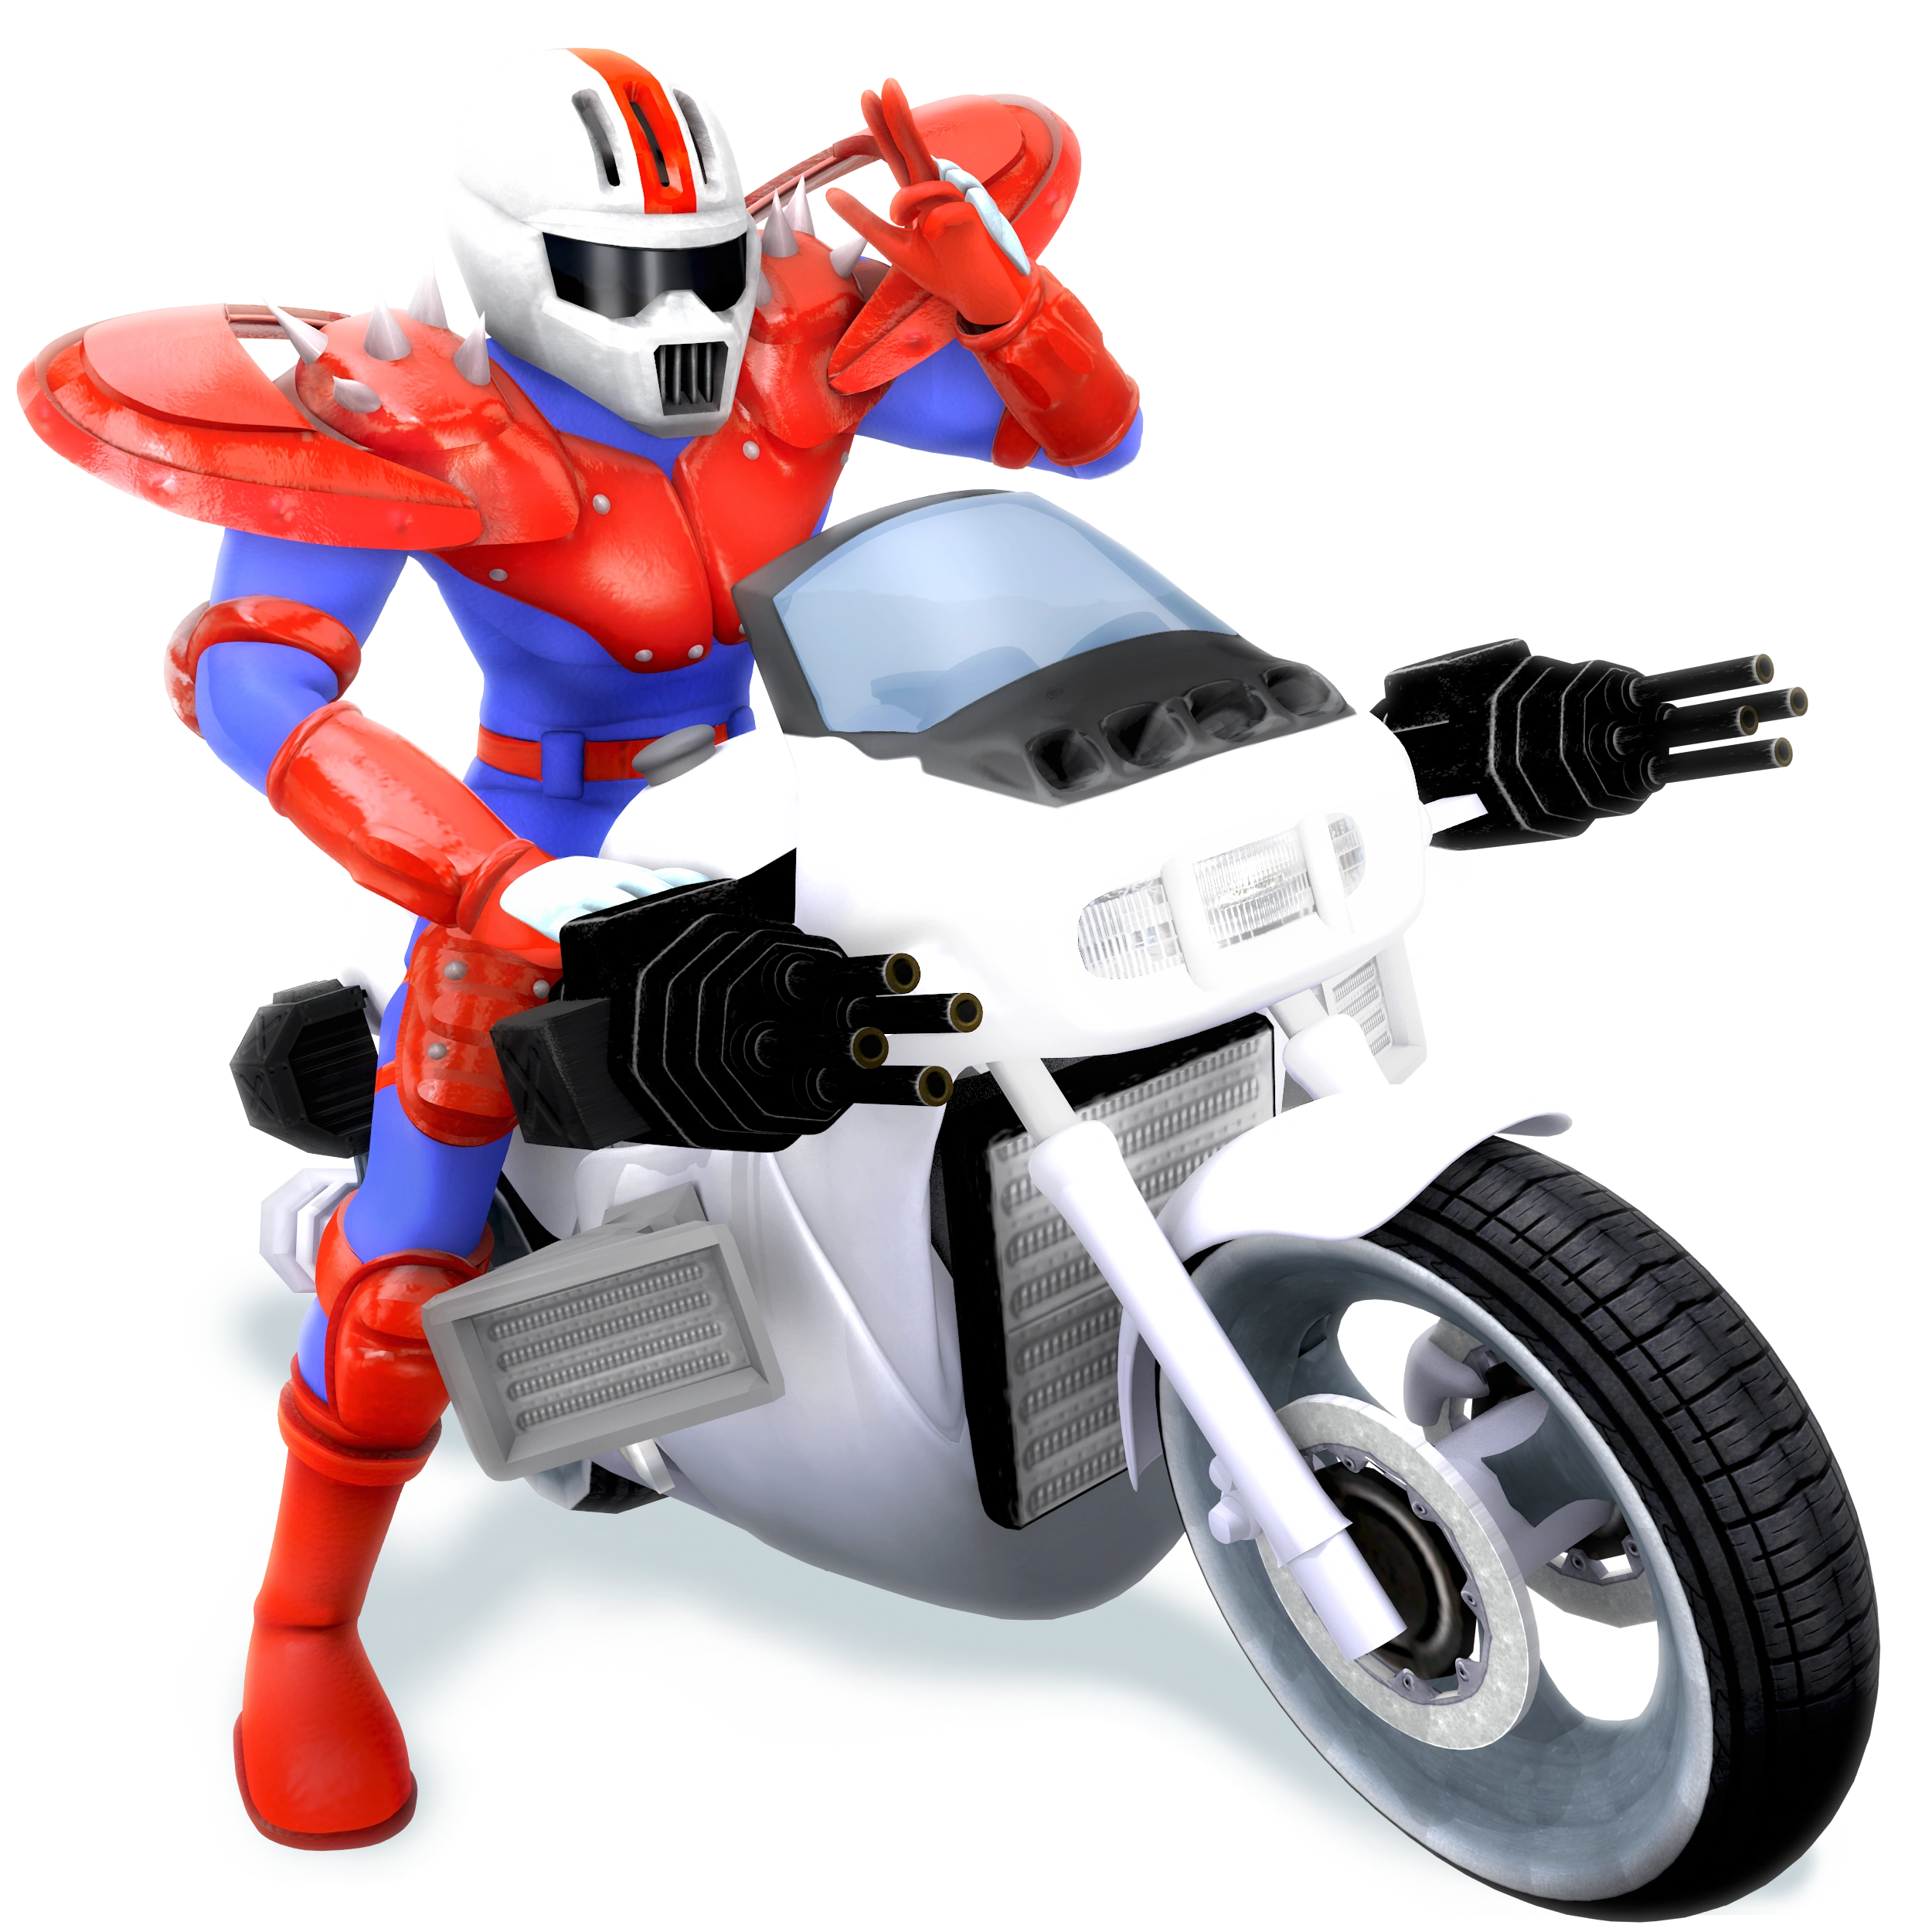
|
Name: Mach Rider Debut: Mach Rider (1985) Born into an apocalyptic future, Mach Rider is a powerful fighter who seems to be mix between characters like Zero Suit Samus in their weaponry, Wario in his motorcycle, and Captain Falcon in his physique and speed. They fight using guns and bombs, disappearing, and the motorcycle they drive, being a strong and fast fighter that specializes in ranged and close-up attacks. All of their attacks do more damage if they're used behind their targets. |
Neutral Special: Mach Gun. Mach Rider pulls out a gun and fires multiple energy blasts from it before having to put it away. Side Special: Motorcycle Drive. Mach Rider hops on their motorcycle and rams into an opponent, the force of the attack causing them to jump off of their bike before it explodes. Up Special: Mach Explosion. Mach Rider detonates a bomb under them, forcing them up higher in the air and damaging anyone beneath them. Down Special: Reformation. Mach Rider "dies" and disappears, separating into pixels before reappearing behind another fighter. The pixels can damage whoever they touch and allow Mach Rider lead into other even stronger attacks if it catches foes off-guard. Final Smash: Road Rage. Mach Rider, speeding towards Quadrunners, ends up ramming into any opponent caught within the Final Smash before hopping off of his bike. The bike then crashes into the Quadrunners and explodes, sending fighters flying when the explosion goes off. | |
|
Name: Takamaru Debut: The Mysterious Murasame Castle (1986) Takamaru is the stoic yet valiant hero of The Mysterious Murasame Castle, always willing to take down evil. In addition to his samurai fighting style, he has one defining mechanic: Scrolls, which allow him to boost his special attack's strength and diversity. He earns these scrolls through consistently dishing out attacks, rewarding a player for mastering him. |
Neutral Special: Pinwheel Knife Storm. Takamaru throws his pinwheel knifes, which can be angled in any direction. When powered by Scrolls, the knives follow their target on their own for a slight while. Side Special: Thunder Stab. Takamaru quickly stabs an opponent with his katan, with paralysis being activated if a sweet spot is hit. When powered by Scrolls, the stab can enact a finish zoom and can do more damage to foes. Up Special: Quick Hop. Takamaru quickly jumps up in the air, spins in a circle, and hops once more, moving both horizontally and vertically. When powered by Scrolls, Takamaru travels faster and farther. Down Special: Disappearance. Takamaru disappears for a split second and comes backs a few feet away from where he was, ready to strike an opponent. When powered by Scrolls, if he phases through an opponent, the opponent takes damage. Final Smash: Inazuma Lightning. Takamaru gains the Inazuma Lightning power-up and unleashes a lightning storm, each bolt hitting a fighter and receiving massive amounts of damage. If the power of the Scrolls is still present, the lightning electrifies the areas where fighters once were. | |
|
Name: Starman Debut: Pro Wrestling (1986 A pink-clad wrestling stranger hailing from Mexico, Star Man fights for his title not only in the V.W.A. Championship, but in the world of Smash as well. Star Man is a pro wrestler and brings the spotlight with him, differing from Incineroar’s heel style with a much harder-hitting style, focusing on grabbing his foes on stopping them in their tracks with the style only Star Man could provide. |
Neutral Special: Starburst Suplex. Star Man reaches out for an opponent and, if contact is made, proceeds to throw them over his shoulder and slam them into the ground. If Star Man doesn’t make contact, he’s left wide open to other attacks from his opponents and can’t fight back until the animation is over. Side Special: Bicycle Kick. Star Man launches himself forwards from the ground and kicks his legs outwards twice, preparing to hit an opponent. If the attack lands, the first kick does little damage but freezes the foe in place, while the second kick does much more damage and launches foes farther away. Up Special: Flying Cross Chop. Star Man leaps up into the air and crosses his arms in an X-formation, slamming down on the ground at seemingly unmatched speeds. Unlike Incineroar’s similar attack, Star Man is able to angle the attack upon the arms crossing, able to shoot down, across, or up into the sky. Down Special: Somersault Kick. Star Man launches himself into the air legs first and aims straight for an opponent. If he lands on them, his left leg begins to wrap around his opponent’s head before his right one delivers a swift kick, sending them to the ground as Star Man stands back up. The attack does more damage the less time it takes to latch onto a foe. Final Smash: 8-Bit Backbreaker. Star Man leaps towards an opponent and wraps his arms around them, lifting them up onto his back and starting a cinematic. A wrestling ring appears with a cage around it as Star Man throws his foe onto the ground, bouncing them against the cage and the floor with rapid attacks sprinkled it. The opponent goes through the ceiling before they land on Star Man’s back, doing massive damage and ending the attack. | |
| |
|
Name: Chibi-Robo Debut: Chibi-Robo: Plug into Adventure! (2005) One of the many Chibi-Robo units designed by Citrusoft, this one has abandoned it's duty and decided to get it's claws dirty in Smash! Rather than a traditional health bar or damage counter, Chibi-Robo has a battery meter with a display that goes up to 100. The more he's damaged, the weaker he gets and the number gets lower. The more he attacks, the more the battery goes up and the more power he earns, forcing players to learn his ins and outs in order to topple their foes. |
Neutral Special: Chibi-Blaster. Chibi-Robo fires a blast of sonic energy out of the Chibi-Blaster. If B is held down for long enough, the Charge Chip activates and fires out a bigger blast of energy. Side Special: Zip Lash. Chibi-Robo charges up an attack with his plug, whirling it around like a whip until unleashing the cord plug-first across the stage, covering good distance while retracting quickly. The attack can also be used as a tether recovery. Up Special: Telly-Copter. Chibi-Robo grabs onto Telly Vision and begins to fly upwards, hanging onto his best friend. The spinning helicopter blades can damage opponents when they touch them before Telly disappears. Down Special: Toothbrush. Chibi-Robo whips out a small mechanical toothbrush, acting as a held item for the time being. He can destroy any loose items laying on the ground and damage opponents, always running in the direction he's facing until he's damaged or stops at a ledge. Final Smash: Giant Chibi-Robo. Chibi-Robo attacks opponents, causing them to land on top of an alien UFO. All of the sudden, Giant Chibi-Robo zooms down from outer space and destroys the ship in a single punch, sending all foes flying once the fight resumes. | |
|
Name: Marshal Debut: Rhythm Tengoku (2006) Marshal is an amalgamation character, using various moves based off of other Rhythm Heaven characters and minigames. Marshal is a fighter noted for their varied movepool, using both close and far-ranged attacks. Their small size makes them an easy target to K.O., however, able to be launched quite far in a short amount of time. |
Neutral Special: Karate Man. Marshal chucks a flower pot into the air and punches it, sending it straight towards an opponent. The pot can sometimes be a rock if B is held for long enough. Side Special: Built To Scale. Marshal's arm pushes a red stick outwards at full speed, winding his arm back up for a second before pushing the stick forwards and damaging fighters in their path. Up Special: Working Dough. The "working dough" from the titular minigame appears under Marshal and bounces him back to safety, falling down and disappearing shortly after. Down Special: Glee Club. Marshals runs and stops as the Chorus Kids slide out from behind him, the last one of the trio hitting opponents with the soundwaves produced from their yell. Final Smash: Night Walk. Marshal starts to run across the screen as flowers pop out of the ground beneath him, sending any opponent they touch upwards. Marshal ends the attack with an uppercut, jumping into the air and hitting anyone in his range. | |

|
Name: Tibby Debut: Rhythm Heaven Megamix (2015) A young prince who fell down from Heaven World, Tibby's adventurous nature has landed him a position in Smash! Tibby functions as Marshal's Echo Fighter, using most of the same moves he does with a few exceptions. His down special now sees him begin to cry puddles of tears that can damage and trip opponents and his Final Smash sees him turn into a castle to crush opponents. |
Neutral Special: Karate Man. Tibby chucks a flower pot into the air and punches it, sending it straight towards an opponent. The pot can sometimes be a rock if B is held for long enough. Side Special: Built To Scale. Tibby's arm pushes a red stick outwards at full speed, winding his arm back up for a second before pushing the stick forwards and damaging fighters in their path. Up Special: Working Dough. The "working dough" from the titular minigame appears under Tibby and bounces him back to safety, falling down and disappearing shortly after. Down Special: Tear Streams. Tibby sniffs and begins to cry massive streams of tears. They damage anyone they touch and create puddles for fighters to trip it. Final Smash: Heaven Castle. Tibby leaps up into the air off-screen before crashing back down as a large colorful castle. The castle crushes anyone in it's path before Tibby reverts back to his normal self, everyone crushed under the castle trapped in the ground. | |
|
Name: Dillon Debut: Dillon's Rolling Western (2012) Dillon the armadillo, also known as the Red Flash, is a silent and stoic protector of villages under the nightly threat of the Grock menace. In Smash Bros., Dillon is an incredibly fast yet reckless character; a lot of his moves revolve around rolling and being able to control his movements. Once mastered, however, Dillon is an incredibly rewarding fighter to duke it out with. |
Neutral Special: Gunfire. Based on the gun towers from his games, Dillon pulls out a firearm and shoots two bullets, both causing small knockback and slightly damaging opponents. Side Special: Grinding Halt. Dillon rolls up and forces his spikes to protrude out of his shell, charging up a roll before launching forwards at an incredibly fast speed. Up Special: Grind Roll. Dillon, curled up with his spikes out, shoots upwards in a sort of arc, going from one position to another in an instant as he rolls on thin air. Down Special: Down Undercut. Dillon digs in the ground and moves in the opposite direction before popping back up, performing a strong uppercut as he does so. Final Smash: The Dead-Heat Breaker. Dillon rams into an opponent, green flames coming from the engines strapped to him. The attack continues as he keeps rolling, full green fire and sparks coming from his shell before he shoves them, sending his target flying to their demise. | |
|
Name: Tempo Debut: Harmoknight (2012) A noble Harmoknight in training, Tempo isn’t just a rookie when it comes to the weapon he uses; the Legendary Music Note Staff. Tempo’s moves require timed button presses in order to get the most out of them, almost as if he was still in his home game. In addition to the staff, Tempo is capable of using the weapons of his friend Cymbi and calling upon Tappy, giving him quick movement and range to boot. |
Neutral Special: Staff Notes. Tempo, with the press of the B button, spins around once as his staff collides with opponents. When moving, Tempo can perform this and move forwards slightly, essentially giving him a second dash attack. If the B button is pressed at the right time before the attack lands, the attack becomes multi-hit. Side Special: Tappy to Help! Tempo stops as his rabbit friend, Tappy, appears from nowhere and fights alongside him for a little bit. Tappy doesn’t do a lot of attacks, instead preferring to block attacks coming Tempo’s way and act as a one-hit shield. If the B button is pressed right before Tappy is hit, he counters the attack slowly with a kick and disappears. Up Special: Drum Toss. Tempo spawns a smaller version of a drum from Rock Range and bounces off of it, hurtling in an arc before he lands back down or falls to his demise. The drum immediately disappears when Tempo lands back down and Tempo is able to travel higher if the B button is pressed right before the drum launches him. Down Special: Cymbal Plan. Tempo whips out the two brass symbols Tyko’s friend, Cymbi, wields and slams them together while idle, damaging any opponents next to him. The attack requires being close to your opponents, as the soundwaves don’t travel as far as you’d think. If B is pressed at the right time, the cymbals are capable of breaking shields. Final Smash: There’s Note Stopping Us! Tempo calls upon Lyra, Tyko, Tappy, and Cymbi to help rain down fire on a single foe that Tempo traps. Cymbi stuns them, Tyko whacks them into the air, Lyra fires arrows, Tappy kicks them towards Tempo, and Tempo delivers the final attack with his staff, sending the foe flying. | |

|
Name: Gargan Debut: Harmoknight (2012) The leader of the Noizoid race, the sinister Gargan has come to prove his dominion over the cavalcade of villains in Smash. Gargan shows his brutal nature in his moveset, prefering to use brash and bold moves rather than subtlety. His sinister behavior is showcased in his side special, in which he launches a Noizoid grunt at foes, and his down special, where he can shove another Noizoid in the ground. |
Neutral Special: Soundwave Strike. Gargan blasts four purple energy blasts out of the speakers on his back. While Gargan must stay still when firing, the blasts are powerful and always shoot up to two blasts no matter what. Up to four blasts can be shot overall, each shot being timed to sort of rhythmic beat. Side Special: Noizoid Punt. Gargan pulls out a standard Noizoid from out of the nowhere and throws it up in the air. With the press of the B button, Gargan is able to toss the little fella up into the air, the creature going so fast he catches fire. By inputting the side special once again, Gargan kicks the Noizoid in the direction he’s facing as the same blistering speed. Up Special: Booster Boots. Gargan’s boots begin to shoot out dual streams of fire from beneath them, forcing him to rise up at a fast speed until the fire stops spewing. The initial launch can damage opponents above Gargan and the attack can be angled, blue arrows appearing when you choose a direction. Down Special: Spiked Noizoid. Gargan summons a spiked Noizoid in front of him, the creature being about half his size. The Noizoid can be sent out slowly in front of him with the press of the B button or be left on that point on the stage with another input of the down special, allowing Gargan to go off and fight with the Noizoid stays idle for five seconds. Final Smash: Go for Baroque. Gargan forcefully kicks a nearby opponent off-screen, sending them crashing into a green spiked meteor atop Baroque Volcano. Gargan then causes the volcano to erupt, now in a charred and magma-filled state as the lava shoots the meteor and the opponent into the stars, the Final Smash then ending as Gargan cackles. | |
|
Name: Snake Debut: Metal Gear (1987) Naked Snake, aka Big Boss, has come to Smash Bros., this time being based off of his appearance in Snake Eater. A heavyweight with more grounded proportions and moves, Snake is a weapons specialist that aims to control the stage with mines, guns, and missiles. He works best when he dips out and pops back in, setting up traps around the stage to activate later. |
Neutral Special: Hand Grenade. Snake pulls out a small hand grenade that he can chuck at anyone he sees fit, the grenade exploding upon contact with anything. Side Special: Remote Missile. Snakes fires a missile from a Nikita launcher and can control it remotely for a short time before it either touches something or explodes on it's own, damaging anyone near it. Up Special: Kidnapper. Snakes grabs onto a drone known as a Kidnapper and flies upward on it, eventually letting go once the machine is worn out or he reaches the stage. Down Special: C4. Snake pulls out a C4 and can stick it to a fighter or a specific surface, remotely detonating it after. If he doesn't do so in the time that he can, it explodes on it's own. Final Smash: Electromagnetic Wave Gun. Snake grabs onto an electromagnetic wave gun and charges up an attack for it, aiming at opponents from afar before launching a single blast of paralyzing energy, damaging his targets. | |
|
Name: Sonic Debut: Sonic the Hedgehog (1991) The blue blur and Mario's meanest friendliest rival, Sonic the Hedgehog dashes back into the fray once more. He's received some major updates to his moveset, switching out his down special and gaining two different side specials that increase in power by charging. He's still an extremely fast foe, requiring precise play and lightning-fast reflexes. |
Neutral Special: Homing Attack. Sonic turns into a ball and leaps into the air, a reticle appearing on a nearby fighter before he lunges at them, bouncing off with the attack. Side Special (Uncharged): Boost. Sonic charges up an attack, unleashing it as a quick dash across the stage, lightly headbutting opponents in his path. Side Special (Charged): Double Boost. After charging his side special for longer, Sonic dashes forward, ramming into any opponents head on before coming to a stop. Up Special: Spring Jump. A spring appears underneath Sonic, prompting him to leap upwards into the air as the spring falls further before disappearing. Down Special: Blue Tornado. Sonic spins around an opponent, creating a tornado like formation around them as a trail of blue light trails behind him. Final Smash: Super Sonic. Sonic, surrounded by the Chaos Emeralds, turns into Super Sonic and darts around the stage, going all across the screen. The attack ends when a ring counter on the side of the screen runs out, Sonic reverting back to his normal form. | |

|
Name: Tails Debut: Sonic the Hedgehog 2 (1992) Sonic’s trusty sidekick, Miles “Tails” Prower, makes his grand playable entrance in Smash Bros. along his blue friend. Tails fights with much more methodical means than Sonic does, utilizing aspects from his debut appearance, Sonic Adventure, and even Tails Adventure such as bombs, the Spin Dash, and flight via his two identical tails. |
Neutral Special: Spin Dash. Tails curls up into a ball and is able to launch forwards, ramming into any foes in his path. The move can be charged into a more powerful longer-lasting state if the B button is held down. Side Special: Tails Attack. Tails rushes at an enemy and spins around in a tornado formation. If he hits his target, he gets pushed back depending on the distance he traveled. If he spun around from afar, he bounces back slightly, but if he hits from up close, he goes back farther. Up Special: Propellor Flight. Tails begins to spin his two tails together, flying up into the sky as he does so. He can use his down special in this state, using his amazing air game to duke it out, but enters free-fall if he’s in the air for too long. Down Special: Bomb Drop. Tails drops a black short-fused bomb that explodes after time. The bomb can be used in various ways; it slides along the ground if Tails uses the move while running, drop napalm-like bombs from the sky, or just throw them like normal bombs. Final Smash: Tornado Crash. Tails launches an opponent onto his biplane, the Tornado, and sends them flying through the sky. An engine failure occurs during the flight, causing the plane to crash and send the fighter soaring. | |
|
Name: Metal Sonic Debut: Sonic CD (1993) Sonic's robotic counterpart has chased him throughout time and space, eventually ending up fighting with gaming’s all-stars. Metal Sonic is a brutal fighter that relies on what he’s made of to get him through the fight. Built with jet thrusters, abilities like the Black Shield and Overdrive Rush, and his chaotic Metal Overlord form, Metal Sonic isn’t to be taken lightly. |
Neutral Special: Overload. Metal Sonic charges up a form of electric energy, eventually creating an electric force around him that can damage whoever he touches. The power and range of the attack can be charged by pressing the B button. Side Special: Overdrive Rush. Metal Sonic releases a burst of fire from his chest engine and feet, dashing forward along the stage or the air at an incredible speed. If the attack fails to land, Metal Sonic crashes onto ground, leaving him open. Up Special: Jet Storm. Metal Sonic shoots upwards like a rocket at a blazing fast speed, only really covering vertical distance with little room for horizontal movement. If an opponent is above Metal Sonic at the height of the attack, they take a good chunk of damage. Down Special: Black Shield. Metal Sonic creates a diamond-shaped shield around him that reflects any projectiles launched at him. If he activates the attack while running, he doesn’t stop moving until the attack ends or gets close to a ledge. Final Smash: Metal Overlord. Metal Sonic flies off stage and becomes the gigantic Metal Overlord, towering over the Final Fortress where other fighters lay. Metal Overlord then fires a single laser that completely destroys the airship, sending it crashing as he reverts back to Metal Sonic and the attack ends. | |
|
Name: Blaze Debut: Sonic Rush (2005) The princess of the Sol Dimension has finally caught up with her blue carefree counterpart, bringing her own moveset to the table. Blaze is an athletic fighter, using swift and delicate movements to inflict damages upon her foes. Her pyrokinetic powers inflict burning damage onto her foes, the burns increasing with the more combos she strings together. |
Neutral Special: Fire Claw. Upon the B button being pressed, Blaze leaps up into the air and a reticle appears on a foe. If the button is pressed again, Blaze launches towards them, her paws on fire as she slashes once. Side Special: Burst Dash. Blaze crouches down and charges up a surge of fire from underneath her, gaining more and more power based on how long the analog stick and B are held. Once released, Blaze dashes off in a fiery tornado formation. Up Special: Axel Jump. Blaze leaps at a 45 degree angle into the air. If the B button is pressed during this attack, Blaze catches fire and launches herself higher, damaging anyone she touches before the fire goes out. Down Special: Spinning Claw. Blaze spins around in place, creating a ring of fire that extends under her. The ring is able to burn opponents, leaving them open to other potential attacks from Blaze. Final Smash: Burning Blaze. Blaze, with the power of the Sol Emeralds, turns into Burning Blaze and launches various fire attacks at the stage below. If she traps an opponent in these attacks, she finishes off the Final Smash by rushing at them like a flaming bullet. | |
|
Name: Mega Man Debut: Mega Man (1987) Rock Light, aka Mega Man, is a robot created by Dr. Light who's taken out Dr. Wily and his evil Robot Masters on many occassions, able to absorb their powers and use them in a rock-paper-scissors style. He uses attacks and mannerisms from his NES outings, attacking with the Robot Master powers he's gathered such as the Crash Bomber, Leaf Shield, and Metal Blade. |
Neutral Special: Metal Blade. Mega Man pulls out a metal sawblade and chucks it at an enemy. The blade itself can be picked up and thrown by others. Side Special: Crash Bomber. Mega Man chucks a sticky bomb at an opponent, the bomb stuck on the foe until it detonates seconds later Up Special: Rush Coil. Mega Man calls upon his trust companion Rush to spring him upwards into the air, thrusting him back up into the air. Down Special: Leaf Shield. Mega Man creates a rotating shield of leaves, surrounding him before they launch towards the direction Mega Man was facing. Final Smash: Mega Legends. Mega Man calls upon X, Megaman Volnutt, Star Force Mega Man, and MegaMan.EXE to fire a series of lazers at opponents caught in a black hole. Bass and Treble also appear here, following in the other's footsteps | |
|
Name: Proto Man Debut: Mega Man 3 (1990) Before Mega Man, there was the enigmatic Blues, known by his alias Proto Man. Proto Man has similar physics and mobility to his younger blue brother, but is generally lighter due to him not being able to take as much damage as Mega Man. He's much more defensive than his brother, using his shield for multiple attacks and firing two strong shots from his Proto Buster rather than three. |
Neutral Special: Wheel Cutter. Proto Man throws a sharp sawblade along the ground rather than Mega Man's air-based Metal Blade, damaging enemies on the ground. Side Special: Commando Bomb. Proto Man launches out a small missile like the Crash Bomber, but the missile can be controlled by the fighter and angled in a 90 degree arc. Up Special: Proto Leap. Proto Man throws his shield underneath himself and jumps on it, launching himself high into the air while the shield falls, leaving him shieldless for a second. Down Special: Proto Shield. Proto Man blocks attacks with his shield, the trajectory launching opponents backwards and forcing projectiles to go in an arc. Final Smash: Proto Legends. Proto Man calls upon Zero, Future Zero, Vent/Aile and ProtoMan.EXE to help fire a single powerful laser at foes. Like with Mega Man's Final Smash, Bass and Treble also make an appearance here to help deal out damage. | |
|
Name: Pac-Man Debut: PAC-MAN (1980) The arcade king is here and better than ever! Pac-Man is able to utilize aspects from all of his games, such as pellets, fire hydrants, the fruit, and even other Namco iconography like the Galaxian. He's a fast character, moving around the stage while messing with his opponents. |
Neutral Special: Bonus Fruit. Pac-Man can throw a fruit, cycling through multiple different ones with their own aspects. Side Special: Power Pellet. Pac-Man lays down a Power Pellet and proceeds to eat it, darting to the side. Up Special: Pac-Jump. A trampoline appears underneath Pac-Man, allowing him to bounce up in the air three times. Down Special: Fire Hydrant. Pac-Man throws down a fire hydrant that can shoot out water and crush opponents. Final Smash: Super Pac-Man. Pac-Man becomes his classic "pizza" form, darting across the stage and munching up opponents. This even turns them into the little ghost eyes for a few seconds. | |
|
Name: Ryu Debut: Street Fighter (1987) Ryu is a wandering martial artist, traveling all over the world, mastering new techniques, and acting as the main character in the Street Fighter franchise. Ryu uses the attacks and techniques he's learned over the years, the power of his attacks increasing depend on how well you execute Street Fighter-styled combos. He even has two different Final Smashes! |
Neutral Special: Hadoken. Ryu launches a ball of fire from his hands, slowly traveling across the stage. The power and speed can be amplified by holding down the B button. Neutral Special (Tilt): Shakenetsu Hadoken. Ryu launches a larger orange fireball across the stage, dealing more damage as it strikes opponents before exploding. Side Special: Tatsumaki Senpukyaku. Ryu performs a kick, keeping one leg out as he starts spinning around in a whirlwind formation as a small tornado forms around him. Up Special: Shoryuken. Ryu leaps into the air via an uppercut, striking any opponents in his path. He's left wide open if the attack fails, however. Down Special: Focus Attack. Ryu, surrounded in ink, charges up a punch that briefly stuns opponents once they're hit, leaving them open to Ryu's other attacks. Final Smash (Up Close): Shinku Hadoken. Ryu fires off a larger Hadoken blast across the stage, sucking in opponents who stand in it's path and slowly but surely damaging them until it launches them outwards. Final Smash (Far Away): Shin Shoryuken. Ryu traps an opponent in an attack and unleashes a series of punches, ending off the attack with an extremely powerful Shoryuken, sending opponents flying once the attack is done. | |
|
Name: Ken Debut: Street Fighter (1987) The original Echo Fighter returns to the battlefield once more, retaining all of his original moves and design from Super Street Fighter II Turbo. Ken, while still being Ryu's Echo Fighter, is much more distinguished than most of the others; nearly all of his specials either have a unique twist or are all new moves from the Street Fighter series. |
Neutral Special: Hadoken. Ken launches a ball of fire from his hands, slowly traveling across the stage. The image of Ken's hands are present within the fireball as it travels. Neutral Special (Tilt): Shakenetsu Hadoken. Ken launches a larger orange fireball across the stage, dealing more damage as it strikes opponents before exploding. The move is functionally the same as Ryu's. Side Special: Tatsumaki Senpukyaku. Ken performs a kick, keeping one leg out as he starts spinning around in a whirlwind formation as a small tornado forms around him. Up Special: Heavy Shoryuken. Ken leaps into the air via an uppercut, striking any opponents in his path. Unlike Ryus, this attack is multi-hit, damaging opponents over and over. Down Special: Focus Attack. Ken, surrounded in ink, charges up a kick that briefly stuns opponents once they're hit, leaving them open to Ken's other attacks. Final Smash (Up Close): Shinryuken. Ken creates two parallel beams of fire, shooting high into the sky and trapping anyone between them. The fire has the potential to launch anyone who's unfortunate enough to be caught right above one of them. Final Smash (Far Away): Shippu Jinraikyaku. Ken, when next to a fighter, delivers a series of rapid kicks, continuing on into a whirlwind of powerful hurricane kicks. The attack is finished with one final kick, sending Ken's chosen target soaring. | |
|
 Name: Chun-Li Debut: Street Fighter II (1991) An officer of Interpol and a master of multiple martial art styles, Chun-Li joins the brawl alongside Ryu and Blanka. Chun-Li utilizes her most valuable weapon in most of her attacks; her legs. She's extremely quick, using different kinds of kicks to duke out damage. Like Ryu, she has two different Final Smashes depending on if opponents are close to her or not. |
Neutral Special: Hyakuretsukyaku. Chun-Li delivers multiple brutal kicks in a single direction, gaining an additional few if the B button is pressed more than once. Side Special: Spinning Bird Kick. Chun-Li flips upside down and performs a split, beginning to spin around quickly, rapidly kicking her nearby opponents as she spins forwards. Up Special: Tenshokyaku. Chun-Li performs a series of roundhouse kicks that propel her upwards towards the stage, finishing off with a slightly more hard-hitting one. Down Special: Sen'enshu. Chun-Li enters a handstand-like form and spins her legs around before slamming both down upon the ground, creating a small shockwave around her. Final Smash (Up Close): Hazan Tenshokyaku. Chun-Li performs a delta motion before unleashing a series of Tenshokyakus, launching whoever's caught in the attack high up into the air before finishing off with a final kick. Final Smash (Far Away): Senretsukyaku. Chun-Li rushes forward, kicking anyone in her path with a quick Hyakuretsukyaku, launching the other fighters with a single kick followed by a single reverse roundhouse kick. | |
|
Name: Blanka Debut: Street Fighter II (1991) Blanka was formerly a normal human until a plane crash gave him the ability to generate electricity and a vivid green skin color. Couple this with his beastly fighting style, and you have one deadly fighter. Blanka is a fast jack-of-all-trades; his moveset consists of electricity, rolling, and even tripping opponents. The attacks he brings to the table leave his foes open to his deadlier methods of fighting. |
Neutral Special: Electric Thunder. Blanka crouches as a field of electricity forms around him, electrocuting and paralyzing anyone nearby for a short time. Side Special: Ground Shave Roll. Blanka curls up into a ball before launching forwards, hitting his opponents multiple times with deadly force. Up Special: Lightning Cannonball. Blanka crouches, curls up into a ball, and launches himself high into the air, spinning around as electricity generates around him. Down Special: Amazon River Run. Blanka ducks and shoves his arms outwards, striking any opponents in the legs and causing them to collapse and trip. Final Smash: Dynamic Rolling. Blanka curls up and traps an opponent, trapping them as his curled up form jumps on them three times before leaping backwards and rolling into them once more, electrocuting them and sending them flying. | |
|
Name: Cloud Debut: Final Fantasy VII (1997) A soldier working SHINRA, Cloud Strife now works against them with a group of rebels known as AVALANCHE. Cloud uses the Buster Sword for most of his attacks, being able to charge it's Limit Break and unleash powerful variations on his specials. |
Neutral Special: Blade Beam. Cloud swings his sword in the air, unleashing a beam of energy that travels across the stage. Side Special: Cross Slash. Cloud performs five hits at once if his side special is used three times, damaging any foe caught in the attack. Up Special: Climhazzard. Cloud, holding the Buster Sword in one hand, leaps upwards, slashing down to the ground. Down Special (Uncharged): Limit Charge. Cloud charges his limit meter, forcing him to stand still and wait for it to fill. Down Special (Charged): Finishing Touch. Cloud spins around, holding out his Buster Sword. The move does 1% of damage, but has extremely high knockback. Final Smash: Omnislash. Cloud activates his level four Limit Break move, Omnislash, bringing opponents up in the air and repeatedly slashing at them before slamming them back down onto the stage. | |
|
Name: Noctis Debut: Final Fantasy XV (2016) Born to the throne of Lucis, Noctis Lucis Caelum uses his Engine Blade and the power of the Lucian Kings to fight. Noctis does better when he catches opponents off-guard with the Engine Blade's warp function. He specializes in getting extremely close to opponents via the blade and striking them when they least expect it. His play style rewards the player with a good combo game and a good amount of power to back it up. |
Neutral Special: Engine Strike. Noctis slashes at foes with the Engine Blade, dealing good damage and decent knockback if it lands. Side Special: Warp Punish. Noctis charges up an attack from the Engine Blade, resulting in him warping forwards and stabbing them with the blade. If timed just right, it can do massive damage to foes. Up Special: Death Drop. Noctis throws the Engine Blade into the air, disappearing before warping to it, grabbing before slamming back down on the ground. Down Special: Warp Away. Noctis throws the Engine Blade behind him, disappearing before reappearing and grabbing the blade. The blade can damage whoever it touches in this phase. Final Smash: Limitless Link. Noctis calls upon Gladiolus, Ignis, and Prompto to help execute a link-strike, all four of them viciously slashing and attacking any foe they caught in their attack. The attack finishes with one final blow from Noctis. | |

|
Name: Terra Debut: Final Fantasy VI (1994) A human/Esper halfbreed Magitek amnesiac with a mysterious past, Terra Branford has removed the Slave Crown and is ready to fight. In Smash, Terra uses the many spells known in the Final Fantasy series, acting as a glass cannon with a twist. A magic meter exists near her character icon, charging up overtime while lowering with the use of magic attacks and resulting in stronger magic if left charged. |
Neutral Special: Blizzara. Terra places a diamond made of ice in front of her and can leave it there for a few seconds. Terra also has the ability to place another diamond somewhere else on the stage if she has the time. After time has passed, the crystal(s) will fly up into the sky at an angle, taking any foe in their path with them until they shatter after a few frames. Neutral Special (Charged): Blizzaga. Terra places five orbs made of ice in a pentagon shape mid-air before immediately launching forwards. The orbs do slight damage with each one but really add up if all hit a foe one after another. Like her uncharged attack, Terra can leave the orbs be for a while before they automatically fire off. Side Special: Fira. Terra puts both of her hands up and shoots up to four balls of fire across the stage. The fireballs only travel in a straight and disappear within a few frames, but can rack up damage if two or more hit. Using all four fireballs at once takes a good chunk out of the magic meter, but leaves foes open to other attacks. Side Special (Charged): Firaga. Terra swings her blade along the ground, creating a single large wave of fire that travel along the stage. The wave does fire damage, but mainly does one hit rather than multiple. To compensate for the large size of the wave, it travels rather slowly but hits like a truck once it touches you. Up Special: Tornado. Terra spins her blade around herself, creating a tornado around herself that launches them up into the air. The tornado is able to pull nearby projectiles and items towards Terra and can do slight damage to anyone who touches it. The main purpose of the attack is to provide vertical distance for Terra, however. Up Special (Charged): Tornadaga. Terra spins around and summons a much more powerful tornado, propelling her both horizontally and vertically. The tornado does much more damage to anyone who happens to touch it and is able to block weak projectiles, doubling its use as a recovery and a damaging attack. Down Special: Trance. Terra changes into her purple Esper form and gains a substantial increase to speed and attack at the cost of her magic meter. The attack can be used at any time (minus when cooldown is in effect), but it drains the meter as it’s used. An upside is that using her other specials don’t drain the meter in this state. Final Smash: Riot Blade. Terra’s transforms into her Esper form and is given the Lightbringer, the most powerful sword in Final Fantasy VI. Terra immediately rushes towards the nearest foe, striking them with Riot Blade and the powerful effects that come with it. As one last attack, Terra uses Meteor, bombarding her prey with meteors before reverting back to her human form. | |
| |
|
Name: Bayonetta Debut: Bayonetta (2009) One of the last remaining members of the Umbra Witch clan, Bayonetta uses her hair to summon Infernal Demons alongside her set of guns, Love is Blue. Bayonetta is extremely agile and acrobatic, moving around the stage with grace. Her Down Special, Witch Time, slows down time on a single fighter and allows for multiple attacks to be used upon them. |
Neutral Special: Bullet Climax. Bayonetta fires bullets from her boots or her guns. The move can be charged and repeatedly used to extend the firing time. Side Special (Ground): Heel Slide. When on the ground, Bayonetta will slide across the ground, going into a vertical kick if timed right. Side Special (Air): After Burner Kick. Bayonetta kicks in a diagonal direction in the air, being able to kick back down to the stage. Up Special: Witch Twist. Bayonetta spins in the air for a short time, twisting around in the air and gaining vertical distance. Down Special: Witch Time. Bayonetta does a backflip, causing time around a nearby opponent to slow down, making them easy targets. Final Smash: Infernal Climax. Bayonetta uses Witch Time to slow down the entire stage and summon Gomorrah, chowing down on opponents before sending all of them flying off the stage. | |
|
Name: Rodin Debut: Bayonetta (2009) Formerly a famous weaponsmith working alongside angelic forces, Ronin is now one of the most feared demons of all time. Rodin is a brawler and functions differently from Bayonetta, making up for his lack of agility with his immense power. Despite this, the Infinite One is very good at keeping opponents away and rushing at them when their guard is down. |
Neutral Special: Laser Eyes. Rodin lifts his sunglasses up slightly and fires lasers from his eyes, going in a straight line across the stage. Side Special: Infernal Portal. Rodin opens a small portal besides him and punches, unleashing a giant version of his fist that launches fighters back a good amount. Up Special: Demon Leap. Rodin's demon wings appear on his back and he launches upwards, his wings disappearing when he lands. Down Special: Shockwaves. Rodin slams his foot down on the ground, creating a red shockwave that deals massive damage if timed right. Final Smash: The Infinite One. Rodin enters his Father Rodin form and rushes into any fighter in his path, causing the screen to go white as the impacts of various punches can be seen. When the screen returns, all fighters caught in the attack are on the ground and have taken massive damage. | |
|
Name: Simon Belmont Debut: Castlevania (1986) Legendary vampire hunter and archenemy of Dracula, Simon Belmont returns once again to fight alongside others. He's a very ranged fighter, using his whip and special items from the Castlevania series, such as holy water, crosses, and axes to get the job done. He's a slow fighter with plenty of range, making him a deadly force if used right. |
Neutral Special: Axe. Simon tosses an axe, which goes in an arc formation in the air before landing or hitting another foe. Side Special: Cross. Simon tosses a holy cross at an opponent, functioning like a boomerang when it returns. It's power depends on how the control stick is moved when throwing it. Up Special: Uppercut. Simon delivers a brutal uppercut, dealing damage to foes while forcing himself high up into the air. If it hits when he leaves the ground, multiple hits are done. Down Special: Holy Water. Simon throws a glass of holy water onto the ground, creating a pillar of flames that can start on the ground or on another opponent, doing a kind of chip damage. Final Smash: Grand Cross. Simon traps an opponent in a coffin before wrapping them in chains and sending into the air before delivering multiple blows to them via crosses made of holy light. The attack works on multiple opponents, sending more flying. | |
|
Name: Richter Belmont Debut: Castlevania: Rondo of Blood (1993) The descendant of Simon Belmont and yet another legendary vampire hunter, Richter returns from his surprise appearance in Super Smash Bros. Ultimate. He's still an Echo Fighter of Simon, having plenty of differences in style and animations. This time, he wields a new Final Smash that references the Item Crash ability, debuting in Castlevania: Rondo of Blood. |
Neutral Special: Axe. Richter tosses an axe, which goes in an arc formation in the air before landing or hitting another foe. Side Special: Cross. Richter tosses a holy cross at an opponent, functioning like a boomerang when it returns. It's power depends on how the control stick is moved when throwing it. Up Special: Uppercut. Richter delivers a brutal uppercut, dealing damage to foes while forcing himself high up into the air. If it hits when he leaves the ground, multiple hits are done. Down Special: Holy Water. Richter throws a glass of holy water onto the ground, creating a pillar of flames that can start on the ground or on another opponent. The fire here is blue instead of orange. Final Smash: Item Crash. Richter jumps up into the air and unleashes a barrage of attacks based on his sub-weapons, dishing out a ring of axes, throwing daggers, and finishing it off with a rain of holy water upon the stage, damaging anyone the attack touches. | |

|
Name: Gabriel Belmont Debut: Castlevania: Lords of Shadow (2010) A former member of the Brotherhood of Light and the Belmont clan, Gabriel Belmont has transformed into the world's most powerful vampire; Dracula. Gabriel fights in his vampire for all of his attacks, utilizing Void and Chaos Magic for almost everything. He's a lighter character than other Belmonts, meaning he can get his multiple hits in faster as well. |
Neutral Special: Void Slash. Gabriel uses the Void Sword to slash two heavy blows in a row in front of him. When running, Gabriel can perform this move while skidding along the ground slightly. Side Special: Shadow Whip. Gabriel charges up an attack from his Shadow Whip, unleashing a strong yet slow ranged attack from the whip. Up Special: Void Sweep. Gabriel swings the Void Sword around him, launching himself extremely high into the air while leaving himself open by the end of the attack. Down Special: Blood Shockwave. Gabriel calls upon Blood Magic, jumping up into the air and creating a damaging shockwave on the ground once he lands. Final Smash: Dracula the Draconic. Gabriel grabs the Tailsman of the Dragon and enters his true form; a large demonic dragon. He locks fighters in the attack and spews a large pool of fire, burning all caught in it before transforming back into his vampire form. | |

|
 Name: Rock Howard Debut: Garou: Mark of the Wolves (1999) Biological son of Geese Howard and adoptive son of Terry Bogard, Rock Howard joins the fray with a twist on the Fatal Fury series’ icons. Rock brings a mix of both his adoptive and biological father’s fighting styles, using Terry’s up special and overall kit while taking Geese’s Reppuken among other things. Just like Terry, he comes with two side specials and two input specials, making him quite the deadly fighter. |
Neutral Special: Repuuken. Rock fires a blast of blue energy from his fingers, aiming it at the ground. The attack moves along the ground for a short time and acts as a sort of wall unlike Terry’s Power Wave. When the B button is held down, the attack is slightly larger, moves faster, and deals slight knockback. It’s better for leading into attacks rather than being any kind of finisher. Side Special (Forwards): Hard Edge. Rock rushes forward as his hand begins to be covered in blue energy, eventually striking a nearby opponent with full force via the open palm of his hand. The dash is lightning quick and acts as a sort of counter. When a special input is entered, Rock travels farther with more force behind his attack, dealing more damage and gaining more invulnerability upon startup. Side Special (Backwards): Crack Counter. Rock prepares himself for an enemy attack, holding his arms close. If an enemy hits him, Rock will unleash a stationary version of the Crack Shoot attack. The attack has alright knockback and good damage, but a special input allows it to be followed by a smaller and weaker Crack Shoot that knocks opponents into the air slightly. Up Special: Rising Tackle. Rock leaps up into the air with his legs facing the sky, spinning around rapidly while doing so. While it doesn’t get him that far up, the move is good for doing damage to those right above you. The move has the same special input as Terry’s, but is slightly slower to make up for a boost in power. Down Special: Shinkuu Nage. Rock holds his palm out; in this state, any physical attack will be halted by Rock as he throws his opponent overhead behind him. While not doing too much damage, its a move that's easy to follow into; in addition, a special input gives the throw more power overall. Input Special 1: Shining Knuckle. When Rock is at over 100%, Rock can execute ↓ ↘ → ↓ ↘ → + A or ↓ → ↓ → + A to activate Shining Knuckle, allowing him to dash forwards to deal multiple hits to a foe. The initial strike does more damage than the other hits, but each hit adds up and can end up in a K.O. if the opponent’s damage is high enough. If Rock misses an opponent, he’s vulnerable for a good few frames. Input Special 2: Raging Storm. When Rock is at over 100%, Rock can execute ↓ ↘ → ↓ ↘ → + B or ↓ → ↓ → + B to activate Raging Storm. Rock shoves his hands on the ground and creates a pillar of energy around him, doing massive damage to anyone right next to him. The power at the center is similar to a bomb item, but the effect is weaker if a fighter touches the top of it first. Final Smash: Neo Deadly Rave. Rock enacts his own version of Geese’s Deadly Rave attack, slamming into an opponent with Shining Knuckle while his fist is covered in blue/purple energy. Rock then launches into a rapid series of punches and kicks before finishing off with a large energy-powered projectile that sends Rock’s target flying. At high percents, this can easily K.O. anyone unfortunate enough to be in Rock’s path. | |

|
Name: Cuphead Debut: Cuphead (2017) The more mischievous of the two container cranium kiddos, Cuphead joins the fray in his signature 1930’s cartoon style! Cuphead is a master of vertical and horizontal movement; while slow, his dash makes him temporarily invincible at the cost of no damage, he has a unique “Air Special” that allows him to parry, he can get serious air in most situations...Cuphead’s got you covered on all bases! |
Neutral Special: Peashooter. Cuphead snaps his fingers together and shoots out multiple shots of energy in a straight line, disappearing across the screen if it doesn’t hit anything. The attack itself is incredibly weak but can fire multiple times without the opponent flinching; however, it can’t be fired forever. Air Special: Parry. Instead of being able to use his neutral special in the air, Cuphead gains an entirely unique “Air Special” in the form of his iconic parry ability. When pressing B in the air, Cuphead is able to slap anything underneath him, acting as a sort spike while giving Cuphead extra air time overall. Don’t worry, though; he can still use every other attack in the air! Side Special: Roundabout. Cuphead fires a single projectile that functions like a boomerang. The blast moves forward before coming around over Cuphead’s cup head, flying off into the distance. Only one shot can be fired off at once, but the damage done on both of it’s trips is pretty decent for the projectile it is. Up Special: Plane Crazy. Cuphead briefly turns into his airplane form and performs a shuttle loop-like motion in the air, turning back into his regular cup form upon the loop concluding. If the B button is pressed at the peak of the loop, Cuphead is able to fire out small bullets straight up into the air before reverting. Down Special: Chaos Orbit. Cuphead snaps his fingers and creates four green stars that begin to circle around him, protecting him from melee and projectiles attacks. Cuphead has to snap his finger four times if he wants all four stars, but can stop whenever he wants and end up with one to four stars to protect him. Final Smash: Energy Beam. Cuphead rushes towards the other side of the screen and jumps up before enacting his super move known as Energy Beam. Now spinning and aiming his head horizontally, Cuphead fires out a large beam of energy across the stage that massively damages anyone in its path. The beam can’t be dodged out of and launches anyone caught in off in the direction their back was facing. | |
| |
|
Name: Crono Debut: Chrono Trigger (1995) A young man from 1000 AD, Crono is a silent yet strong fighter who went on a time-traveling odyssey with his friends. Crono is a fast character, able to deal hits and dodge them quickly. The way he holds his sword with both hands also affects his play style, making him different from any other swordsman. While relying on his blade for all attacks, Crono uses it in interesting ways, often applying elemental effects for extra damage. |
Neutral Special: Cyclone Spin. Crono, holding his sword out by the hilt, spins around twice in a circle. While performing the attack, Crono is able to be moved in a similar fashion to the Ice Climbers, the main difference being that Crono can shove his sword downs with the press of the B button. This action creates a small shockwave around the sword, dealing extra damage while canceling the attack itself. Side Special: Lightning Strikes. Crono holds out his sword as the B button and control stick are held in unison, rumbling thunder being heard in the background. Once the player lets go of the B button, Crono slashes his sword, kncoking any up-close opponents straight into the path of a lightning bolt, doing double the damage in a small amount of time. If both miss, the lightning stuns the floor, but nothing else happens. Up Special: Barrage of Blades. Crono wildly whips around his sword, rising upwards with each individual swing. The direction the sword moves in obviously extends Crono's hitbox, but the sword's position has different effects depending on it's position when it hits a foe. The foe is able to fly across, down, or above into the air depending on how high their percentages are, some directions spiking in the air when enemies are at high percentages. Down Special: Shadow Cleave. Crono crouches down before leaping straight into the air in an arc formation. Crono is followed by a series of after-images, raising his sword into the air before slamming it back down. The sword itself has a sweet spot at the very tip, doing a substantially larger amount of damage than the regular sword on it's own. Final Smash: Luminaire. Crono calls upon close friends Marle and Lucca before performing an attack known as Luminaire. A green aura surrounds all three of them as it grows, drawing in more and more energy before exploding. The explosion causes the area around Crono to flash white before revealing who took damage and green sparkles shining around Crono, Marle and Lucca disappearing right after. Luminaire is able to kill foes who are over 100%. | |
|
Name: Wryn Debut: BLEED (2012) Wryn is a young girl with only one goal in mind: become the best hero in the world, even if it means to kill the old ones. Wryn is incredibly fast, rivaling some of the roster's fastest with her use of guns and her katana, which can be use to cancel out/reflect attacks if a sweet spot is hit. |
Neutral Special: Bullet Storm. Wryn fires a storm of bullets from her dual pistols, ending after a few seconds. Side Special: Rocket Launcher. Wryn launches a rocket that follows a random opponent, albeit slowly. Up Special: Air Dash. Wryn dashes upwards in the air, leaving purple afterimages behind her as she moves. Down Special: Katana Reflect. Wryn deflects an attack, with her katana, lightly damaging and pushing back the opponent. Final Smash: Time Runs Out. Wryn makes time slow down, running at an opponent and using all of her arsenal on them, including bullets, katanas, missiles, and more. | |

|
Name: Flynn Debut: Shin Megami Tensei IV (2013) Flynn is the samurai protector of the Kingdom of Mikado, preventing multiple attacks sent from the threat of demons...until the people he protects become them. When an attack is properly timed, Flynn gains the Smirk effect and gets a general increase in his strength for a short time, wearing off after a few seconds on not being used. |
Neutral Special: Pistol. Flynn pulls out a small gun and fires a single shot in whatever direction he's facing, the bullet traveling rather quickly. Side Special: Party Members. Flynn strikes forward and calls upon one of five different demons he can recruit into his party, all of which dealing different effects when attacking. Up Special: Phoenix Summon. Flynn calls up a Phoenix to help shoot him upwards, burning anyone that touches it before turning into dust and flying away in the wind. Down Special: Makarakarn. Flynn shoots out a barrier in front of him that blocks an attack from making contact with him, disappearing if nothing hits it. Final Smash: Godslayer. Flynn grabs the Godslayer Sword and thrusts it into nearby opponents, causing Smirk to be activated as he slashes multiple other times and sends his targets flying. | |
|
Name: Spyro Debut: Spyro the Dragon (1998) A member of the Artisan subspecies of dragons, Spyro is a young purple dragon who's always willing to lend a hand - or tail - when trouble arises. Spyro is a somewhat grounded character, being easy to learn but hard to master. He's able to utilize elements from the classic series of games alongside later titles such as The Legend of Spyro. |
Neutral Special: Flame Breath. Spyro shoots out a stream of fire directly aimed forwards, stopping after a second or two. Side Special: Charge. Spyro aims his horns forwards and rams into an enemy. If timed properly, the damage done can be devastating. Up Special: Dragon's Flight. Spyro glides upwards, fluttering upwards slightly before floating back down to the ground. Down Special: Skateboard. Spyro slides along the ground on his skateboard, ramming into opponents and being able to jump up off of it and keep it rolling on the ground. Final Smash: Inner Darkness. Spyro taps into the Dark Aether and becomes Dark Spyro, ramming into opponents at a blistering speed before swatting them away with his powered-up wings. | |

|
Name: Cynder Debut: The Legend of Spyro: A New Beginning (2006) Formerly a slave to the sinister dragon Malefor, Cynder is now a close ally to Spyro and has forged her own path in life. Despite looking similar, Cynder is a unique newcomer rather than an Echo, controlling faster than Spyro with different moves. She delivers more hard-hitting attacks at the cost of her speed and reaction time. |
Neutral Special: Shadow Fire. Cynder spits out a stream of dark fire made from the Shadow element. It's slower than Spyro's, but deals more damage overall. Side Special: Shadow Lightning. Cynder charges up an attack from her mouth, unleashing black lightning bolts that electrify whoever they touch. Up Special: Cynder Strike. Cynder thrusts her body upwards twice in a somewhat "jagged" fashion before spreading her wings out and landing back on the ground. Down Special: Shadow Strike. Cynder dives into her own shadow and pops back up moments later, aiming to hit an unsuspecting fighter from below. Final Smash: Malefor's Curse. Cynder reverts back to her adult dragon form powered by Malefor's corruption and proceeds to wreck havoc across the stage, crashing into any foe in her way. | |

|
Name: Shantae Debut: Shantae (2002) After large fan demand, Shantae has finally joined the brawl and sits alongside gaming's all-stars! Shantae's two unique attributes are her hair that she uses for her attacks and her ability to turn into one of four different forms; the monkey, which gives her faster speed, the elephant, which gives her better strength, the spider, which allows her to stick of walls, and the harpy, giving her better vertical abilities. |
Neutral Special: Hair Whip. Shantae uses her ponytail as a large whip, lashing opponents once with a surprising amount of force and somewhat stunning them. Side Special: Spitfire. Shantae charges up a ball of fire that can be launched in front or her in diagonal directions or in a straight line, giving her a better chance of hitting foes. Up Special: Risky's Cannon. Shantae jumps and holds Risky Boot's cannon under her, which shoots two cannonballs that propel her upwards into the air. Down Special: Transform! Shantae starts to dance and is able to select one of four different transformations Monado-Arts style, able to swap through an easy to navigate layout in a cross shape. Final Smash: Ammo Baron's Revenge. The Ammo Baron drives onto the stage and immediately begins to fire cannonballs randomly, dealing massive damage to whoever they hit. Shantae reappears and deflects a cannonball back at him, sending him and tank flying into the sky. | |
|
Name: Shovel Knight Debut: Shovel Knight (2014) Shovel Knight has brought his unique code of Shovelry to the brawl, fighting alongside some of gaming’s greatest. His fighting style uses various relics from his home game, allowing him to hit hard and fast with weapons like the Dust Knuckles, the Throwing Anchor, and the Mobile Gear. Of course, his iconic shovel isn’t left out of his arsenal either, flinging small projectiles. |
Neutral Special: Steel Thy Shovel. Shovel Knight whips his shovel along the ground, small chunks of dirt and gems flinging out from where his shovel landed. The projectiles don’t do much damage, but the initial strike of the shovel does. Side Special: Dust Knuckles. Shovel Knight slips on the Dust Knuckles and proceeds to charge forwards, his fist straight out in front of him. The move be can used in the air to gain horizontal distance before the use of the up special. Up Special: Throwing Anchor. Shovel Knight throws a purple anchor onto the stage, grabbing onto a rope he tied to the end of it. The anchor can do devastating damage if it hits an opponent, but can also get stuck in the stage and be thrown like a projectile. Down Special: Mobile Gear. Shovel Knight lays down a platform attached to a gear, rolling along the ground until it hits another fighter or an obstacle in its path. The gear is easy to defeat, however, just taking one hit before disappearing. Final Smash: Dream Sequence. Shovel Knight throws a single opponent up into the air as the world becomes white around them. As Shovel Knight runs to try and catch them, he’s too late and the fighter hits the floor, taking plenty of damage as the attack ends. | |

|
Name: Polar Knight Debut: Shovel Knight (2014) Shovel Knight’s former friend, the cold and brooding Polar Knight, has made a surprise appearance in the world of Smash. Polar Knight’s main gimmick is shoveling snow and throwing it up into the air, acting as large, heavy projectiles. His down special creates said snowballs for him to simply kick at foes or use for tricky traps with the other moves in his arsenal. |
Neutral Special: Frostbite Blade. Polar Knight shoves his shovel into the ground before digging it out, two snowballs moving in arcs above him. While harder to hit foes with than Shovel Knight’s attack, these snowballs do more damage when they do hit. Side Special: Charge Forth. Polar Knight dashes across the screen, ramming into his opponents with his snow shovel. If a snowball is out on the field, Polar Knight can move it along and throw it up into the air upon the end of the attack. Up Special: Rainbow Bridge. Polar Knight calls upon a Rainbow Bridge to appear underneath him. While it doesn’t cover vertical distance, hitting the platform causes it to move forwards as a rainbow trails behind it, allowing him to get close to his enemies. Down Special: Snowball. Polar Knight kicks a large snowball across the stage. While the ball itself is somewhat slow, it takes a few hits to destroy it and can deal pretty decent damage upon touching a foe. Final Smash: Stranded Ship. Polar Knight halts the action and calls upon his home, the Stranded Ship. The wrecked vessel falls from the sky and lands on the poor souls Polar Knight caught in the attack, crushing them as chilly winds and wooden debris fly out from the impact. | |

|
Name: Spinal Debut: Killer Instinct (1994) An undead pirate turned Ultratech agent, Spinal’s insanity will stop at nothing in order to reach his goal: the Mask of the Ancients. In Smash Bros., Spinal is able to gain more strength via stringing combos together with grabs, throws, and his other attacks to gain skulls. Up to three skulls can be on-screen at once and allow him to boost the power of his special moves for a turn. |
Neutral Special: Searing Skull. Spinal launches a green skull-shaped projectiles towards his foes. With one skull, it shoots low on the ground. With two, it shoots in a straight up in the air. With three, it fires like a rocket and tries to hit from above. Side Special: Bone Shaker. Spinal raises his shield and rushes forward, damaging anyone in his path. The amount of damage Spinal does depends on how far he is from a foe, with three skulls allowing him to phase through small projectiles. Up Special: Skeleport. Spinal disappears into a portal and pops out in a different location. The amount of skulls Spinal has allows him to move higher or farther, each skull enhancing the effects of the attack. Down Special: Power Devour. Spinal raises his shield and is able to absorb small projectiles like Clay Pigeons and Din’s Fire. With these items absorb, the power of his shield is increased, but is only able to absorb three projectiles. Final Smash: Mask of the Ancients. Spinal gets his hands on the treasure he’s been searching for; the Mask of the Ancients. After putting on the mask, he launches into a frenzy of powerful attacks using his undead powers, pirate motifs, cutlass, and shields, ending it off with one final swipe of his cutlass. | |

|
Name: Great Maccao Debut: Monster Hunter Generations (2015) While seemingly a random pick, the Great Maccao represents the primal animal-based instinct side of the Monster Hunter series. Easily of the heaviest fighters in the game, the Great Maccao has very little options in the air at the cost of being a real threat on the ground, using various kicks and the rest of its body to put some real pressure onto its more mindful foes. |
Neutral Special: Maccao Kick. The Great Maccao, with the press of the B button, ends up on it’s tail and kicks twice if the button is pressed twice more. If a foe is hit by the second kick, they get knocked back farther. Side Special: Wyvern Thrust. The Great Maccao, stationary, charges up an attack using its back. When the attack is unleashed, the creature thrusts its body in a vertical line, clobbering anything in its way as it gets back up on its feet. Up Special: Dragon Lunge. The Great Maccao pulls its arms, legs, and head back in midair before lunging in a diagonal line upwards. While powerful if the attack lands, one wrong move can cost you your stocks. Down Special: Rage. The Great Maccao jumps up slightly and slams back down three times, creating shockwaves around it that grow slightly bigger with each return. The attack ends in a vicious roar from the beast, returning to its normal state. Final Smash:Rise of the Maccao’s. The Great Maccao lets out a screech as it calls upon smaller Maccao’s to help it out. All of these Maccao’s begin to rapidly attack a single opponent, kicking and biting that them before the Great Maccao delivers a final kick, ending the attack. | |
|
Name: Django Debut: Boktai: The Sun Is in Your Hand (2003) Django is the current Solar Boy and wielder of the Gun Del Sol, a gun that uses the power of the sun as energy. In Smash Bros., Django’s main gimmick is sunlight; the more he’s absorbed, the more power he has for his special moves. Using these moves drains sunlight, however, with sunlight able to be earned slowly over time or quickly recharged via his down special. |
Neutral Special: Sol Shot. Django fires a single blast of solar energy out of the Gun Del Sol. The attack can be repeated over and over again with a catch; the gun will overheat eventually, causing Django to take major damage if he doesn’t stop. With more sunlight, the blasts increase in power. Side Special: Solar Sword. Django pulls the Solar Sword out from seemingly nowhere, reeling back as the sword prepares to strike. Once the attack is executed, Django rushes forwards with the Solar Sword pointing outwards, stabbing anyone in his path. With more sunlight, the blade shines brightly and does more damage. Up Special: Rising Sun. Django, surrounded in the power of the sun, leaps up into the air before beginning to fall back down. The sunlight stays around him for awhile, damaging anyone who touches it, but eventually disappears and leaves him helpless. With more sunlight, the shield stays for a slightly longer time. Down Special: Recharge. Django stops and raises the Gun Del Sol to the sky, causing it to absorb sunlight. The TRC meter near his character icon shows how much sunlight the weapon has, with larger amounts of sunlight giving Django’s specials a buff for a short time. Final Smash: Sol Trance. Django fuses with Otenko and becomes Sol Django, rushing at an enemy before enacting Sol Prominence, a move that delivers repeated kicks before using Sol Flare, spinning around in a circle before a final kick is delivered. A purely visual TRC meter sits in the corner, draining as the attack goes on before the two unfuse. | |
|
 Name: Rayman Debut: Rayman (1995) The Limbless Wonder, after years of ALMOST making it, has finally entered the fray! Rayman’s entirely body is made up of projectiles, allowing him to have some of the longest ranged attacks in the game. He’s a rather tricky character to use, relying on odd projectiles and the player’s wits to survive whatever battles he’s a part of. |
Neutral Special: Wind-Up. Rayman winds up a limb and prepares to launch it, the limb coming back like a boomerang. If the L-stick is used when charging the attack, Rayman launches a different limb; just holding B uses his heads, flicking it to the side uses his torso, moving it up moves his head, and holding it down brings in his feet. Side Special: Lockjaw. Rayman equips a bear trap-like weapon around his fist, pulling said fist back before pushing the trap forward. The trap is attached to a chain and launches forward, latching onto an opponent and pulling Rayman forward if the weapon lands. If it doesn’t land, the trap retracts and Rayman groans slightly. Up Special: Propellor Hair. Rayman’s hair begins to spin around like helicopter blades, slowing him down in the air as he makes a slow descent. The blades themselves can damage opponents who deliberately get close to them, but it’s much more of a recovery rather than an attack. Down Special: Rabbid. Rayman grabs a Rabbid by the ears and pulls it out of the ground. The Rabbid itself is random; a screaming Rabbid runs up to opponents and clobbers them, a Rabbid with a plunger gun shoots said plunger and disappears, and a Peach Rabbid takes a selfie next to a nearby foe and stuns them for a brief period of time. Final Smash: Moskito’s Revenge. Rayman hops on Moskito, the large insect sucking up any nearby opponents and flying through the clouds. A cutscene then plays where Moskito shoots the opponents out of its nose, acting as a projectile as they slam against enemy forces and take high damage. The cutscene then ends as Rayman and the others return to the stage. | |
|
Name: Barbara Debut: Rayman Legends (2013) The princess of the forest and one of many sisters, Barbara makes her playable debut in the world of Super Smash Bros.! In Smash, she functions as a fusion of Rayman and Echidna, taking aspects from both of them to create a playstyle befitting of the warrior herself. As a character, she’s slower than Rayman with more power to boot. |
Neutral Special: Wind-Up. Barbara pulls back her axe and thrusts it forwards, the axe reaching its horizontal peak before zipping back to her. Unlike Rayman’s move, the axe deals much more damage than his limbs at the cost of speed, the attack coming out slower due to the bulk of the axe. Side Special: Axe Rush. Barbara rushes forwards, the blades of her axe in front of her as she does so. If she makes contact with a foe, she “swooshes” the axes in front of them and ends up with the axe behind her, leaving her open to other attacks. The move is functionally similar to Echidna’s with the added power of Barbara’s weapon. Up Special: Winged Helmet. Barbara’s small wings on her helmet start to flap, slowing her down in the air as she descends slowly. Unlike Rayman’s attack, Barbara’s variant doesn’t do damage against people who touch her, but in return, she’s able to go much faster and evade death at a much brisker pace. Down Special: Counter Swipe. Barbara raises her axe to her chest, preparing for an upcoming attack. If the attack hits her, she’ll thrust her axe behind her before sweeping it at the opponent, knocking them back as she stays still. Unlike Echidna’s same attack, the attack takes a little more time to come out in exchange for more damage. Final Smash: Medieval Dragon. Barbara hops upon the Medieval Dragon, flying into the background as the dragon begins to spew fire. Each fireball that hits the stage gets progressively bigger and bigger, eventually resulting in a large stream of fire cutting through the stage, burning anyone who touches it. After this, Barbara hops off and the dragon flies away. | |

|
Name: Meryl Debut: Oddity (202X) One of the main characters of the upcoming indie game Oddity, Meryl is a young girl from the town of La Folia, using her psychic abilities and her future sight to duke it out. While her moveset is based on pre-release information from Oddity, it’s also heavily influenced by characters from the Earthbound series, giving her a mix of projectile moves, a tether grab up special, and a Shulk-like counter to boot. |
Neutral Special: Heat VOX. Meryl unleashes a fire projectile from her hand, the fire quickly shooting out and doing minimal fire damage overall. If the first attack connects, however, she can quickly follow it up with a second blast, doing more fire damage. It’s rather easy to avoid, but can keep opponents locked in place if they aren’t careful. Side Special: Thunder VOX. While an up special for other Earthbound characters, Meryl shoots out a large ball of electricity from her open palm, the ball gaining speed as it travels. It only goes in a straight line and is fairly predictable, but does good damage at high percents and stun damage at low percents. Since they move slow at first, it’s also good for stage control. Up Special: Jump Whip. Meryl pulls out her jump rope out of seemingly thin air and lashes it at a 45 degree angle. If she catches onto a ledge, she’s pulled to safety almost immediately, kicking her legs to try and get back up. If she catches an opponent, however, she throws the jump rope down on the ground; while similar to Joker’s up special, it focuses on damage rather than pulling anyone close to her. Down Special: Future Sight. Meryl braces herself for an upcoming attack - if she’s hit in this state, she uses her psychic powers to lift the opponent high up into the air. This attack can be used to end an opponent at extremely high percents and punishes those who get reckless hard, but if Meryl fails to execute the attack, she takes greater damage than she would normally. Final Smash: The Gang. Meryl calls upon Travis, Floyd, and Leo to help her out in battle. Meryl locks the opponent in place with her cognitive powers before Floyd strikes them with a rake, Leo fires Beam VOX repeatedly, and Travis hits them over and over with a baseball bat. Meryl finishes the attack by having the gang flee before slamming her foe into the ground, resulting in massive damage. | |
| |
|
Name: Thanos Debut: Invincible Iron Man #55 (1973) The Mad Titan, Thanos, has made his way into the world of Smash Bros., bringing infinite power with him. Thanos has the ability to rewind time via the Time Stone, allowing him to recover from most attacks...with a lot of cooldown to compensate for the sheer power of it. All of his attacks can catch a fighter off-guard, all with variations on unique side effects. |
Neutral Special: Reality Check. Thanos delivers a single punch that, due to the Reality Stone, has various random effects. One punch can poison a fighter while the other can trap them in a bubble, leaving them open to other attacks while ascending upwards. Side Special: Power of Earth. Thanos lifts chunks of dirt and rock out from behind him before launching them forwards. The attack can be titled at the cost of standing still for longer. Up Special: Travel Delays. Thanos disappears into thin air and reappears via the Space Stone's power, coming out from a blue portal. If a fighter tries to damage Thanos while the portal is active, the portal will force them to take damage. Down Special: Mad Titan's Strike. Thanos slams the Infinity Gauntlet onto the ground, creating purple shockwaves that spread out around him. The shockwaves toss opponents up into the air and leave them open to more attacks from Thanos. Final Smash: Infinite Power. Thanos, using the full might of the Infinity Gauntlet, leaps up in the air and pulls down Titan's moon from the background, creating fiery meteors that can hit fighters and the stage while dealing out massive damage. | |

|
Name: Robot Jones Debut: Whatever Happened to Robot Jones? (2002) Robot Electro Jones, a relatively obscure KX-8 model of robot, has finally made a major reappearance ever since his debut in 2002! In Smash, Robot Jones wields the Data Log Entry mechanic, a move which allows him to copy the stats of whatever fighter he’s duking it out with until he takes enough damage for the trick to wear off. Other than that, Jones is a technical fighter with a knack for non-traditional weapons. |
Neutral Special: Wonder Cube. Robot Jones grabs a Wonder Cube and begins to shuffle the parts around. The attack requires holding down the button and releasing at the right time, the cube being thrown and exploding into pieces upon contact. Holding down the button for too long will result in Jones going nuts over trying to solve the cube, taking a bit of damage. Side Special: Data Log Entry. Robot Jones scans an opponent from head to toe, the attack doing extremely minimal damage with a twist; scanning a foe allows Robot Jones to inherit their very same stats. Depending on the fighter, Jones can increase his speed, weight, jumping abilities, strength, and more. Up Special: Growth Spurt. Robot Jones extends his legs, making himself taller while propelling the rest of his body high up into the air. The legs return to normal after a short time. If an opponent is under Jones when his legs stretch, the move spikes them and sends them up into the air. Down Special: Hall Monitor. Robot Jones crouches, a bucket appearing on top of his head. The move is a counter; if an opponent hits Jones in this state, the bucket is flung in their direction, appearing on the ground as an item if it doesn’t hit anyone while dealing decent damage if it does hit. Final Smash: Help From My Friends! Robot Jones calls upon Socks, Cubey, and Mitch to attack whichever opponent he’s caught in the attack. All of them deliver various attacks and 80’s material to dish out real damage, Jones himself ending the attack with a laser blast aimed straight at his target and all four boys yelling “ZOMBIES!” as their target goes soaring. | |

|
Name: Mii Fighter Debut: Wii Sports (2006) The Mii Fighter has been completely retooled from it's last two appearances. Rather than a variety of different Mii types, you're able to choose from multiple different specials correlating to a specific form of attack. This means if you want to use a sword, your fists, an arm cannon, and a tennis racket all at once, you can. In addition, a new set of moves, dubbed the Mii Athlete set, has been introduced, giving Miis much more customizability. |
Neutral Special (Brawler): Fist Flurry. The Mii punches with both of their fists multiple times, finishing it off with a single uppercut. Neutral Special (Swordfighter): Blurring Blade. The Mii pulls it's sword back before unleashing into a flurry of strikes and stabs. Neutral Special (Gunner): Laser Blaze. If the B button is repeatedly tapped, the Mii fires off multiple blasts of energy in the direct they're facing. Neutral Special (Athlete): Lob Shot. The Mii chucks a tennis ball into the air and hits it downwards, the ball ricocheting off of walls and fighters. Side Special (Brawler): Burning Dropkick. The Mii lunges forward feet-first as their lower half catches fire. It can be charged by holding down the B button. Side Special (Swordfighter): Slash Launcher. The Mii charges up an attack before unleashing it, traveling across the stage with their sword forwards. Side Special (Gunner): Mii-ssile. The Mii fires off a small missile at opponents, heading straight towards whoever it's in front of. Side Special (Athlete): Baseball Bash. The Mii charges up a baseball bat and hits a ball at opponents, sending it in a straight line or upwards if it works. Up Special (Brawler): Piston Punch. The Mii punches in the air, propelling themselves upwards and damaging anyone in their way. Up Special (Swordfighter): Skyward Slash Dash. The Mii leaps into the air with a variety of sword slashes, leaping back and forth. Up Special (Gunner): Lunar Launch. The Mii shoots an explosive burst of energy below them and propels upwards, covering everything below them in smoke. Up Special (Athlete): Trample-ine. A trampoline appears under the Mii, allowing them to bounce up on it once before disappearing. Down Special (Brawler): Headache Maker. The Mii jumps into the air and slams back down fists-first, crushing any and all opponents beneath them. Down Special (Swordfighter): Reversal Slash. The Mii flips opponents around and can deflect projectiles along with them, defending himself. Down Special (Gunner): Bomb Drop. The Mii drops a small self-detonating bomb on the stage, going off a second or two after being dropped. Down Special (Athlete): Curling Stone. The Mii pushes a curling stone along the stage, sending it at a high speed before it slows down and disappears. Final Smash (Brawler): Omega Blitz. The Mii punches their opponent once before launching into a flurry of martial art attacks and finishing off with yet another punch, sending their opponents crashing into the ground. Final Smash (Swordfighter): Sword From The Heavens. The Mii sticks their sword up towards the sky, causing a larger sword made of light to come crashing down from above and demolish anyone in it's immediate path. Final Smash (Gunner): Full Blast. The Mii leaps up and fires a large beam of energy across the stage, obliterating everything in it's path before concentrating into a thinner beam, then sizzling out. Final Smash (Athlete): Volleybomb. The Mii jumps in the air, volleyball in hand, and hits it down onto the stage below with the strength of millions. The ball causes an explosion, damaging any players in the it's range. | |

DLC Characters[]


In Super Smash Bros. Swansong, downloadable content and characters are available for purchase. All of the DLC characters from Super Smash Bros. Ultimate are available to purchase for significantly less money than any of the newcomers.
As of right now, thirteen DLC fighters are available to purchase. Series with their first playable representative include Marvel VS Capcom, Darkstalkers, The King of Fighters, and Steven Universe.
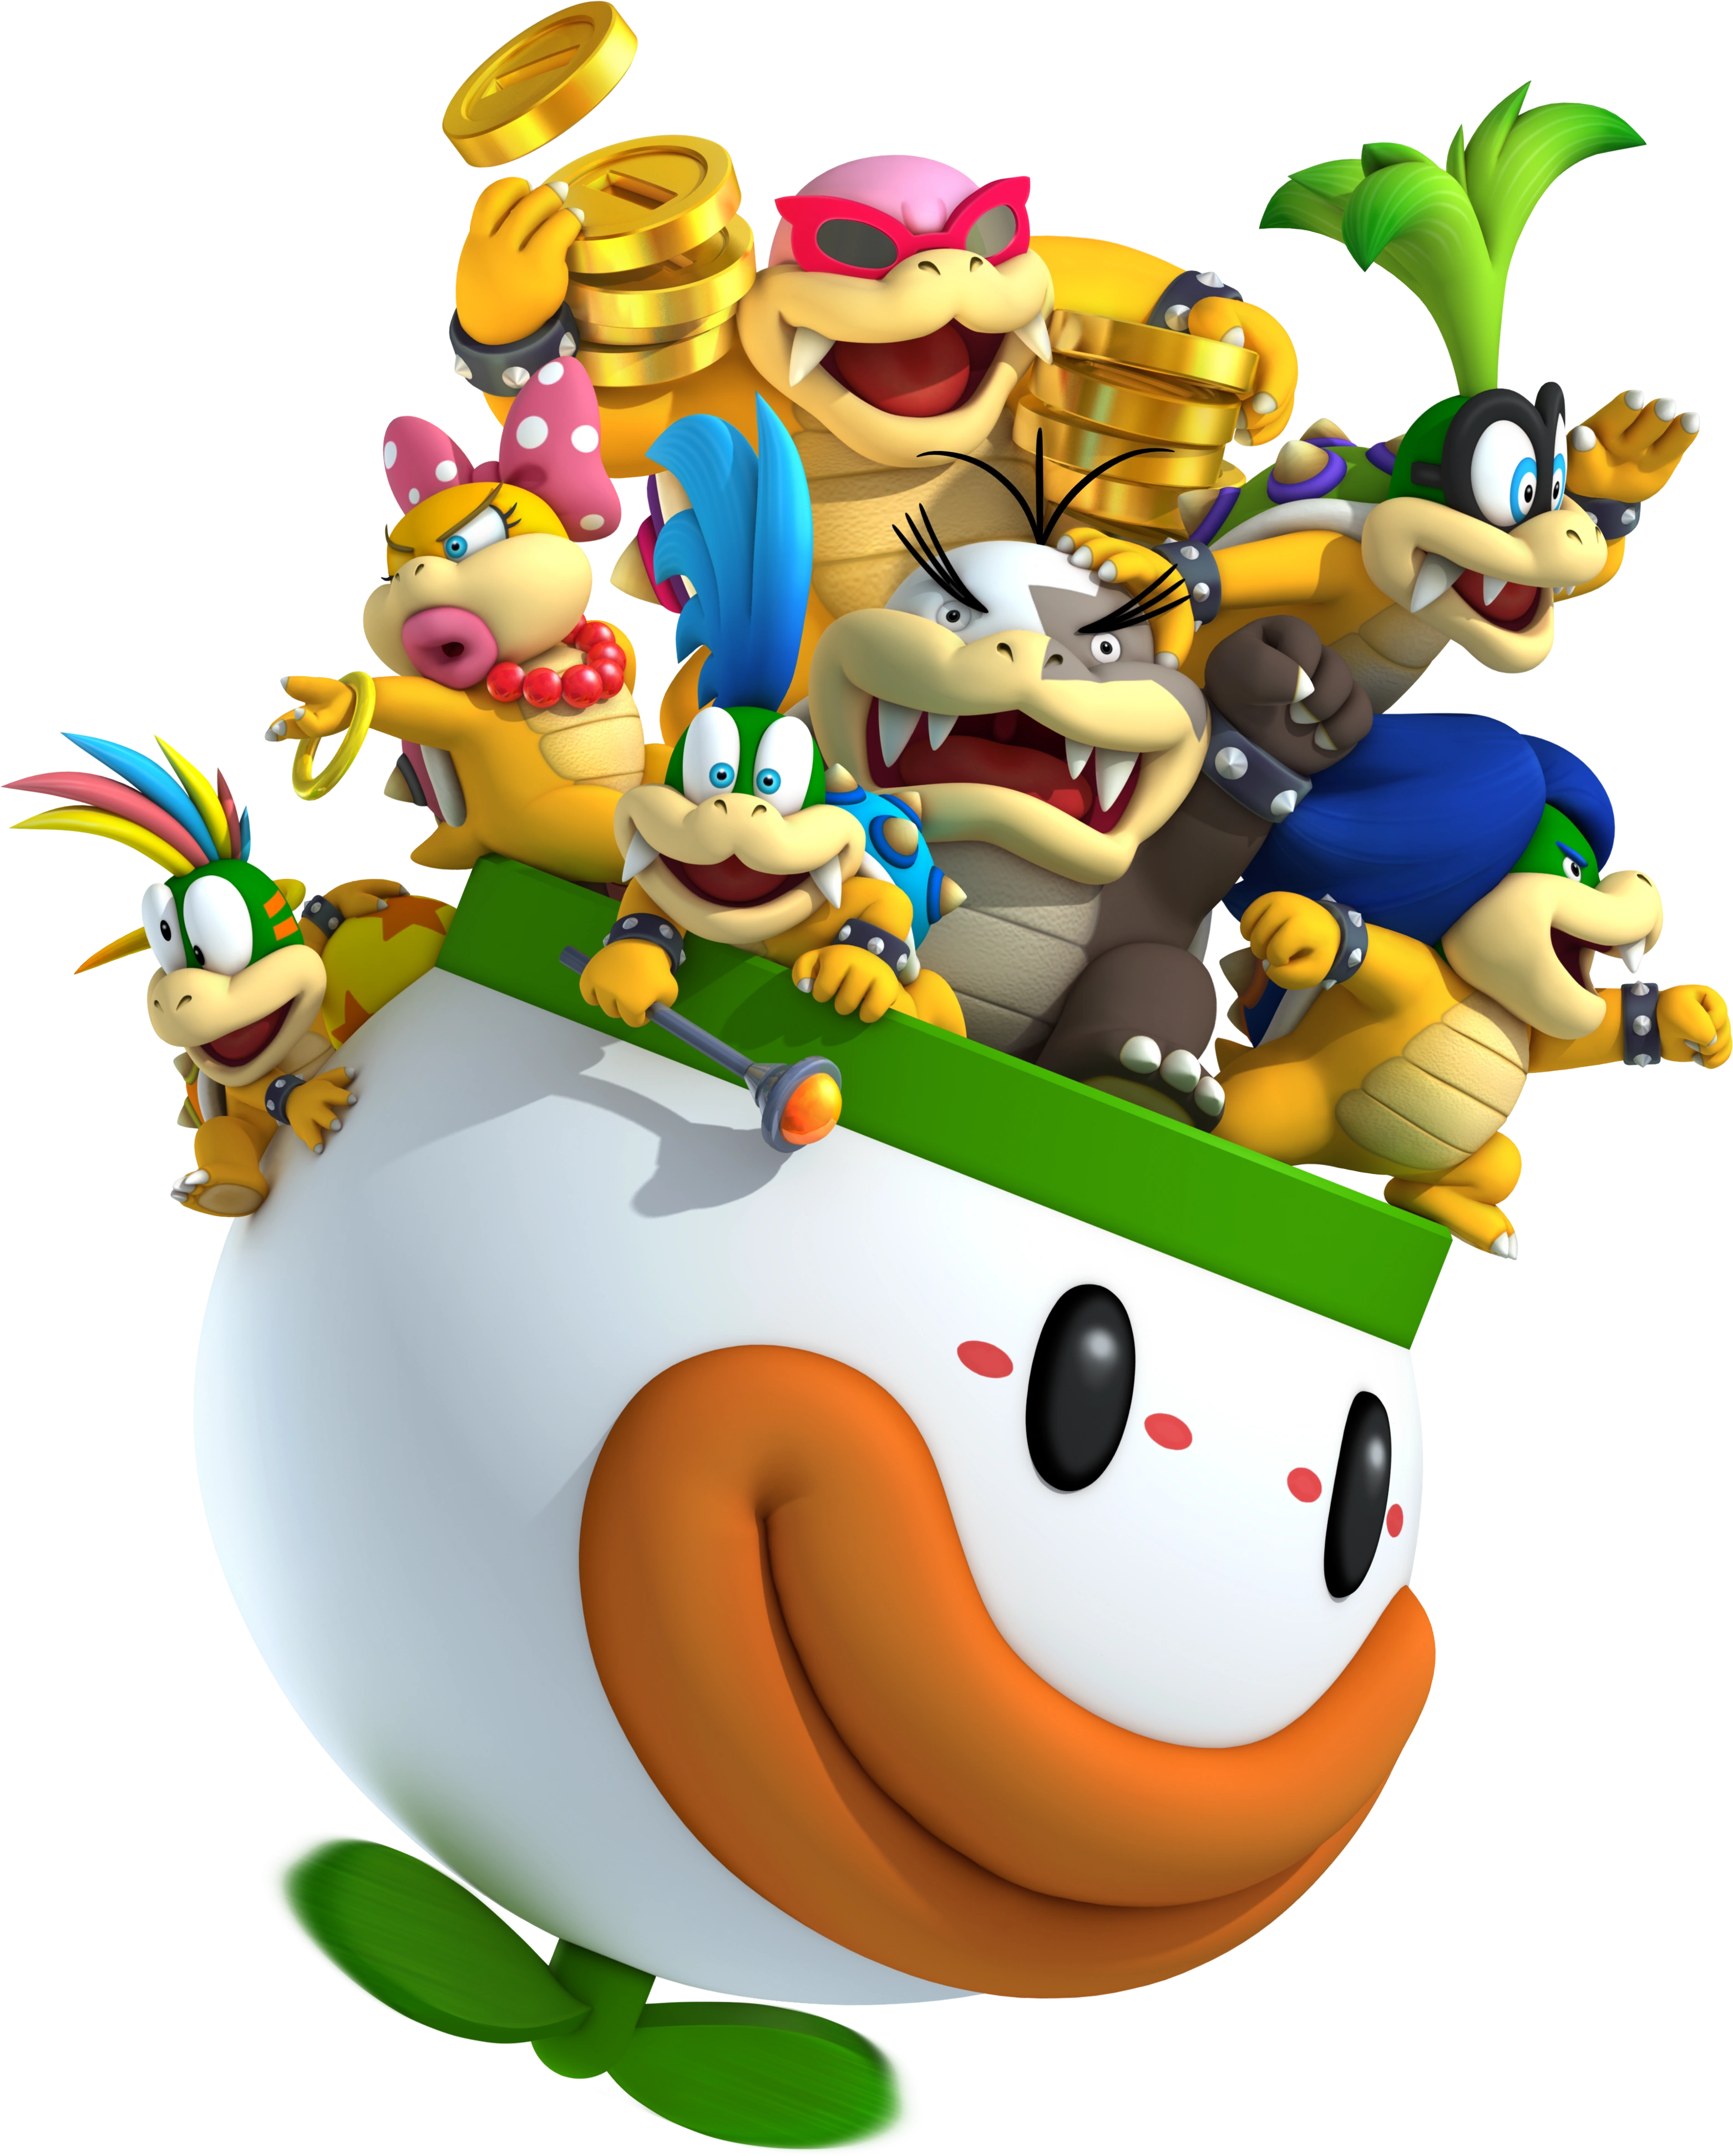
|
Name: Koopalings Debut: Super Mario Bros. 3 (1988) The Koopalings have been upgraded from costumes to quite the unique newcomer. While some of them share moves with each other, not one shares the same physics, weight, or speed and can be swapped between easily via their neutral special. Each of them also have unique moves that they either claim as their own or share with a few others, giving each of them a unified yet different feel. They’re a seven-in-one combo deal! |
Neutral Special: Koopaling Swap. The Koopaling on stage laughs as a small menu appears above their heads. This menu contains the other six Koopalings and can be quickly shuffled through with the B button. Upon choosing a Koopaling, the current disappears into a smoke cloud and reappears as the selected one. Side Special Side Special Side Special Side Special Up Special Up Special Up Special Up Special Up Special Down Special Down Special Down Special Down Special Down Special Final Smash: Giga Koopalings. All seven Koopalings hop in a giant Koopa Clown Car before growing in size and appearance, resembling Giga Bowser somewhat. A single aiming reticle appears on stage and can be aimed anywhere, a timer set before it can’t be aimed anymore. Upon the B button being pressed, all seven Koopalings will perform one punch each, doing massive damage before they all revert back to their original forms. | |
| |
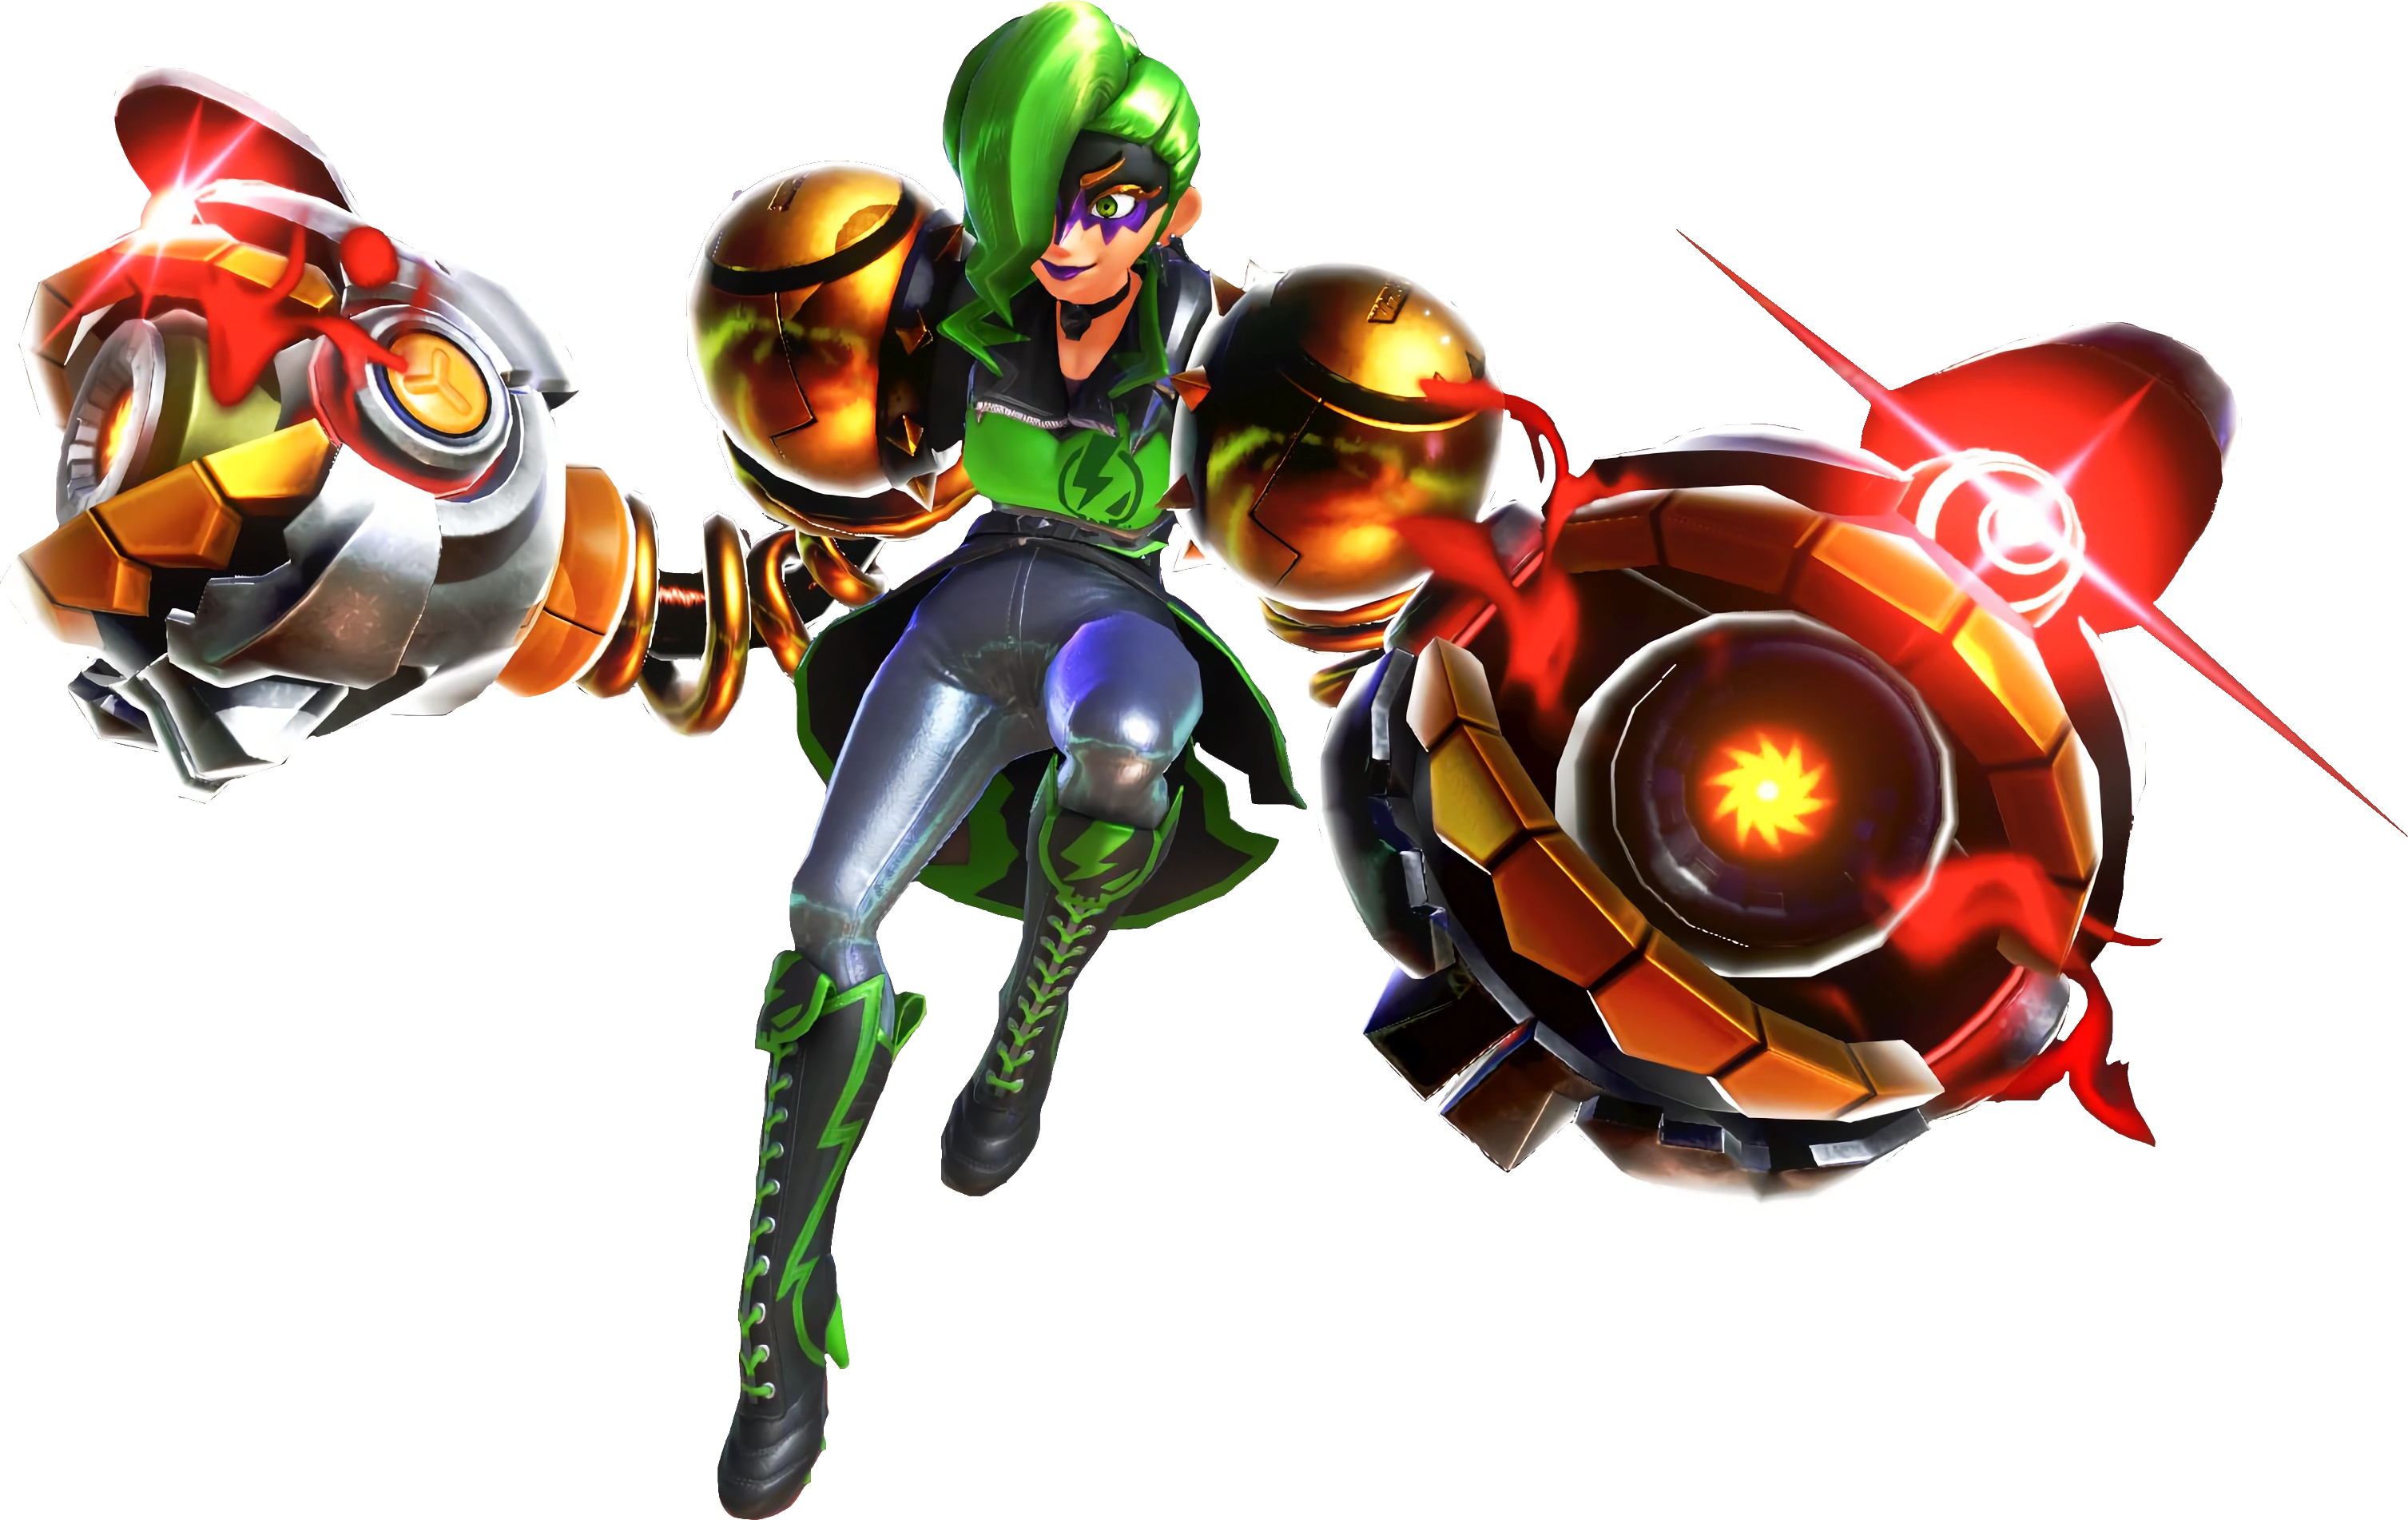
|
Name: Dr. Coyle Debut: ARMS (2017) The director of the ARMS Laboratories and one of the most advanced fighters in the world, Dr. Coyle brings a villainous flair to the world of Smash! She’s a rather tricky character, wielding multiple methods of dodging attacks and one of the best air games in the entire roster. Her up special, like Jigglypuff’s, gives her an advantage in combat rather than sending her higher, giving her a third ARM that modifies plenty of her melee-based attacks! The latest ARMS fighter is sure to send you flying! |
Neutral Special: Lokjaw Strike. Dr. Coyle shoots out a Lokjaw ARM, the weapon launching itself a decently good distance away from her. If you press the B button again, the Lokjaw launches a fast fireball at the cost of not extending further; if the attack continues to go uninterrupted, the ARM keeps going until it's reached its maximum length, leaving Coyle open but doing more damage if it hits a foe. Side Special: Cell Shield. Dr. Coyle disappears and in her place is now a Cell enemy from ARMS; the Cell can only take hits, and when it does, it disappears only for Coyle to reappear with a strong strike. The move doesn’t work if you use it too early, however, as the Cell eventually disappears, forcing Coyle to reappear and take whatever hit it was going to take. Up Special: Extra ARM. Dr. Coyle laughs as a third ARM pops out from behind her; with this ARM, all of her jabs, grabs, throws, and other fist-based attack gains more power or is altered in their animations. However, a single hit from a foe can destroy that ARM, turning Dr. Coyle into a sort of glass cannon in this state. The attack is good to end off a fight, but leaves you vulnerable if you're too careless. Down Special: Phase Through. Dr. Coyle laughs as she shields herself from the next attack. Rather than doing a counter, Dr. Coyle turns completely transparent and lets the fighter fall through her, allowing them to follow it up with any attack they choose. If you miss the window, however, Dr. Coyle will not only remain vulnerable, but take more damage as a whole. Final Smash: Hedlok Rush. Dr. Coyle laughs as Hedlok falls upon her head, giving her six arms. Rushing forward, Coyle unleashes a series of rapid-fire punches as Hedlok lets out a mechanical cackle, ending the attack by grabbing her foe and delivering one last strong jab, sending them flying as Hedlok leaves her head. When she's trapped two foes, she ends the attack by slamming them on the ground which causes them to fly upwards instead. | |
| |
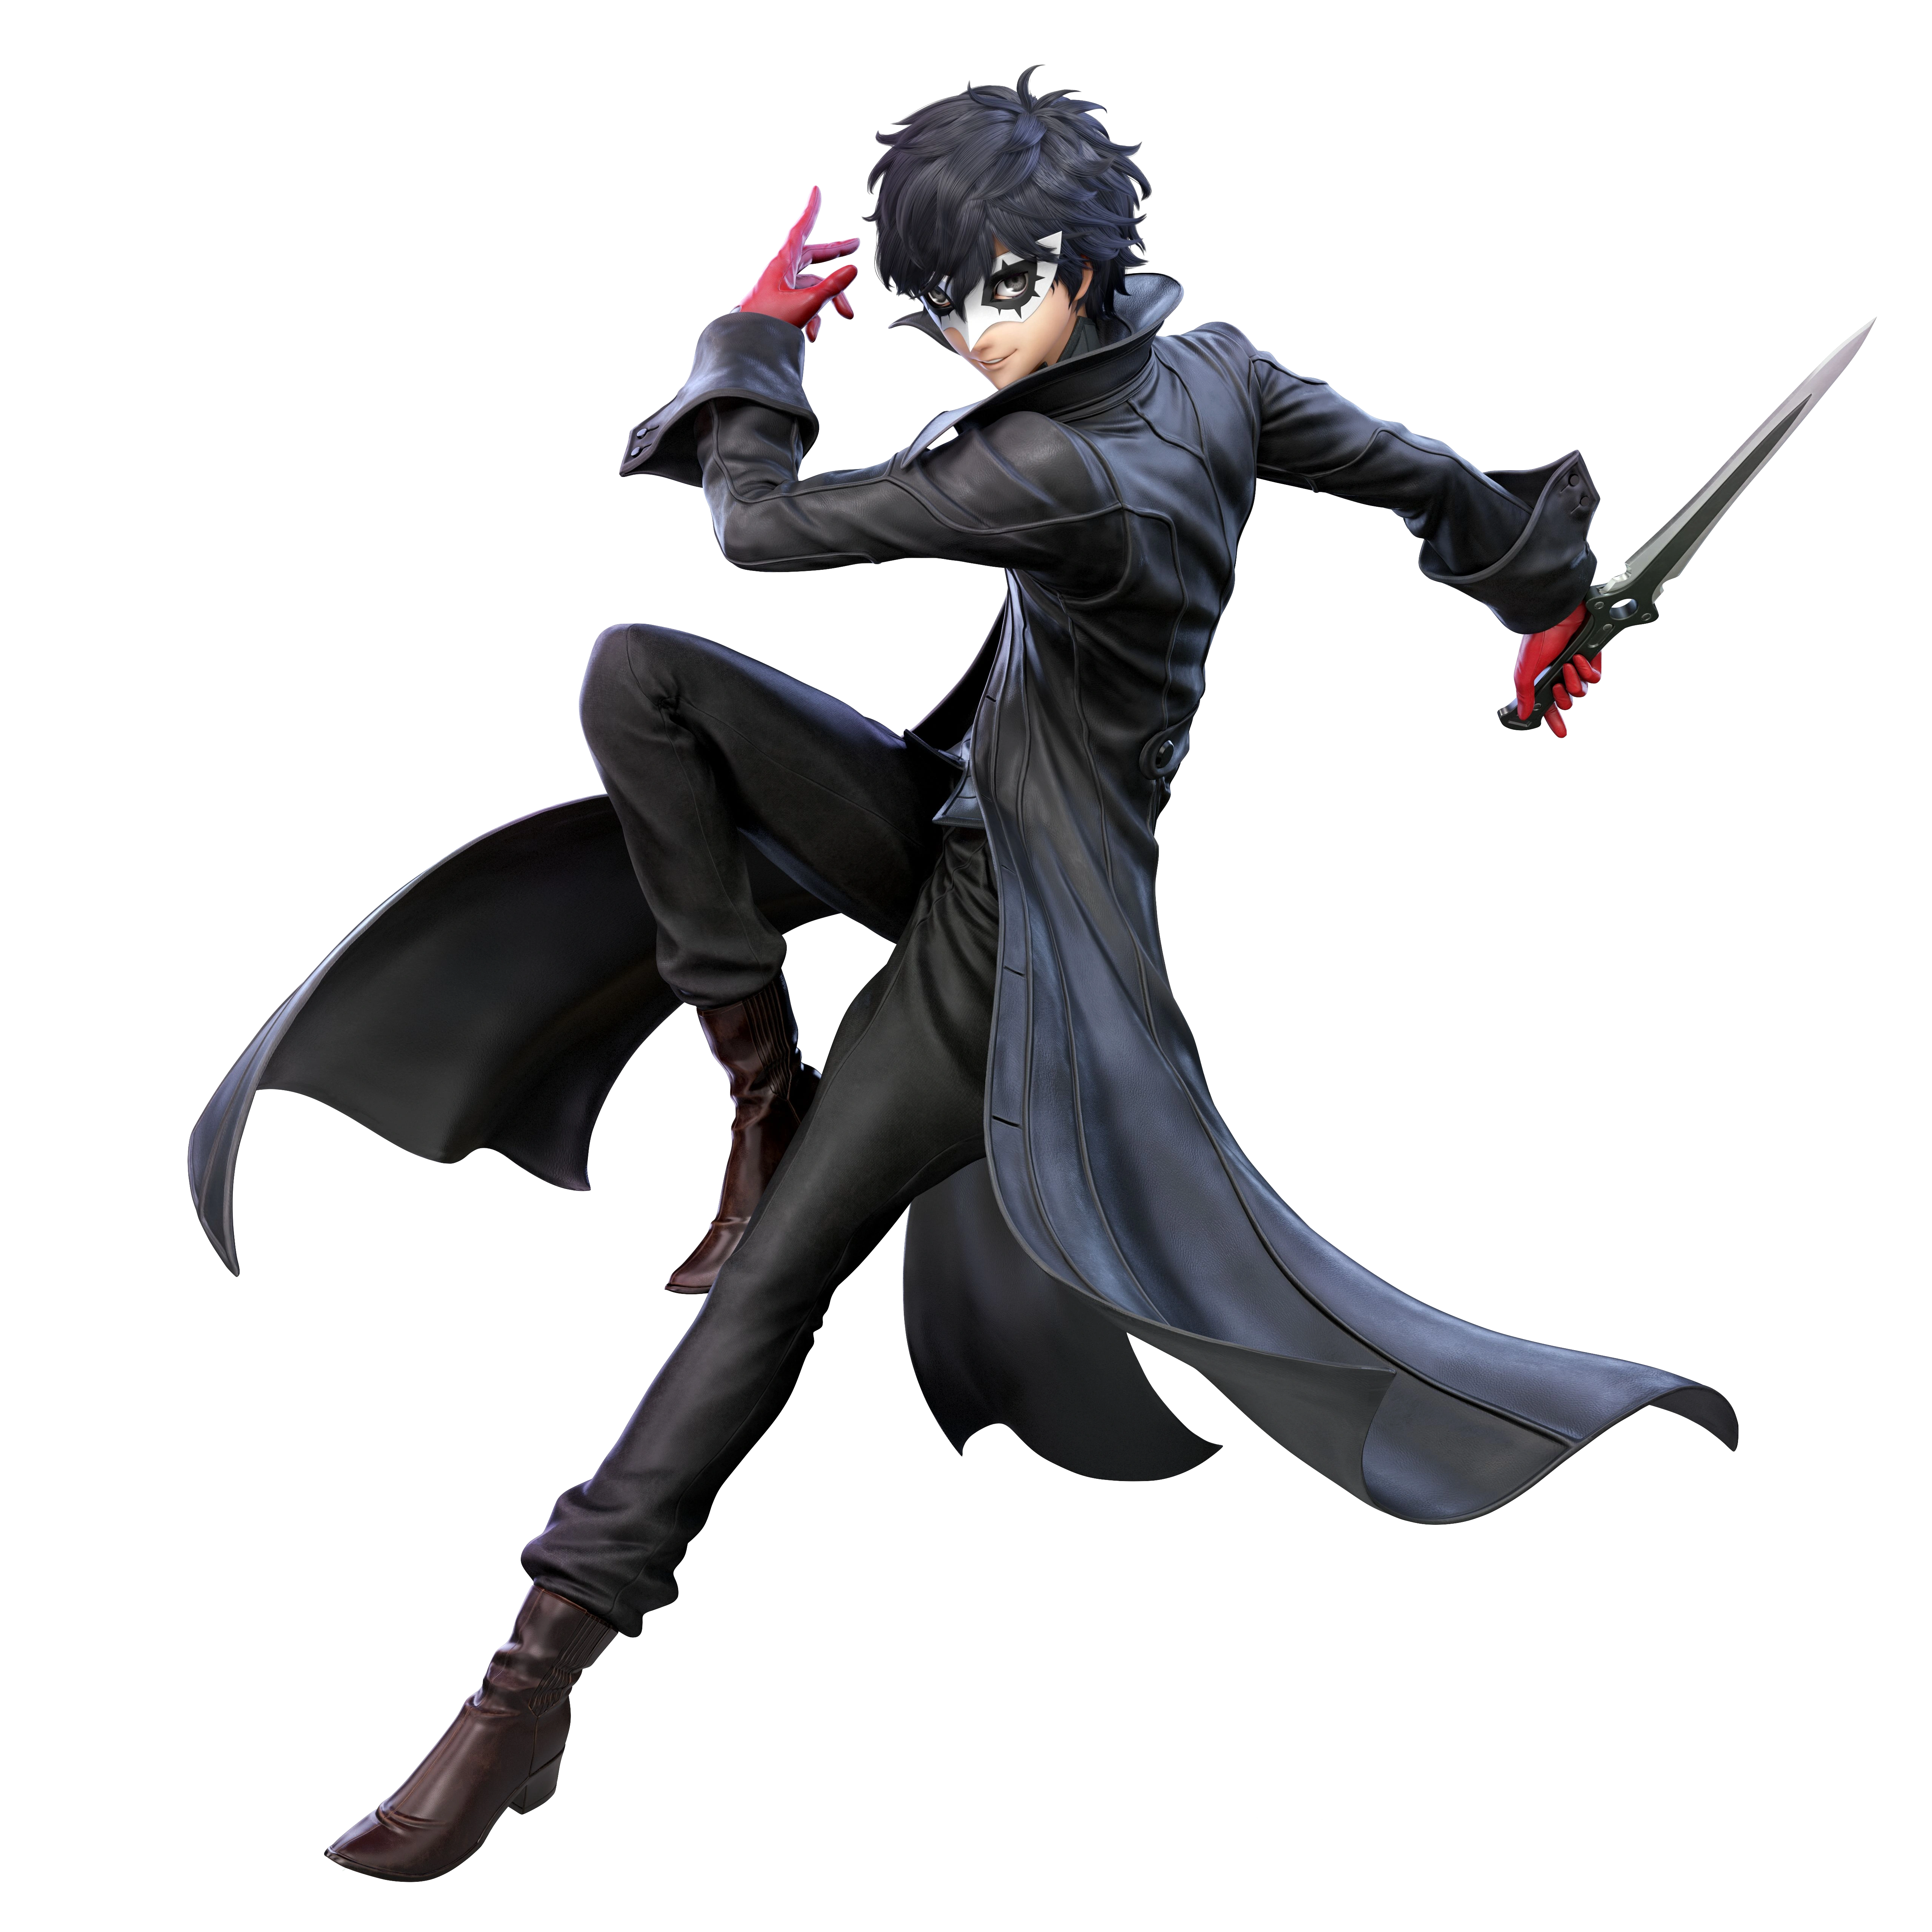
|
Debut: Persona 5 (2017) The cunning leader of the Phantom Thieves, Joker is a quick and nimble fighter that uses his trusty knife and pistol to show the corruption within adults. By using his down special, Rebel’s Guard, or just continuously fighting, Joker’s Rebellion Gauge fills up until he’s able to unleash his Persona, Arsene. Arsene disappears once the gauge runs out, but boosts all of Joker’s attacks and even gives him new special attacks, making Joker one hell of a fighter. |
Neutral Special (Normal): Gun. Joker fires from his fake pistol turned real firearm from a distance, firing off real bullets. You’re able to shoot once or fire up to three bullets at once via the repeated tapping of the B button. You’re able to shoot on the ground, forwards, backwards, in the air, and even dodge while shooting. Neutral Special (Arsene): Gun Special. Joker whips out his gun once more, and with Arsene by his side, is able to fire up to three bullets per shot. With the same mobility options as before, the sheer damage Joker is now able to do with at least up to nine bullets is astonishing and could send foes packing. Side Special (Normal): Eiha. Joker snaps his fingers and unleashes the move known as Eiha, a small flame falling towards the ground at a 45 degree angle. If it hits a foe, they don’t take much damage, but in return, plenty of chip damage is taken. If it hits the ground, nothing happens and the flame disappears. Side Special (Arsene): Egaion. Joker snaps his fingers and Arsene pushes out a larger flame that travels across the ground or even in the air. Unlike Eiha, the attack does tons more damage and even functions like a less time consuming PK Fire, still inflicting chip damage after the attack is complete. Up Special (Normal): Grappling Hook. Joker fires at grappling hook up in the air at an angle, making his normal recovery a tether-based one. On the ground, Joker is able to latch onto other opponents and pull them closer to him, making sure that no one is safe from the barrage of attacks Joker is able to dish out. Up Special (Arsene): Wings of Rebellion. Joker, with Arsene’s help, ditches the grappling hook in favor of gaining a temporary pair of black angel wings that shoot up upwards straight up into the air or at a 45 degree angle. While not doing any damage, the sheer height Joker gains from the attack makes him one threatening aerial foe. Down Special (Normal): Rebel’s Guard. Joker puts up his mask and prepares to take the full force of an attack or even combos. Unlike most counters, the attack doesn’t damage opponents and instead halves damage taken, the only way they take damage being when the attack ends. The main purpose of the attack is to fill up Joker’s Rebellion Gauge much faster, allowing Arsene to join the fray sooner. Down Special (Arsene + Melee): Tetrakarn. Joker and Arsene create a small shield around Joker that immediately nulls all melee attacks and sends his would-be assailant flying back into the sky. Other than that, this counter isn’t too special. Down Special (Arsene + Projectiles): Makarakarn. With Arsene’s help, Joker reflects any projectile that was launched his way back at its sender. What’s interesting is that the projectile moves faster on its return trip, making it more likely to hit the sender. Final Smash: All-Out Attack. Joker rushes towards an opponent, knocking them into a group attack between him and three random members of the Phantom Thieves. Whether it be Ryuji, Ann, Makoto, Yusuke, Futaba, Haru, Morgana, or even Goro, all of these thieves do their best to repeatedly attack their target, Joker ending his attack by tugging on his glove and essentially killing them. | |
| |

|
Name: Morgana Debut: Persona 5 (2017) The smallest and feistiest of the Phantom Thieves, Morgana joins the fight as the second DLC fighter overall and the second Persona character. Morgana keeps a lot of what Joker pioneered; the Rebellion Gauge, Rebel’s Guard, and even a similar move to Joker’s Gun. What is different is Morgana’s Persona, Zorro, who gives the not-cat benefits based on wind, increasing or amplifying all of Morgana’s other moves. |
Neutral Special (Normal): Slingshot. Morgana whips out a small slingshot out of nowhere and is able to fire off one large projectile in a straight line. The projectile is powerful but is easy to miss and can even be charged up. If it hits an opponent at full charge while shielding, it has a good chance of breaking their shields. Neutral Special (Zorro): Special Slingshot. Zorro increases the power of Morgana’s slingshot, increasing its size and firing rate. The projectiles are even stronger and can still be charged up, but are now larger and harder to avoid. The chance of a shield breaking increases tenfold when Special Slingshot is used, almost guaranteeing a broken shield. Side Special (Normal): Garu. Morgana launches a small burst of wind from his paws, the burst traveling in a straight line forwards. The attack doesn’t do too much damage, mainly serving as a way to keep opponents away from Morgana. If it doesn’t hit an opponent, it disappears, but if it does, a similar effect to Robin’s wind grab occurs. Side Special (Zorro): Magaru. Morgana, with the help of Zorro, summons a large burst of wind from between his paws. Unlike Garu, Magaru not only shoves foes away from Morgana, but doubles the damage done by the regular attack, making it a devastating projectile if used in the correct situation. It still disappears if it doesn’t hit anything. Up Special (Normal): Lucky Punch. Morgana jumps in the air, his fist raised in a similar style to Mario and Luigi’s up specials or even the Belmonts. Morgana is able to rise higher, but the real fun comes in when he hits an opponent from below. Upon hitting them, Morgana rises even higher than usual, koban coins coming from the impact. Up Special (Zorro): Miracle Punch. Zorro is able to shoot Morgana further into the air by default, using its Wind abilities to do so. When coming into contact with a foe, Morgana’s attack is still the same, but the damage it does is slightly increased, which means foes will be launched higher. It’s all about vertical movement with Zorro. Down Special (Normal): Rebel’s Guard. Morgana raises his sword to the sky, now able to take full attacks and combos without flinching. Like Joker’s same move, the attack halves all damage taken from any attack, but is also able to reflect projectiles at the cost of Morgana’s Rebellion Gauge filling slightly slower. Down Special (Zorro): Salvation. Morgana and Zorro stand in place as Zorro casts Salvation, healing a good chunk of damage taken by Morgana. While incredibly useful and powerful, the move requires anything left in the Rebellion Gauge to use and forces Morgana to stand still; as such, using it when the time is right is key to victory. Final Smash: All-Out Attack. Morgana enters his bus form and slams right into any opponent in his path, beginning a cutscene where, with the help of Joker, Ryuji, Anne, Futaba, Makoto, Yusuke, Haru, or Goro, he enacts his All-Out Attack. The Phantom Thieves repeatedly strike their targets, ending with Morgana sitting down in a swivel chair holding a cigar before yelling “mission completed!,” ending the attack. | |
| |
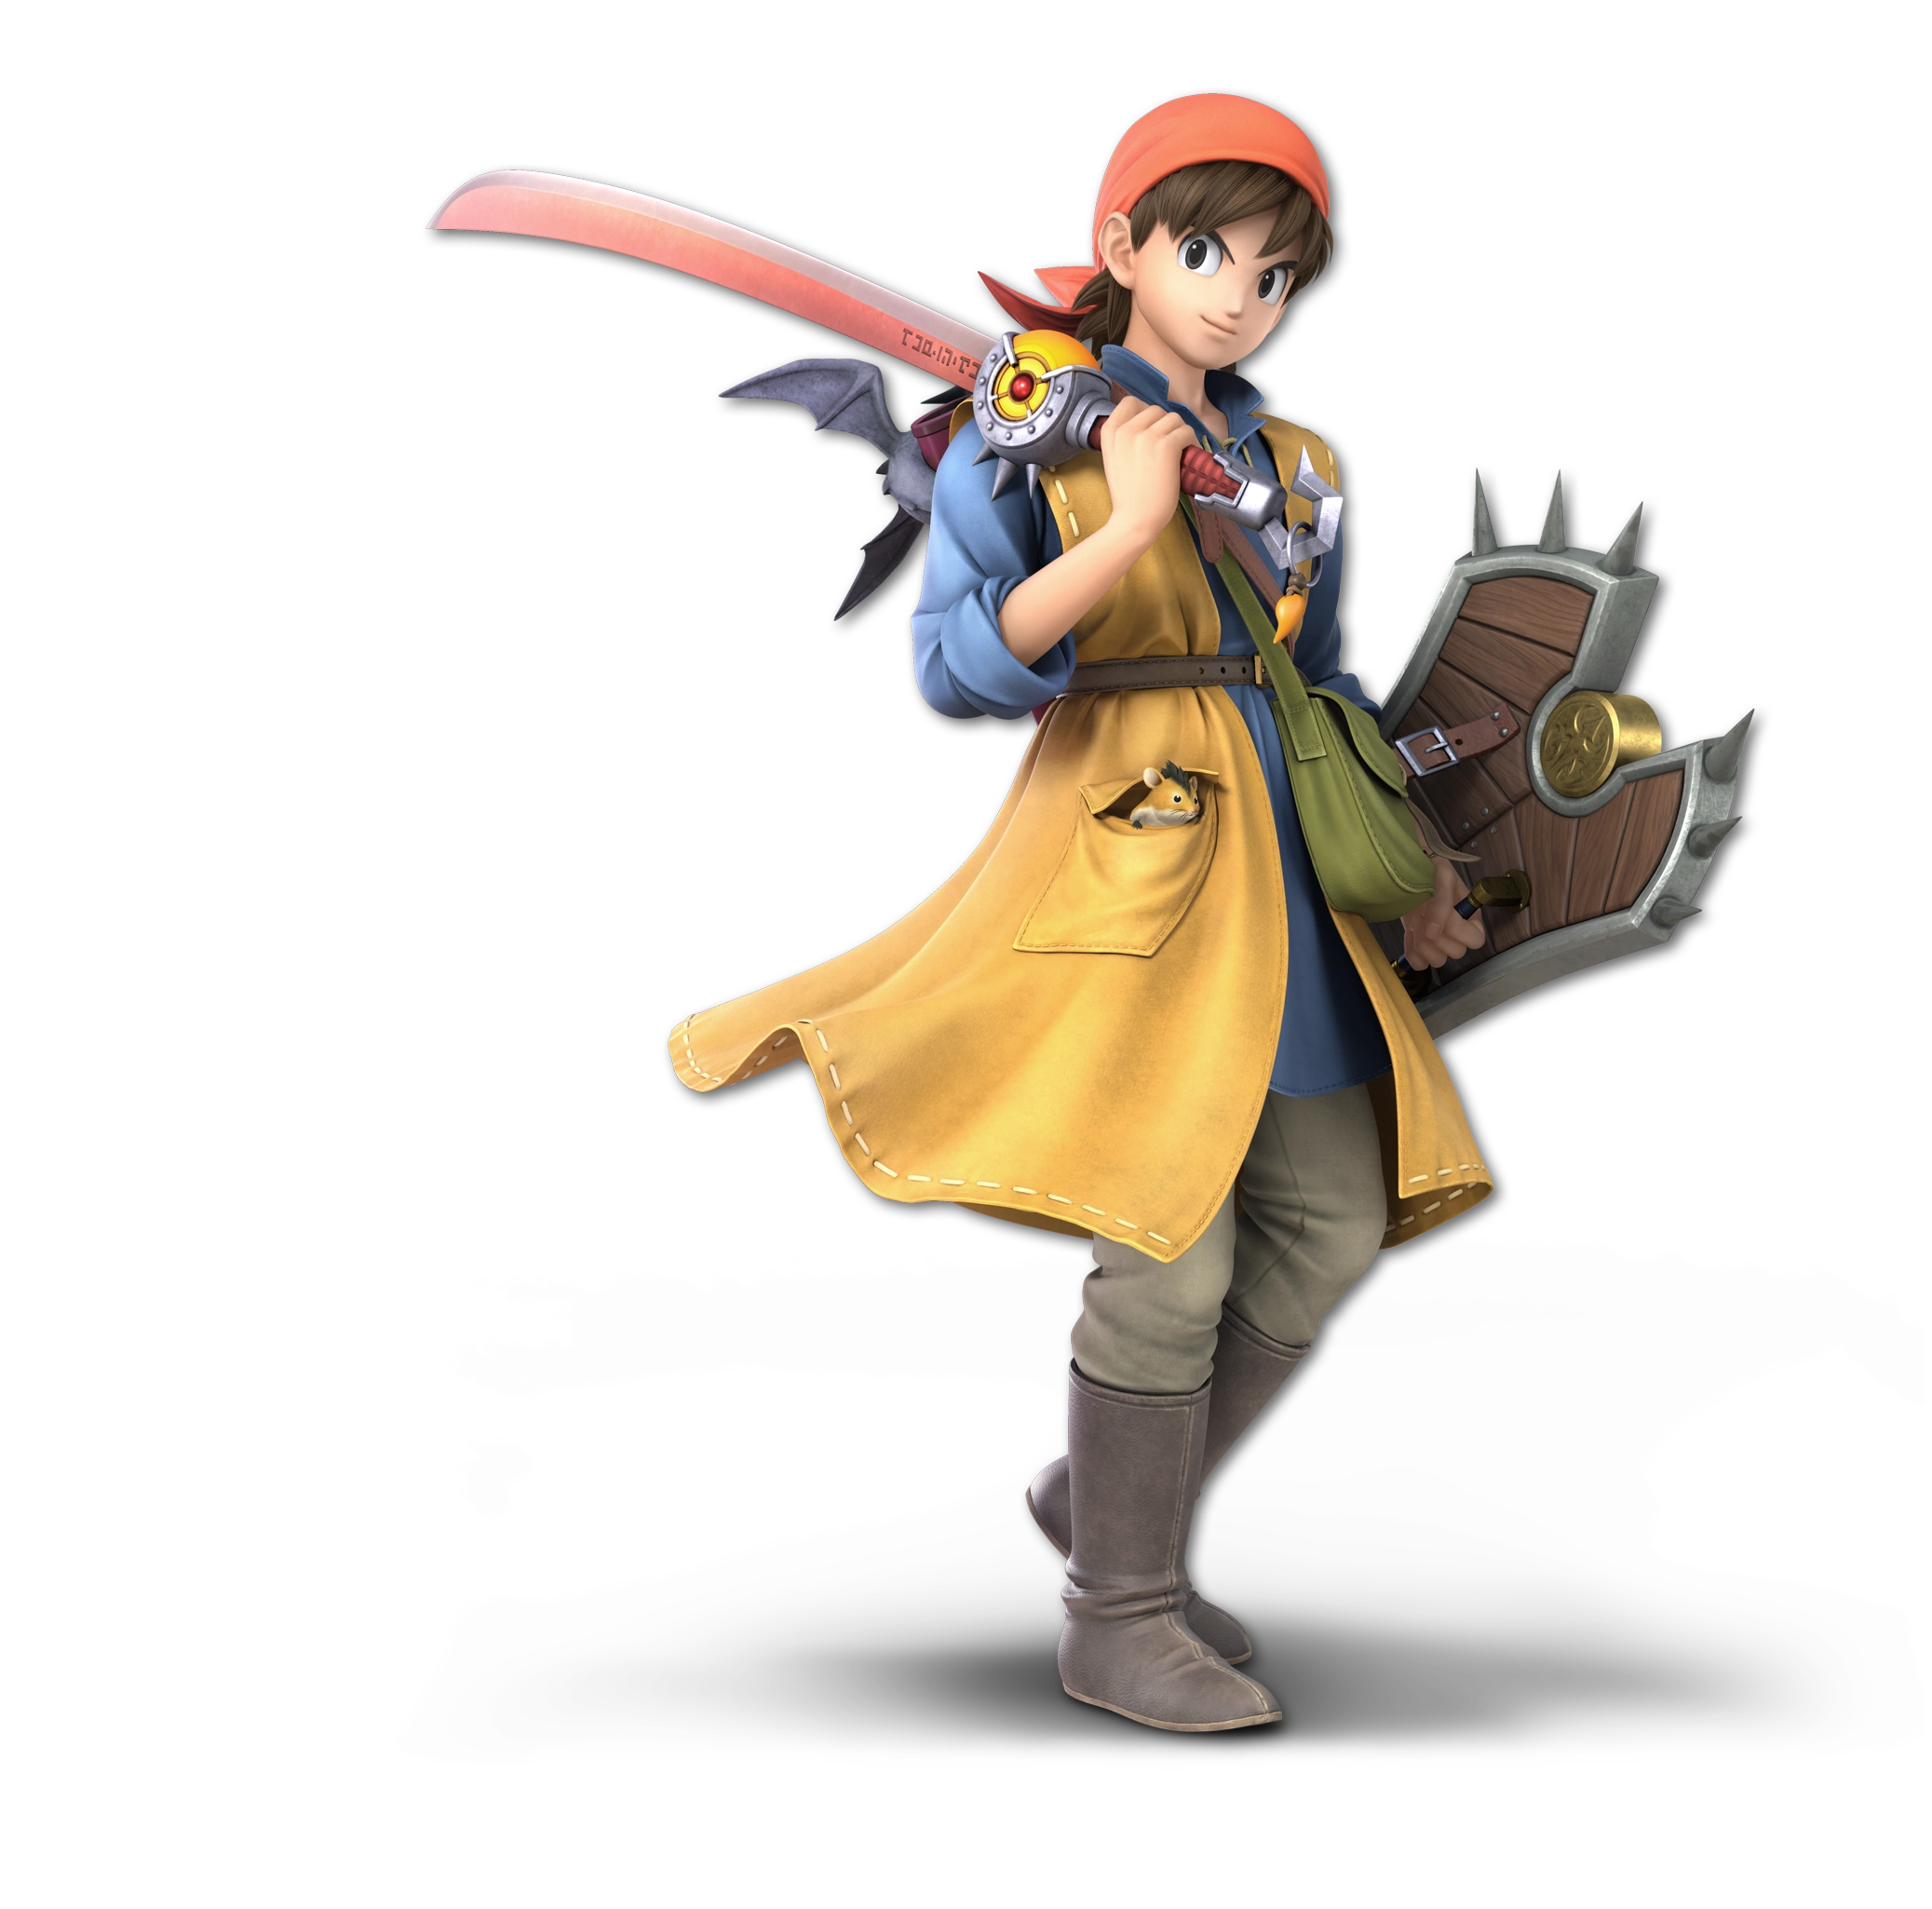
|
Debut: Dragon Quest (1986) Returning from Ultimate, the Dragon Warrior is overall the same fighter despite their rebranding. Their moveset revolves an MP meter than drains with the use of their special attacks, each magic attack slowly or rapidly depleting it. This ties into the Dragon Warrior’s command menu, which allows the Dragon Warrior to use up to eighteen different down specials from a randomly selected list of four, each being incredibly varied from one another. |
Neutral Special: Frizz. The Dragon Warrior launches a single fireball towards an enemy that travels in a straight line. When charged slightly, it becomes Frizzle, a much larger and more powerful fireball, and when charged for a while, it becomes Kafrizz, an even stronger fireball that traps foes in a fiery blast for a short time. The charge is able to be stored and used later. Side Special: Zap The Dragon Warrior thrusts their sword forwards, a bolt of electricity jutting outwards and attacking foes. When held for a little while longer, it becomes Zapple, extending the electricity out further, and when held for the longest time possible, it becomes Kazap, allowing the Dragon Warrior to electrify opponents with a quick spin on their blade. Up Special: Woosh. The Dragon Warrior calls upon a small tornado to blow them upwards into the air, giving them extra air time. Charging it up longer results in Swoosh, giving the Dragon Warrior more air, while charging it for the longest amount of time results in Kaswoosh, thrusting the Dragon Warrior upwards as two tornadoes appear underneath them. All of these spells can do damage to foes via the tornadoes. Down Special: Command Selection. The Dragon Warrior thinks as a small menu appears near their character portrait. Said menu can contain four random spells at a time, eighteen spells being present in total. The moves the menu can pull from are:
Final Smash: Gigaslash. The Dragon Warrior slashes their sword upwards, electricity covering the blade as they hit a foe. A cutscene then starts where we see the heroes from Dragon Quest II, V, VI, VII, and X alongside the Dragon Warrior’s unused costumes. All of them put their weapons together and cast a spell onto the Dragon Warrior’s sword, the foes caught in the attack taking massive damage. | |
| |
|
Name: Slime Debut: Dragon Quest (1986) The most iconic Dragon Quest enemy is more than just a common mook! Slime takes aspects from both mainline and spinoff titles in the series, but its main feature is that it can switch between different members of the Slime family. These alternate forms have their own advantages and disadvantages while also keeping Slime’s core moveset intact, essentially giving Slime six different playstyles overall. |
Neutral Special: Slime Toss. Slime, upon the press of the B button, causes a barrel to appear above his head. The barrel doesn’t slow Slime down and, with another press, is able to throw the barrel across the stage. The barrel itself can be dropped and left in place like an item and doesn’t affect the other Slime variants outside of animations; for example, the Icicle Slime balances the barrel on its icy shell. Side Special: Slime Stretch. Slime plants himself on the ground and begins to stretch back like a slingshot. Upon releasing the input, Slime launches himself forward in a small arc, hitting like a truck if he immediately touches a foe. The different Slimes have unique twists to the attack; the Healslime uses their tentacles, the King Slime doesn’t go as far but does more damage, Metal Slime moves faster but does less damage, etc.. Up Special: Slime Stack. Slime calls upon a series of multicolored Slimes to spawn underneath them, propelling Slime upwards as the stack disappears. When used on the ground, the stack is able to topple with an extra input, crushing and potentially burying opponents. Different Slimes have different properties; King Slime can divebomb off the stack, Angel Slime can lift herself off of the stack, etc.. Down Special: Slimification. A small menu appears above the Slime containing five different Slimes. Like Shulk’s Monado Arts, Slime is able to cycle through them with the menu open or by quickly cycling through them, but when changing into another Slime, the current one is surrounded by a cloud of dust before gaining their new form. There’s six Slime forms, those being:
Final Smash: Schleiman the Magnificent. Slime uses an instrument known as the Warrior Flute to call upon a tank known the Schleiman Tank, a weapon used by Rocket in Dragon Quest Heroes: Rocket Slime. The tank appears in the background before immediately covering the stage in rocks that explode upon contact before firing a single missile at the stage, covering it in an even bigger explosion before the tank disappears. | |
| |
|
 Debut: Diddy Kong Racing (1997) The iconic bear and bird duo of Rareware fame return once more! Banjo & Kazooie function like one character rather than two, both relying on each other to get the job done. While similar to their Ultimate counterpart, the two have upgrades to all of their moves to give them extra utility and less weaknesses, the most notable of these being collect-a-thon aspects in their side special. However, they’re still the same lovable team you all know! |
Neutral Special: Breegull Blaster. Banjo pulls Kazooie out of the backpack and fires a single egg in the direction he’s facing out of her mouth. If the B button is held down, Banjo rapidly fires eggs and can’t stop until the B button is released. In this state, Banjo can jump and walk, but can’t do anything else until the attack is stopped. The eggs now fire much faster than in Ultimate and come with extra damage. Side Special: Wonderwing. Banjo & Kazooie has up to five uses of the Wonderwing ability, a forward dash that barrels through foes, doing massive damage and giving the duo super armor. Once all feathers are used, Banjo & Kazooie must either be K.O.’d or must collect the golden feathers that randomly appear around the battlefield. These feathers can only be picked up by the duo and force them to constantly be on the move. Up Special: Shock Spring Jump. A Shock Spring pad appears underneath Kazooie as she comes out of Banjo’s backpack and shoots both up into the air. If used in the air, the pad falls and can do slight damage to whoever it touches, not being good enough to spike but good enough to hurt. A new addition is that with the apex of their ascent, the duo can do damage to anyone above them, but lose the property while falling. Down Special: Rear Egg. Banjo laws low as Kazooie points her rear out of the backpack, shooting out a grenade-like egg onto the ground. The egg lands behind Banjo, forcing him to get up and grab it. In addition, it takes much longer to explode than it did in Ultimate, making it less of a hassle to use overall. The grenade explodes after enough time has passed or once it has been thrown. Final Smash: The Mighty Jinjonator. Banjo & Kazooie summon the statue of the Mighty Jinjonator from the ground, hitting anyone beneath it. Five Jinjo’s go into the statue and reawaken the mighty being, all Jinjos rapidly striking an opponent over and over again. The Final Smash ends when all strike at once, sending the opponent tumbling to the ground as a boulder covers them (only if its a K.O.) and ends the attack. | |
| |

|
Debut: Fatal Fury: King of Fighters (1991) Terry Bogard, also known as the Hungry Wolf, is a strong American fighter who aimed to take down Geese Howard after the death of his father. Terry plays the exact same as he did in Ultimate, being a tall heavyweight with an alright air game but a killer ground game. His seven special moves all have stronger variants and command inputs, making Terry feel like he was plucked straight out of the Fatal Fury games. |
Neutral Special: Power Wave. Terry yells “POWUH WAVE!” before launching an energy wave that travels across the stage. When the B button is held down longer, the attack’s strength, size, and speed increase, making it even deadlier for smaller fighters. In the air, this move creates a stationary burst of energy in front of Terry that can be held down just like its mobile variant. Side Special (Forwards): Burn Knuckle. When the side special is angled forwards, Terry launches forward, his fist covered in blue fire as he yells “BURN KNUCKLE!”. The move has a special input that increases its overall strength and gives the fire a slightly greener tint. It can also be held the other moves, giving it a separate stronger variant. Side Special (Backwards): Crack Shoot. When the side special is angled backwards, Terry performs a flying axe kick while yelling “CRACKSHU!”. The attack has its own input that allows for it to have increased knockback and strength. While it has no held variant, the attack is good for catching players off-guard and leading into other attacks. Up Special: Rising Tackle. Terry leaps up into the air with his legs facing the sky, yelling out “RISING TACKUH!” as he spins around. While it doesn’t get him that far up, the move is good for doing damage to those right above you. If Terry is crouching for a short while and then performs the attack, he goes higher, does more damage, and is invincible for most of the attack. It still leaves him wide open, however. Down Special: Power Dunk. Terry leaps up into the air and readies his fist before slamming it down onto the nearest foe with an energy punch. The move has a special input that has the chance to perform a Meteor Smash if it lands while also providing more invincibility frames and more damage done. If Terry does this move off of the stage, coming back from it can be a nightmare. Input Special 1: Power Geyser. When Terry is at over 100%, Terry can execute ↓ ↙ ← ↙ → + A/B or ↓ ← ↓ → +A/B to activate Power Geyser, a move that shoots a burst of energy out of the ground. The burst has three individual hitboxes that deal more damage the closer the target is to the center and, at high percents, can K.O. them from sheer force alone. Input Special 2: Buster Wolf. When Terry is at over 100%, Terry can execute ↓ ↘ → ↓ ↘ → + A/B or ↓ → ↓ → + A/B to activate Buster Wolf, a move where Terry dashes forwards and, if he connects with an opponent, sends out an explosion of energy from his fist. The explosion can easily K.O. foes at high percents and does more damage on the explosion. Final Smash: Triple Wolf. Terry yells out “Are you okay?” before striking the ground three times with three giant Power Geysers. If an opponent is caught in these geysers, Terry will then perform Power Dunk and send his opponents into the ground before yelling “Here’s a big one...BUSTAAAAH WAHLF!!” and unleashing Max Buster Wolf, ending the attack with a seriously damaging strike to the chest. | |
| |

|
Name: Cinder Debut: Killer Instinct (1994) Ultratech’s very own plasma-covered warrior joins the fray alongside Spinal, bringing his wisecracking personality along with him. Cinder’s main gimmick is his Burnout State, a form that Cinder takes if he’s performed enough attacks but causes him to take more damage upon being hit. Burnout State boosts his special and smash attacks, giving a character with a strong aerial and speed game even more tools at his disposal. |
Neutral Special: Inferno. Cinder puts his palms together and shoots out a small stream of flame, doing decent damage at the start before going into chip damage. The attack itself can be made stronger by charging it up over a few seconds. When in Burnout State, Inferno has much better range and can be slightly angled, but gives Cinder a few extra frames when the attack ends. Side Special: Trailblazer. Cinder launches forwards in a few frames, doing more damage if he hits at the peak of his speed. The attack is able to angled with the use of special inputs and can be compared to Bayonetta’s side special. In Burnout State, this attack does minimal burn damage and can still be angled, but Cinder can now become dizzy if he’s struck at his top speed, instantly ending his momentum. Up Special: Fireflash. Cinder performs a kick that, if it connects with a target, hurls them up into the air above Cinder. This is one of the easiest ways Cinder can start a combo, acting as a unique sort of throw. When in Burnout State, Fireflash creates a thin pillar of flame next to Cinder that can easily be dodged out of but does decent damage to those in the air. If Cinder misses the initial kick, he’ll be left open for a few extra frames. Down Special: Pyrobomb. Cinder tosses a Pyrobomb onto a foe, the bomb detonating upon impact with the floor or after a few seconds on an opponent. Cinder can control the arc of the bomb by holding the down special for short or longer periods of time, although the speed stays the same. In Burnout State, the bomb is bigger and does more damage, but causes Cinder to use more frames to throw it. Final Smash: Ultra Combo. Cinder enters his Final Smash state before Trailblazing into an opponent, enacting his Final Smash. It’s a flurry of hits, kicks, and strikes as Cinder throws Pyrobombs onto his foes. Cinder delivers a final Fireflash before all hell breaks loose, setting the opponent aflame before the attack ends. Upon the attack ending, the Killer Instinct announcer briefly yells “GODLIKE!” as the fight resumes. | |
| |

|
Name: Ruby Heart Debut: Marvel VS Capcom 2: New Age of Heroes (2001) A French pirate who seeks to stock up on mystical and rare artifacts, Ruby Heart has finally reemerged once more and plans to usher in a new age of fighters. Ruby attacks with some of the many treasures she’s acquired over the years, including ancient tomes, an anchor that works like a grappling hook, strange energy that evokes fire, and even a haunted treasure. Ruby is a tricky foe to face with plenty of pirate tricks up her sleeves. |
Neutral Special: Sublimation. Ruby Heart throws a brown book onto the ground and can leave it there for anyone to walk over. Whenever she sees fit, Ruby can activate the book’s powers with the press of the B button and shoot up a geyser of highly damaging water. The book is able to be picked up like an item and, in this state, can’t be opened, making timing key to executing this move correctly. Side Special: Rafale Cannon. Ruby Heart summons an anchor and chain and throws it out in front of her, the range being similar to a Belmont’s whip. If she catches an opponent, she pulls them towards her before launching them out of a cannon at a 45 degree angle. In the air, using this special makes Ruby launch the anchor towards the nearest ledge; however, if it misses, the anchor pulls Ruby downwards to her demise. Up Special: Schwarzaile. Ruby Heart surrounds herself in energy and becomes a fireball, launching into the air. The attack can be angled in eight different ways and does massive damage if an opponent touches it, but doesn’t go too far and can leave Ruby stranded in the air if she doesn’t use it right. The attack’s course can be corrected once, but it lasts a shorter amount of time if done so. Down Special: Fantôme. Ruby Heart summons a treasure chest and drops it onto the ground, the chest opening to reveal one green ghoul. The ghost travels in a straight line and must come into contact with a foe in a few frames. If this quota is met, the ghost latches onto the nearest foe and begins to take damage away from Ruby and exchange it onto their prey, keeping Ruby’s chances of fighting high. Final Smash: Triple Hyper Combo. Ruby stays motionless as she calls upon SonSon and Amingo by her side, the three teaming up to do massive damage. Ruby summons her ship, the Partenaire, which stabs a foe and launches a series of cannonballs, Amingo uses Boon of the Sun to ram a giant vine straight into their target, and SonSon turns into an Oozaru, smashing her target with her fists and spewing fire. | |
| |
|
Name: Morrigan Debut: Darkstalkers: The Night Warriors (1994) Heir to the Makai throne and daughter of Belial, Morrigan Aensland escapes her duties once more and enters the world of Smash Bros.! Morrigan is a speedy powerhouse that attacks with both projectiles and up-close attacks; she’s the master of trickery and shows off her playful attitude in all of her moves. Her Final Smash even incorporates three strong moves in one, creating the ultimate version of Capcom’s succubus. |
Neutral Special: Soul Fist. Morrigan thrusts her arm forward and launches a small fireball in the shape of a bat forwards. While it doesn’t move fast, it moves across the stage longer than other projectiles. This allows for Morrigan to leave the fireball in the air and use it to set up other attacks, adding extra damage to an attack. It’s easy to avoid, but cross it’s path and you’re toast. Side Special: Cryptic Needle. Morrigan shoves her arm forwards as it becomes a large needle, striking through opponents. The move takes time to execute and doesn’t do much damage, but it can go through multiple opponents and paralyzes them if a sweetspot is hit. While its a move that needs time to reach its full potential, the payoff is satisfying and gives Morrigan an edge in battle. Up Special: Shadow Blade. Morrigan dashes forwards slightly before leaping up into the air as her arm turns into a blade. If she makes contact with an opponent, Morrigan is propelled upwards further than she would without touching anyone. The move itself is prone to leaving Morrigan helpless in the air, but if used at the right time, it can be a deadly end to the battle. Down Special: Astral Vision. Morrigan splits herself into two and functions like the Ice Climbers for a few seconds. The clone itself is easy to kill and doesn’t last long on its own, but can easily rack up damage if used in the right place at the right time. The clone has all of Morrigan’s moves except the down special and the Final Smash; in fact, Morrigan herself can’t use this attack for 10 seconds upon its initial conclusion. Final Smash: Finishing Shower. Morrigan uses Valkyrie Turn and launches into an opponent; once the attack starts, Morrigan clones herself and attacks her prey on both sides with both clones, ending the attack with each Morrigan using Finishing Shower. As bullets are sprayed onto her target, the succubus laughs before a K.O. in the style of Darkstalkers appears in front of the fighter, ending the Final Smash. | |
| |
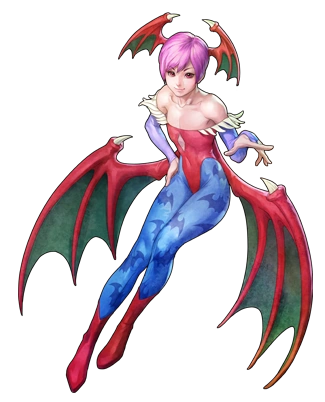
|
Name: Lilith Debut: Darkstalkers 3 (1997) The other half of Morrigan’s soul, Lilith joins the fray as Morrigan’s Echo Fighter! Lilith loses some of Morrigan’s power for even more speed and two new attacks. Her side special, Merry Turn, is fast and hard-hitting with some downsides while her Final Smash, Gloomy Puppet Show, gives her foes the chance to fight back against her...somewhat. If you’re looking for a more up-close and faster Morrigan, Lilith is your best bet! |
Neutral Special: Soul Flash. Lilith thrusts her arm forward and launches a small fireball in the shape of a bat forwards. The fireball moves faster than Morrigan’s and does more damage at the cost of size; it’s easier to avoid and harder to lead into, but does more damage if it does hit. It’s best to use this closer to a foe in order to deal even more damage than usual. Side Special: Merry Turn. Lilith’s wings turn into blades as she spins around like a ballerina in the air, launching herself forwards but leaving herself open at the end of the attack. Besides the Final Smash, this is Lilith’s sole original move, replacing Morrigan’s Cryptic Needle. It hits fast and hard, but can easily be taken advantage of if not used correctly; it’s important to use it in moderation. Up Special: Shining Blade. Lilith dashes forwards slightly before leaping up into the air as her wings turns into a singular blade. This move has the same upsides and downsides as Morrigan’s base moves right down to leaving Lilith helpless if she misses; however, since Lilith is faster and lighter, the attack doesn’t push her up into the air as much with the pro of triggering much faster than Morrigan’s. Down Special: Luminous Illusion. Lilith splits herself into two and functions like the Ice Climbers for a few seconds. All the upsides and downsides of Morrigan’s moveset are kept along with Lilith’s speed and agility; however, the clone is even easier to kill than Morrigan’s at the cost of reduced waiting time, now down to 8 seconds instead of 10. It’s important to use the clone well instead of just throwing her into the fray all willy-nilly. Final Smash: Gloomy Puppet Show. Lilith dashes into an opponent, causing a red curtain to fall in front of the stage before revealed Lilith in her bunny outfit and her foe in a top hat on a small stage. Lilith names different button inputs for her foes to follow; the more correct inputs they make, the less damage they’ll take. Get all inputs wrong and Lilith instantly K.O.’s her foe, ending the Final Smash with a bang. | |
| |

|
Name: Rugal Bernstein Debut: The King of Fighters ‘94 An influential cartel leader and one of the most difficult bosses in gaming history, Rugal Bernstein joins from the King of Fighters universe! Rugal, unlike Terry and Rock, has no second side special; he’s a bruiser with tons of mean tricks up his sleeves. He feels as if he’s a playable boss, coming with all the tricks and flaws of that trope. In addition, he contains command inputs and powered up versions of his moves like the other two SNK fighters. |
Neutral Special: Repuuken. Rugal fires a blast of purple energy from his hand, aiming it at the ground. The attack moves along the ground for a short time and functions more like Power Wave than Rock’s version. Like the other SNK fighters, Rugal’s special inputs allow for this move to become even stronger, moving faster and becoming stronger while gaining no extra height. Side Special: Kaiser Wave. Rugal leans backwards with his arms outstretched, yelling “KAISER…” before unleashing a large ball of energy with an extra “WAVE!!” to go with it. The attack is able to be charged, although it would leave Rugal standing wide open for a long period of time. The special input allows for the ball to come out faster and hit slightly harder, making it decent for starting combos. Up Special: Genocide Cutter. Rugal kicks up in the air, using his iconic Genocide Cutter attack as his leg spins around. The attack does more damage at the foot than at the leg, and with a special input, can kick up to three times before Rugal is in a helpless state. The attack isn’t the best for aerial recovery, but if it connects with an opponent, it can give Rugal plenty of options. Down Special: Dark Barrier. Rugal creates a small green barrier in front of his torso, acting as a reflector rather than a counter. The attack reflects most projectiles, but cannot absorb the force of something like Pac-Man’s fast fire hydrant or a reflected Blunderbuss ball. When the special input is used, the barrier will be slightly taller and have a bit more resistance overall. Input Special 1: Gigatech Pressure. When Rugal is at over 100%, Rugal can execute ↓ ↘ → ↓ ↙ ←+ A/B or ↓ → ↓ ← + A/B to activate Gigatech Pressure. Rugal crouches and charges his palm for a bit before rushing forwards and grabbing his prey. Unlike his versions from the main games, Rugal simply slams his opponent on the ground rather than throwing them across the battlefield. Rugal’s startup animation leaves him wide open, however. Input Special 2: Dead End Screamer. When Rugal is at over 100%, Rugal can execute ↓ ↘ → ↓ ↘ → + A/B or ↓ → ↓ → + A/B to activate Dead End Screamer; Rugal leaps into the air and, if he makes contact with a foe, pins them to the ground and begins to spin around. This move doesn’t usually K.O. and never buries, but does good damage nonetheless. Final Smash: G.END. Rugal grabs his opponent by the chest and lifts them up above his head. In order for the attack to be executed, Rugal must be near his target. Upon being lifted up, Rugal unleashes a pillar of dark red energy that does massive damage, sending foes into a star K.O. if their percent is high enough. If Rugal uses this attack when no opponent is nearby, he’ll simply grab the air and return back to idle pose. | |
| |
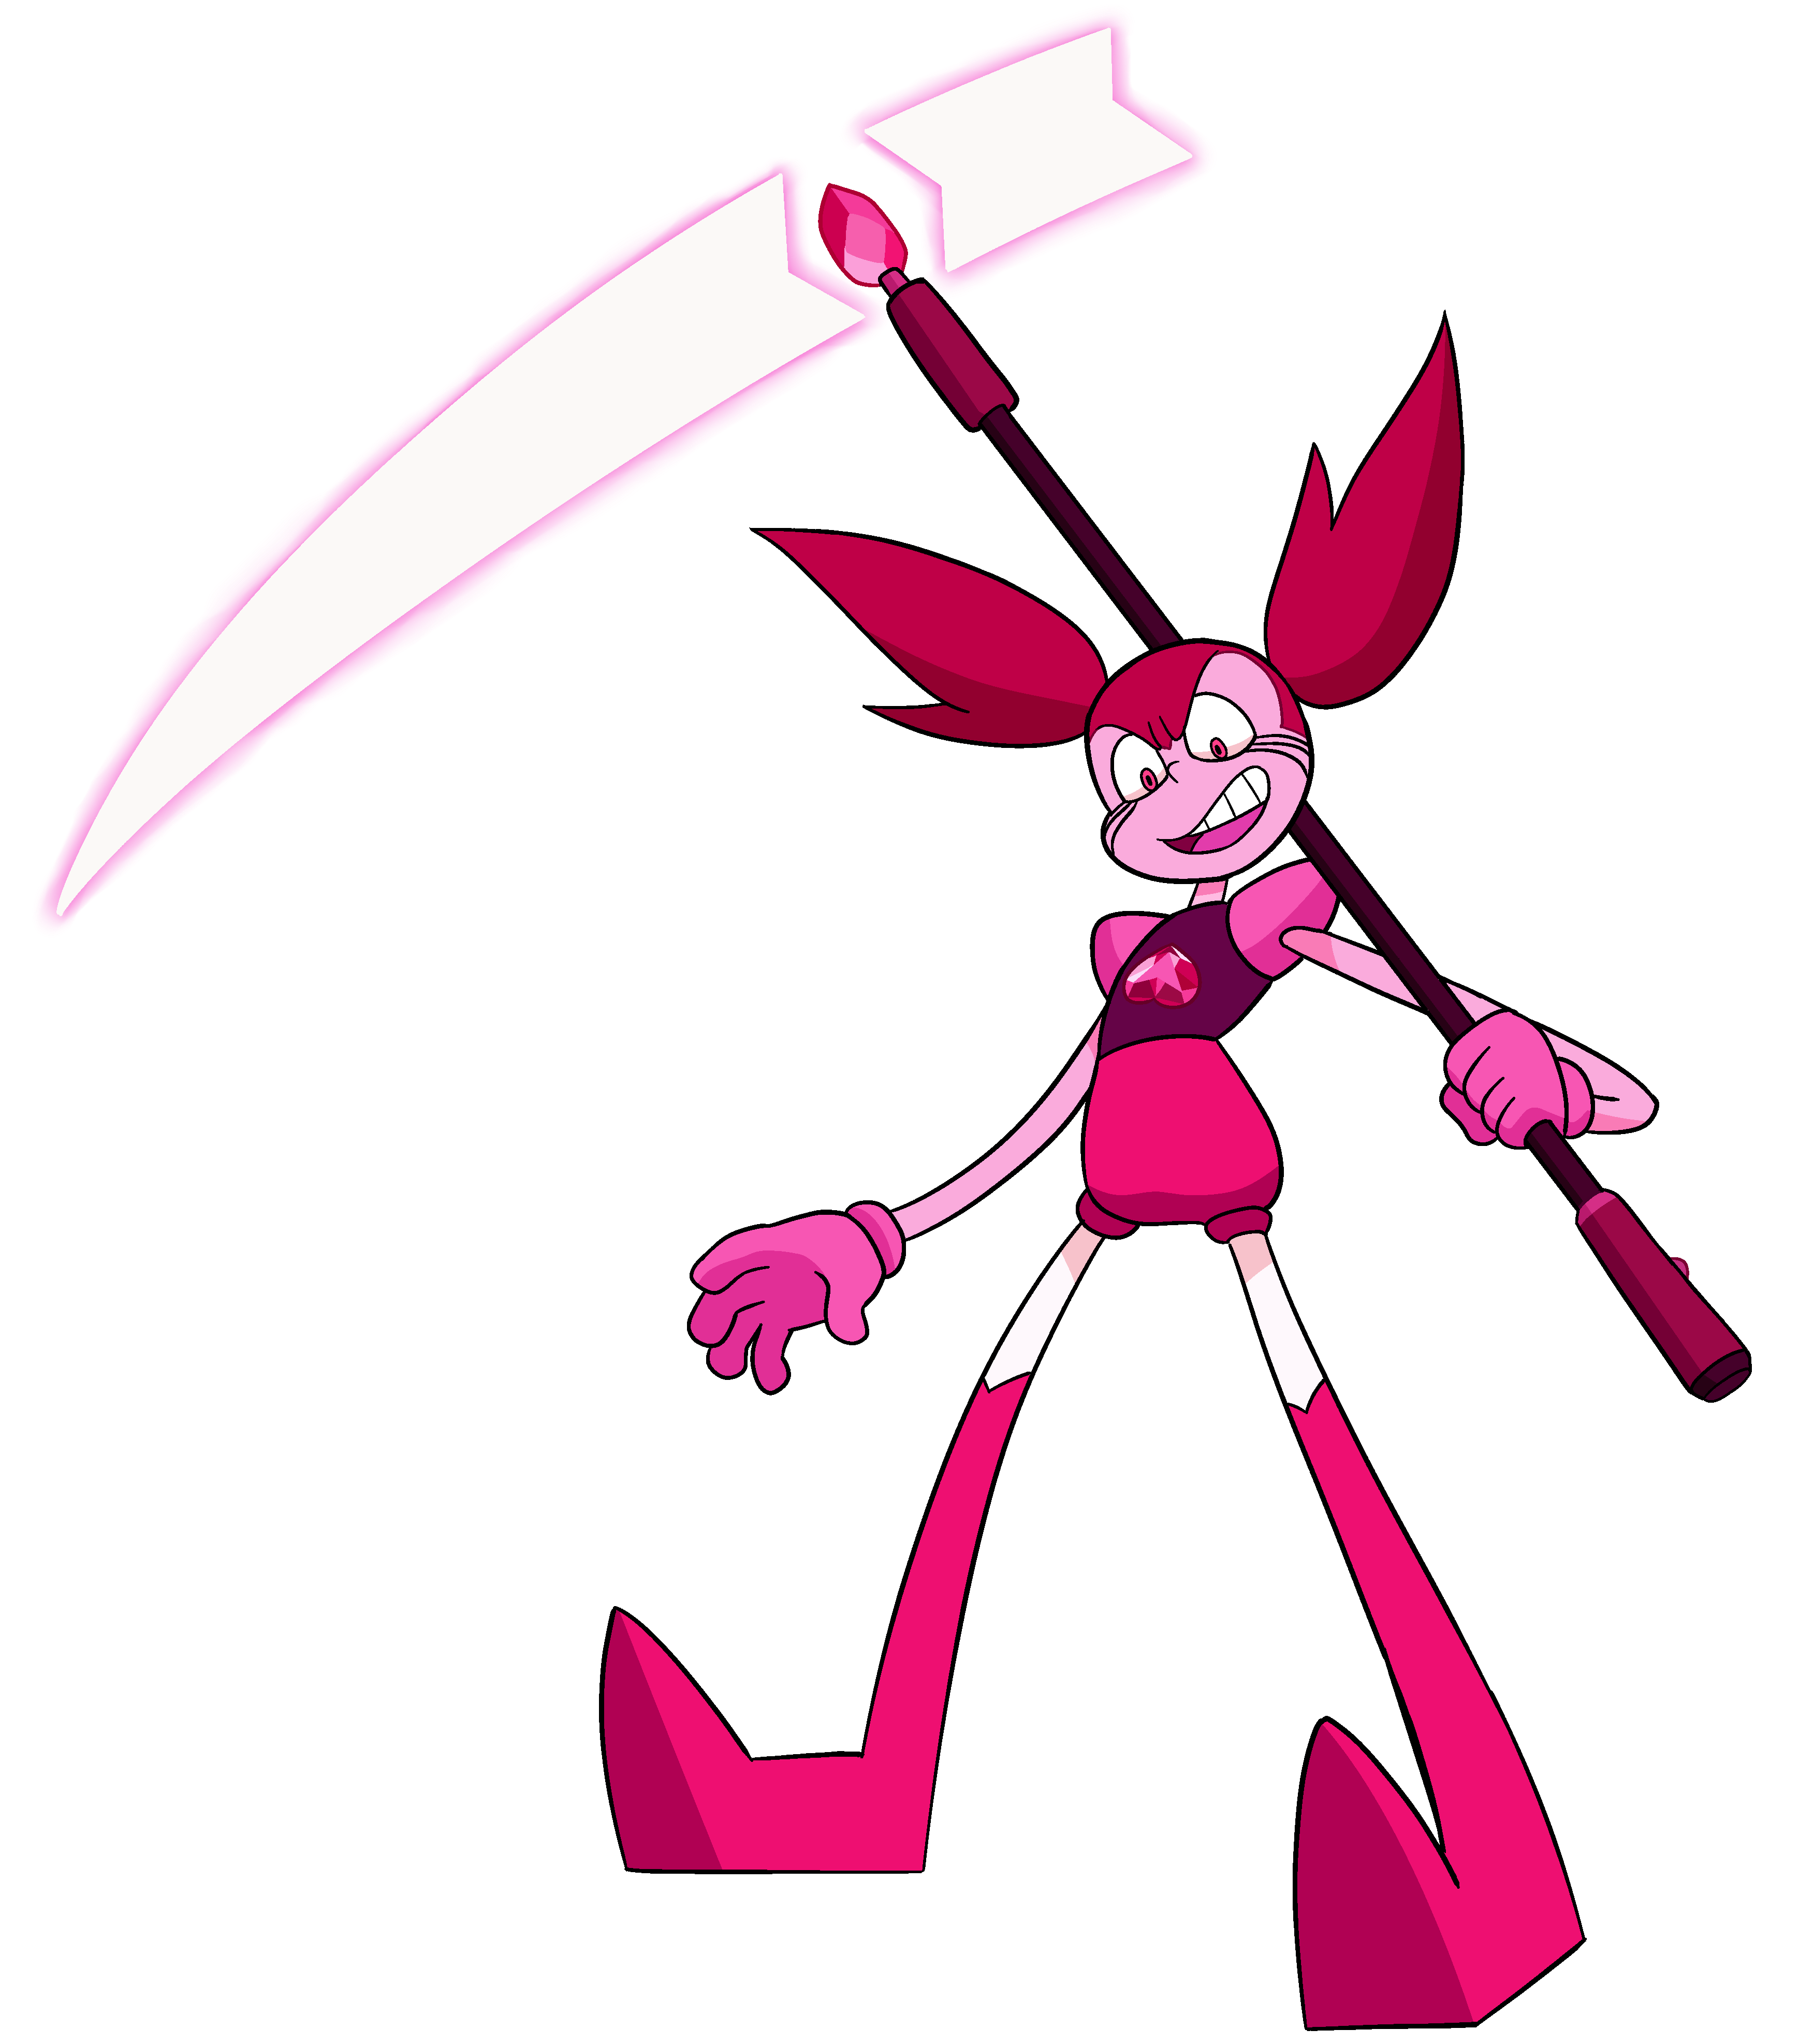
|
 Name: Spinel Debut: Steven Universe: The Movie (2019) Your new best friend makes her way into Smash as the third fourth-party character! Spinel’s gimmick is that she essentially has two unique movesets: one that gives off the vibes of a grappler and the other than gives her a style similar to a swordfighter. Swapping between the two is as easy as using her down special, Gem Rejuvenator, with each providing unique benefits and downsides the other doesn’t have. |
Neutral Special (Body): Elastic Punch. Spinel pulls her fist back as it slowly gets larger the longer the B button is held. The power of the move increases in this time, but gives Spinel a longer cooldown whether she misses or not. The fist can be angled around Spinel in eight directions, thrusting Spinel backwards, upwards, left, or right slightly depending on where she launches her fist. Neutral Special (Scythe): Pink Reaper. Spinel pulls back her Rejuvenator as she prepares to spin around with it. Upon the B button being released, Spinel spins around up to three times, not moving horizontally while making her general area a hazard. While this attack does less damage to shields, getting hit while shielding three times at once can break it and lead to your demise if you aren’t careful. Side Special (Body): Twister Dash. Spinel begins to twist her arms and legs around her before launching into a tornado-like formation. The longer the B button is held, the faster and stronger she’ll be with more cooldown. She moves forward slightly no matter what and each fist does individual hits. If you hit the B button at the perfect time, Spinel will perform an uppercut that can be shielded but ends the attack in style. Side Special (Scythe): Rejuvenation Slash. Spinel performs a single strike with her Rejuvenator. It doesn’t do much damage and leaves a light poison effect on whoever it hits, but it does massive damage to shields almost on the level of Marth’s Shield Breaker. The attack requires some build-up, but requires her opponent to constantly be on the move if they want to survive. Up Special (Body): Spring Hop. Spinel’s arm becomes longer and coils into a spring-like shape, thrusting her upwards in an arc formation. While similar to other up specials, Spinel’s variation has the chance to spike anyone below her and, like her other body moves, can be held down for more strength at the cost of cooldown. The longer she’s in the air, the more open she is, however. Up Special (Scythe): Scythe Toss. Spinel grips onto her Rejuvenator as she extends her arm into the air. If the attack is successful, the scythe can land in an opponent or on a ledge, causing Spinel to pull herself closer. If it misses, however, Spinel will either be left helpless or fall to her doom off-stage. While still good at breaking shields, it’s better for getting Spinel out of tough situations more than anything. Down Special: Gem Rejuvenator. Spinel reaches into her gem and pulls out her signature weapon, the Gem Rejuvenator, a weapon that takes on the appearance of a scythe. With this move, Spinel’s entire kit outside of her down special and Final Smash are altered, giving her the skillset similar to that of a sword user. The scythe can be stored back in her gem which gives her back the old moveset. Final Smash: Diamond Injector. Spinel dashes into a foe and begins a cinematic; her opponent lands on Beach City before Spinel’s Injector crashes down right on top of them, releasing a wave of Bio-Poison that completely decimates them. Spinel blows from a horn made for her finger, causing the injector to release even more poison, wiping out the beach before the cinematic ends. | |
| |
Stages[]
Returning Stages[]
Most of the stages across the series's history return, ranging from 64 to Ultimate. In addition, the ability to toggle stage hazards on and off has been brought back from Ultimate as well. Omega versions of all stages come back once again, including Battlefield, Final Destination, and for the first time, Big Battlefield forms.
As of right now, there are 115 returning stages in the game with seven absent. Those seven are ![]() Mushroom Kingdom,
Mushroom Kingdom, ![]() Flat Zone,
Flat Zone, ![]() Flat Zone 2,
Flat Zone 2, ![]() Pictochat,
Pictochat, ![]() Pictochat 2,
Pictochat 2, ![]() Pyrosphere, and
Pyrosphere, and ![]() Miiverse.
Miiverse.

|
|
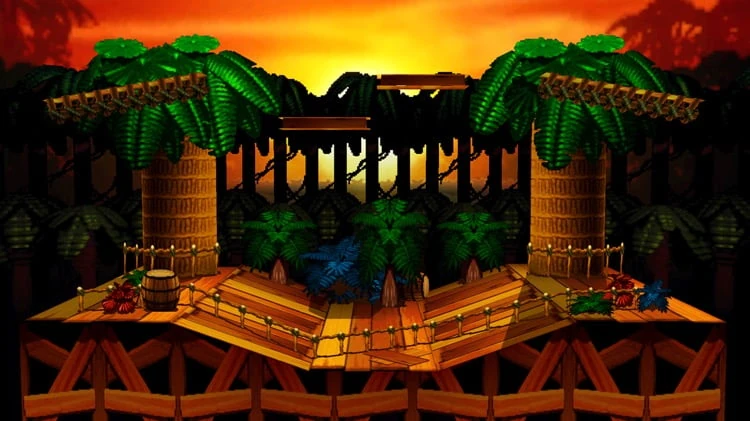
|
|
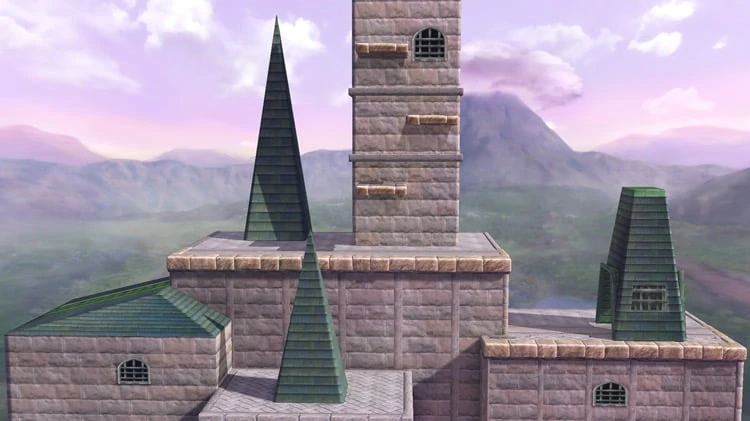
|
|

|
|
 |
|
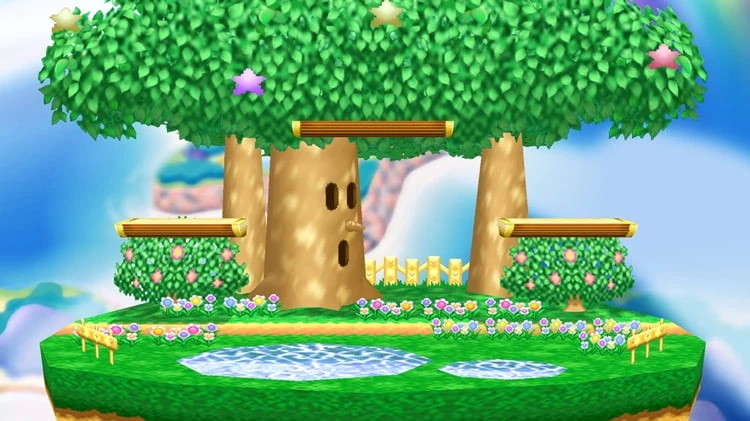 |
|
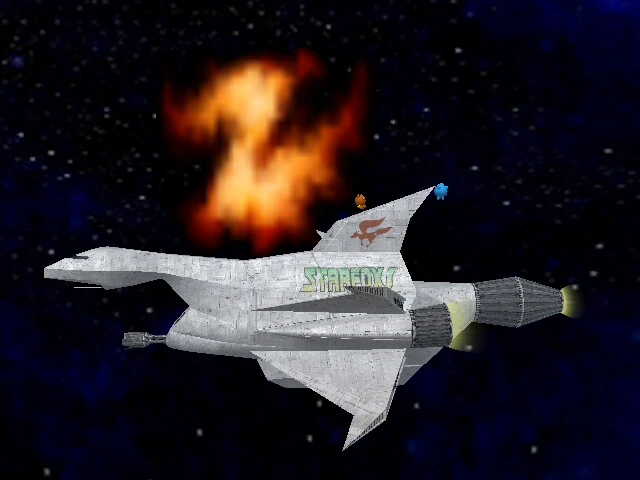 |
|
 |
|
 |
|
 |
|
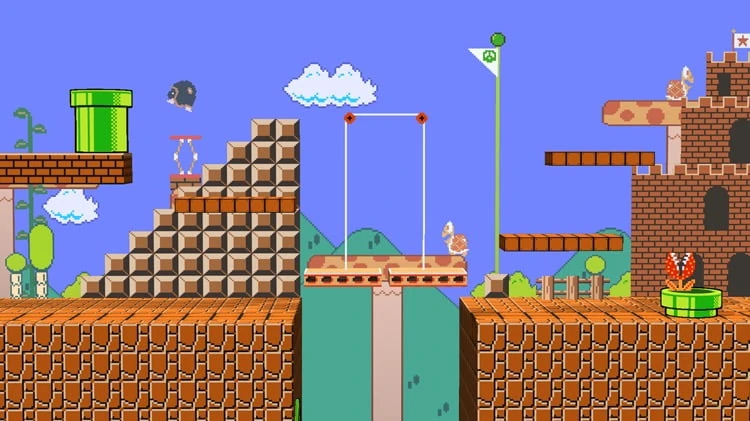 |
|
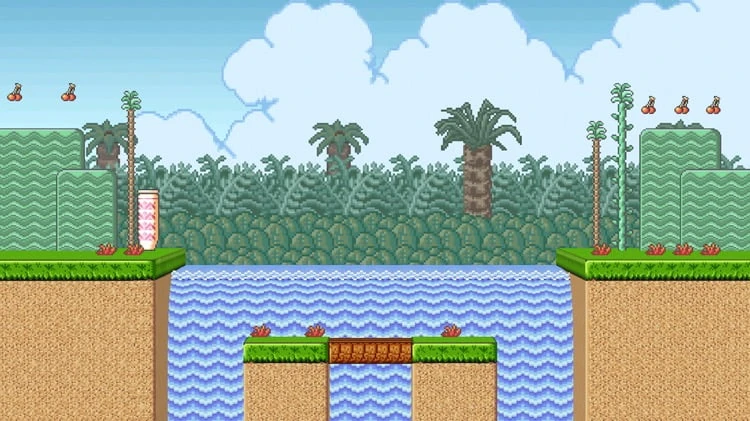 |
|
 |
|
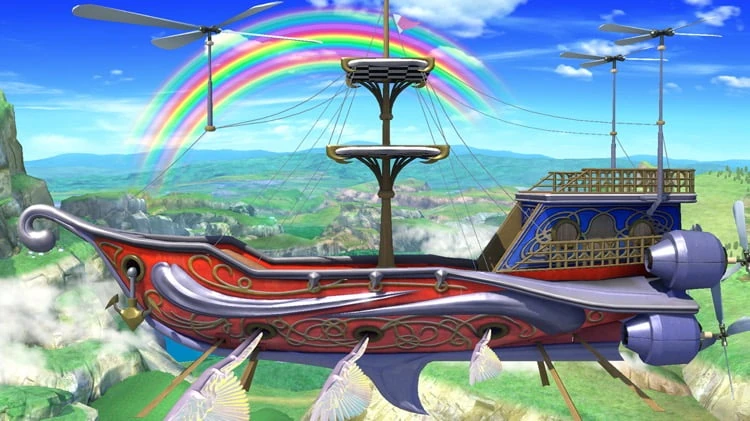 |
|
 |
|
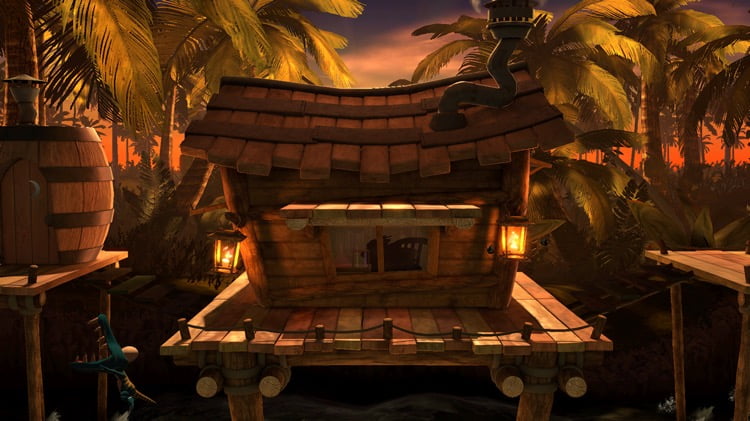 |
|
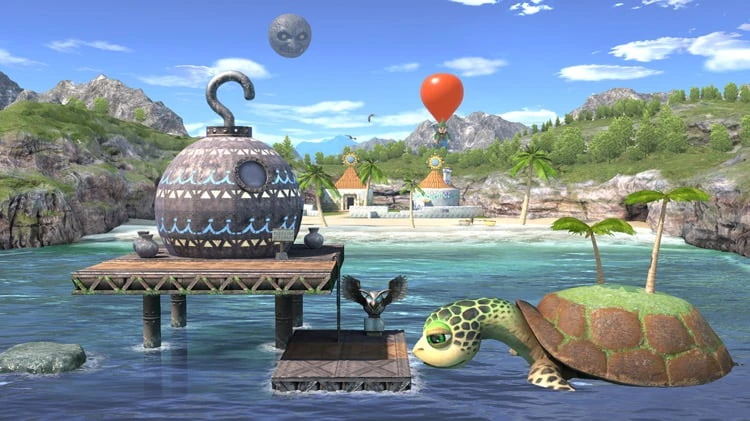 |
|
 |
|
 |
|
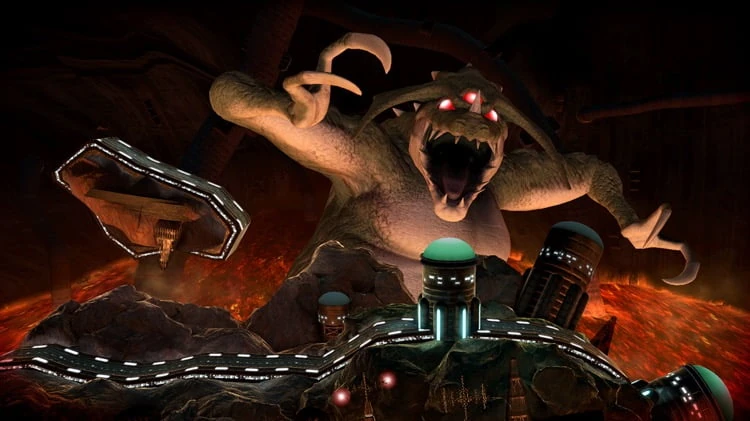 |
|
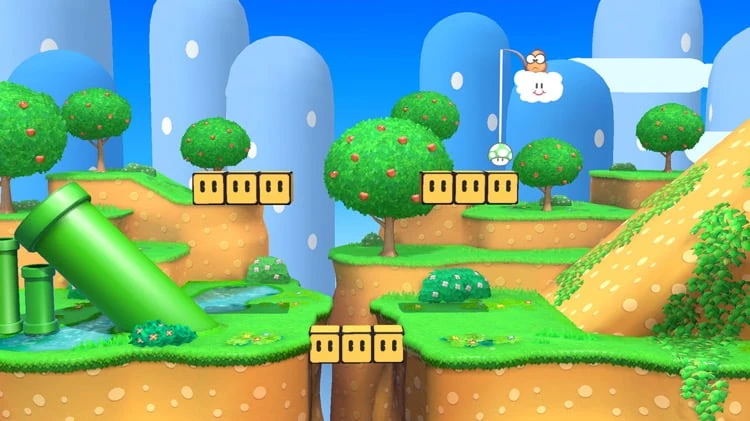 |
|
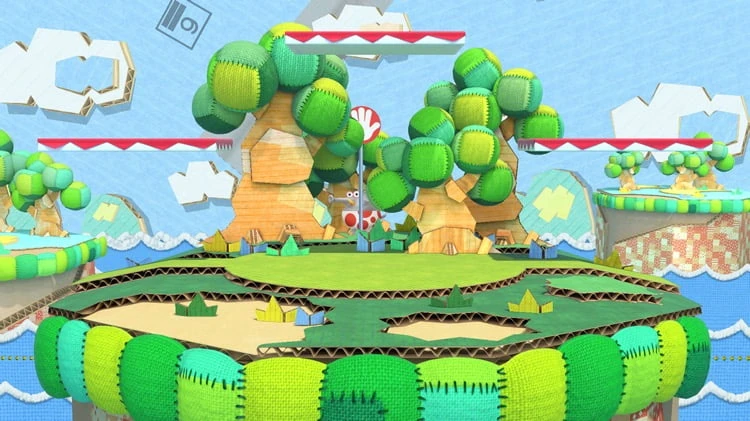 |
|
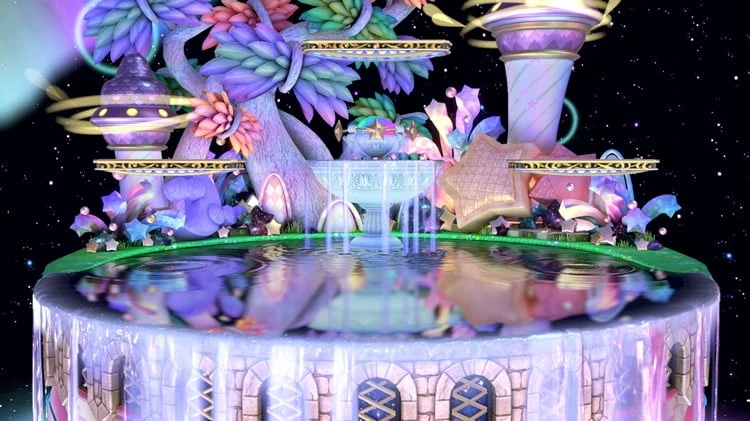 |
|
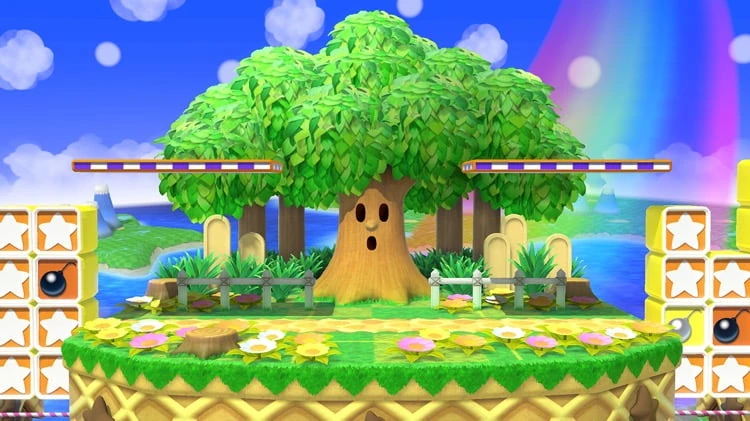 |
|
 |
|
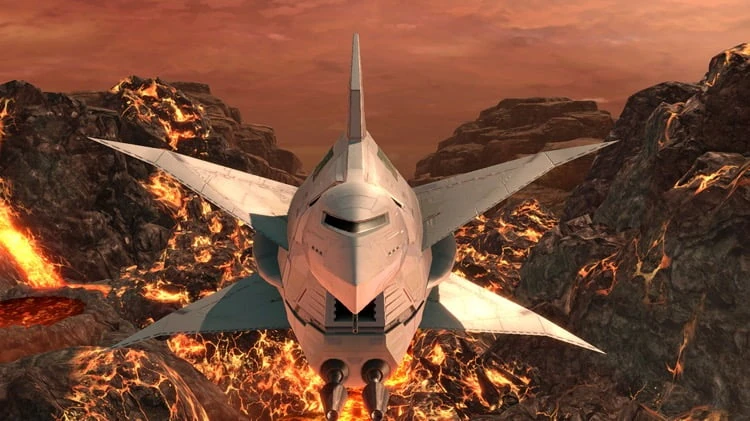 |
|
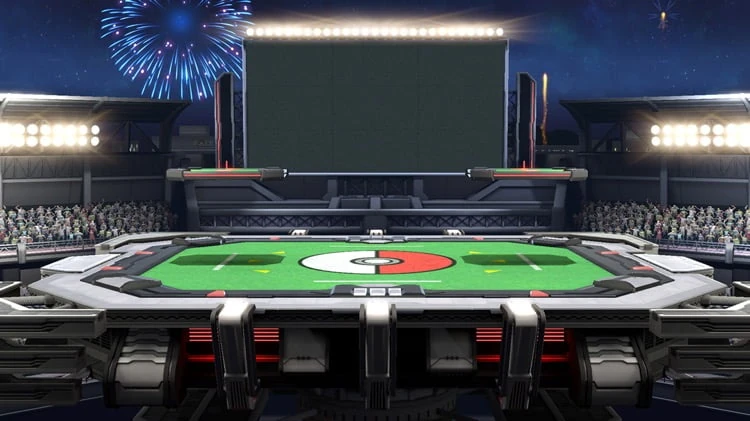
|
|
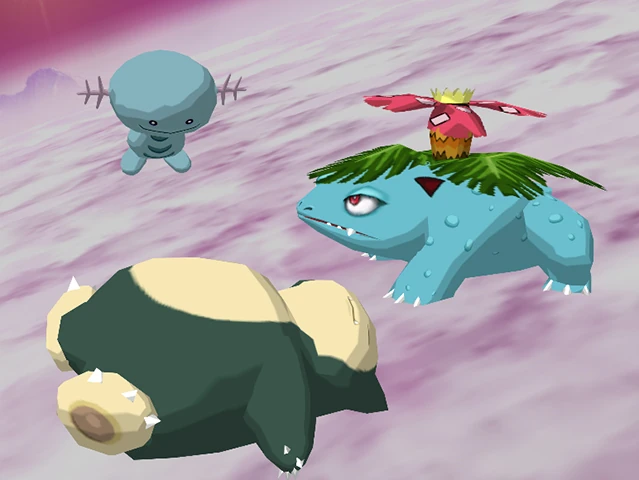
|
|
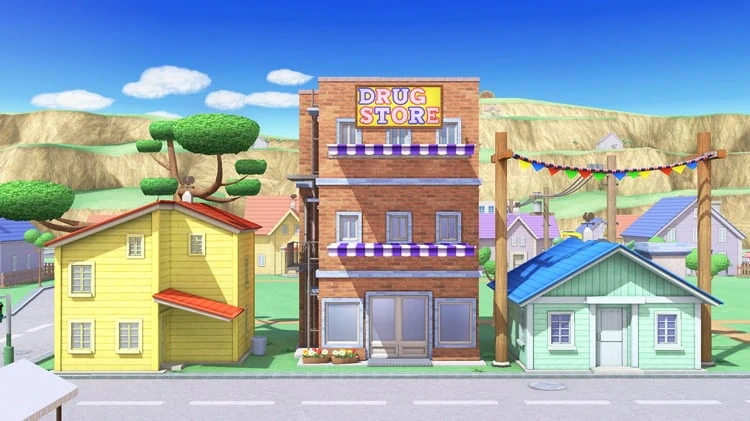
|
|
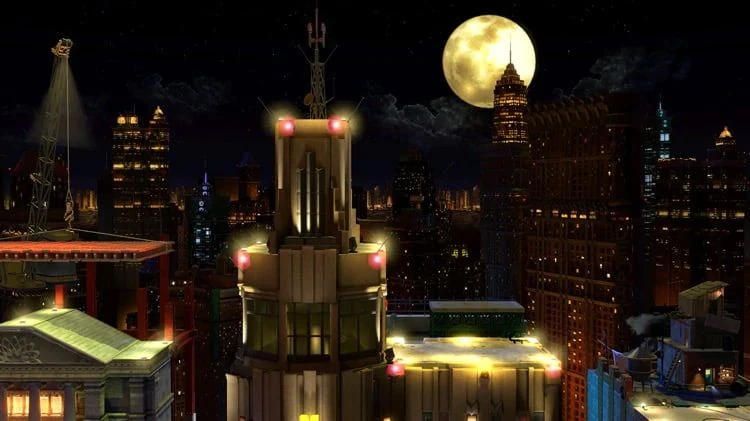
|
|

|
|
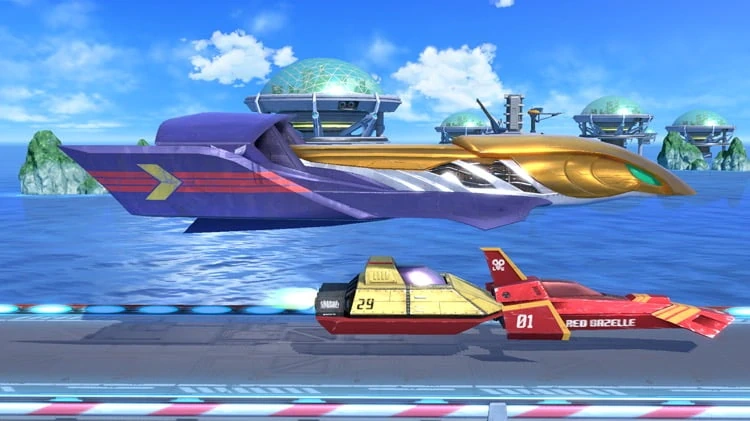
|
|

|
|
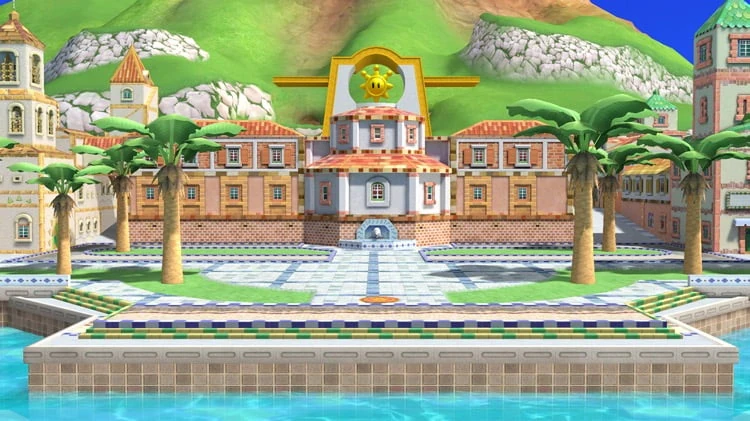
|
|
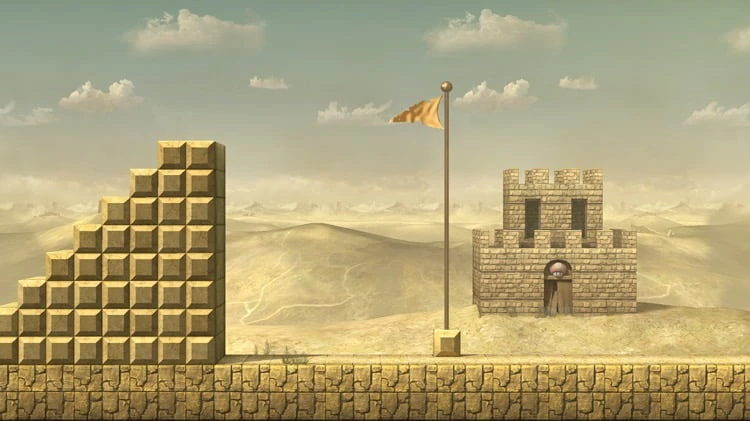
|
|

|
|
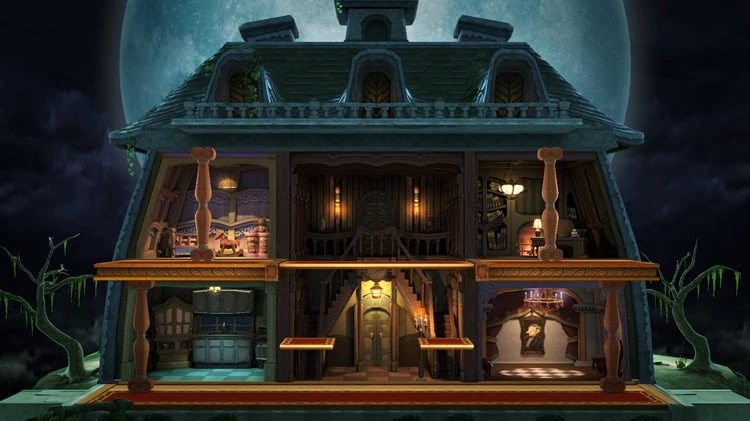
|
|
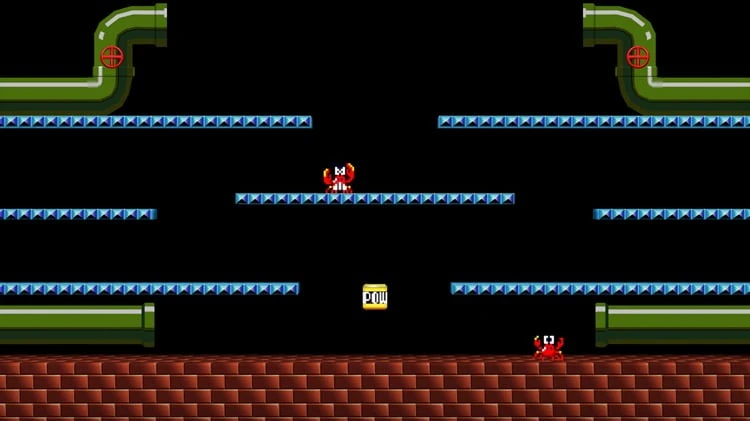
|
|

|
|
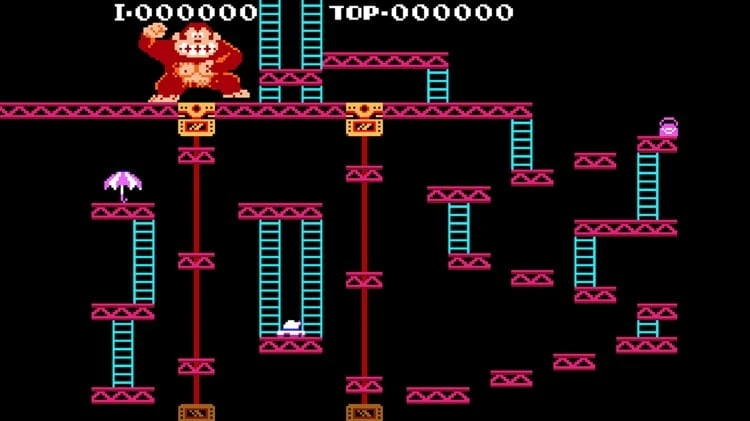
|
|
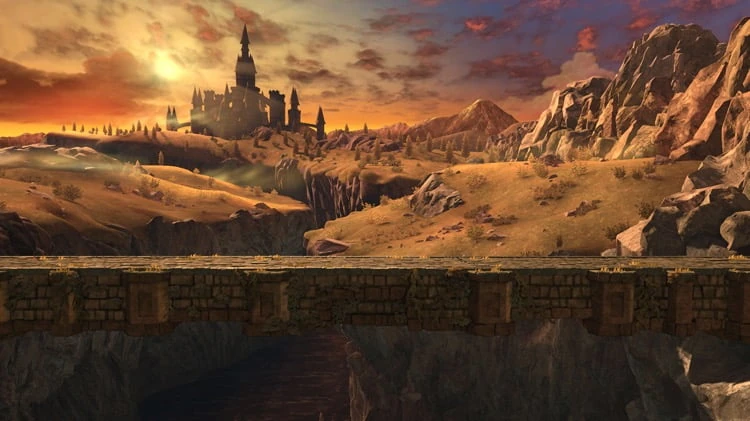
|
|
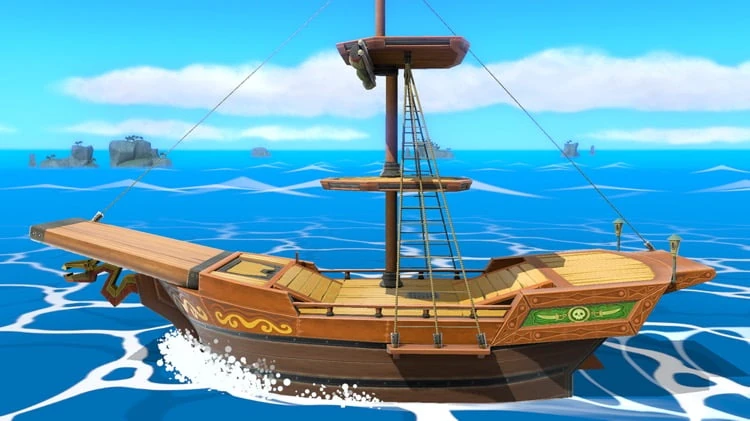
|
|

|
|

|
|
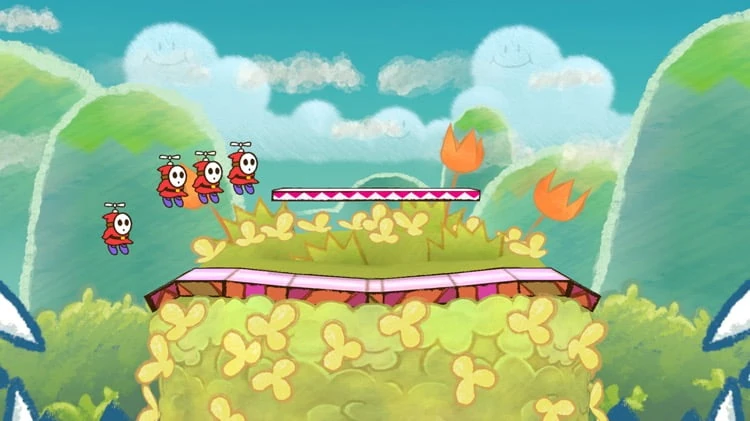
|
|
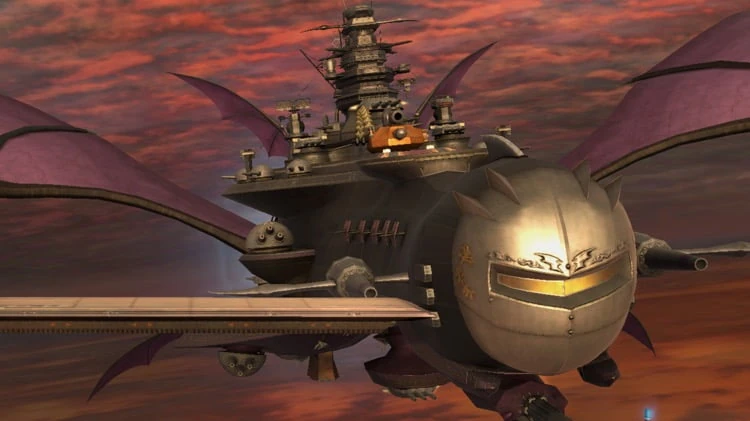
|
|
|
|
|
|

|
|
|
|
|
|
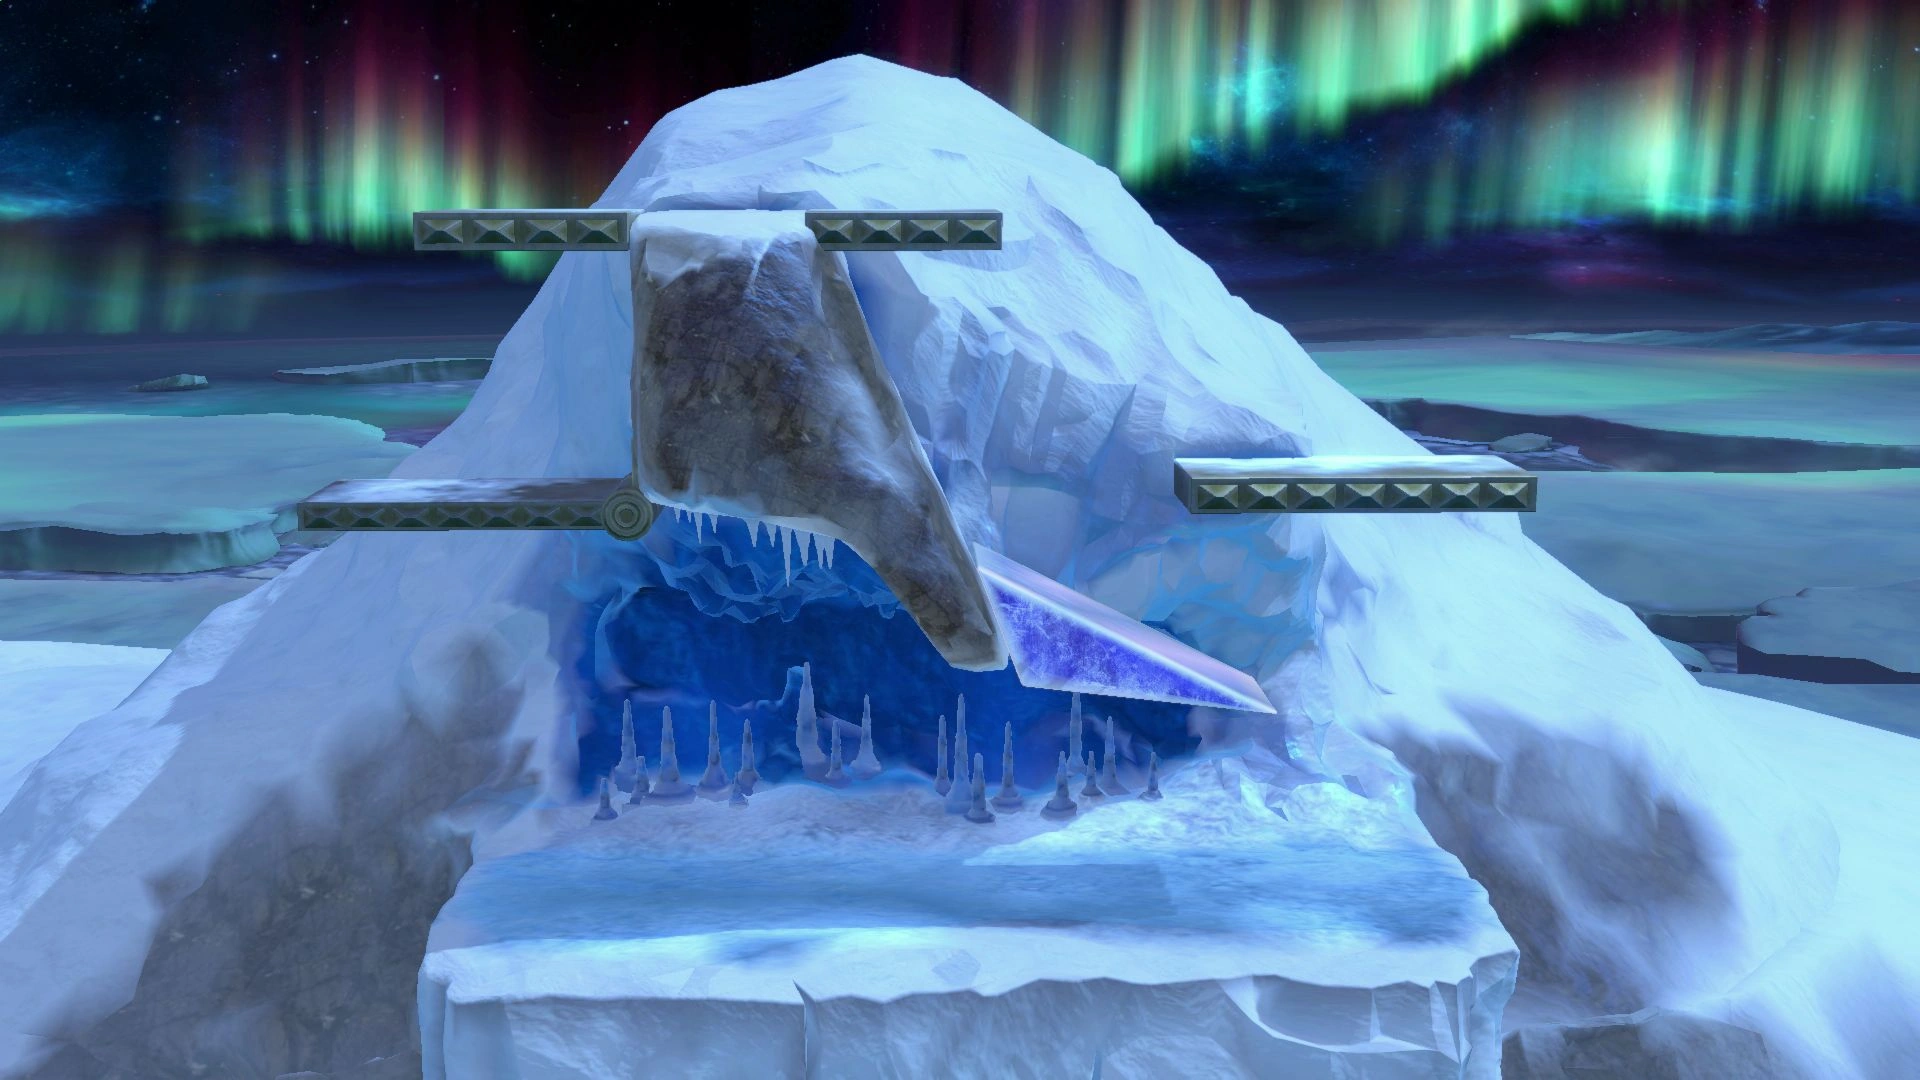
|
|
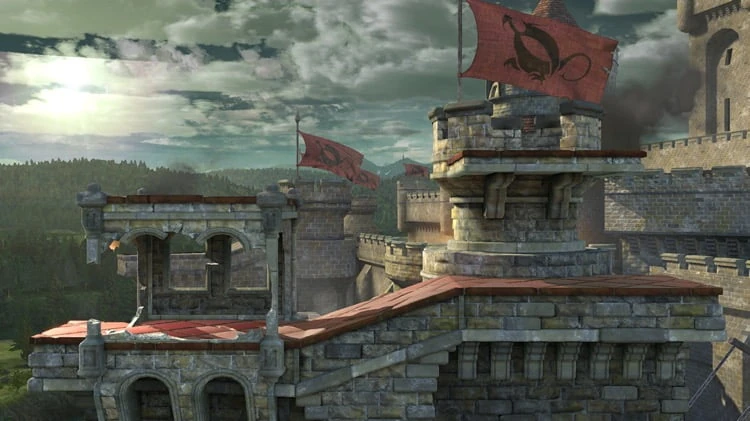
|
|

|
|

|
|
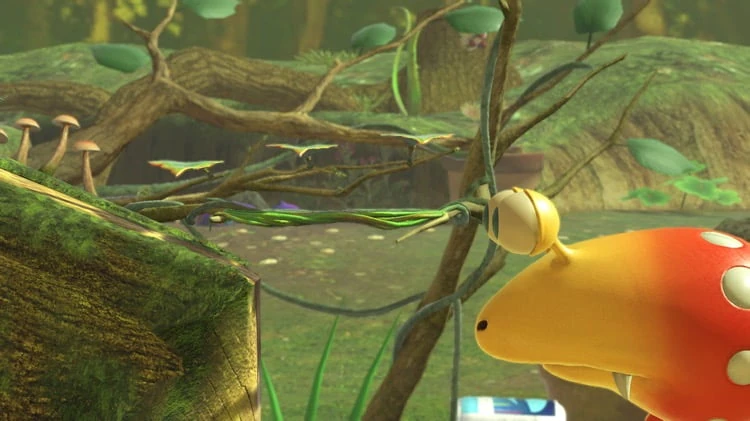
|
|
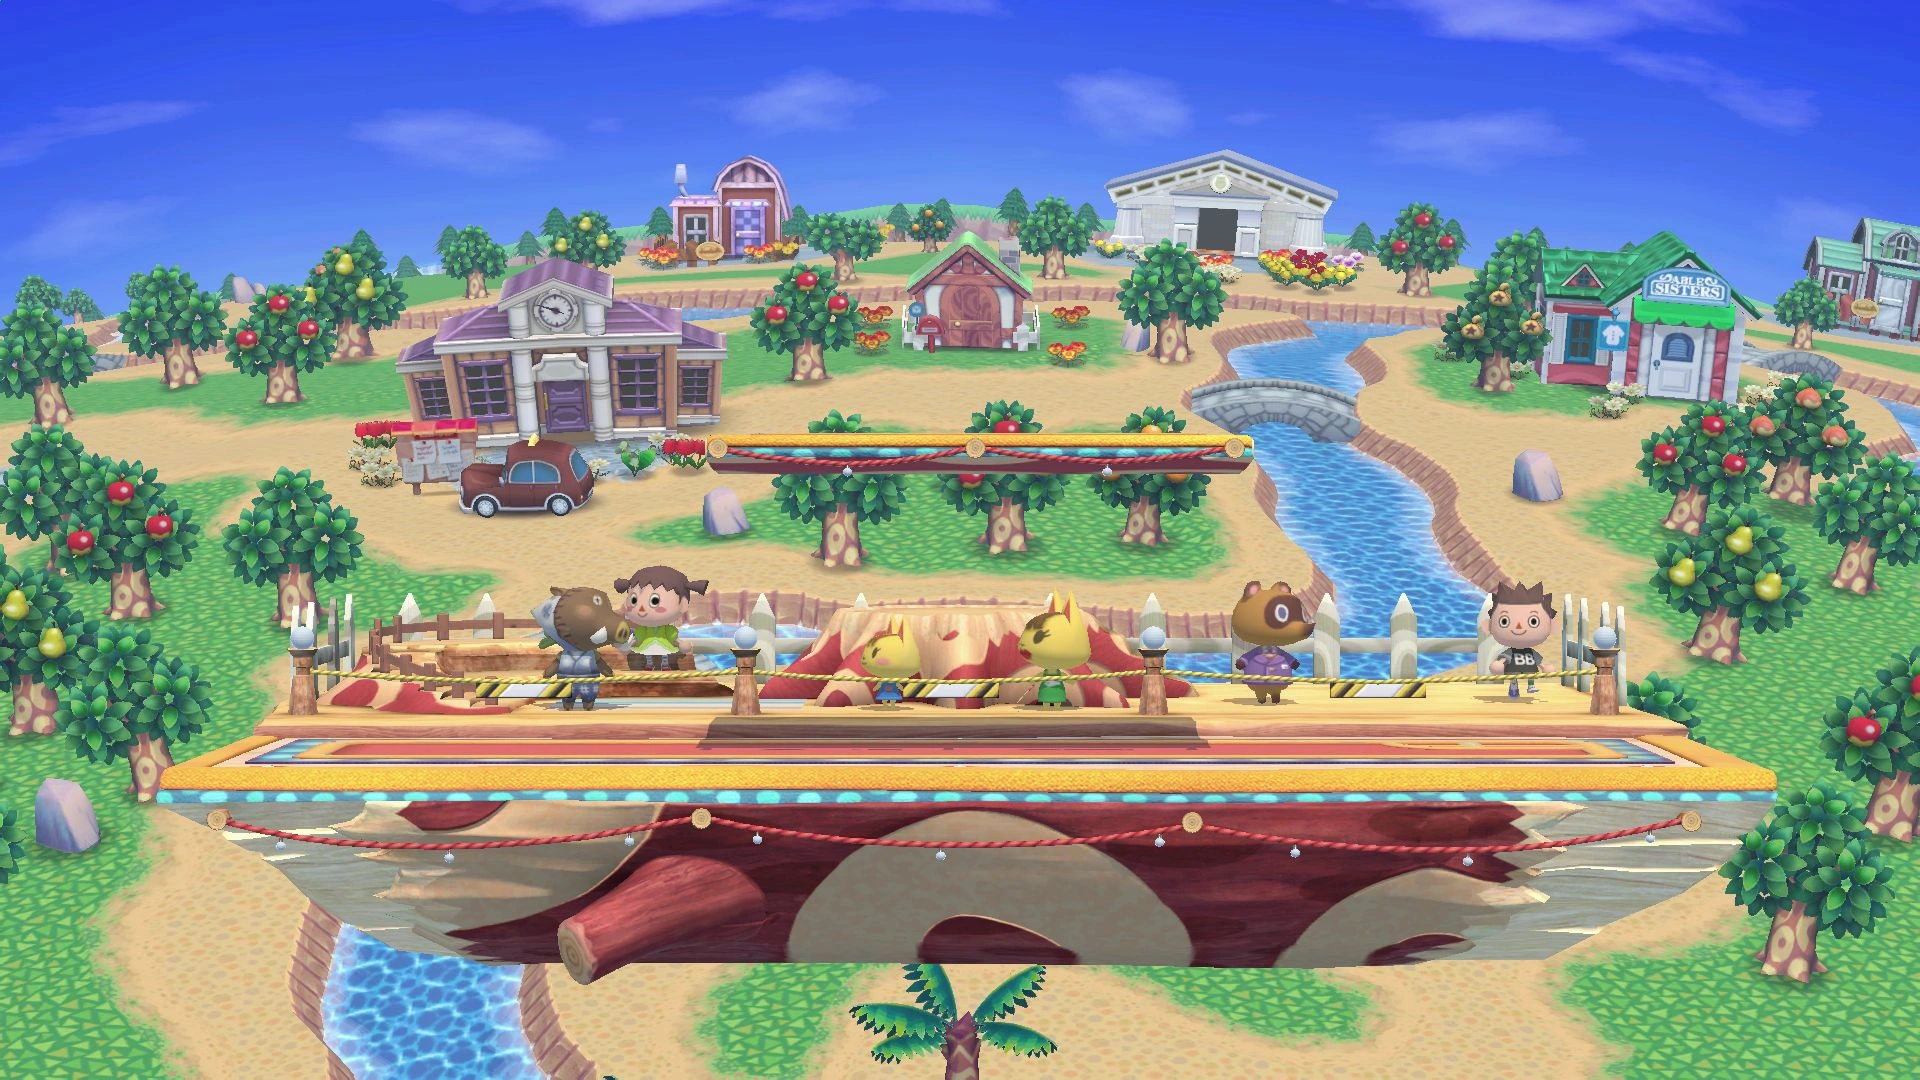
|
|

|
|
|
|
 |
|
|
|
|
|

|
|
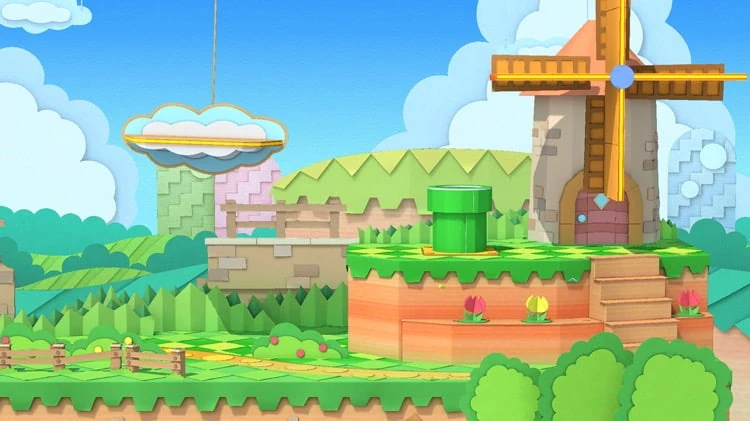
|
|

|
|
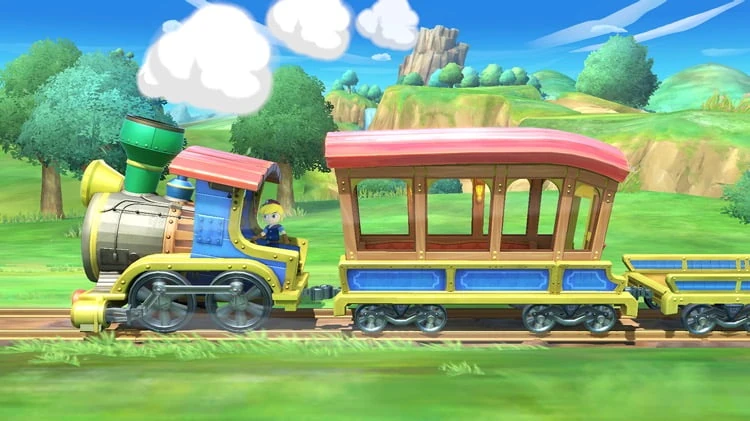
|
|

|
|
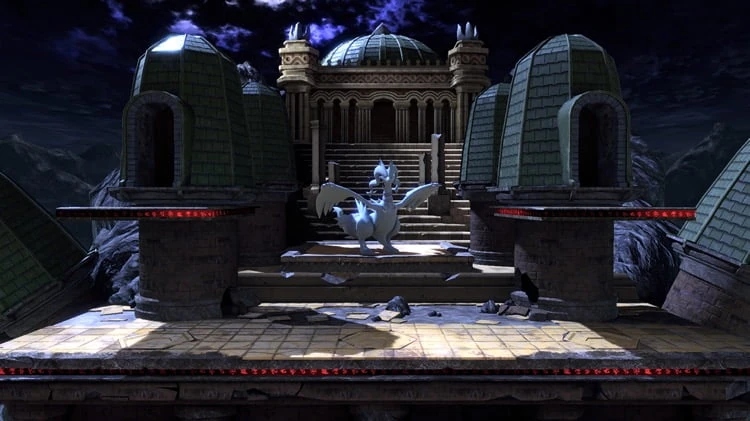
|
|

|
 |
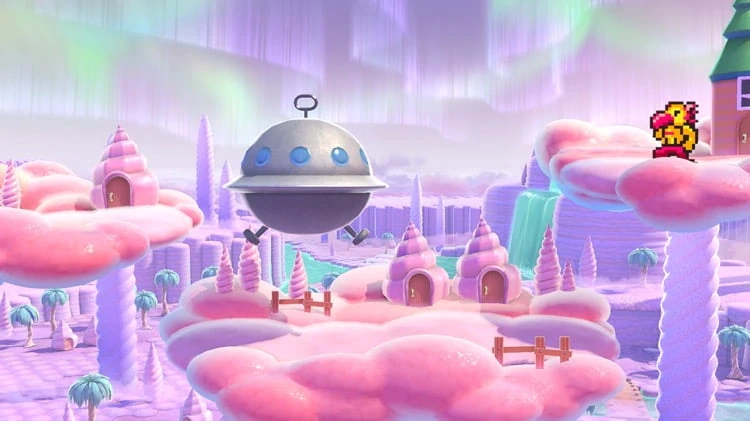
|
|
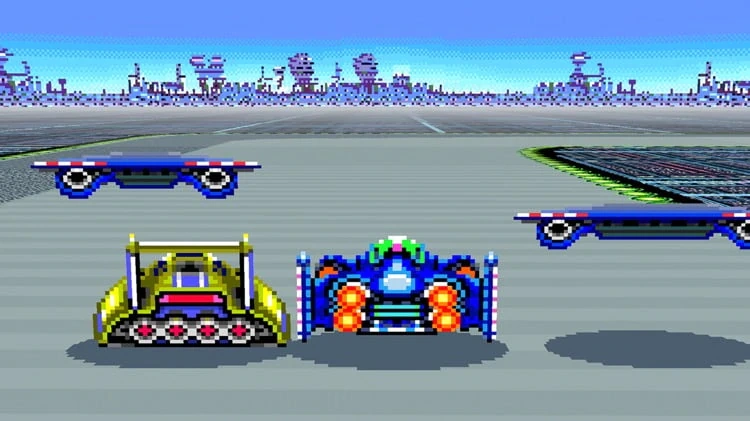
|
|
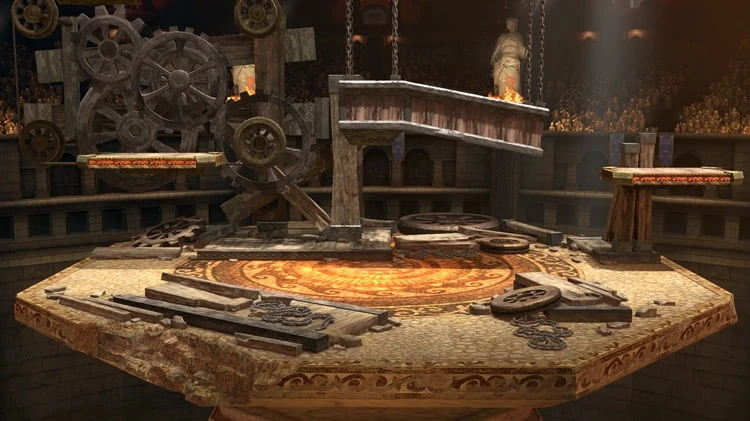
|
|
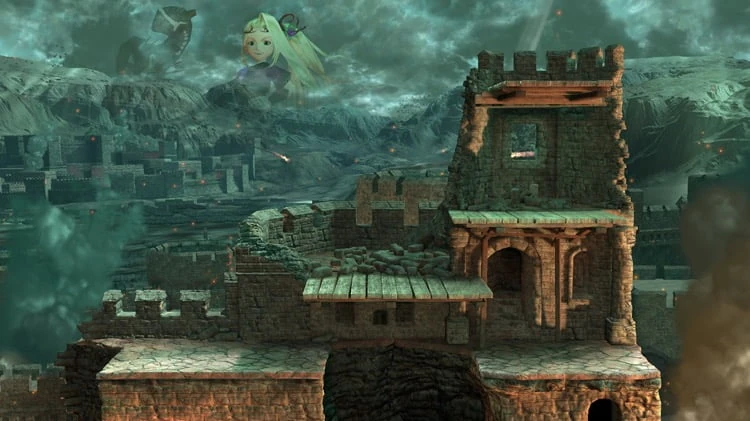
|
|
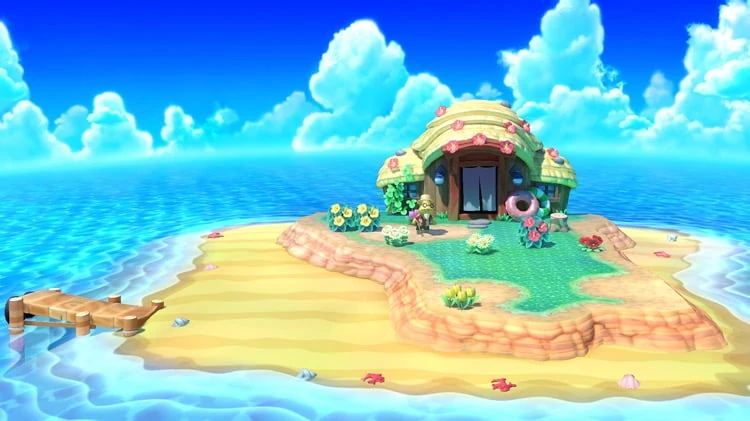
|
|
|
|
|
|
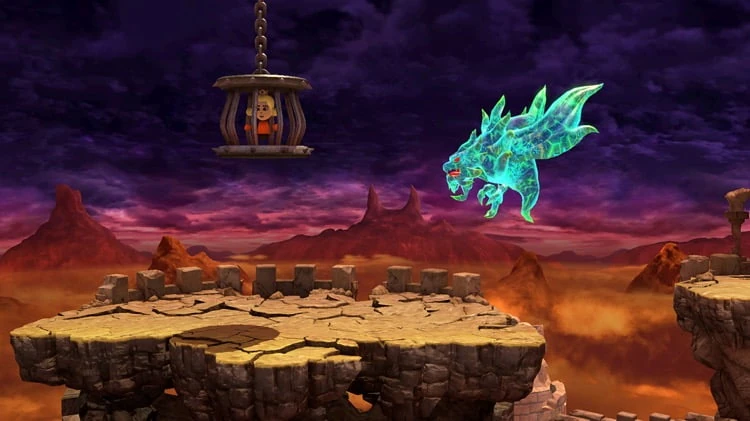
|
|
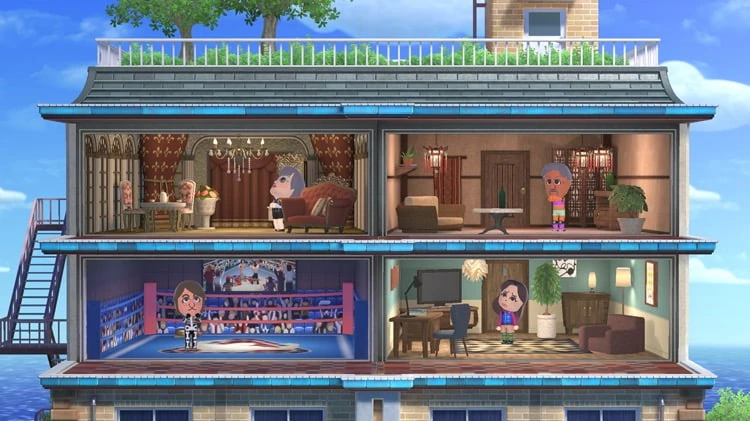
|
|
|
|
|
|
|
|
|
|
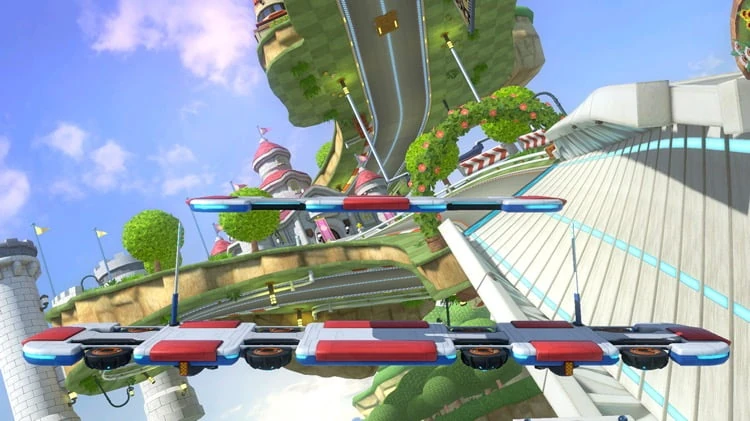
|
|
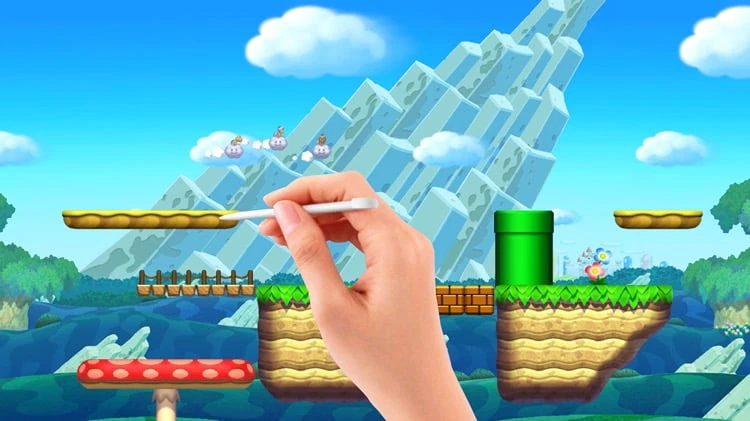
|
|
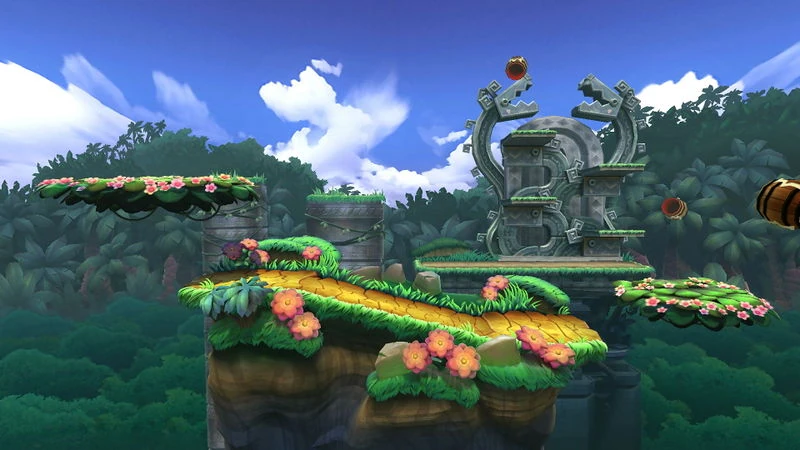
|
|

|
|
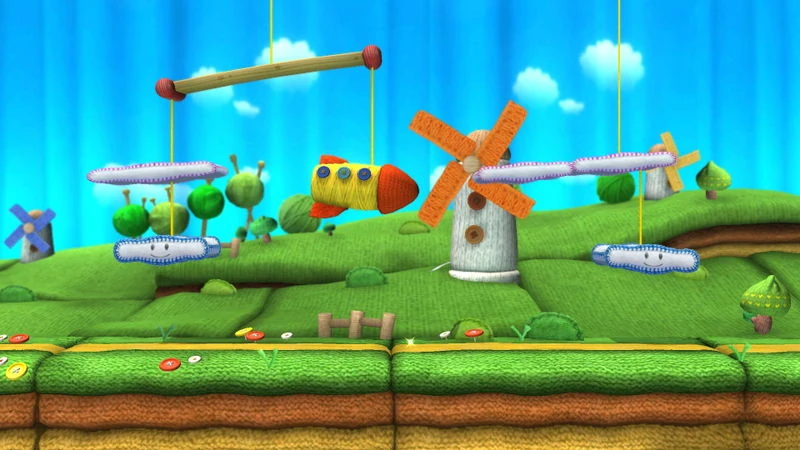
|
|
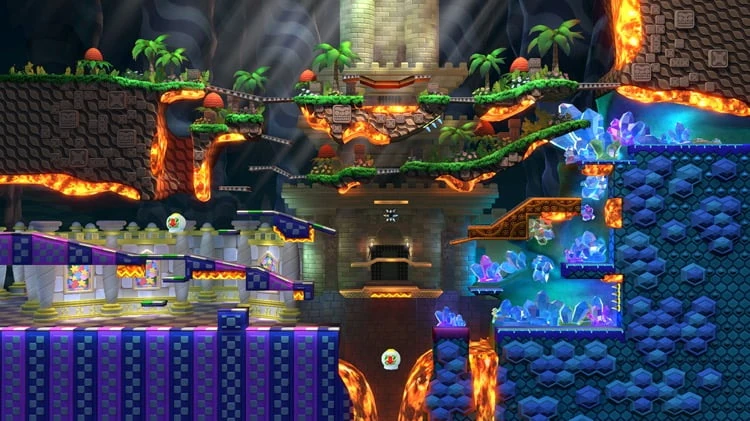 |
|
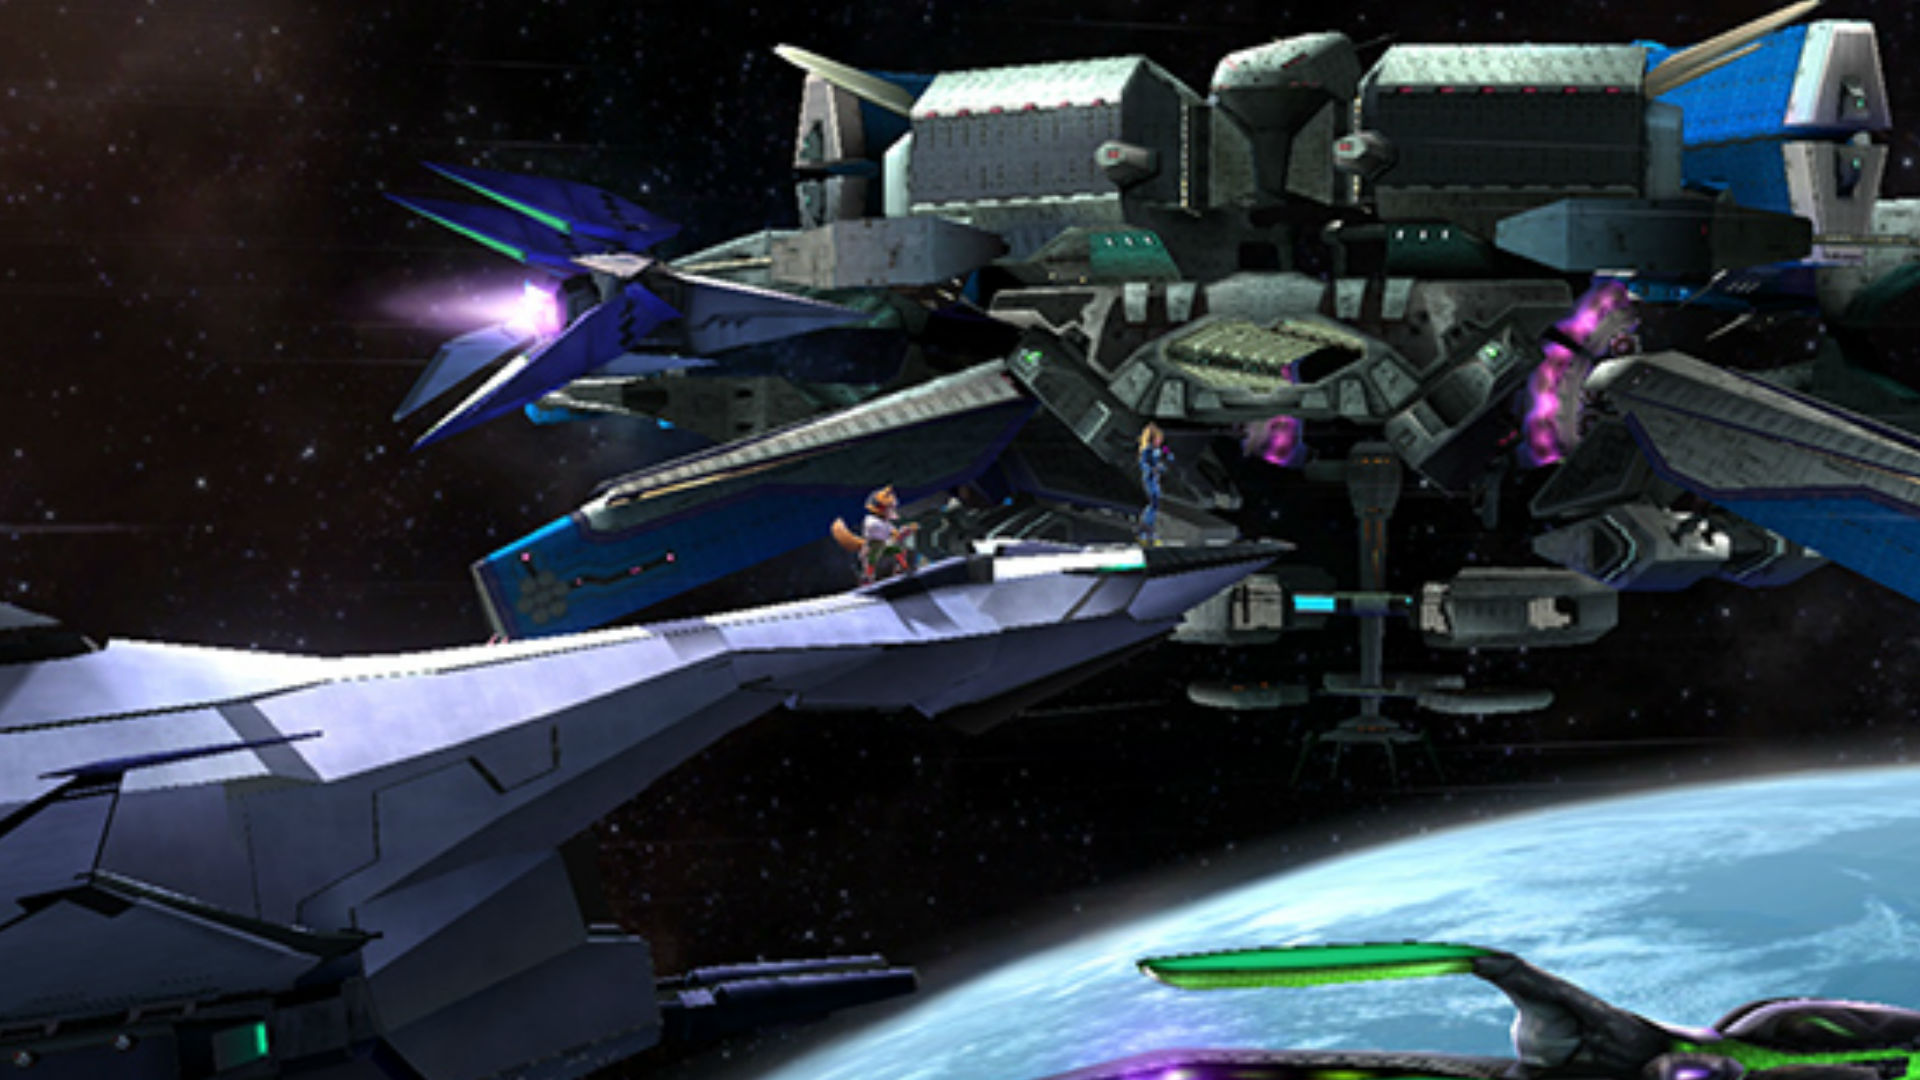
|
|
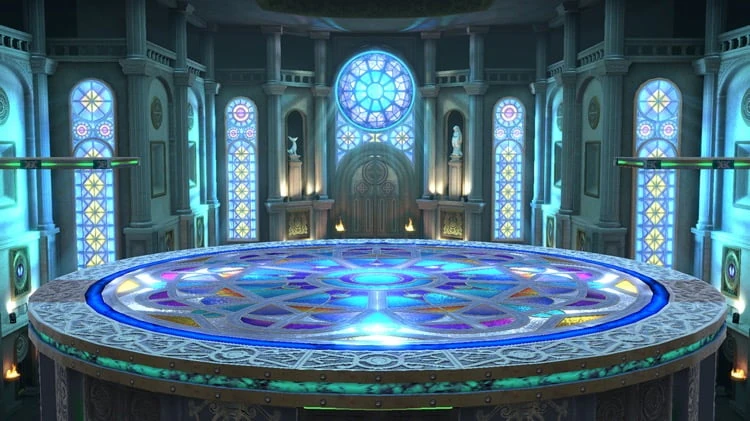
|
|

|
|
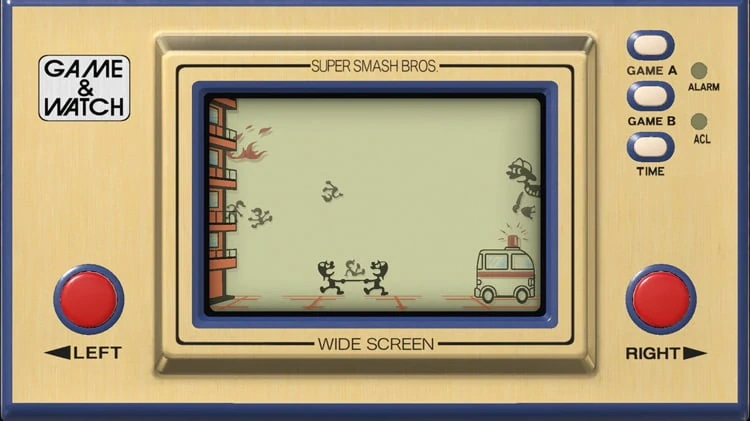
|
|

|
|
|
|
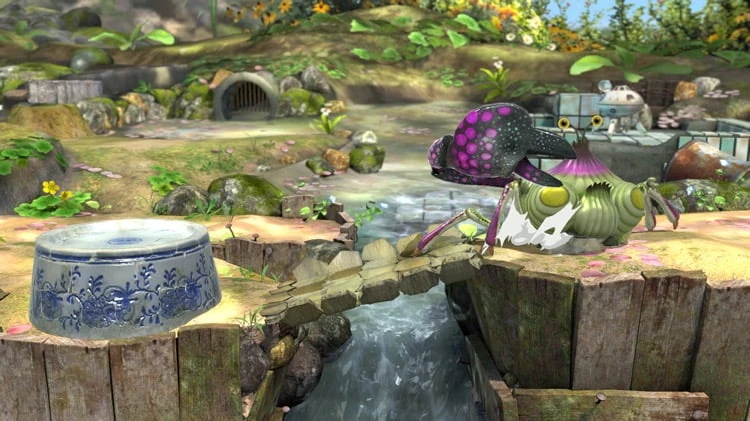
|
|
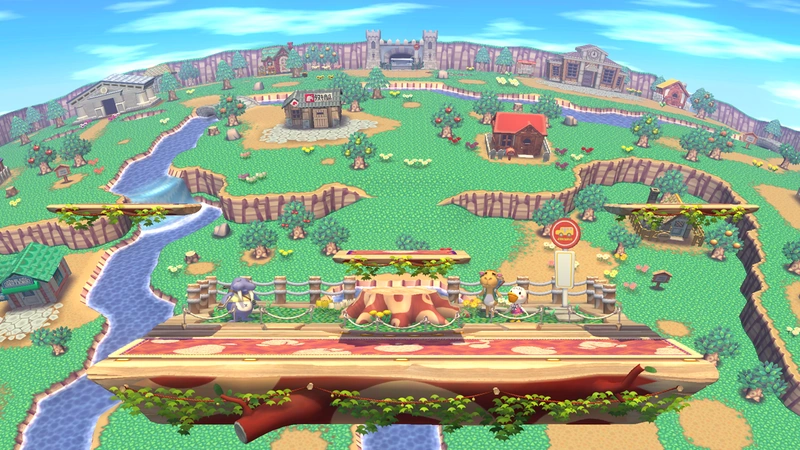
|
|
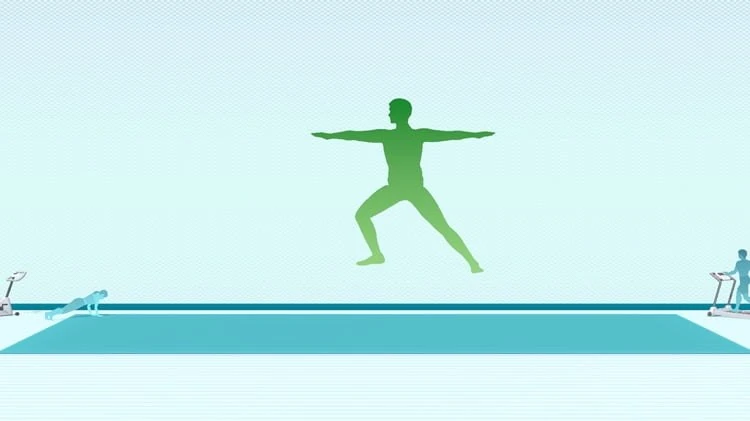
|
|
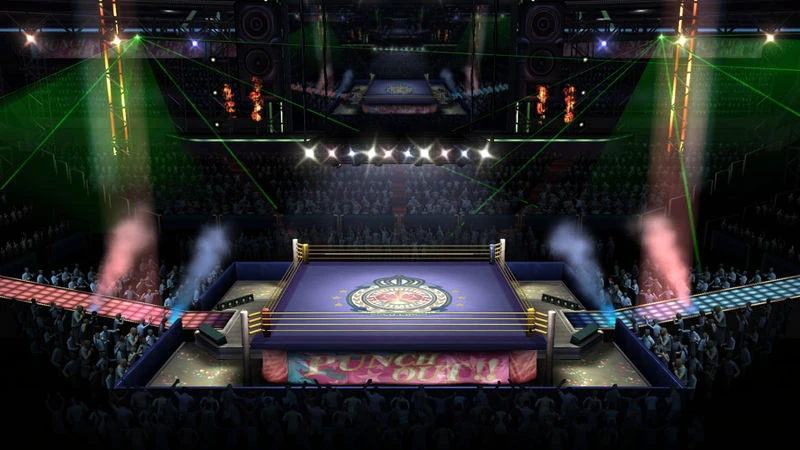
|
|
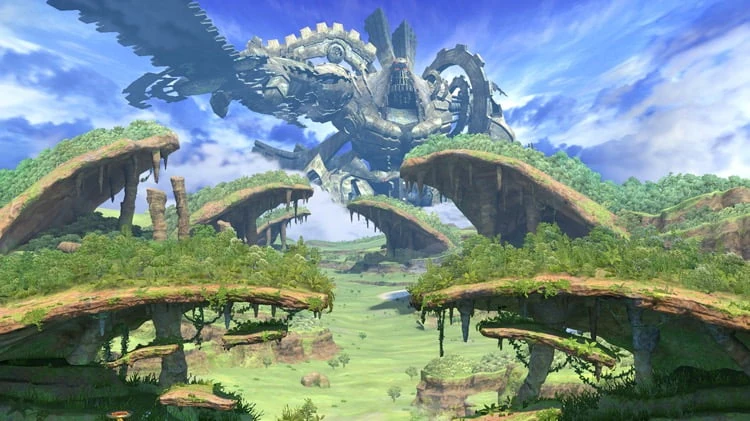
|
|

|
|
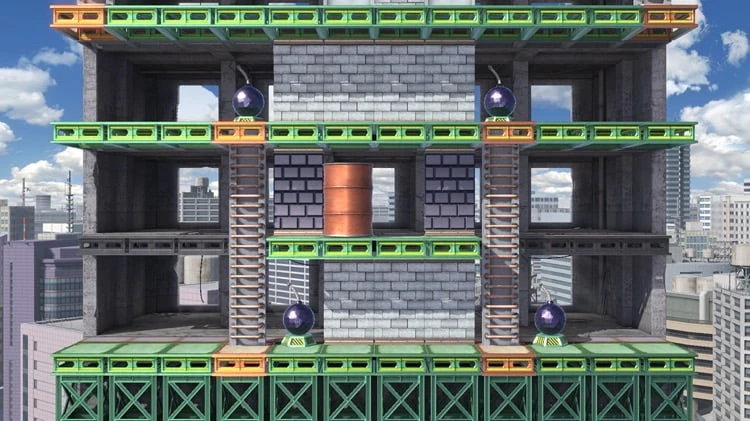
|
|

|
|

|
|

|
|
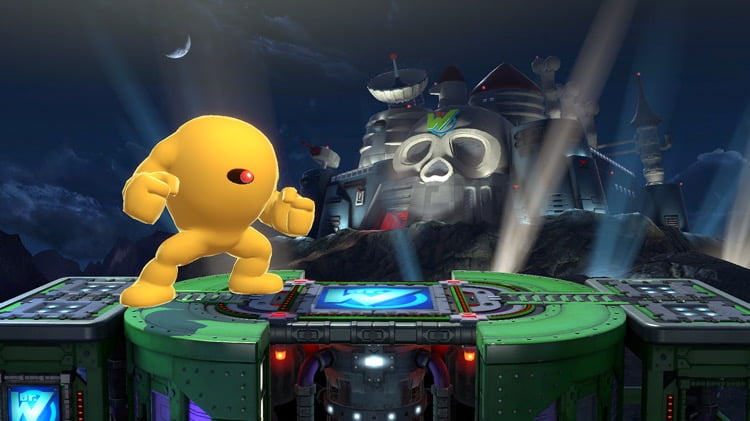
|
|
|
|
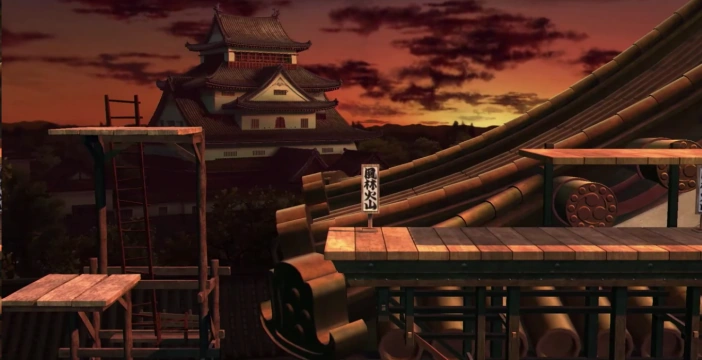
|
|
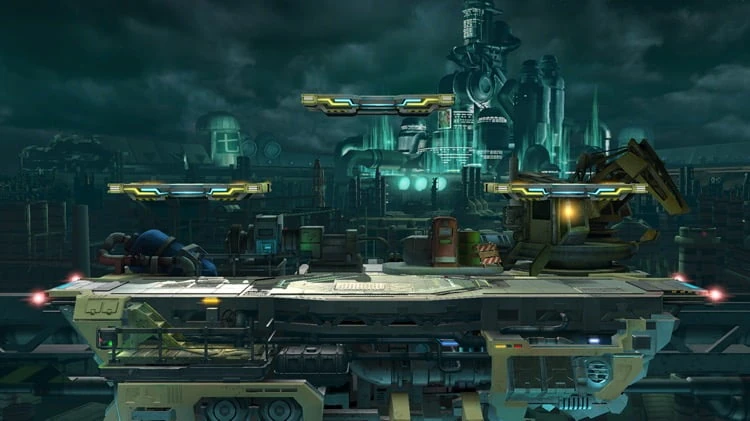
|
|

|
|
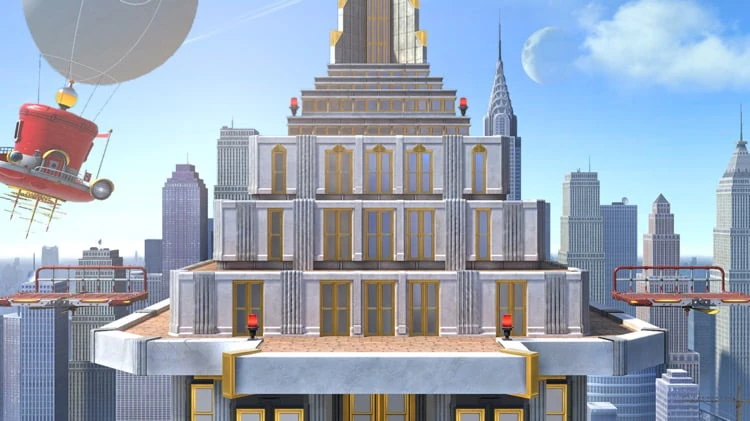
|
|

|
|
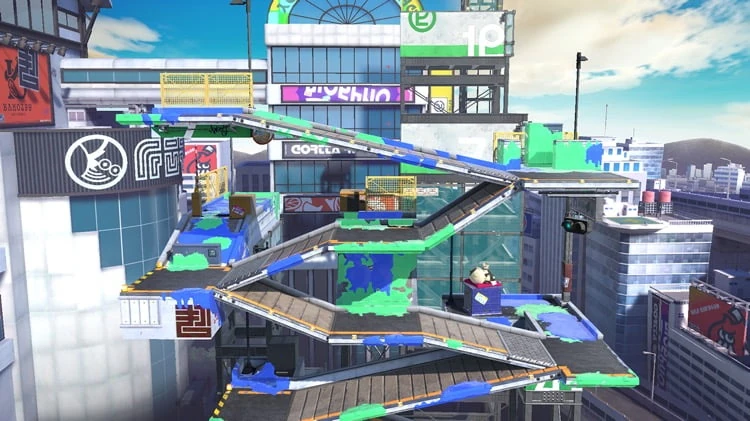
|
|
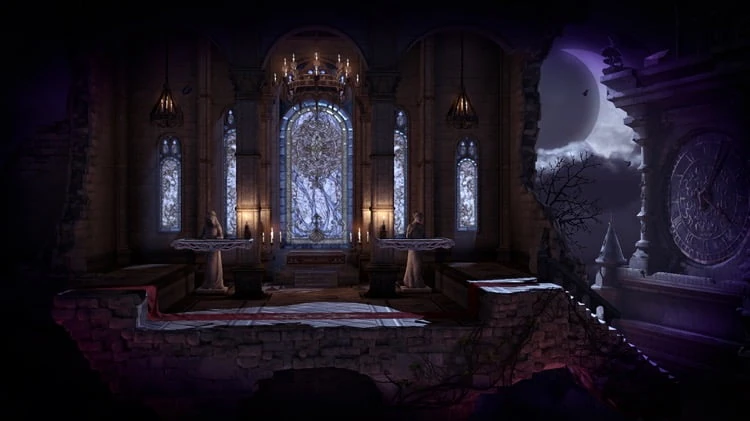
|
|
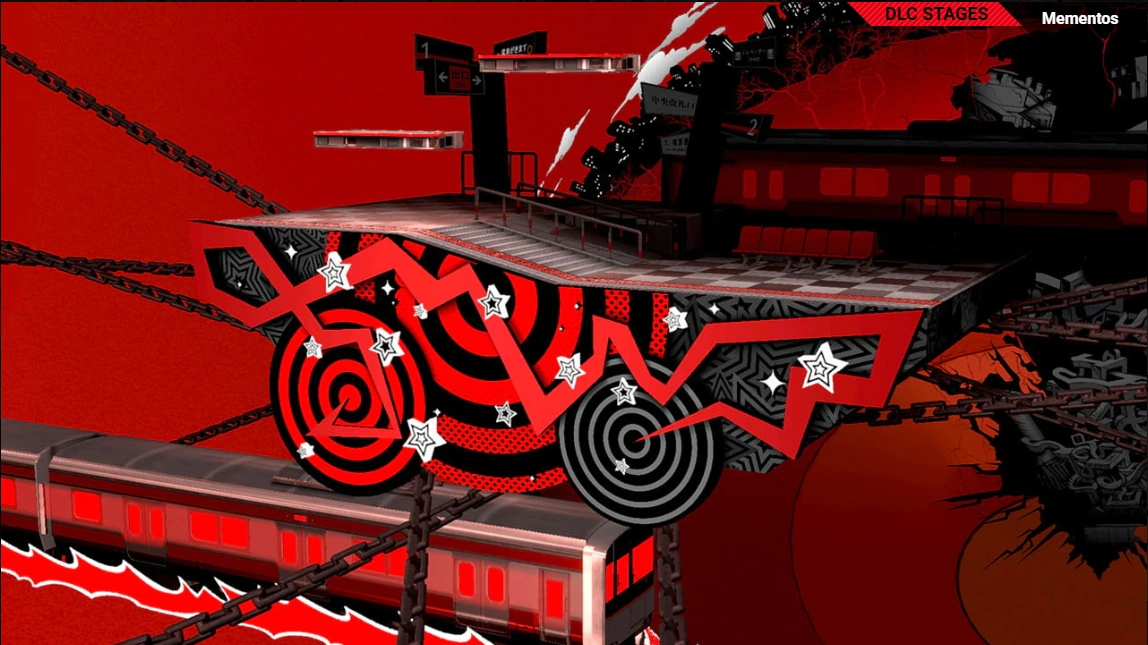
|
|
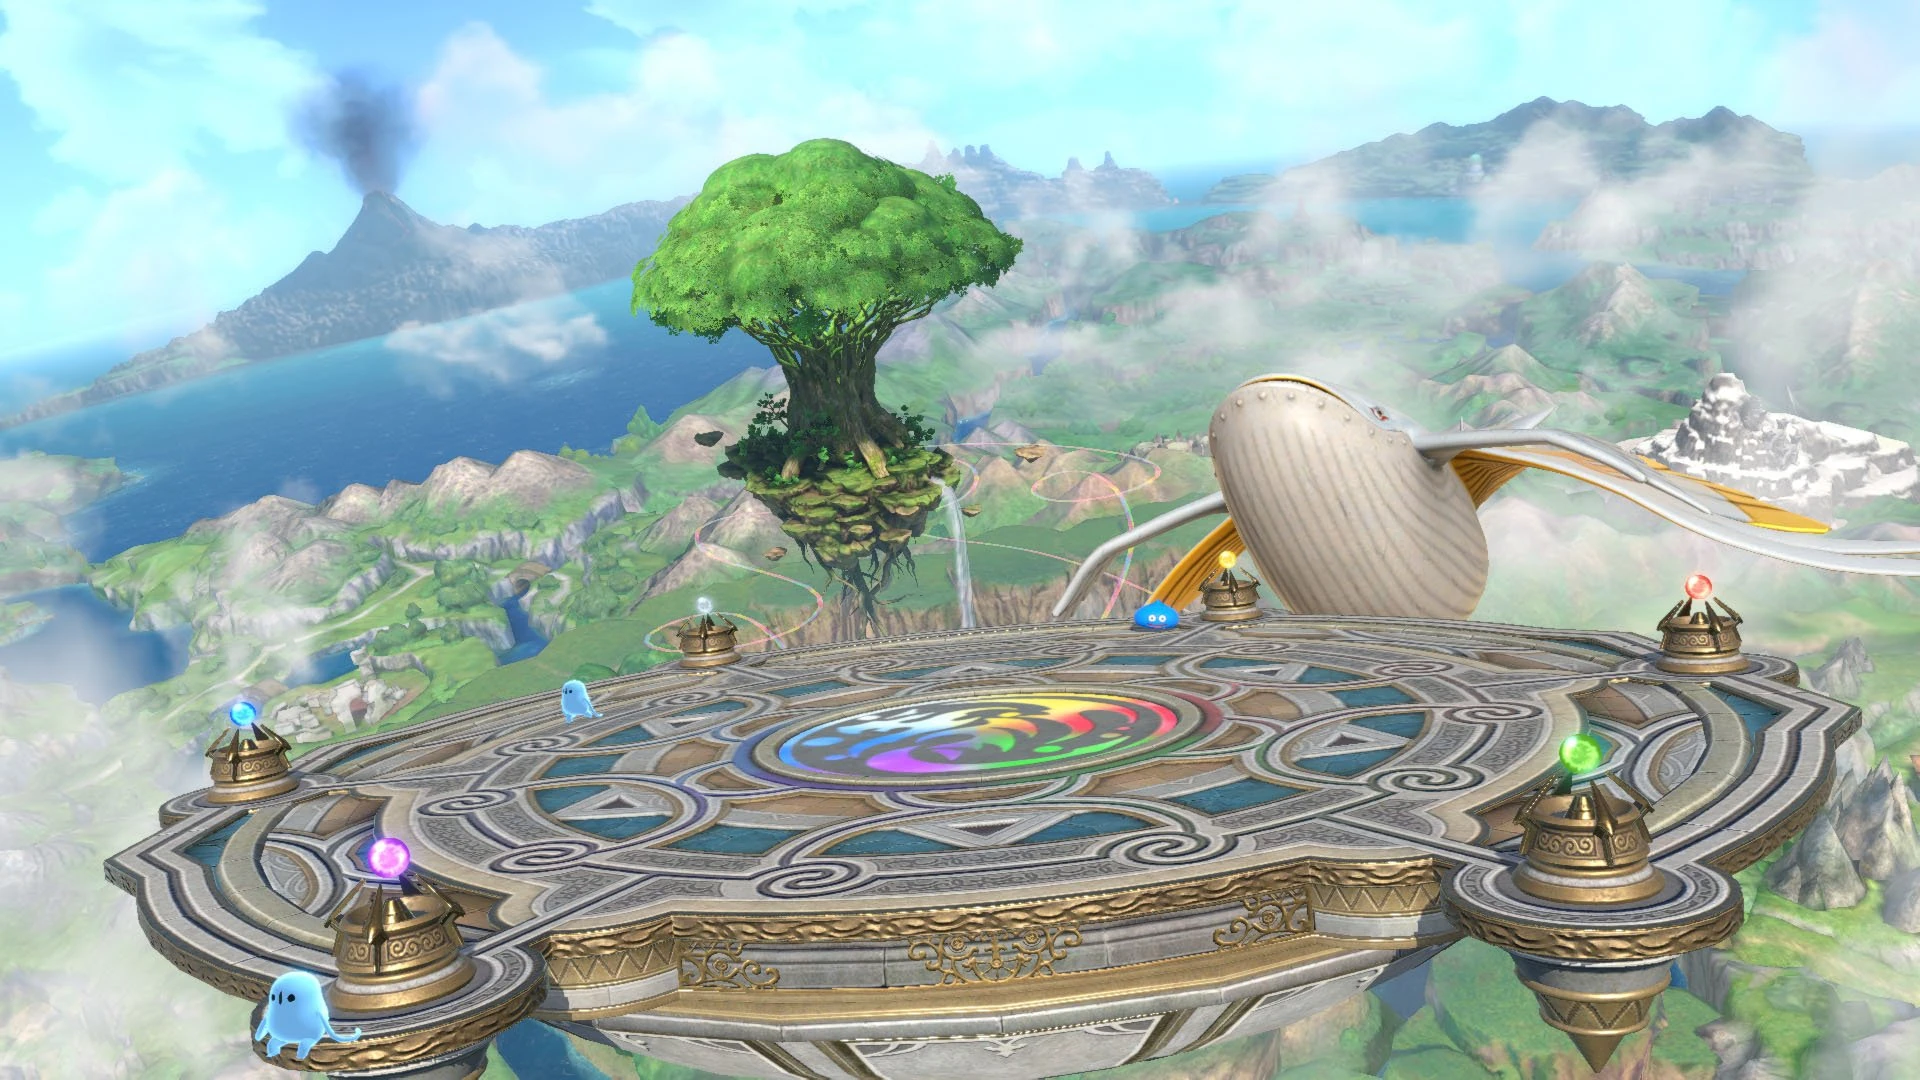
|
|
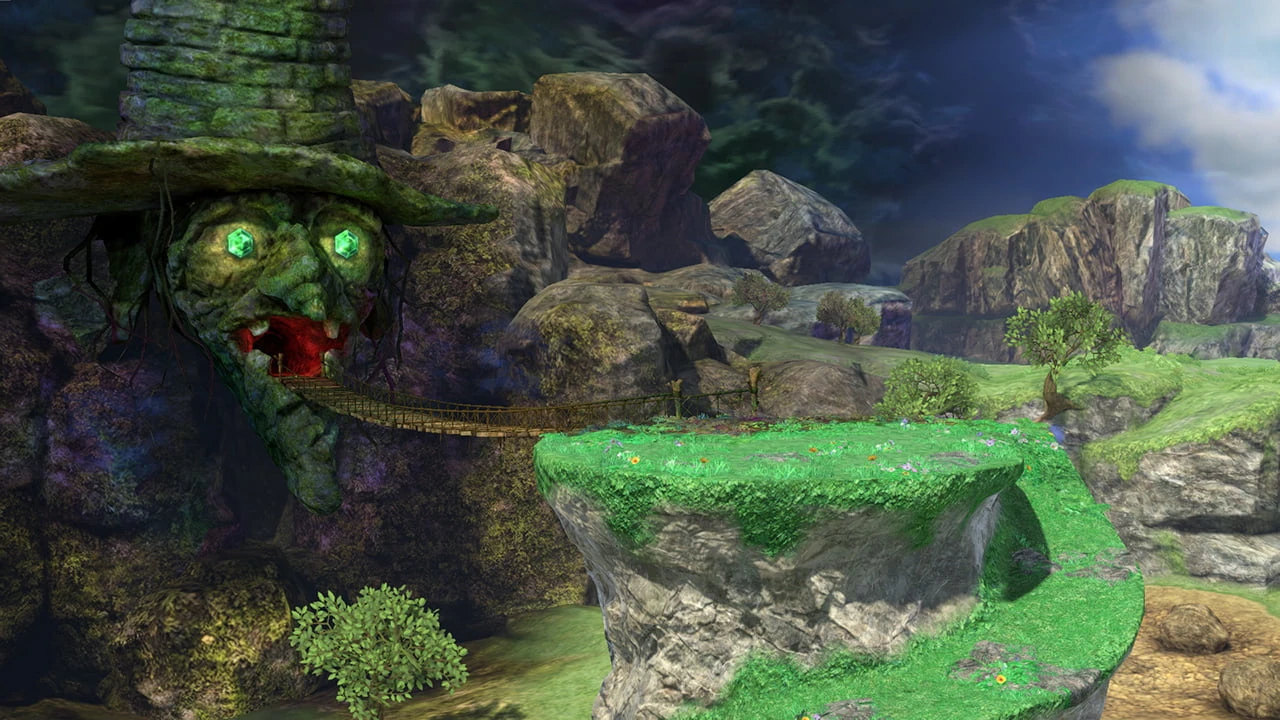
|
|
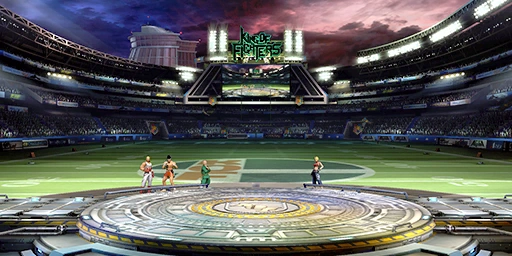
|
|
New Stages[]
Like it's older brothers, Super Smash Bros. Swansong has plenty of new arenas to duke it out on, retaining the option of the three different Omega Forms and the stage hazard toggle. As of right now with DLC included, there are 118 new stages in the game.

|
|
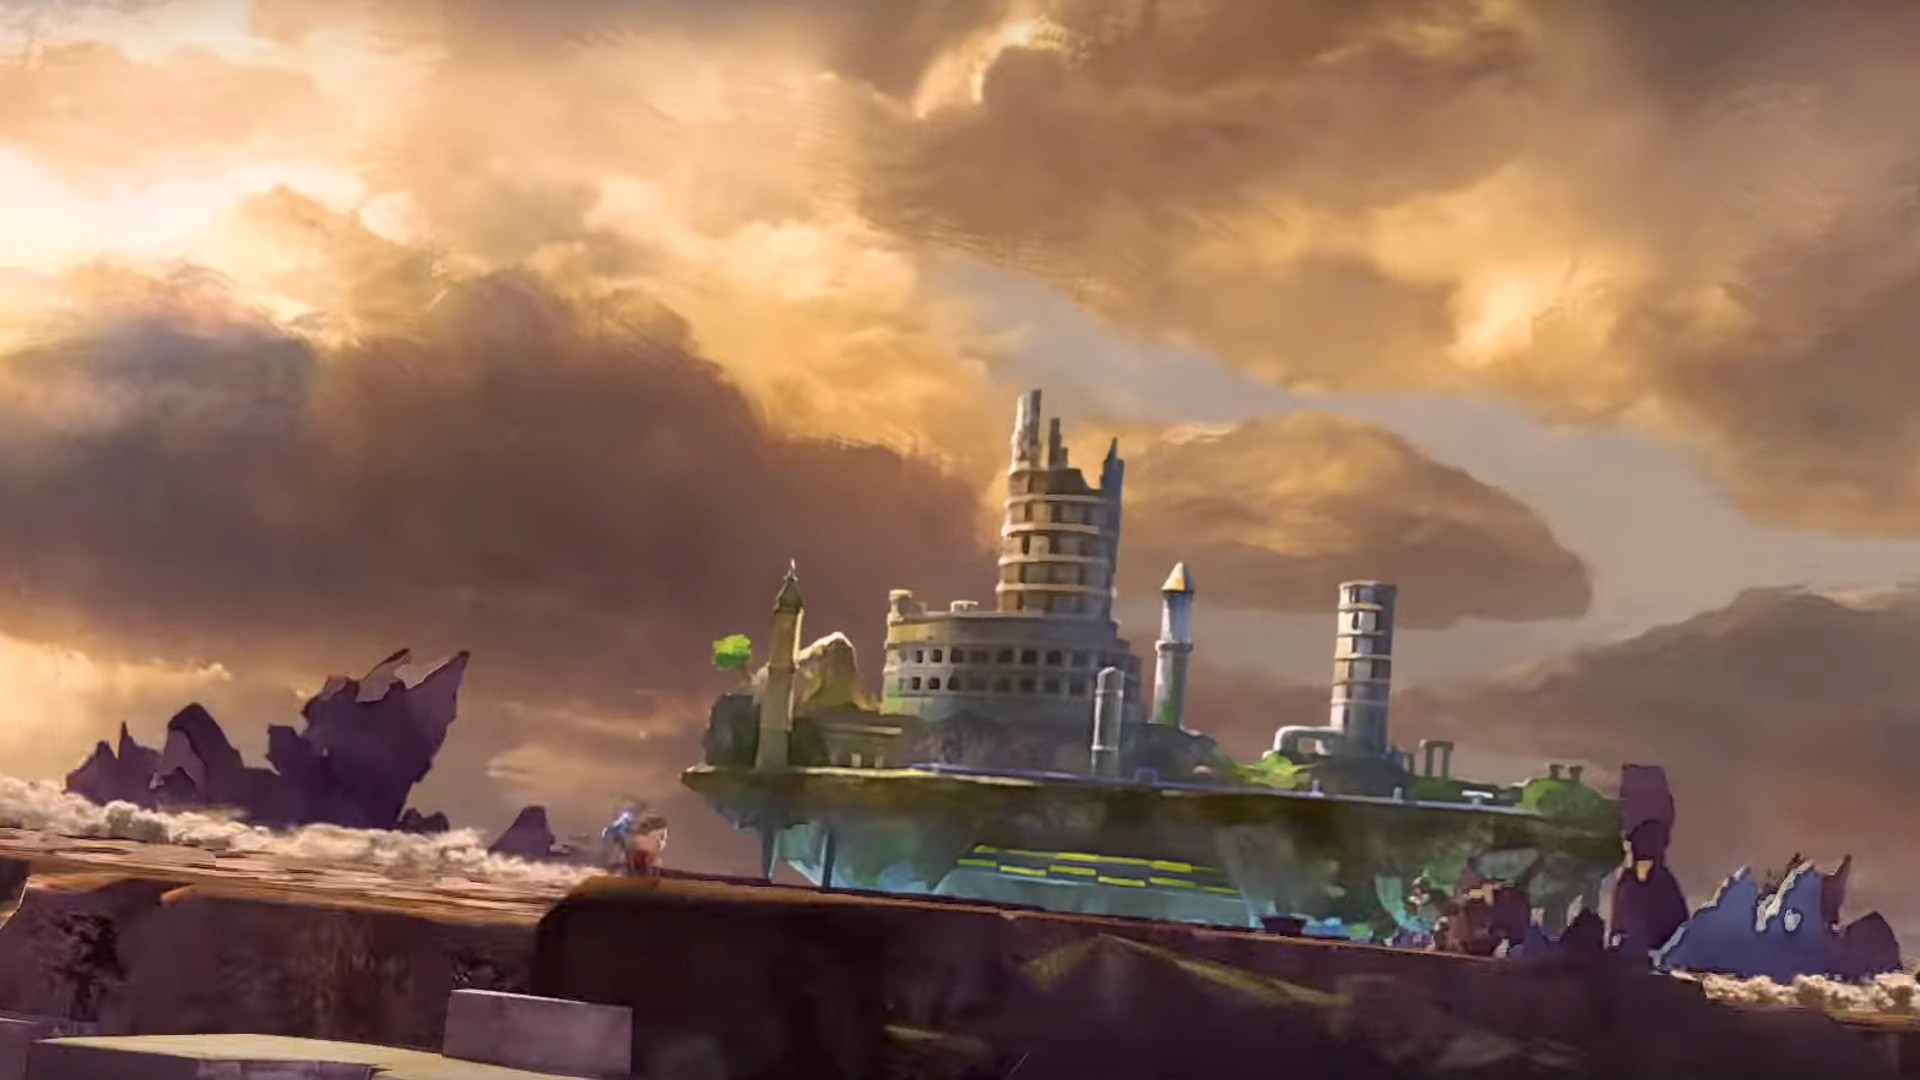
|
 |

|
 |
|
|
|
|

|
|

|
|

|
|

|
|

|
|

|
|

|
|

|
|

|
|

|
|

|
|

|
|

|
|

|
|

|
|

|
|

|
|

|
|

|
|

|
|

|
|

|
|

|
|

|
 |

|
|

|
|

|
|

|
|

|
|

|
|

|
|

|
|

|
|

|
|

|
|

|
|

|
|

|
|

|
|

|
|

|
|

|
 |

|
|

|
|

|
|

|
|

|
|

|
|

|
|

|
|

|
|

|
|

|
|

|
|

|
|
|
|
|
|

|
|

|
|

|
|

|
|

|
|

|
|

|
|

|
|

|
|

|
|

|
|

|
|

|
|

|
|

|
|

|
|

|
|

|
 |

|
|

|
|

|
|

|
|

|
|

|
|

|
|

|
|

|
|

|
|

|
|

|
 |
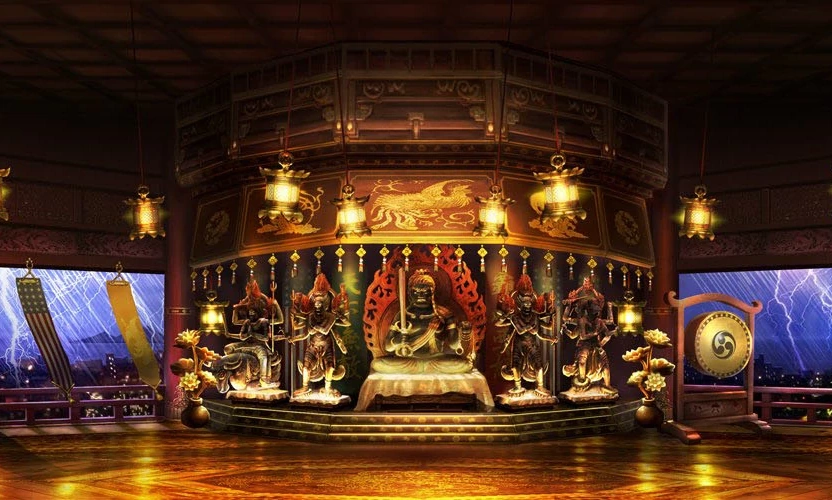
|
|

|
|
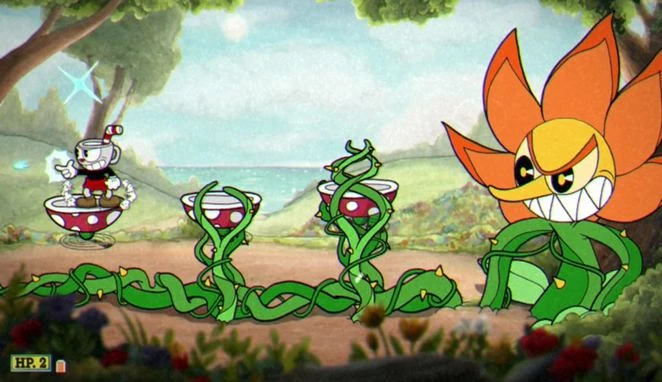
|
|

|
|

|
|

|
|
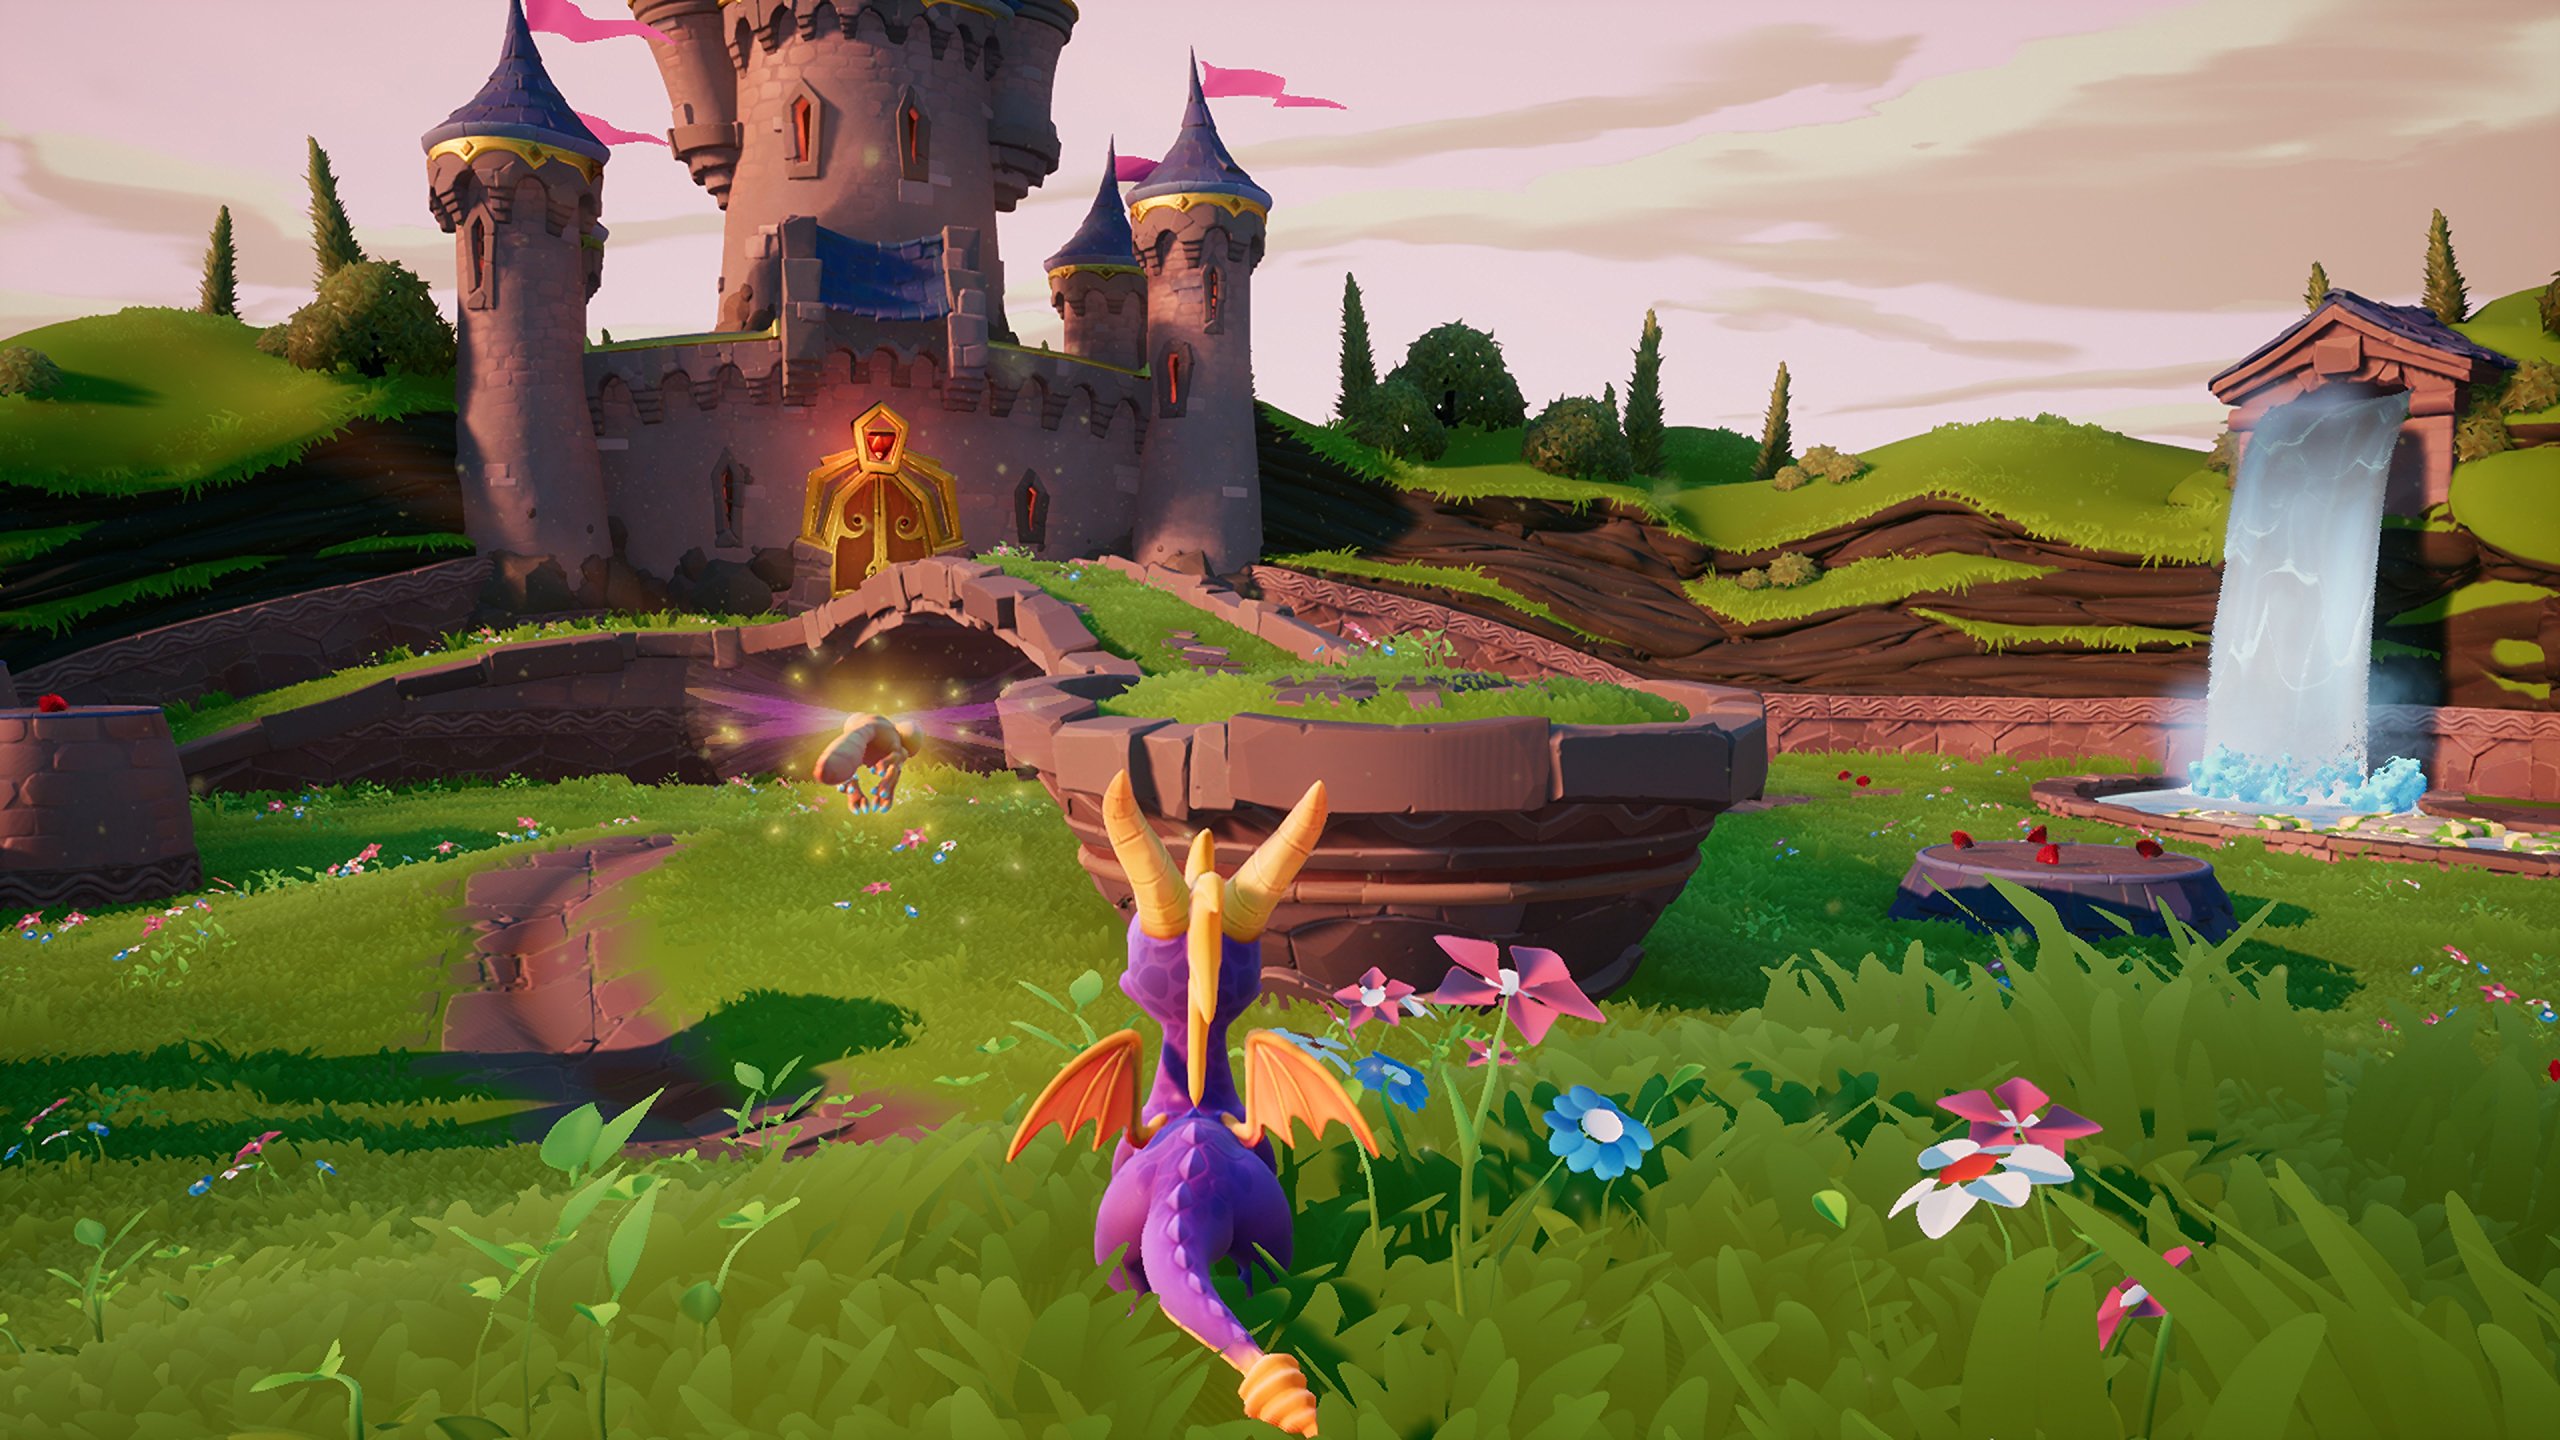
|
|

|
|

|
|

|
|

|
|

|
|

|
|
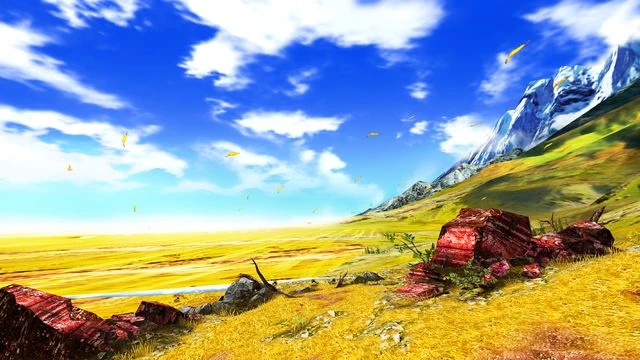
|
|

|
|

|
|

|
|

|
|
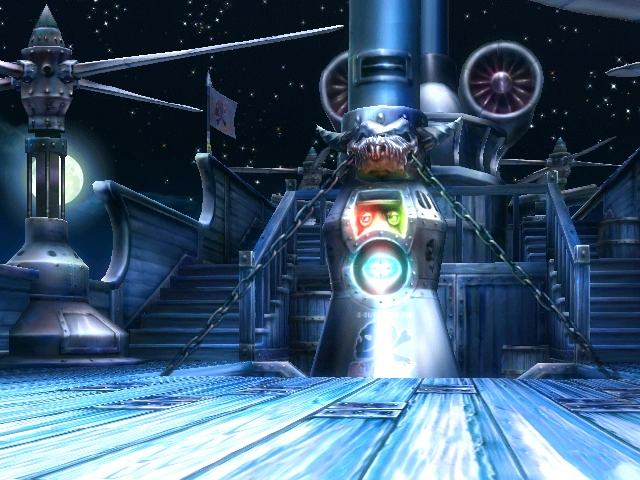
|
|

|
|

|
|

|
|

|
|

|
|

|
|

|
|

|
|

|
Items  []
[]
Almost every single item from across the series has been brought back for Super Smash Bros. Swansong. In addition, many new items have been added to spice up the gameplay, spanning across multiple franchises and genres.
|
|
|
|

|
|
|
|
|
|
|
|
|
|
|
|
|
|
|
|
|
|
|
|
|
|
|
|
|
|
|
|
|
|
|
|
|
|
|
|
|
|
|
|

|
|
|
|
|
|
|
|
|
|
|
|
|
|
|
|
|
|
|
|

|
|
|
|

|
|

|
|
|
|
|
|
|
|

|
|
|
|
|
|
|
|
|
|
|
|
|
|
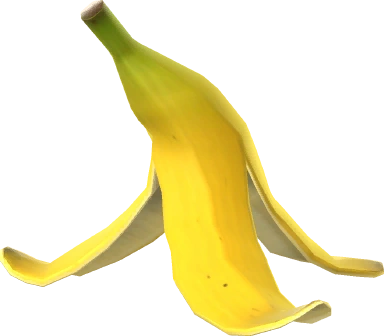
|
|
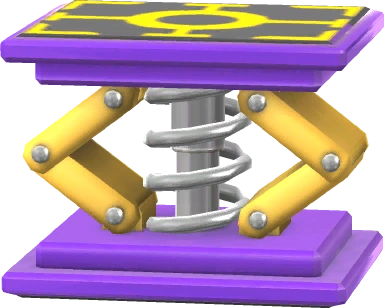
|
|
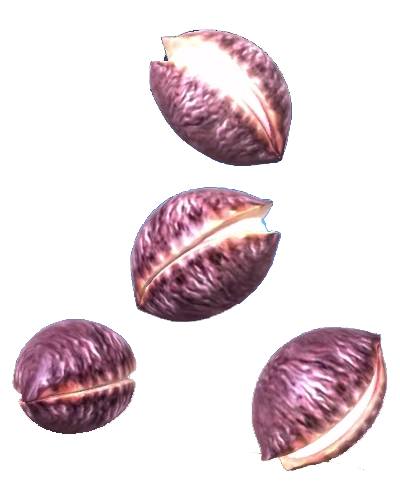
|
|
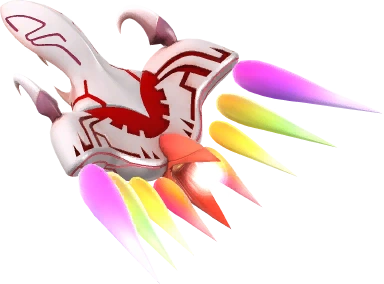
|
|
|
|
|
|
|
|

|
|
|
|
|
The Drill Arm can be used in two ways. One is close-quarters physical attacks, while the other involves launching the drill off at an opponent and then throwing the handle in front of you in a straight path. |
|
|
|
|
|
|
|
|
|
|

|
|
|
|
|
|

|
|

|
|
|
|
|
|
|
|
|
|
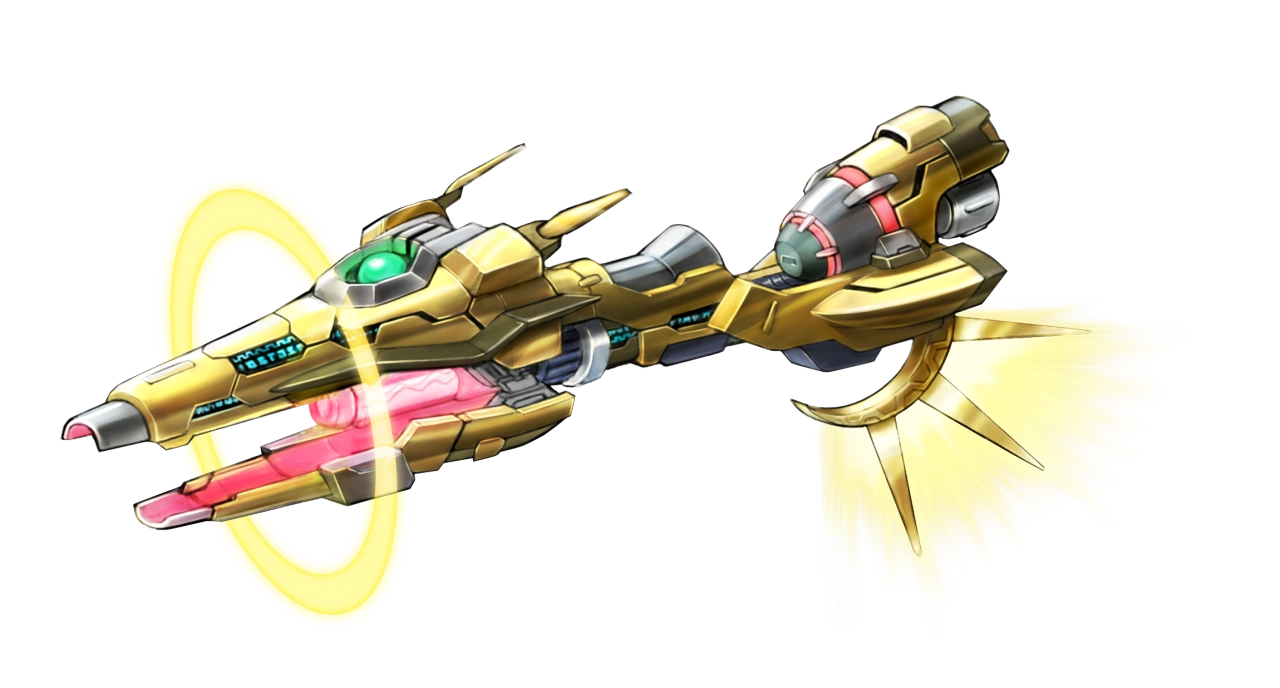
|
|
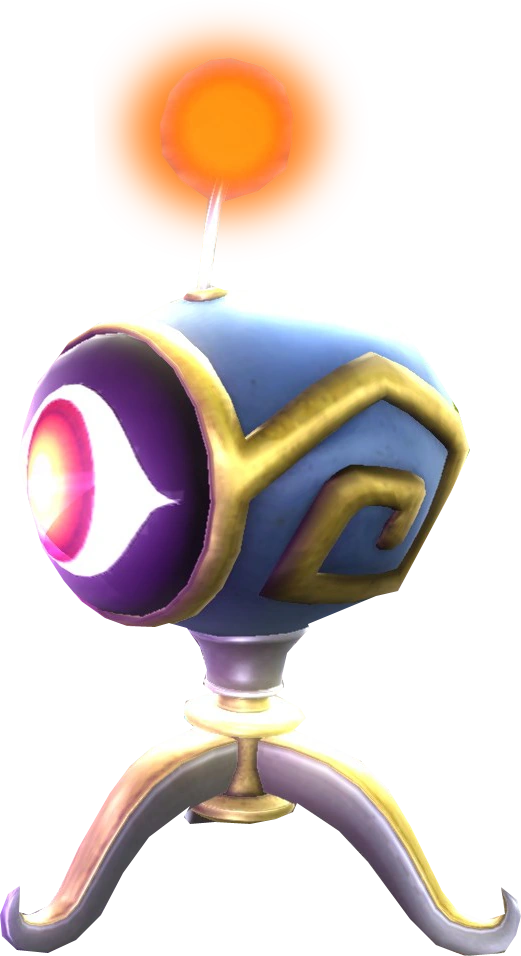
|
|
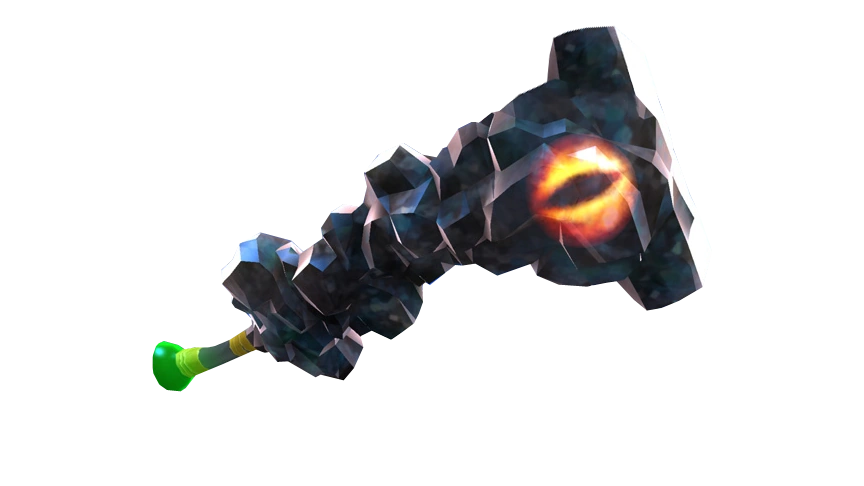
|
|
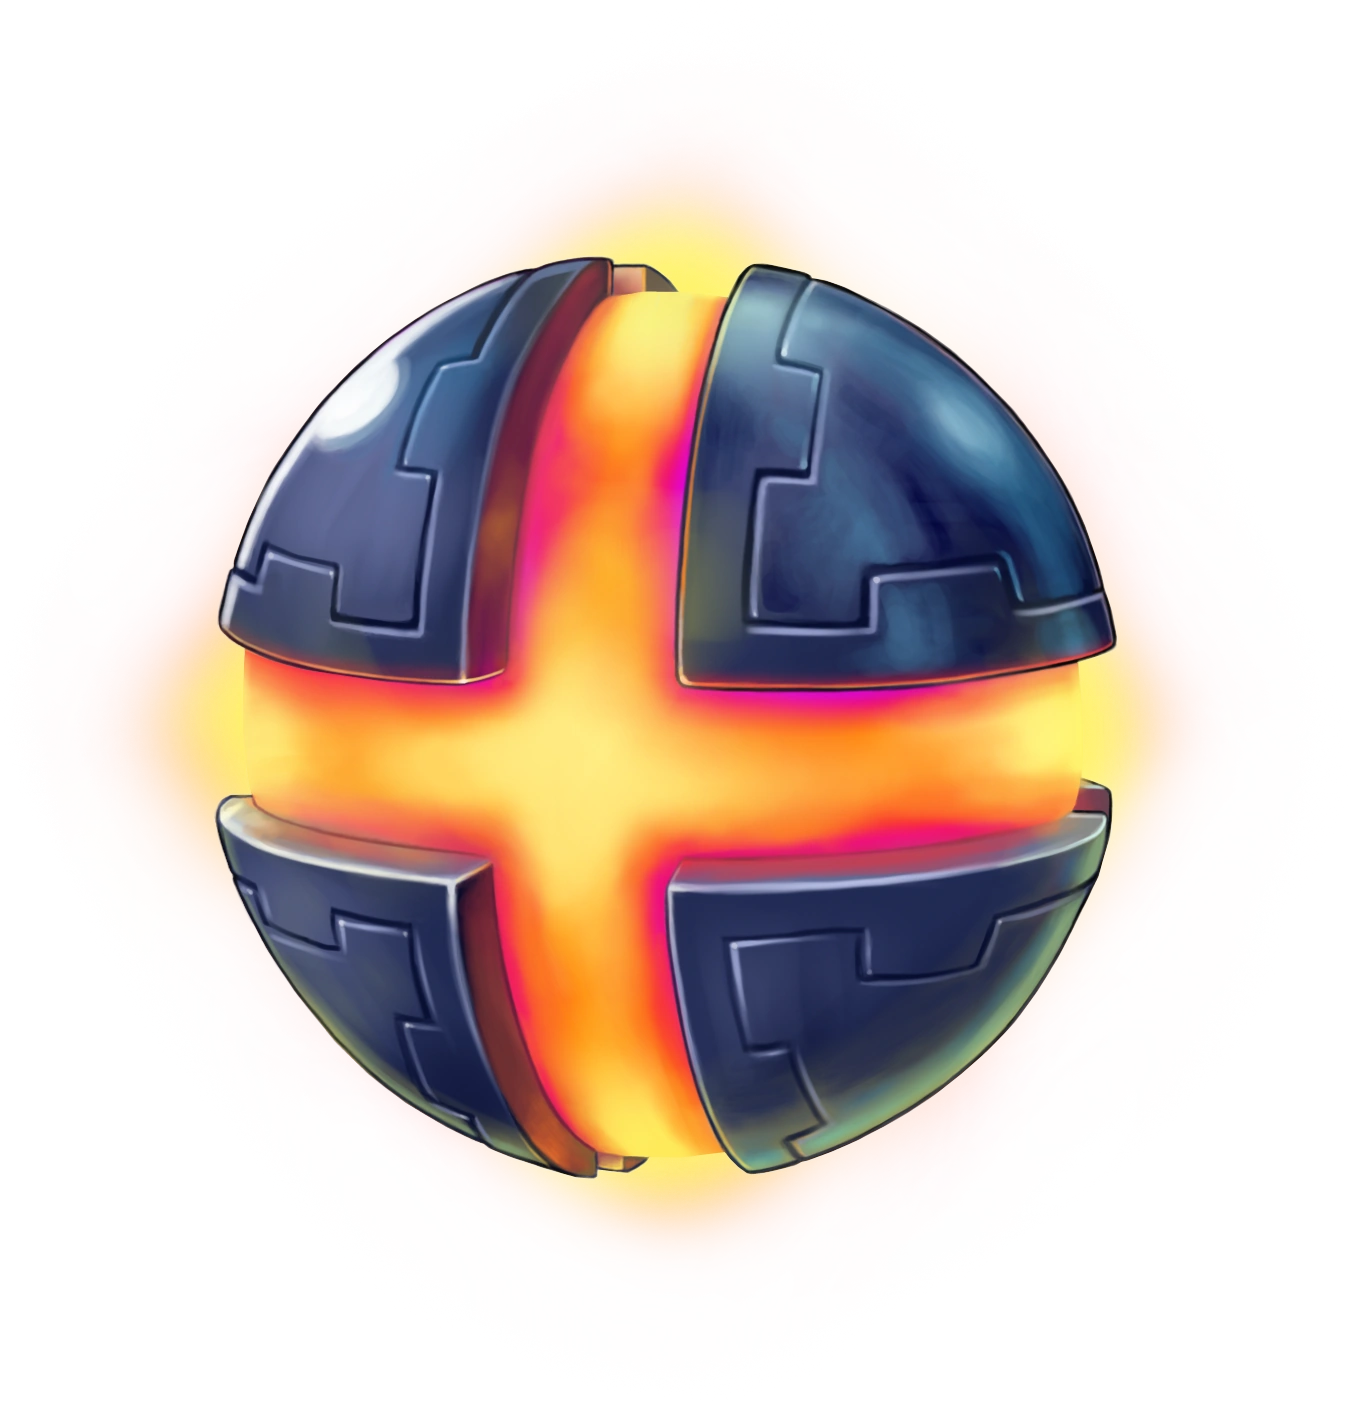
|
|
|
|
|
|
|
|
|
|

|
|
|
|
|
|
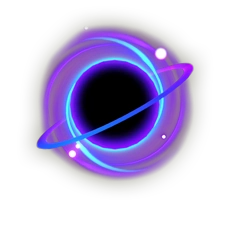
|
|

|
|
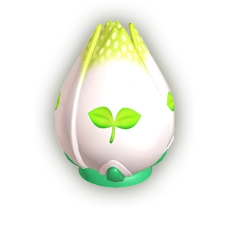
|
|
|
|
|
|
|
|
|
|

|
|

|
|
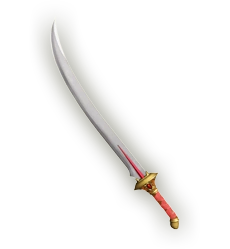
|
|
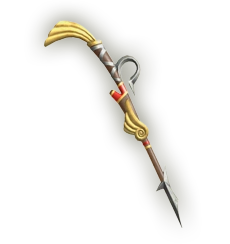
|
|
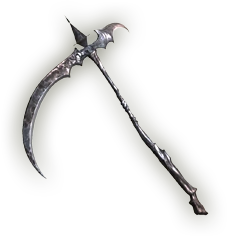
|
|

|
|

|
|

|
|
|
|
|
|

|
|

|
|
|
|

|
|

|
|

|
|

|
|

|
|

|
|
|
|

|
|

|
|

|
|

|
|

|
|
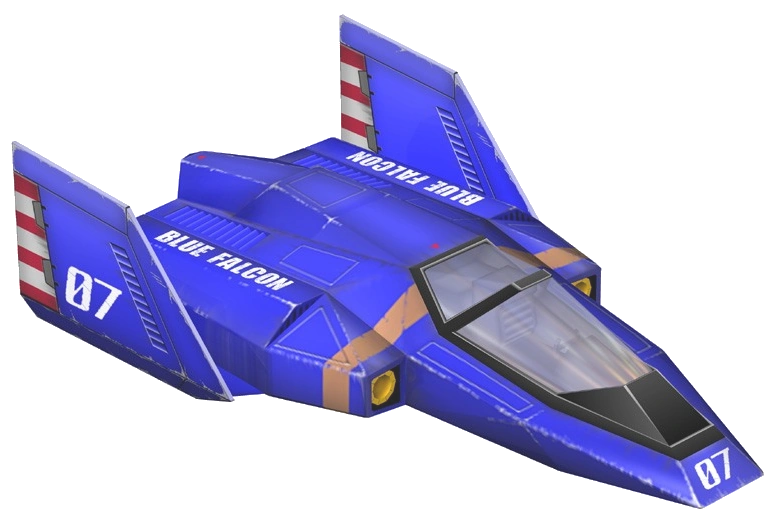
|
|

|
|

|
|

|
|

|
|

|
|

|
|

|
|

|
|

|
|

|
|

|
|

|
|

|
|

|
|
|
|

|
|

|
|

|
|

|
|

|
|

|
|

|
|

|
|
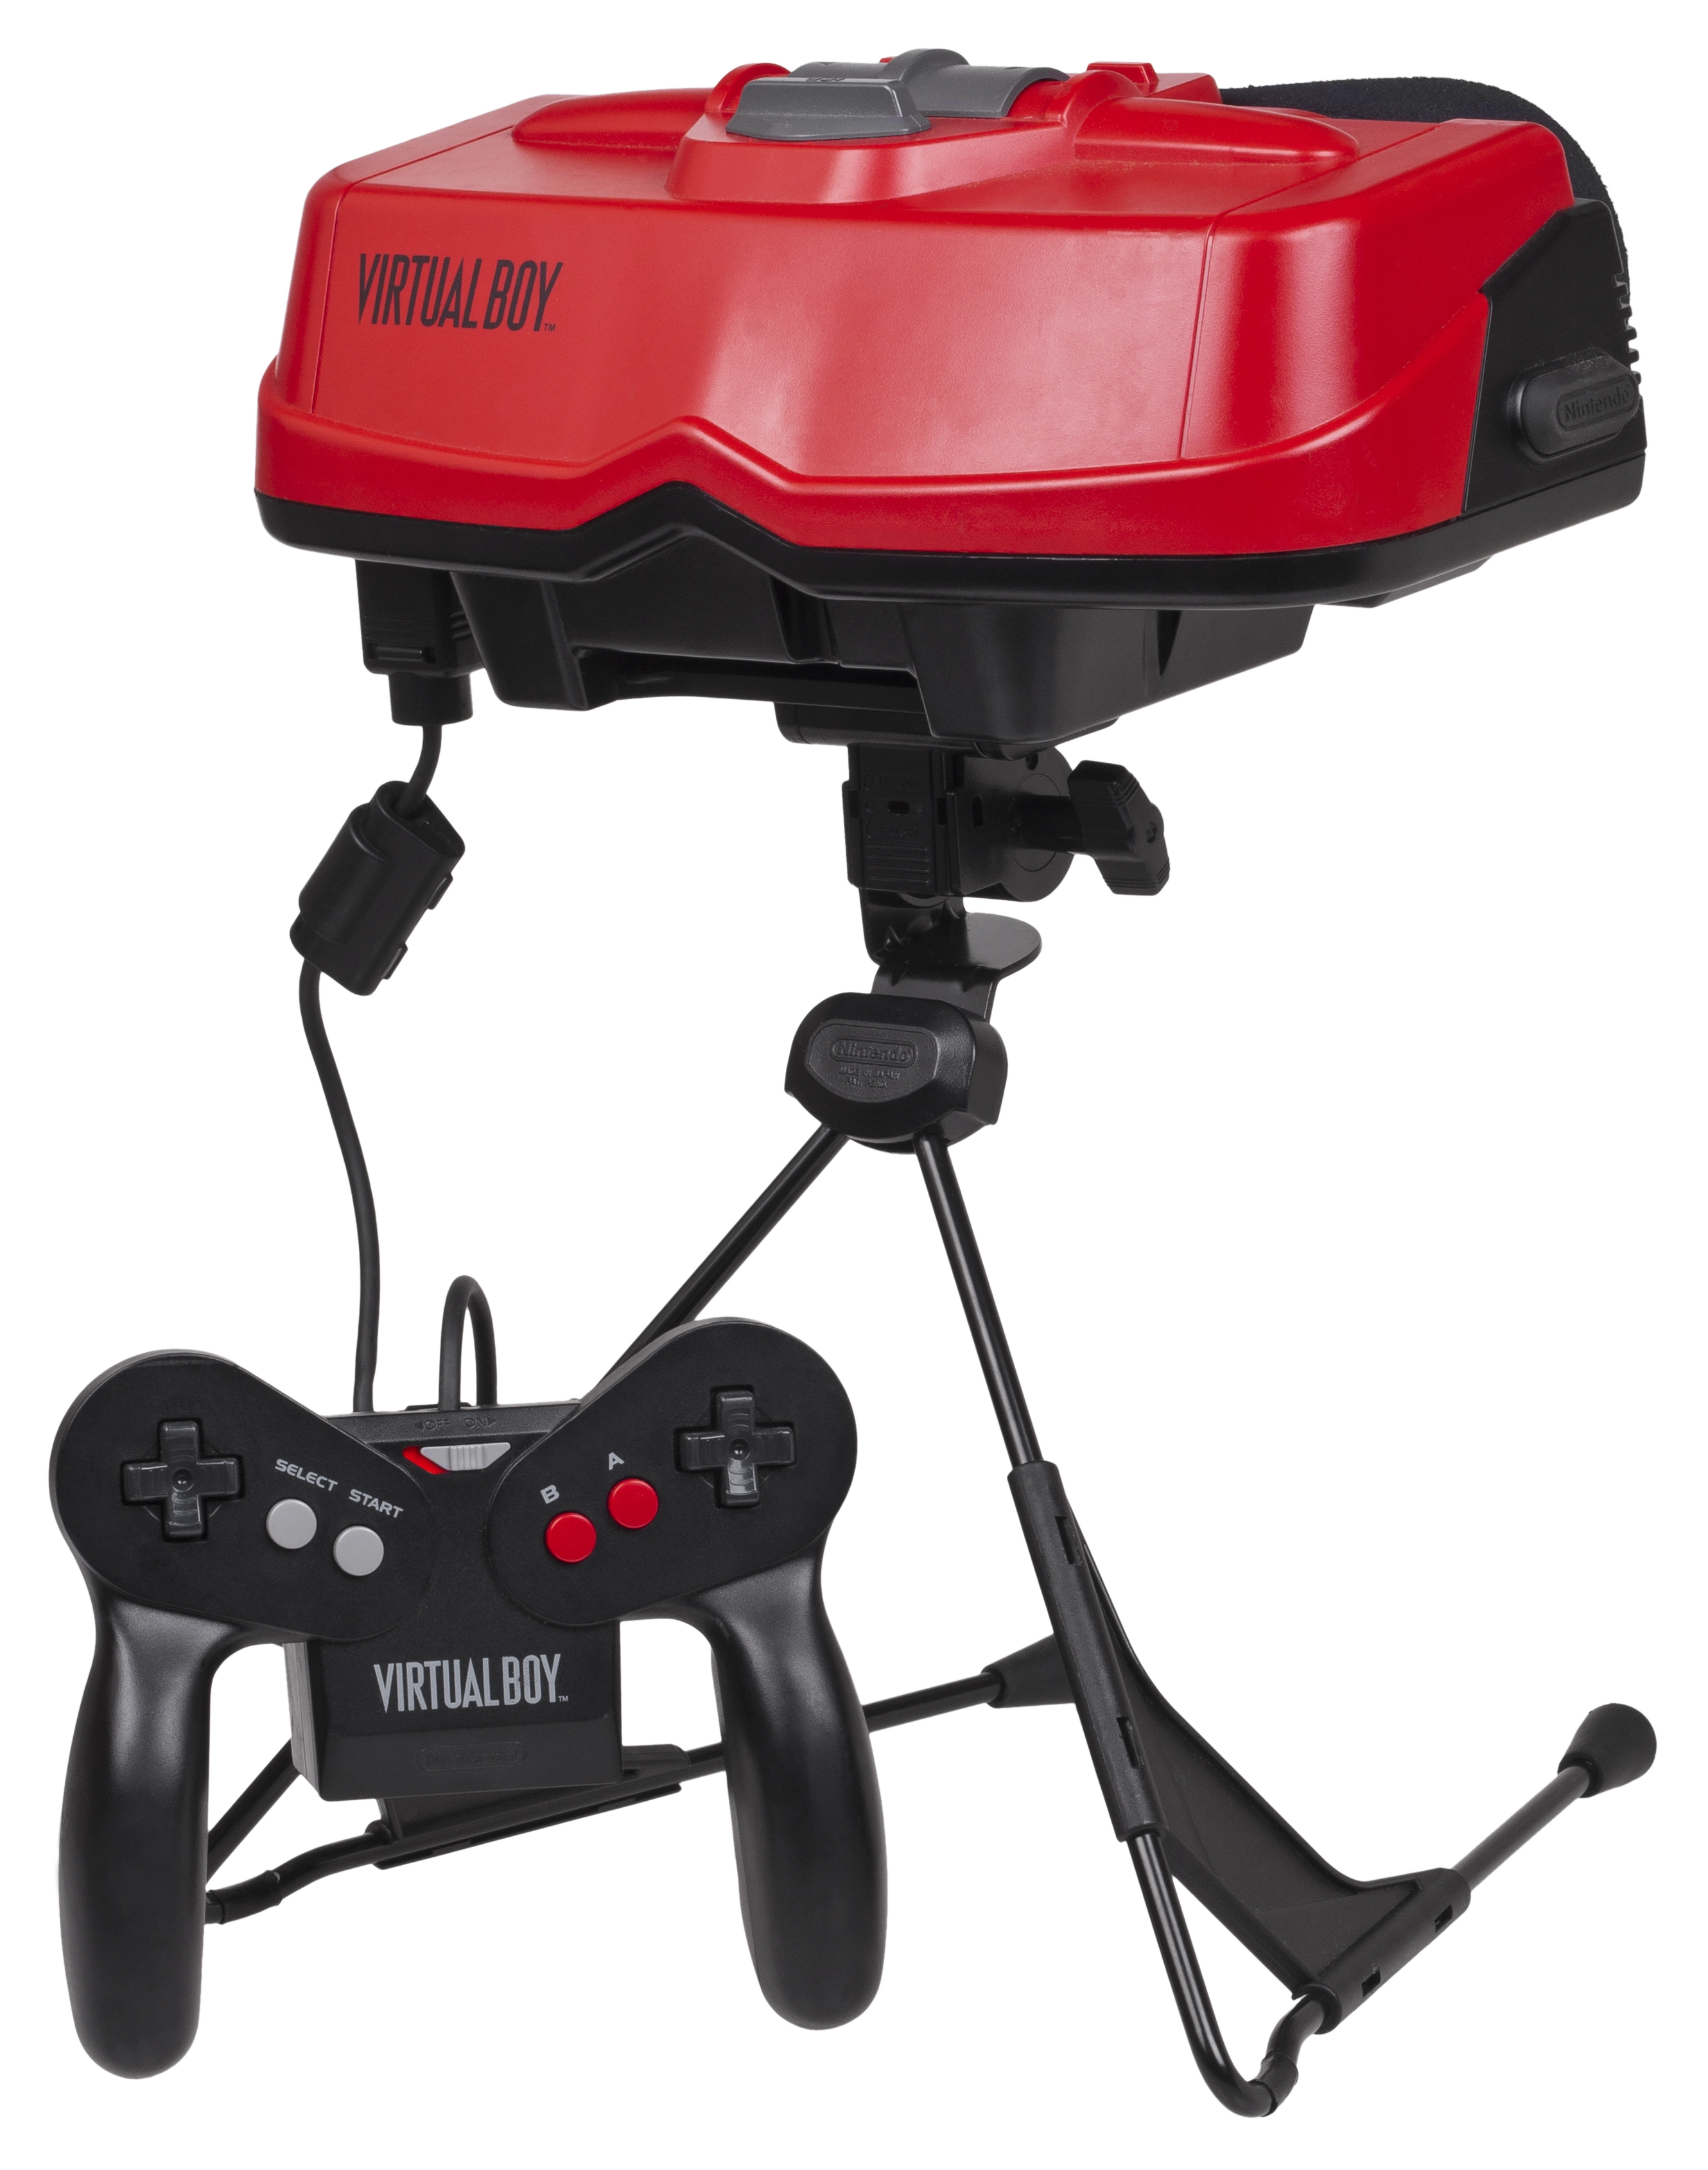
|
|
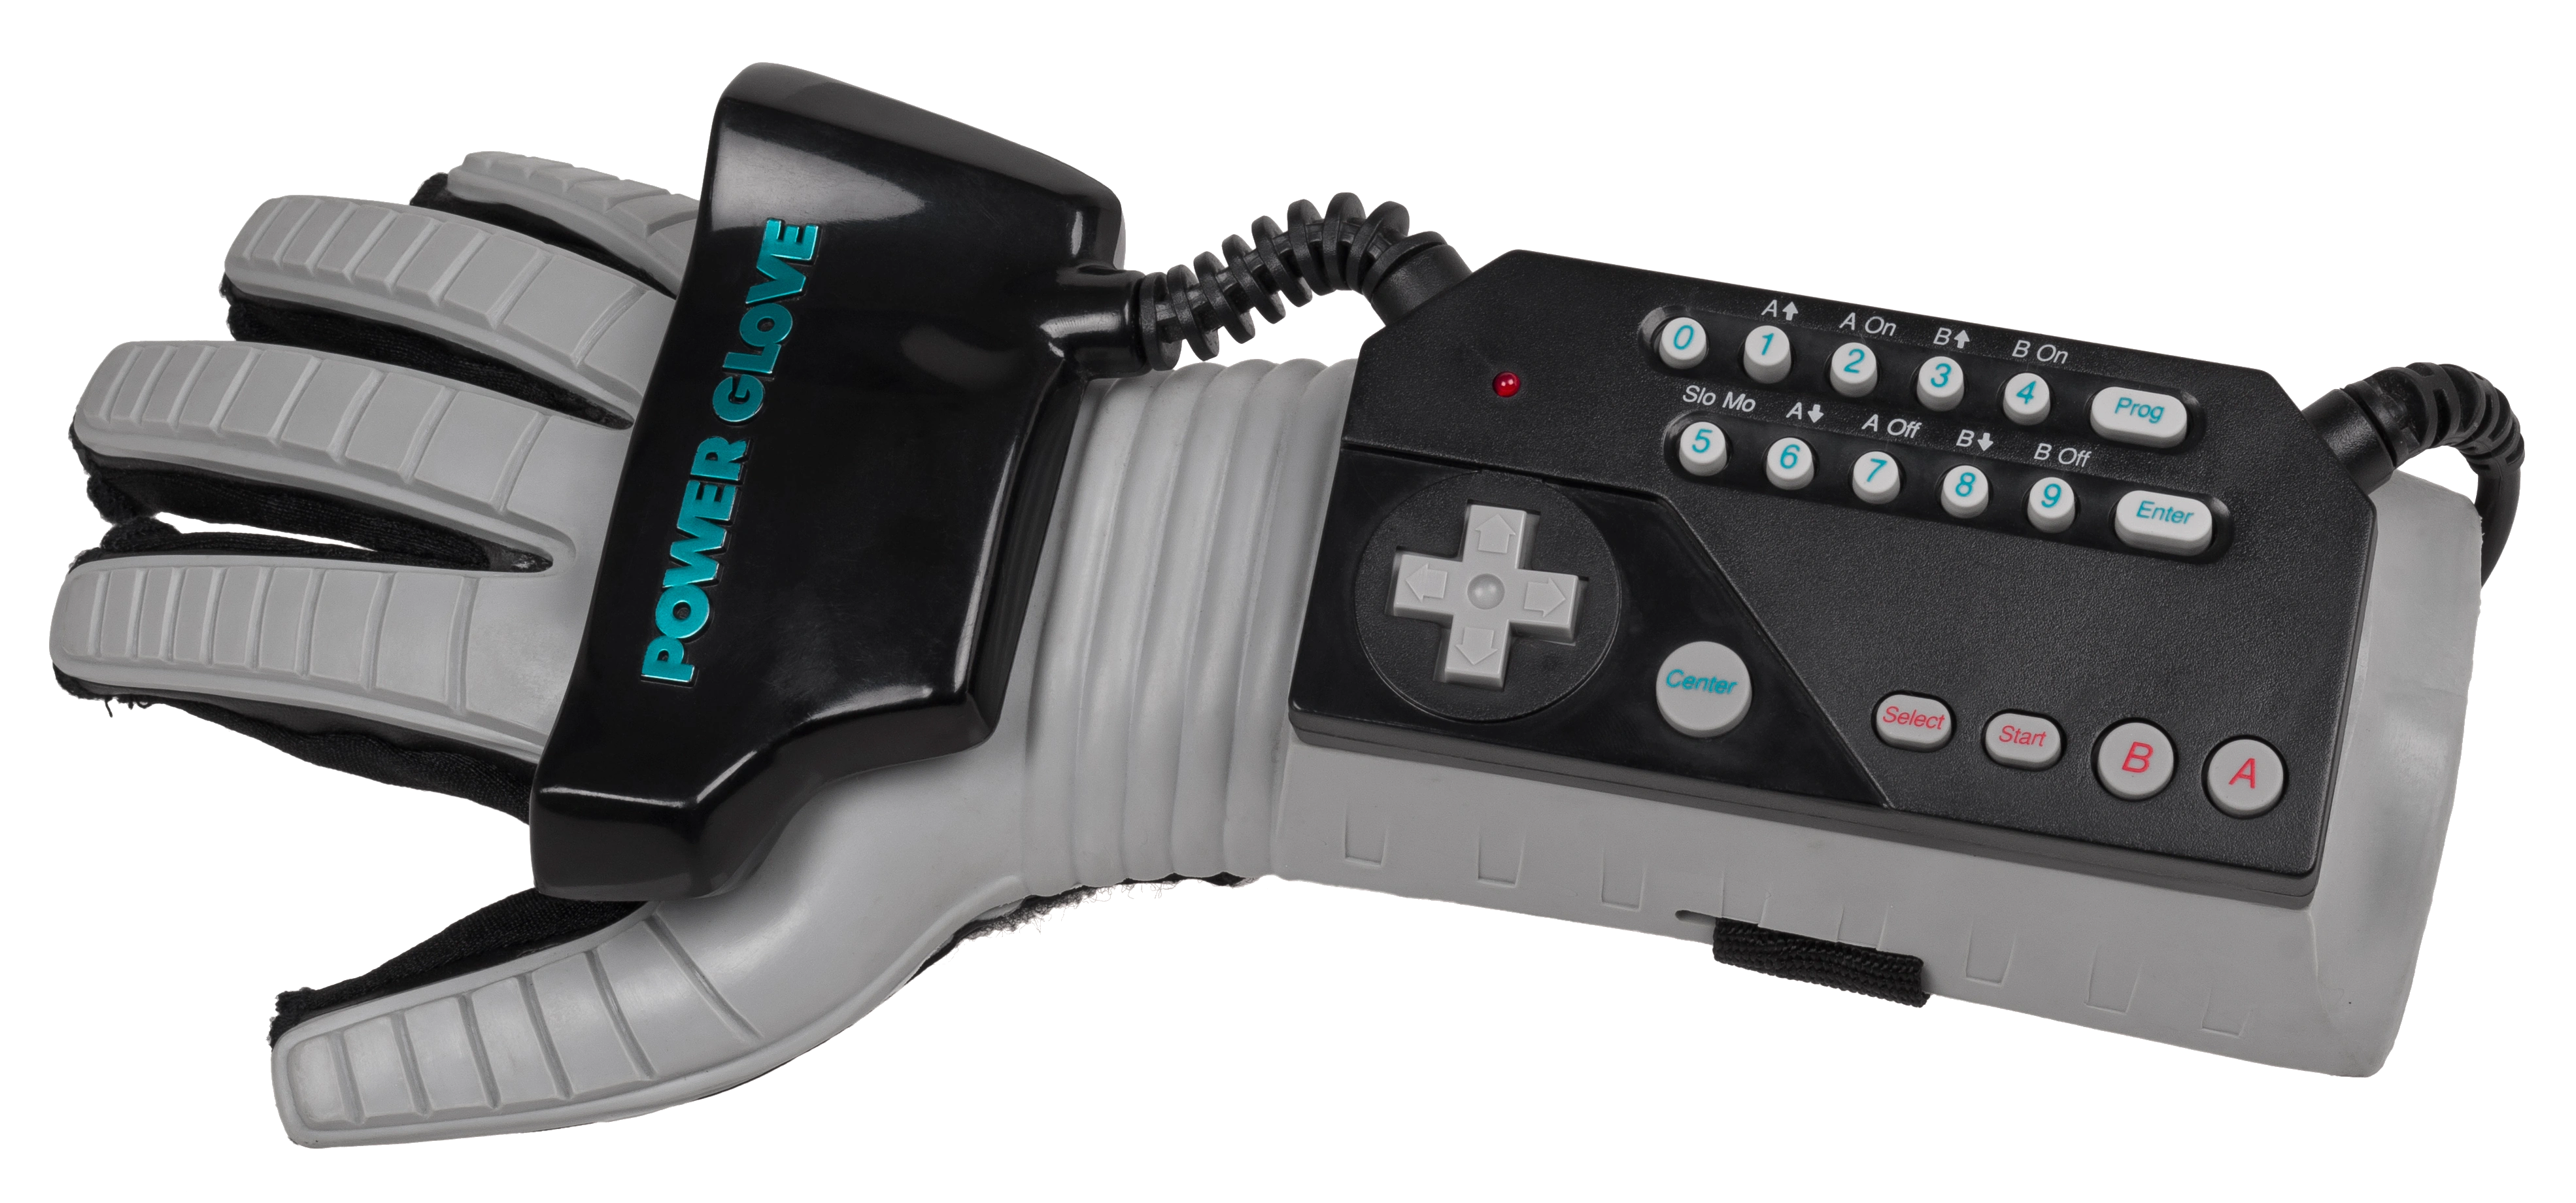
|
|

|
|
|
|
|
|
|
|
|
|

|
|

|
|

|
|

|
|

|
|

|
|

|
|

|
 |

|
|

|
|

|
|

|
|

|
|
|
|

|
|

|
|
Assist Trophies[]
Assist Trophies can be spawned by activating an Assist Capsule when it drops down on the stage you're fighting on. A majority of these assistants can be K.O.'d with only a select few not being able to be. All Assist Trophies are ordered by their appearance in the Smash Bros. series, spanning from Brawl to Swansong.
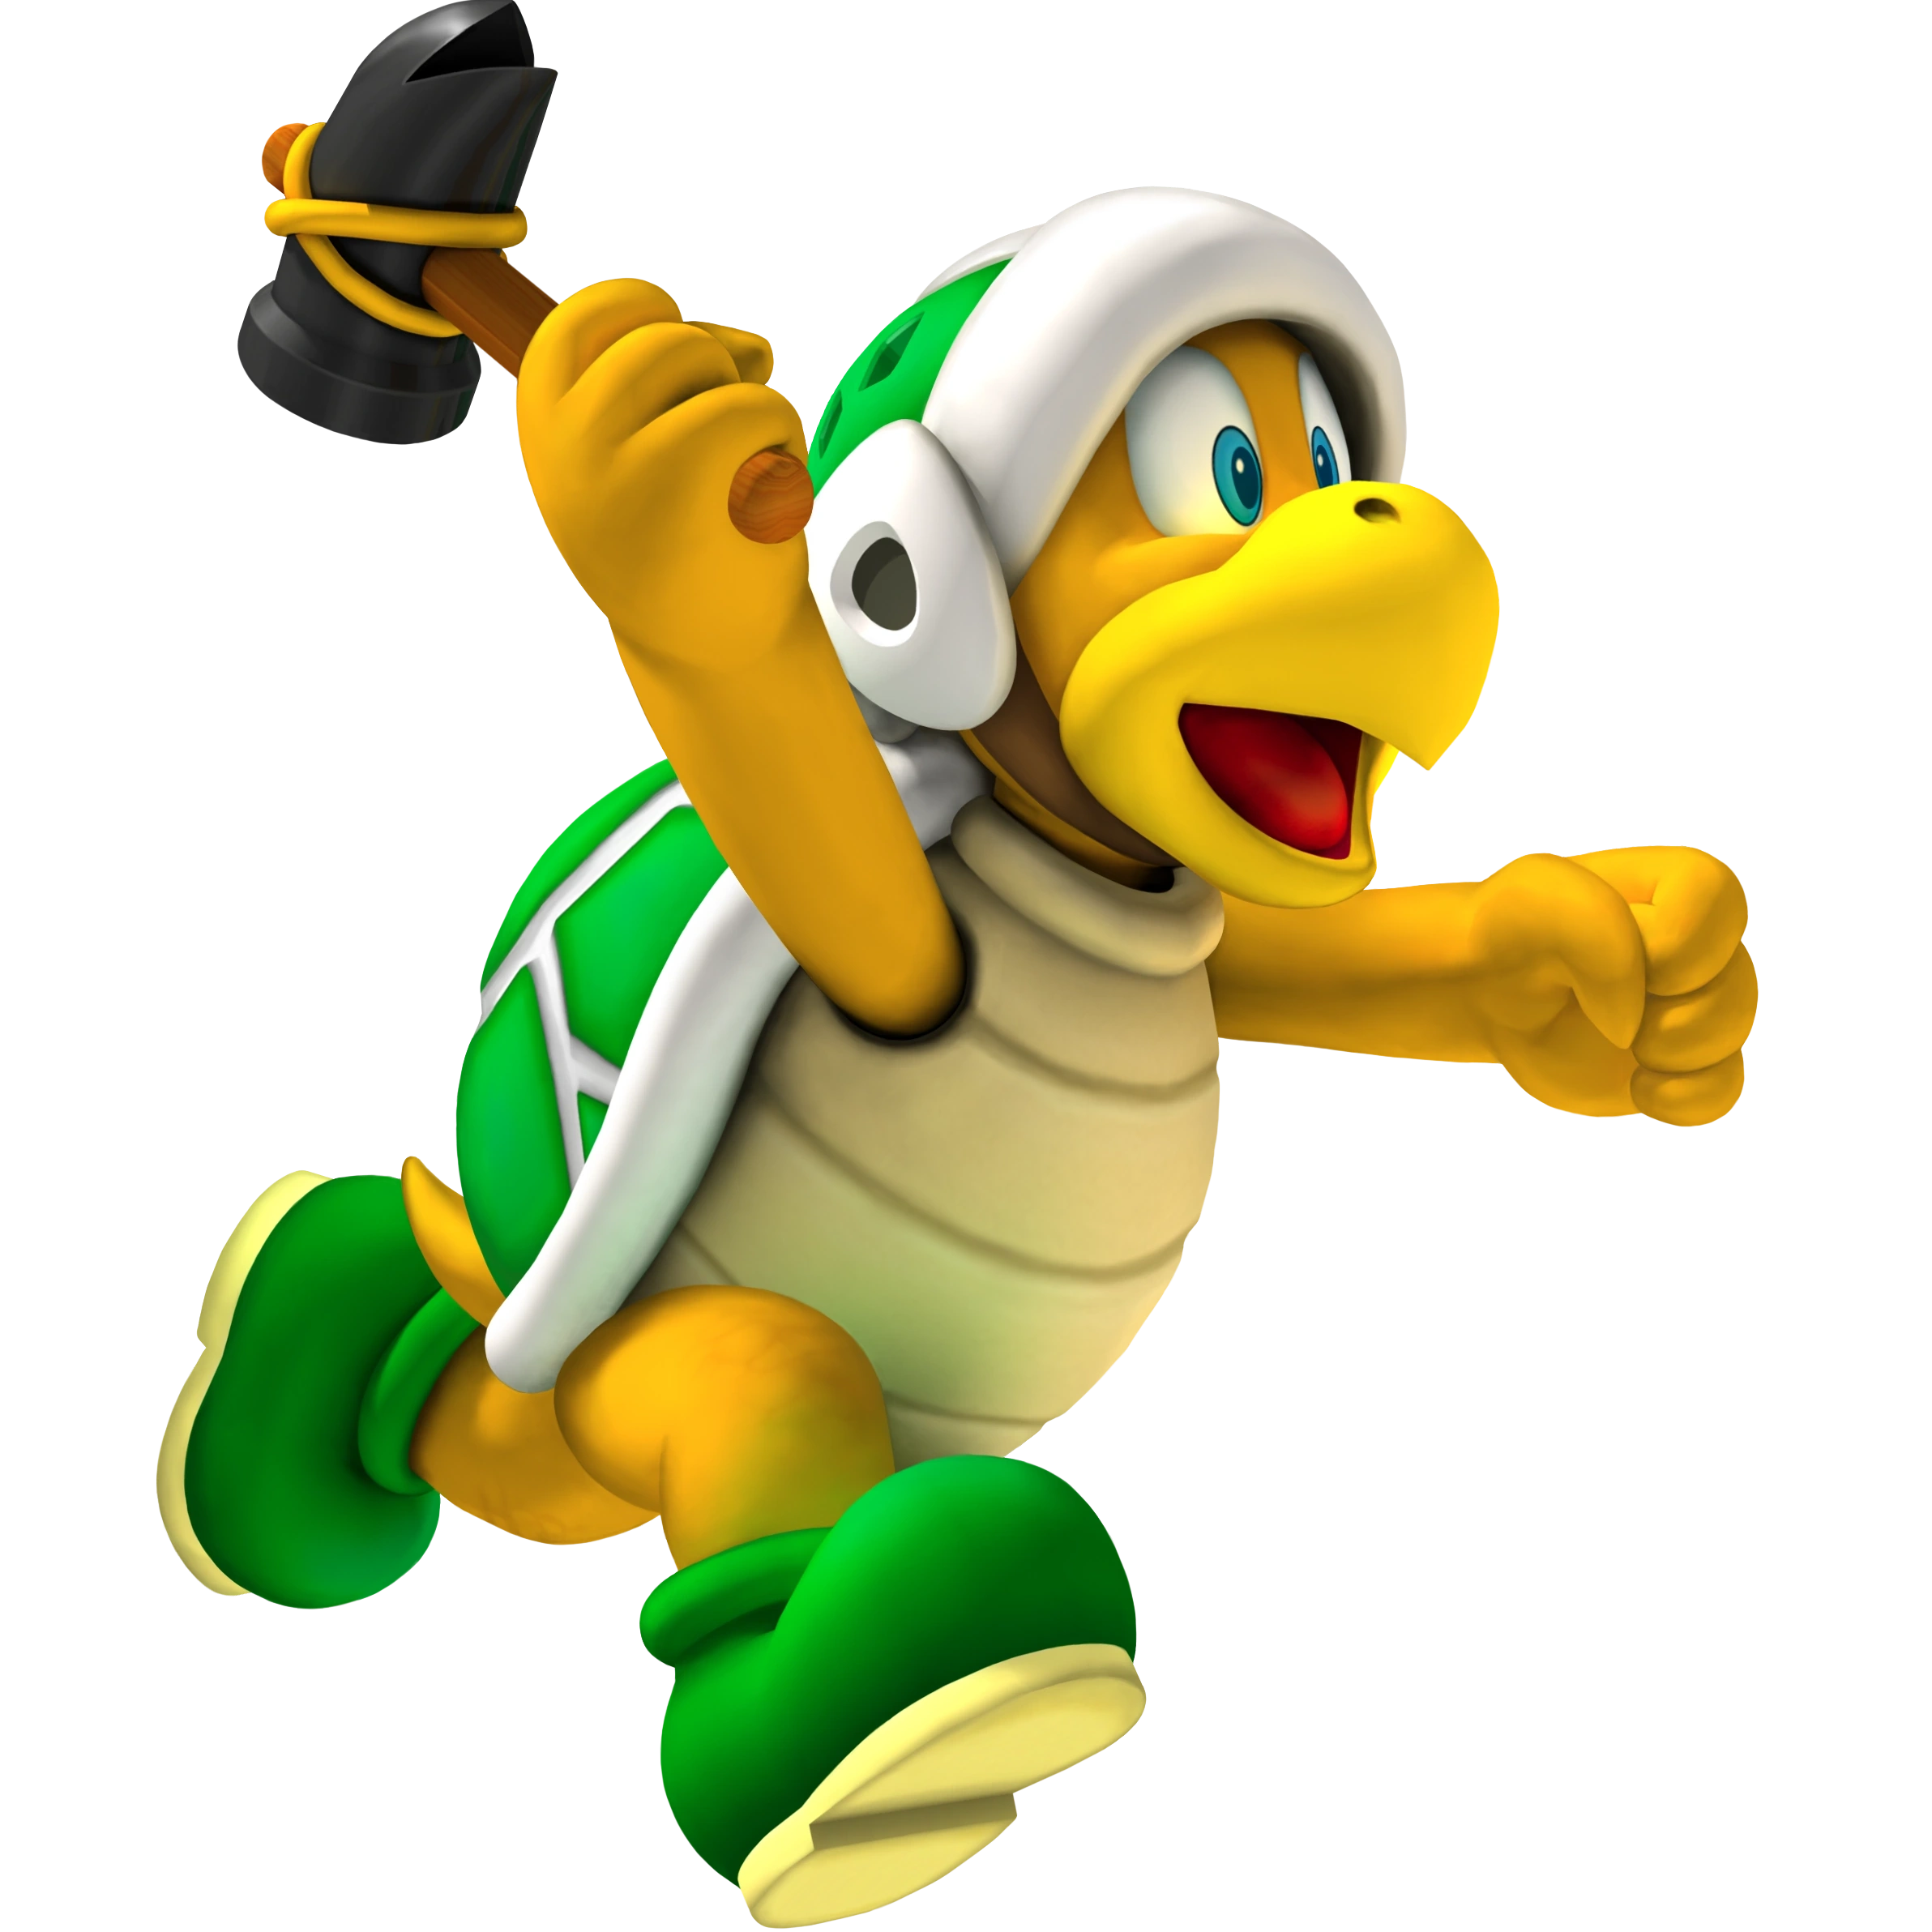
|
Hammer Bro. moves back and forth, jumping up and tossing hammers left or right that go in arc formations. The hammers do a lot of damage to whoever they hit, but have no effect if they land on the ground. |
|
Lakitu drops Spinies all over the stage, which proceeded to walk around and interfere with battles. The Spinies can be knocked back and retreat into their shells at the risk of the attack forcing the fighter to take damage. |
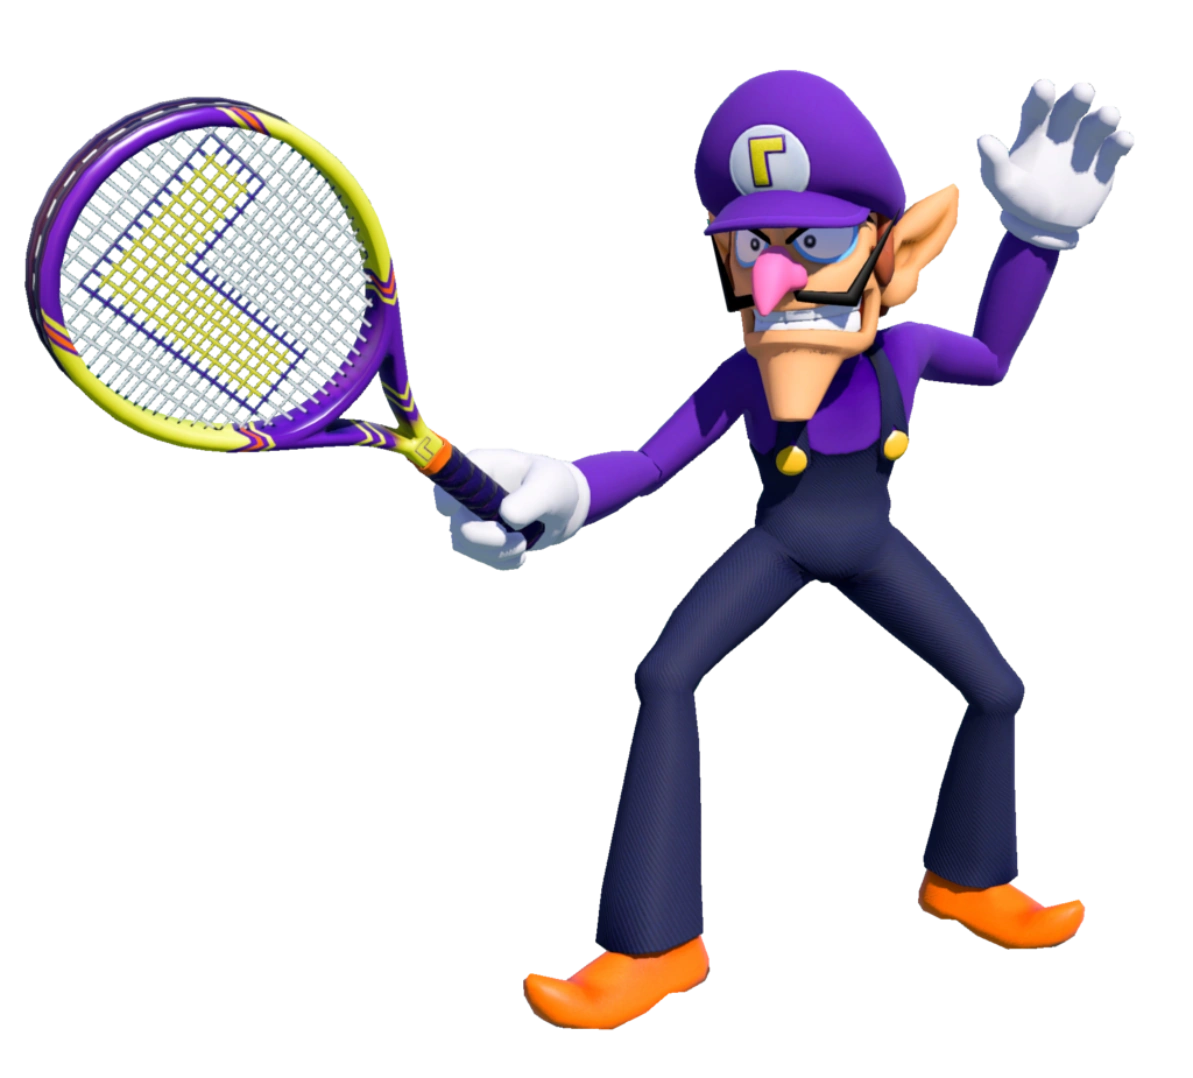
|
Waluigi, wielding a tennis racket, slams an enemy into the ground with his foot and repeatedly smashes them over the head with his tennis racket. He has a fifty percent chance of looking like his regular appearance or his Mario Tennis Aces garb. |

|
Tingle appears and unleashes a cluster of balloons, healing items, hammer items, or literal nothingness. After that, he proceeds to put his balloon back and fly off into the sunset. He even yells "kooloo-limpah" as he flies away. |
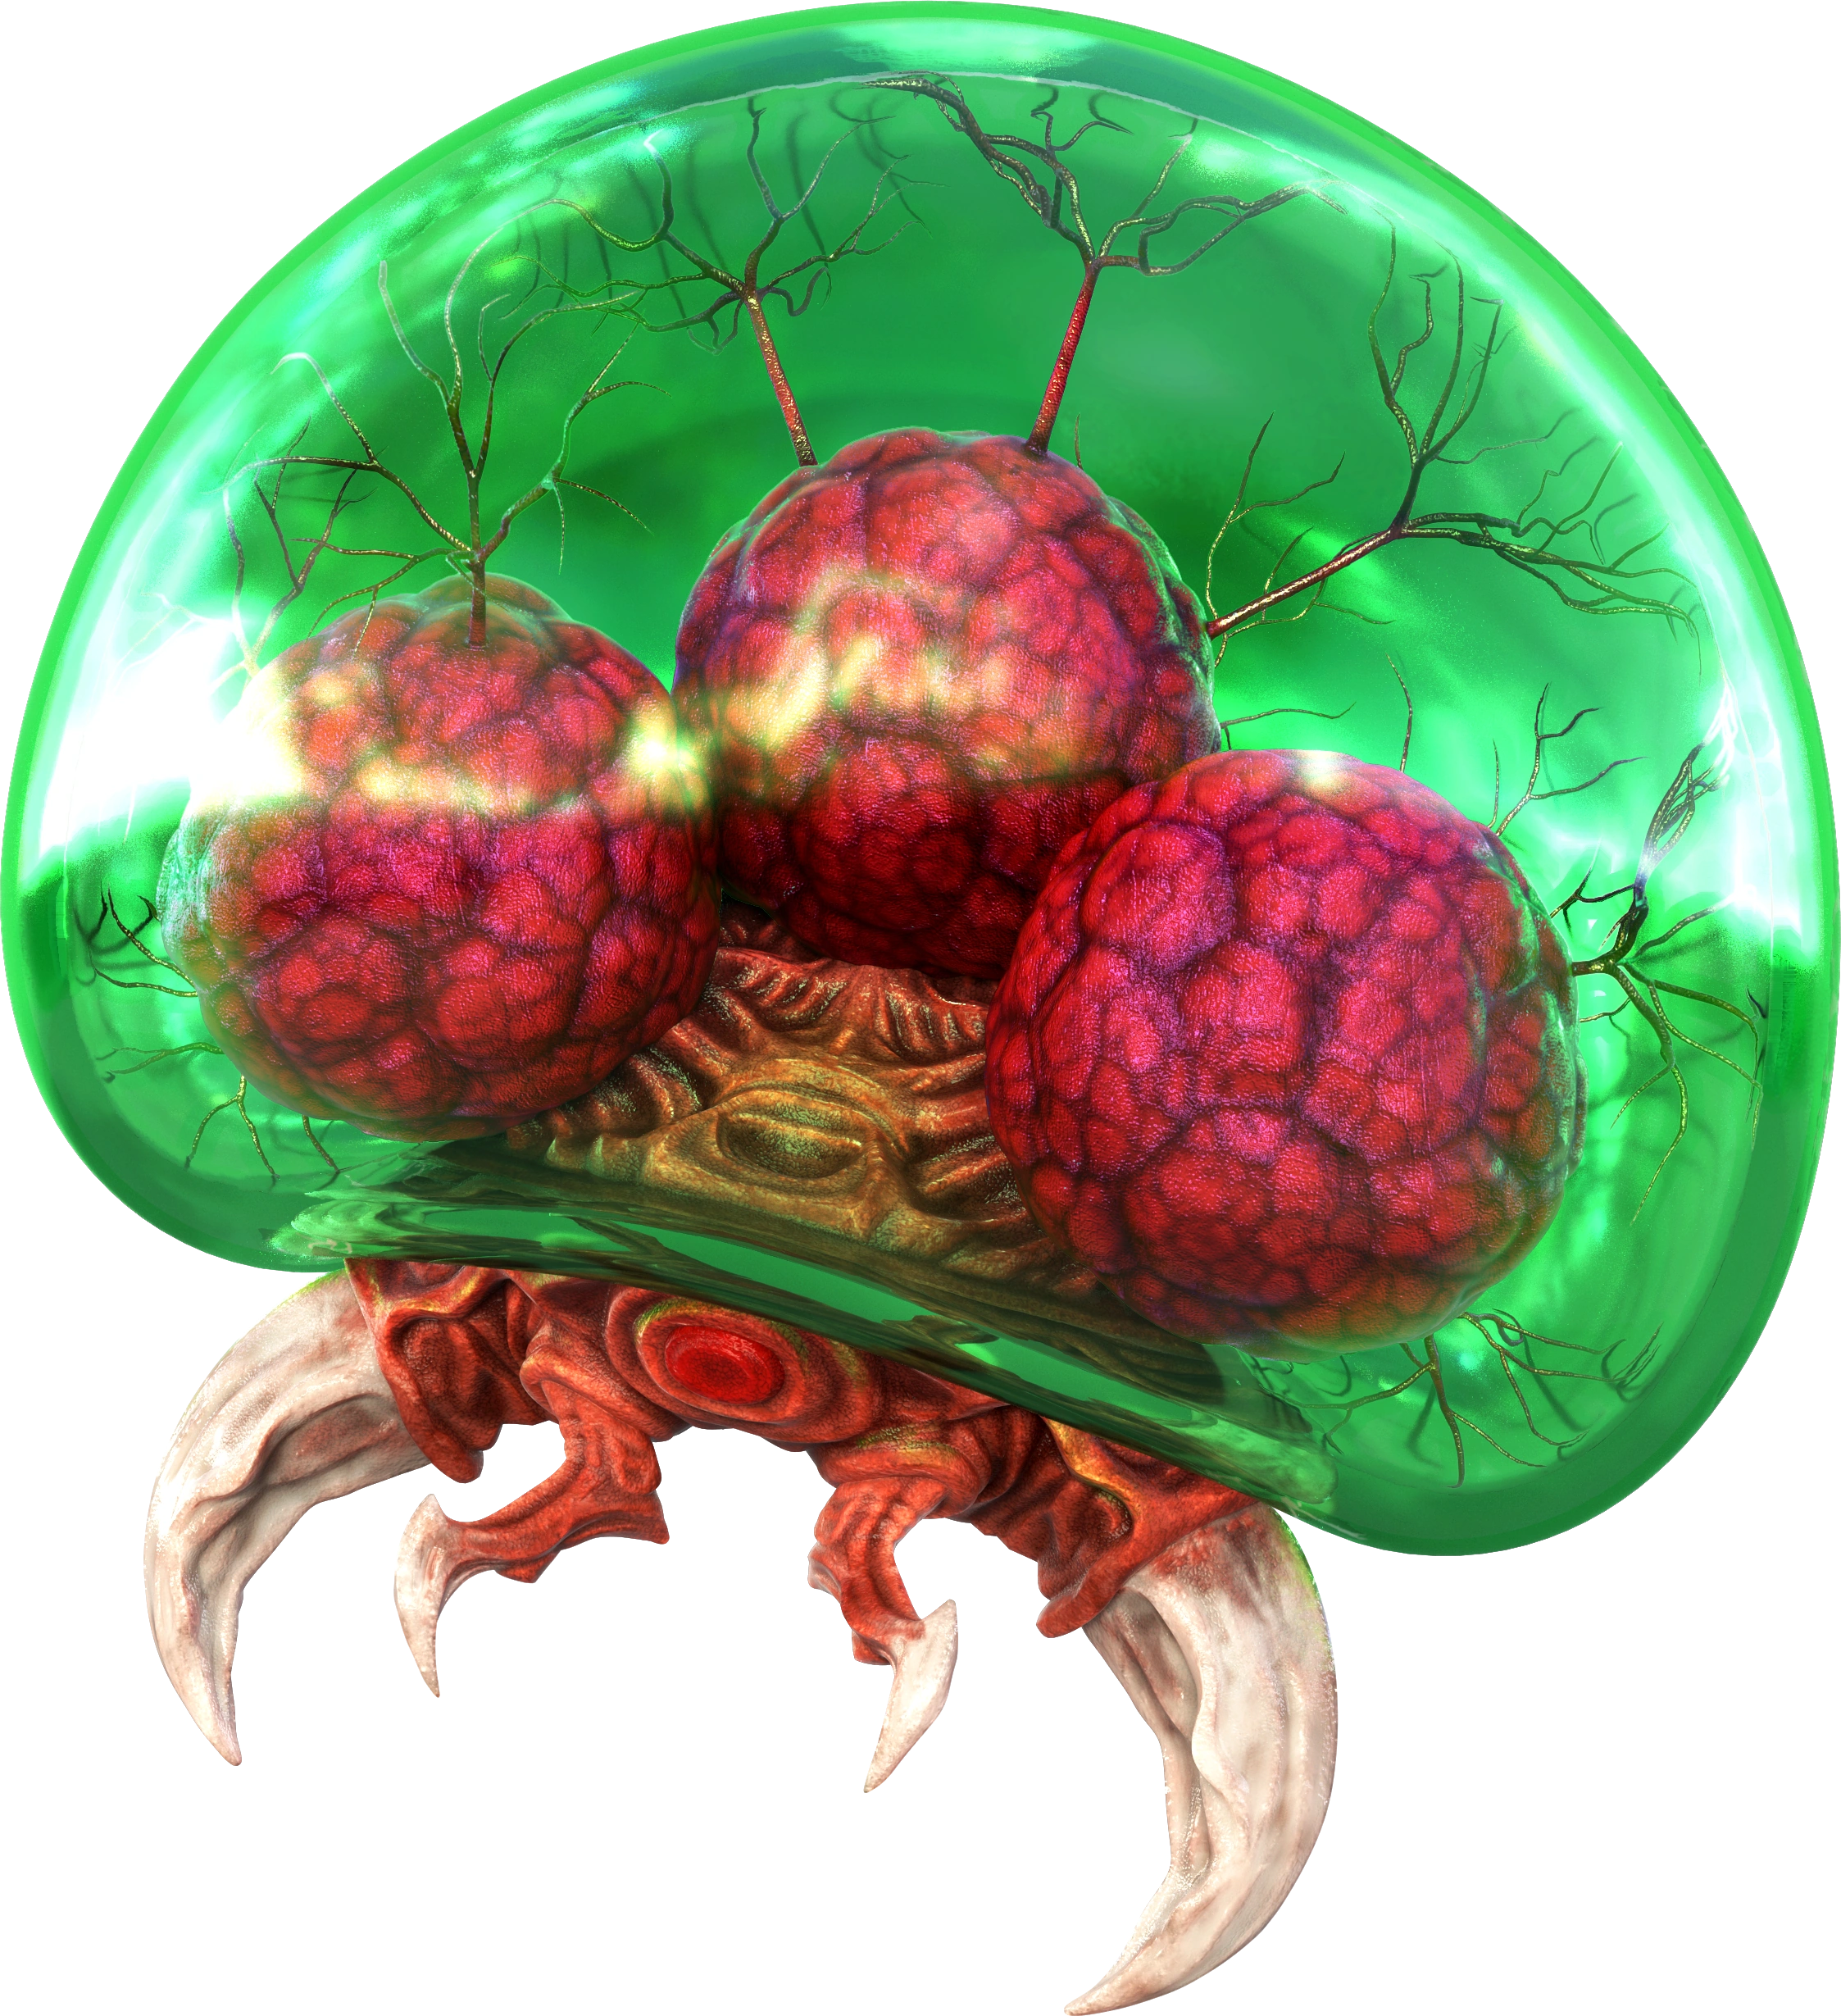
|
The Metroid will seek out any fighter and latch onto their head multiple times, forcing them to take chip damage. The fighter is nearly immobile for the duration of the attack with only small movements being able to be pulled off. |
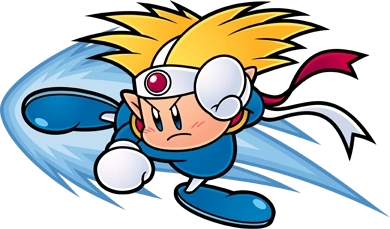
|
Knuckle Joe runs towards a random opponent and delivers jabs, punches, and kicks to them in rapid succession. He walks in sidestep motions, delivering quick uppercuts and hits when he's right near an opponent. |
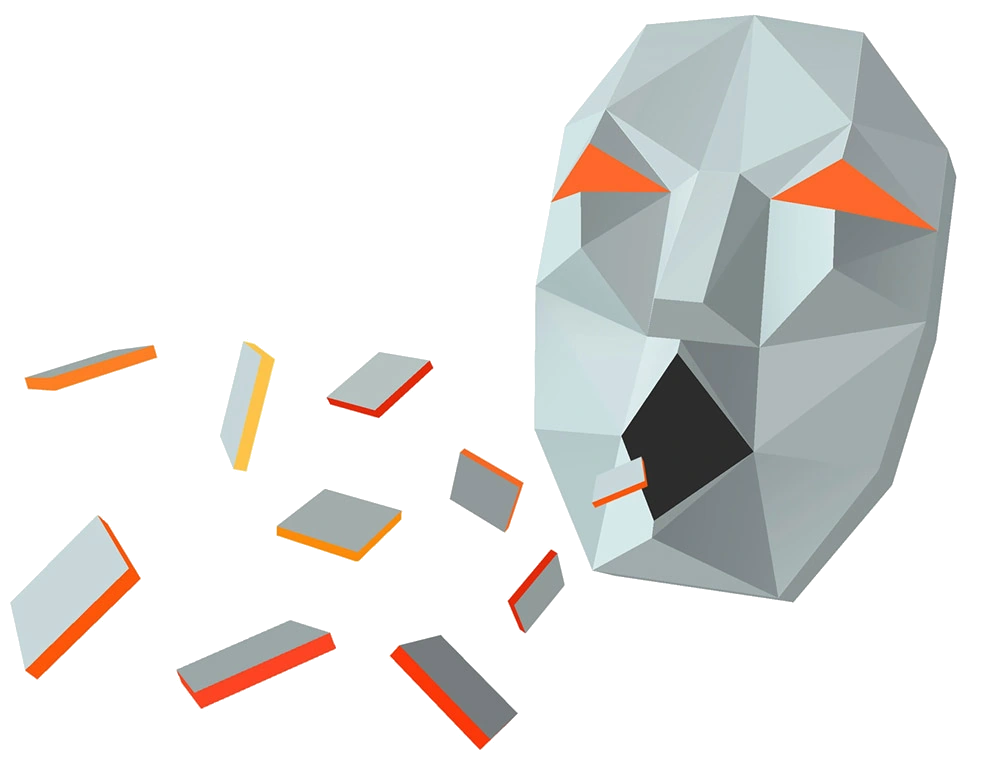
|
Andross pops into the background and starts spitting out polygons that can damage opponents at the screen, all flying in different directions. He's still using his rather iconic design from the original game. |
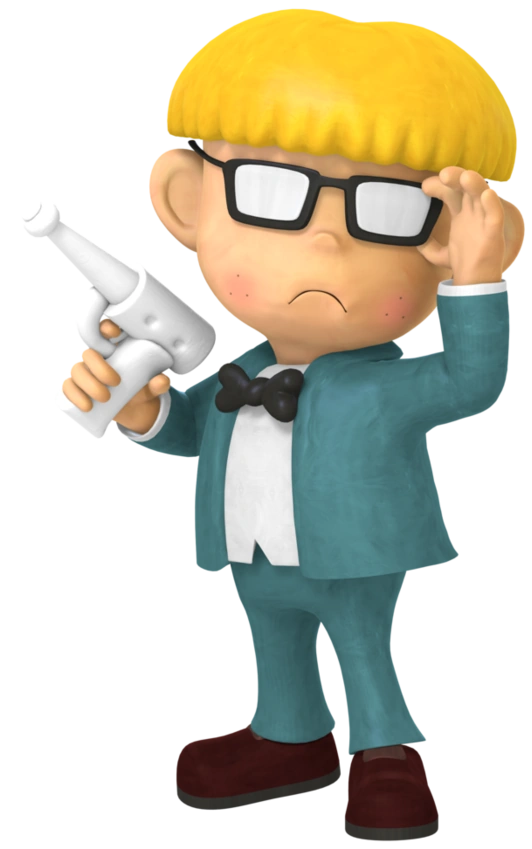
|
Jeff Andonuts appears slightly behind everyone else, setting up a group of five bottle rockets that launch into the air and follow opponents. Each rocket doesn't explode until they've hit their desired target or something else in the way. |
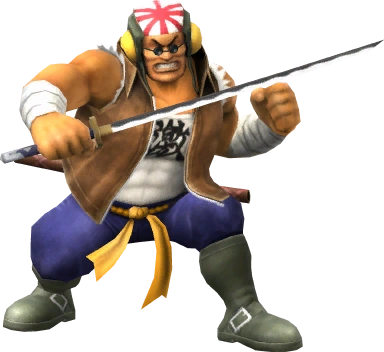
|
Samurai Goroh, using his design from F-Zero GX, runs around the stage while swinging around his katana wildly. He chases after any opponent he pleases, jumping and maneuvering around the arena just to try and get a few hits in on his target. |
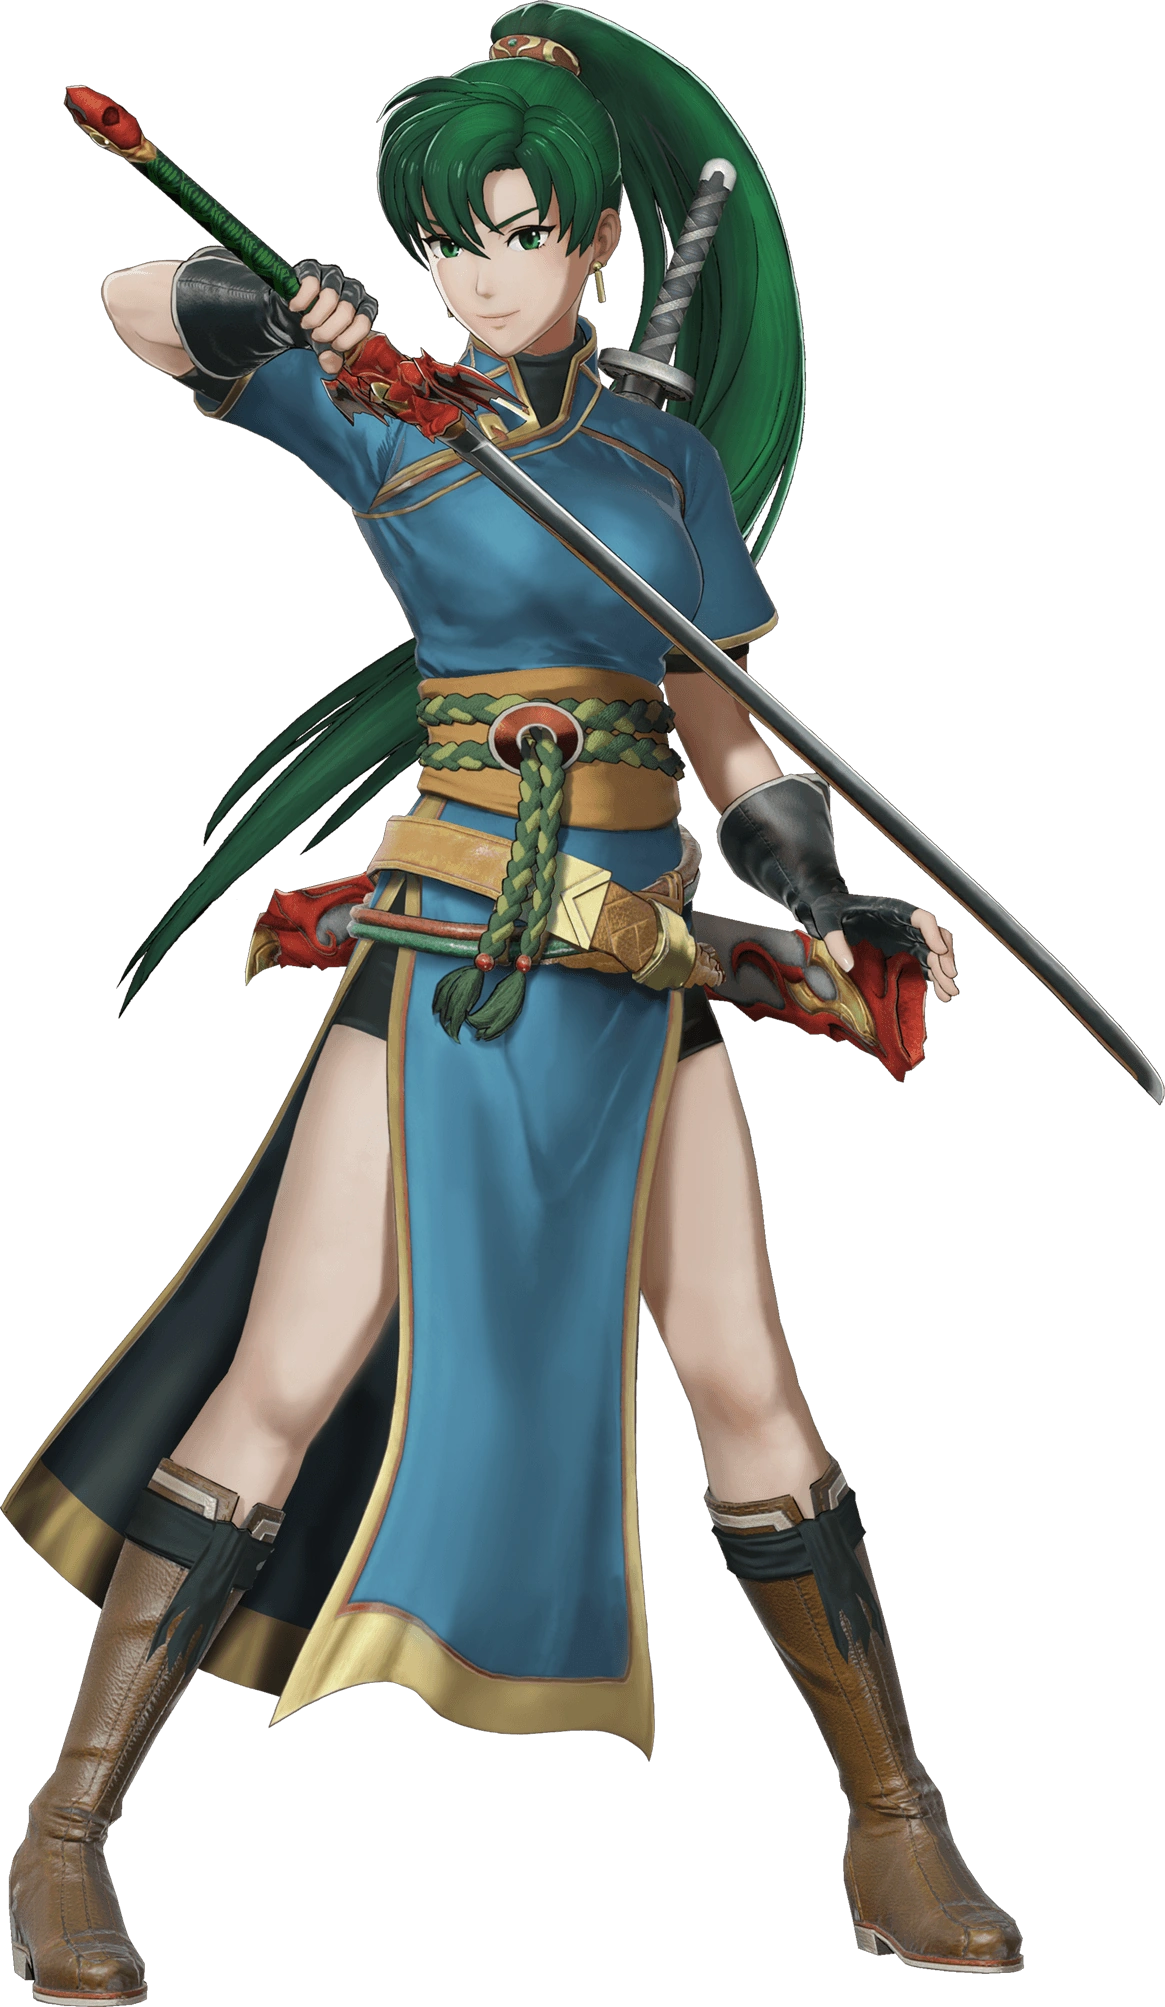
|
Lyn appears and crouches down, pulling out her sword and facing an enemy. She then lunges towards them, sending the target flying with a slice of her sword. The attack can be blocked by the target, albeit with frame-perfect timing. |

|
Kat & Ana, wielding their katanas, float high up in the air dart around in an X-shaped pattern. Any foe caught in their path will be thrown around in the air if more than one of the girls hit them, sending them flying across the stage before the two high-five and disappear. |
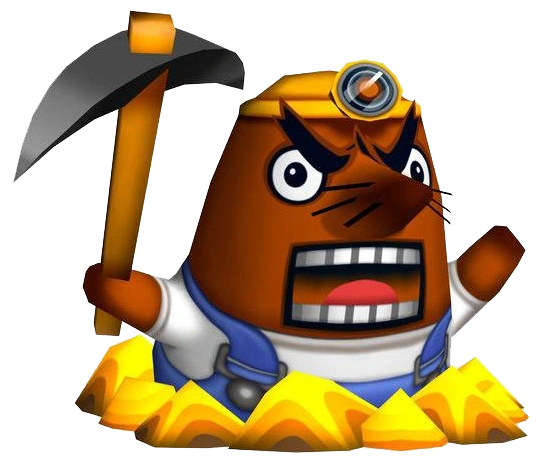
|
Mr. Resetti pops out of the ground and starts to ramble on about the fighters duking it out on the stage. He stays around the longest out of any Assist Trophy, rambling on about a random topic and not even attacking before disappearing. |
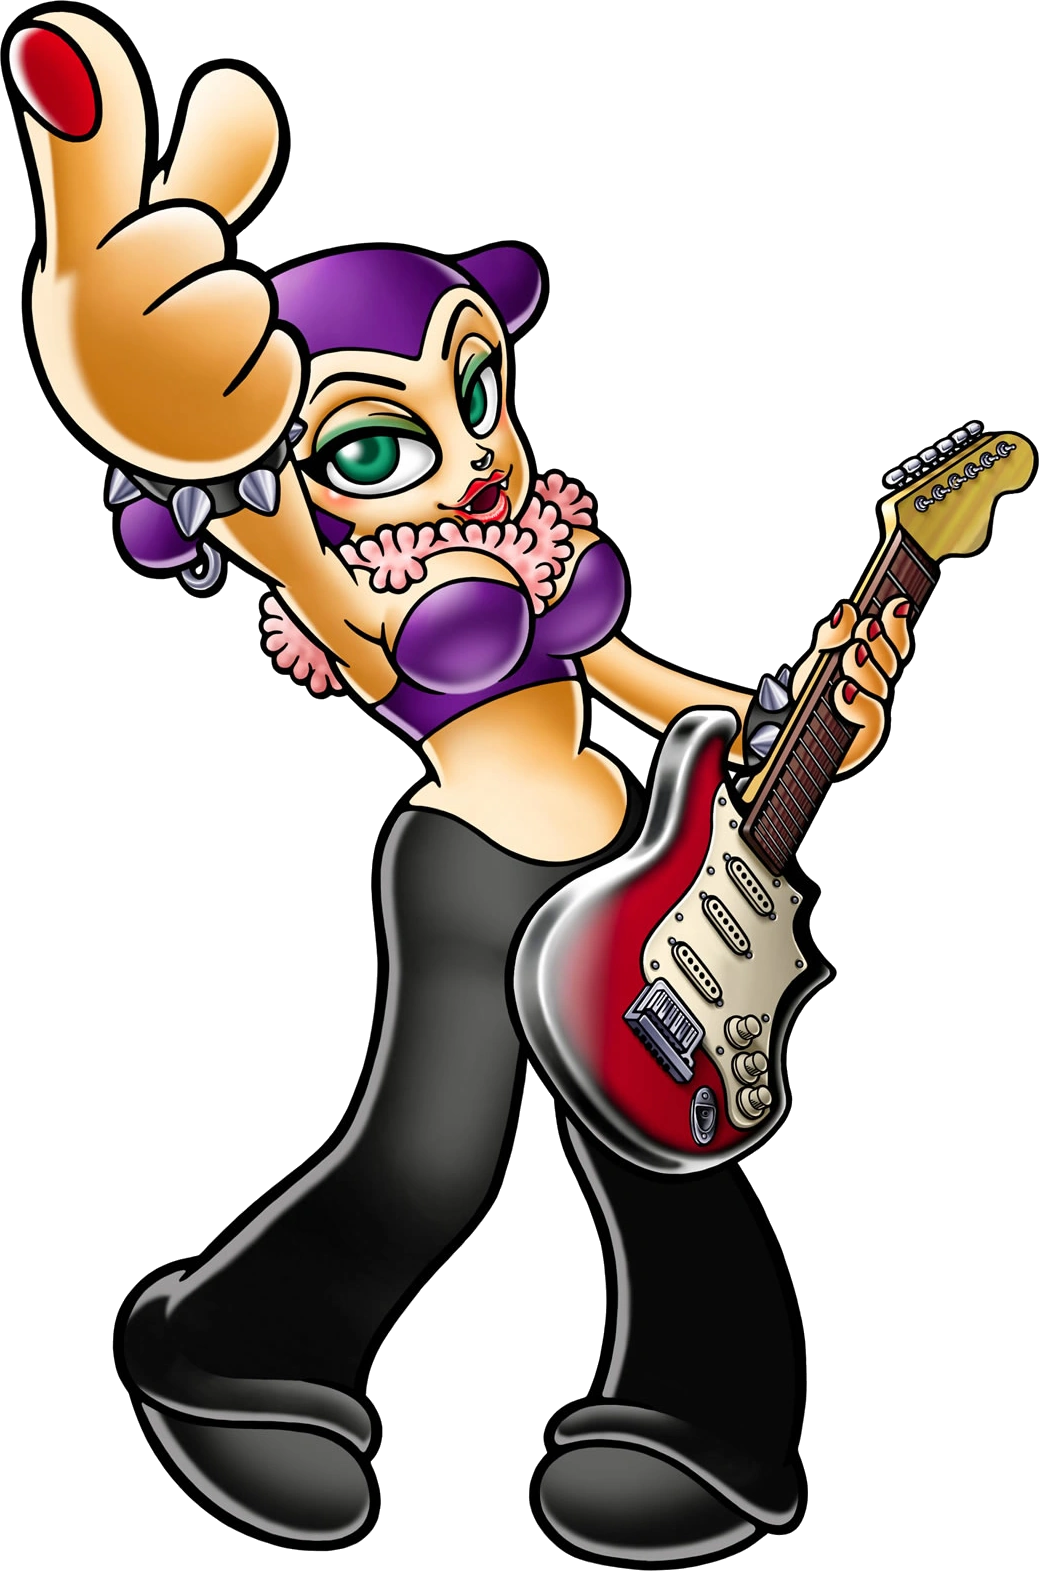
|
Barbara the Bat appears and starts to jam out on her electric guitar. She hops all around the stage, striking different chords on the guitar and creating musical shockwaves that damage whoever approaches them. |
|
The Devil doesn't physically attack his opponents. Rather, he moves the camera around, making it harder for all fighters to see where they are and what they're doing. It can scroll to the left, right, up, or down. |
|
Dr. Wright hops down from out of nowhere and moves his arms upwards. All of the sudden, a large cartoonish building pops up from out of nowhere right next to him, sending whoever was near or under it flying up in the air. |
|
Multiple different Excitebikers appear, all varied in coloration. They ride off to a side on the stage, trying to take whoevers in their way with them. They do damage, but are mostly a hazard that affects how a fighter maneuvers the stage. |
|
The Helirin rotates around the point it spawned in, the two "wings" on the sides spinning with it. When sideways, they can act as extra platforms, but act as walls when facing upwards. If a fighter is stuck under it's wings, they'll take damage. |

|
These pixelated soldiers take on their appearance from Advance Wars. They slowly move across the stage, firing bullets and cannonballs in the direction they're facing before walking off the stage to their (supposed) demise. |
|
Jill, inside of her drilling machine, drives around the stage preparing to hit opponents. She can stop and turn mid-drive, damaging foes harder if they touch her during that period. |

|
The Nintendog, in the form of a border collie puppy, appears and starts playfully jumping in front of the screen. It eventually jumps down after a whistle is heard, leaving the battlefield. It just wants to be friends! |
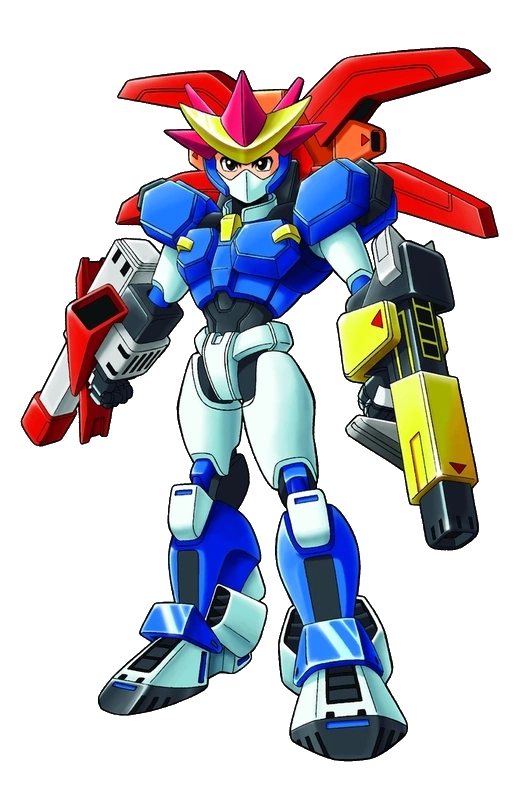
|
Ray MK III will dart around the stage from above, going back and forth and shooting energy blasts and missiles at will. The missiles are slower than the energy blasts, but deal much more damage. |
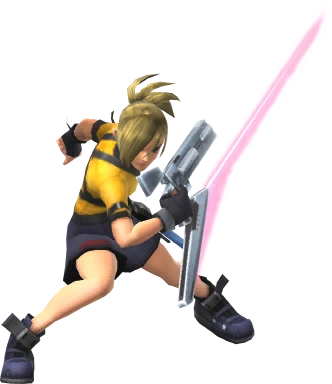
|
Saki drops down onto the stage, dashing around and hitting nearby foes with his Canon Gun. The gun itself can be used as a gun and a sword-like device, with Saki being able to switch between both styles at will. |

|
Starfy is easily one of the most endearing yet weak Assist Trophies. He skips around playfully, spinning around and bouncing fighters back and forth with ease at the cost of being able to be K.O.'d easily due to his light weight. |
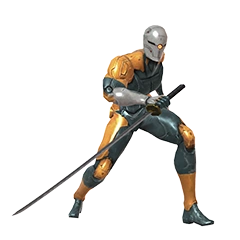
|
Gray Fox runs around the stage, adapting to the layout and striking opponents with his sword. The sword can reflect any and all projectiles fired at him, making him a hard Assist Trophy to completely take out. |

|
Shadow, holding the green Chaos Emerald, enacts Chaos Control, slowing every fighter besides his summoner. While he does nothing himself, this attacks leaves others open to his moves, allowing for multiple attacks to be used on a single fighter. |
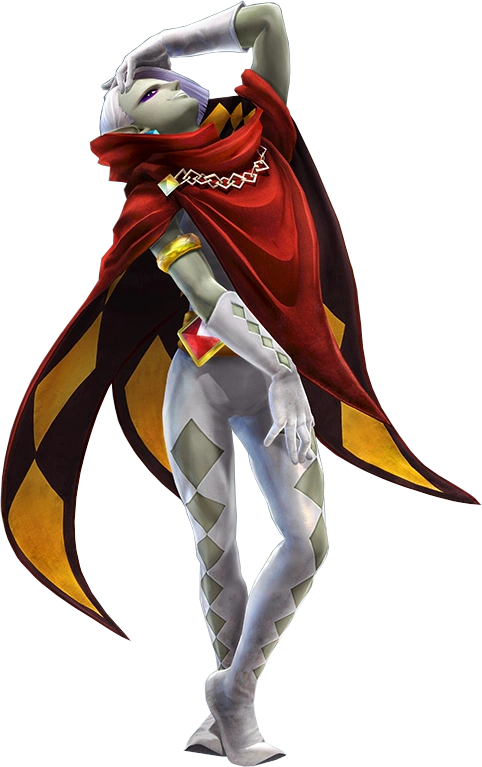
|
|
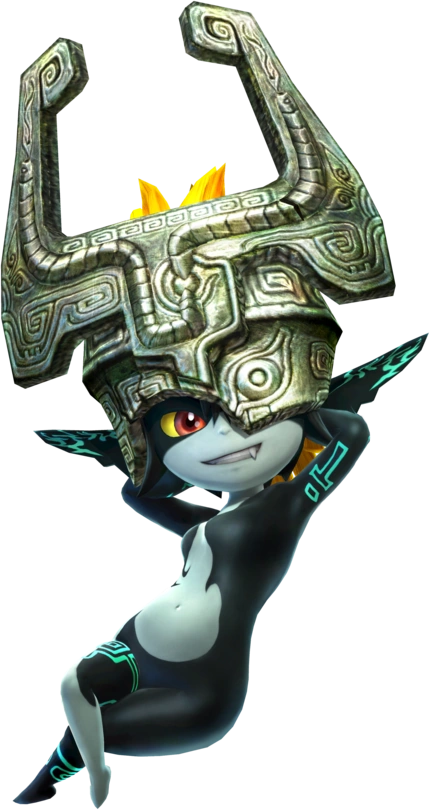
|
|
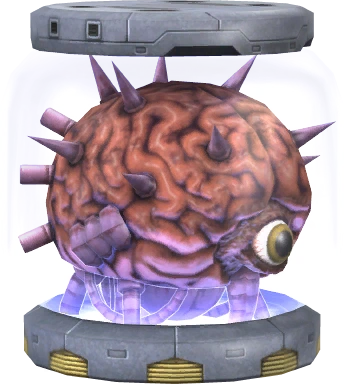
|
Mother Brain will prepare to aim a lazer at a random opponent and, once charged, will fire off for a few seconds. The glass surrounding her can be cracked and shattered, exposing her to the outside and making her vulnerable. |
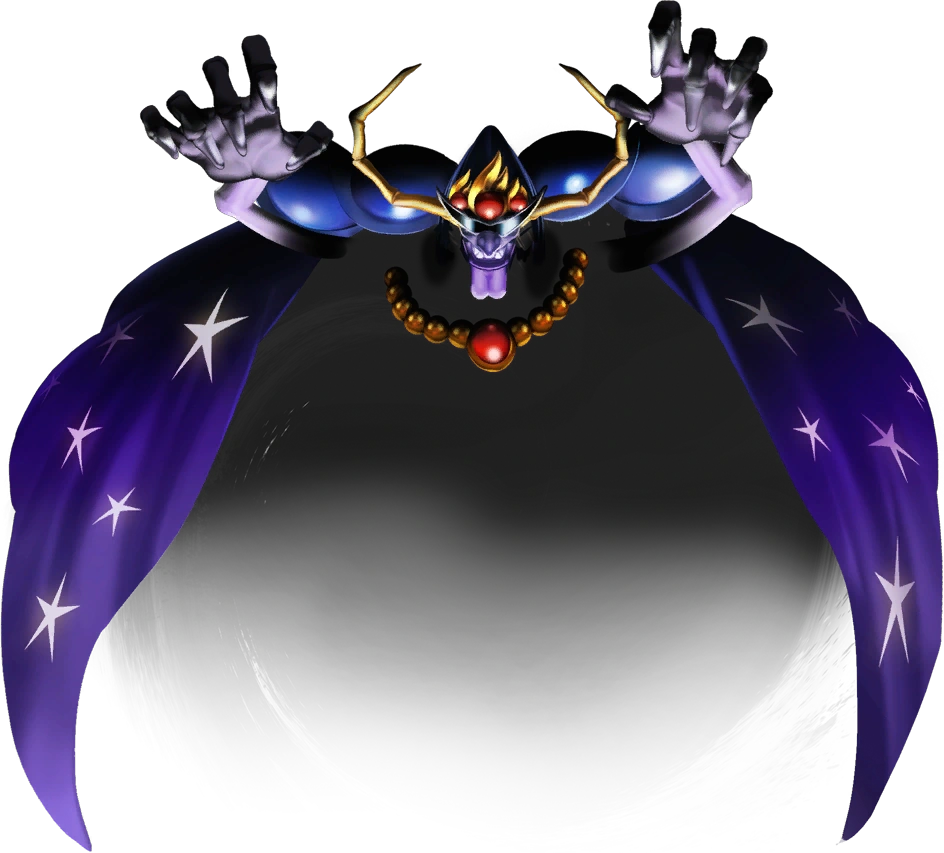
|
Nightmare appears in the background and turns the entire screen black, leaving the fighters in complete darkness. The effects of this can be turned off earlier in Nightmare takes enough damage to his face, which is also visible in the void. |
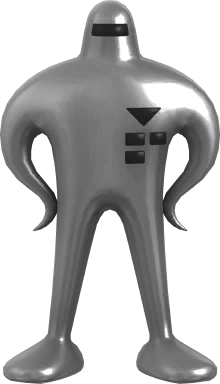
|
The Starman stands still and shoots single lightning blasts out of his visor before teleporting away to another point on the stage. Like others, he can be knocked off of the stage, but also has the "SMAAASH!" effect from Earthbound. |
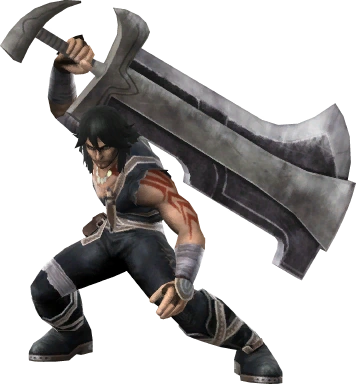
|
Magnus appears and jumps around the stage with his sword, smashing any enemy who stands in his way. He leaps around the stage, slamming his sword down on those who are unlucky enough to be in range of his weapon. |
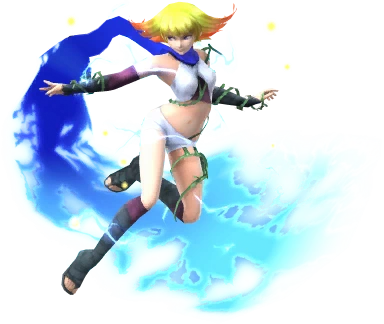
|
Phosphora floats above the stage, laughing while shooting large pulsating balls of electricity. The balls can move in any direction, darting straight towards an opponent's location and paralyzing them upon contact. |
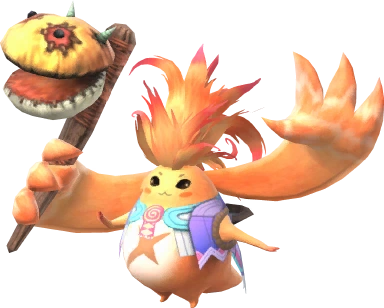
|
Riki appears and can boost or lower the stats of anyone on the field by using different Arts, even the one who summoned him. He can use Arts like Bedtime, Yoink!, Happy Happy, and Freezinate, all of them having different effects. |
|
Color TV-Game 15 appears and proceeds to play a game of Pong. The "ball" gives whoever touches large amounts of damage, with the "paddles" bouncing it all around the stage. Whenever a ball goes past one of the paddles, their score increases. |

|
Dr. Kawashima, the floating head, appears and flies offscreen before the background becomes a white grid. Numbers fly around the screen, becoming bigger numbers if they touch each other and exploding into a fiery blaze. |
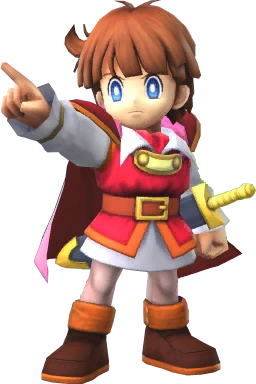
|
The Sablé Prince uses his unique shapeshifting abilities to turn into a frog or a snake, both of which lunge at nearby fighters and proceed to vigorously attack them, complete with a cartoonish dust cloud surrounding them. |
|
The Sheriff hobbles around in the fire, firing pixelated bullets at whoever he sees fit. The bullets deal massive knockback and damage, with the sheriff himself not stopping his barrage for a good while. as he walks around in the air. |

|
Elec Man appears and proceeds to move and act like his original boss fight. He runs around the stage and unleashes a blast of lightning in a cross-shaped pattern that goes in three different directions, those being a straight path, up, or down. |
|
Inky, Blinky, Pinky, and Clyde appear and hover around the stage in their specific patterns, harming anyone who touches them. As time goes on, they start moving faster before disappearing from the fight shortly after. |
|
Coming from Mario Paint, flies go all across the screen as a hand wielding a flyswatter flies across the screen, destroying all flies it can find. The impact of the flyswatter deals damage to any fighter it touches. |
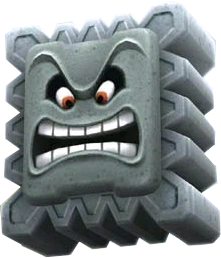
|
Thwomp hovers above a single point on the stage, sitting idle. If a fighter walks under it, it immediately slams down upon them and crushes them, burying them into the ground before rising back up to repeat the process. |
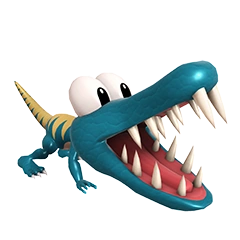
|
Klaptrap wanders back and forth around the stage, quickly pacing back and forth until it spots a target. It then lunges at them, chomping and biting at them until it eventually gets tired of doing so and disappears. |
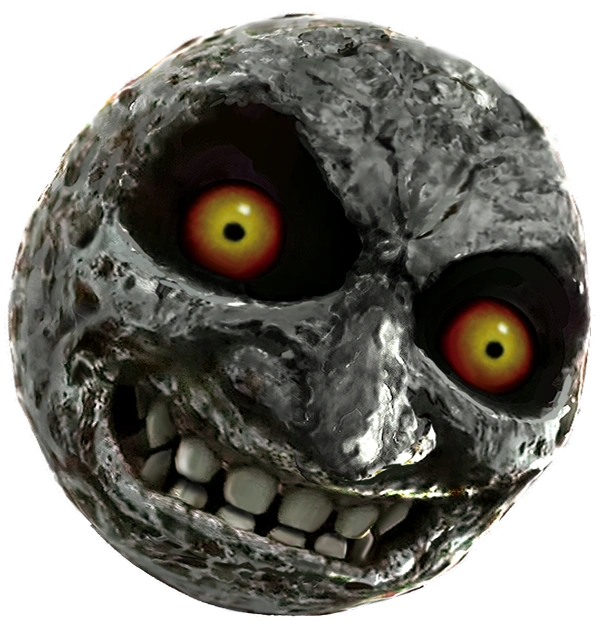
|
|
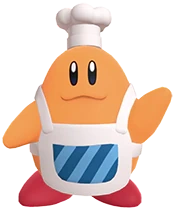
|
|

|
|
|
|
|
|
|
|
|
|
|
|

|
|
|
|
|
|

|
|

|
|
|
|
|
|
|
|
|
|

|
|
|
|
|
|
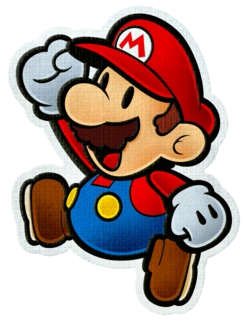
|
|
|
|
|
|
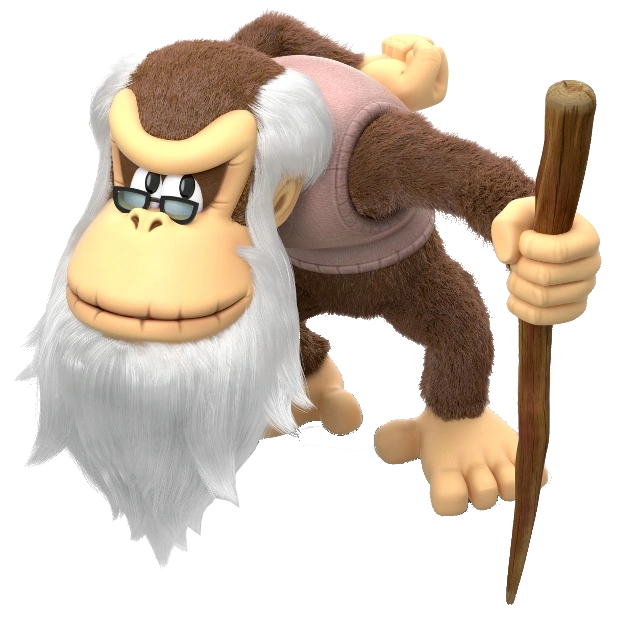
|
|

|
|
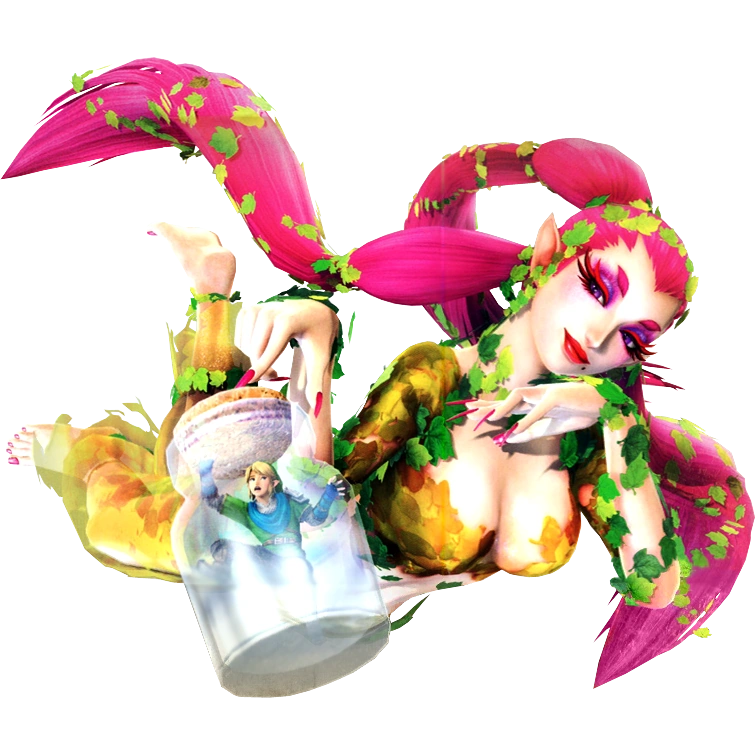
|
|
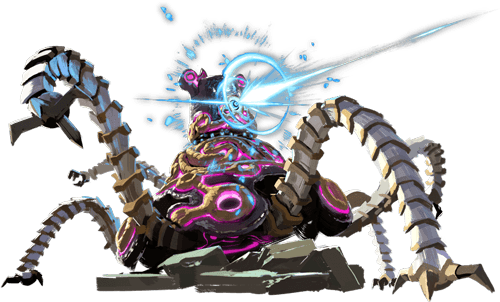
|
|

|
|
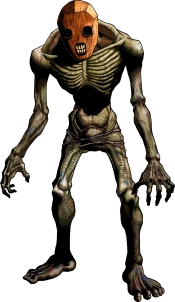
|
|

|
|
|
|

|
|
|
|
|
|
|
|
|
|
|
|

|
|
|
|

|
|

|
|
|
|
|
|
|
|
|
|
|
|
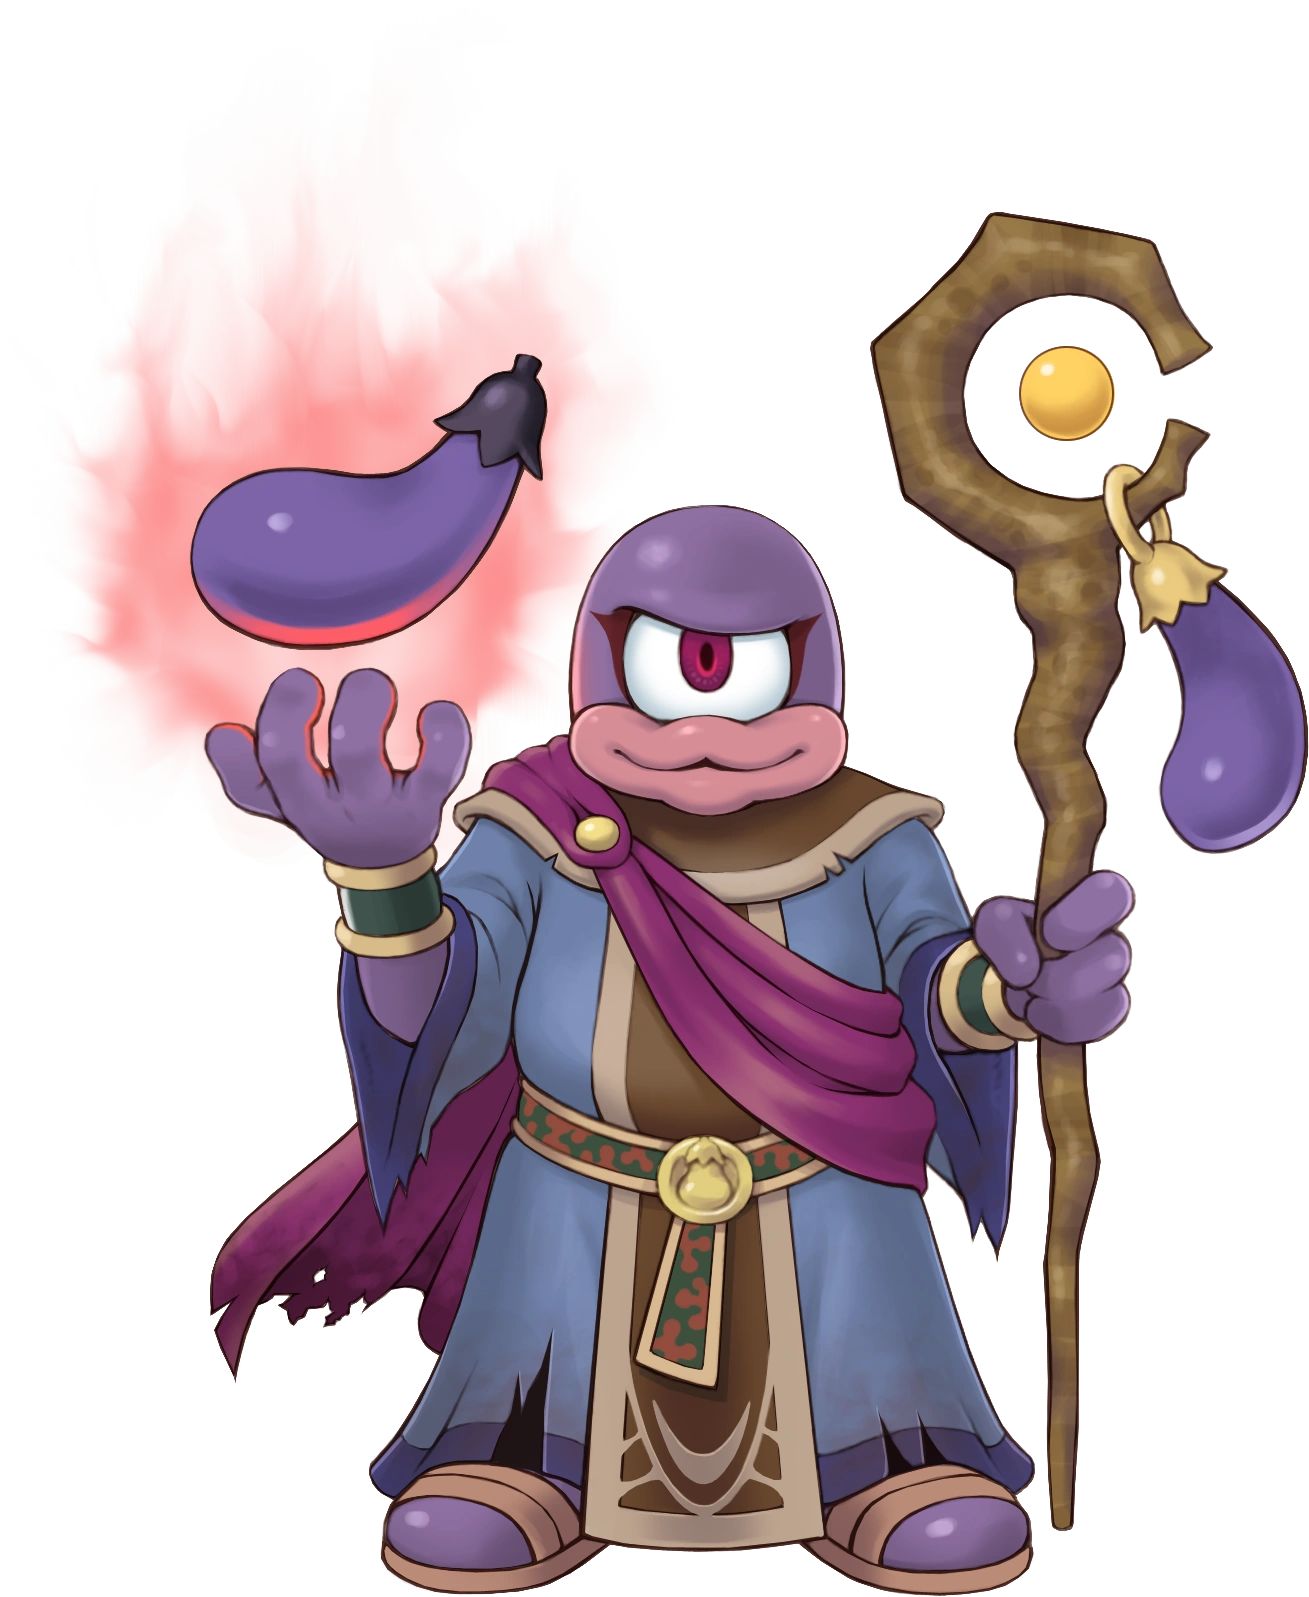
|
|
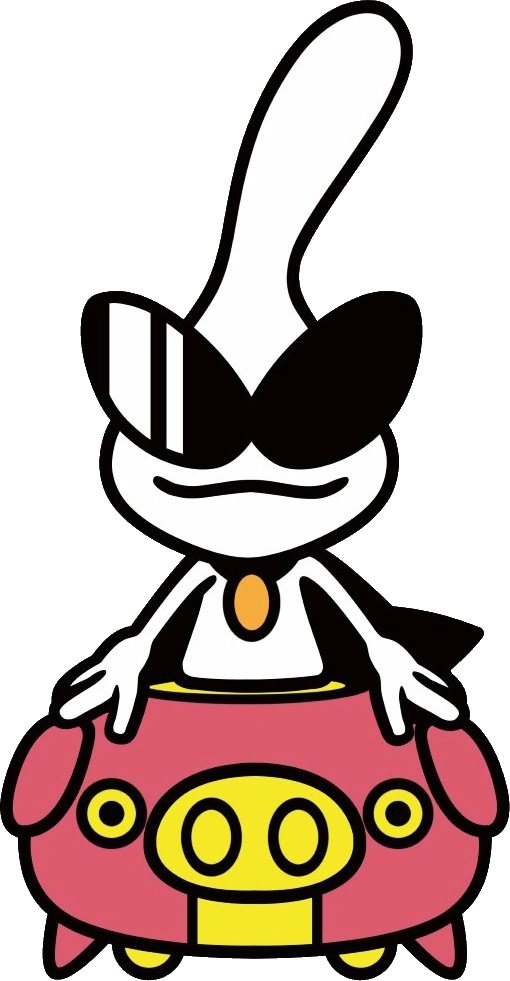
|
|
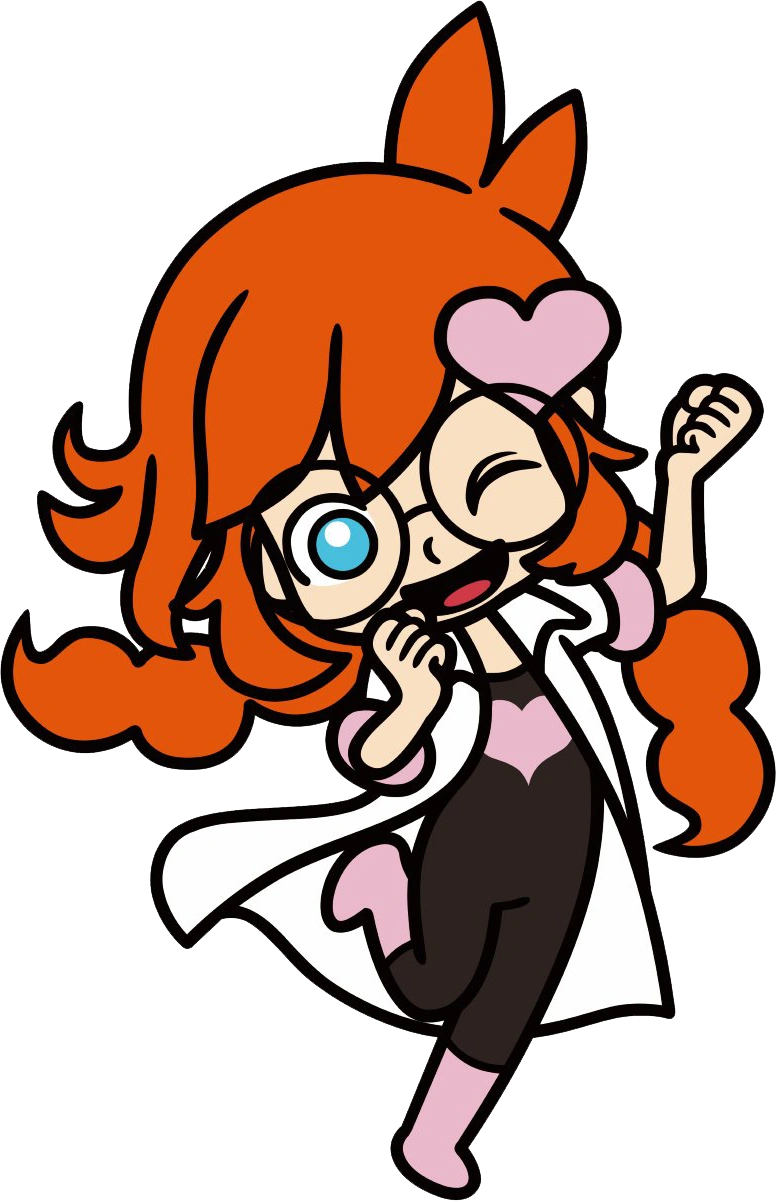
|
|

|
|

|
|
|
|
|
|

|
|
|
|
|
|
|
|

|
|

|
|
|
|

|
|
|
|
|
|

|
|
|
|

|
|

|
|
|
|
|
|
|
|

|
|
|
|

|
|
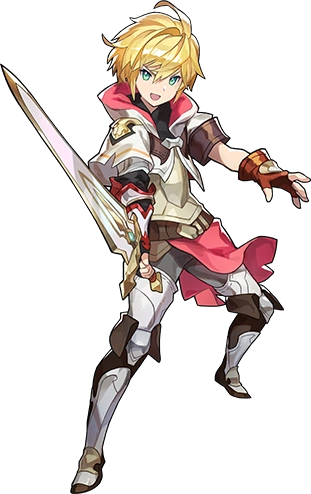
|
|

|
|

|
|
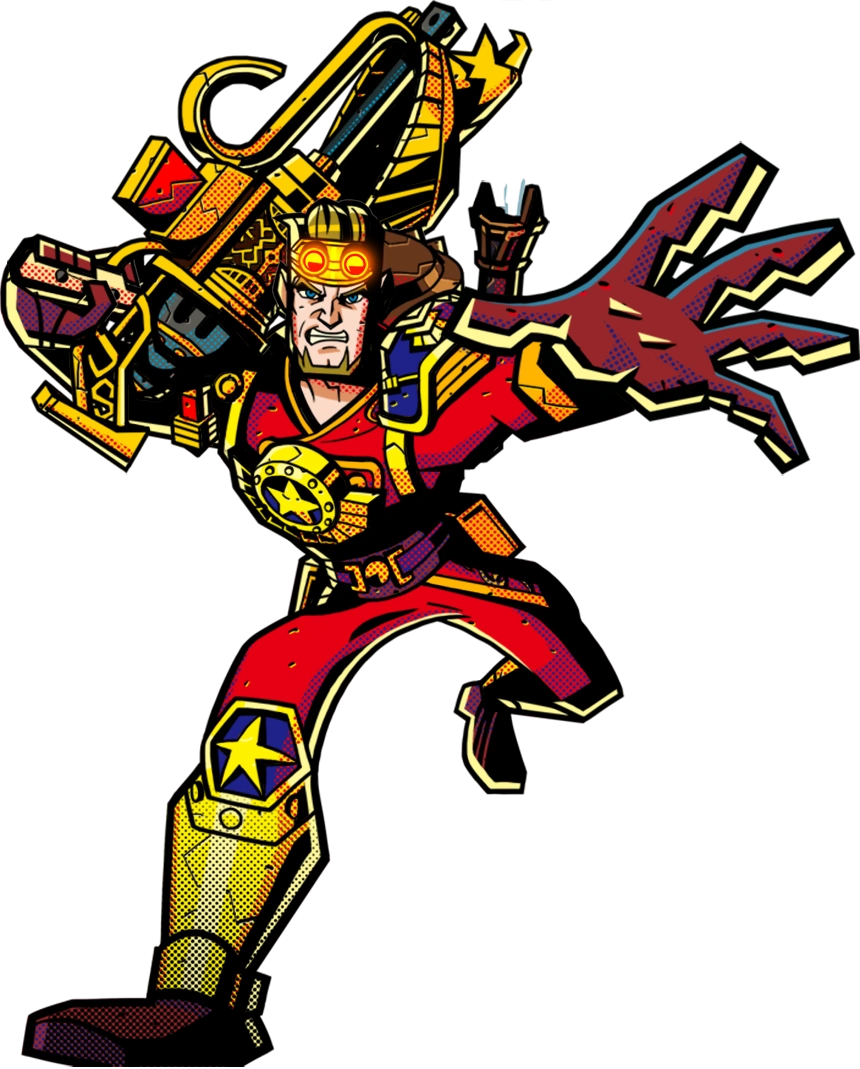
|
|
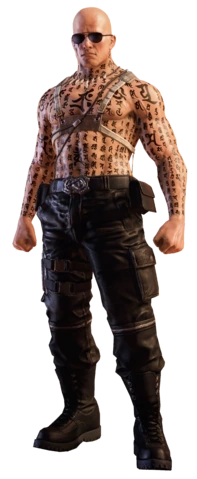
|
|
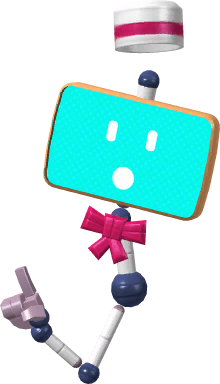
|
|

|
|

|
|
|
|

|
|

|
|
|
|

|
|

|
|
|
|

|
|
|
|

|
|

|
|

|
|

|
|

|
|

|
|

|
|
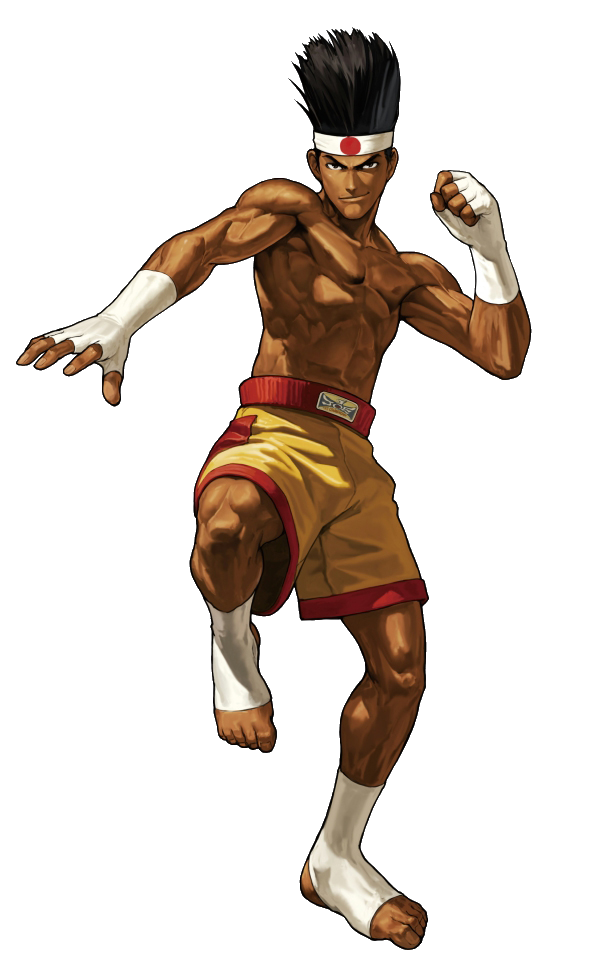
|
|

|
|

|
|

|
|

|
|

|
|
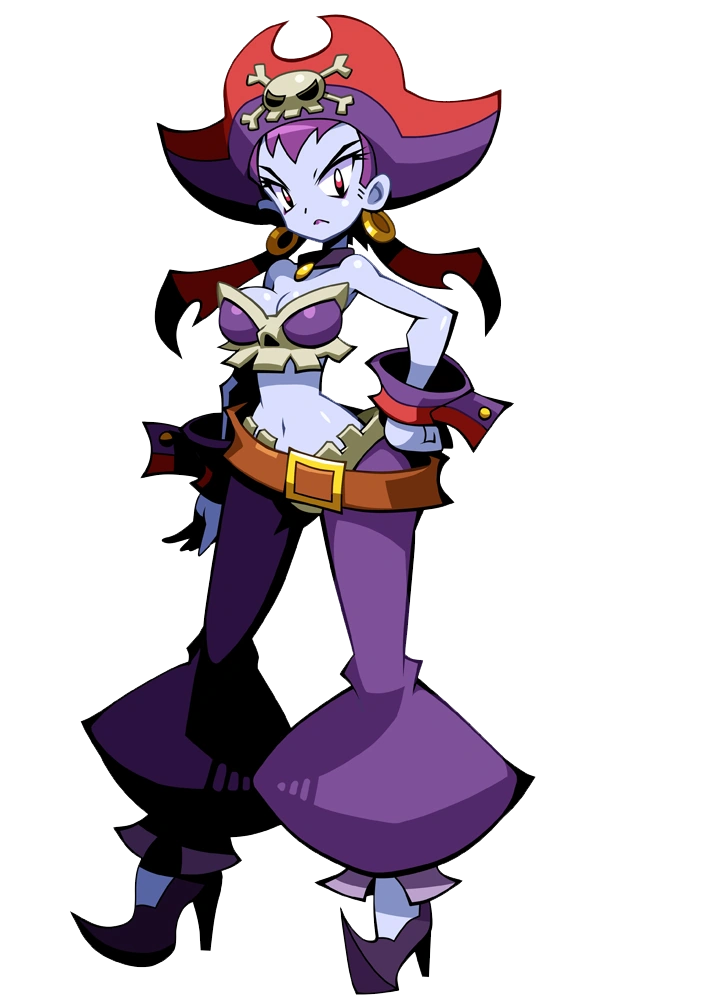
|
|

|
|
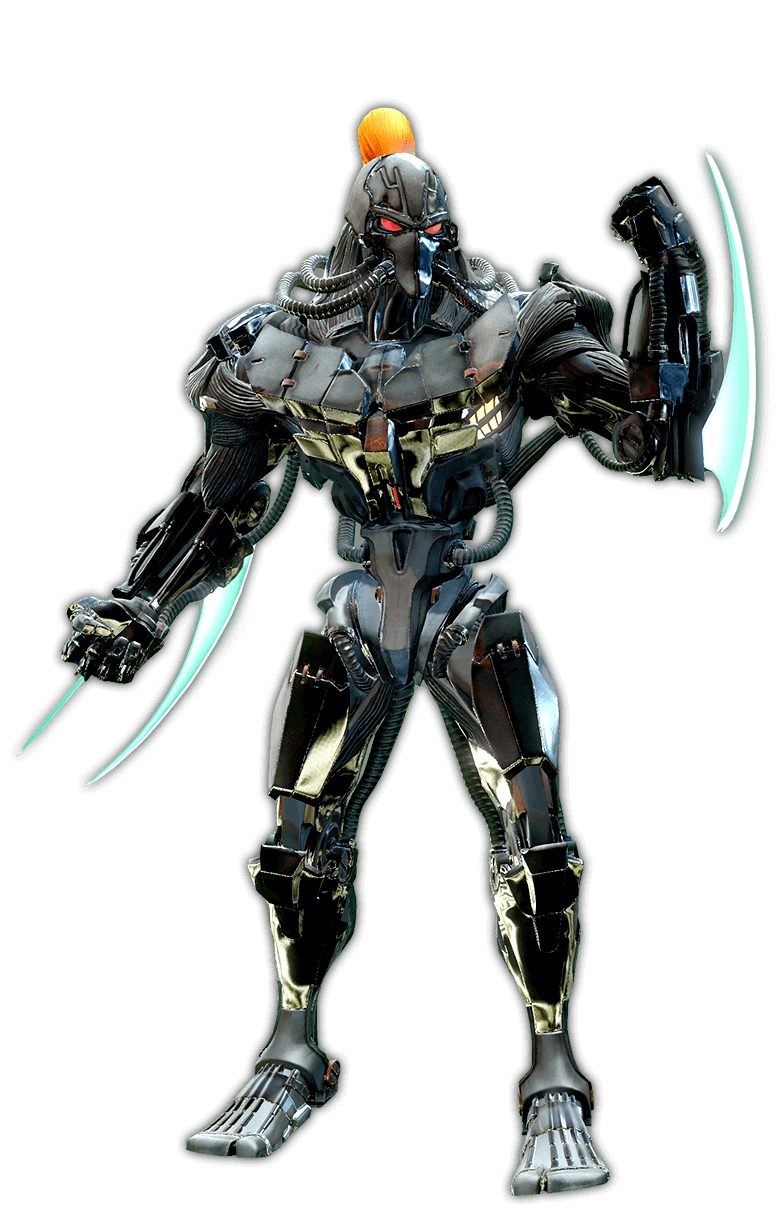
|
|

|
|
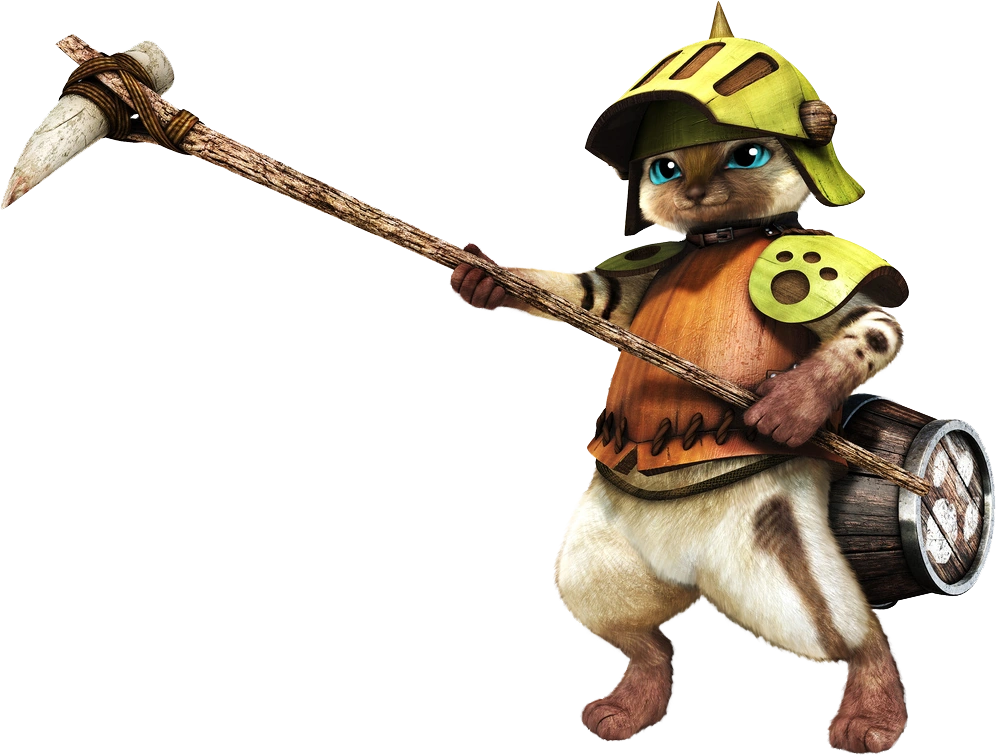
|
|

|
|

|
|

|
|

|
|

|
|
  
|
|
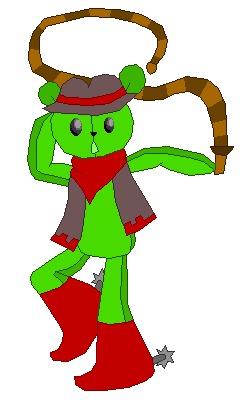
|
|

|
|
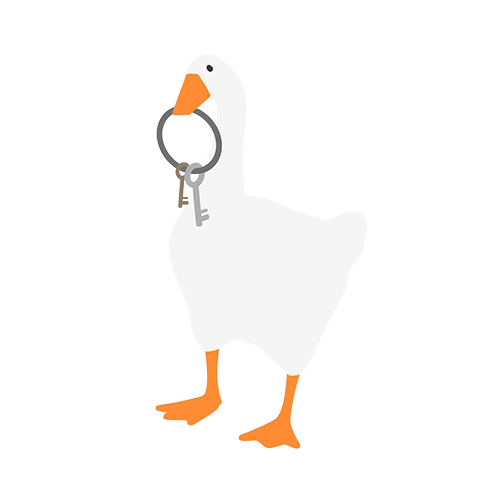
|
|

|
|
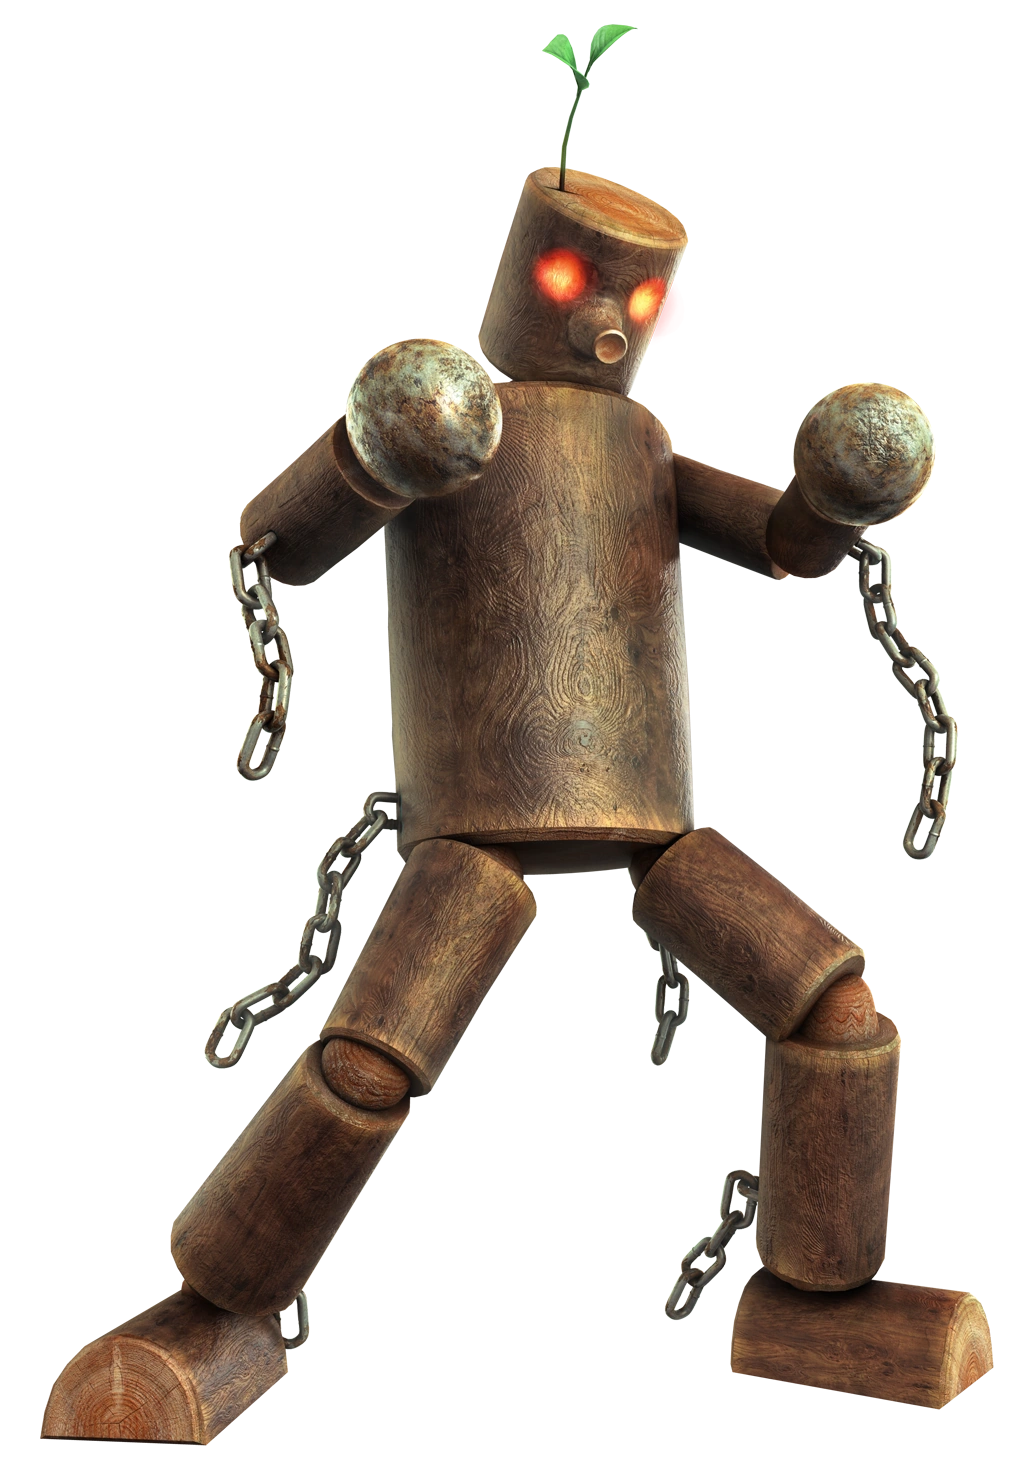
|
|

|
|
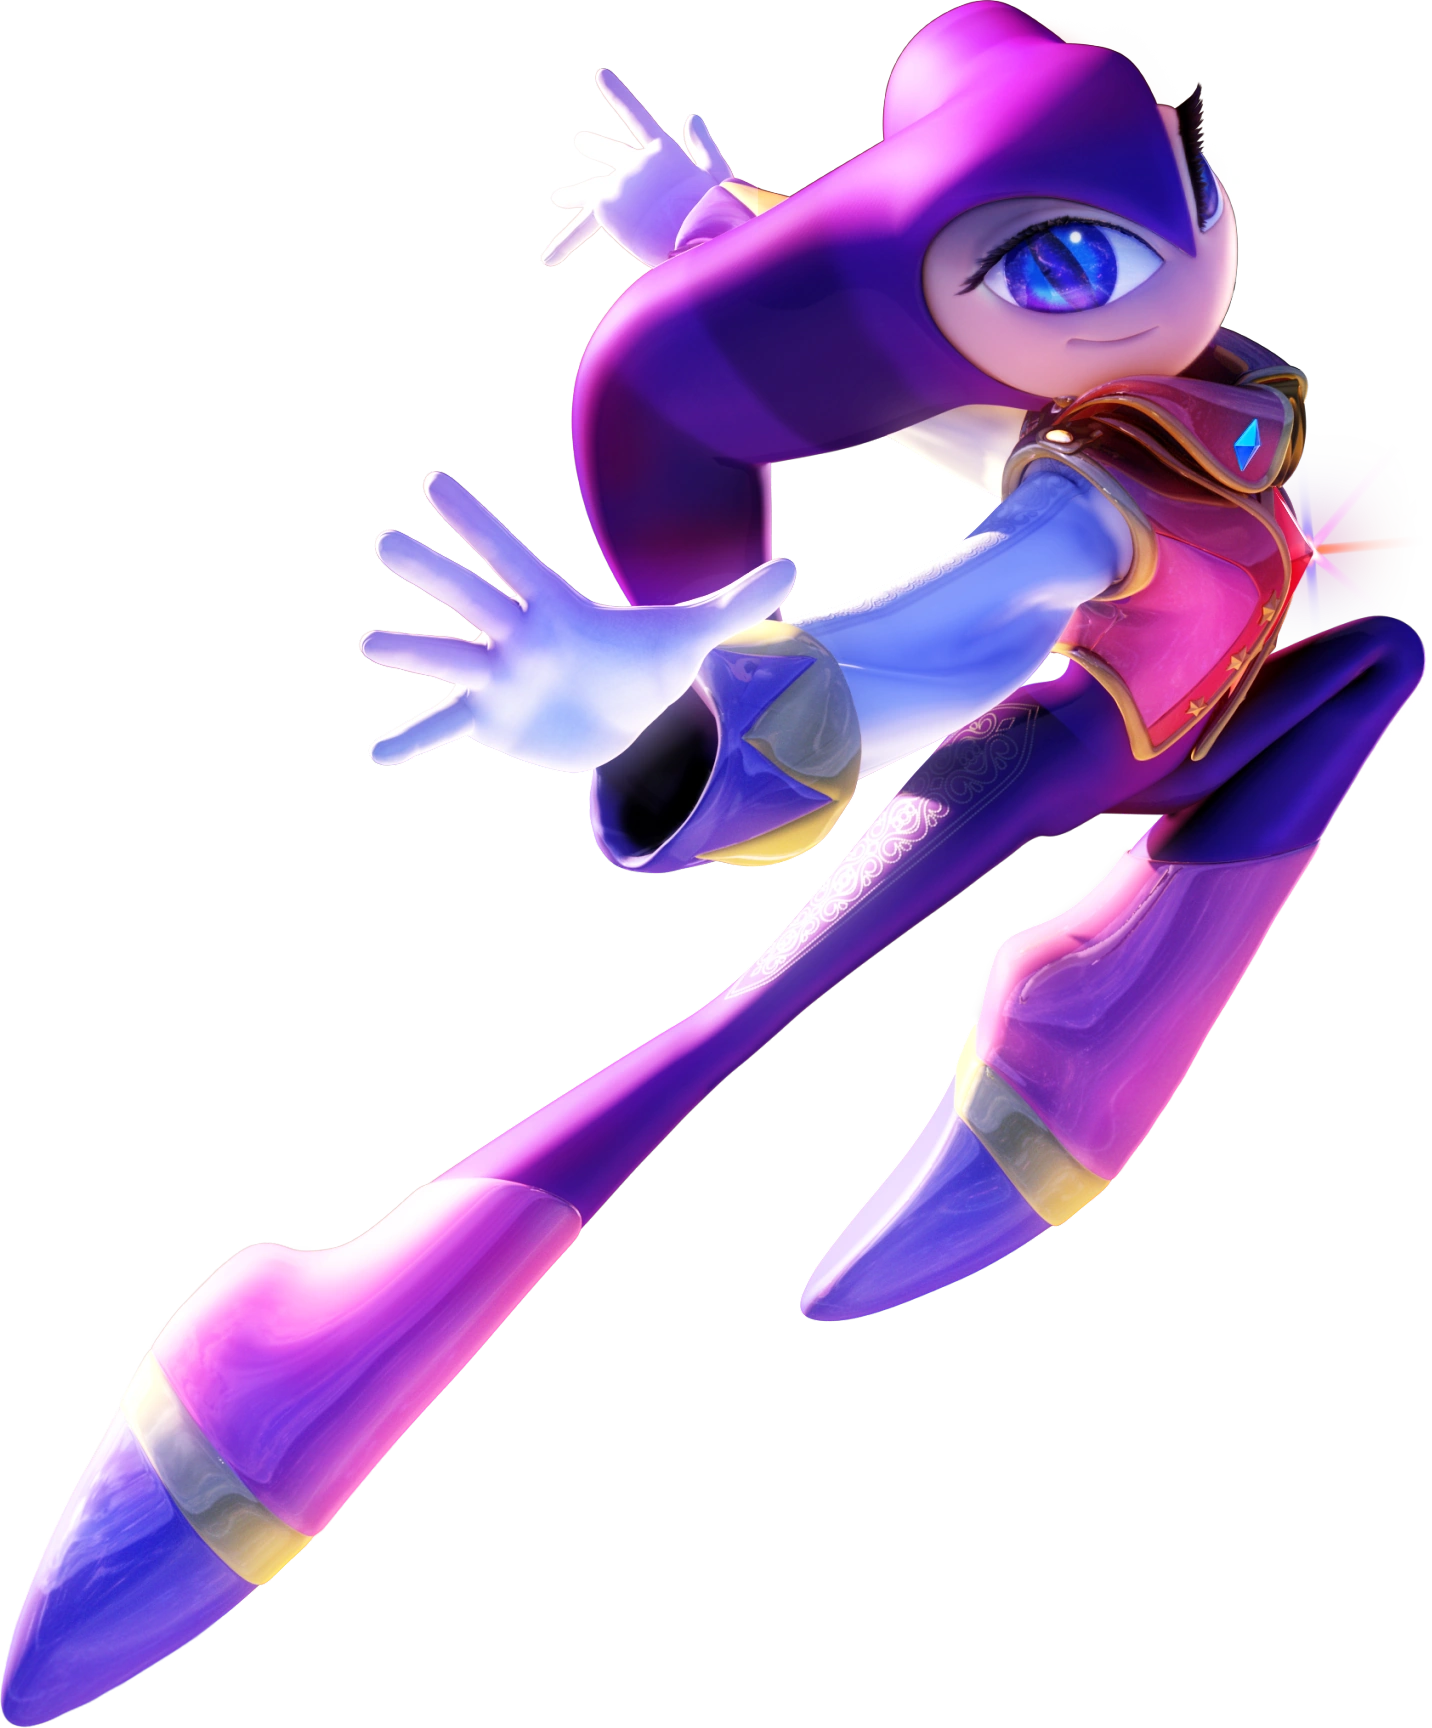
|
|

|
|

|
|
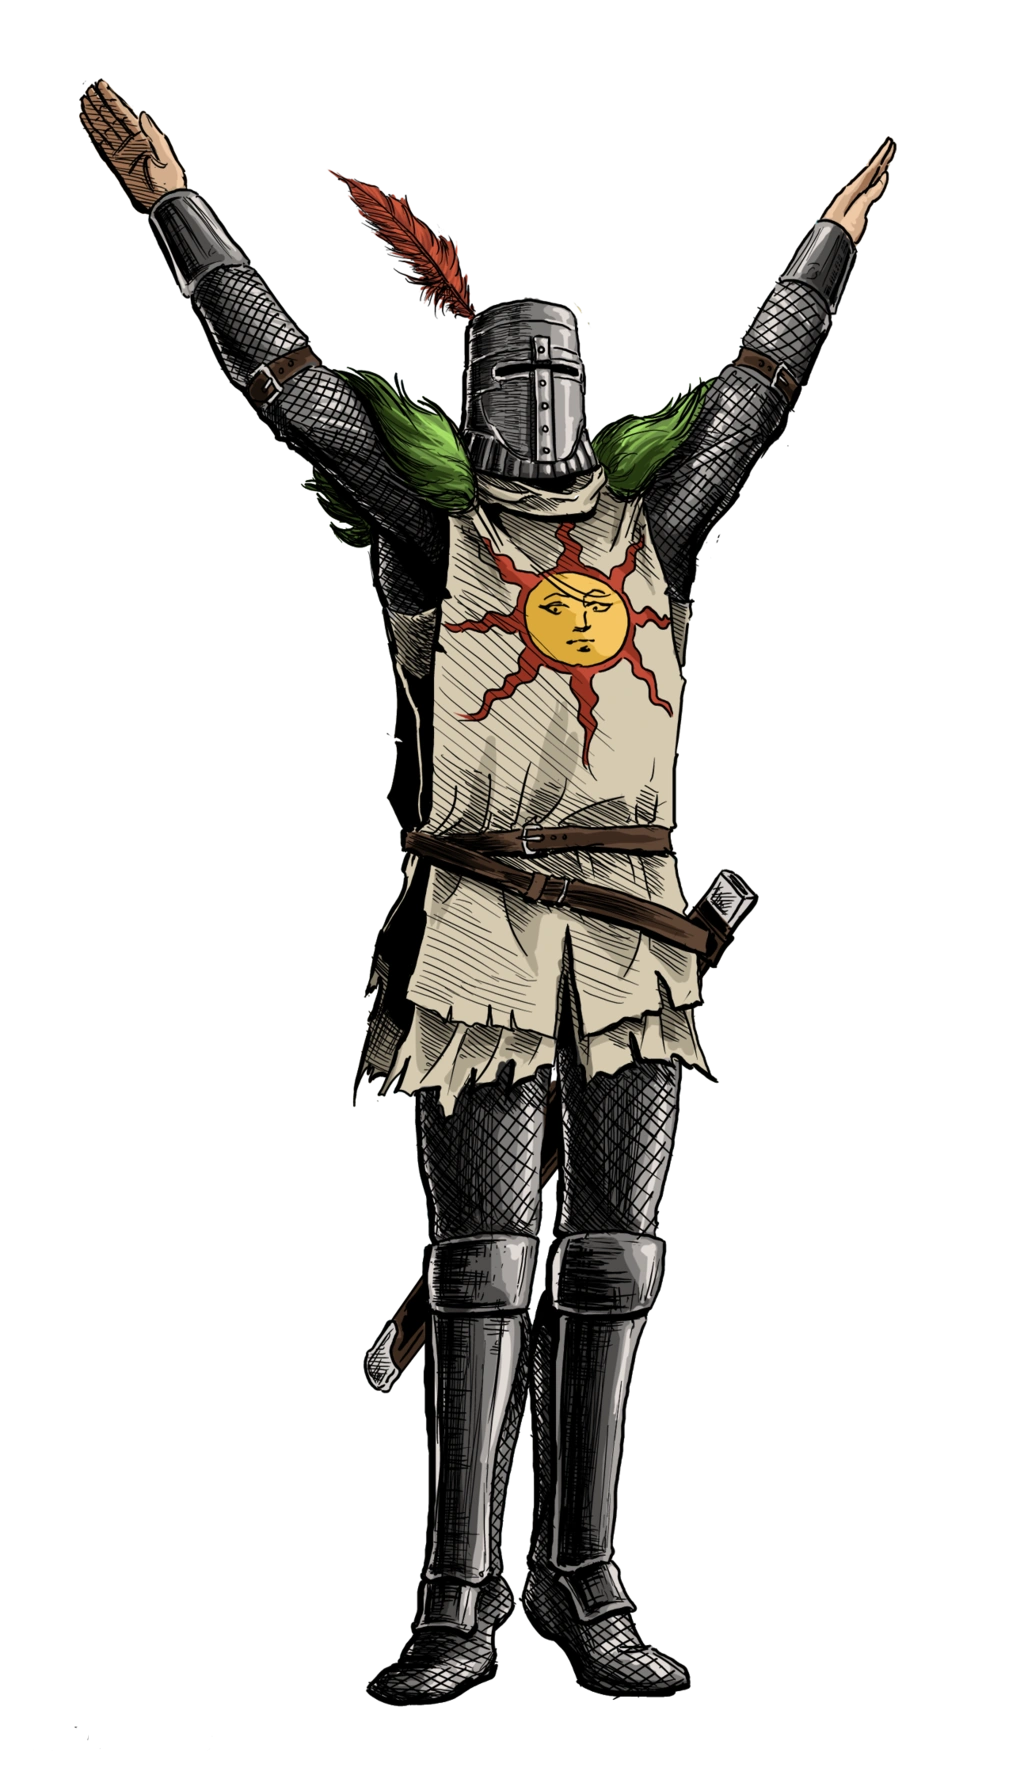
|
|

|
|

|
|
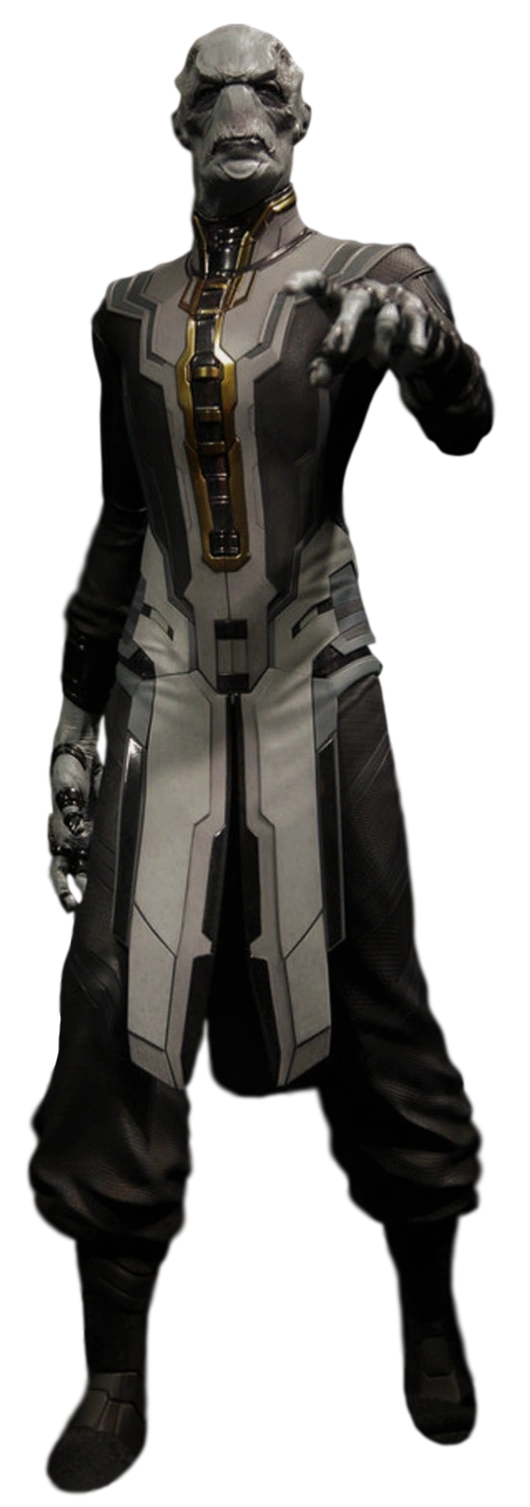
|
|

|
|

|
|
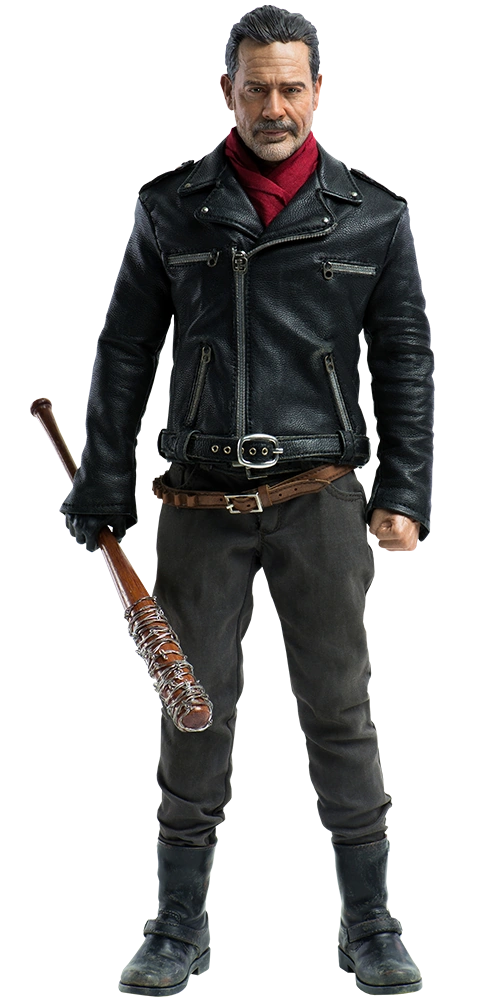
|
|
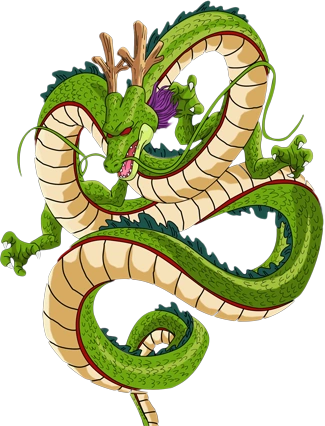
|
|
|
|

|
|
Bosses[]
There are multiple bosses within Super Smash Bros. Swansong, whether they appear on stages or fighter's One Smashing Career mode. All of them can be fought in Boss Rush...if you're brave enough to do so.
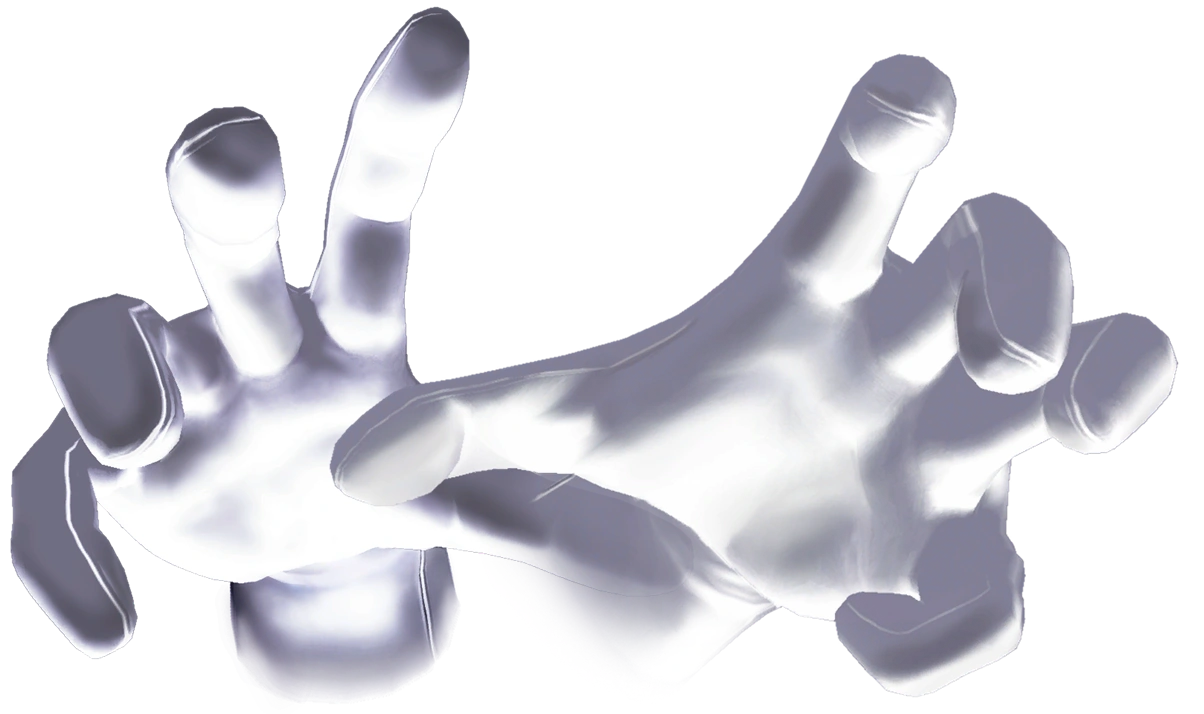
|
|

|
|
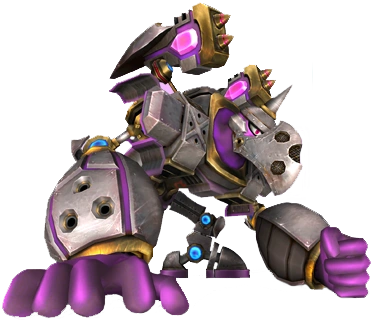
|
|
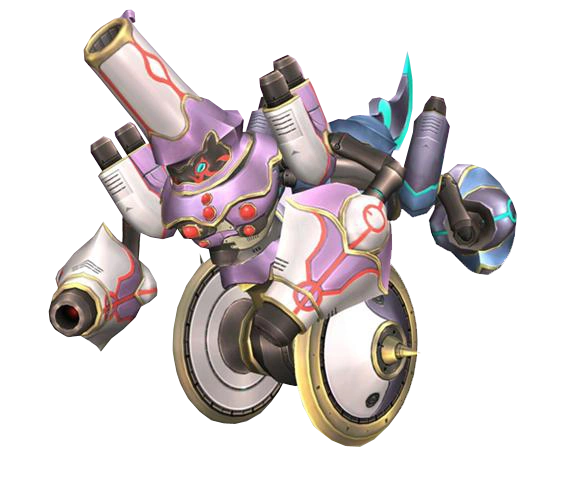
|
|

|
|

|
|
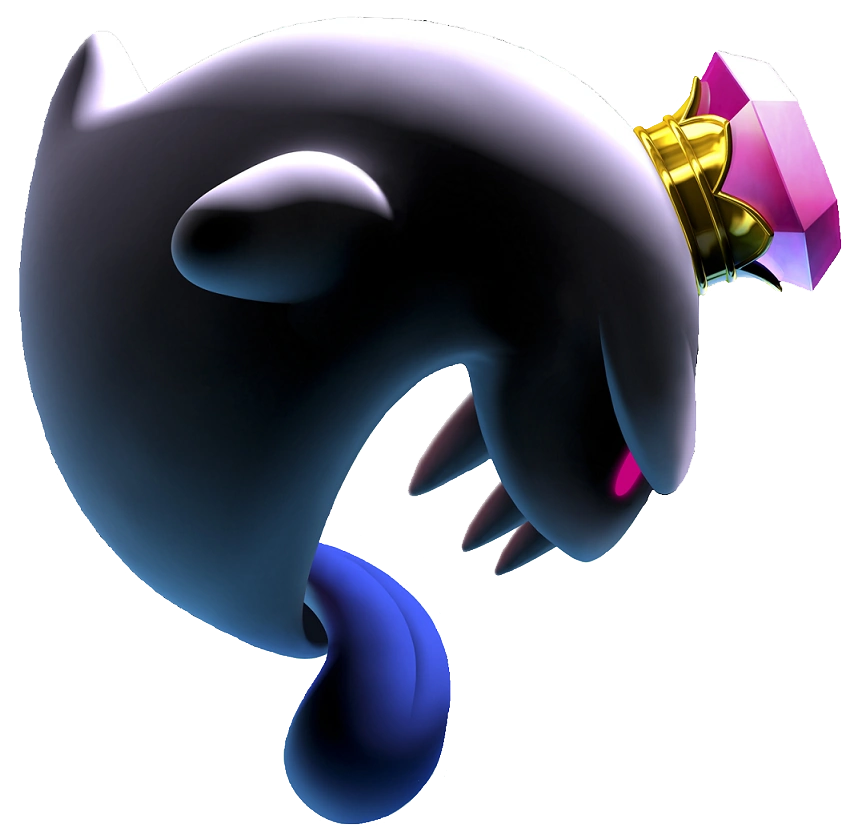
|
|

|
|
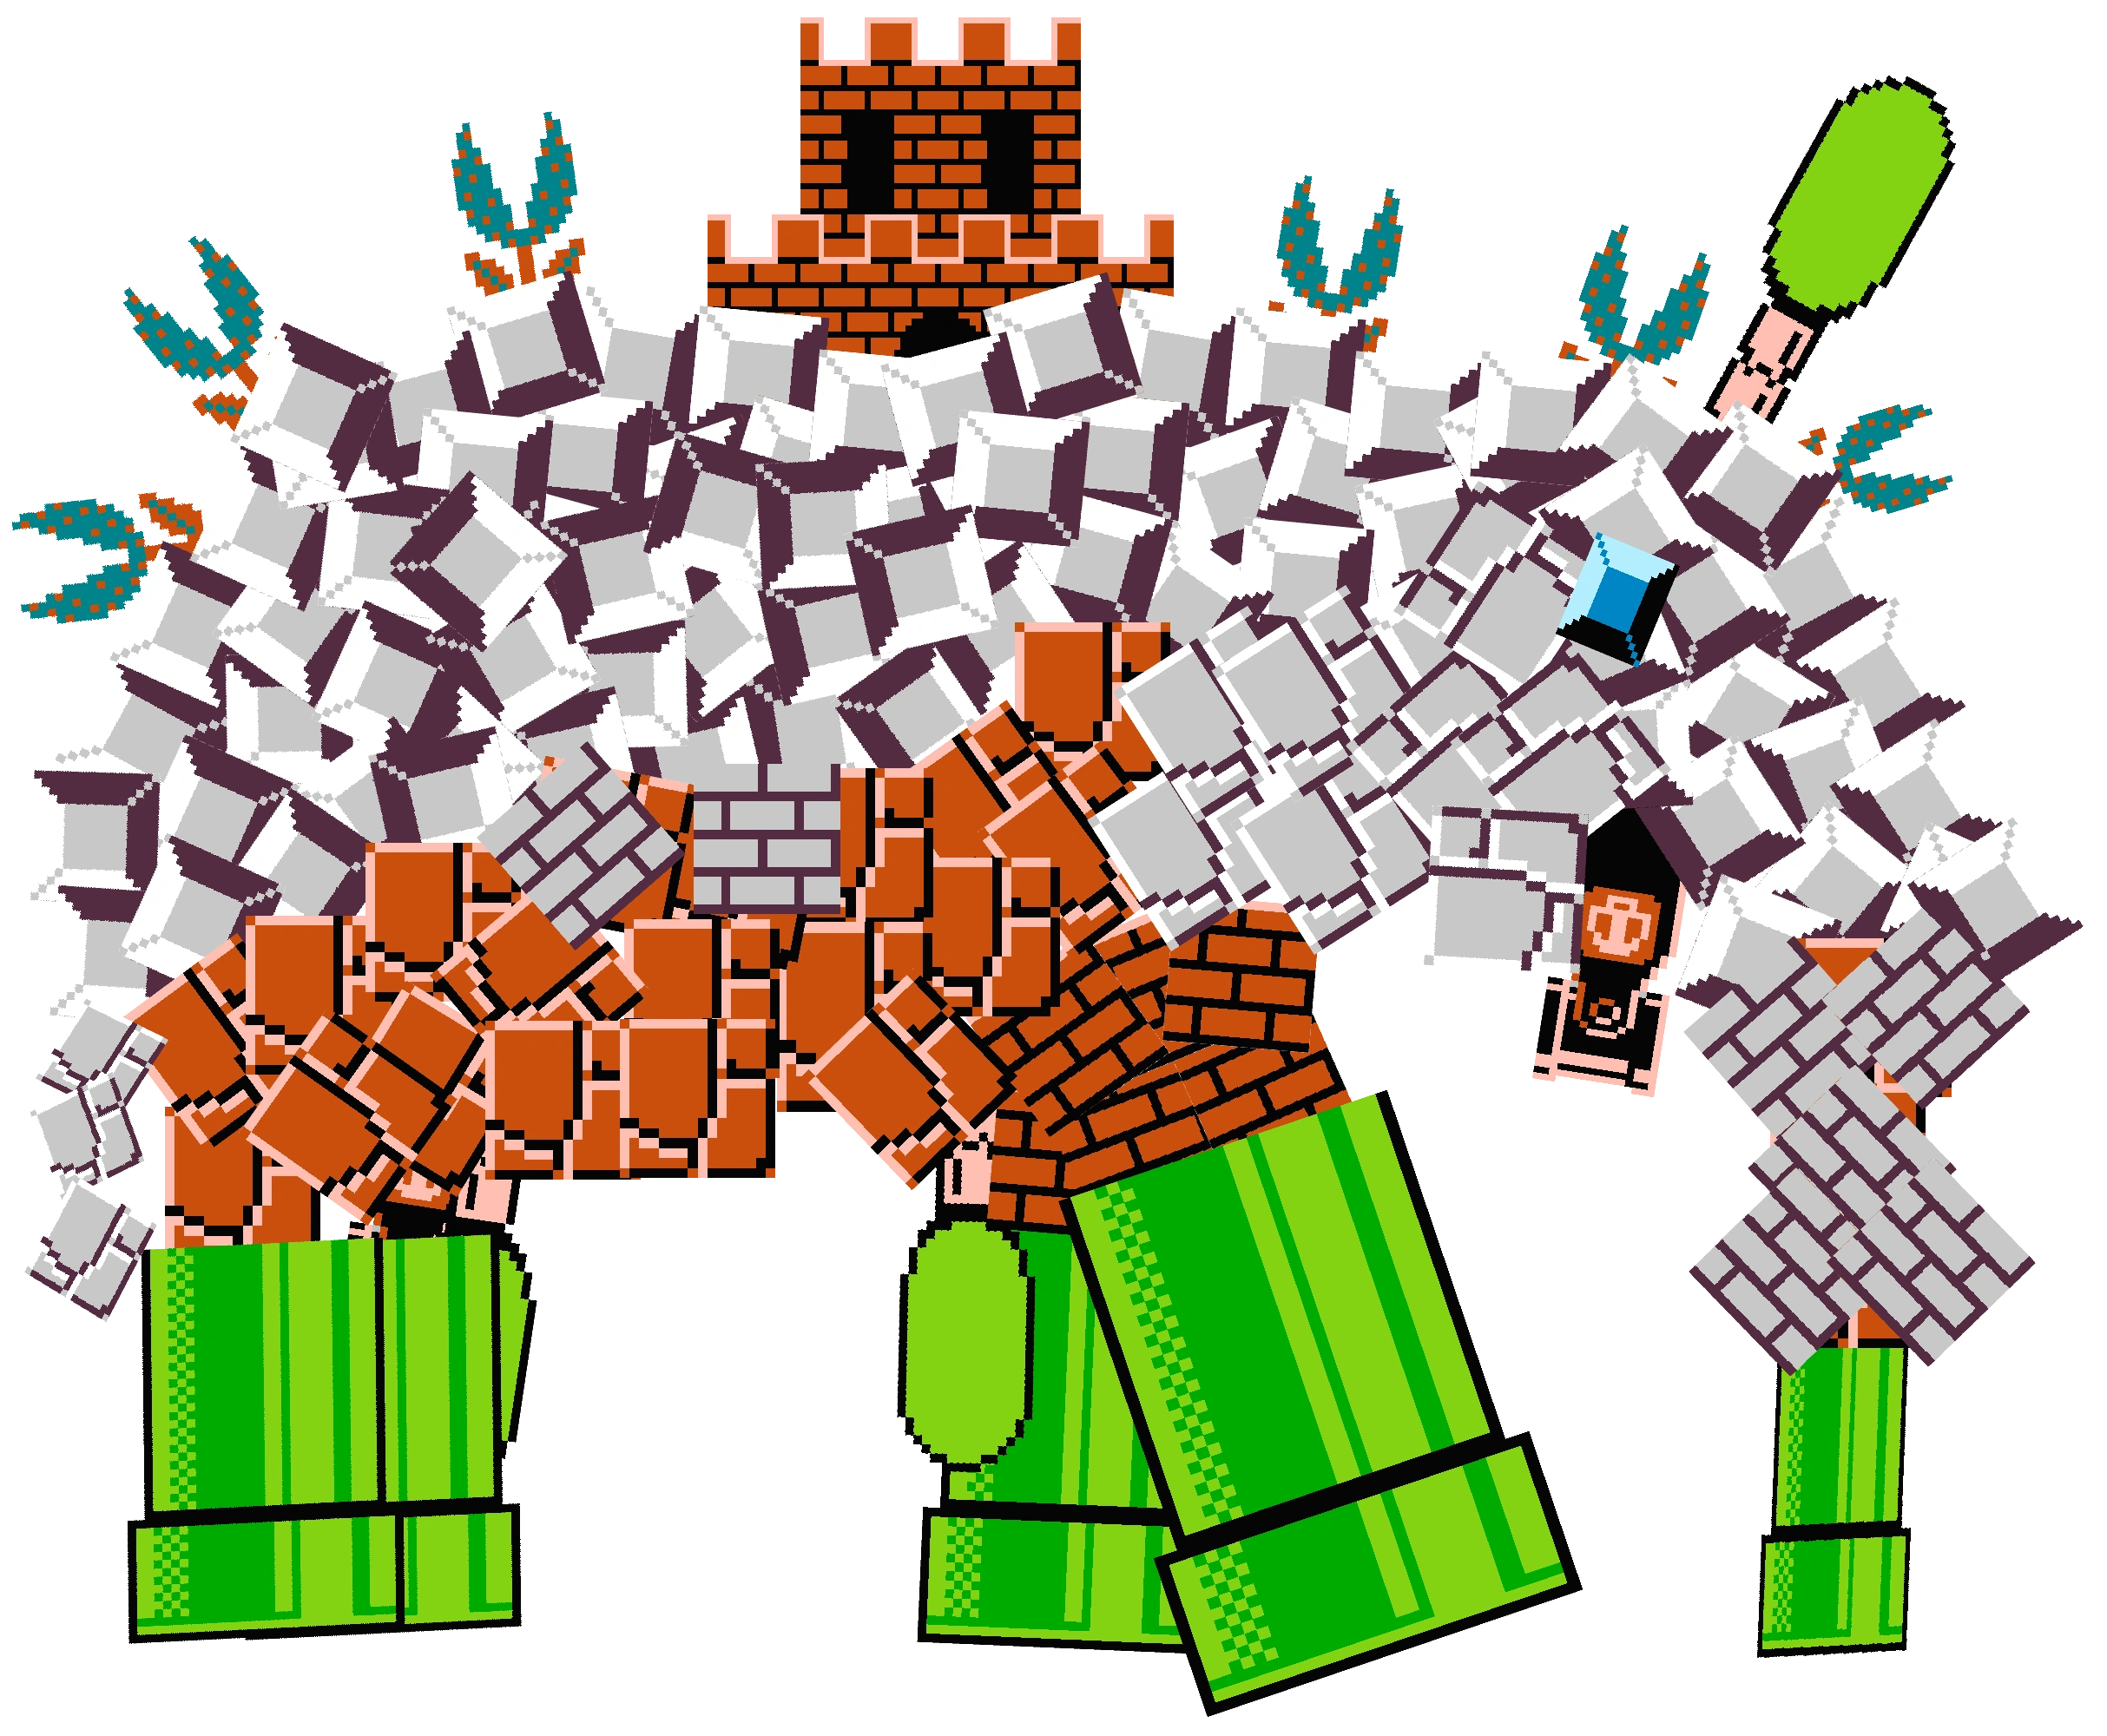
|
|
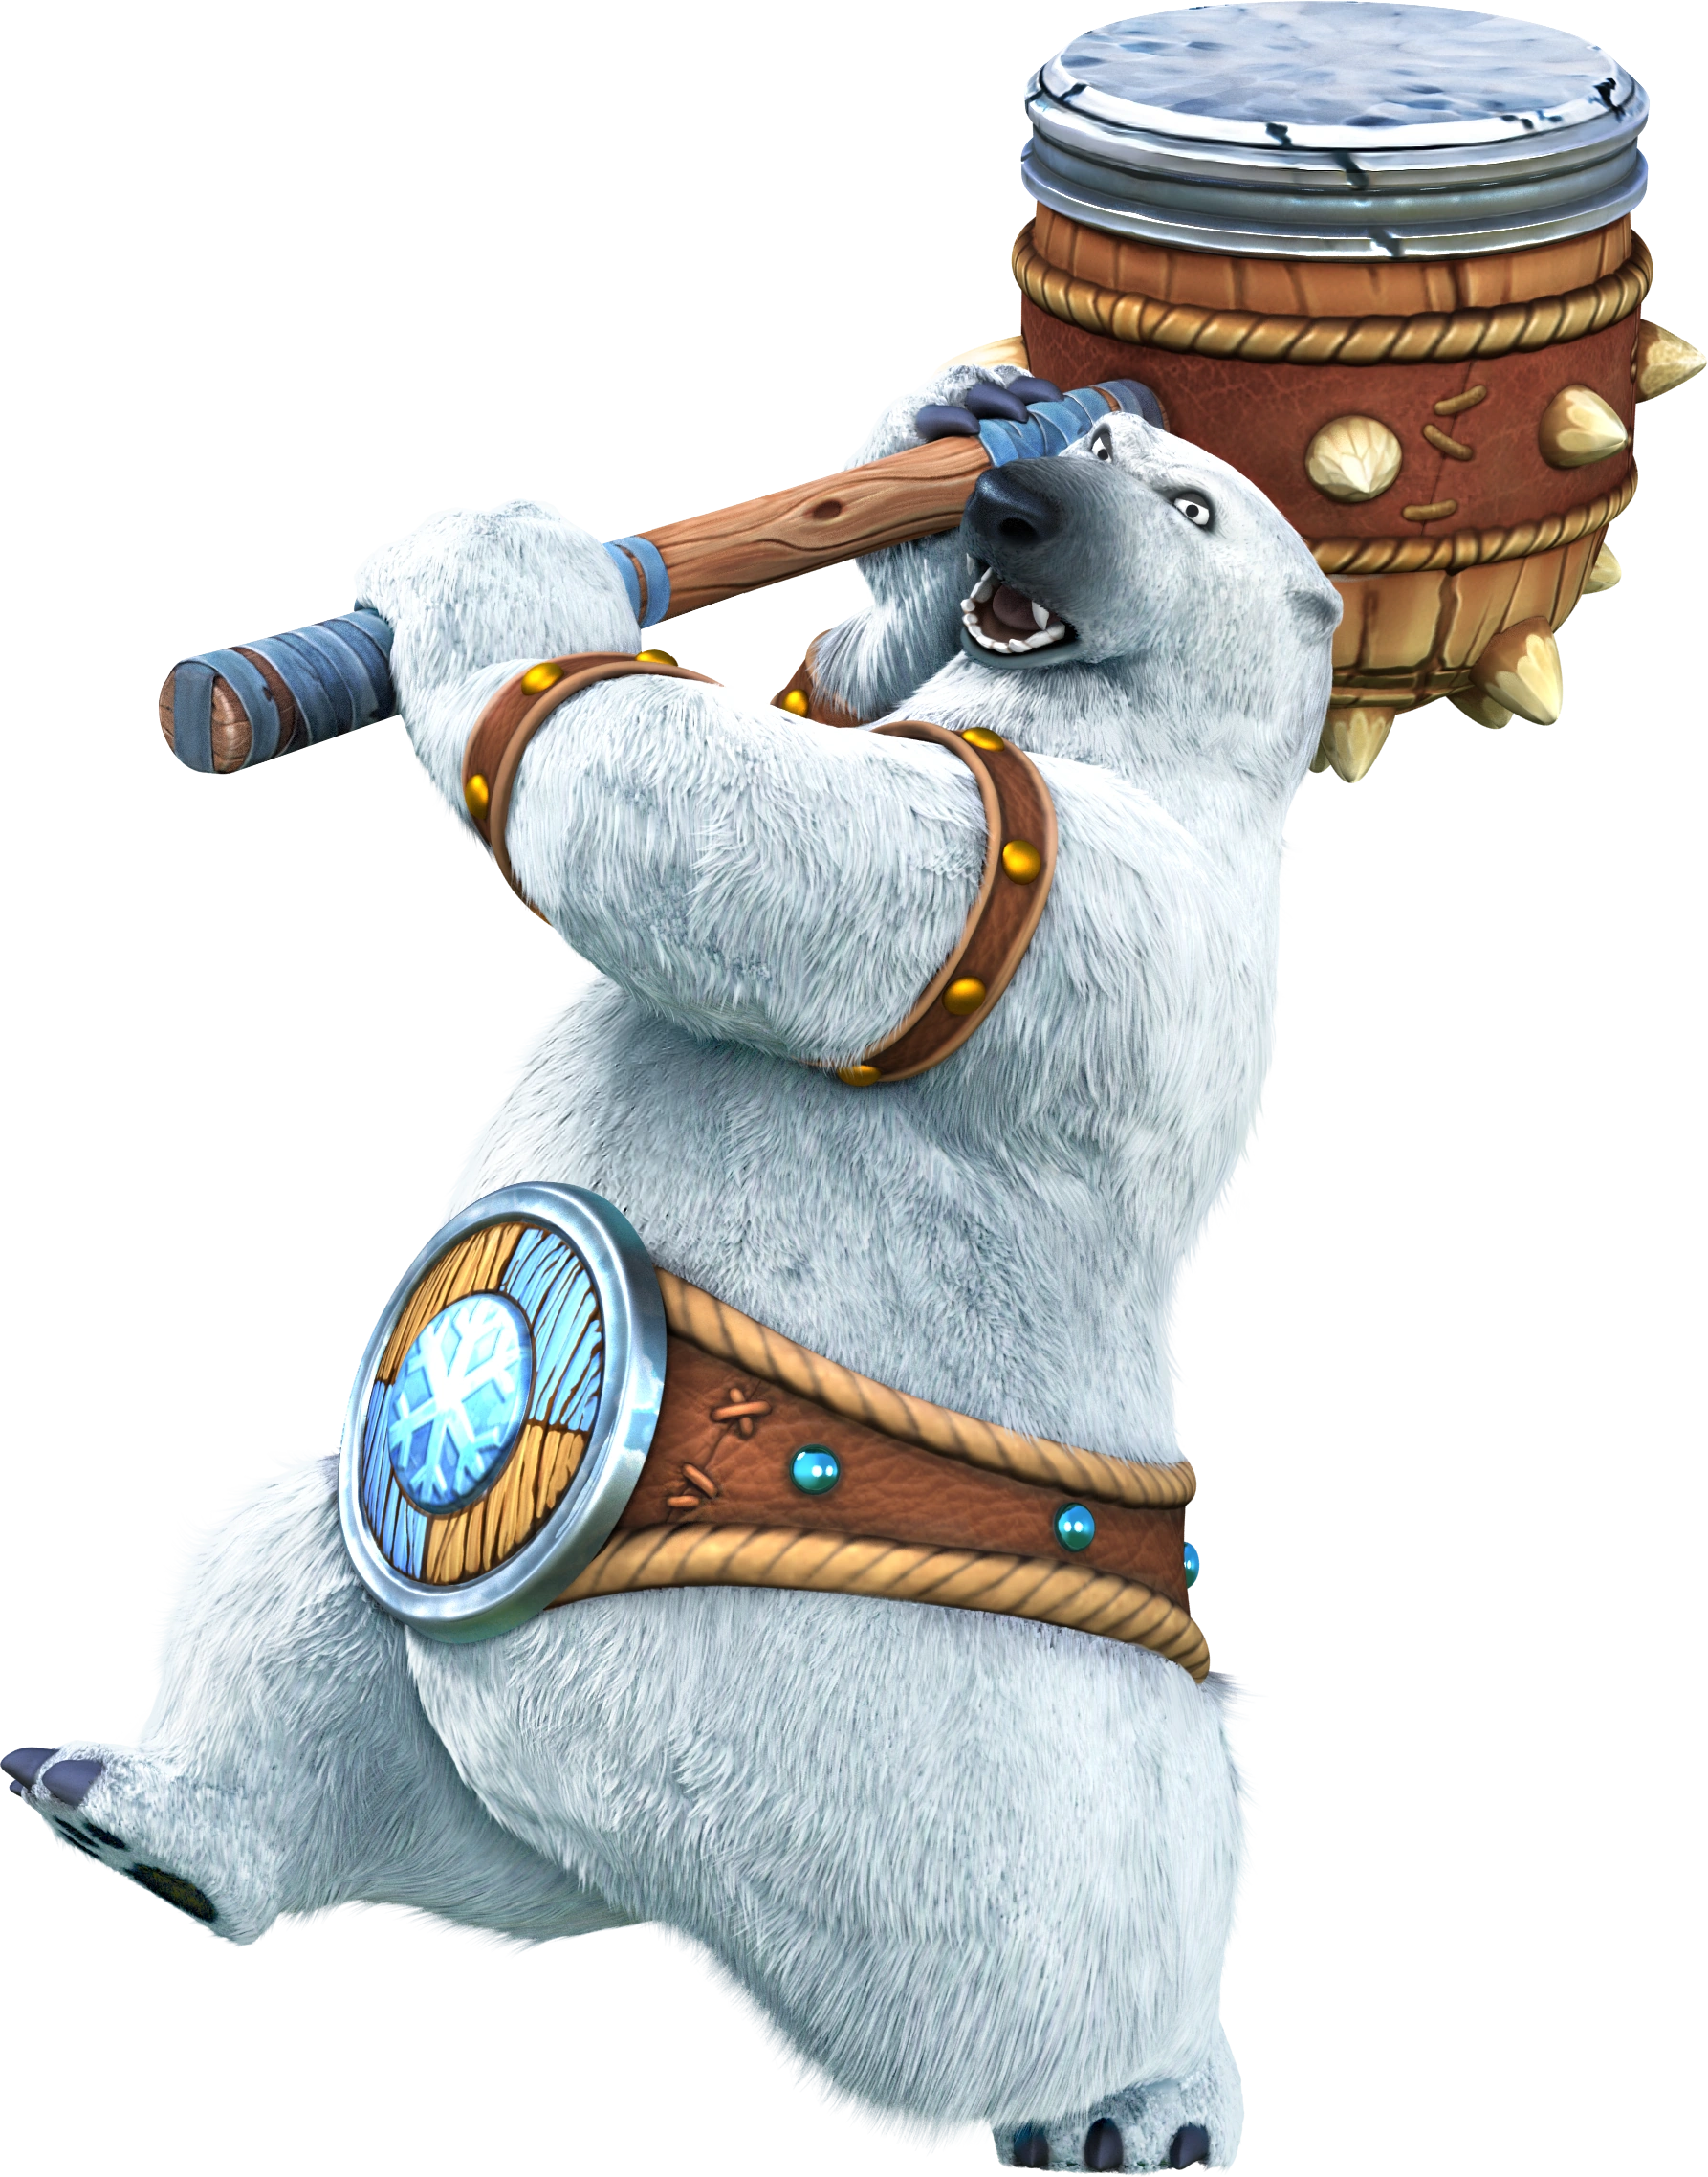
|
|
|
Poké Ball Pokémon[]
Once a Poké Ball appears on the battlefield, a fighter is able to pick it up and open it, bringing out one of over 50 different Pokémon. These different creatures span across all seven generations of the series, starting with iconic Pokémon like Venusaur and Clefairy before getting to new runner-ups like Bewear and Togedemaru. They function like Assist Trophies, popping up on stage and performing a specific action that helps the summoner and hinders opponents.
In addition, the Master Ball serves the same function as the Poké Ball, but only summons powerful legendary Pokémon like Giratina and Mew.
Below are all of the Pokémon in the game, going in the order of their original PokéDex numbers. All new Pokémon are labeled with a ![]() icon next to their name, whereas returning ones have no icon associated with them.
icon next to their name, whereas returning ones have no icon associated with them.
| 003: Venusaur | Venusaur slams down upon the stage, roaring before spreading poisonous pollen upon the stage. The initial slam causes an earthquake akin to the POW Block item, launching fighters. |
| 009: Blastoise | Blastoise stands firm in a single spot and shoots concentrated streams of water from both of it's cannons. The water pushes fighters backwards while dealing damage to them. |
| 015: Beedrill | Beedrill appears and moves to the left or the right, dashing off-screen. Seconds later, a swarm of Beedrill dash to the opposite side, hurting whoever is in their path while using Poison Sting. |
| 026: Raichu (Alolan) | Raichu, in his Alolan form, surfs in the air around the stage, zipping around and knocking opponents who are in his way around. He's covered in electric energy, so make sure to avoid him. |
| 035: Clefairy | Clefairy appears and waves around, allowing it's summoner to use Metronome. Metronome allows them to copy the move of any Pokémon's signature move, going from Goldeen to Mew. |
| 037: Vulpix | Vulpix appears and starts shooting out streams of fire from it's mouth, burning the platform it's on along with anyone who comes into contact with it. |
| 037: Vulpix (Alolan) | Vulpix appears in it's Alolan form, breathing small bursts of chilling air in a certain direction. The air puts fighters under a unique "freeze effect", chipping away at their percentage for a bit. |
| 052: Meowth | Meowth jumps into the fray and starts rapidly tossing coins in one direction. The coins do minimal damage, but push fighters away from him until he disappears. |
| 063: Abra | Abra appears on the stage and hovers there silently. If a fighter gets too close to it, it grabs it and teleports to another point on the stage that houses some form of danger, damaging it's kidnapee. |
| 095: Onix | Onix appears and drops rocks off it's large body. The rocks deal massive damage to whoever gets hit by them, but sometimes contain healing or offensive items for someone to use. |
| 101: Electrode | Electrode pops in and starts shaking around, ready to explode. If it does explode, those caught in it's range are damaged and damaged hard. Sometimes, however, it doesn't explode and sits there. |
| 103: Exeggutor (Alolan) | Exeggutor, in his Alolan form, towers over all other fighters and creates a barrier that cuts the stage in half, making the others halves inaccessible to people on each side. |
| 106: Hitmonlee | Hitmonlee jumps down on the stage and proceeds to jump high before landing back down with a hard kick, slamming anyone who comes in contact with the flaming foot. |
| 110: Weezing | Weezing charges up, small bursts of gas coming out of him as he slightly expands. Once he's ready, he explodes, leaving behind a poisonous cloud where he once was that damages foes. |
| 113: Chansey | Chansey, like certain other Pokémon, don't attack their opponents head-on. Rather, she throws eggs three times, all of which contain a random item for someone to pick up. |
| 118: Goldeen | Goldeen flops onto the stage and does...nothing. It simply flops around, gasping for air and begging to be retracted back into the Poké Ball. Literally nothing else happens. |
| 121: Starmie | Starmie appears on the stage and starts rapidly spinning like a top, shooting lazers out of his gem eye. Those caught near him will be rapidly hit before being slightly launched off. |
| 132: Ditto | Ditto appears and immediately transforms into a clone of another fighter, the only difference being their blank expressionless face. It then proceeds to fight them for a few seconds. |
| 133: Eevee | Eevee appears on the stage and runs around, ramming it's head into whoever is in it's path. If no one is near it, it simply looks both ways and stays idle, making the same expression. |
| 143: Snorlax | Snorlax jumps up in the air, disappearing for a few seconds before coming back down, much bigger than before. He moves down across the screen, massively damaging whoever he touches. |
| 144: Articuno | Articuno flies down and hovers over the stage, looking left and right. It then unleashes a blast of freezing energy that encases whoever it touches into a block of ice, damaging them. |
| 145: Zapdos | Zapdos zooms down to the stage and screeches before a flurry of lightning strikes hit the stage. They hit in random points, never hitting the same spot twice. |
| 146: Moltres | Moltres jets off into the air, disappearing off of the screen for a few seconds before slamming down on a random part on the stage. Even when he leaves, fire remains there for a few seconds. |
| 151: Mew | Mew appears and giggles before dropping only trophies and CDs and flying away. They have a one out eight hundred and two chance of appearing, so it's important to keep watch for it. |
| 152: Chikorita | Chikorita pops into existence and swings it's head up and down, resulting in razor-sharp leafs flying out of the leaf on it's head. They give minimal knockback but large chunks of damage if used right. |
| 155: Cyndaquil | Cyndaquil's back is lit aflame, jutting out blasts of fire. He walks around the stage, going back and forth in hopes of damaging whoever stands in his path...even with the short attack range. |
| 167: Spinarak |
Spinarak drops down from a web and scuttles around the stage, running directly at an opponent. It latches onto then and bites them, poisoning them before trying to find another fighter. |
| 175: Togepi | Togepi, like Clefairy, uses Metronome...albeit different. She can copy up to five different moves from the Pokémon series, using moves that harm, heal, or even hinder. |
| 181: Ampharos |
Ampharos pops out and begins to light up it's tail. The sheer brilliance of the light can paralyze opponents if they get too close to it, leaving them wide open for attacks. |
| 182: Bellossom | Bellossom starts to sway from side to side and do a dance, putting opponents to sleep if they're nearby. This leaves fighters open to the attacks of others, as Bellossom doesn't do real damage. |
| 183: Marill | Marill pops in and runs around the stage, slapping foes. It uses it's tail to attack sometimes, whipping it back and forth and dealing decent damage and knockback. |
| 185: Sudowoodo |
Sudowoodo stands in place, not moving until another fighter gets near. It then slams it's arms down, knocking opponents back until it goes away. |
| 193: Yanma |
Yanma flies around, biting opponents in it's way before going back and forth. It can be used as a moving platform, allowing for easy recoveries and ways to avoid opponents. |
| 201: Unown | Unown floats there, staring idly at the screen before flying off. Like Beedrill, he comes back with all of his Unown friends, slamming into anyone with a flurry of living letters. |
| 202: Wobbuffet | Wobbuffet doesn't seem to do much, simply standing there until a fighter hits him. He acts like a punching bag, hitting fighters harder if he rebounds after the delivered hit. |
| 212: Scizor | Scizor rushes at a random foe and grabs them with his pincers, delivering multiple pinches and jabs to them. He lets go and proceeds to fly off screen, leaving the fighter he attacked. |
| 214: Heracross |
Heracross's main move is to charge into opponents with his horn, locking them into position before pummeling them with the aforementioned horn and his arms, punching rapidly. |
| 216 & 217: Teddiursa/Ursaring |
Ursaring stands her baby Teddiursa, staring down at it in pride. If a fighter hits Teddiursa, Ursaring goes berserk and slams them around, swiping and biting at them before sitting with her cub. |
| 219: Magcargo |
Magcargo is slow, dragging itself across the battlefield. It leaves a boiling hot trail of fire behind it, damaging whoever touches it. The Pokémon itself is hot to the touch, setting fighters ablaze. |
| 232: Donphan |
Donphan curls up into a wheel-like form and barrels through items, fighters, and other obstacles. When uncurled, it can grab fighters and toss them around with it's long trunk. |
| 233: Porygon2 | Porygon2 proceeds to move forwards and backwards upon being called on, rotating it's "feet" and moving it's head up and down to clobber anyone who's in front of it. |
| 237: Hitmontop |
Hitmontop lands on it's head and proceeds to spin around, dashing around the stag like a tornado and sweeping up items and fighters before jumping back to it's feet and delivering a final kick. |
| 243: Raikou | Raikou creates a current of electricity that covers every inch of the platform Raikou is standing on. It covers the top, sides, and bottom, only not covering the ledges on the main platform if it's there. |
| 244: Entei | Entei makes it's presence known, creating a tremendous roar before initiating it's attack. A pillar of fire rises around it and shoots upward, almost K.O.ing whoever is caught within it. |
| 245: Suicune | Suicine gracefully appears on the stage and proceeds to summon a wave of frost that moves across the stage. Whoever touches it takes damage and even freezes at high percentages. |
| 249: Lugia | Lugia, rather than flying into the foreground, goes into the background and starts flapping it's wings, creating gusts of winds that travel around the stage, instantly K.O.ing whoever touches it. |
| 250: Ho-Oh | Ho-oh descends from the heavens and proceeds to fly back upwards, sprouting a spinning column of fire underneath it. The fire damages whoever is caught within it, spinning them around as well. |
| 251: Celebi | Celebi appear and flutters over the stage. Rather than harming fighters, she instead drops trophies, healing items, regular attacking items, or sometimes nothing at all. |
| 255: Torchic | Torchic gleefully hopes around the stage, smiling and looking cheerful the whole way through. However, it leaves behind a burning trail of embers wherever it goes, damaging those who step in it. |
| 264: Linoone |
Linoone runs around the stage at a fast pace, zig-zagging all around the stage. It can move up and down on floating platforms, meaning that no fighter is fully safe from it's attacks. |
| 271: Lombre |
Lombre appears and starts to dance, causing it to start raining. The rain can damage opponents and also make areas not beneath platforms soaked and slippery, causing tripping at certain points. |
| 275: Shiftry |
Shiftry is vicious, stomping over to opponents and slashing at them with his leaf hands. Once caught in it's grasp, it'll deliver devastating amounts of damage, ending in a swift slap. |
| 282: Gardevoir | Gardevoir appears and creates a shield around her summoner. The shield protects them from any and all projectiles, with Gardevoir moving and taking the shield with her. |
| 286: Breloom |
Breloom hops around, bouncing across the stage. He lunges at opponents when he's near one, kicking them square in the chest before beginning to hop up and down once again. |
| 288: Vigoroth |
Vigoroth is an energy-filled machine, dashing around and looking both ways. He'll slash at other fighters with his claws, hanging on platforms and planning to drop down onto their heads. |
| 294: Loudred |
Loudred slams down and starts to roar loudly, creating shockwaves that emit straight from it's mouth. The soundwaves paralyze a fighter before launching them backwards a bit. |
| 302: Sableye |
Sableye digs in a specific spot on the stage before pulling out a valuable item, whether it be offensive or defensive. Sableye has a small chance of taking the item for himself and leaving, however. |
| 303: Mawile |
Mawile waddles around the stage, seemingly harmless until a fighter gets close to it's large mouth on the back. It will then swallow them as Mawile then tries to run off the stage before they escape. |
| 316: Gulpin | Gulpin plops down on the stage and sits, waiting for someone to get close. Once they do, it opens wide and swallows them, making them immobile as it gobbles them up. |
| 327: Spinda |
Spinda, being the clumsy creature it is, wanders around the stage, delivering hits at random. It spins around in a similar style to drunken boxing, deliver hits with the weight of it's body. |
| 335: Zangoose |
Zangoose is a relentless fighter, finding a random opponent and pursuing them throughout it's time on the stage. It'll do anything in order to duke it out with them, ready to slash and swipe at them. |
| 352: Kecleon |
Kecleon appears and immediately turns invisible, only it's shadow remaining. It will randomly pop out at points and use it's tongue to poke and strike opponents before blending back in. |
| 359: Absol |
Absol appears and howls, signalling a disaster is about to happen. The disaster is all offensive weapons like bombs going off after the howl, exploding together. |
| 362: Glalie |
Glalie roars and summons a blizzard, sending chunks of ice flying. The ice surprisingly does no damage and instead completely freezes whoever it touches, locking them in place until they escape. |
| 366: Clamperl |
Clamperl is able to trap a fighter inside of it's shell, keeping them in there until spitting them back out. Along with them comes a random item for someone else to use. |
| 376: Metagross | Metagross begins to rapidly slam his legs down onto the battlefield, shaking the stage and trapping anyone near or below his legs in the dirt. He does massive amounts of damage. |
| 377: Regirock |
Regirock pops out and roars before throwing large boulders around the stage. Some bounce twice before breaking and some break upon impact with the ground or another fighter. |
| 380/381: Latias & Latios | Latias and Latios function as a duo, flying across the screen separately and damaging whoever they touch. They end it by flying in an X formation, making their attack deadlier. |
| 382: Kyogre | Kyogres pops in out of nowhere and proceeds to glide towards a random opponent, spewing out a jet of water to damage and knock them off of the stage in order to K.O. them. |
| 383: Groudon | Groudon appears and sits idly as it sets itself ablaze. It's large figure and frame make it a hard hazard to avoid, taking up a large part of whatever stage it's been summoned on. |
| 385: Jirachi | Jirachi appears from nowhere and cries it's name before flying back upwards, dropping trophies, music, and other items before disappearing, akin to Mew and Celebi. |
| 386: Deoxys (Attack Form) | Deoxys, in it's Attack Form, flies upwards and fires a beam downwards. The beam is extremely powerful, getting narrower as time goes on and damaging any opponents caught within it. |
| 391: Monferno |
Monferno, already in a fighting stance, aims to protect it's summoner by sticking close to it and acting as a partner. It can only take a few hits before being K.O.ing, however. |
| 393: Piplup | Piplup plops down on the stage and starts moving in a stream of water. If it makes contact with another player, it attempts to drag them off of the stage, K.O.ing them and itself. |
| 405: Luxray |
Luxray, looking rather miffed, starts to charge himself up as electricity surrounds him. It then proceeds to roar as lightning strikes the stage in three random places, frying anything in it's way. |
| 407: Roserade |
Roserade gracefully moves around the stage, twiling and struting around. Her main attack acts like a charged side special, jutting out a lance-like protrusion from her hand. |
| 408: Cranidos |
Cranidos can't exactly be stopped when it gets going, darting back and forth like an unstoppable juggernaut. It's head damages opponents when used as a battering ram-like object. |
| 416: Vespiquen |
Vespiquen sits idly in the background, calling upon a swarm of Combees to stick themselves to a single figher. The weight of them slows a fighter down, making them much slower and heavier. |
| 417:Pachirisu |
Pachirisu is able to whack opponents with her tail and paralyze them by charging her cheeks and charging at them. She doesn't do the best damage, but keeps opponents on their toes. |
| 428: Lopunny |
Lopunny is a very physical fighter, darting around the stage and delivering kicks and punches. She evokes Mega Lopunny, using punches, kicks, and her ears to deal out damage. |
| 433: Chingling |
Chingling hops around, jingling around before latching herself around an opponent. She uses the appendages on her head to constrict opponents, paralyzing them and keeping them in place. |
| 438: Bonsly | Bonsly functions much more like a projectile than a regular Pokémon. He's able to be picked up and tossed, dealing critical damage if it hits a target akin to Mr. Saturn. |
| 442: Spiritomb |
Spiritomb traps opponents in a vortex of sorts, sucking them into the keystone that it calls home before spitting them back out onto the stage, laughing maniacally. |
| 446: Munchlax | Munchlax is somewhat of a hinderance, as instead of fighting or helping the summoner, it simply walks around and eats any items on the battlefield. If there are none to eat, he's even more useless. |
| 453: Croagunk |
Croagunk jumps around the stage, performing crazy acrobatic tricks in order to get to others. He jabs opponents with his hands, damaging them and chipping at their health like poison. |
| 455: Carnivine |
Carnivine hovers around, ready to chow down on opponents. It'll then get their head stuck in it's mouth, thrashing around in order to inflict damage onto them. |
| 460: Abomasnow | Abomasnow pops up on the battlefield and is able to use two different moves. He can create a blizzard around him that knocks back opponents while also being able to punch foes, freezing them. |
| 461: Weavile | Weavile runs at any and all other opponents at a rapid pace, swiping at them before running off. He's able to jump up onto platforms and is extremely fast, making an effort to chase after others. |
| 472: Gliscor |
Gliscor flies around in the air, waiting for a good moment to strike. Upon finding that moment, it'll swoop down and use a flurry of attacks using it's tail, claws, and wings. |
| 475: Gallade |
Gallade will valiantly defend it's summoner, leaping in to deflect or even take hits for them. It can be K.O.'d, but is still a challenge as it's pretty relentless overall. |
| 479: Rotom |
Rotom takes on the form of one of it's many different electrical appliance, using their unique abilities to deal out different kinds of damage depending on the form they take. |
| 487: Giratina | Giratina appears and creates a large tornado that sweeps up fighters in it's general direction. It can carry those caught in off of the stage and can even K.O. them at high percentages. |
| 488: Cresselia |
Cresselia floats down and proceeds to shine moonbeams down upon the summoner, healing them or boosting a random attribute of theirs, whether it be speed, strength, or agility. |
| 490: Manaphy | Manaphy appears and uses it's powers to swap the actions of a CPU and a player, resulting in them switching bodies until Manaphy disappears. This means you get to play as someone else for a bit. |
| 491: Darkrai | Darkrai flashes onto the stage and shoots out voids from his hands. The voids put those within in to sleep, drawing them in and leaving them open for powerful attacks from others. |
| 493: Arceus | Arceus is summoned, gently touching down upon the stage. He slams his two front legs down upon the ground, forcing all but the summoner to take damage as if a down Smash was used on them. |
| 494: Victini | Victini flies onto the stage, cheering as it boosts the physical power of whoever summoned it. The boost applies to all attacks, including smashes and specials. |
| 495: Snivy | Snivy appears starts swinging his tails around, launching razor-sharp leaves in a single direction. He can jump as well, allowing for the leaves to potentially reach more fighters. |
| 500: Emboar |
Emboar stomps around and slams opponents down on the stage, using it's sheer strength and physique to crush whoever it grabs into the ground, leaving them stuck in the floor. |
| 501: Oshawott | Oshawott appears and starts bouncing around, excited. It proceeds to toss it's shell at fighters, bouncing off of them before coming back to him. He can turn left and right upon the shell returning. |
| 523: Zebstrika |
Zebstrika stands in one position, crouching down in a readying stance. Sparks appear around it before it jets off in a single direction, taking everything in it's path with it. |
| 529: Drilbur |
Drilbur burrows under the stage, moving around as small dirt pebbles fly up. It eventually pops back out right under a fighter or an item, spinning as it juts out of the ground. |
| 532: Timburr |
Timburr, gripping on tightly to it's wooden plank, starts to spin around while holding the very end of it. He moves like a spinning top, slamming the plank straight into fighters. |
| 539: Sawk |
Sawk runs around the stage and delivers brutal fist-based attacks to others. He frequently counters physical attacks like punches and kicks, so projectiles are the best weapon to use against him. |
| 552: Krokorok |
Krokorok swings it's whole body around, engaging in a more versatile form of Brutal Swing. It uses it's head and tail to deliver varying degrees of damage. |
| 555: Darmanitan |
Darmanitan stays in it's Zen form until a fighter gets near, then deciding to lash out and rapidly attack a fighter with it's brute strength. It reverts back to it's Zen form when the fighter is gone. |
| 563: Cofagrigus |
Cofagrius reaches out for any nearby fighters and drags them into it's coffin-like body, damaging them while standing still. It'll then spit them back out, revealing they now have a random status effect. |
| 570: Zoroa |
Zoroa appears and turns into a fighter who wasn't chosen during the match. He proceeds to use all of their special moves to their fullest extent, but cannot use a Final Smash. |
| 573: Cinccino |
Cinccino latches onto it's summoner and acts as a protective shield, taking a few hits before having to get off. It doesn't directly attack, instead soaking up hits from others. |
| 575: Gothorita |
Gothorita uses Future Sight to see when her summoner is going to be attacked and will immediately counter the opponent's attack with a few of her own. |
| 579: Reuniclus |
Reuniclus fires out balls of psychic energy at the stage, targetting random places. The balls have considerable knockback, stunning fighters before having them launched. |
| 587: Emolga |
Emolga glides around the battlefield, swooping down and grabbing onto a fighter's head. It then shocks them, launching them as it glides off into the distance. |
| 605: Elgyem |
Elgyem uses it's intergalactic powers to heal it's summoner, taking some damage away. It must stay untouched, however, as even one hit will send it flying. |
| 612: Haxorus |
Haxorus uses the two axe-like apendages on the side of it's head to slice at opponents. Simply running into Haxorus will bring a fighter loads of hurt, so it's important to keep an eye out. |
| 620: Mienshao |
Mienshao leaps around the stage gracefully, whacking opponents with her arms. She can deliver kicks as well, but they're nowhere near as powerful as the slaps. |
| 624: Pawniard |
Pawniard uses the blades that surround his whole body as his main method of attacking. He can use quick jabs, stabs, slashes, or even throw his whole body at a foe to do damage. |
| 646: Kyurem | Kyurem slams down onto the stage and roars before shooting out a frosty wind that freezes whoever stands in it's way. It deals large chunks of damage before freezing them. |
| 647: Keldeo | Keldeo runs around the stage, extending it's horn to perform it's Secret Sword attack. The horn can be swung like an actual sword or just used to jab and strike enemies. |
| 648: Meloetta | Meloetta starts to sing a song that sends music notes and shockwaves outwards towards the stage. They bounce off of fighters and solid surfaces, going away when Meloetta ges away. |
| 649: Genesect | Genesect jumps down and fires a lazer from their back, dealing massive damage to those caught in it. The lazer goes through walls and platforms, meanign that no one besides the summoner is safe. |
| 650: Chespin | Chespin appears on the stage and jumps around before beginning to fire seed bombs in the air. They move in an arc and explode upon contact, able to be thrown in any direction by Chespin. |
| 653: Fennekin | Fennekin runs out on the stage and spews out blasts of fire. It doesn't like being stationary, moving between parts on the stage every few seconds before repeating it's attack. |
| 659: Bunnelby |
Bunnelby digs at the point it spawned in, searching for something in the ground. It can pull up an item, food, an Assist Trophy, or nothing, as the chances are random. |
| 661: Fletchling | Fletching hops around and even jumps at points, only rapidly pecking at other fighters when they're in it's range. It's not the fastest thing, hopping to get around. |
| 665: Spewpa | Spewpa appears and puffs out the hair around it, launching small spores around him. The spores lightly damage fighters, but mainly paralyze them and don't allow them to move for a second or two. |
| 668: Pyroar |
Pyroar roars and proudly runs across the stage, biting at opponents who stand in his way. His mane is set ablaze when he does so, burning anyone who touches it. |
| 671: Florges |
Florges stands idle, waiting for her someone to get near. If it's her summoner, then she will heal them slightly. If it's another foe, then she will impose an effect similar to Lip's Stick. |
| 673: Gogoat | Gogoat runs around the stage, darting back and forth and using it's head as a blunt weapon. It can be hopped on akin to a moving platform, allowing for extra creativity when using it. |
| 677: Espurr |
Espurr doesn't do much for the majority of their time on the stage, sitting idle until it's ears lift. Psychic energy spews out of them, damaging any foe that comes in contact with them. |
| 681: Aegislash |
Aegislash acts like a living sword would, flying around and slashing at foes. It's extremely hard to take out due to him going back and forth between it's Shield and Blade forms. |
| 684: Swirlix | Swirlix creates a field of fairy-like energy around her which slows down any fighter who runs into it. While no damage is taken, the field is large and can potentially trap fighters for a good while. |
| 686: Inkay | Inkay pops up and burrows into the ground, spinning like a drill. If an opponent touches it, not only do they take damage, but they also trip and fall down, leaving them wide open for attacks. |
| 687: Malamar |
Malamar appears and immediately flips the stage upside down while keeping the fighter's controls the same. A similar effect to Palkia, he immediately disappears when the stage is back to normal. |
| 693: Clawitzer |
Clawitzer floats above the stage, shooting out bursts of water from his one large claw. It eventually gets tired of this and proceeds to snip at brawls with the same claw up close. |
| 695: Heliolisk |
Heliolisk absorbs solar energy, popping out it's frills to do so. It then lunges around, tackling opponents with it's frills and tail while shocking them with it's electric powers. |
| 701: Hawlucha |
Hawlucha jumps up into the air and slams back down in, landing on the other side of the stage. It travels from side to side, slamming opponents who it lands on top of. |
| 702: Dedenne | Dedenne pops out on the battlefield and proceeds to generate ball of electricity around him. The ball bounces those caught within in back and forth, eventually launching them away. |
| 709: Trevenant |
Trevenant is out to "plant new trees"; by that, it means that it wanders around the stage and slams fighters into the ground, keeping them there until they can wiggle out. |
| 713: Avalugg |
Avalugg acts as a moving platform for fighters to stand on. He can crush anything that's below him, but is immobile if two or more fighters stand on him. |
| 715: Noivern |
Noivern jets upwards, flying high above the stage. He then proceeds to screech, sending damaging soundwaves across the stage. In stages with walls, the soundwaves bounce off of them. |
| 716: Xerneas | Xerneas appears and proceeds to use it's magic to raise the attack power of any and all fighters on the stage. He raises the power of his summoner more, however, giving them the advantage. |
| 717: Yveltal |
Yveltal flies into the background and proceeds to fire it's signature move, Oblivion Wing, at the stage. It can angle the beam upwards and downwards, making avoiding it a challenge. |
| 720: Hoopa |
Hoopa throws rings all around the battlefield, throwing up to four. He then flies through all of them, damaging any fighter that's on his flight path. |
| 721: Volcanion |
Volcanion stomps on the ground, causing cracks to appear at certain points in the stage. Boiling hot geysers shoot up, burning anyone who comes in contant with them. |
| 726: Torracat |
Torracat pounces on opponents, swiping and spewing flames at them. It can sense when someone is able to attack it as the hairs on it's back rise up. |
| 732: Trumbeak |
Trumbeak flies towards an opponent and pecks at them, perching itself on their backs. It'll leave if a fighter is attacked, prompting it to move to another fighter. |
| 738: Vikavolt |
Vikavolt zips around the stage at blazing speeds, grabbing anyone in his way with his two long spikes. He then proceeds to electrify his prey, shocking them and launching them back. |
| 741: Oricorio |
Oricorio, in one of it's four forms, attacks based on it's form of dance. It uses it's body and form to attack, delivering specific kinds of damage depending on the form. |
| 744: Rockruff |
Rockruff barks and proceeds to use Stealth Rock, surrounding points on the stage with sharp jagged rocks. Once a point touches a fighter and damages them, it goes away. |
| 750: Mudsdale |
Mudsdale appears on one end of the stage and charges off of the other side, ramming into other fighters. He falls off the stage, taking whoever got hit with him if they're not careful. |
| 754: Lurantis |
Lurantis uses X-Scissor on unsuspecting foes, slashing at them twice before launching them backwards. They're very easy to hit from behind, as they have no method of defense behind them. |
| 757: Salandit |
Salandit spews poisonous patches of fire as it walks around, viciously biting anyone in it's path. If there's an item on the ground, it'll steal it and dive off of the stage instead. |
| 760: Bewear | Bewear runs around the stage, seemingly doing nothing in particular. Once it finds an opponent, it delivers a powerful uppercut, sending whoever it touches flying into the air. |
| 766: Passimian |
Passimian chucks a large berry around the stage. The berry bounces off fighters, platforms, and walls if a stage has them, breaking after a few bounces. |
| 771: Pyukumuku | Pyukumuku is stationary until a fighter approaches it. Upon them getting near, Pyukumuku launches it's innards out in the shape of a hand, punching and slapping fighters around. |
| 772: Type:Null |
Type:Null walks around the stage, bashing opponents with it's head. It's head has random properties based off of a select few Pokémon types, such as Fire, Water, or Grass. |
| 776: Turtonator |
Turtonator stations itself where it spawns. If a fighter touches or lands on top of it, Turtonator explodes, sending that fighter and others around it flying at incredible speeds. |
| 777: Togedemaru | Togedemaru appears on the stage and waddles around. Upon getting near an opponent, the spikes on it's back jut outwards, a small burst of electricity appearing around him when they first do. |
| 778: Mimikyu | Mimikyu shuffles around the stage in search of a target, which it, upon finding one, proceeds to drag them under it's costume and damage them from the inside. |
| 785: Tapu Koko | Tapu Koko floats above the stage before sending thunder down upon the stage. If a foe is paralyzed by the thunder, it'll encase them it's "shell", damaging them from the inside. |
| 791: Solgaleo | Sogaleo proceeds to roar and rush upwards before unleashing Sunsteel Strike, a fiery hot beam of energy that shoots down at a point on the stage. Sogaleo hops into the beam before disappearing. |
| 792: Lunala | Lunala, like Lugia, flies behind the stage and prepares to fire Moongeist Beam, a single beam that almost K.O.'s whoever it touches. It moves the beam up after a few seconds. |
| 793: Nihilego |
Nihilego hovers above a fighter of it's choosing before descending down and sticking to their heads. The fighter is now immobile, trying to get the creature off of them. |
| 795: Pheromosa |
Pheromosa appears and uses a variety of kicks and punches to duke it out, using her thin frame to weasel her way through the different fighters and hazards around her. |
| 796: Xurkitree |
Xurkitree uses it's "arms" and "legs" to move around wildly, electrocuting and attacking whoever happens to come near it. It's last attack will electrify a small area around it, paralyzing foes. |
| 798: Kartana |
Kartana's small size makes it's tremendous power even more potent. It floats around the straight, slicing and dicing opponents rapidly as if it's using miniature swords. |
| 802: Marshadow | Marshadow becomes a flat shadow and moves around the stage, popping out under a fighter and rapidly punching them before disappearing back into the ground. |
| 806: Blacephalon |
Blacephalon juggles it's head around before tossing it at the stage. It explodes upon contact, prompting Blacephalon to throw two more duplicate heads at random points. |
| 812: Rillaboom |
Rillaboom begins to bang on it's drum, sitting stationary in the area where it was summoned. Repurposing Donkey Kong's old Final Smash, each soundwave bounces fighters back and forth, causing them to rack up damage over time. |
| 826: Orbeetle |
Orbeetle uses it's immensely strong Psychic abilities to control the nearest fighter, reversing their controls. Should Orbeetle be attacked in this state, the hold it has on the fighter breaks, allowing for it to be K.O.'d easily...as if getting close would be easy. |
| 831: Wooloo |
Wooloo, like Goldeen, seems to have no purpose, standing around absentmindedly and looking cute while doing so. However, should anyone attack it, the fluffiness of it's fleece with reflect the attack back at them, Wooloo taking no harm. |
| 841: Flapple |
Flapple darts around in the air, diving and swooping throughout the battlefield. Should it get close to the ground, it spews out small puddles of acid that do poison damage to anyone who steps in them. These puddles only disappear when Flapple's time on the stage is up. |
| 849: Toxtricity |
Toxtricity appears in either it's Amped or Low Key forms; in the former, it attacks by getting up close and doing stun damage , while with the latter, it does the same while inflicting poison damage. Either form is dangerous no matter what they do. |
| 851: Centiskorch |
Centiskorch lunges forwards 24/7, acting as an evermoving whip that does burn damage if it hits opponents with it's head. It snakes along the ground and since it's so flat, it can easily end up sneaking up on foes when they least expect it. |
| 858: Hatterene |
Hatterene rushes towards a foe and grabs them with it's hair-made claw, continuing to move forwards with them in tow. Unless they're stopped, Hatterene will go off the nearest edge or walkoff in an attempt to silence the fighter, although breaking free is an option. |
| 861: Grimmsnarl |
Grimmsnarl is all about grabs and throws, clutching onto opponents and performing it's own set of throws to dish out damage. The forward and side throws send them flying, the up throw has him toss them into the air like a toy, and the down throw has him shove his foe right into the floor. |
| 865: Sirfetch'd |
Sirfetch'd runs around with it's lance and shield, striking anyone nearby with the lance while protecting itself for attacks with the shield. The lance can unleash a rather strong attack with a light amount of super armor on it, making this duck one tricky threat. |
| 870: Falinks |
Falinks stacks themselves in two formations; two as legs, three as the torso and arms, and the brass one as the head. This form dishes out more physical attacks while it's other form, it's iconic line form, sees all six charge into opponents like a train. |
| 887: Dragapult |
Dragapult lingers in the background like some character's Final Smashes. Once ready to attack, they launch Dreepy out of their heads at laser-fast speeds, each Dreepy targeting one or two fighters. They don't do much damage on their own, but their speed is the real threat in this scenario. |
| 893: Calyrex |
Calyrex floats elegantly across the stage, not doing much in terms of attacks unless it's provoked. If done so, Calyrex uses their abilities to do rather minimal damage...unless you're shielding, in which your shield is almost destroyed by their power. |
Music[]
Like every other Smash game before it, Super Smash Bros. Swansong offers plenty of new music tracks for fighters to duke it out to. Unlike past games, any and all music tracks are able to be played on any stage you choose, the number of new remixes and original tracks increasing tenfold. Every past song returns, with all new ones being listed here.
Credit to every single remix artist presented here. You guys are the absolute bomb.
| Happy Together | The Turtles |
| Lifelight (Chipmunks Cover) | Super Smash Bro. Ultimate/Alvin & the Chipmunks |
| Melee Battle Remix | Super Smash Bros. Melee |
| Attack on the Koopa Bros. | Paper Mario |
| Battle Against an Armed Boss | Super Mario RPG: Legend of the Seven Stars |
| Bowser Medley | Super Mario 3D World |
| Champion of Destruction | Super Paper Mario |
| Come On! | Mario & Luigi: Superstar Saga |
| Crystal King Duel | Paper Mario |
| Double Cherry Pass | Super Mario 3D World |
| Forest Maze | Super Mario RPG: Legend of the Seven Stars |
| Gap of Crag | Super Paper Mario |
| Island of Violet/Sammer's Kingdom | Paper Mario: Color Splash/Super Paper Mario |
| Jr. Troopa Fight | Paper Mario |
| Let's Get A Move On! | Mario Party 3 |
| Lineland Road | Super Paper Mario |
| Mario vs Luigi - Stage Theme 2 | New Super Mario Bros. |
| Mine Cart | Captain Toad: Treasure Tracker |
| Moonview Highway | Mario Kart Wii |
| Mount Lineland | Super Paper Mario |
| Mr. L Medley | Super Paper Mario |
| Overworld | Super Mario Land |
| Party On! | Super Mario Party |
| Popple Battle | Mario & Luigi: Superstar Saga |
| Rainbow Road (Falcon Mix) | F-Zero X |
| Rawk Hawk | Paper Mario: The Thousand Year Door |
| Ready, GO! | Super Paper Mario |
| Sherbet Land | Mario Hoops: 3-on-3 |
| Slide | Super Mario 64 |
| Sunshine Boss Theme | Super Mario Sunshine |
| The Final Antasma Battle | Mario & Luigi: Dream Team |
| Victory! | Dr. Luigi |
| VS Elder Princess Shroob | Mario & Luigi: Partners in Time |
| Waluigi Pinball (Sports Mix) | Mario Sports Mix |
| We Like Baseball! | Mario Super Sluggers |
| Ancient Lake/Boss Race | Diddy Kong Racing |
| Aerie Fortress | Donkey Kong Jungle Beat |
| Big Top Bop | Donkey Kong Country: Tropical Freeze |
| Donkey Kong 3 Medley | Donkey Kong 3 |
| Flight of the Zinger | Donkey Kong Country 2: Diddy's Kong Quest |
| Forest Interlude | Donkey Kong Country 2: Diddy's Kong Quest |
| Grassland Grove | Donkey Kong Country: Tropical Freeze |
| Homecoming Hijinks | Donkey Kong Country: Tropical Freeze |
| Irate Eight/Lockjaw's Saga | Donkey Kong Country: Tropical Freeze |
| King Kut Out | Donkey Kong 64 |
| Mad Jack | Donkey Kong 64 |
| Mining Melancholy | Donkey Kong Country 2: Diddy's Kong Quest |
| Punch Bowl | Donkey Kong Country: Tropical Freeze |
| Sawmill Thrill | Donkey Kong Country: Tropical Freeze |
| Scorch 'N' Torch | Donkey Kong Country: Tropical Freeze |
| Showdown at the Tower | Donkey Kong '94 |
| Treetop Rock | Donkey Kong Country |
| VS Hog (Phase 1) | Donkey Kong Jungle Beat |
| VS Tusk (Phase 1) | Donkey Kong Jungle Beat |
| Ballad of the Wind Fish | The Legend of Zelda: Link's Awakening |
| Breath of the Wild Medley | The Legend of the Zelda: Breath of the Wild |
| Clock Town | The Legend of Zelda: Majora's Mask |
| Ganondorf Battle | The Legend of Zelda: The Wind Waker |
| Hyrule Castle Under Siege | The Legend of Zelda: A Link to the Past |
| Hyrule Circuit | Mario Kart 8 |
| Indigo-Go's Song | The Legend of Zelda: Majora's Mask |
| Koloktos Fight | The Legend of Zelda: Skyward Sword |
| Linebeck's Theme | The Legend of Zelda: Phantom Hourglass |
| Lorule Castle (Remix) | The Legend of Zelda: A Link Between Worlds |
| Majora's Wrath | The Legend of Zelda: Majora's Mask |
| Minish Village | The Legend of Zelda: The Minish Cap |
| Molduga Battle | The Legend of the Zelda: Breath of the Wild |
| Molgera (Warriors Mix) | Hyrule Warriors |
| Overworld | Zelda II: The Adventure of Link |
| Paraglider | The Legend of the Zelda: Breath of the Wild |
| Rito Village | The Legend of the Zelda: Breath of the Wild |
| Sacred Duet/Final Boss | The Legend of Zelda: Spirit Tracks |
| Song of Healing | The Legend of Zelda: Majora's Mask |
| Tal Tal Heights (Rock Mix) | The Legend of Zelda: Link's Awakening |
| Temple/Palace | Zelda II: The Adventure of Link |
| The Great Sea | The Legend of Zelda: Phantom Hourglass |
| Town | The Legend of Zelda: Ocarina of Time |
| Usurper King Zant | The Legend of Zelda: Twilight Princess |
| VS Guardian | The Legend of the Zelda: Breath of the Wild |
| VS Monk Maz Koshia | The Legend of the Zelda: Breath of the Wild |
| Windfall Island | The Legend of Zelda: The Wind Waker |
| 8-Bit Brinstar | Metroid |
| Aurora Unit 313 | Metroid Prime 3: Corruption |
| Brinstar (New Remix) | Metroid |
| Escape | Metroid Prime 2: Echoes |
| Metroid Blast - VS Ridley | Nintendo Land |
| Neo Ridley | Metroid Fusion |
| Omega Ridley | Metroid Prime 3: Corruption |
| Ridley Eternal | Super Metroid |
| Rundas Battle | Metroid Prime 3: Corruption |
| SA-X Fight | Metroid Fusion |
| Serris/Yakuza Fight | Metroid Fusion |
| Sylux Battle | Metroid Prime: Hunters |
| Theme of Metroid Prime 3 | Metroid Prime 3: Corruption |
| VS Dark Samus | Metroid Prime 2: Echoes |
| VS Nightmare | Metroid Fusion |
|
| |
| Big Bad Baby Bowser | Super Mario World 2: Yoshi's Island |
| Goal & Score | Super Mario World 2: Yoshi's Island |
| Jungle | Yoshi's Island DS |
| Knitty Knotty Windmill Hill | Yoshi's Woolly World |
| Lava Scarves and Red-Hot Blarggs | Yoshi's Woolly World |
| Overworld | Yoshi's New Island |
| Special Course | Yoshi's Woolly World |
| Title Theme | Yoshi's New Island |
| Yoshi's Island Zone | Sonic Lost World |
| Battle Among Friends (Adeleine) | Kirby 64: The Crystal Shards |
| Bubbly Clouds | Kirby's Epic Yarn |
| City Trial (New Mix) | Kirby Air Ride |
| Dark Matter Melody | Kirby's Dream Land 2 |
| Dark Meta Knight | Kirby Triple Deluxe |
| Dinner Desert | Kirby: Planet Robobot |
| Factory Inspection | Kirby 64: The Crystal Shards |
| Frozen Hillside (Remix) | Kirby Air Ride |
| Grass Land 4 | Kirby's Dream Land 3 |
| Haltmann Works Elite Management | Kirby: Planet Robobot |
| Hyness Medley | Kirby Star Allies |
| Kabula | Kirby Super Star Ultra |
| King Dedede Battle | Kirby Star Allies |
| Light | Kirby Air Ride |
| Marx/Heart of Nova | Kirby Super Star |
| Menu/Title | Kirby Air Ride |
| Meta Knight's Vengeance | Kirby Super Star |
| Moonlight Capital | Kirby Triple Deluxe |
| Parallel Boss Battle | Kirby Star Allies |
| Sky Sands | Kirby Air Ride |
| Taking Battle | Kirby 64: The Crystal Shards |
| Toy Tracks | Kirby's Epic Yarn |
| Void Soul Reborn | Kirby Star Allies |
| VS 0²/Miracle Matter | Kirby 64: The Crystal Shards |
| VS Fangora | Kirby's Epic Yarn |
| VS Masked Dedede | Kirby Super Star Ultra |
| VS Star Dream Soul OS | Kirby: Planet Robobot |
| VS Squashini | Kirby's Epic Yarn |
| Warrior from Another World | Kirby: Planet Robobot |
| Andross | Star Fox Adventures |
| Boss Battle B | Star Fox Zero |
| Meteo | Star Fox Assault |
| Return to Corneria | Star Fox Zero |
| Sauria | Star Fox Assault |
| Sector Y | Star Fox |
| Staff Roll | Star Fox 2 |
| Star Wolf (New Remix) | Star Fox 64 |
| Surprise Attack | Star Fox 2 |
| Versus | Star Fox 64 |
| Battle! Brendan/May | Pokémon Omega Ruby & Alpha Sapphire |
| Battle! Champion Iris | Pokémon Black 2 & White 2 |
| Battle! Colress | Pokémon Black 2 & White 2 |
| Battle! Cynthia | Pokémon Diamond & Pearl |
| Battle! Ho-Oh | Pokémon HeartGold & SoulSilver |
| Battle! Legends Red & Blue | Pokémon Sun & Moon |
| Battle! Rival | Pokémon HeartGold & SoulSilver |
| Battle! Tapu | Pokémon Sun & Moon |
| Battle! Team Skull Grunts | Pokémon Sun & Moon |
| Battle! Totem | Pokémon Sun & Moon |
| Battle! Ultra Beast | Pokémon Sun & Moon |
| Battle! Ultra Necrozma | Pokémon Ultra Sun & Ultra Moon |
| Battle! Xerneas/Yveltal | Pokémon X & Y |
| Battle Frontier Brain | Pokémon Emerald |
| Boss Battle | Pokémon Rumble |
| Champion Battle | HarmoKnight |
| Contest Hall Lobby | Pokémon Omega Ruby & Alpha Sapphire |
| Dialga's Fight to the Finish! | Pokémon Mystery Dungeon: Explorers of Time, Darkness, & Sky |
| Magikarp Festival | Pokkén Tournament |
| Mewtwo Battle | Pokémon X & Y |
| National Park | Pokémon Gold & Silver |
| Thalia Beach | Pokkén Tournament |
| Sky Tower | Pokémon Mystery Dungeon: Red & Blue Rescue Team |
| Temporal Tower | Pokémon Mystery Dungeon: Explorers of Time, Darkness, & Sky |
| Treasure Town | Pokémon Mystery Dungeon: Explorers of Time, Darkness, & Sky |
| Ultra Jungle | Pokémon Ultra Sun & Ultra Moon |
| VS Dusknoir | Pokémon Mystery Dungeon: Explorers of Time, Darkness, & Sky |
| VS Team Aqua/ Magma Leader | Pokémon Omega Ruby & Alpha Sapphire |
| VS Team Galactic Leader | Pokémon Diamond & Pearl |
| VS Wally | Pokémon Omega Ruby & Alpha Sapphire |
| Wild Battle | Pokémon Ruby & Sapphire |
| All That I Needed Was You | Earthbound Beginnings |
| Back Beat Battle | Mother 3 |
| Battle With A Dangerous Foe | Earthbound Beginnings |
| F-F-Fire! | Mother 3 |
| GENE163-1425 | Mother 3 |
| Mind of a Thief | Mother 3 |
| Monkey's Delivery Service | Mother 3 |
| Mr. Batty Twist | Mother 3 |
| Natural Killer Cyborg | Mother 3 |
| New Age Retro Hippie | Earthbound |
| Pokey Means Business | Earthbound |
| Poltergeist/Roving Tanks | Earthbound Beginnings |
| Sanctuary Guardian | Earthbound |
| The Attic's A Dungeon! | Mother 3 |
| |
| Big Blue (Mario Mix) | Mario Kart 8 |
| Feel Our Pain | F-Zero GX |
| Fire Field (New Remix) | F-Zero |
| Illusion | F-Zero GP Legend |
| Lightning | F-Zero GP Legend |
| Mute City (Mario Mix) | Mario Kart 8 |
| Red Canyon (New Remix | F-Zero |
| Wings for My Way | F-Zero GX |
| Bonus Stage | Ice Climber |
| Bonus Stage (Chill Mix) | Ice Climber |
| Icicle Mountain (Chill Mix) | Ice Climber |
| A Mighty Foe | Fire Emblem: Path of Radiance |
| As Swift as Wind (Battle Preparation) | Fire Emblem: Three Houses |
| Battle (Boss) | Fire Emblem Heroes |
| Battle Music/Player Attacks | Fire Emblem: Ankoku Ryu to Hikari no Tsurugi |
| Battle (Veronica) | Fire Emblem Heroes |
| Chance Encounter | Code Name: S.T.E.A.M. |
| Chaos (Ablaze) | Fire Emblem Awakening |
| Conquest | Fire Emblem Awakening |
| Desire Below | Fire Emblem Fates |
| Destiny by Blood | Fire Emblem Fates |
| Justice RIP (Storm) | Fire Emblem Fates |
| Mastermind | Fire Emblem Awakening |
| Normal Battle | Tokyo Mirage Sessions:♯FE |
| Past Below (Flow) | Fire Emblem Fates |
| Rival | Fire Emblem Fates |
| Road Taken (Roar) | Fire Emblem Fates |
| Road Taken (Roar (Grand Mix) | Fire Emblem Fates |
| The Black Knight Lives | Fire Emblem: Radiant Dawn |
| Together We Ride (Retro Mix) | Fire Emblem: Ankoku Ryu to Hikari no Tsurugi |
| Twilight of the Gods | Fire Emblem Echoes: Shadows of Valentia |
| Winds Across the Plains | Fire Emblem Warriors |
| Flat Zone Infinity | Game & Watch |
| Flat Zone (Retro Mix | Game & Watch |
| Octopus Dance | Nintendo Land |
| Boss Battle 2 | Kid Icarus: Uprising |
| Chaos Island | Kid Icarus: Uprising |
| Kid Icarus Medley | Kid Icarus |
| Opening | Kid Icarus: Uprising |
| Overworld | Kid Icarus: Of Myths & Monsters |
| Pandora's Labyrinth of Deceit | Kid Icarus: Uprising |
| Repear's Line of Sight | Kid Icarus: Uprising |
| Solo Menu | Kid Icarus: Uprising |
| The War's End | Kid Icarus: Uprising |
| Together | Kid Icarus: Uprising |
|
| |
| Bamboozle Village | Wario Land: Shake It! |
| Body Rock | WarioWare D.I.Y. |
| Count Cannoli | Wario: Master of Disguise |
| Crescent Moon Village | Wario Land 4 |
| Drifting Away | WarioWare, Inc.: Mega Microgame$! |
| Greenhorn Forest | Wario World |
| Hurry Up!! | Wario Land 4 |
| Neon City | Wario Land: Shake It! |
| Starring Wario | Dance Dance Revolution Mario Mix |
| Split Screen | WarioWare Gold |
| Survival Fever | WarioWare, Inc.: Mega Party Games! |
| Wario Battle | Super Mario Land 2: Six Golden Coins |
| Wario de Mucho | WarioWare: Twisted! |
| Wario Land Medley | Wario Land |
| Final Boss | Pikmin 3 |
| Lushlife Murk | Hey! Pikmin |
| Twilight River | Pikmin 3 |
|
| |
| Bingo | Stack-Up |
| Memory | Stack-Up |
| Stage Theme | Gyromite |
| 1 PM | Animal Crossing: New Leaf |
| 2 AM | Animal Crossing |
| Animal Crossing Track | Mario Kart 8 |
| Bubblegum K.K. (New Remix) | Animal Crossing: New Leaf |
| Go K.K. Rider! (New Remix) | Animal Crossing: City Folk |
| K.K. Country | Animal Crossing |
| K.K. Cruisin' | Animal Crossing |
| K.K. House | Animal Crossing |
| New Leaf Theme | Animal Crossing: New Leaf |
| Tom Nook | Animal Crossing: Happy Home Designer |
| Get in Shape | Wii Fit |
| Hoop Dance | Wii Fit |
| Fighting Song | Punch-Out!! |
| Glass Joe | Punch-Out!! (2009) |
| King Hippo | Punch-Out!! (2009) |
| Minor Circuit | Super Punch-Out!! |
| Mr. Sandman | Punch-Out!! (2009) |
| Special Circuit | Super Punch-Out!! |
| Super Macho Man | Punch-Out!! (2009) |
| World Circuit | Super Punch-Out!! |
| Black Tar | Xenoblade Chronicles X |
| Death Match with Torna | Xenoblade Chronicles 2 |
| Kingdom of Tantal | Xenoblade Chronicles 2 |
| Noctilum Day | Xenoblade Chronicles X |
| RE:ARR.X | Xenoblade Chronicles X |
| The Key We've Lost | Xenoblade Chronicles X |
| Uncontrollable | Xenoblade Chronicles X |
| Vision Reacts | Xenoblade Chronicles |
| You Will Recall Our Names | Xenoblade Chronicles 2 |
| Zanza | Xenoblade Chronicles |
| Duck Hunt Medley (New Remix) | Duck Hunt |
| Light Gun Medley | Duck Hunt/Hogan's Alley/Wild Gunman |
| #13 shade | Splatoon 2 |
| Entropical | Splatoon 2 |
| Fly Octo Fly | Splatoon 2 |
| Kinetosis | Splatoon 2 |
| Shark Bytes | Splatoon 2 |
| Splattack! (Octo Mix) | Splatoon 2 |
| Sucker Punch | Splatoon |
| Buster Beach | ARMS |
| Credits | ARMS |
| Main Theme | ARMS |
| [NAME REDACTED] | ARMS |
| Ninja College | ARMS |
| Replay | ARMS |
| Sky Arena (Night + Hedlok) | ARMS |
| Snake Park | ARMS |
| Sparring Ring | ARMS |
| Spring Stadium | ARMS |
| Tutorial | ARMS |
| VS Hedlok (Party Match) | ARMS |
| Apollo Sanctuary | Golden Sun: Dark Dawn |
| Boss Theme #1 | Golden Sun: Dark Dawn |
| Doom Dragon | Golden Sun: The Lost Age |
| Felix Battle | Golden Sun: The Lost Age |
| Isaac Battle | Golden Sun |
| Mars Lighthouse | Golden Sun: The Lost Age |
| Saturos and Menardi | Golden Sun |
| Set Sail Through the Karagol Sea | Golden Sun |
| Talon Peak | Golden Sun: Dark Dawn |
| Venus Lighthouse | Golden Sun |
| Clu-Clu Land Retro Medley | Clu-Clu Land |
| Deserted Highway | Mach Rider |
| Mach Rider Theme | Mach Rider |
| Boss Fight | Nintendo Land |
| Mystery of Murasame Castle | The Mysterious Murasame Castle |
| Ninja Castle | Nintendo Land |
| The Mysterious Murasame Castle Theme | Samurai Warriors 3 |
| A Winner Is You! | NES Pro Wrestling |
| NES Pro Wrestling Medley | NES Pro Wrestling |
| Drake Redcrest Theme | Chibi-Robo! Plug into Adventure! |
| Main Theme | Chibi-Robo! Plug into Adventure |
| Mega Mech Menace | Chibi-Robo: Zip-Lash |
| Night Play | Chibi-Robo! Plug into Adventure! |
| Toothbrush Scrubbing | Chibi-Robo! Plug into Adventure! |
| Air Rally | Rhythm Heaven Fever |
| Dreams of Our Generation | Rhythm Heaven Fever |
| Frog Hop | Rhythm Heaven |
| Honeybee Remix | Rhythm Heaven Megamix |
| Munchy Monk Circus | Rhythm Heaven |
| Remix 8 | Rhythm Heaven |
| Remix 10 | Rhythm Heaven Fever |
| Rhythm Heaven Medleymix | Rhythm Heaven |
| Tap Trial 2 | Rhythm Tengoku |
| Battle's End | Dillon's Rolling Western: The Last Ranger |
| Enter the Wild | Dillon's Rolling Western: The Last Ranger |
| Frontier Battle | Dillon's Dead-Heat Breakers |
| Protect the Iron Horse! | Dillon's Rolling Western: The Last Ranger |
| The Getaway | Dillon's Rolling Western: The Last Ranger |
| The Bow of Armedo | Dillon's Rolling Western: The Last Ranger |
| A Bumpy Start/Prairie Road | Harmoknight |
| Buzzooka Battle | Harmoknight |
| City Lights/Jazz City | Harmoknight |
| Final Trial | Harmoknight |
| VS Gargan | Harmoknight |
| Ambience | Fatal Frame: Maiden of Black Water |
| Andy’s Anthem | Advance Wars: Dual Strike |
| Balloon Trip (New Remix) | Balloon Trip |
| BANG! (Summoning Remix | Dragalia Lost |
| Bavoom | Meteos Wars |
| Birdman | Pilotwings 64 |
| Boss Battle | The Legendary Starfy |
| Build Finish! | Nintendo Labo |
| Challenge | Pushmo |
| Challenge to the Vertex | Pocket Card Jockey |
| Competition | Snipperclips |
| Credits | Nintendo Land |
| Deadly Dance II | Code Name: S.T.E.A.M. |
| Destiny | Meteos |
| Devil World 8-Bit Medley | Devil World |
| Dynal Appearance | Fossil Fighters |
| Excitebike (Rock Remix) | Excitbike |
| Exciting Shopping | BOXBOY! |
| Final Battle - VS Mashtooth | The Legendary Starfy |
| First Battle | Joy Mech Fight |
| Fluidity Theme | Fluidity |
| Funky Monkey Style | Pocket Card Jockey |
| Grading | Daigasso! Band Brothers |
| Golden Hammer | Wrecking Crew |
| Greatwyrm Showdown | Dragalia Lost |
| Grundla Saha Theme | Devil’s Third |
| Hanenbow (Swansong Remix) | Electroplankton |
| Intersection ~ Me vs. You | Code Name: S.T.E.A.M. |
| It’s Me, Mario! | DSi Flipnote |
| Jess's Theme | Advance Wars 2: Black Hole Rising |
| Juicy (Dungeon Variant | Dragalia Lost |
| Jungle | Kuru Kuru Kururin |
| Main Menu | Sin & Punishment: Star Successor |
| Main Menu | Wii Sports Club |
| Main Plaza (Night) | Nintendo Land |
| Main Theme | Nintendogs |
| Mallo’s March | Pushmo World |
| Menu (Labo Edition) | Nintendo Labo |
| Menu Theme | Art Academy Sketchpad |
| Mission BGM Type A | Famicom Wars |
| Noisy Notebook B | Snipperclips |
| Oleana | Meteos Wars |
| Overworld | Kaeru no Tame Ni Kane wa Naru |
| Pictochat Remix | Pictochat |
| Planet Meteo | Meteos |
| Pong World | Pong: The Next Level |
| RC Car Competition | Nintendo Labo |
| Retro Reboot | Snipperclips |
| Revenge of the ‘Gator | Revenge of the ‘Gator |
| Risk One’s Neck | Sin & Punishment |
| Rocket Belt | Pilotwings |
| Silly Science A | Snipperclips |
| SimCity Theme | SimCity |
| Sheriff Medley | Sheriff |
| Staff Roll | Famicom Detective Club: Twilight Symphony |
| Stage 1 | BOXBOY!+BOXGIRL! |
| Street Fight Area 01 | Urban Champion |
| Street Fight Area 03 | Urban Champion |
| Sturm's Theme | Advance Wars |
| Swapnote Serenade | Swapnote |
| Thanatos' Theme | Panel de Pon |
| The Barthes Island | Doshin the Giant |
| The Big Battle | Fossil Fighters |
| The Girl Who Stands Behind | Famicom Detective Club |
| Theme of Steel Diver | Steel Diver |
| Theme Shop (Hall) | Nintendo Badge Arcade |
| Third Gear | Drill Dozer |
| Title Theme | Panel de Pon |
| Tranquility Renewed | Meteos |
| Tutorial | Thruspace |
| Virus Buster (Chill) | Brain Age 2: MORE Training in Minutes a Day! |
| Wii Play Medley | Wii Play |
| Wii Sports Theme (New Remix) | Wii Sports |
| A Stranger I Remain | Metal Gear Rising: Revengeance |
| Collective Consciousness | Metal Gear Rising: Revengeance |
| Heaven's Divide | Metal Gear Solid: Peace Walker |
| It Has To Be This Way | Metal Gear Rising: Revengeance |
| Love Deterrence | Metal Gear Solid: Peace Walker |
| Main Theme | Metal Gear Solid 2: Sons of Liberty |
| Metal Gear Saga | Metal Gear Solid 4: Guns of the Patriots |
| Nuclear | Metal Gear Solid V: The Phantom Pain |
| Rules of Nature | Metal Gear Rising: Revengeance |
| Sins of the Father | Metal Gear Solid V: The Phantom Pain |
| Snake Eater (Lyrical) | Metal Gear Solid 3: Snake Eater |
| The Only Thing I Know for Real | Metal Gear Rising: Revengeance |
| Way to Fall | Metal Gear Solid 3: Snake Eater |
| A Ghost's Pumpking Soup...for Pumpkin Hill | Sonic Adventure 2 |
| A New Venture | Sonic Rush Adventure |
| Aqua Road | Sonic Forces |
| Big Arms | Sonic the Hedgehog 3 & Knuckles |
| Carnival Night Zone | Sonic the Hedgehog 3 & Knuckles |
| Chun-Nan (Day) | Sonic Unleashed |
| City Escape (Classic) | Sonic Generations |
| Classic Sonic Medley | Sonic the Hedgehog |
| Cosmic Eternity - Believe in Yourself | Sonic CD |
| Crisis City | Sonic the Hedgehog '06 |
| Doomsday Zone | Sonic the Hedgehog 3 & Knuckles |
| E.G.G.M.A.N. (Doc. Robeatnix Mix) | Shadow the Hedgehog |
| / Egg Reverie Zone | Sonic Mania |
| Emerald Beach | Sonic Battle |
| Emerald Hill Zone | Sonic the Hedgehog 2 |
| Flying Battery Zone | Sonic the Hedgehog 3 & Knuckles |
| Hi-Spec Robo Go! | Sonic Mania |
| Honeycomb Highway | Sonic Lost World |
| Hydrocity Zone | Sonic the Hedgehog 3 & Knuckles |
| Ice Paradise | Sonic Advance 2 |
| Metallic Madness Zone | Sonic CD |
| Metal Scratchin' | Sonic Rush |
| Mirage Saloon Zone | Sonic Mania |
| Mushroom Hill Zone | Sonic the Hedgehog 3 & Knuckles |
| Mystic Cave Zone | Sonic the Hedgehog 2 |
| Planet Wisp | Sonic Colors |
| Press Garden Zone | Sonic Mania |
| Secret Base Zone | Sonic Advance |
| Ska Cha Cha | Sonic Rush |
| Sonic Mania Medley | Sonic Mania |
| Spaceport | Sonic Forces |
| Sunset Hill | Sonic Advance 3 |
| Supporting Me | Sonic Adventure 2 |
| Unknown from M.E. | Sonic Adventure |
| VS Metal Sonic | Sonic CD |
| What I'm Made Of | Sonic Heroes |
| Windy Hill (New Remix) | Sonic Lost World |
| Wrapped in Black | Sonic Rush |
| Acid Man | Mega Man 11 |
| Armored Armadillo | Mega Man X |
| Blade Man | Mega Man 10 |
| Bullet Drive | Mega Man ZX: Advent |
| Cannonball | Mega Man Zero 3 |
| Central Highway (New Remix | Mega Man X |
| Clown Man | Mega Man 8 |
| Departure | Mega Man Zero |
| Esperanto | Mega Man Zero 4 |
| In the Wind | Mega Man ZX: Advent |
| Magma Centipede | Mega Man X2 |
| Nitro Man | Mega Man 10 |
| Opening Stage | Mega Man 7 |
| Shade Man | Mega Man 7 |
| Shop - Proto Man | Mega Man 10 |
| Spark Mandrill | Mega Man X |
| Storm Eagle | Mega Man X |
| Surge of Power | Mega Man Battle Network 6 |
| Title Theme | Mega Man 11 |
| Wily Castle Jam Project | Mega Man 2 |
| Wily Stage 1 | Mega Man 7 |
| Zero's Theme | Mega Man X3 |
| B-Doing Woods | Pac-Man World 2 |
| Beginner/Novice | Pac-Attack |
| Babylonian Rhapsody | Pac-Man Championship Edition 2 |
| Galaga Pac Jam | Ridge Racer 64 |
| Green Plains Medley | Pac-Man World 2 |
| Pac Toy-Box | Pac-Man Championship Edition 2 |
| Sandbox Land | Pac-Mania |
| Spooky Battle | Pac-Man World 2 |
| Enter the Battletoad | Killer Instinct '13 |
| I'm Back (To Rise) | Killer Instinct '13 |
| Inferno | Killer Instinct '13 |
| Kneel to your God | Killer Instinct '13 |
| The Instinct | Killer Instinct '13 |
| The Way U Move | Killer Instinct |
| The Way U Move (SeamlessR Remix) | Killer Instinct '13 |
| Touch Me and I'll Break Your Face | Killer Instinct '13 |
| Type-03 | Killer Instinct '13 |
| Warlord | Killer Instinct '13 |
| Battle Against a Clueless Foe | Oddity |
| Battle Against a Hot Foe | Oddity |
| Battle Against a Gorgeous Foe | Oddity |
| Battle Against a Groovy Foe | Oddity |
| Battle Against an Ultra-Dimensional Foe | Oddity |
| Noise of the Decade | Oddity |
| Previous Battle Theme Medley | Oddity |
| The Green Run | Oddity |
| Backside of the TV (Lotus Juice Remix) | Persona 4: Dancing All Night |
| Battle Theme | Persona 2 Innocent Sin |
| Beneath the Mask (KAEIN Remix) | Persona 5: Dancing Star Night |
| Best Friends | Persona 4 Arena |
| Blooming Villain | Persona 5 |
| Blooming Villain (Atlus Konishi Remix) | Persona 5: Dancing Star Night |
| Boss Theme | Persona 2 Innocent Sin |
| Burn My Dread: Last Battle | Persona 3 FES |
| Burn My Dread: Last Battle (future arrange) | Persona 3 Movie |
| Dance! | Persona 4: Dancing All Night |
| Dream of a Butterfly | Persona |
| Electronica in the Velvet Room | Persona 4 |
| Heartful Cry | Persona 3 FES |
| I'll Face Myself (Original) | Persona 4 |
| Invitation to Freedom | Persona Q2: New Cinema Labyrinth |
| Knight of the Holy Lance | Persona 2 Innocent Sin |
| Laser Beam | Persona Q: Shadow of the Labyrinth |
| Life Goes On | Persona 5 |
| Life Will Change | Persona 5 |
| Life Will Change (Rock) | Persona 5 |
| Light Up the Fire in the Night | Persona Q: Shadow of the Labyrinth |
| Mass Destruction (Lotus Juice Remix) | Persona 3 The Movie |
| Master of Tartarus | Persona 3 FES |
| Price | Persona 5 |
| Pull the Trigger | Persona Q2: New Cinema Labyrinth |
| Quest Battle | Persona 2 Innocent Sin |
| Take Over | Persona 5: The Royale |
| The Fog | Persona 4 |
| Tokyo Daylight (Atlus Kozuka Remix) | Persona 5: Dancing Star Night |
| Remember, We Got Your Back | Persona Q2: New Cinema Labyrinth |
| Road Less Taken | Persona Q2: New Cinema Labyrinth |
| Unbreakable Ties | Persona 2 Innocent Sin |
| Wait and See | Persona Q2: New Cinema Labyrinth |
| Whims of Fate | Persona 5 |
| Willpower | Persona 5 |
| Ying-Yang | Persona 4 The Golden Animation |
| Adventure (Orchestrated) | Dragon Quest III |
| Adventure/Battle Theme | Dragon Quest III |
| Battle (V) | Dragon Quest V |
| Battle for Glory (Orchestrated) | Dragon Quest IV |
| Battle for Glory (Fortune Remix) | Fortune Street |
| Beckoning | Dragon Quest IX |
| Boss Fight | Dragon Quest Heroes: Rocket Slime |
| Build-Up to Victory | Dragon Quest IX |
| Bustling Town | Dragon Quest XI-S |
| Fighting Spirits (Eight) | Dragon Quest VIII |
| Fighting Spirits (Orchestrated) | Dragon Quest III |
| Final Boss | Dragon Quest IX |
| Forewood Forest | Dragon Quest Heroes: Rocket Slime |
| Heavenly Flight | Dragon Quest VIII |
| Hero's Challenge | Dragon Quest III |
| Hills and Meadows | Dragon Quest IX |
| Marching Through the Fields (Orchestrated) | Dragon Quest VIII |
| Observatory | Dragon Quest IX |
| Omen of Towering Death | Dragon Quest IX |
| Overture | Dragon Quest |
| Overture XI | Dragon Quest XI |
| Silval Battle | Dragon Quest Heroes: Rocket Slime |
| Tank Battle | Dragon Quest Heroes: Rocket Slime |
| The Hero Goes Forth With a Determination(Orchestrated) | Dragon Quest XI-S |
| Unflinchable Courage (Orchestrated) | Dragon Quest XI-S |
| Unknown World | Dragon Quest III |
| Wagon Wheel's March (Orchestrated) | Dragon Quest IV |
| War Cry (Orchestrated) | Dragon Quest VIII |
|
| |
| Banjoland Medley | Banjo-Kazooie: Nuts & Bolts |
| Click Clock Wood | Banjo-Kazooie |
| Cliff Farm | Banjo-Kazooie: Grunty's Revenge |
| Desert | Banjo-Pilot |
| Freezeezy Peak (Remix) | Banjo-Kazooie |
| Glitter Gulch Mine | Banjo-Tooie |
| Grassland | Banjo-Pilot |
| Gruntilda Battle | Banjo-Kazooie |
| Gruntilda Battle (Nuts & Bolts) | Banjo-Kazooie: Nuts & Bolts |
| Grunty's Lair | Banjo-Kazooie |
| Hag 1 | Banjo-Tooie |
| Showdown Town Square | Banjo-Kazooie: Nuts & Bolts |
| Rusty Bucket Bay | Banjo-Kazooie |
| Mr. Patch (Remix) | Banjo-Tooie |
| Advancing | Samurai Shodown 64 |
| Desert Theme | Metal Slug 3 |
| Duck Duck Dub (Remix) | Fatal Fury Special |
| Emergence | The King of Fighters XIV |
| Flame Dragon God | Fatal Fury 2 |
| Into the Cosmos | Metal Slug 3 |
| Saxophone Under the Moonlight | The King of Fighters XIV |
| Soy Sauce for Geese (New Remix) | Fatal Fury Special |
| Spread the Wings | Garou: Mark of the Wolves |
| Stimulation | Capcom vs. SNK 2: Mark of the Millennium 2001 |
| The Ketchaku R | The King of Fighters ‘98 Ultimate Match Final Edition |
| This is True Love Makin’ | Capcom vs. SNK 2: Mark of the Millennium 2001 |
| Way of the Overlord | Samurai Shodown ‘19 |
| Airship | Marvel VS Capcom 2: New Age of Heroes |
| Airship (Remix) | Marvel VS Capcom 2: New Age of Heroes |
| Captain America Medley | Marvel VS Capcom: Clash of Superheroes |
| Carnival | Marvel VS Capcom 2: New Age of Heroes |
| Clock Tower | Marvel VS Capcom 2: New Age of Heroes |
| Clock Tower (Remix) | Marvel VS Capcom 2: New Age of Heroes |
| I Wanna Take You For a Ride | Marvel VS Capcom 2: New Age of Heroes |
| Marvel VS Capcom 3 Medley | Marvel VS Capcom 3: Fate of Two Worlds |
| River | Marvel VS Capcom 2: New Age of Heroes |
| Swamp | Marvel VS Capcom 2: New Age of Heroes |
| Swamp (Remix) | Marvel VS Capcom 2: New Age of Heroes |
| Theme of Amaterasu | Marvel VS Capcom 3: Fate of Two Worlds |
| Theme of Captain America | Marvel VS Capcom 3: Fate of Two Worlds |
| Theme of Chun-Li (MVC Mix) | Marvel VS Capcom: Clash of Superheroes |
| Theme of Dante | Marvel VS Capcom 3: Fate of Two Worlds |
| Theme of Deadpool | Marvel VS Capcom 3: Fate of Two Worlds |
| Theme of Doctor Doom | Marvel VS Capcom 3: Fate of Two Worlds |
| Theme of Galactus | Marvel VS Capcom 3: Fate of Two Worlds |
| Theme of Gambit | Marvel VS Capcom: Clash of Superheroes |
| Theme of Haggar | Marvel VS Capcom 3: Fate of Two Worlds |
| Theme of Hawkeye | Ultimate Marvel VS Capcom 3 |
| Theme of Hulk | Marvel VS Capcom 3: Fate of Two Worlds |
| Theme of Shuma-Gorath | Marvel VS Capcom 3: Fate of Two Worlds |
| Theme of Trish | Marvel VS Capcom 3: Fate of Two Worlds |
| Theme of Tron Bonne | Marvel VS Capcom 3: Fate of Two Worlds |
| Theme of Vergil | Ultimate Marvel VS Capcom 3 |
| Theme of War Machine | Marvel VS Capcom: Clash of Superheroes |
| Theme of X-23 | Marvel VS Capcom 3: Fate of Two Worlds |
| Concrete Cave | Darkstalkers 3 |
| Demitri, Feast of the Damned | Darkstalkers 3 |
| Demetri's Theme (Ressurection) | Darkstalkers Ressurection |
| Deserted Chateau | Darkstalkers 3 |
| Fetus of God | Darkstalkers 3 |
| Invitation to the Charm of Darkness ~ Kou Otani | Night Warriors: Darkstalkers' Revenge |
| Jon Talbain's Theme | Darkstalkers: The Night Warriors |
| Lord Raptor's Theme | Darkstalkers: The Night Warriors |
| Morrigan's Theme | Night Warriors: Darkstalker's Revenge |
| Pyron's Theme | Darkstalkers: The Night Warriors |
| Red Thirst | Darkstalkers 3 |
| Trouble Man | Darkstalkers |
| Vanity Paradise | Darkstalkers 3 |
| War Agony | Darkstalkers 3 |
| 4 Minutes Before Death | Ghost Trick: Phantom Detective |
| Ain’t Nothin’ Like A Funky Beat | Lethal League Blaze |
| Ain’t That Funny | MadWorld |
| Amalgam | Undertale |
| Astral Alley | Night in the Woods |
| Astral Coal Town | Night in the Woods |
| Battle at Journey’s End | Octopath Traveller |
| Battle I | Octopath Traveller |
| Battle Menu | Super Bomberman R |
| Battle of Providence | Bravely Second |
| Boss 5 | Sinistar Unleashed |
| Boss Theme 2 | Terraria |
| Character Select | Virtua Fighter Remix |
| Cheetahmen Theme | Action 52 |
| ClockTower | Dead Cells |
| Crazy Science Owls | A Hat in Time |
| Decisive Battle II | Octopath Traveller |
| Defense Battle 1 | Tetris 99 |
| Defense Battle 3 | Tetris 99 |
| Devil Trigger | Devil May Cry V |
| Die Anywhere Else | Night in the Woods |
| Feet on the Air [μ ver. | No More Heroes 2: Desperate Struggle |
| Field of Hopes and Dreams | Deltarune |
| Find You | Anarchy Reigns |
| Fortnite Dance | Fortnite |
| Galaga Theme (New Remix | Galaga |
| Heat Haze Shadow (Arcade Version) | Tekken 7 |
| Here We Go | Anarchy Reigns |
| Hip Shop | Deltarune |
| I’m Yours Forever | Tetris Effect |
| It’s Kill Or Be Killed ~ Destroy Resort | No More Heroes 2: Desperate Struggle |
| Jive Bot | Mighty Switch Force! |
| Lancer’s Theme | Deltarune |
| Laughin’ At U | Anarchy Reigns |
| Love You Love You Love | Mighty Switch Force! |
| Main Theme (Bomberman) | Super Bomberman 5 |
| Main Theme (Octopath) | Octopath Traveller |
| Megalovania/The World Revolving | Undertale/Deltarune |
| Minecraft Medley | Minecraft |
| Necromancer | Castle Crashers |
| NiGHTS and Reala | NiGHTS: Journey of Dreams |
| No Regrets | BowieQuest |
| Oh Yeah | Nidhogg 2 |
| Paul Phoenix | Tekken 3 |
| Philistine | No More Heroes 2: Desperate Struggle |
| Police Station | Resident Evil 2 |
| Rescue Girl | Mighty Switch Force 2 |
| Revived Power | Shadow of the Colossus |
| Rock On | Anarchy Reigns |
| Rude Buster | Deltarune |
| Serpent Eating the Horizon | Bravely Default |
| Slave Knight Gael | Dark Souls III |
| Solitude | Tekken 7 |
| Soul of Cinder | Dark Souls III |
| Spear of Justice | Undertale |
| Spider Dance | Undertale |
| Statues (Theme of Akira) | Virtua Fighter 5 |
| Steel Python | No More Heroes |
| Stone Cold | FNAF World |
| Super Ultra Violet - VS Nero | Devil May Cry |
| Tables Turn | The Wonderful 101 |
| That Person’s Name Is | Bravely Default |
| That’s Enough/Jump Around | Jet Set Radio |
| Theme of Ninja Gaiden II | Ninja Gaiden II |
| The Beautiful Miniature Golden Bell | Untitled Goose Game |
| The Opened Way | Shadow of the Colossus |
| Trap Shop | Dead Cells |
| Tumbling Xylophone/Bang! Bang! Big Hornes Explosion! | Billy Hatcher & the Giant Egg |
| Unbreakable Determination | Ninja Gaiden |
| Universal Gravitation | Vib-Ribbon |
| Ultimate Final Boss | Spark the Electric Jester |
| We All Soldiers | Anarchy Reigns |
| We are Finally Cowboys | No More Heroes |
| Wind of Madness | Resident Evil 5 |
| Wizards and Lizards | Crash Bandicoot: The Wrath of Cortex |
| Yo-Kai Fight | Yo-Kai Watch |
| Yo-Kai Watch Theme | Yo-Kai Watch |
| Your Contract Has Expired | A Hat in Time |
| Alone Together | Steven Universe |
| Andy’s Flight | Steven Universe |
| Battle at the Underwater Temple | Steven Universe |
| Change | Steven Universe: The Movie |
| Dance of Swords | Steven Universe |
| Giant Woman | Steven Universe |
| It’s Over Isn’t It | Steven Universe |
| Malachite VS Alexandrite | Steven Universe |
| Meat Beat Mania | Steven Universe |
| Monster Buddy | Steven Universe |
| Moonlit Battlefield | Steven Universe |
| Obsidian | Steven Universe |
| Opal | Steven Universe |
| Other Friends | Steven Universe: The Movie |
| Peace and War | Steven Universe |
| Smoky Quartz | Steven Universe |
| Stronger Than You | Steven Universe |
Trivia[]
Below are facts about the content and development of Super Smash Bros. Swansong, pretaining to cut fighters, old ideas, and other fun facts.
- Multiple characters were considered to be put in Super Smash Bros. Swansong as playable fighters. These include:
- Sukapon from Joy Mech Fight
- Sheldon from Splatoon
- Excitebiker from Excitebike
- Nintendog from Nintendogs
- Kumatora from Mother 3
- Balloon Fighter from Balloon Fight
- Heihachi from the Tekken series
- Nabbit from the Super Mario series
- Guzma & Golisopod from Pokémon Sun & Moon
- James Bond from Goldeneye 007
- Urban Champion from Urban Champion
- Ayumi Tachibana from Famicom Detective Club
- Blastoise from the Pokémon series
- Plusle & Minun from the Pokémon series
- Itsuki Aoi from Tokyo Mirage Sessions ♯FE
- Donkey Kong Jr. from the Donkey Kong series
- Rex & Pyra from Xenoblade Chronicles 2
- Travis from Mother 4
- Yu Narukami from Persona 4
- Axel from Streets of Rage
- The Battletoads from Battletoads
- Scorpion from Mortal Kombat
- Mametchi from Tamagotchi
- 2B from NieR:Automata
- It's been heavily rumored that Nabbit was eventually replaced with Popple due to the latter having more moveset potential among fans of the character compared to Nabbit. In addition, Scorpion was dropped in favor of Spinal.
- Chrom from Fire Emblem: Awakening was originally planned as a newcomer before being revealed as an echo of Roy in Super Smash Bros. Ultimate, the same applying to Banjo & Kazooie from Banjo-Kazooie. Similarly, Dark Samus was going to stay as an Assist Trophy until she was revealed for the same game.
- In a somewhat similar case, there were rumors that Bandana Dee from the Kirby series was intended to be playable along with the other cut characters. However, the rumors were confirmed false when Bandana Dee appeared as an Assist Trophy, replacing Isabelle's function from Super Smash Bros. for Wii U & 3DS.
- Core Crystals were originally going to be an item, along with Blades from Xenoblade Chronicles 2 acting as Assist Trophy-like characters, but was scrapped during development. The only remant of this system is the presence of Roc as an Assist Trophy, representing the game as it's sole Assist Trophy.
- The additions of Spyro, Cinder, and the Cheetahmen Assist Trophy were all due to CrunchTime420 (t∣b∣c)'s request after helping Doodle fix the game after an unexplained event occurred involving certain assets.
- The decision was made to consolidate the Mii Fighter into one character relatively early on in development.
- Spinal from Killer Instinct was added to the game via a character swap program with Ambrisynth (t∣b∣c). In return for Spinal, Doodle offered her Wryn from BLEED. While Spinal was the only thing that Ambro specifically wanted, Doodle added other pieces of Killer Instinct content to the game just for fun.
Credits[]
This section is for crediting those who have helped me on this project.
- Credit to CrunchTime420 (t∣b∣c) for stepping in when people stepped out.
- Credit to Mirai Moon (t∣b∣c) for giving me the inspiration/drive to make this project.
- Credit to EnderLegends (t∣b∣c) for making the transparent art for the Rival.
- Credit to Exotoro (t∣b∣c) for helping make the Caladbolg, Cheetahmen, Crystal Dragon, and Django images. In addition, thank you for helping improve the movesets for K.K. Slider, Thanos, Chain Chomp, Noctis, Ganondorf, Takamaru, Bubbles, the Black Knight and overall helping to improve the quality of the newcomers in the game.
- Credit to Deviantart user emma-zelda2 for his Princess Zelda render.
- Credit to Artsy Omni for making the Dixie Kong, Krystal, Geno, and Sceptile renders.
- Credit to Pyrostar (t∣b∣c) for helping with the idea for Lucina's new up special, Morgana's moveset, and Final Smash and digital artwork of Sheik, Ganondorf, and the Mii Fighter along with the logo for Spirit Hunters.
- Credit to SmashBoards for the Chrono Trigger item idea and the Phantom Ganon artwork.
- Credit to [REDACTED] for helping with the new tables.
- Credit to HollowPharaoh (t∣b∣c) for fixing the Kid Icarus: Uprising logo, making the transparent logo for Star Fox: Assault, and completely reworking the table format on the entire page.
- Credit to Athena Hawkins (t∣b∣c) for helping with the Dillon's Rolling Western logo.
- Credit to Montatora-501 for the Robot Jones art.
- Credit to TechnoTigzon (t∣b∣c) for providing the transparent render for Meryl.
- Credit to IncarnateParanoia (t∣b∣c) for giving me a lot of good pointers for Morgana's moveset.
- Credit to Pokerninja2 (t∣b∣c) for helping with the Super Smash Bros. Swansong logo.

|
If you are going to comment on this page, please read this first. Do not post comments unrelated to the page itself. Comments are fine, as long as you actually provide a comment to the actual page itself and not some random, completely trivial thing that has nothing to do with the page in question. If you are going to comment, post something related to the page itself. |