This page is finished. The author of this article has completed it to the extent they are satisfied with. They do not plan to expand it in the future, so further major updates should not be expected.
'(Feel free to fix grammatic errors but please don't do any other types of edits without my permission. Anyways, enjoy!)
Call of Duty: Uprising
Developer(s)
Treyarch Studios
Publisher(s)
Activision
Platform(s)
PC, PS4, Xbox One, Nintendo Switch
Genre(s)
Shooter Games
Series
Call of Duty (series)
Engine
Black Ops 2 engine (heavily-modified)
Release Date(s)
Septermber 30, 2017 - NA (North America)
October 13, 2017 - Everywhere Else
Mode(s)
Campaign
Multiplayer,
Zombies,
Contracts,
Age Rating(s)
ESRB - Rated M for Mature
PEGI - 18
USK - 18
Media Included
Blu-ray Disc
Digital Download
Call of Duty: Uprising (義務蜂起の呼び出し in Japanese) is a first-person shooter for the PC, PS4, Xbox One, and Nintendo Switch. The game was released on September 30, 2017 for all consoles in North America, and on October 13, 2017 for all consoles everywhere else in the world. The game is a standalone story. Not following the Modern Warfare or Black Ops timeline. This game also includes 5 DLC map packs in the future, just like Call of Duty: Black Ops 3. Contextual lean returns from Call of Duty: Ghosts; and an option to do either a Dolphin Dive or Tactical Slide is provided instead of being restricted to just doing one.
In the year 2018, a new prototype weapon codenamed "Thanatos" is secretely being manufactured in Middle Eastern countries. As terroristic tensions rise and the War on Terror grows fiercer by the day, discover the far more devious plot that is transpiring in the shadows. - Campaign Blurb
Players will be able to play together locally (up to 2 players) and online (up to 4 players). All standard missions are unlocked from the beginning and can be played from any position without negative consequence. Seventeen missions are available from the start, with six ones being secret levels (a) that can only be played via easter egg or alternative ending according to the corresponding level. However, these bonus missions are not pivotal to the overall story like the standard ones are. Some bonus missions take place before the events of the main story while others provide a different perspective of a mission from another soldier or player. Therefore, they are there just to provide extra replayability and unlocking some cool achievements. There is also a leveling up system where players can unlock new weapons, camos, and costumes to use in Multiplayer. If you're offline, play Campaign so you can still rank up. Once you're back online, your rank will automatically be transferred onto your Multiplayer rank.
Campaign Missions[]
Icon
Mission Name
Mission #
Summary
Down Under
1
Storm the Islamic State compound, capture Zufar el-Amir, and save the hostages.
Thanatos
2
After discovering the weapon of mass destruction, fight your way out.
The Odyssey
3
After the fall of the ISIS compound in Tehran, they must head back to the U.S. with the newfound technology. They have some company, however.
Legacy
4
Back in the U.S., the CIA and U.S. military work together to figure out this new technology. Meanwhile, the player reminisces over his dead best friend from the previous battle.
Brothers (secret)
4a
Keep back and defend the Saudi Arabian city together.
Researching Death
5
Infiltrate the Thanatos facility by any means necessary.
From the Shadows (secret)
5a
You and your best friend lead an ambush attack on a terrorist compound.
Alfada
6
Discover the uprising of the political party in Iran, led by Dumaar al-Huda.
Sling Your Hook
7
Alfada is suspected for being the one manufacturing Thanatos weaponry.
Deception
8
The Alfada Party tricks Russia into thinking that the U.S. blew up the Kremlin. Go into Moscow and calm down the aggression.
Battle of Moscow
9
The Russian Armed Forces have blockaded the city. It's do or die to get out of this one.
Apprehension (secret)
9a
Fight the Battle of Moscow from Commanding Officer, Rooney Oswald's point of view.
Prisoners of War
10
With you and eight other squadmates trapped in Russia's most advanced prison, devise a plan of escape.
Phantoms
11
While the U.S. President tries to calm down relations with Russia, a ghost squadron named "The Phantoms" go and capture Dumaar al-Huda.
The Blindside
12
al-Huda is in containment when the containment trucks get blown up by unknown forces. Identify who they are.
Alfada War
13
The U.S. is completely blindsided by the power that the Alfada Party has gained in such a short amount of time. Subvert them at all costs!
War Time (secret)
13a
Follow another soldier's perspective of the big war on another battlefield.
Homebound
14
A Russian battalion attacks New York City. Evacuate civilians while defending NYC.
The Allies
15
The U.S. has fully mustered the support of its NATO allies. Together, they go up against Alfada Party-controlled states (Iran, most of Afghanistan, some of Pakistan) and Russia.
Brisky Out Here, Eh? (secret)
15a
Follow a Canadian-led battle against the Russians in a town.
Devastation
16
Russia pulls out of the war. Parts of the American, Canadian, Norwegian, Belgian, and German armies converge onto the main headquarters of the Alfada Party to execute Dumaar al-Huda once and for all.
Support Bird (secret)
16a
Provide air support to the ground soldiers by piloting a British Apache warship.
Denouement
17
The NATO armies are severely crippled after receiving a devastating hit from Thanatos. Destroy Thanatos and then make a last ditch effort to execute al-Huda and extinguish the Alfada Party.
Multiplayer[]
Join the fight and follow the U.S., Canada, ISIS, Alfada, or Russia in their pursuits for victory. Customize your look, soldier, class, and patch to win the war for your country or organization! - Multiplayer Blurb
Multiplayer is mostly the same as past titles before Advanced Warfare. One big feature that will be returning is on-map vehicles, first seen in World at War. Vehicles like tanks, turret jeeps, double-seated motorcycles, and amphibious vehicles. Tournaments will also be held on occasion, similar to Splatfests on Splatoon. There are official tournaments with REAL prizes, semi-official which usually have REAL prizes, and fan-made tournaments that can boost XP. All three of these types of tournaments occur over the course of 4-5 days.
Weapons[]
Weapons return back to the modern era with a few experimental weapons and a few classic ones as well.
Assualt:[]
A slightly modified rendition of the AK-47.
M16
AK-47
G3
G36C
XM-LAR
FAMAS
STG-44 (bonus)
Excalibur (Dominion)
Submachine:[]
MP5K
Kuda
VMP
Kiparis
UMP50
MP-40 (bonus)
Shotguns:[]
M1014
Ranger
SPAS-12
KSG-12
USAS 12 (bonus)
Snipers:[]
MK14 EBR
MSR
L118
Dragunov
Barrett (bonus)
Dragunov with the Psychedelic camo.
Light Machine:[]
A player ADSing with the PKM light machine gun.
[]
RPD
M240
PKM
Bered MK8 (bonus)
Handguns:[]
Five-seven
M1911
Python
B23R
KAP-40
Rift E9 (bonus)
Launchers:[]
RPG-7V2
XM-53
China Lake
Crossbow
L4 Siege (bonus)
Riot Shield[]
Lethal[]
Frag
Semtex
Explosive Drone
AA3 Combat Axe
Incendiary Bomb
Tactical[]
Concussion
Smoke
Flashbang
Trophy System
Tear Gas
Equipment[]
C4
Claymore
Targeting Drone
Scrambler
Tactical Insertion
Game Modes[]
Game modes new and old are in this game.
Core[]
Game Mode
Summary
Team Deathmatch
Two teams battle it out for the first to get 75 points.
Free-For-All
Every man for himself. First to 30 points wins.
Offense (new)
Both teams hold two flags. If a flag is captured, then that flag is permanently captured. If both flags are captured, then the team that captured those flags win. If time runs out and a team captured one flag while the other didn't capture any, then the former team wins. If neither team captures a flag or both captures one flag and time runs out, then it goes to Round 2. If the same thing happens in Round 2, then it's a stalemate and the match ends.
Domination
Two teams try to capture and hold 3 flags for more points. Time is unlimited and the first to 200 points wins.
Vehicle Deathmatch (new)
Same as Team Deathmatch, only that vehicles spawn on the map much more frequently.
Kill Confirmed
After a kill, confirm it by picking up their tags. Only then will it count as a kill. If the tag is picked up by a friendly, then it's denied. First team to 75 points wins.
Search & Destroy
4 rounds. First team to eliminate all enemy players or destroy the objective (or defuse it) wins that round. If the match ends as "2-2" by the end of the fourth round, it's a tie.
Uplink
A satellite drone spawns in the middle of the map. The objective is to obtain it and get it to the other enemy station near their spawn by any means necessary. The drone can be thrown, passed, and can even kill if used properly. If thrown out of bounds then it will go back to its starting position. There are 2 rounds and the second round time is based off of how long it took the winning team to win the previous round. For example, a team winning in five minutes will reduce the second round timer to five minutes rather than ten.
Capture the Flag
Both teams have a flag to protect and a flag to capture. Capture the enemy flag and bring it back to your flag to get a point. Your flag must be there however or else it won't count. First team to 3 points will win the round. There are two rounds.
Demolition
Similar to Search & Destroy but with several differences. Players can respawn after being killed and every attacking player has a bomb. The defending team must make sure that their objectives do not get destroyed. The attacking team must destroy all of the objectives in the alloted time. There are 4 rounds with a tiebreaker 5th round.
Cranked
Same as Team Deatchmatch with one main difference. Once a player gets a kill, they're under a 30 second timer and must get another kill within that time or else they will go BOOM! Getting a kill will restart the timer. While under the timer, the player gets speed enhancements such as Marathon, Sleight of Hand, and Lightweight.
Drop Zone
A drop zone spawns in the middle of the map first and then randomly across the map after that. Hold down the drop zone to call in Care Packages and gain points. First team to 7500 points wins.
[]
A close-up of a motorcycle in a Multiplayer map.
[]
Search & Destroy game.
==== ====
Hardcore[]
Hardcore variants of these game modes include: reduced health, no radar without UAV, and friendly fire. Everything else remains the same.
Hardcore TDM
Hardcore FFA
Hardcore Domination
Hardcore Search & Destroy
Hardcore Uplink
Clans & Tournaments[]
The Clans game mode showcases all of the core game modes in a random fashion. The game will randomly choose the map and game mode rather than letting the players vote. Clans uses eSports rules. Tournaments feature three choses: Official, semi-official, and fanmade. Official tournaments are hosted by Treyarch and occur every 1-2 months. Prizes can include $50 Gamestop gift cards, $100 in cash, or a free season pass. Semi-official tournaments are endorsed by Treyarch but not hosted by them. Prizes can include $15 Gamestop gift cards, $30 in cash, or one free DLC map pack. Fanmade tournaments are far more common and don't have any real-world prizes. However, winning a fanmade tournament can heavily boost one's XP. To set up a tournament, set up the rules, game modes, maps and guns allowed in the tournament. Then, give it a catchy name. Once everything is set and done, you can submit the tournament and the game will process and refine it, and players will be able to begin signing up for your tournament. If you want, you can go above and beyond and try to get your tournament endorsed by Treyarch. Tell them the rules of your tournament, how you will handle prizes and the shipment of them, and send the report to Treyarch through email or on their website, treyarch.com. If they endorse it, a yellow badge with the Treyarch symbol on it will appear next to the name of your tournament. Signifying that it has been successfully endorsed. Official tournaments are usually nationwide. Semi-official can be anywhere from local to nationwide. Fanmade, most of the time, are local although they do have the potential to be much bigger than that with good advertising. Clans (5-8 members) will take part in these tournaments to win BIG or small prizes. It's all just a game... right?
Clans (eSports)
Treyarch Tournament
Endorsed Tournaments
Regular Tournaments
Maps[]
Where all of the Multiplayer action takes place. Most of these maps will feature vehicles and some maps will feature underwater swimming. The main new mechanic with maps, is dynamics. All maps will feature destruction of certain structures and some of the maps will feature more dynamics that the player will have to find out themselves.
Map Icon
Map
Description
Map Pack
Hazard
Returning in 60fps. Watch out for snipers going up and down the course. SMGs and LMGs make for a good fit here.
On-Disc
Punjab
Gunfights within and outside the prison. ARs, SMGs, and the occasional sniper is a good choice. Intense Domination matches.
On-Disc
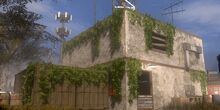
Town Square
Recently abandoned small town. The town has had its fair share of earthquakes in the past.
On-Disc
Breakout
The most technologically advanced prison in Russia. Tight security, and then long engagements.
On-Disc
Riverbank
Top secret facility in a seemingly peaceful woodland and river. Tanks are a real threat. Offense games get tactical here.
On-Disc
Nuketown
All time fan-favorite map. All matches are crazy here.
On-Disc
Favela
Downpour storm in the Brazilian sticks. Another all-arounder.
On-Disc
Nightlife
Battle it out on the streets of downtown NYC. Mid-long range weapons will come out on top. Think it out in strategic matches of Search & Destroy.
On-Disc
Subway
Recently destroyed subway station. Keep a shotgun or SMG nearby.
On-Disc
Beached
Hotel resort with a beach adjacent to the Pacific Ocean. Many destructible rocks across the beach. Golden Uplink matches.
On-Disc
Colosseum
A rapidly changing environment with a mechanical steampunk vibe to it, all within a big Roman colosseum. Pillars, structures, equipment will all be coming up off the ground. Matches can change in the blink of an eye.
On-Disc
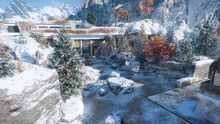
Ascent
Take command of the satellite control center at the top of this snowy mountain. Turret Jeeps and motorcycles are of great use here. Strategic Team Deathmatch and Free-For-All matches.
On-Disc
Oil Rig
Fight inside and out. The rig is not structurally sound and is shaky. Exciting Demolition games.
On-Disc
Lone
Watch out for snipers in this lonesome and quite frankly, creepy town. It's going to take teamwork to win objective-based games on this map.
Revolt
Rooftops
Fight out on the rooftops of an evacuated city. ARs and mid-long range weapons will shine here.
Revolt
Snow
Dress up warm in this snowy Russian battleground. There is quite a bit of open space on this map so make sure that cover can be found when needed. Also watch out for snowstorms!
Revolt
Cascades
Arabian cascading village. SMGs are a good choice here and Free-For-All matches are heated.
Revolt
Oriental
A valley with a monastery in the middle of it. A special care package award can activate a bunch of dormant Bouncing Betties from World War II. Where they are, no one knows.
Power
Volcano
Fight near an active volcano in a forest. The volcano could erupt at any point during the match. If it does, change tactics because the map's layout will be completely changed once it happens.
Power
Medieval
Eastern European castle that bears resemblance to the one from Call of Duty: Ghosts. However, there are a few differences. This isn't a sniper's playground like it used to be.
Power
Breached
Classified U.S. military compound that has been breached. A special care package award can activate halon gas that blurs the enemy's vision. SMGs, ARs, and some LMGs work well here.
Power
Detroit
Battle it out on the streets and rooftops of Motown. There are some changes to this map compared to the one in Advanced Warfare. All gun classes work to an extent on here. There is also a special care package award that will activate the Tram Turrets that will act as a sentry gun that goes around the map.
Bonus (free)
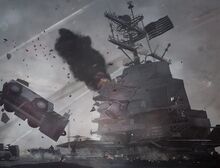
Transport
An American carrier is under attack. Defend or destroy it by making use of varying sightlines and cover structures. Security can be called in by a mysterious button.
Dominion
Cathedral
The sermon is, use SMGs and shotguns to your advantage. The interior bell tower can also make for a great sniping spot.
Dominion
Last Ditch
The devastated headquarters of the Alfada Party. It's a last ditch effort to win this fight. Who will be the victor?
Dominion
Tortola
A sunny and beatiful day on the beaches and villages of Tortola is suddenly interrupted by a skirmish. A special care package can be called in to bombard the enemy with artillery from the offshore battleship.
Dominion
Stadium
Returns from Black Ops with a few minor differences to make it more vehicle-friendly. Besides that, it's still the same frenzied combat in and out of the stadium.
Coup
Steel
Down in an abandoned steel manufacturing plant, a fight ensues. Watch out for molten material.
Coup
Jade
Jade River is under attack! Save the beautiful town from destruction, or destroy it.
Coup
Harbor
Utilize shipment containers as cover in this strategic gunfight. Rough Search & Destroy games. Some of these containers can hold some good rewards.
Coup
Perks[]
There are a total of 34 perks in this game. Each one is be put into one of five tiers. Every perk also has a Pro version once all of its challenges are met. Vehicle Perks also make a return. Players are able to select one of each tier and one vehicle perk. Meaning that a player will be able to have six perks at a time (seven with Gambler Pro).
Perk Name
Category
Description
Pro
ICU
Tier 1
Increased health regeneration.
Increases health to 120%.
Lightweight
Tier 1
Increases movement speed by 15%.
Neutralizes fall damage.
Scavenger
Tier 1
Pick up ammo clips and lethal grenades from dead players.
Additionally, picks up tactical grenades and equipment from dead players.
Recon
Tier 1
Enemy players hit by a grenade or tactical grenade will briefly be seen on the mini-map.
Enemy players hit by a lethal or tactical grenade will be seen on the mini-map by much longer and will send out a ping from that enemy that can detect other enemies in close proximity.
Quickdraw
Tier 1
Guns can aim down the sight 45% quicker. Snipers 25%.
Guns can aim down the sight 65% faster (almost instant). Snipers 45%.
Martydom
Tier 1
Drop a frag upon death.
Drop a short-fused frag upon death.
Mechanic
Tier 2
Sentry Guns, S.A.M. Turrets, and other equipment are more resistant to damage.
Turrets and equipment become resistant to EMPs, flashbangs, and concussions.
Sleight of Hand
Tier 2
Decreases reload time by 50%.
Switch between weapons faster.
Tac Resist
Tier 2
Decreases the effects of tactical grenades.
Negates EMP Systems.
Focus
Tier 2
Reduces flinching when shot.
Reduces weapon sway and recoil.
Marathon
Tier 2
Sprint for 50% longer.
Unlimited sprint.
Chameleon
Tier 2
Remain completely invisible to the radar for 12 seconds after spawning and respawning.
Remain invisible to the radar for 35 seconds after spawning and respawning.
Extra Lethal
Tier 3
Provides the player with two lethal grenades.
Provides the player with four lethal grenades.
Extra Tactical
Tier 3
Provides the player with two or four tactical grenades (Smoke and Tear Gas is two.)
Smoke and Tear Gas get four grenades. Flashbangs, Concussions, and Trophy Systems, get five uses.
Extra Attachment
Tier 3
Allows for two attachments on a primary weapon.
Allows for three attachments on a primary weapon and two attachments on a secondary weapon.
Overkill
Tier 3
Carry two primary weapons.
Carry two primary weapons with two attachments available for the second weapon.
Fully Loaded
Tier 3
Spawn in with full ammo in the gun.
Increases ammo capacity in the gun by 25%.
Gambler
Tier 4
Get a random perk.
Get two random perks.
Flak Jacket
Tier 4
The infamous perk gives the user added resistance to explosive damage.
Reduces fire damage and resets the fuse of throwing back frags.
Danger Close
Tier 4
Increases explosive damage by 40%.
Turns all explosives incendiary. Including scorestreaks. Stacks with the Incendiary Bomb.
SitRep
Tier 4
Enemy equipment can be seen through walls.
Enemy equipment can be hacked.
Ninja
Tier 4
Silences your footsteps.
Amplifies enemies' footsteps.
Hardline
Tier 5
Deducts 100 points from obtaining scorestreaks (i.e. UAV goes from 300 to 200 points to obtain).
Deducts 150 points and allows for a reroll of the Care Package.
Ping
Tier 5
After getting a kill, a ping will be sent out from that dead player which will put enemies in close proximity on the minimap.
The ping sent out will have much larger area of effect. All of your teammates will be able to see it as well.
Stopping Power
Tier 5
Bullets penetrates through walls more efficiently.
Bullets pierce through and penetrate scorestreaks far more efficiently while increasing bullet damage by 5%.
Double Tap
Tier 5
Increases fire rate by 25%.
Increases fire rate by 39%. Also adds more ammo capacity to the gun.
Headache
Tier 5
Bullets have a 18% chance of slowing down enemies and blurring their vision for 4 seconds.
Bullets have a 36% chance of slowing and blurring enemies. It lasts for 10 seconds.
Control Freak
Tier 5
Capture objectives 5% faster.
Capture objectives 10% faster.
Additional Passenger
Vehicle
Two passengers can occupy one vehicle. One of them can man the turret.
N/A
Pedal to the Metal
Vehicle
Increases vehicle top speed by 35%.
N/A
Staying Cool
Vehicle
Vehicle weapons overheat slower and reload faster.
N/A
Toughness
Vehicle
Vehicle damage is reduced (except for Stopping Power Pro).
N/A
Radar
Vehicle
The vehicle is constantly sending out a ping that can detect enemies in close proximity. Stacks with Ping Pro.
N/A
Off the Grid
Vehicle
Remain undetectable from scorestreaks and UAV. However, if hit by a Targeting Drone it will be prone to detection.
N/A
Scorestreaks[]
Players are able to gain scorestreaks not just by kills but by many other things as well: assists, capturing objectives, destroying enemy equipment and aircraft, and completing Contracts. There are a total of 23 scorestreaks, growing in intensity as the point value goes higher. Hardline will subtract 100 points from the point value of the scorestreak. Hardline Pro will subtract 150 points. Players will be able to select 4 scorestreaks.
Icon
Scorestreak
Points
Description
UAV
300
Shows enemies on the mini-map. Adds 10 points to the player's scorestreak for each kill their team gets while it is active (UAV Assists). Can be shot down.
RC-XD
300
Remote-controlled car strapped with explosives that the player can boost and explode at will. Adds 25 points per kill (RC-XD Kill). Can be destroyed by enemy players.
Ballistic Vests
350
Provides additional armor for themselves and their teammates. Adds 15 points to the player's scorestreak for each kill their team gets while they have a vest on (Ballistic Vest Assists). Vest stack can be destroyed by enemy team.
Counter-UAV
400
Temporarily disables enemy radar. Adds 10 points to the player's scorestreak for each kill their team gets while it is active (Counter UAV Assists). Can also be shot down.
SAM Turret
450
A surface-to-air unmanned rocket launcher. Specifically designed to take down aircraft. Can be destroyed by enemy players. Adds 150 points for every air vessel destroyed.
Care Package
450
Contains a random scorestreak.
Sentry Gun
500
An automatic sentry gun which can be remote-controlled or left to kill enemies. Adds 25 points to the player's scorestreak per kill (Sentry Gun Kill).
Precision Airstrike
600
Lay down a path for three airstrikes to occur. Each kill adds 50 points to the player's scorestreak.
Mortar Strike
650
Set down three coordinates across the map for three sets of mortar bombs to explode on each coordinate. These explosions are big so set them near objectives or points of interest to net the most kills (Mortar Strike Kills). Each kill adds 50 points to the player's scorestreak
Hellstorm Missile
650
An air-to-surface missile which can be scattered into a cluster bomb while falling. Adds 25 points to the player's scorestreak per kill (Hellstorm Missile Kill). The missiles can be shot down by the enemy (only if the cluster is not yet deployed).
Escort Drone
700
Get personal air support from an escort drone that follows you throughout the map. Adds 25 points to the player's scorestreak per kill.
A.G.R.
800
Air-drop an autonomous ground robot that searches for and destroys enemies and is equipped with rocket launchers and mini-guns. Can also be remote-controlled if the player would like to. Adds 25 points to the player's scorestreak per kill.
Rolling Thunder
800
Call in a massive flying fortress that will bomb a large path of the map chosen by the player. Each kill nets 25 points to the player's scorestreak.
Tactical Tri-Area Ground Jammer
800
Set down the coordinates for three SAT COMs to jam enemy electronics in their selected areas. Adds 10 points to the player's scorestreak for every kill the team gets while active in their zones. (TTAGJ assist). SAT COMs can be shot.
Advanced UAV
850
Shows both enemy position and direction on the mini-map. Cannot be shot down. Also gives 10 score towards the player's scorestreak whenever a player on their team kills an enemy.
Strafe Run
900
Five helicopters will strafe a path on the map for 60 seconds. A great way to protect an objective, however these helicopters are susceptible to being destroyed by SAM Turrets. Once one is destroyed, it isn't coming back. Each kill adds 25 points to the player's scorestreak.
Stealth Chopper
1000
Call in a stealth helicopter which does not appear on the enemy's mini-map and is very distracting to enemies trying to take it down. Adds 25 points to the player's scorestreak per kill (Stealth Chopper Kill). Takes two shots to destroy.
EMP Systems
1100
Disables enemy electronics and HUD and destroys scorestreaks that are active at time of detonation for 30 seconds. Also gives 10 score towards the player's scorestreak whenever a player on their team kills an enemy (EMP Assist).
O.K.B.S
1150
Operate an Orbital Kinetic Bombardment System in space. From space, the player can control this system and bombard the map with small and large kinetic rods that will devastate the battlefield. Adds 20 points to the player's scorestreak per kill (O.K.B.S. Kill). Can't be shot down.
Helicopter Pilot
1200
Pilot a powerful warship armed with dual explosive round miniguns and rockets. Has two sets of flares. Adds 15 points to the player's scorestreak per kill.
Attack Dogs
1200
Spawns attack dogs that hunt down the enemy. Dogs will continue to spawn if one is killed. Adds 15 points to the player's scorestreak per kill (K9 Kill). Dogs can be shot.
Emergency Airdrop
1250
Drops four care packages at once.
Thanatos
1500
A swarm of drones that track and kill enemies bombard the map. Eventually, they destroy much of the map and kill every enemy on the team at once.
Zombies[]
Step into the world of Zombies as the newly unleashed evil entity named Gossamer, assumes his control over Earth as the zombies run rampant on it. - Zombies Blurb
Zombies has retained most of the features of past Treyarch COD titles. Survive endless rounds of incoming zombies with your friends. Each round gets harder than the last. Completing easter eggs will also unlock new and exclusive camos, patches, and gear to customize your look both in Zombies and in Multiplayer.
Maps[]
Map Icon
Map
Location
Summary
Theta
Chihuahuan Desert, New Mexico, United States of America
With the Alfada War happening overseas, a classified military research center is looking into a new weapon that can combat Thanatos. They were experimenting with an unknown element and inadvertently bridged a gap to the Other World. This unleashes the zombie outbreak and a superior entity named Gossamer. Now the base is overrun by zombies, and it's up to four soldiers (Jack Barnes, Tristan Bowen, Amos McFarland, and Holly Wood) to contain this zombie outbreak while learning about the secrets of the Other World.
Hospital of the Undead
London Bridge Hospital, London, United Kingdom
Shortly after the events of Theta, zombies have spread everywhere across the world. Just then, the Original Crew: Tank Dempsey, Nikolai Belinski, Takeo Masaki, and Edward Richtofen teleport into the future of 2018. Richtofen knows of an experimental weapon located in the depths of the hospital that can seal up the gap to the Other World. Gossamer knows that they're here, however.
Wald Des Todes
Black Forest, Germany
A week after the events of Hospital of the Undead, the Original Crew now travel and teleport into the Black Forest in Germany. Richtofen finds a building that is out of place. The Other World still has influence on Earth's plane of existence so it's time to get to zombie killing.
Church of the Damned (The Cathedral)
New York City, New York, United States of America
Immediately after the Original Crew obtain the Brimstone Gem, the Theta Crew get a reading that another breach between our world and the Other World has opened. This breach is different, however. The Theta Crew fly up to NYC and a damned St. John's Cathedral. Perhaps, entering the gap could unlock immeasurable secrets and wonders of this other dimension.
Other World
Dimension 52
The Theta Crew have successfully entered the Other World. The four soldiers go in with the objective of recording and researching data about this unknown world and making sure that this world can never maliciously interact with our world again. A demonic voice, however, tells them that there's no turning back and zombies start coming in. The mission is still a go, will our soldiers make it out of this one?
Zephyr
Mambosa Seaport, Kenya
Running concurrently with the events of Other World, the port of Mambosa has received a shipment of 115 and the whole port has been infected with zombies. Four survivors (Chuck Cleveland, Basile Cao, Fifine Nakkula, and James Calabrese) are told by Audio Logs that they must complete the Trials of Zephyr if they want to reverse the effects of the 115 infection across the port city. Arm up and get to zombie killing.
Distortion Paradox
Waffenfabrik Der Riese, Lower Silesia, near Breslau, Germany (starting area)
------------------
Land of the Desolate, Dimension 52 (main area)
Now with all of the Other World gaps closed in the present, the Original Crew must travel back in time via teleporter to World War II and back to the main Group 935 facility, Der Riese. They have found that the place is already ransacked with zombies but a breach to the Other World is open. Using the Brimstone Gem, Richtofen distorts the gap and the four enter into a world full of paradox, madness, and death. Will they destroy the sinister world or be destroyed? This is where it all ends.
Trials of Zephyr[]
This new mechanic is introduced in the map Zephyr and only appears on that map. Instead of the traditional set easter eggs for each map, this randomizes the easter eggs for completion each time the player plays the map. A trial board can be found at the beginning port area, at the town section, and at the church. Trial 1 is unlocked by default while the subsequent trials are unlocked once the preceding one is completed. The players have the option of starting the trials whenever they want without consequence. For each trial, one of the three easter eggs are randomly chosen for the players to do during that playthrough of the map. It's a 33% for each one. However, the musical easter egg will remain the same no matter.
Trial 1 []
Shoot the lock at the Comfort Station and kill 50 zombies in that area.
Kill the Rambo Zombie.
Find and shoot the 12 otherworldly skulls layed out across the beginning and mid-area.
Top Tip: Make sure that you're armed with at least one power weapon so that you won't get manhandled by the Rambo Zombie if that easter egg is chosen. Not a chance you want to take to not do it.
Reward: Max Ammo, Perk Bottle, Unlocking Trial 2
Trial 2 []
Use the Dimensional Splitter to cross into a part of the Other World and kill 77 zombies in there.
Build the Angel Wings and then use them to fly up and activate the cell tower. Defend the tower from parasites for 115 seconds.
Find the medkit and syringe for Dr. Matts. Minibosses will spawn more often until the items are found.
Top Tip: By this point, everyone should have at least one power weapon on them so they can deal with whatever trial comfortably.
Reward: Max Ammo, Perk Bottle, Scavenger, Unlocking Trial 3
Trial 3 []
Kill 92 zombies near the Fountain of Sacrifice.
Kill the three Rambo Zombies.
Survive 8 minutes of endless zombies and hellhounds.
Top Tip: Start Trial 3 as soon as possible. The sooner it's done, the less intense the trial will prove to be. However, make sure that all players are equipped and ready for the final boss once the trial is over.
Reward: Golden PPSh-41, Golden Bowie Knife, Ray Gun, Awaking the Thunderbeast
Wonder Weapons[]
Wonder Weapons are weapons that are exotic, experimental, futuristic and even alienistic. They can accomplish things that no normal gun or weapon can do. Most of these weapons are gotten through the Mystery Box while some of them are buildables using spare parts. They are essentially weapons that are way ahead of their time. All of the Wonder Weapons are available on Distortion Paradox.
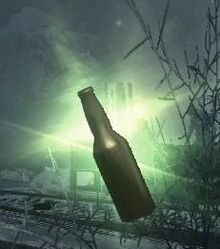
Ray Gun - Shoots powerful green balls of energy. Kills zombies in one-hit up to around Round 22. If it's upgraped, it can one-hit up to around Round 30. (Appears on all maps)
Monkey Bomb - Using its cymbals, a mechanic monkey attracts zombies to its location and then blows up. Very useful in creating a distraction to get away from the zombies and be able to do something else. (Appears on Theta & Wald Des Todes & Church of the Damned)
Rocket Shield - Buildable shield that is equipped with rockets. Not only is this a defensive tool, it's an offensive tool as well. It can be used to defend yourself from zombies or propel yourself right through a group of zombies using the rockets. (Appears on Theta & Wald Des Todes & Zephyr)
Thundergun - Shoots gusts of compressed air that can blast away hordes of zombies in one hit. Will always be a one-shot kill no matter the round. Useful for clearing out large groups of zombies if one is getting surrounded. It has low ammo capacity, however upgrading it will increase it. (Appears on Hospital of the Undead & Wald Des Todes)
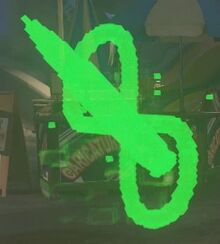
IZ-42 Spiraller - Shoots a sticky red ball of energy. Once it latches onto a zombie or surface, it detonates in two seconds. Once detonated, it creates a large spiralling laser that melts through any zombies in its way. Useful in clearing out large hordes. (Appears in Theta & Hospital of the Undead & Zephyr)
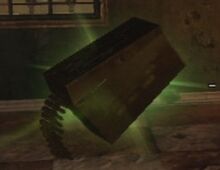
Dimensional Splitter - Creates a black hole that sucks in zombies. Has a similar effect that the Monkey Bomb has, creating a diversion for the zombie. This weapon also plays a major role in the Easter Egg for Hospital of the Undead and Church of the Damned and it also plays a smaller role in Zephyr. (Appears on Hospital of the Undead & Church of the Damned & Zephyr)
32K-Hybridi - A slender shotgun-like hybrid gun and sword weapon. In gun form, it shoots out yellow bursts of powerful energy that can one-hit kill zombies up to Round 20 (Round 40 upgraded). In sword form, it can hack'n'slash zombies in one-hit up until Round 15 (Round 28 upgraded). Once upgraded, the sword can perform a slam attack that will create a shockwave that kills zombies in the player's vicinity. However, this special attack uses ammo from the gun form so use it wisely. This weapon plays a major role in the Easter Egg for Wald Des Todes. (Appears on Wald Des Todes & Zephyr)
Angel Wings - A marvellous buildable combining human technology with alien technology. These wings can be used to make players fly for a brief period of time and reach areas that were previously unreachable. Players can also perform a swooping attack on zombies while in the air like a Dark Raven. The attack can one-hit kill up to Round 32 and is a good method of killing zombies if one is trying to conserve ammo. This weapon plays a role in the Easter Egg for Church of the Damned. It also plays a part in one of the Trial 2 easter eggs. (Appears on Church of the Damned & Zephyr)
Scavenger - This weapon returns from Call of the Dead and functions the same way. It's a sniper crossbow with a special explosive tip that will have a large explosive radius that can one-hit kill zombies all the way up to Round 61 (92 upgraded). The explosion is very powerful and useful for clearing out large hordes in dire situations but it will hurt the player like a normal grenade if they're too close. PhD Flopper will negate this. The weapon also has relatively low ammunition so use it only when needed. Can be obtained by completing the Dr. Matts Trial 2 easter egg or getting it through the Mystery Box. (Appears on Zephyr)
A black hole created by the Dimensional Splitter.
IZ-42 Spiraller in action.
Drops & Search Piles[]
Drops make a return appearance in Zombies. They are Power-Ups dropped from zombies that will help the player(s) in their fight against the undead. They can be anywhere from doubling the points that the players acquire, to completly bombing all the zombies on the map. A new addition, however, comes into the Zombies mode. Search Piles. Search Piles are located all across the map, and can be dropped from zombies. Most of them contain little things like an extra grenade or even a little bit more ammo. However, some of them can contain some epic loot. Like a fully upgraded gun!
Drops[]
Drop Icon
Drop
Effect
Double Points
Doubles the points of players for 30 seconds. For example, a normal kill would award 60+ points but with Double Points, it's 120+ points.
Insta-Kill
Instantly kill normal zombies in one-hit for 30 seconds. Using your melee attack is best advised so that ammo is saved.
Nuke
Bombs the map and kills all zombies on-screen at once and awards 400+ points (800+ with DP). Can be a lifesaver if one is out of ammo or is surrounded by zombies.
Max Ammo
Refills all players ammo to full capacity. Make sure you reload first before getting this.
Speed Boots
Increases all players speed by 25% for 30 seconds. Outrun any situation!
Carpenter
Restores all zombie barriers on the map and awards 200+ points (400+ with DP). Keeps the zombies out of the map for a little bit.
Time Warp
All zombies are slowed down to turtle speed for 30 seconds. Buy yourself some more ammo during this time.
Infinite Ammo
Grants all players unlimited ammo for 30 seconds. Use your wonder weapons (if you have any) during this period.
Monkey Bomb
Spawns a Monkey Bomb which attracts all the zombies in the area towards it. This Drop only appears in Hospital of the Undead.
Wunderwaffe DG-2
Grants only the player that got this, a Wunderwaffe DG-2. This gun shoots a bolt of lightning that will shock all zombies in its area of effect. Lasts for 30 seconds.
Perk Bottle
Grants every player one random Perk-A-Cola.
Zombie Cash
Gives the player that picked it up 500-1500+ points and doesn't give it to other players; looks gold when adding. Also has a 10% chance of subtracting 500-1500 points, however the icon will look silver rather than gold if it will subtract.
Search Pile Loot[]
Attachment - Adds a random attachment to current gun.
Cash - Gives the player anywhere from 50+ to 500+ points.
Ammo - Gives the player either a clip of ammo or full ammo.
SOFLAM - Gives the player a device that can call down one missile for each specified location. Up to three locations.
Frag - Adds two grenades to the player's inventory.
Semtex - Adds two sticky grenades to the player's inventory.
Incendiary Bomb - Adds two Incendiary Bombs to the player's inventory
Claymore - Adds five Claymores to the player's inventory.
XP - Adds experience points to the player's Zombie rank.
Drop - Spawns a random Power-Up for use.
Gun - Gives the player a locked and loaded gun that can come with attachments.
Upgraded Gun - Gives the player a gun that has been Pack-A-Punched already.
A free Upgraded MP-40 gotten through a Search Pile.
Perk-A-Colas []
Perk-A-Colas are vending machines that give players perks similar to Multiplayer. This perks will last for as long as the player doesn't go down. Some easter eggs may even give players perks for the rest of the game, regardless of going down or not. Perks can also be gotten for free via Perk Bottles. There are a total of 16 perks for zombies.
Perk Icon
Perk-A-Cola Name
Cost in Points
Description
Quick Revive
1500 (500 on Solo Mode)
(Co-Op Mode) Be able to revive downed teammates twice as fast. (Solo Mode) Be able to come back from being down up to three times. The player will be equipped with two explosive pistols so they can clear away the zombies once they get up. Be careful, once you go down for the fourth time, that's it!
Juggernog
2500
Be able to take six hits from zombies instead of the normal three. This is arguably the most important Perk-A-Cola to have because it essentially doubles the players health. Go for it first before you get anything else.
Speed Cola
3000
Be able to reload your gun and rebuild barriers 25% faster. Even with its high price, having this perk can save a player from death with its quick reload. Get it if you can.
Double Tap
2000
Increases bullet fire rate by 20%. This perk can greatly increase the effectiveness of a weapon without upgrading it. However, if a player isn't using their ammo properly than they could burn through much quicker. Be careful.
Pack-A-Punch
5000
Upgrades current weapon and could add attachments and modifications as well. Because of its luxurious price, it's recommended that this is gotten later in the game. This machine will allow weapons to remain effective for much longer against zombies. Double Pack-A-Punching a weapon will further increase a weapon's effectiveness and gives it a cool name. Ex: Voice of Justice, Skullcrusher.
Mule Kick
4000
Allows the player to carry a third weapon. Recommended if the player has two Wonder Weapons in stock already and want to get a third weapon.
Stockpile Whiskey (new)
2200
Increases ammo capacity by 20% and adds one more lethal grenade and tactial grenade. Combine this with an LMG or Pack-A-Punch and the player can have ammo for days.
Banana Colada (new)
3000
Double-tap the crouch button to slide, leaving a yellow slimy trail that zombies will slip over. You can also slide up stairs and slopes. This can provide some cover and for your teammates and can get yourself out of trouble in dire situations.
Stamin-Up
2000
Increases running speed and duration by 25%. A really good perk to have if you plan on running around the map alot (or running away from zombies).
Deadshot Daiquri
1500
Adds auto-aim to headshots for zombies. As zombies get stronger and stronger, it's good to aim to the head for quicker kills. This perk greatly helps with that.
Electric Cherry
2000
Creates an electrical shockwave everytime a player reloads. The power of the shockwave is dependent on how much the player reloads their mag. If they dump out their whole magazine, than the shockwave is at its strongest. If a player just shoots one bullet out of thirty bullet mag, the shockwave will be very weak. If the zombies have you surrounded, this could the perk that keeps you from dying.
Widow's Wine
4000
1. Turns your lethal grenades into Webby Grenades which entrap zombies in webs. 2. Zombies that hit the player will unleash a wave of webbing from the player, trapping nearby zombies for 20 seconds. 3. Zombies can sometimes drop Webby Grenade power-ups and you can replenish grenades that way. 4. Your melee attack also gets stronger and has a weaker webbing effect against the zombies.
Vitamin Juice (new)
3500
This perk is unique in that it only works once activated. However, it can only be activated once per round. Once activated, a barrier surrounds the player and it excessively regenerates the health of that player and other players within its barrier. Great perk for team support.
PhD Flopper
2000
Takes away fall damage and explosive damage. Also, if the player holds down the crouch button and dolphin dives off a steep slope or set of stairs, they will create a large explosion which kills all zombies in the blast radius. Can be a lot of fun to use, but be careful though!
Savage Energy (new)
2500
Every zombie kill has a 5% chance of bringing them back and fighting on your side. Once a zombie becomes a "savage", they will continue to kill other zombies until they die themselves. Zombies that turn into a savage have a more reddish and devilish appearance than their normal zombie counterparts.
Vulture Aid
3000
1. Players will be able to see where all utilities are including: other perks, wall weapons, the Pack-a-Punch machine, and the Mystery Box. 2. Zombies occasionally drop packets of extra points and ammo (which will become really helpful in the later rounds). 3. Zombies will occasionally release a green gas cloud upon death which a player can stand on. Once standing in the cloud, the Vulture Aid icon will begin to glow and zombies will ignore the player until the icon stops glowing. 4. Zombies will also be easier to spot due to their brighter eyes.
Types of Zombies[]
Beware! There are more than just the normal, average zombies lurking in the shadows. On the map Other World, all of the zombies look different and more demonic.
Regulars[]
Normal zombies.
Zombies - Average run-of-the-mill zombie. Has no particular strength or weakness but in large numbers they can surround you in a pinch if you're not careful. They appear on all Zombie maps.
Creepy Crawlers - These stinky guys traverse the terrain on all fours and can move faster than the normal zombie. They also leave behind a disorienting cloud of smoke once they're killed. However, they have less health than a normal zombie and their noxious gas cloud can be averted by killing them with a melee attack or using a Wonder Weapon. They appear in Hospital of the Undead & Church of the Damned & Zephyr.
Bullies - These foes have more health than the normal zombie and can down a player in just 2 hits (average zombies take 3 hits to down a player). They also maintain the same speed as a normal zombie. However, they are more susceptible to explosive damage than normal zombies, so use grenades and explosives to take these guys out comfortably. They appear on all Zombie maps.
Parasite insects.
Parasites - These little pests fly down from the sky in swarms of 5-7 on occasion. They spit down bubbles of acid towards the players. Parasites have a small amount of health and are generally easy to kill on their own. However, if they are coupled with other zombie enemies, they can spell disaster for the players. So it would be best if they are taken out as soon as possible. They appear in Hospital of the Undead & Wald Des Todes & Church of the Damned.
Haymakers - These zombies are marked with their distinctive, bright clothing. They are almost identical to normal zombies in function except for one thing. When they hit a player, it will disorient them (similar to how a player gets hit by a Creepy Crawler's gas cloud). This will blur the player's vision and strip them of their ability to run for a couple of seconds. During these few vital seconds, the player could end up getting down because of their difficulty to see and their inability to run from the zombies. Look out for their bright clothing and kill them ASAP. They appear in Theta & Church of the Damned & Zephyr.
Rollers - These disgusting things are big, live pieces of flesh that have the intention of blowing up in your face. Getting hit by one causes major damage to the player and can get you down. Best thing to do with them is shoot them from a distance and let them blow up the other zombies. Kill two birds with one stone. They appear on all Zombie maps.
Ghosts - When a player goes into the graveyard portion of the cathedral space (they also appear occasionally at the church space in Zephyr), these enemies will appear. They move slightly faster than zombies but will move much slower when the player has them in their crosshairs. If they get too close to the player, they will subtract 2000 points from that player. If the player has below 2000+ points, then Ghosts will attack a player like a normal zombie would. They have less health than a normal zombie so killing them isn't much of a problem. Make sure that you look around constantly so that you don't get robbed of your points. They appear in Church of the Damned and Zephyr.
Horsemen - These decaying skeletons with cowboy hats ride on undead horses. These enemies don't appear often but look out for them. The skeleton has a gun and he will shoot at players. Interestingly enough, the bullets do less damage than a swipe from a normal zombie. However, the horses have above average health while the skeleton has the same amount of health as a regular zombie. The horse must be shot first before the player can shoot the skeleton. They appear in Other World and Zephyr.
All zombie types appear in Distortion Paradox.
Specials[]
Hellhounds - These enemies have their own special round apart from the rest of the zombies. They teleport into the map and then they chase down a player. They aren't hard to kill and they have less health than a normal zombie. However, they are very fast and they can down a player in the blink of an eye if one isn't careful. These guys will always drop a Max Ammo once their round is finished. Appears in Theta & Church of the Damned & Zephyr via a 33% of Trial 3.
Jumping Jacks - These guys resemble Creepy Crawlers and they also have their own special round. They teleport onto the map and then they look for a player. Once they spot a player, they teleport in and out of the map until they reach the player. The player has to keep track of where these guys are teleporting to and must shoot them on the way. Otherwise, these guys will shock you with their electricity if they hit you. This would leave the player disoriented and open to more hits. If the player(s) manage to kill all of the Jumping Jacks without taking any damage, then they will be awarded with a Max Ammo AND a free Perk Bottle. If the player(s) do take damage at any time during the round, they'll receive just a Max Ammo at the end. Appears in Hospital of the Undead.
Dark Ravens - These abnormal birds appear on special rounds of their own. These birds will fly in circles in the sky and then suddenly swoop down and attack the players when they least expect it. Also beware that a Raven just needs to hit you twice in order to down you without Juggernog. A good strategy to fight these special enemies is to shoot them after they perform their unpredictable swooping attack and take them out comfortably. Once the round ends then a Max Ammo drops ready for taking. They also can appear on normal rounds when a Momma Raven calls them. Appears in Wald Des Todes.
Minibosses[]
Rambo Zombie - These are zombies that were caught inside the experimental "Rambo-XA9" suit during the outbreak. Once the players begin the Easter Egg for the map Theta, these guys will have a chance of spawning in during a normal round. They are very tough with a lot of health and run quicker than a normal zombie. They also utilize a flamethrower if you get too close them. Using a Wonder Weapon would be the most efficient way of dealing with a zombie of this caliber. However, if no one has a Wonder Weapon, then shooting at the head of the armor continuously will eventually take it down. Once killed, they will drop two random Power-Ups ripe for the taking. Appears in Theta & Zephyr via a 33% of Trial 1 and Trial 3.
Goster - These are high-level henchmen of the super-entity Gossamer. Gosters have two main methods of attack: one is direct while the other is indirect. The direct one is this; a Goster will target a player and will quickly perform a spin dash attack on the player. The player has only a couple of seconds to get out of the way and failing to do so will result in an instant down without Juggernog. Goster's indirect attack is this; he'll get himself into a crowd of zombies and start buffing up their health. Once the Goster tires himself out by doing this, it'll take him 25 seconds to regain his strength. Plenty of time to deal with the buffed zombies and getting some hits in on the Goster (especially if the player(s) have a Wonder Weapon). They'll drop two Power-Ups once defeated. They begin to have a chance to appear after Round 16 and they appear in Hospital of the Undead & Church of the Damned & Distortion Paradox.
Momma Raven - This beast is 5x the size of a normal Dark Raven. They have a chance of appearing once the players begin the Easter Egg for Wald Des Todes. The miniboss has two forms of attack. The first method is a swooping attack just like the Dark Ravens but this is significantly stronger. A player that gets hit by this will instantly go down without Juggernog. Avoiding the attack is not too hard but a player should be aware of the zombies nearby so they don't get shanghaied. Players can also "lead" the Momma Raven to a certain location on the map to do its swooping attack. The attack can clear out a bunch of trees and reveal a new location on the map that could be vital to the completion of it. The bird's second method of attack is not exactly direct. What she does is call her flock and regular Dark Ravens swarm the map during a normal round. At this time, the player(s) must remain extremely vigilant because they have both zombies and Dark Ravens to worry about. If one or more of the players have a Wonder Weapon, use that to take care of these guys quickly. Once the players defeat Momma Raven, she'll drop a Power-Up and the Quietus Feather. Appears on Wald Des Todes.
Eagleman - These humanoid beings are basically smaller and much more agressive versions of Momma Ravens. They hold the same amount of health as a Momma Raven. They perform a more aggressive version of the swooping attack which deals more damage than a Momma Raven. A loud screech is heard whenever one spawns so take them out as quick as possible. They can distract players from the other zombies and that could end up getting everyone killed. Appears on Other World & Distortion Paradox.
Astronaut - Remember him from Moon? He makes a return appearance in Zephyr and does the exact same thing. He has a lot of health but he moves very slowly toward the closest player. If he reaches a player, he'll grab them and headbutt them which will effectively teleport them back to the beginning area of the map with low health and losing a perk. Due to his very slow movement, the players do not have to take him out immediately. The best time to take him out would be at the end of the round with a crawler. A Wonder Weapon could also get rid of him real quick. His suit is black here unlike Moon, where his suit was grey. He begins to have the chance to appear on Zephyr as early as Round 3.
Speedy - This zombie is around the same health as the Rambo Zombie. Instead of hunting down players in a suit, this guy hunts players on foot. Due to his speed, the player has to make sure that they sprint every couple of seconds. They don't have to sprint the whole time but having Stamin-Up would really help out with dealing with this zombie. He makes a distinctive shriek when he appears on map and makes the same shriek when he dies. He always drops a Power-Up upon death. Many players consider him the cousin of the Shrieking Zombie from Shangri-La. These guys start having the chance to appear on Round 5 on Zephyr.
Chance - These minibosses are unlike any other. They take the appearance of a demonic die and will begin their rollout by a player shooting them or being left alone for 15 seconds. Like a normal die, these guys have six sides and it will randomly land on one of them. The odd numbers will actually help the players while even numbers will make things harder for the player. They begin to have the chance to spawn as soon as the players begin the "Verzerrung" easter egg. Appears in Distortion Paradox.
Provides Max Ammo to all players or player who shot it.
Spawns in 22 more zombies into the map or near the player who shot it.
Provides Speed Boots to all players of player who shot it.
Dumps out all ammo for the current gun used to shoot the die for 30 seconds. 15 seconds if nobody shot the die.
Swaps out current gun used to the shoot the die for a Wonder Weapon for 45 seconds. 30 seconds if nobody shot the die.
Spawns in 6 Horsemen into the map or near the player who shot it and the die itself will turn into a Goster.
Bosses[]
Panther - When the Easter Egg for Theta is nearly complete, the main boss of the map is unleashed. Panther, a creature from the Other World. Nobody is completely sure what this thing is but it moves blindingly quick. All the normal lights of the map go dark and the emergency lights come on, with the Panther switching on and off the emergency lights. His pattern can be detected by the pattern of lights he goes after. However, when the Panther goes in to attack a player, one of the lights will flicker a blue color. The players must then take out their Rocket Shields to defend themselves from the Panther's attacks while evading the other zombies in a timely fashion. Panther himself isn't the thing that's lethally dangerous, it's the combination of him and the other zombies that is lethally dangerous. This is what gets many inexperienced players killed (if they somehow made it this far). Once the Panther finishes his attack, he'll move in and out of the lights again and the players will proceed to shoot the corresponding lights to damage it. When the Panther is finally defeated, the players are provided with the option of ending the game there or continuing on with map. Final boss for Theta.
Gossamer (Wrecking Forme) - Once the players nearly complete the Easter Egg for Hospital of the Undead, Gossamer himself steps into the onslaught. He transforms into his Wrecking Forme. Note that this battle can only take place if at least one player has the Dimensional Splitter. Gossamer in his Wrecking Forme has three methods of attack:
1. Summonning a dimensional rift that spawns a group of shadowy zombies. These zombies have a tiny bit more health than a normal zombie but they function like a normal zombie in every other way. Be careful when Gossamer uses this attack because if the players aren't careful, they can find themselves surrounded by both the shadowy zombies and the other zombies.
2. Hovering in the air and then slamming into the ground, creating shockwaves. If Gossamer hits a player head on with this attack, they'll instantly go down without Juggernog. Getting hit by the shockwave will cause some damage but not too much. When Gossamer is performing this attack, create some distance between yourself and the zombies so you can safely get out of the way of Gossamer's attacks without getting held up by the zombies.
3. Gossamer disappears and then a jumpscare noise is made, and then Gossamer violently pops his head up from the ground. If the jumpscare noise is very loud and it sounds like it's ontop of your head, it means that Gossamer is about to hit you from the ground. Quickly moving away from that spot (Dolphin Dive or Tactical Slide are good ways) will avoid the attack. Keeping a level-head through the jarring noises and moving quickly out of the way of Gossamer's attacks will ensure the players will be fine. There are moments in between Gossamer's attacks where he doesn't move much, those are the times when he should be shot. Once Gossamer is low enough in health, Richtofen will yell out to use the Dimensional Splitter to get rid of him for good. The player who has that Wonder Weapon will proceed to shoot Gossamer and send him back to the dimension that he came from. Doing this will complete the Easter Egg and prompt the players to either end the game or continue with it. Final boss for Hospital of the Undead.
Meteor Man - After the players have destroyed Facility 44 with the Meteor of Destiny, Meteor Man will emerge from the detritus of the meteor. Being a creature filled with vengeful fire and energy, he attacks the players. This boss has three methods of attack.
1. Shooting fire blasts. This attack is fairly easy to avoid. Once Meteor Man has a player in his sights he'll shoot bursts of fire at them. If the player has Rocket Shield (which they most likely do at this point in the game), all they literally have to do is use it to shield themselves from the attack. Some of the blasts may even deflect back to Meteor Man; damaging him in the process. Once his attack is down, the player(s) can proceed to shoot him.
2. Laying down lava patches and rivers. Meteor Man will cover parts of the map with blobs and rivers of lava. This attack can get very annoying because the lava creates an obstacle for the players to look out for while already fighting the zombies. If a player touches the lava, his vision will blur and will take small continual damage for a short amount of time. It's for this reason that touching the lava can prove to be disastrous because the player could easily get overwhelmed by zombies while being disoriented and damaged by the lava. Zombies that touch lava will also catch on fire and will explode once they're killed, doing additional damage to the player if close by. Don't melee zombies that are on fire.
3. Nuclear blast. Meteor Man will assume the fetal position and levitate off the ground. When Meteor Man does this, the players have six seconds to run away as far as possible away from the resulting explosion. The range is pretty big so getting Stamin-Up before this can happen is highly recommended. Getting caught in the explosion will result in an instant down, regardless if the player has Juggernog or not. Try to get as far away as possible. Normal zombies won't die from the explosion so be ready to fight them once the attack is over. When the players defeat Meteor Man, he'll implode and drop the Brimstone Gem. Once the Brimstone Gem is collected, the map and Easter Egg is complete.
Shadow Demon - When the priest opens the breach to the Other World, he gets consumed by an unholy creature known as the Shadow Demon. The Demon has three methods of attack.
1. Turning into a poisonous cloud of gas that floods the bottom portion of the map. When the Demon performs this attack, all of the players must use their Angel Wings to fly up to a higher part of the map. With zombies jumping up onto these parts, it could get tight. Touching the gas will deal slow and continuos damage that will eventually down the player. It will also blur vision. When the Demon finishes this attack, the players can shoot him while he's cooling down.
2. Shooting the Laser of Agony at players. The Shadow Demon will slowly follow a random player and shoot the lasers. The best thing to do to get away from this attack is to just simply run away from the boss. Be wary of the zombies that could get in the way while running away. If done properly, then the player should have no problems with getting hit by this attack. However, if a player does get hit by this, they'll get severely injured and will be limited in movement. The player will most likely go down at this point because the other zombies will finish them off.
3. Danger Zone. The Demon will section a part of the map to be the only safe place on that map. The Shadow Demon doesn't directly attack during this but the tight space can make it very hard for the player(s) to train the zombies. Wonder Weapons will reliably make this attack doable. Once the Shadow Demon is defeated, the Theta crew can make their way into the breach to the Other World. Entering this breach will complete the map and the Easter Egg.
Gossamer (Human Forme) - This boss is special in that he warps the layout of the map (since it's his domain) as the players progress through the "The Great Unknown" easter egg. He does this to progressively make the map more dangerous to the players. Once the players nearly complete the easter egg, he will transform into his Human Forme and take on the players head-on. Gossamer is a reality-warper when he's in his domain. As such, his three methods of attack are unorthodox and quite arcane.
1. Firing rainbow-colored theta rays at the players. This is quite possibly his most devastating attack and arguably one of the most dangerous attacks in the whole game. If a player gets hit with a theta ray, they won't get damaged by it. Instead, they'll be teleported into a hellish tight space that is filled to the brim with zombies. It is not impossible to make it out of this room alive but it is very laborious to do so. If the player does go down in the tight space, they'll hear Samantha's laugh and then be teleported back to the main area. Another player can try to revive them at this point, although it would be tough with Gossamer and the zombies. Having Quick Revive is an absolute must by now. The theta rays aren't that fast and aren't that hard to avoid, however with the incoming zombies, that could be subject to change.
2. Stealing a player's weapon. When Gossamer initiates this move, he acts nearly identical to the Pentagon Thief from Five. He'll only physically appear to the player that he's trying to steal from while the other players will simply see his "otherworldly particles". However, all players are able to shoot and damage him while he is doing this. In Solo, if he steals the player's weapon, the player will get back that weapon in 60 seconds (that player can't buy another weapon in the meantime). This attack will end once Gossamer either steals a player's weapon or if 30 seconds pass and he hasn't gotten anything. If Gossamer is chasing you, don't even attempt to shoot him. Just run away. Let the other players shoot him instead if you're playing with other people. Stamin-Up and the Launch Pads are your friends.
3. Disabling the player(s) perks for 15 seconds. Gossamer lets out an ear-piercing scream that will distort the players hearing while their vision remains clear. Gossamer won't directly attack while using this move, although it's best advised to steer clear of zombies until the effect wears off. No Juggernog is no fun. When Gossamer gets severely injured, a cutscene commences and he unleashes an attack that none of the soldiers can defend against. The soldiers end up getting captured while Gossamer gets exhausted and is forced to close up the gaps to our world. However, he sends out an entity through the last gap to continue his work on Earth while he's locked in the Other World. The cutscene ends with "To Be Continued" marked in blood. The map and Easter Egg is now complete at this point.
Thunderbeast - Once the player(s) complete all three Trials of Zephyr, a dimensional rift appears and the entity Thunderbeast is unleashed since Gossamer was locked in the Other World. He destroys the cell tower before the boss battle is initiated. He has three methods of attack.
1. A loud, thundering screech. When Thunderbeast yells out this attack, he'll send players in the way reeling. From just the blast alone, players will go down without Juggernog. With Juggernog, they'll be blown back as if they were blasted by the Thundergun and will take severe damage (usually a red screen). The beast prepares himself taking a deep breath and this is the time when players can and should move out the way. Make sure that zombies aren't in the way so this can be done without dying.
2. Performing a boulder-esque rolling attack onto players. This attack begins with Thunderbeast kicking his feet up like a ring bull. Players should take this chance to move out of the way immediately. If players ge caught in the attack, they'll instantly go down with or without Juggernog. The attack is fairly easy to avoid without surrounding zombies and highly punishable. The beast will also claw at players that are too close to him before and after the attack.
3. Lightning strikes. Thunderbeast yells at the sky and dark clouds start rolling in. Soon after, lightning strikes in random positions on the map frequently. If lightning strikes a player, they'll get shocked and be disoriented which can set themselves up for going down from other zombies. The best way to avoid this is to simply go inside a building. The problem with that is, there are only two buildings in the whole map that players can go into and they're small. Many of the lightning strikes will just so happen to strike zombies and they electricity coursing through their bodies. Once that happens, they will unleash a burst of electricity upon death which can be dangerous inside the small buildings. Be prepared for that. Once the Thunderbeast is killed, the seaport town will be rid of the 115 and can be restored to its fomer glory. Or the players can continue killing zombies if that's what they want to do.
No boss appears on Distortion Paradox and is instead replaced with an easter egg as long as the one done in Revelations.
Contracts[]
Contracts is a new main game mode of the Call of Duty franchise that takes some inspiration from the Contracts system in Black Ops 1. Here, players can purchase Contracts using their COD points and then they will complete them across the other gamemodes. Some Contracts can prove to be tough so the tougher they are, the more they cost in COD points, the tougher they are in challenge. However, the corresponding challenge can bring the corresponding reward as well. Failure to complete a Contract will just result in the loss of COD points used to buy that particular Contract. Once a Contract is purchased, a time limit is given to complete the Contract in gametime. Meaning that as soon as the player is actively trying to complete the Contract, the time limit is running. And if the player is not playing a match and completing the Contract (or logged off of their game and console) then the time limit is paused. Here are five examples of Contracts that players can complete.
Cooked Zombies (500 COD Points) - Kill 6 zombies by dolphin diving with PHD Flopper and creating an explosion. Reward is 5000 XP. (40 min.)
Army of Two (1500 COD Points) - Defend the Saudi Arabian city with another player and don't let the enemy kill a single civilian in the Campaign mission "Brothers". Reward is Red Skulls Camo. (40 min.)
Grenade! (1000 COD Points) - Kill 2 enemy players using a lethal grenade at the same time during a Multiplayer match. Reward is unlocking bonus weapon L-4 Siege. (40 min.)
Pack-A-Punched (1200 COD Points) - Upgrade a gun using Pack-A-Punch before Round 10 in a Zombie match. Reward is a free Wonder Weapon for next Zombie match. (40 min.)
Guerrila Warfare (800 COD Points) - Pick up another player's gun and kill 5 enemy players with that gun in a Multiplayer match. Reward is the Warlord helmet gear piece. (40 min.)
A contract involving the SPAS-12.
DLC[]
Five DLC packs have been released for the game. Each of these packs (minus Macabre) include four Multiplayer maps and one Zombies map, plus additional content on occasion. The season pass costs $33.00 USD and each map pack costs $9.99 USD separately.
1. Revolt[]
Multiplayer Maps[]
Lone
Rooftops
Snow
Cascades
Zombies Map[]
Wald Des Todes
2. Power[]
Multiplayer Maps[]
Oriental
Volcano
Medieval
Breached
Zombies Map[]
Church of the Damned (The Cathedral)
Additional Content[]
Two new scorestreaks were added along with this DLC pack.
Mortar Strike
O.K.B.S.
3. Dominion[]
Multiplayer Maps[]
Transport
Cathedral
Last Ditch
Tortola
Zombies Map[]
Other World
Additional Content[]
One new assault rifle was added along with this DLC map.
Excalibur
4. Coup[]
Multiplayer Maps[]
Stadium
Steel
Jade
Harbor
Zombie Map[]
Zephyr
5. Macabre[]
This map pack is unique in that it only contains just one Zombies Map
rather than the usual four multiplayer maps and one zombies map.
Zombies Map[]
Distortion Paradox
Additional Content[]
One new scorestreak was added to the game.
Tactical Tri-Area Ground Jammer
Trivia[]
It is rumored that Uprising came after Kid Icarus: Uprising.
In the Campaign mission "Down Under", Private Robinson is seemingly blown up by a rogue grenade yet, he is seen again by the end of the mission.
COD points make a return after last appearing in Call of Duty: Black Ops.
This game marks the second time that Germany has acted as allies rather than enemies in the entire Call of Duty franchise. The first being in Call of Duty: Modern Warfare 3.
This game also marks the first time that Norway has an active role in the story in the Call of Duty franchise.
In the Campaign mission "Battle of Moscow", if the player shoots the five Martryoshka Dolls located in the beginning area they'll complete an easter egg. The easter egg will allow the player to use the Dimensional Splitter wonder weapon for the rest of the mission (however this will not carry over to other missions).
The gun turret utility will shoot every type of zombie, even bosses. However, for some reason, they never shoot Rollers. Even if said Rollers are right in front of the turret. This has become a joke within the community.
Some players hold races in private matches on maps such as Town Square and Nightlife. They use motorcycles to race.
Players are able to select a variety of songs to play within the menu music of Campaign, Multiplayer, and Zombies.
The Zombies map, Distortion Paradox, features mostly WWII-era weapons due to its setting.
It also features parts of the Nacht Der Untoten and Origins maps within the Land of the Desolate.


-1.jpg)
.jpg)
.jpg)


